GMC SIERRA 1994 Owners Manual
Manufacturer: GMC, Model Year: 1994,
Model line: SIERRA,
Model: GMC SIERRA 1994
Pages: 404, PDF Size: 20.91 MB
GMC SIERRA 1994 Owners Manual
SIERRA 1994
GMC
GMC
https://www.carmanualsonline.info/img/44/57858/w960_57858-0.png
GMC SIERRA 1994 Owners Manual
Trending: audio, oil type, brake pads, fuel type, CD player, maintenance, emergency towing
Page 241 of 404
That will lift the jack head a little. Before raising the vehicle, do the
following things.
Put your spare tire near the flat tire.
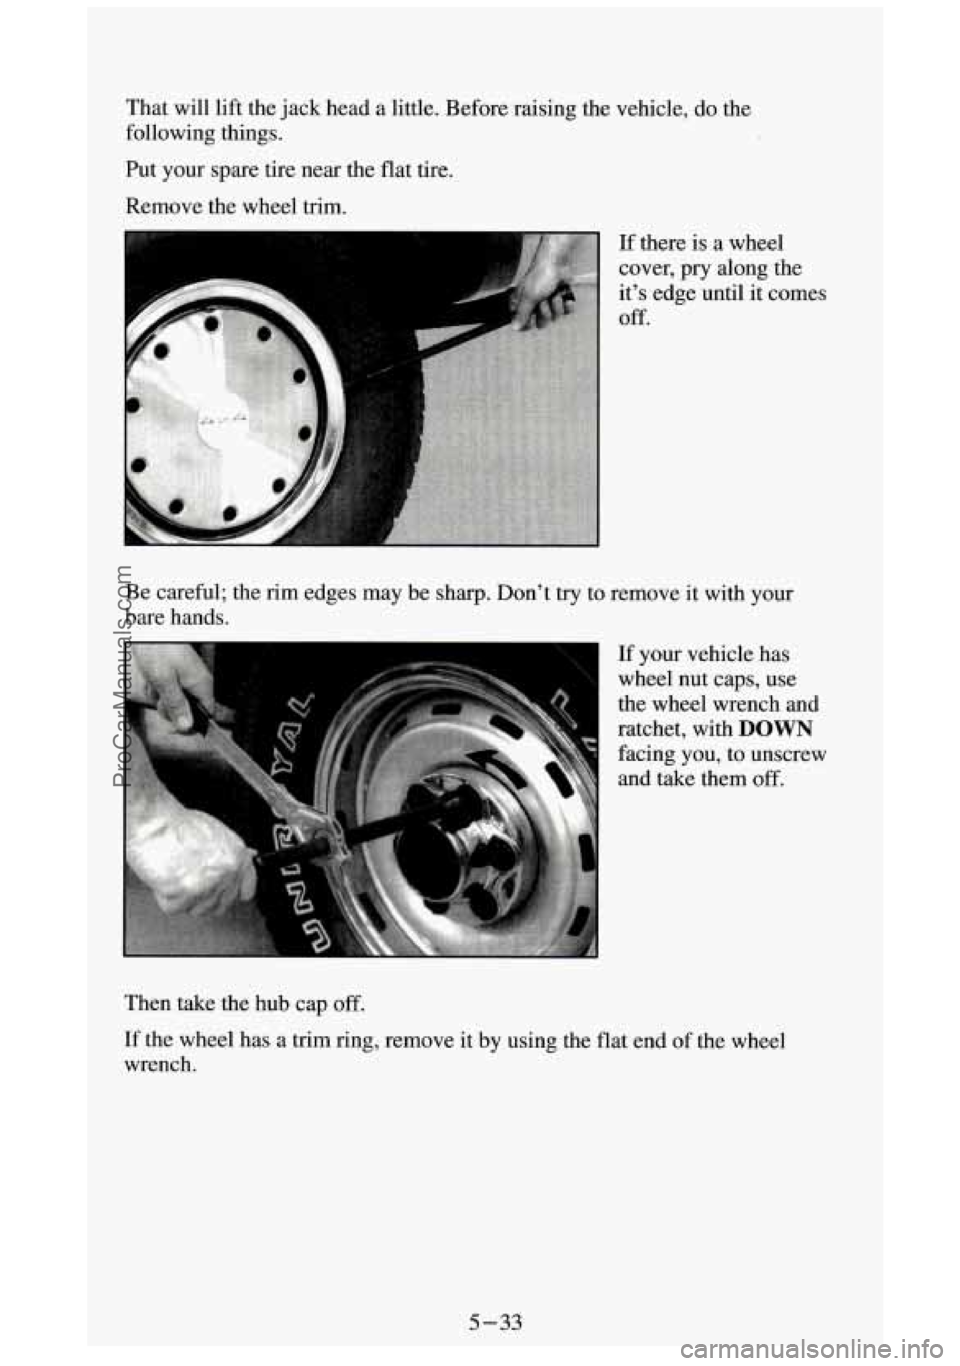
Remove the wheel trim.
Be careful; the rim edges may be sharp. Don't
try to remove it with your
bare hands.
- If your vehicle has
wheel nut caps, use
the wheel wrench and
ratchet, with
DOWN
facing you, to unscrew
and take them off.
Then take the hub cap off.
If the wheel has a trim ring, remove it by using the flat end of the wheel
wrench.
5-33
ProCarManuals.com
Page 242 of 404
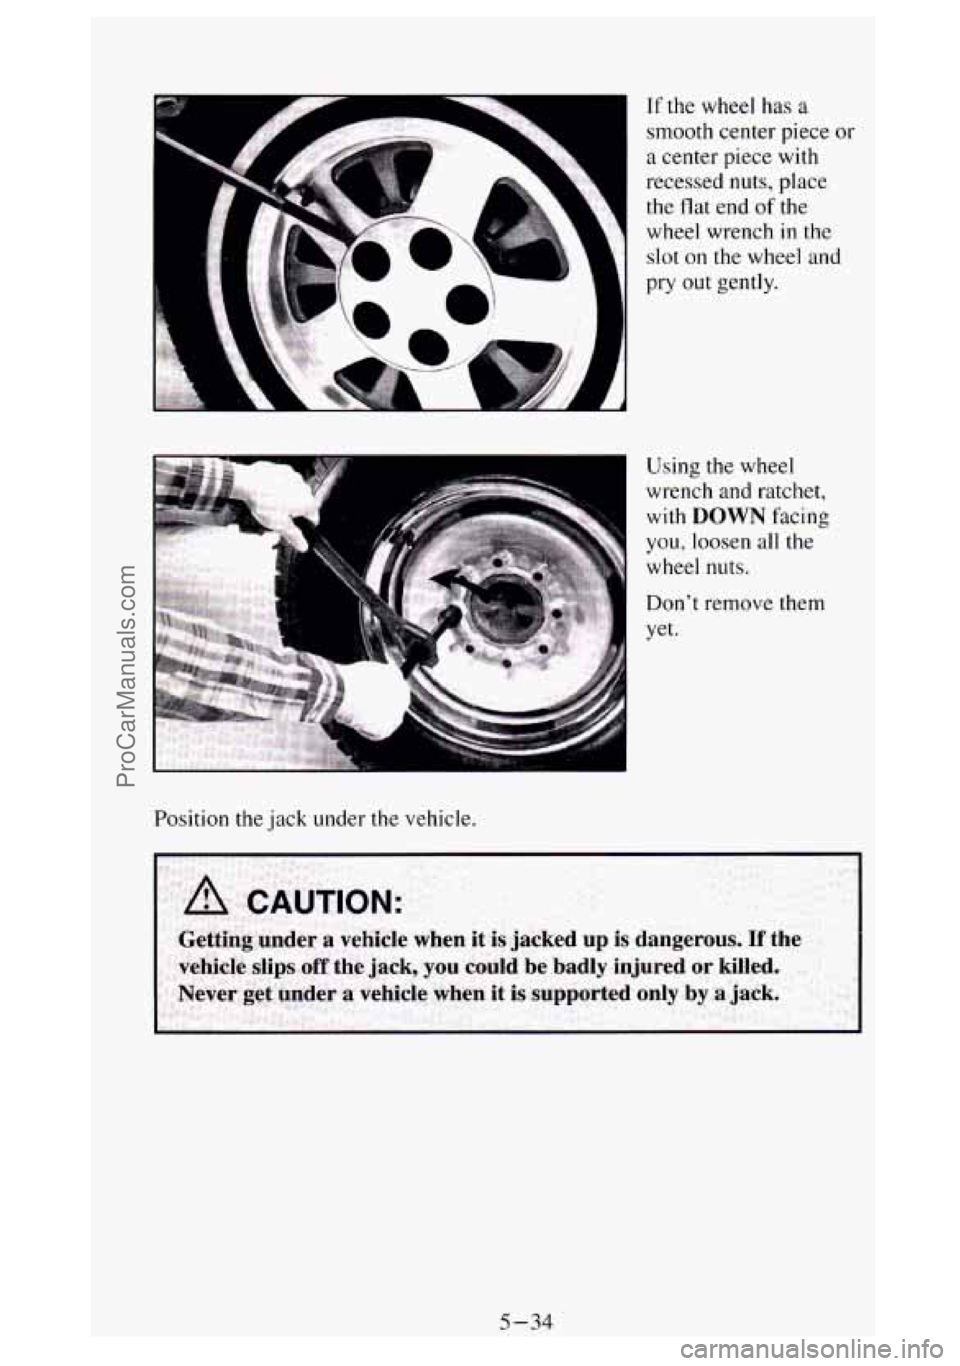
If the wheel has a
smooth center piece
or
a center piece with
recessed nuts, place
the
flat end of the
wheel wrench
in the
slot on the wheel and
pry out gently.
Using the wheel
wrench and ratchet,
with
DOWN facing
Position the
jack under the vehicle.
5-34
ProCarManuals.com
Page 243 of 404
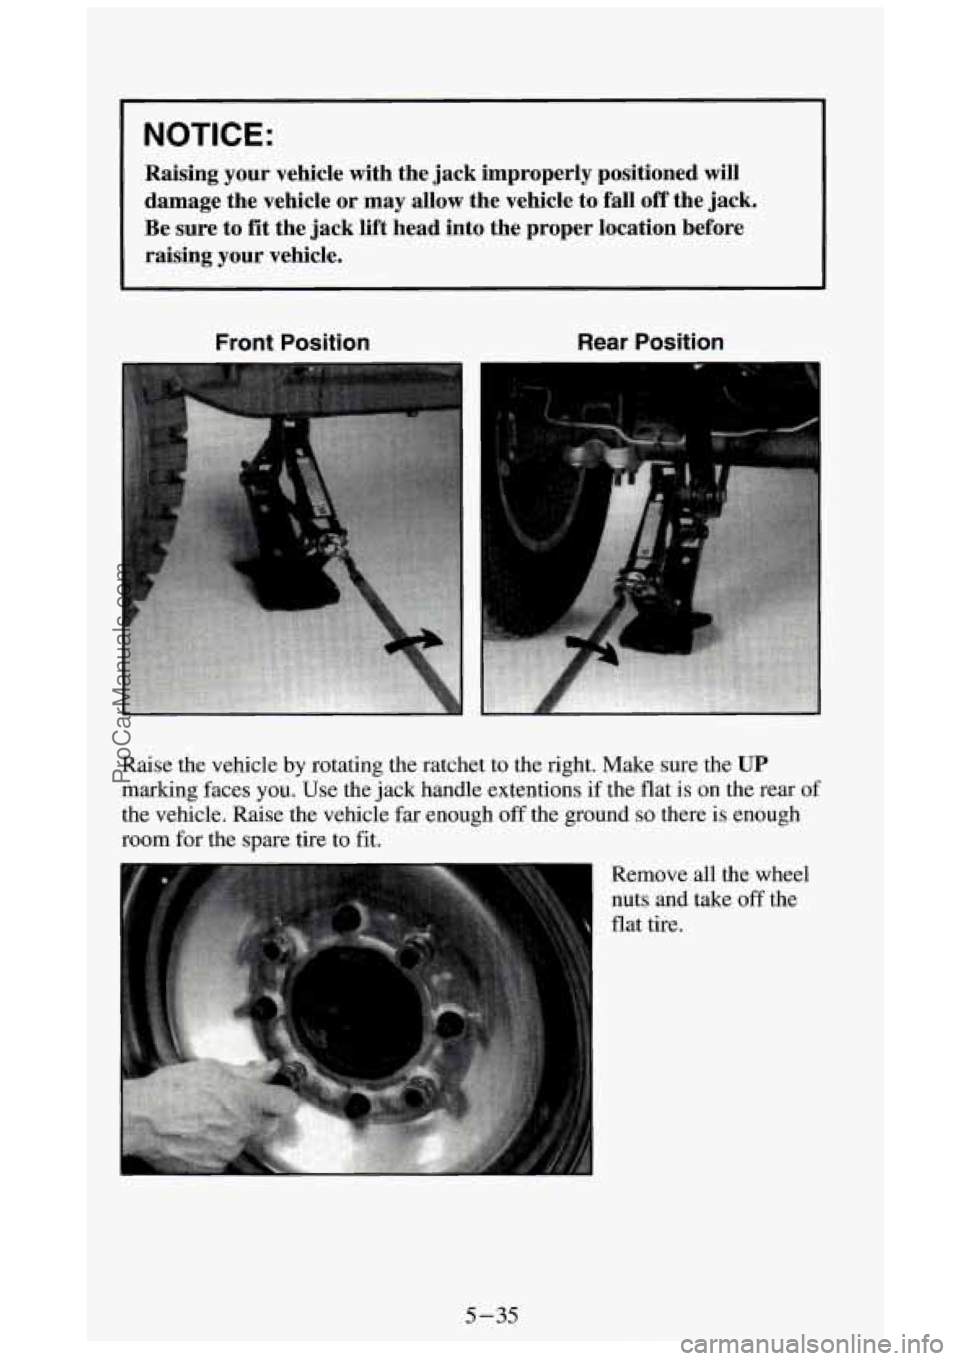
NOTICE:
Raising your vehicle with the jack improperly positioned will
damage the vehicle or may allow the vehicle to fall
off the jack.
Be sure to fit the jack lift head into the proper location before
raising your vehicle.
Front Position
I
Raise the vehicle by rotating the ratchet to the right. Make sure the UP
marking faces you. Use the jack handle extentions if the flat is on the rear of
the vehicle. Raise the vehicle far enough off the ground so there is enough
room for the spare tire to fit.
Remove all the wheel
nuts and take off the
flat tire.
5-35
ProCarManuals.com
Page 244 of 404
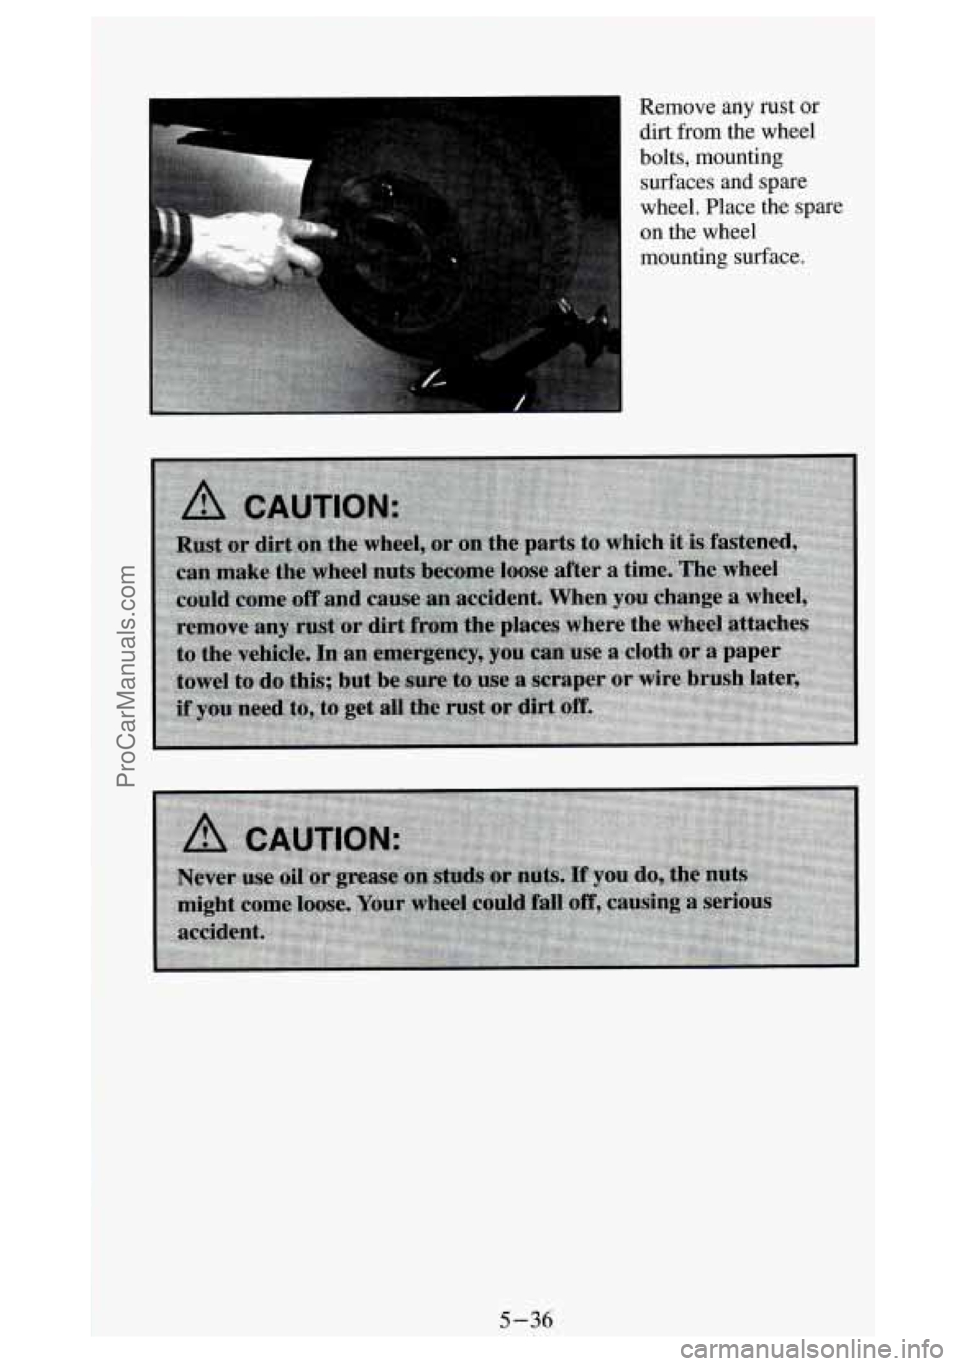
Remove any rust or
dirt from the wheel
bolts, mounting surfaces and spare
wheel. Place the spare
on the wheel
mounting surface.
5-36
ProCarManuals.com
Page 245 of 404
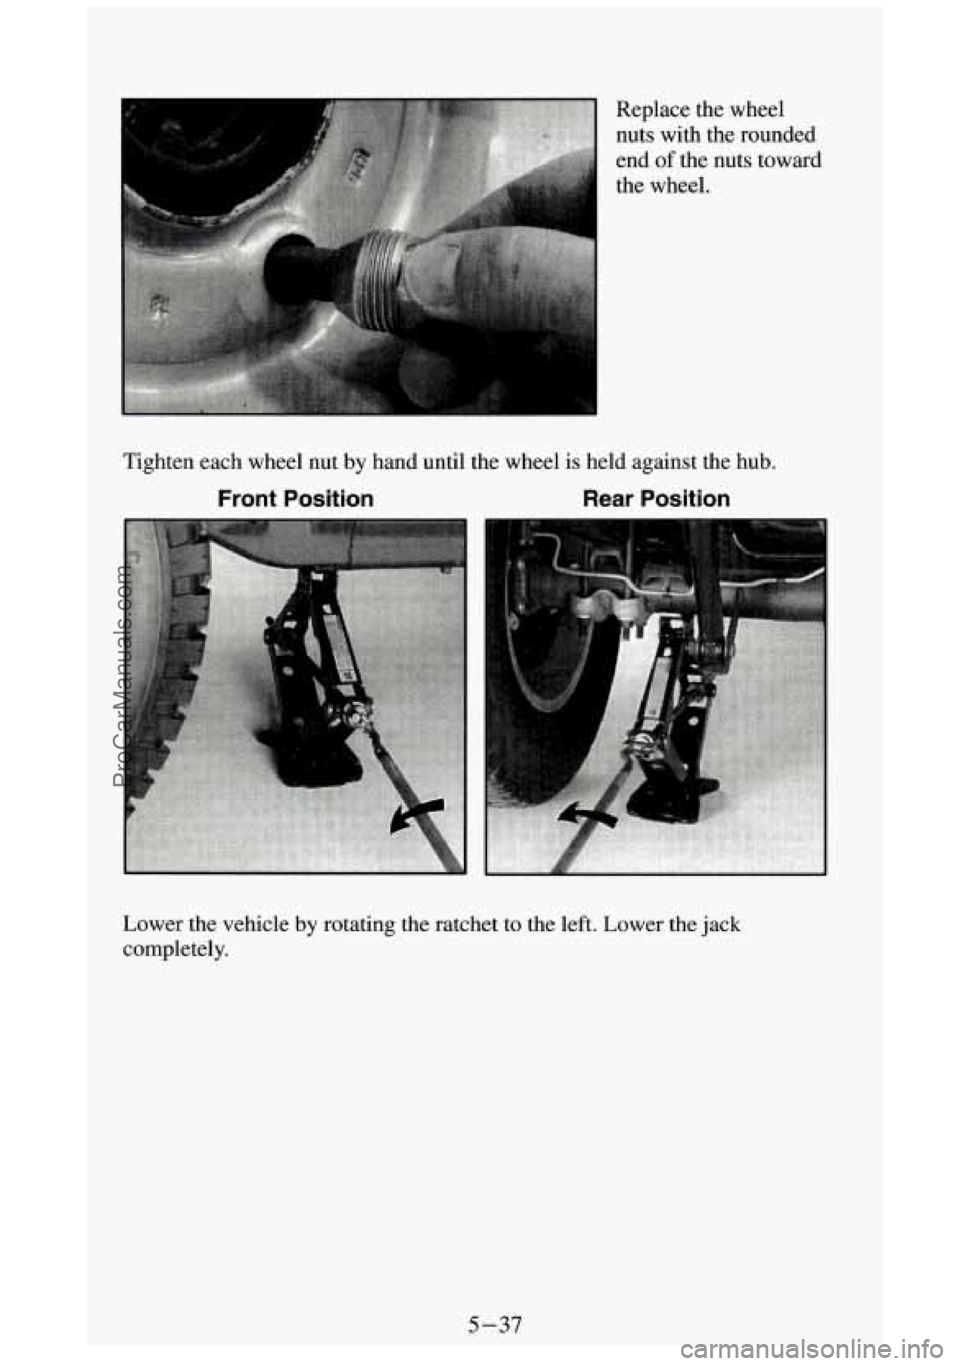
Replace the wheel
nuts with the rounded
end of the nuts toward
the wheel.
Lower the vehicle by rotating the ratchet to the left. Lower the jack
completely.
5-37
ProCarManuals.com
Page 246 of 404
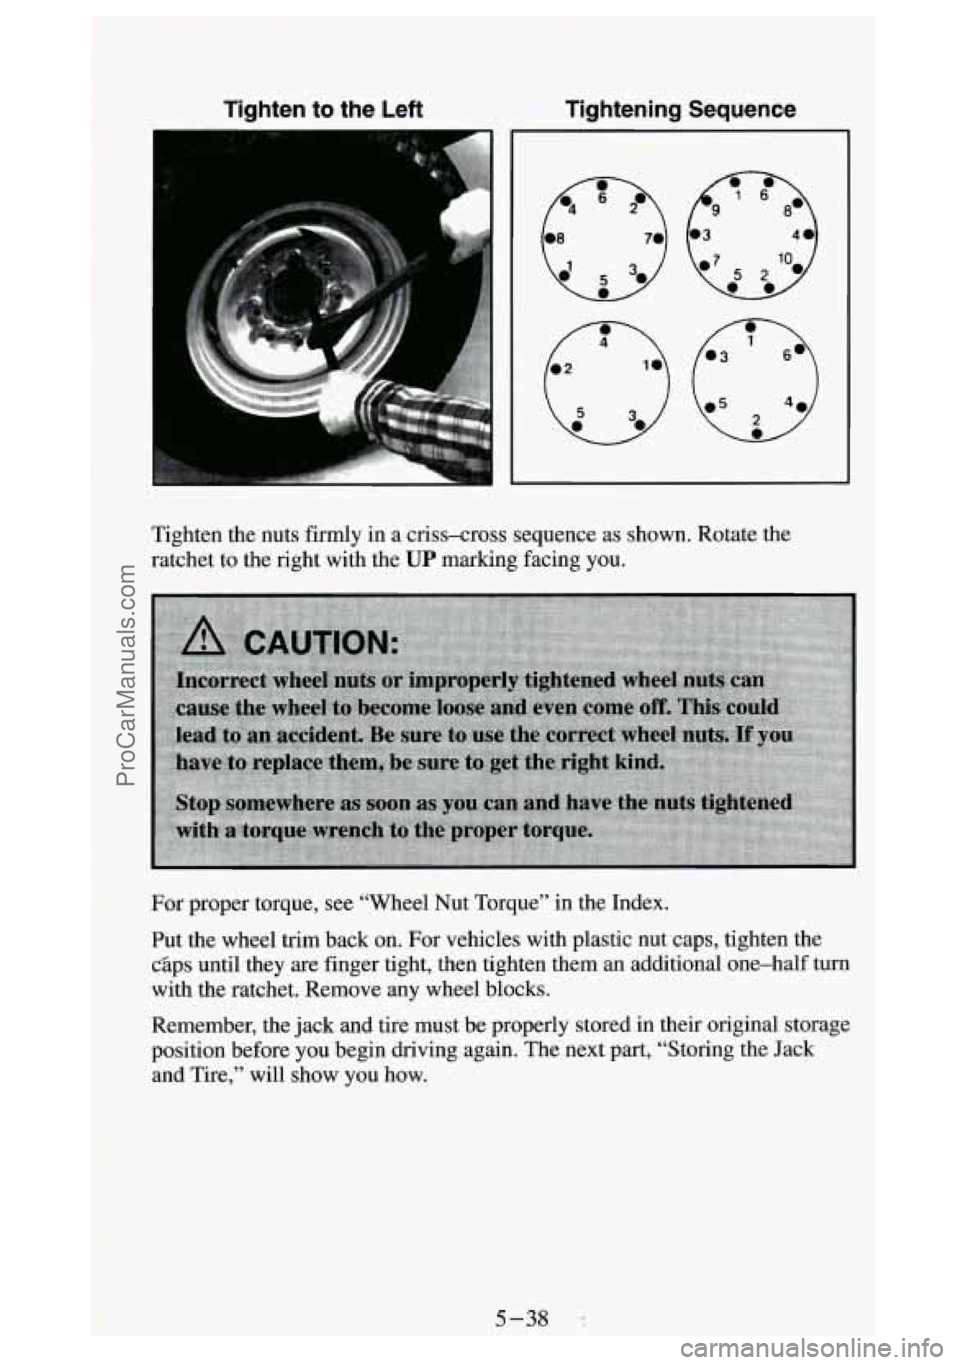
Tighten to the Left Tightening Sequence
Tighten the nuts firmly in a criss-cross sequence as shown. Rotate the
ratchet to the right with the
UP marking facing you.
For proper torque, see “Wheel Nut Torque” in the Index.
Put the wheel trim back on. For vehicles with plastic nut caps, tighten the
c3ps until they
are finger tight, then tighten them an additional one-half turn
with the ratchet. Remove any wheel blocks.
Remember, the jack and tire must be properly stored
in their original storage
position before you begin driving again. The next part, “Storing the Jack
and Tire,” will show
you how.
ProCarManuals.com
Page 247 of 404
Storing the Tire and Jack
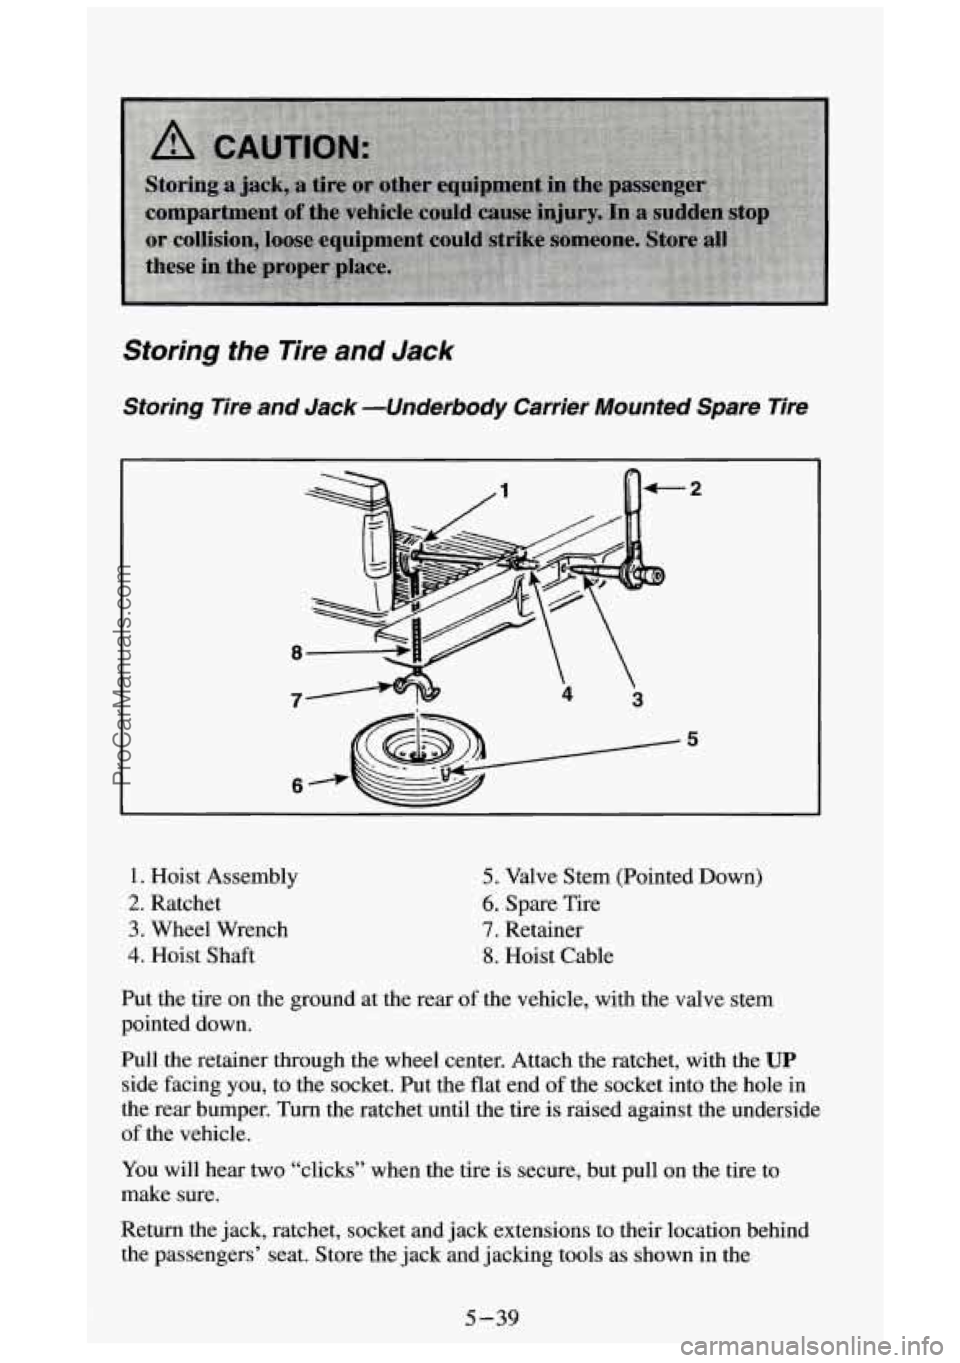
Storing Tire and Jack -Underbody Carrier Mounted Spare Tire
8
7
1. Hoist Assembly
2. Ratchet
3. Wheel Wrench
4. Hoist Shaft
5. Valve Stem (Pointed Down)
6. Spare Tire
7. Retainer
8. Hoist Cable
Put the tire on the ground at the rear of the vehicle, with the valve stem
pointed down.
Pull the retainer through the wheel center. Attach the ratchet,\
with the
UP
side facing you, to the socket. Put the flat end of the socket into the hole in
the rear bumper.
Turn the ratchet until the tire is raised against the underside
of the vehicle.
YOU will hear two “clicks” when the tire is secure, but pull on the tire to
make sure.
Return the jack, ratchet, socket and jack extensions to their location behind
the passengers’ seat. Store the jack; and jacking tools
as shown in the
5-39
ProCarManuals.com
Page 248 of 404
illustrations earlier in this section. Secure the items and replace the jack
cover
if there is one.
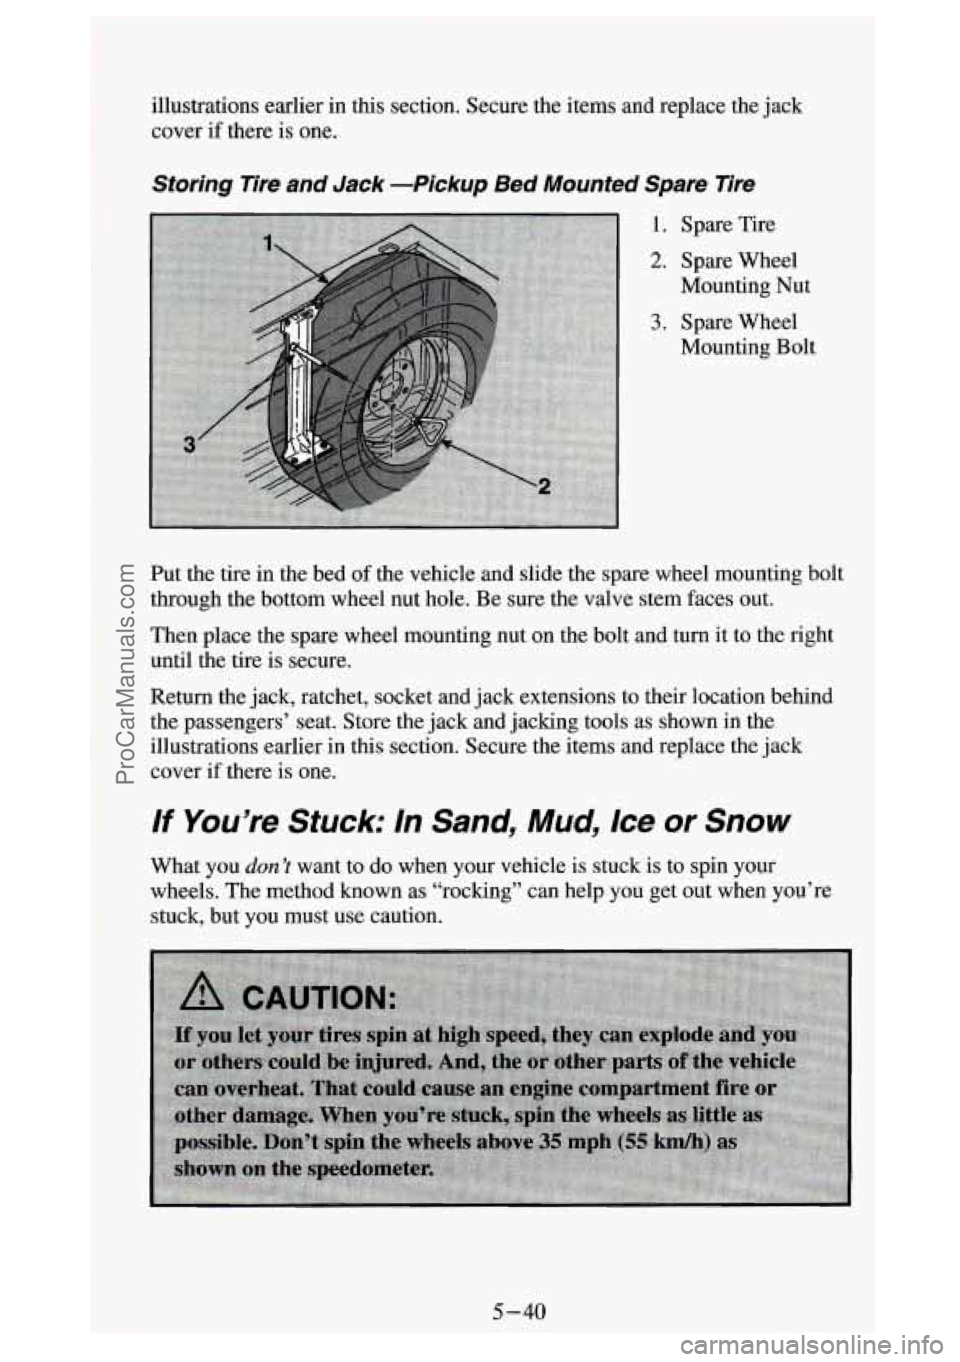
Storing Tire and Jack -Pickup Bed Mounted Spare Tire
1. Spare Tire
2. Spare Wheel
3. Spare Wheel
Mounting Nut
Mounting Bolt
Put the tire in the bed of the vehicle and slide the spare wheel mounting bolt
through the bottom wheel nut hole. Be sure the valve stem fac\
es
out.
Then place the spare wheel mounting nut on the bolt and turn \
it to the right
until the tire is secure.
Return the jack, ratchet, socket and jack extensions
to their location behind
the passengers’ seat. Store the jack and jacking tools as shown in the
illustrations earlier in this section. Secure the items and rep\
lace the jack
cover
if there is one.
If You’re Stuck: In Sand, Mud, Ice or Snow
What you don’t want to do when your vehicle is stuck is to spin your
wheels. The method known as “rocking” can help you get o\
ut when you’re
stuck, but
you must use caution.
5-40
ProCarManuals.com
Page 249 of 404
NOTICE:
~ ~ ~~ ~~
Spinning your wheels can destroy parts of your vehicle as well\
as
the tires. If you spin the wheels too fast while shifting your back
and forth, you can destroy your
.
Rocking your vehicle to get it out:
First, turn your steering wheel left and right. That will clear the area around
your front wheels. Then shift back and forth between
“R’ (Reverse) and a
forward gear (or with a manual
, between First or Second gear and Reverse),
spinning the wheels as little as possible. Release the accelerator pedal while
you shift, and press lightly on the accelerator pedal when the\
is in gear. If
that doesn’t get you out after a few tries, you may need to be towed out. Or,
you can use your recovery hooks,
if your vehicle has them. If you do need
to be towed out, see “Towing Your Vehicle” in the Index.
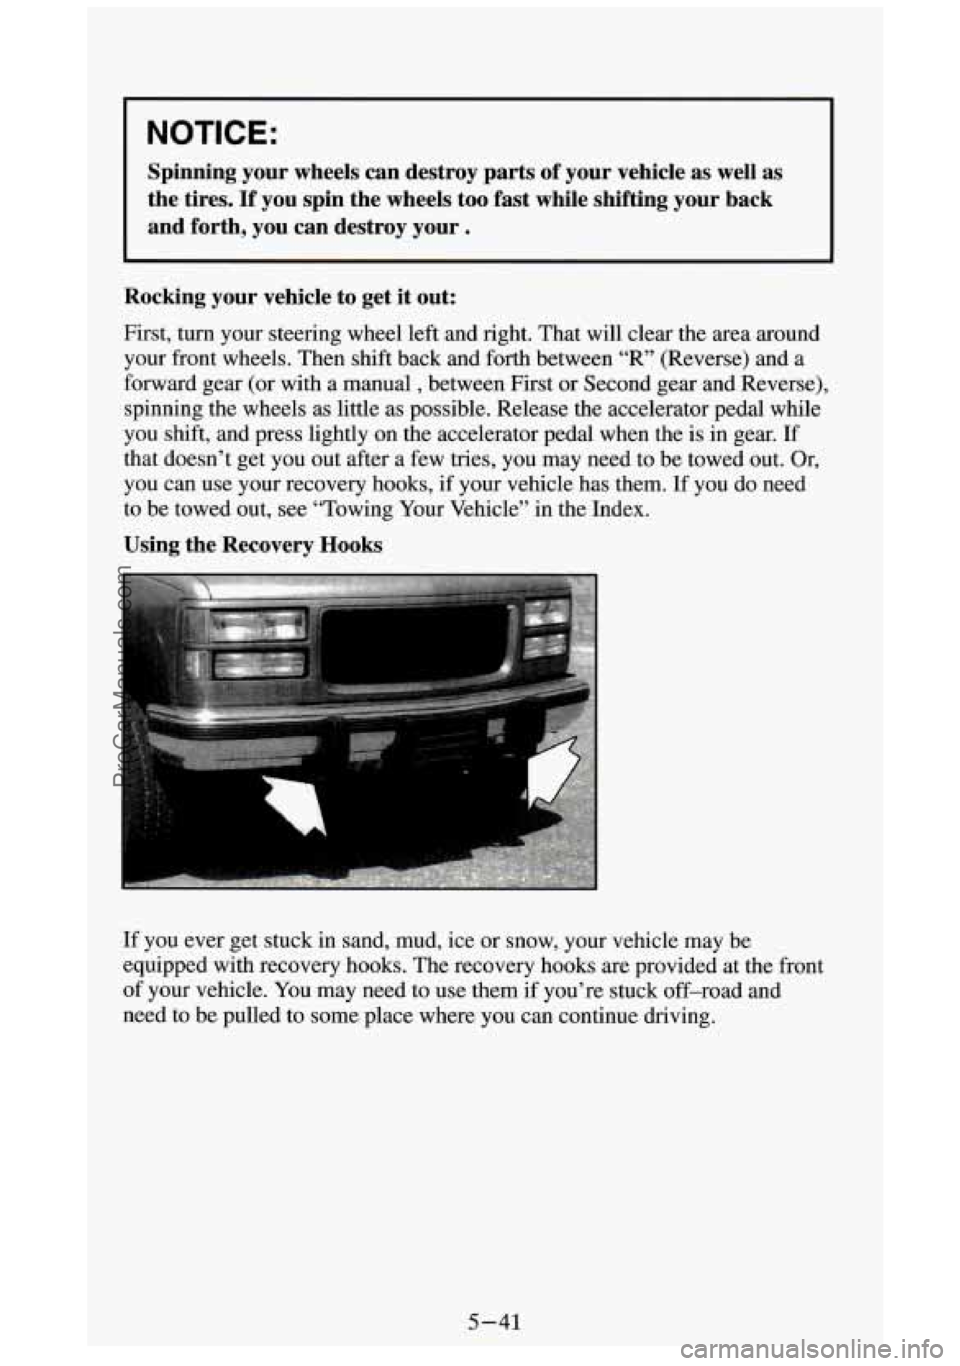
Using the Recovery Hooks
If you ever get stuck in sand, mud, ice or snow, your vehicle may be
equipped with recovery hooks. The recovery hooks are provided at the front
of your vehicle. You may need to use them
if you’re stuck off-road and
need to be pulled to some place where you can continue drivin\
g.
5-41
ProCarManuals.com
Page 250 of 404
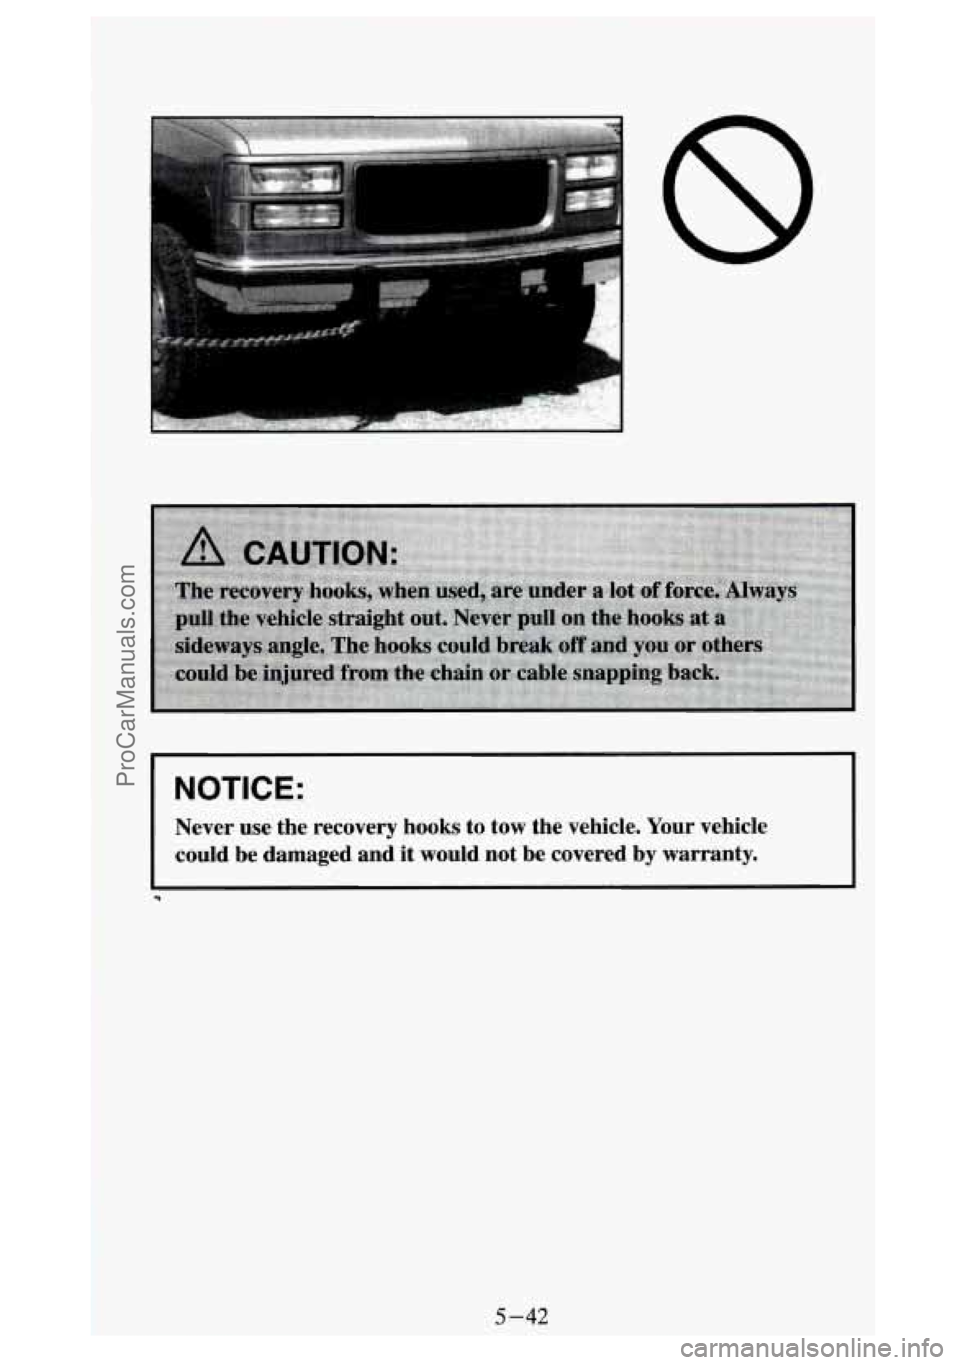
NOTICE:
I
Never use the recovery hooks to tow the vehicle. Your vehicle \
could be damaged and it would not be covered by warranty.
5-42
ProCarManuals.com
Trending: bulb, window, tow bar, maintenance schedule, tire size, wheel alignment, park assist
