TPMS reset GMC SIERRA 2010 Owner's Manual
[x] Cancel search | Manufacturer: GMC, Model Year: 2010, Model line: SIERRA, Model: GMC SIERRA 2010Pages: 630, PDF Size: 4.65 MB
Page 33 of 630

Driver Information Center (DIC)
The DIC display is located at the bottom of the
instrument panel cluster. It shows the status of many
vehicle systems and enables access to the
personalization menu.
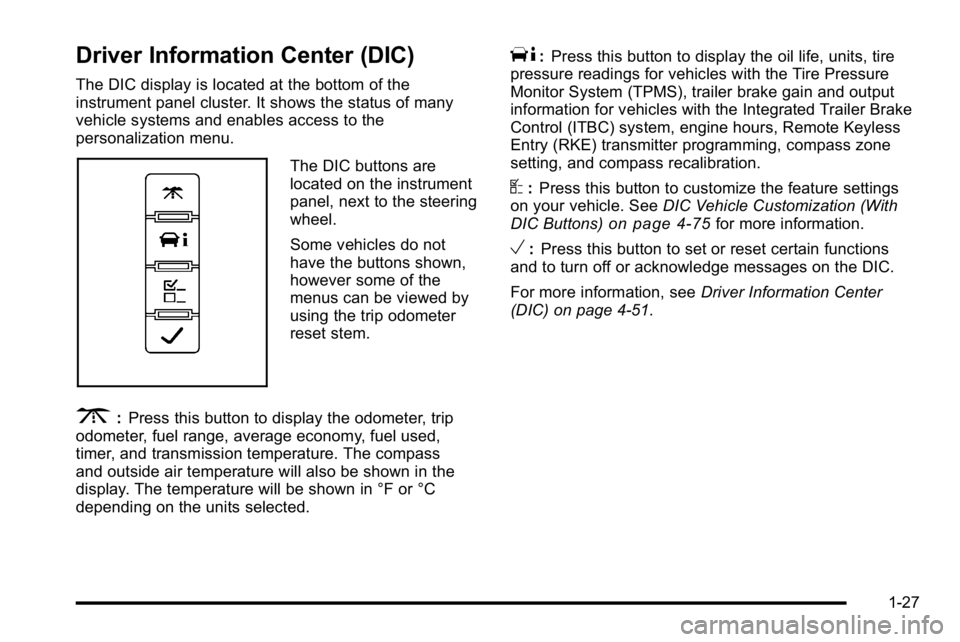
The DIC buttons are
located on the instrument
panel, next to the steering
wheel.
Some vehicles do not
have the buttons shown,
however some of the
menus can be viewed by
using the trip odometer
reset stem.
3:Press this button to display the odometer, trip
odometer, fuel range, average economy, fuel used,
timer, and transmission temperature. The compass
and outside air temperature will also be shown in the
display. The temperature will be shown in °F or °C
depending on the units selected.
T: Press this button to display the oil life, units, tire
pressure readings for vehicles with the Tire Pressure
Monitor System (TPMS), trailer brake gain and output
information for vehicles with the Integrated Trailer Brake
Control (ITBC) system, engine hours, Remote Keyless
Entry (RKE) transmitter programming, compass zone
setting, and compass recalibration.
U: Press this button to customize the feature settings
on your vehicle. See DIC Vehicle Customization (With
DIC Buttons)
on page 4‑75for more information.
V: Press this button to set or reset certain functions
and to turn off or acknowledge messages on the DIC.
For more information, see Driver Information Center
(DIC) on page 4‑51.
1-27
Page 38 of 630

Tire Pressure Monitor
This vehicle may have a Tire Pressure Monitor
System (TPMS).
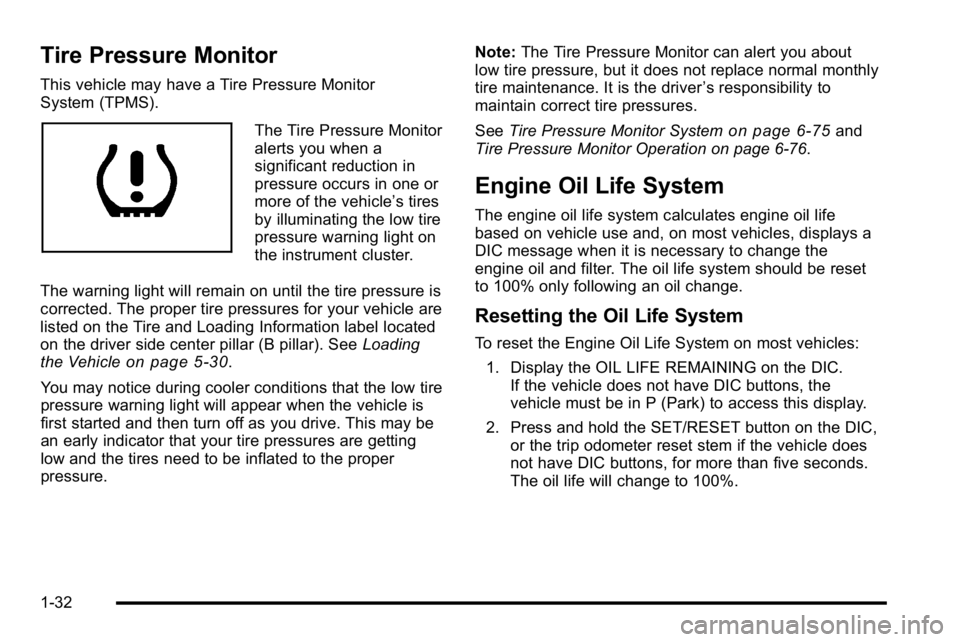
The Tire Pressure Monitor
alerts you when a
significant reduction in
pressure occurs in one or
more of the vehicle’s tires
by illuminating the low tire
pressure warning light on
the instrument cluster.
The warning light will remain on until the tire pressure is
corrected. The proper tire pressures for your vehicle are
listed on the Tire and Loading Information label located
on the driver side center pillar (B pillar). See Loading
the Vehicle
on page 5‑30.
You may notice during cooler conditions that the low tire
pressure warning light will appear when the vehicle is
first started and then turn off as you drive. This may be
an early indicator that your tire pressures are getting
low and the tires need to be inflated to the proper
pressure. Note:
The Tire Pressure Monitor can alert you about
low tire pressure, but it does not replace normal monthly
tire maintenance. It is the driver ’s responsibility to
maintain correct tire pressures.
See Tire Pressure Monitor System
on page 6‑75and
Tire Pressure Monitor Operation on page 6‑76.
Engine Oil Life System
The engine oil life system calculates engine oil life
based on vehicle use and, on most vehicles, displays a
DIC message when it is necessary to change the
engine oil and filter. The oil life system should be reset
to 100% only following an oil change.
Resetting the Oil Life System
To reset the Engine Oil Life System on most vehicles:
1. Display the OIL LIFE REMAINING on the DIC. If the vehicle does not have DIC buttons, the
vehicle must be in P (Park) to access this display.
2. Press and hold the SET/RESET button on the DIC, or the trip odometer reset stem if the vehicle does
not have DIC buttons, for more than five seconds.
The oil life will change to 100%.
1-32
Page 270 of 630

DIC Buttons
The buttons are the
trip/fuel, vehicle
information,
customization, and
set/reset buttons.
The button functions
are detailed in the
following pages.
3(Trip/Fuel):Press this button to display the
odometer, trip odometer, fuel range, average economy,
fuel used, timer, instantaneous economy and Active
Fuel Management™ indicator, and transmission
temperature. The compass and outside temperature will
also be shown in the display. The temperature will be
shown in °F or °C depending on the units selected.
T(Vehicle Information): Press this button to display
the oil life, units, tire pressure readings for vehicles with
the Tire Pressure Monitor System (TPMS), trailer brake
gain and output information for vehicles with the Integrated Trailer Brake Control (ITBC) system, engine
hours, Remote Keyless Entry (RKE) transmitter
programming, compass zone setting, and compass
recalibration.
U(Customization):
Press this button to customize the
feature settings on your vehicle. See DIC Vehicle
Customization (With DIC Buttons)
on page 4‑75for
more information.
V(Set/Reset): Press this button to set or reset certain
functions and to turn off or acknowledge messages on
the DIC.
Trip/Fuel Menu Items
3
(Trip/Fuel): Press this button to scroll through the
following menu items:
Odometer
Press the trip/fuel button until ODOMETER displays.
This display shows the distance the vehicle has been
driven in either miles (mi) or kilometers (km). Pressing
the trip odometer reset stem will also display the
odometer.
To switch between English and metric measurements,
see “Units” later in this section.
4-52
Page 273 of 630

Vehicle Information Menu Items
T
(Vehicle Information):Press this button to scroll
through the following menu items:
Oil Life
Press the vehicle information button until OIL LIFE
REMAINING displays. This display shows an estimate
of the oil's remaining useful life. If you see 99% OIL
LIFE REMAINING on the display, that means 99% of
the current oil life remains. The engine oil life system
will alert you to change the oil on a schedule consistent
with your driving conditions.
When the remaining oil life is low, the CHANGE
ENGINE OIL SOON message will appear on the
display. See “CHANGE ENGINE OIL SOON” underDIC
Warnings and Messages
on page 4‑65. You should
change the oil as soon as you can. See Engine Oilon
page 6‑18. In addition to the engine oil life system
monitoring the oil life, additional maintenance is
recommended in the Maintenance Schedule in this
manual. See Scheduled Maintenance
on page 7‑3for more information.
Remember, you must reset the OIL LIFE display
yourself after each oil change. It will not reset itself.
Also, be careful not to reset the OIL LIFE display
accidentally at any time other than when the oil has just been changed. It cannot be reset accurately until the
next oil change. To reset the engine oil life system,
see
Engine Oil Life System on page 6‑20.
Units
Press the vehicle information button until UNITS
displays. This display allows you to select between
English or Metric units of measurement. Once in this
display, press the set/reset button to select between
ENGLISH or METRIC units. All of the vehicle
information will then be displayed in the unit of
measurement selected.
Tire Pressure
If your vehicle has the Tire Pressure Monitor System
(TPMS), the pressure for each tire can be viewed in the
DIC. The tire pressure will be shown in either pounds
per square inch (psi) or kilopascals (kPa). Press the
vehicle information button until the DIC displays FRONT
TIRES PSI (kPa) LEFT ## RIGHT ##. Press the vehicle
information button again until the DIC displays REAR
TIRES PSI (kPa) LEFT ## RIGHT ##.
If a low tire pressure condition is detected by the
system while driving, a message advising you to add
pressure in a specific tire will appear in the display.
See Inflation - Tire Pressure
on page 6‑72and
DIC Warnings and Messageson page 4‑65for more
information.
4-55
Page 276 of 630

Language
This display allows you to select the language in which
the DIC messages will appear. To select a language:1. Press the trip odometer reset stem until ODOMETER displays.
2. While in the ODOMETER display, press and hold the trip odometer reset stem for three seconds until
the currently set language displays.
3. Continue to press and hold the trip odometer reset stem to scroll through all of the available
languages.
The available selections are ENGLISH (default),
FRANCAIS (French), ESPANOL (Spanish), and
NO CHANGE.
4. Once the desired language is displayed, release the trip odometer reset stem to set your choice.
Engine Hours
To display the ENGINE HOURS, place the ignition in
LOCK/OFF or ACC/ACCESSORY, then press and hold
the trip odometer reset stem for four seconds while
viewing the ODOMETER. This display shows the total
number of hours the engine has run.
DIC Operation and Displays
(Without DIC Buttons)
If your vehicle does not have DIC buttons, the
information below explains the operation of this system.
The DIC has different displays which can be accessed
by pressing the trip odometer reset stem located on the
instrument panel cluster. Pressing the trip odometer
reset stem will also turn off, or acknowledge, DIC
messages.
The DIC displays trip and vehicle system information,
and warning messages if a system problem is detected.
If the vehicle does not have DIC buttons, you can use
the trip odometer reset stem to view the following
displays: language selection, trip odometer,
transmission temperature, trailer brake gain and output
information for vehicles with the Integrated Trailer Brake
Control (ITBC) system, compass zone setting, compass
recalibration, oil life, Tire Pressure Monitor System
(TPMS) programming for vehicles with the TPMS, and
Remote Keyless Entry (RKE) transmitter programming.
4-58
Page 279 of 630

Remember, you must reset the OIL LIFE display
yourself after each oil change. It will not reset itself.
Also, be careful not to reset the OIL LIFE display
accidentally at any time other than when the oil has just
been changed. It cannot be reset accurately until the
next oil change. To reset the engine oil life system,
seeEngine Oil Life System on page 6‑20.
Relearn Tire Positions
Your vehicle may have this display. To access this
display, the vehicle must be in P (Park). If your vehicle
has the Tire Pressure Monitor System (TPMS), after
rotating the tires or after replacing a tire or sensor, the
system must re-learn the tire positions. To re-learn the
tire positions, see Tire Pressure Monitor System
on
page 6‑75. See Tire Inspection and Rotationon
page 6‑80and DIC Warnings and Messageson
page 4‑65for more information.
Relearn Remote Key
To access this display, the vehicle must be in P (Park).
This display allows you to match Remote Keyless Entry
(RKE) transmitters to your vehicle. This procedure will
erase all previously learned transmitters. Therefore,
they must be relearned as additional transmitters. To match an RKE transmitter to your vehicle:
1. Press the trip odometer reset stem until RELEARN REMOTE KEY displays.
2. Press and hold the trip odometer reset stem for three seconds.
The message REMOTE KEY LEARNING ACTIVE
will display.
3. Press and hold the lock and unlock buttons on the first transmitter at the same time for about
15 seconds.
On vehicles with memory recall seats, the first
transmitter learned will match driver 1 and the
second will match driver 2.
A chime will sound indicating that the transmitter
is matched.
4. To match additional transmitters at this time, repeat Step 3.
Each vehicle can have a maximum of eight
transmitters matched to it.
5. To exit the programming mode, you must cycle the key to LOCK/OFF.
4-61
Page 291 of 630

TIRE LEARNING ACTIVE
If your vehicle has the Tire Pressure Monitor
System (TPMS), this message displays when the
system is re-learning the tire positions on your vehicle.
See“DIC Operation and Displays (Without DIC
Buttons)” earlier in this section for more information.
The tire positions must be re-learned after rotating the
tires or after replacing a tire or sensor. See Tire
Inspection and Rotation
on page 6‑80, Tire Pressure
Monitor Systemon page 6‑75, and Inflation - Tire
Pressureon page 6‑72for more information.
TIRE LOW ADD AIR TO TIRE
If your vehicle has the Tire Pressure Monitor System
(TPMS), this message displays when the pressure in
one or more of the vehicle's tires is low. This message
also displays LEFT FRT (left front), RIGHT FRT (right
front), LEFT RR (left rear), or RIGHT RR (right rear) to
indicate the location of the low tire. The low tire
pressure warning light will also come on. See Tire
Pressure Light
on page 4‑42. You can receive more
than one tire pressure message at a time. To read the other messages that may have been sent at the same
time, press the set/reset button or the trip odometer
reset stem. If a tire pressure message appears on the
DIC, stop as soon as you can. Have the tire pressures
checked and set to those shown on the Tire Loading
Information label. See
Tires
on page 6‑64,Loading the
Vehicleon page 5‑30, and Inflation - Tire Pressureon
page 6‑72. The DIC also shows the tire pressure
values. See “DIC Operation and Displays (With DIC
Buttons)” earlier in this section.
TRACTION CONTROL OFF
If your vehicle has StabiliTrak, this message displays
when the Traction Control System (TCS) is turned off.
Adjust your driving accordingly. See StabiliTrak
®
Systemon page 5‑6for more information.
4-73
Page 525 of 630

The TPMS sensor matching process is outlined below:1. Set the parking brake.
2. Turn the ignition switch to ON/RUN with the engine off.
3. Press the Remote Keyless Entry (RKE) transmitter's LOCK and UNLOCK buttons at the
same time for approximately five seconds. The
horn sounds twice to signal the receiver is in
relearn mode and TIRE LEARNING ACTIVE
message displays on the DIC screen.
If your vehicle does not have RKE, press the
Driver Information Center (DIC) vehicle information
button until the PRESS
VTO RELEARN TIRE
POSITIONS message displays. The horn sounds
twice to signal the receiver is in relearn mode and
TIRE LEARNING ACTIVE message displays on
the DIC screen.
If your vehicle does not have RKE or DIC buttons,
press the trip odometer reset stem located on the
instrument panel cluster until the PRESS
VTO
RELEARN TIRE POSITIONS message displays.
The horn sounds twice to signal the receiver is in
relearn mode and TIRE LEARNING ACTIVE
message displays on the DIC screen.
4. Start with the driver side front tire. 5. Remove the valve cap from the valve cap stem.
Activate the TPMS sensor by increasing or
decreasing the tire's air pressure for five seconds,
or until a horn chirp sounds. The horn chirp, which
may take up to 30 seconds to sound, confirms that
the sensor identification code has been matched to
this tire and wheel position.
6. Proceed to the passenger side front tire, and repeat the procedure in Step 5.
7. Proceed to the passenger side rear tire, and repeat the procedure in Step 5.
8. Proceed to the driver side rear tire, and repeat the procedure in Step 5. The horn sounds two times to
indicate the sensor identification code has been
matched to the driver side rear tire, and that the
TPMS sensor matching process is no longer
active. The TIRE LEARNING ACTIVE message on
the DIC display screen goes off.
9. Turn the ignition switch to LOCK/OFF.
10. Set all four tires to the recommended air pressure level as indicated on the Tire and Loading
Information label.
11. Put the valve caps back on the valve stems.
6-79
Page 528 of 630

Make certain that all wheel nuts are properly
tightened. See“Wheel Nut Torque” under
Capacities and Specifications
on page 6‑126.
{WARNING:
Rust or dirt on a wheel, or on the parts to
which it is fastened, can make wheel nuts
become loose after time. The wheel could
come off and cause an accident. When you
change a wheel, remove any rust or dirt from
places where the wheel attaches to the
vehicle. In an emergency, you can use a
cloth or a paper towel to do this; but be sure
to use a scraper or wire brush later,
if needed, to get all the rust or dirt off.
See Changing a Flat Tire
on page 6‑90.
If your vehicle has a Tire Pressure Monitor
System (TPMS), reset the TPMS sensors after
rotating the tires. See Tire Pressure Monitor
Operation
on page 6‑76. Make sure the spare tire, if your vehicle has one,
is stored securely. Push, pull, and then try to
rotate or turn the tire. If it moves, tighten the
cable. See
Storing a Flat or Spare Tire and Tools
on page 6‑106.
When It Is Time for New Tires
Various factors, such as maintenance, temperatures,
driving speeds, vehicle loading, and road conditions,
influence when you need new tires.
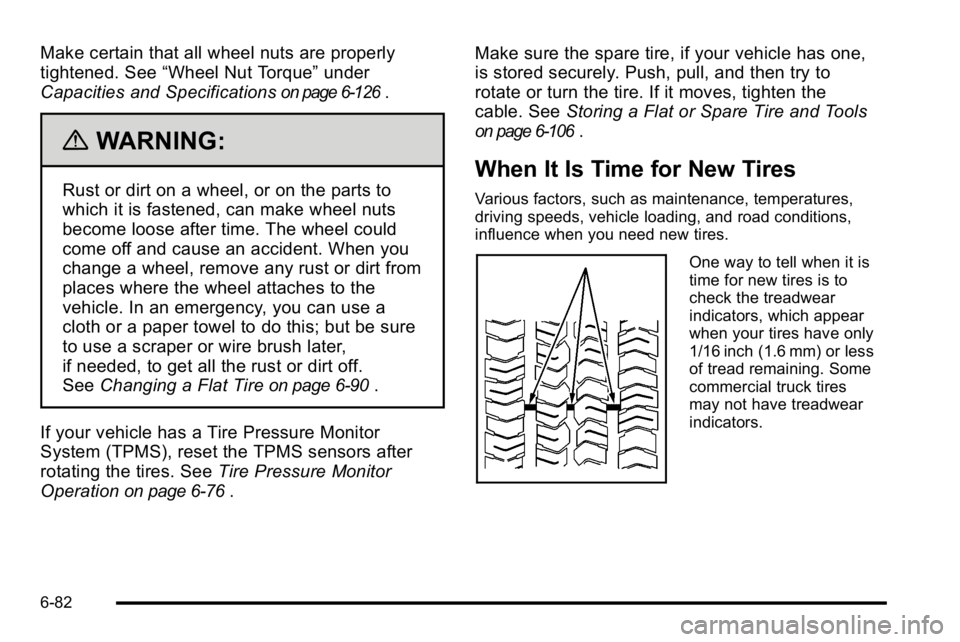
One way to tell when it is
time for new tires is to
check the treadwear
indicators, which appear
when your tires have only
1/16 inch (1.6 mm) or less
of tread remaining. Some
commercial truck tires
may not have treadwear
indicators.
6-82