wheel GMC SIERRA DENALI 2010 Owner's Guide
[x] Cancel search | Manufacturer: GMC, Model Year: 2010, Model line: SIERRA DENALI, Model: GMC SIERRA DENALI 2010Pages: 550, PDF Size: 4.17 MB
Page 199 of 550
Outlet Adjustment
Use the air outlets located in the center and on the side
of the instrument panel to direct the airflow. Use the
thumbwheels near the air outlets to open or close off
the airflow.
Operation Tips
.Clear away any ice, snow, or leaves from air inlets
at the base of the windshield that could block the
flow of air into the vehicle.
.Keep the path under the front seats clear of
objects to help circulate the air inside of the vehicle
more effectively.
.Use of non‐GM approved hood deflectors can
adversely affect the performance of the system.
Check with your dealer/retailer before adding
equipment to the outside of the vehicle.
Warning Lights, Gages, and
Indicators
Warning lights and gages can signal that something is
wrong before it becomes serious enough to cause an
expensive repair or replacement. Paying attention to the
warning lights and gages could prevent injury.
Warning lights come on when there might be or there is
a problem with one of the vehicle's functions. Some
warning lights come on briefly when the engine is
started to indicate they are working.
Gages can indicate when there might be or there is a
problem with one of the vehicle's functions. Often gages
and warning lights work together to indicate a problem
with the vehicle.
When one of the warning lights comes on and stays on
while driving, or when one of the gages shows there
could be a problem, check the section that explains
what to do. Follow this manual's advice. Waiting to do
repairs can be costly and even dangerous.
4-27
Page 208 of 550
Antilock Brake System (ABS)
Warning Light
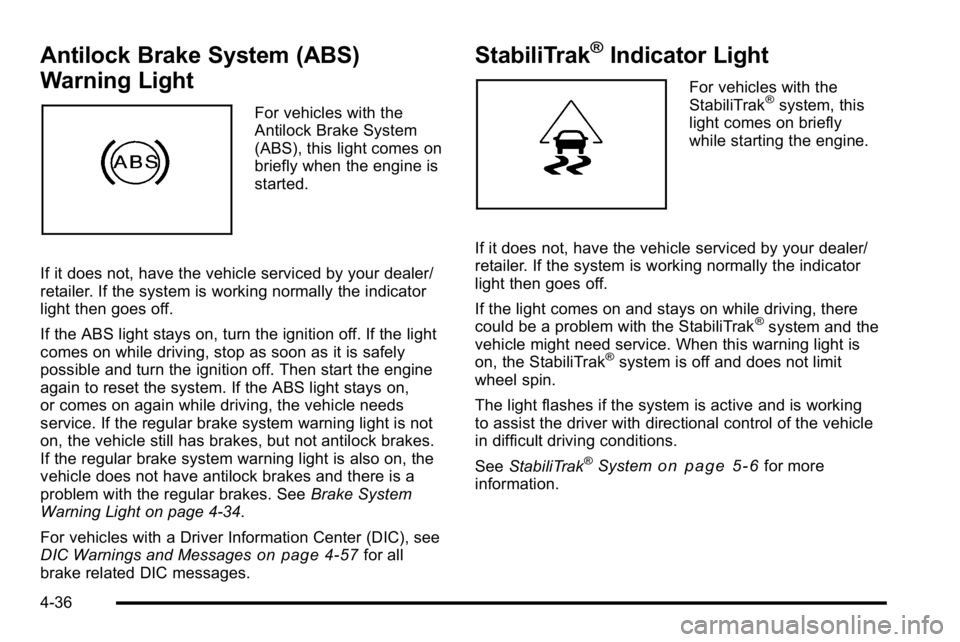
For vehicles with the
Antilock Brake System
(ABS), this light comes on
briefly when the engine is
started.
If it does not, have the vehicle serviced by your dealer/
retailer. If the system is working normally the indicator
light then goes off.
If the ABS light stays on, turn the ignition off. If the light
comes on while driving, stop as soon as it is safely
possible and turn the ignition off. Then start the engine
again to reset the system. If the ABS light stays on,
or comes on again while driving, the vehicle needs
service. If the regular brake system warning light is not
on, the vehicle still has brakes, but not antilock brakes.
If the regular brake system warning light is also on, the
vehicle does not have antilock brakes and there is a
problem with the regular brakes. See Brake System
Warning Light on page 4‑34.
For vehicles with a Driver Information Center (DIC), see
DIC Warnings and Messages
on page 4‑57for all
brake related DIC messages.
StabiliTrak®Indicator Light
For vehicles with the
StabiliTrak®system, this
light comes on briefly
while starting the engine.
If it does not, have the vehicle serviced by your dealer/
retailer. If the system is working normally the indicator
light then goes off.
If the light comes on and stays on while driving, there
could be a problem with the StabiliTrak
®system and the
vehicle might need service. When this warning light is
on, the StabiliTrak
®system is off and does not limit
wheel spin.
The light flashes if the system is active and is working
to assist the driver with directional control of the vehicle
in difficult driving conditions.
See StabiliTrak
®Systemon page 5‑6for more
information.
4-36
Page 220 of 550
DIC Operation and Displays
(Using DIC Buttons)
The DIC has different displays which can be accessed
by pressing the DIC buttons located on the instrument
panel, next to the steering wheel.
The DIC displays trip, fuel, and vehicle system
information, and warning messages if a system problem
is detected.
The DIC also allows some features to be customized.
SeeDIC Vehicle Customization (With DIC Buttons)
on
page 4‑67for more information.
If the vehicle has DIC buttons, you can also use the trip
odometer reset stem to view some of the DIC displays.
See “Trip Odometer Reset Stem Menu Items” later in
this section.
DIC Buttons
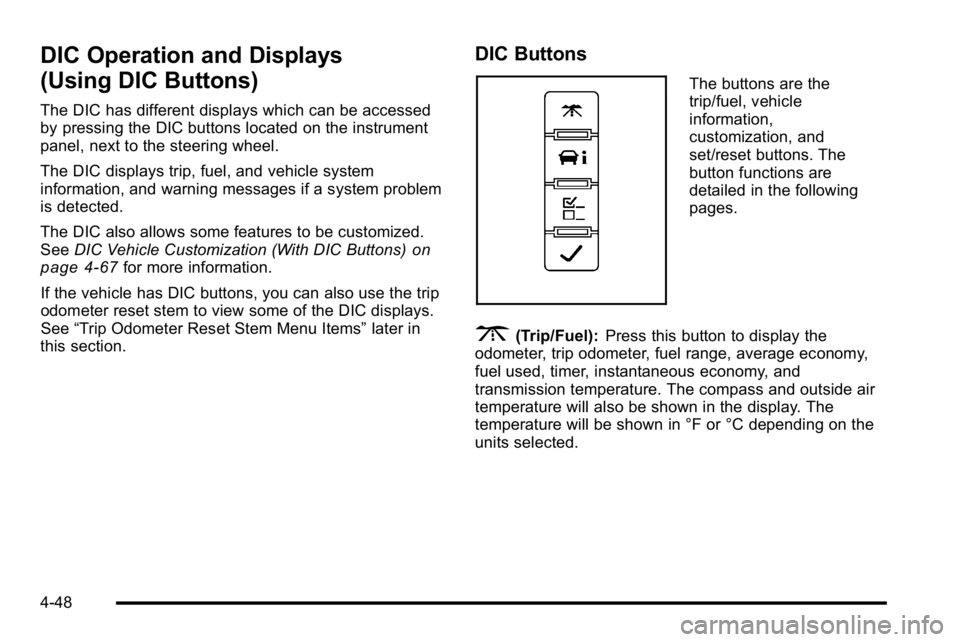
The buttons are the
trip/fuel, vehicle
information,
customization, and
set/reset buttons. The
button functions are
detailed in the following
pages.
3(Trip/Fuel): Press this button to display the
odometer, trip odometer, fuel range, average economy,
fuel used, timer, instantaneous economy, and
transmission temperature. The compass and outside air
temperature will also be shown in the display. The
temperature will be shown in °F or °C depending on the
units selected.
4-48
Page 234 of 550
SERVICE 4 WHEEL DRIVE
If your vehicle has the all-wheel-drive (AWD) system,
this message displays if a problem occurs with this
system. If this message appears, stop as soon as
possible and turn off the vehicle. Restart the vehicle
and check for the message on the DIC display. If the
message is still displayed or appears again when you
begin driving, the AWD system needs service. See your
dealer/retailer.
SERVICE AIR BAG
This message displays if there is a problem with the
airbag system. Have your dealer/retailer inspect the
system for problems. SeeAirbag Readiness Light
on
page 4‑31and Airbag Systemon page 2‑56for more
information.
SERVICE BATTERY CHARGING
SYSTEM
On some vehicles, this message displays if there is a
problem with the battery charging system. Under certain
conditions, the charging system light may also turn on
in the instrument panel cluster. See Charging System
Light
on page 4‑33. Driving with this problem could
drain the battery. Turn off all unnecessary accessories.
Have the electrical system checked as soon as
possible. See your dealer/retailer.
SERVICE BRAKE SYSTEM
This message displays along with the brake system
warning light if there is a problem with the brake
system. See Brake System Warning Light
on
page 4‑34. If this message appears, stop as soon as
possible and turn off the vehicle. Restart the vehicle
and check for the message on the DIC display. If the
message is still displayed or appears again when you
begin driving, the brake system needs service as soon
as possible. See your dealer/retailer.
SERVICE BRAKES SOON
This message displays if there is a problem with the
brake system. If this message appears, stop as soon as
possible and turn off the vehicle. Restart the vehicle
and check for the message on the DIC display. If the
message is still displayed or appears again when you
begin driving, the brake system needs service. See
your dealer/retailer.
4-62
Page 235 of 550
SERVICE PARK ASSIST
On vehicles with the Ultrasonic Rear Parking Assist
(URPA) system, this message displays if there is a
problem with the URPA system. Do not use this system
to help you park. SeeUltrasonic Rear Parking Assist
(URPA)
on page 3‑43for more information. See your
dealer/retailer for service.
SERVICE STABILITRAK
If your vehicle has StabiliTrak®and this message
displays, it means there may be a problem with the
StabiliTrak system. If you see this message, try to reset
the system. Stop; turn off the engine for at least
15 seconds; then start the engine again. If this message
still comes on, it means there is a problem. You should
see your dealer/retailer for service. The vehicle is safe
to drive, however, you do not have the benefit of
StabiliTrak, so reduce your speed and drive accordingly.
SERVICE THEFT DETERRENT SYSTEM
This message displays when there is a problem with the
theft-deterrent system. The vehicle may or may not
restart so you may want to take the vehicle to your
dealer/retailer before turning off the engine. See
PASS-Key
®III+ Electronic Immobilizer Operationon
page 3‑20for more information.
SERVICE TIRE MONITOR SYSTEM
If your vehicle has the Tire Pressure Monitor System
(TPMS), this message displays if a part on the system
is not working properly. The tire pressure light also
flashes and then remains on during the same ignition
cycle. See Tire Pressure Light
on page 4‑37. Several
conditions may cause this message to appear. See Tire
Pressure Monitor Operation
on page 6‑74for more
information. If the warning comes on and stays on,
there may be a problem with the TPMS. See your
dealer/retailer.
SERVICE TRACTION CONTROL
If your vehicle has StabiliTrak, this message displays
when there is a problem with the Traction Control
System (TCS). When this message displays, the
system will not limit wheel spin. Adjust your driving
accordingly. See your dealer/retailer for service. See
StabiliTrak
®Systemon page 5‑6for more
information.
4-63
Page 236 of 550
SERVICE TRAILER BRAKE SYSTEM
On vehicles with the Integrated Trailer Brake Control
(ITBC) system, this message displays and a chime
sounds when there is a problem with the ITBC system.
When this message displays, power is no longer
available to the trailer brakes.
As soon as it is safe to do so, carefully pull your vehicle
over to the side of the road and turn the ignition off.
Check the wiring connection to the trailer and turn the
ignition back on. If this message still displays, either
your vehicle or the trailer needs service. See your
dealer/retailer.
See“Integrated Trailer Brake Control System” under
Towing a Trailer
on page 5‑42for more information.
STABILITRAK OFF
If your vehicle has StabiliTrak, this message displays
when you turn off StabiliTrak, or when the stability
control has been automatically disabled. To limit wheel
spin and realize the full benefits of the stability
enhancement system, you should normally leave
StabiliTrak on. However, you should turn StabiliTrak off
if your vehicle gets stuck in sand, mud, ice, or snow and
you want to rock your vehicle to attempt to free it, or if
you are driving in extreme off-road conditions and
require more wheel spin. See If Your Vehicle is Stuck in Sand, Mud, Ice, or Snow
on page 5‑6. To turn the
StabiliTrak system on or off, see StabiliTrak®Systemon page 5‑6.
There are several conditions that can cause this
message to appear.
.One condition is overheating, which could occur if
StabiliTrak activates continuously for an extended
period of time.
.The message also displays if the brake system
warning light is on. See Brake System Warning
Light on page 4‑34.
.The message could display if the stability system
takes longer than usual to complete its diagnostic
checks due to driving conditions.
.The message displays if an engine or vehicle
related problem has been detected and the vehicle
needs service. See your dealer/retailer.
The message turns off as soon as the conditions that
caused the message to be displayed are no longer
present.
4-64
Page 254 of 550
4(Information) (XM Satellite Radio Service, MP3, and
RDS Features): Press to switch the display between
the radio station frequency and the time. When the
ignition is in the OFF position, press
4to display the
time. For vehicles with XM, MP3, WMA or RDS
features, press
4to display additional text information
related to the current FM-RDS or XM station; or CD,
MP3 or WMA song. If information is available during
XM, CD, MP3 or WMA playback, the song title
information displays on the top line of the display and
artist information displays on the bottom line. When
information is not available, “NO INFO”displays.
Setting Preset Stations
If the radio does not have a FAV button, up to
18 stations (six FM1, six FM2, and six AM), can be
programmed on the six numbered pushbuttons. To
program presets:
1. Turn the radio on.
2. Press BAND to select FM1, FM2, or AM.
3. Tune in the desired station.
4. Press and hold one of the six numbered pushbuttons for three seconds until a beep sounds.
Whenever that pushbutton is pressed and
released, the station that was set, returns.
5. Repeat the Steps 2 through 4 for each pushbutton.
Storing a Radio Station as a Favorite
Radios that have a FAV button store radio stations as
favorites.
Drivers are encouraged to set up their radio station
favorites while the vehicle is parked. Tune to favorite
stations using the presets, favorites button, and steering
wheel controls, if the vehicle has this feature. See
Defensive Driving on page 5‑2.
FAV (Favorites) : If the vehicle has a FAV button, a
maximum of 36 stations can be programmed as
favorites using the six softkeys below the radio station
frequency tabs and by using the FAV button. Press the
FAV button to go through up to six pages of favorites,
each having six favorite stations available per page.
Each page of favorites can contain any combination of
AM, FM, or XM, if equipped, stations.
4-82
Page 288 of 550
Bluetooth Controls
Use the buttons located on the steering wheel to
operate the in‐vehicle Bluetooth system. SeeAudio
Steering Wheel Controls
on page 4‑137for more
information.
b g(Push To Talk) : Press to answer incoming calls,
to confirm system information, and to start speech
recognition.
c x(Phone On Hook): Press to end a call, reject a
call, or to cancel an operation.
Pairing
A Bluetooth enabled cell phone must be paired to the
in‐vehicle Bluetooth system first and then connected to
the vehicle before it can be used. See the cell phone
manufacturers user guide for Bluetooth functions before
pairing the cell phone. If a Bluetooth phone is not
connected, calls will be made using OnStar
®
Hands‐Free Calling, if available. Refer to the OnStar
owner's guide for more information. Pairing Information:
.Up to five cell phones can be paired to the
in‐vehicle Bluetooth system.
.The pairing process is disabled when the vehicle is
moving.
.The in‐vehicle Bluetooth system automatically links
with the first available paired cell phone in the
order the phone was paired.
.Only one paired cell phone can be connected to
the in‐vehicle Bluetooth system at a time.
.Pairing should only need to be completed once,
unless changes to the pairing information have
been made or the phone is deleted.
To link to a different paired phone, see Linking to a
Different Phone later in this section.
4-116
Page 309 of 550
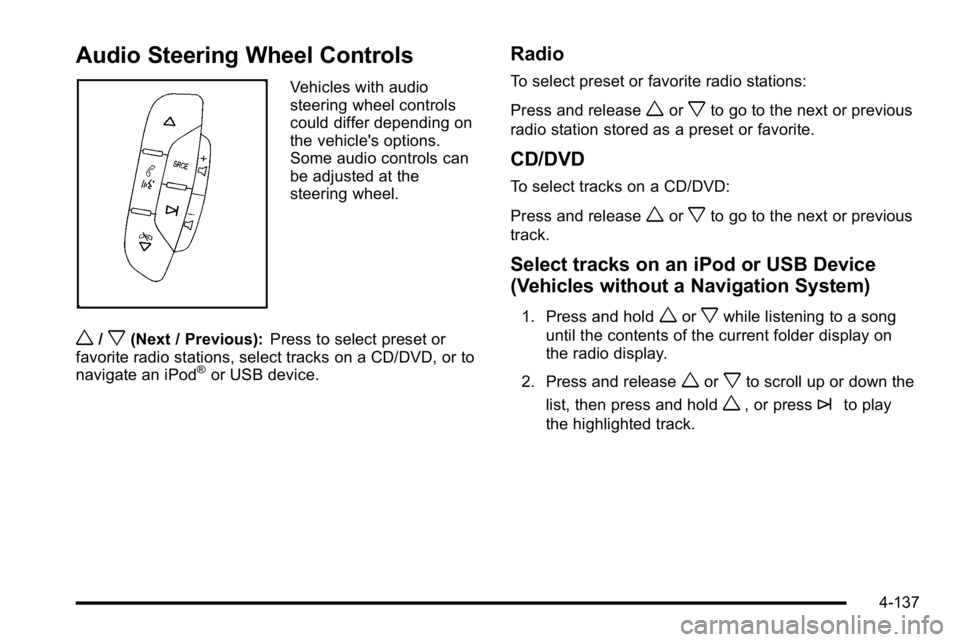
Audio Steering Wheel Controls
Vehicles with audio
steering wheel controls
could differ depending on
the vehicle's options.
Some audio controls can
be adjusted at the
steering wheel.
w/x(Next / Previous):Press to select preset or
favorite radio stations, select tracks on a CD/DVD, or to
navigate an iPod
®or USB device.
Radio
To select preset or favorite radio stations:
Press and release
worxto go to the next or previous
radio station stored as a preset or favorite.
CD/DVD
To select tracks on a CD/DVD:
Press and release
worxto go to the next or previous
track.
Select tracks on an iPod or USB Device
(Vehicles without a Navigation System)
1. Press and holdworxwhile listening to a song
until the contents of the current folder display on
the radio display.
2. Press and release
worxto scroll up or down the
list, then press and hold
w, or press¨to play
the highlighted track.
4-137
Page 313 of 550
Section 5 Driving Your Vehicle
Your Driving, the Road, and the Vehicle. . . . . . . . . .5-2
Defensive Driving . . . . . . . . . . . . . . . . . . . . . . . . . . . . . . . 5-2
Drunk Driving . . . . . . . . . . . . . . . . . . . . . . . . . . . . . . . . . . . 5-2
Control of a Vehicle . . . . . . . . . . . . . . . . . . . . . . . . . . . . . 5-3
Braking . . . . . . . . . . . . . . . . . . . . . . . . . . . . . . . . . . . . . . . . . 5-3
Antilock Brake System (ABS) . . . . . . . . . . . . . . . . . . . 5-4
Braking in Emergencies . . . . . . . . . . . . . . . . . . . . . . . . . 5-5
StabiliTrak
®System . . . . . . . . . . . . . . . . . . . . . . . . . . . . . 5-6
Locking Rear Axle . . . . . . . . . . . . . . . . . . . . . . . . . . . . . . 5-8
All-Wheel Drive (AWD) System . . . . . . . . . . . . . . . . . 5-9
Steering . . . . . . . . . . . . . . . . . . . . . . . . . . . . . . . . . . . . . . . . . 5-9
Off-Road Recovery . . . . . . . . . . . . . . . . . . . . . . . . . . . . 5-10
Passing . . . . . . . . . . . . . . . . . . . . . . . . . . . . . . . . . . . . . . . . 5-11
Loss of Control . . . . . . . . . . . . . . . . . . . . . . . . . . . . . . . . 5-11
Off-Road Driving . . . . . . . . . . . . . . . . . . . . . . . . . . . . . . . 5-12
Driving at Night . . . . . . . . . . . . . . . . . . . . . . . . . . . . . . . . 5-24
Driving in Rain and on Wet Roads . . . . . . . . . . . . . 5-24 Before Leaving on a Long Trip . . . . . . . . . . . . . . . . . 5-25
Highway Hypnosis . . . . . . . . . . . . . . . . . . . . . . . . . . . . . 5-26
Hill and Mountain Roads . . . . . . . . . . . . . . . . . . . . . . . 5-26
Winter Driving . . . . . . . . . . . . . . . . . . . . . . . . . . . . . . . . . 5-27
If Your Vehicle is Stuck in Sand, Mud, Ice,
or Snow . . . . . . . . . . . . . . . . . . . . . . . . . . . . . . . . . . . . . 5-29
Rocking Your Vehicle to Get It Out . . . . . . . . . . . . . 5-30
Recovery Hooks . . . . . . . . . . . . . . . . . . . . . . . . . . . . . . . 5-30
Loading the Vehicle . . . . . . . . . . . . . . . . . . . . . . . . . . . . 5-31
Truck-Camper Loading Information . . . . . . . . . . . . 5-37
Pickup Conversion to Chassis Cab . . . . . . . . . . . . 5-37
Towing . . . . . . . . . . . . . . . . . . . . . . . . . . . . . . . . . . . . . . . . . . . . 5-38
Towing Your Vehicle . . . . . . . . . . . . . . . . . . . . . . . . . . . 5-38
Recreational Vehicle Towing . . . . . . . . . . . . . . . . . . . 5-38
Towing a Trailer . . . . . . . . . . . . . . . . . . . . . . . . . . . . . . . . 5-42
Trailer Recommendations . . . . . . . . . . . . . . . . . . . . . . 5-61
5-1