tow GMC TERRAIN 2010 Service Manual
[x] Cancel search | Manufacturer: GMC, Model Year: 2010, Model line: TERRAIN, Model: GMC TERRAIN 2010Pages: 410, PDF Size: 2.55 MB
Page 295 of 410
Vehicle Care 9-21
If the temperature overheat gauge
is no longer in the overheat zone
or an overheat warning no longer
displays, the vehicle can be driven.
Continue to drive the vehicle slow
for about 10 minutes. Keep a safe
vehicle distance from the car in front
of you. If the warning does not come
back on, continue to drive normally.
If the warning continues, pull over,
stop, and park the vehicle
right away.
If there is no sign of steam, idle the
engine for three minutes while
parked. If the warning is still
displayed, turn off the engine
until it cools down.
Power Steering Fluid
(2.4L L4 Engine)
The vehicle has electric power
steering and does not use power
steering fluid.
Power Steering Fluid
(3.0L V6 Engine)
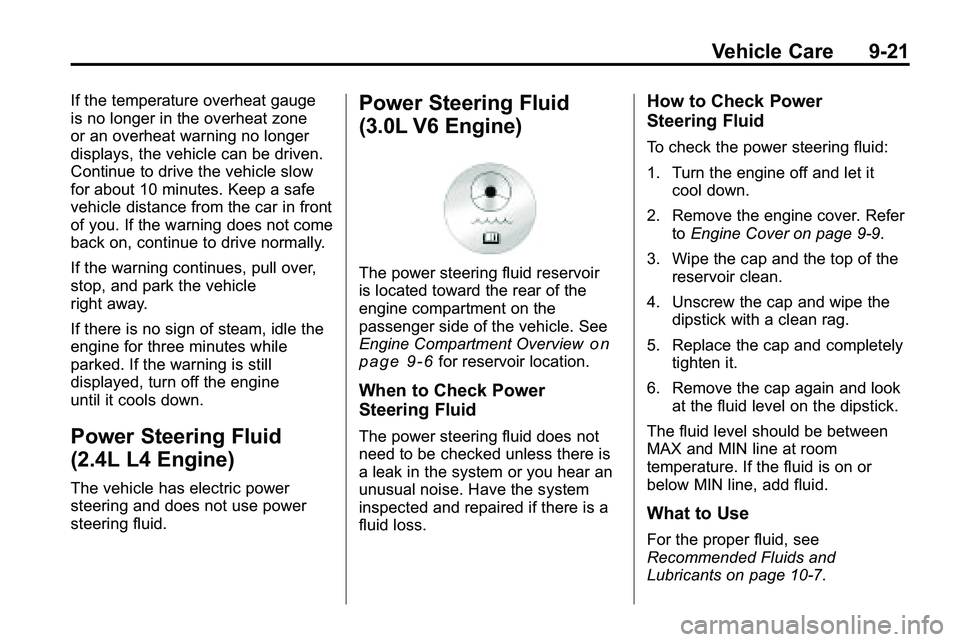
The power steering fluid reservoir
is located toward the rear of the
engine compartment on the
passenger side of the vehicle. See
Engine Compartment Overview
on
page 9‑6for reservoir location.
When to Check Power
Steering Fluid
The power steering fluid does not
need to be checked unless there is
a leak in the system or you hear an
unusual noise. Have the system
inspected and repaired if there is a
fluid loss.
How to Check Power
Steering Fluid
To check the power steering fluid:
1. Turn the engine off and let it cool down.
2. Remove the engine cover. Refer toEngine Cover on page 9‑9.
3. Wipe the cap and the top of the reservoir clean.
4. Unscrew the cap and wipe the dipstick with a clean rag.
5. Replace the cap and completely tighten it.
6. Remove the cap again and look at the fluid level on the dipstick.
The fluid level should be between
MAX and MIN line at room
temperature. If the fluid is on or
below MIN line, add fluid.
What to Use
For the proper fluid, see
Recommended Fluids and
Lubricants on page 10‑7.
Page 311 of 410
Vehicle Care 9-37
3. Turn the bulb socketcounterclockwise and pull it out.
4. Pull the bulb straight out of the socket.
5. Install the new bulb.
6. Push the bulb socket in and turn it clockwise.
7. Reinstall the interior trim access panel.
License Plate Lamp
To replace one of these bulbs:
1. Open the liftgate partway. SeeLiftgate (Manual)
on page 1‑8orLiftgate (Power)on
page 1‑9.
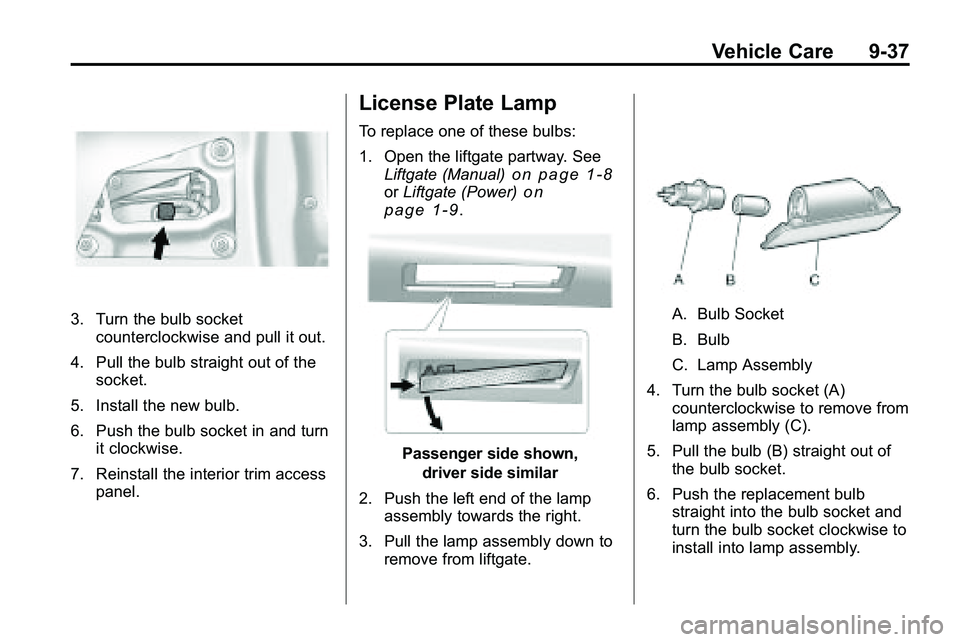
Passenger side shown,
driver side similar
2. Push the left end of the lamp assembly towards the right.
3. Pull the lamp assembly down to remove from liftgate.
A. Bulb Socket
B. Bulb
C. Lamp Assembly
4. Turn the bulb socket (A) counterclockwise to remove from
lamp assembly (C).
5. Pull the bulb (B) straight out of the bulb socket.
6. Push the replacement bulb straight into the bulb socket and
turn the bulb socket clockwise to
install into lamp assembly.
Page 333 of 410
Vehicle Care 9-59
After the tires have been
rotated, adjust the front and rear
inflation pressures as shown on
the Tire and Loading Information
label. SeeTire Pressure
on
page 9‑52
and Vehicle Load
Limits
on page 8‑22.
Reset the Tire Pressure Monitor
System. See Tire Pressure
Monitor Operation
on page 9‑55.
Make certain that all wheel nuts
are properly tightened. See
“Wheel Nut Torque” under
Capacities and Specifications
on
page 11‑2
.
{WARNING
Rust or dirt on a wheel, or on the
parts to which it is fastened, can
make wheel nuts become loose
after time. The wheel could come
off and cause an accident. When
changing a wheel, remove any
rust or dirt from places where the
wheel attaches to the vehicle. In
an emergency, use a cloth or a
paper towel to do this; but be sure
to use a scraper or wire brush
later, if needed, to get all the rust
or dirt off. See If a Tire Goes Flat
on page 9‑67.
When It Is Time for New
Tires
Various factors, such as
maintenance, temperatures, driving
speeds, vehicle loading, and road
conditions influence when you need
new tires.
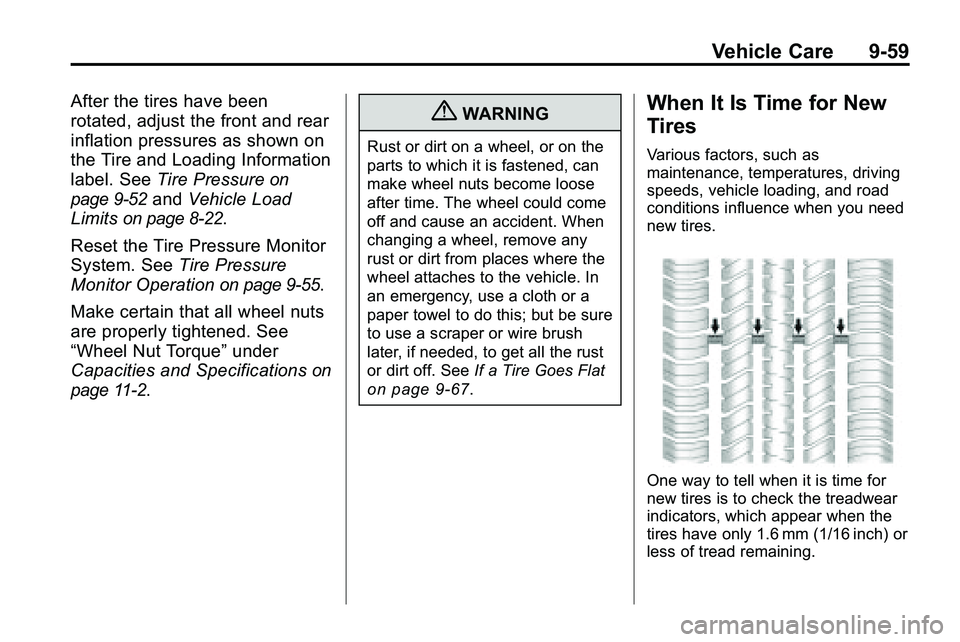
One way to tell when it is time for
new tires is to check the treadwear
indicators, which appear when the
tires have only 1.6 mm (1/16 inch) or
less of tread remaining.
Page 341 of 410

Vehicle Care 9-67
If a Tire Goes Flat
It is unusual for a tire to blowout
while you are driving, especially if
you maintain your vehicle's tires
properly. If air goes out of a tire, it is
much more likely to leak out slowly.
But if you should ever have a
blowout, here are a few tips about
what to expect and what to do:
If a front tire fails, the flat tire
creates a drag that pulls the vehicle
toward that side. Take your foot off
the accelerator pedal and grip the
steering wheel firmly. Steer tomaintain lane position, and then
gently brake to a stop well out of the
traffic lane.
A rear blowout, particularly on a
curve, acts much like a skid and
may require the same correction
you would use in a skid. In any rear
blowout remove your foot from the
accelerator pedal. Get the vehicle
under control by steering the way
you want the vehicle to go. It may
be very bumpy and noisy, but you
can still steer. Gently brake to a
stop, well off the road if possible.{WARNING
Lifting a vehicle and getting
under it to do maintenance or
repairs is dangerous without the
appropriate safety equipment and
training. If a jack is provided with
the vehicle, it is designed only for
changing a flat tire. If it is used for
anything else, you or others could
be badly injured or killed if the
vehicle slips off the jack. If a jack
is provided with the vehicle, only
use it for changing a flat tire.
Page 347 of 410
Vehicle Care 9-73
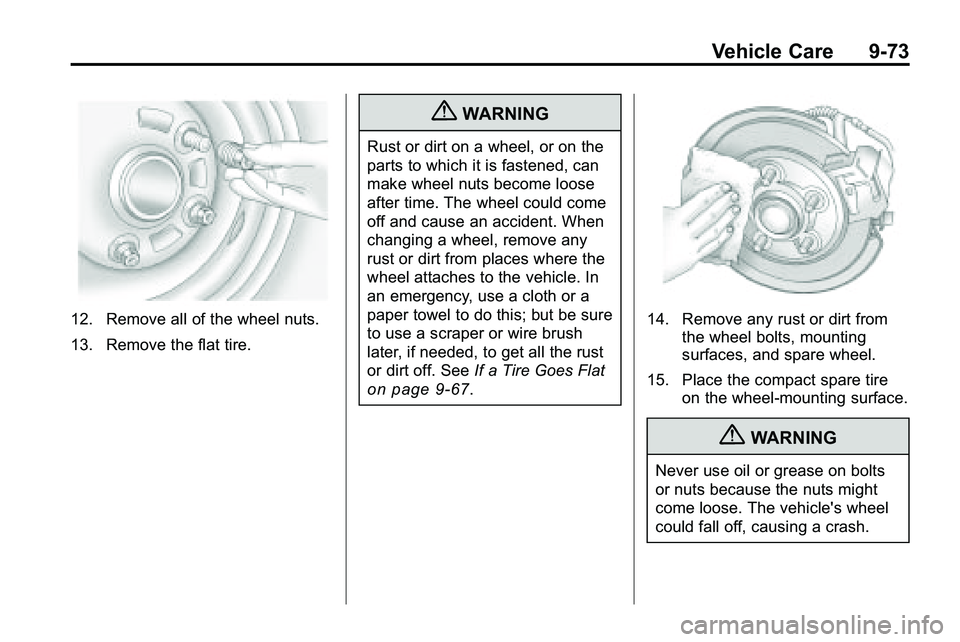
12. Remove all of the wheel nuts.
13. Remove the flat tire.
{WARNING
Rust or dirt on a wheel, or on the
parts to which it is fastened, can
make wheel nuts become loose
after time. The wheel could come
off and cause an accident. When
changing a wheel, remove any
rust or dirt from places where the
wheel attaches to the vehicle. In
an emergency, use a cloth or a
paper towel to do this; but be sure
to use a scraper or wire brush
later, if needed, to get all the rust
or dirt off. SeeIf a Tire Goes Flat
on page 9‑67.
14. Remove any rust or dirt from
the wheel bolts, mounting
surfaces, and spare wheel.
15. Place the compact spare tire on the wheel-mounting surface.
{WARNING
Never use oil or grease on bolts
or nuts because the nuts might
come loose. The vehicle's wheel
could fall off, causing a crash.
Page 349 of 410
Vehicle Care 9-75
Storing a Flat or Spare Tire
and Tools
{WARNING
Storing a jack, a tire, or other
equipment in the passenger
compartment of the vehicle could
cause injury. In a sudden stop or
collision, loose equipment could
strike someone. Store all these in
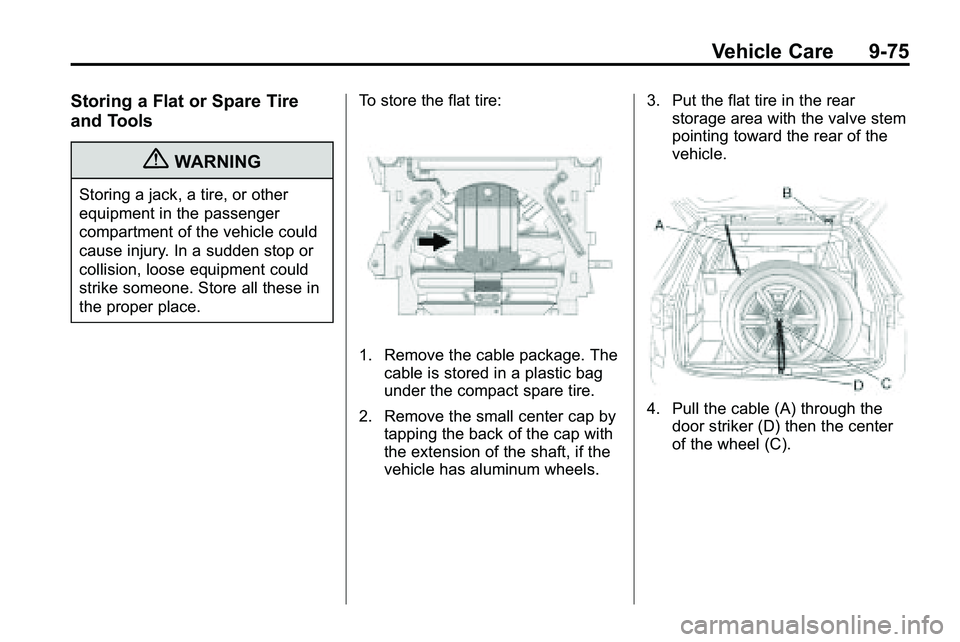
the proper place.To store the flat tire:
1. Remove the cable package. The
cable is stored in a plastic bag
under the compact spare tire.
2. Remove the small center cap by tapping the back of the cap with
the extension of the shaft, if the
vehicle has aluminum wheels. 3. Put the flat tire in the rear
storage area with the valve stem
pointing toward the rear of the
vehicle.
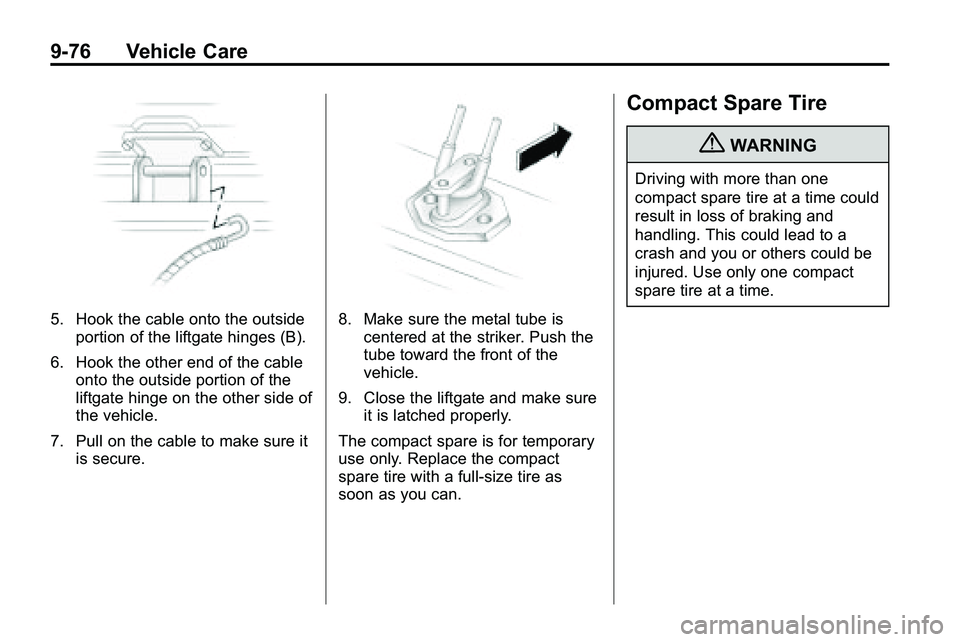
4. Pull the cable (A) through the
door striker (D) then the center
of the wheel (C).
Page 350 of 410
9-76 Vehicle Care
5. Hook the cable onto the outsideportion of the liftgate hinges (B).
6. Hook the other end of the cable onto the outside portion of the
liftgate hinge on the other side of
the vehicle.
7. Pull on the cable to make sure it is secure.8. Make sure the metal tube iscentered at the striker. Push the
tube toward the front of the
vehicle.
9. Close the liftgate and make sure it is latched properly.
The compact spare is for temporary
use only. Replace the compact
spare tire with a full-size tire as
soon as you can.
Compact Spare Tire
{WARNING
Driving with more than one
compact spare tire at a time could
result in loss of braking and
handling. This could lead to a
crash and you or others could be
injured. Use only one compact
spare tire at a time.
Page 353 of 410
Vehicle Care 9-79
1. The vehicle used to jump startmust have 12-volt battery with a
negative ground.
Notice: If the other vehicle's
system is not a 12-volt system
with a negative ground, both
vehicles can be damaged. Only
use vehicles with 12-volt systems
with negative grounds to jump
start your vehicle.
2. The vehicles should be close enough for the jumper cables to
reach, but the vehicles should
not be touching. Touching could
cause grounding and possible
electrical system damage.
Put both vehicles in P (Park)
and set the parking brake firmly.
3. Unplug accessories plugged into the cigarette lighter or the
accessory power outlet. Turn off
the radio and all lamps that are
not needed. Turn off the ignition
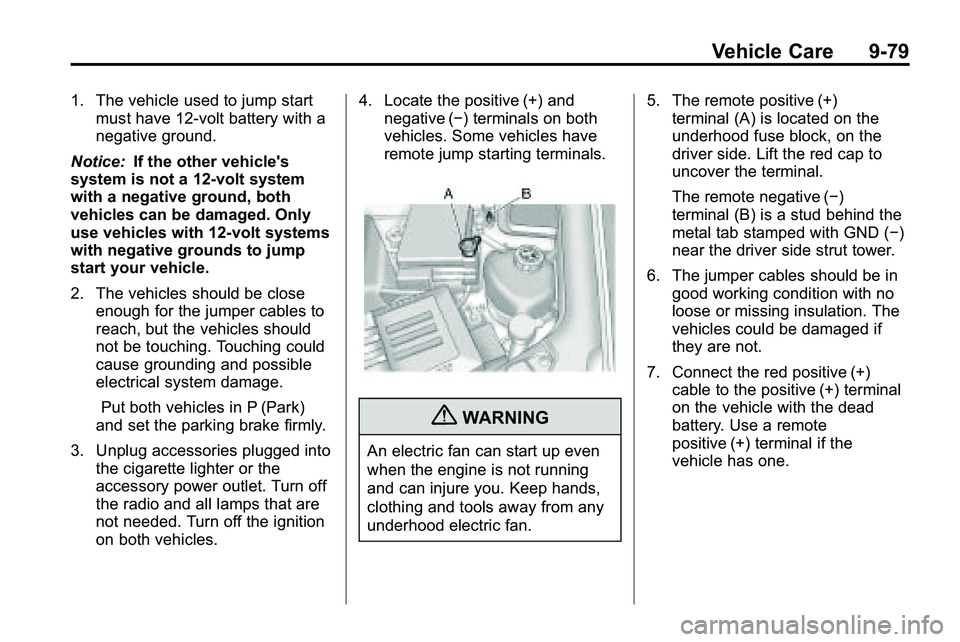
on both vehicles. 4. Locate the positive (+) and
negative (−) terminals on both
vehicles. Some vehicles have
remote jump starting terminals.
{WARNING
An electric fan can start up even
when the engine is not running
and can injure you. Keep hands,
clothing and tools away from any
underhood electric fan. 5. The remote positive (+)
terminal (A) is located on the
underhood fuse block, on the
driver side. Lift the red cap to
uncover the terminal.
The remote negative (−)
terminal (B) is a stud behind the
metal tab stamped with GND (−)
near the driver side strut tower.
6. The jumper cables should be in good working condition with no
loose or missing insulation. The
vehicles could be damaged if
they are not.
7. Connect the red positive (+) cable to the positive (+) terminal
on the vehicle with the dead
battery. Use a remote
positive (+) terminal if the
vehicle has one.
Page 355 of 410
Vehicle Care 9-81
To disconnect the jumper cables
from both vehicles,
1. Disconnect the blacknegative (−) cable from the
vehicle that had the dead
battery.
2. Disconnect the black negative (−) cable from the
vehicle with the good battery.
3. Disconnect the red positive (+) cable from the vehicle with the
good battery.
4. Disconnect the red positive (+) cable from the other vehicle.
5. Return the underhood fuse block cover to its original position,
if applicable.Towing
Towing the Vehicle
To avoid damage, the disabled
vehicle should be towed with all four
wheels off the ground. Consult your
dealer/retailer or a professional
towing service if the disabled
vehicle must be towed. See
Roadside Assistance Program
on
page 12‑6.
To tow the vehicle behind
another vehicle for recreational
purposes —such as behind a
motorhome, see Recreational
Vehicle Towing following.
Recreational Vehicle
Towing
Recreational vehicle towing means
towing the vehicle behind another
vehicle –such as behind a
motorhome. The two most common
types of recreational vehicle towing
are known as dinghy towing and
dolly towing. Dinghy towing is
towing the vehicle with all four
wheels on the ground. Dolly towing
is towing the vehicle with two
wheels on the ground and two
wheels up on a device known as
a dolly.
Page 356 of 410
9-82 Vehicle Care
Here are some important things to
consider before recreational vehicle
towing:
.What is the towing capacity of
the towing vehicle? Be sure to
read the tow vehicle
manufacturer's
recommendations.
.What is the distance that will be
travelled? Some vehicles have
restrictions on how far and how
long they can tow.
.Is the proper towing equipment
going to be used? See your
dealer/retailer or trailering
professional for additional advice
and equipment
recommendations.
.Is the vehicle ready to be
towed? Just as preparing the
vehicle for a long trip, make sure
the vehicle is prepared to be
towed.
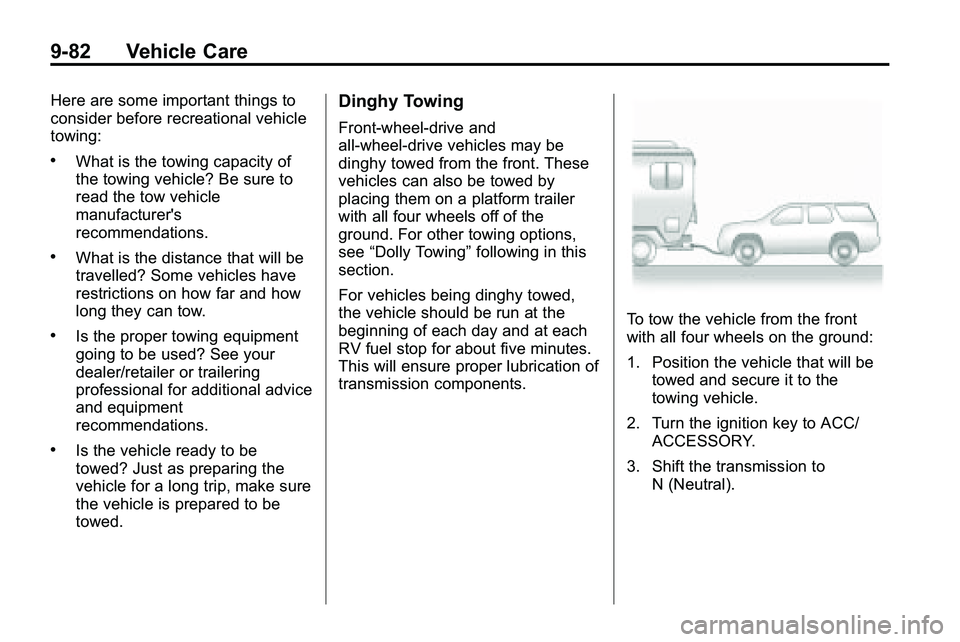
Dinghy Towing
Front-wheel‐drive and
all-wheel-drive vehicles may be
dinghy towed from the front. These
vehicles can also be towed by
placing them on a platform trailer
with all four wheels off of the
ground. For other towing options,
see“Dolly Towing” following in this
section.
For vehicles being dinghy towed,
the vehicle should be run at the
beginning of each day and at each
RV fuel stop for about five minutes.
This will ensure proper lubrication of
transmission components.
To tow the vehicle from the front
with all four wheels on the ground:
1. Position the vehicle that will be towed and secure it to the
towing vehicle.
2. Turn the ignition key to ACC/ ACCESSORY.
3. Shift the transmission to N (Neutral).