engine GMC TERRAIN 2010 Workshop Manual
[x] Cancel search | Manufacturer: GMC, Model Year: 2010, Model line: TERRAIN, Model: GMC TERRAIN 2010Pages: 410, PDF Size: 2.55 MB
Page 245 of 410
Driving and Operating 8-37
Notice:If the vehicle seems to
accelerate slowly or not shift
gears when you go faster, and
you continue to drive the vehicle
that way, you could damage the
transmission. Have the vehicle
serviced right away. You can
drive in L (Low) when you are
driving less than 56 km/h (35 mph)
and D (Drive) for higher speeds
until then.
M (Manual Mode): Allows the
driver to select the range of gear
positions. If the vehicle has this
feature, see Manual Mode
on
page 8‑37.
Manual Mode
Electronic Range Select
(ERS) Mode
ERS or manual mode allows for the
selection of the range of gear
positions. Use this mode when
driving down hill or towing a trailer
to limit the top gear and vehicle
speed. The shift position indicator
within the Driver Information Center
(DIC) will display a number next to
the M indicating the highest
available gear under manual mode
and the driving conditions when
manual mode was selected.
To use this feature:
1. Move the shift lever to M (Manual Mode).
2. Press the plus/minus button on the shift lever, to increase or
decrease the gear range
available. When shifting to M (Manual Mode),
the transmission will shift to a preset
lower gear range. For this preset
range, the highest gear available is
displayed next to the M in the DIC.
See
Driver Information Center (DIC)
on page 4‑25for more information.
All gears below that number are
available to use. For example, when
4 (Fourth) is shown next to the M,
1 (First) through 4 (Fourth) gears are
shifted automatically. To shift to
5 (Fifth) gear, press the + (Plus)
button or shift into D (Drive).
M (Manual Mode) will prevent
shifting to a lower gear range if the
engine speed is too high. If vehicle
speed is not reduced within the time
allowed, the lower gear range shift
will not be completed. Slow the
vehicle, then press the −(Minus)
button to the desired lower gear
range.
While using the ERS, cruise control
can be used.
Page 246 of 410
8-38 Driving and Operating
Fuel Economy Mode
The vehicle may have a Fuel
Economy Mode. When engaged,
fuel economy mode can improve the
vehicle's fuel economy.
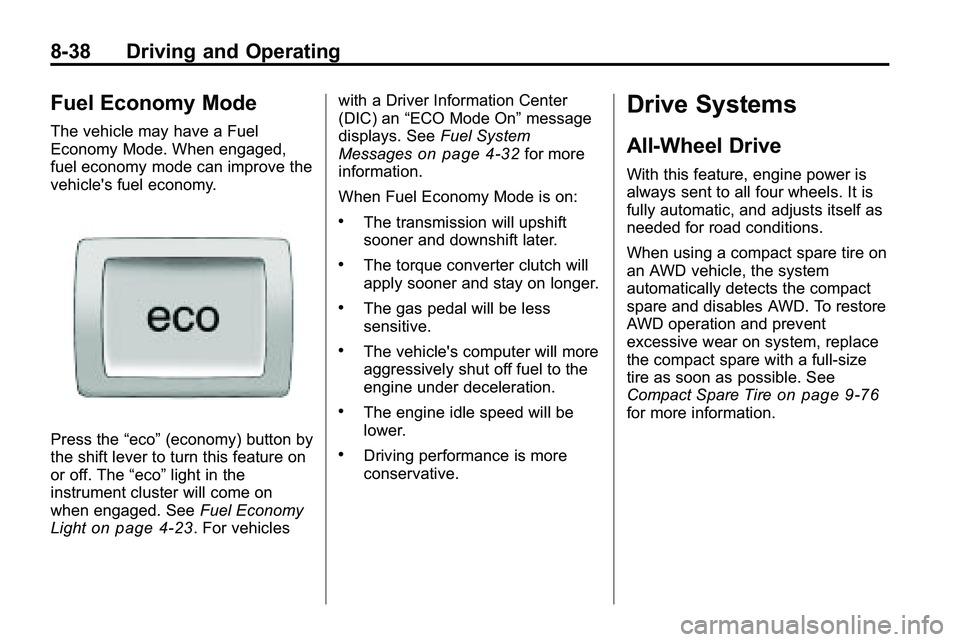
Press the“eco”(economy) button by
the shift lever to turn this feature on
or off. The “eco”light in the
instrument cluster will come on
when engaged. See Fuel Economy
Light
on page 4‑23. For vehicles with a Driver Information Center
(DIC) an
“ECO Mode On” message
displays. See Fuel System
Messages
on page 4‑32for more
information.
When Fuel Economy Mode is on:
.The transmission will upshift
sooner and downshift later.
.The torque converter clutch will
apply sooner and stay on longer.
.The gas pedal will be less
sensitive.
.The vehicle's computer will more
aggressively shut off fuel to the
engine under deceleration.
.The engine idle speed will be
lower.
.Driving performance is more
conservative.
Drive Systems
All-Wheel Drive
With this feature, engine power is
always sent to all four wheels. It is
fully automatic, and adjusts itself as
needed for road conditions.
When using a compact spare tire on
an AWD vehicle, the system
automatically detects the compact
spare and disables AWD. To restore
AWD operation and prevent
excessive wear on system, replace
the compact spare with a full-size
tire as soon as possible. See
Compact Spare Tire
on page 9‑76for more information.
Page 247 of 410

Driving and Operating 8-39
Brakes
Antilock Brake
System (ABS)
This vehicle has the Antilock Brake
System (ABS), an advanced
electronic braking system that helps
prevent a braking skid.
When the engine is started and the
vehicle begins to drive away, ABS
checks itself. A momentary motor or
clicking noise might be heard while
this test is going on, and it might
even be noticed that the brake
pedal moves a little. This is normal.
If there is a problem with ABS, this
warning light stays on. SeeAntilock
Brake System (ABS) Warning Light
on page 4‑20. If driving safely on a wet road and
it becomes necessary to slam on
the brakes and continue braking
to avoid a sudden obstacle, a
computer senses that the wheels
are slowing down. If one of the
wheels is about to stop rolling, the
computer will separately work the
brakes at each wheel.
ABS can change the brake pressure
to each wheel, as required, faster
than any driver could. This can help
the driver steer around the obstacle
while braking hard.
As the brakes are applied, the
computer keeps receiving updates
on wheel speed and controls
braking pressure accordingly.
Remember: ABS does not change
the time needed to get a foot up to
the brake pedal or always decrease
stopping distance. If you get too
close to the vehicle in front of you,
there will not be enough time to
apply the brakes if that vehicle
suddenly slows or stops. Always
leave enough room up ahead to
stop, even with ABS.
Using ABS
Do not pump the brakes. Just hold
the brake pedal down firmly and let
ABS work. The ABS pump or motor
might be heard operating, and the
brake pedal might be felt to pulsate,
but this is normal.
Braking in Emergencies
ABS allows the driver to steer and
brake at the same time. In many
emergencies, steering can help
more than even the very best
braking.
Page 249 of 410

Driving and Operating 8-41
Hill Start Assist (HSA)
This vehicle has a Hill Start Assist
(HSA) feature, which may be useful
when the vehicle is stopped on a
grade. This feature is designed to
prevent the vehicle from rolling,
either forward or rearward, during
vehicle drive off. After driver
completely stops and holds the
vehicle in a complete standstill on a
grade, HSA will be automatically
activated. During the transition
period between when the driver
releases the brake pedal and starts
to accelerate to drive off on a grade,
HSA holds the braking pressure to
ensure that there is no rolling back.
The brakes will automatically
release when the accelerator pedal
is applied within the two second
window. It will not activate if the
vehicle is in a drive gear and facing
downhill or if the vehicle is facing
uphill and in R (Reverse).
Ride Control Systems
Traction Control
System (TCS)
The vehicle has a Traction Control
System (TCS) that limits wheel spin.
On a front-wheel-drive vehicle, the
system operates if it senses that
one or both of the front wheels are
spinning or beginning to lose
traction. On an All-Wheel-Drive
(AWD) vehicle, the system will
operate if it senses that any of the
wheels are spinning or beginning to
lose traction. When this happens,
the system brakes the spinning
wheel(s) and/or reduces engine
power to limit wheel spin.
The system may be heard or felt
while it is working, but this is
normal.The TCS/StabiliTrak warning light
will flash to indicate that the traction
control system is active.
This warning light comes on if there
is a problem with TCS, and the
system will not limit wheel spin.
Adjust your driving accordingly.
TCS automatically comes on
whenever the vehicle is started.
To limit wheel spin, especially in
slippery road conditions, the system
should always be left on. But, TCS
can be turned off if needed.
Notice:Do not repeatedly brake
or accelerate heavily when TCS is
off. The vehicle's driveline could
be damaged.
Page 262 of 410
8-54 Driving and Operating
Fuel
Use of the recommended fuel
is an important part of the proper
maintenance of this vehicle. To help
keep the engine clean and maintain
optimum vehicle performance, we
recommend the use of gasoline
advertised as TOP TIER Detergent
Gasoline.
Look for the TOP TIER label on the
fuel pump to ensure gasoline meets
enhanced detergency standards
developed by auto companies. A list
of marketers providing TOP TIER
Detergent Gasoline can be found at
www.toptiergas.com.
Recommended Fuel
Use regular unleaded gasoline with
a posted octane rating of 87 or
higher. If the octane rating is less
than 87, an audible knocking noise,
commonly referred to as spark
knock, might be heard when driving.
If this occurs, use a gasoline rated
at 87 octane or higher as soon as
possible. If heavy knocking is heard
when using gasoline rated at
87 octane or higher, the engine
needs service.
Gasoline Specifications
At a minimum, gasoline should
meet ASTM specification D 4814in the United States or CAN/
CGSB‐3.5 or 3.511 in Canada.
Some gasolines contain an
octane-enhancing additive called
methylcyclopentadienyl manganese
tricarbonyl (MMT). We recommend
against the use of gasolines
containing MMT. See Fuel
Additives
on page 8‑55for
additional information.
Page 263 of 410
Driving and Operating 8-55
California Fuel
Requirements
If the vehicle is certified to meet
California Emissions Standards, it is
designed to operate on fuels that
meet California specifications. See
the underhood emission control
label. If this fuel is not available in
states adopting California emissions
standards, the vehicle will operate
satisfactorily on fuels meeting
federal specifications, but emission
control system performance might
be affected. The malfunction
indicator lamp could turn on and the
vehicle might fail a smog‐check test.
SeeMalfunction Indicator Lamp
on
page 4‑17. If this occurs, return to
your authorized dealer/retailer for
diagnosis. If it is determined that the
condition is caused by the type of
fuel used, repairs might not be
covered by the vehicle warranty.
Fuels in Foreign
Countries
If you plan on driving in another
country outside the United States or
Canada, the proper fuel might be
hard to find. Never use leaded
gasoline or any other fuel not
recommended in the previous text
on fuel. Costly repairs caused by
use of improper fuel would not be
covered by the vehicle warranty.
To check the fuel availability, ask an
auto club, or contact a major oil
company that does business in the
country where you will be driving.
Fuel Additives
To provide cleaner air, all gasolines
in the United States are now
required to contain additives that
help prevent engine and fuel system
deposits from forming, allowing the
emission control system to work
properly. In most cases, nothing
should have to be added to the fuel.
However, some gasolines contain only the minimum amount of
additive required to meet U.S.
Environmental Protection Agency
regulations. To help keep fuel
injectors and intake valves clean,
or if the vehicle experiences
problems due to dirty injectors or
valves, look for gasoline that is
advertised as TOP TIER Detergent
Gasoline. Look for the TOP TIER
label on the fuel pump to ensure
gasoline meets enhanced
detergency standards developed
by the auto companies. A list of
marketers providing TOP TIER
Detergent Gasoline can be found at
www.toptiergas.com.
For customers who do not use TOP
TIER Detergent Gasoline regularly,
one bottle of GM Fuel System
Treatment PLUS, added to the fuel
tank at every engine oil change,
can help clean deposits from fuel
injectors and intake valves. GM Fuel
System Treatment PLUS is the only
gasoline additive recommended by
General Motors. It is available at
your dealer/retailer.
Page 264 of 410
8-56 Driving and Operating
Gasolines containing oxygenates,
such as ethers and ethanol, and
reformulated gasolines might be
available in your area. We
recommend that you use these
gasolines, if they comply with the
specifications described earlier.
However, E85 (85% ethanol) and
other fuels containing more than
10% ethanol must not be used in
vehicles that were not designed for
those fuels.
Notice:This vehicle was not
designed for fuel that contains
methanol. Do not use fuel
containing methanol. It can
corrode metal parts in the fuel
system and also damage plastic
and rubber parts. That damage
would not be covered under the
vehicle warranty.
Some gasolines that are
not reformulated for low
emissions can contain an
octane-enhancing additive called
methylcyclopentadienyl manganese tricarbonyl (MMT); ask the attendant
where you buy gasoline whether the
fuel contains MMT. We recommend
against the use of such gasolines.
Fuels containing MMT can reduce
the life of spark plugs and the
performance of the emission control
system could be affected. The
malfunction indicator lamp might
turn on. If this occurs, return to your
dealer/retailer for service.
Filling the Tank
{WARNING
Fuel vapor burns violently and a
fuel fire can cause bad injuries.
To help avoid injuries to you and
others, read and follow all the
instructions on the fuel pump
island. Turn off the engine when
refueling. Do not smoke near fuel
or when refueling the vehicle. Do
not use cellular phones. Keep
(Continued)
WARNING (Continued)
sparks, flames, and smoking
materials away from fuel. Do not
leave the fuel pump unattended
when refueling the vehicle. This is
against the law in some places.
Do not re-enter the vehicle while
pumping fuel. Keep children away
from the fuel pump; never let
children pump fuel.
The fuel cap is behind the fuel door
on the vehicle's passenger side.
Turn the fuel cap counterclockwise
to remove. Do not release the cap
too soon or it will spring back.
Reinstall the cap by turning it
clockwise until it clicks.
If the cap is not properly installed,
the Malfunction Indicator Lamp
come on. See Malfunction Indicator
Lamp
on page 4‑17for more
information.
Page 266 of 410
8-58 Driving and Operating
Towing
General Towing
Information
Only use towing equipment that has
been designed for the vehicle.
Contact your dealer/retailer or
trailering retailer for assistance with
preparing the vehicle for towing a
trailer.
See the following trailer towing
information in this section:
.For information on driving while
towing a trailer, see“Driving
Characteristics and
Towing Tips”.
.For maximum vehicle and trailer
weights, see “Trailer Towing”.
.For information on equipment to
tow a trailer, see “Towing
Equipment”.
For information on towing a disabled
vehicle, see Towing the Vehicle
on
page 9‑81. For information on
towing the vehicle behind another vehicle
—such as a motorhome,
see Recreational Vehicle Towing
on
page 9‑81.
Driving Characteristics
and Towing Tips
{WARNING
The driver can lose control when
pulling a trailer if the correct
equipment is not used or the
vehicle is not driven properly. For
example, if the trailer is too
heavy, the brakes may not work
well —or even at all. The driver
and passengers could be
seriously injured. The vehicle may
also be damaged; the resulting
repairs would not be covered by
the vehicle warranty. Pull a trailer
only if all the steps in this section
have been followed. Ask your
dealer/retailer for advice and
information about towing a trailer
with the vehicle. The vehicle can tow a trailer when
equipped with the proper trailer
towing equipment. For trailering
capacity, see
“Trailer Towing”
following in this section. Trailering
changes handling, acceleration,
braking, durability and fuel
economy. With the added weight,
the engine, transmission, wheel
assemblies and tires are forced to
work harder and under greater
loads. The trailer also adds wind
resistance, increasing the pulling
requirements. For safe trailering,
correctly use the proper trailering
equipment.
The following information has
important trailering tips and rules
for your safety and that of your
passengers. Read this section
carefully before pulling a trailer.
Page 267 of 410

Driving and Operating 8-59
Pulling A Trailer
Here are some important points:
.There are many laws, including
speed limit restrictions that apply
to trailering. Check for legal
requirements with state or
provincial police.
.Do not tow a trailer at all during
the first 1 600 km (1,000 miles)
the new vehicle is driven. The
engine, axle or other parts could
be damaged.
.During the first 800 km
(500 miles) that a trailer is
towed, do not drive over 80 km/h
(50 mph) and do not make starts
at full throttle. This reduces wear
on the vehicle.
.The vehicle can tow in D (Drive).
Use a lower gear if the
transmission shifts too often.
.Do not use the Fuel Saver Mode
when towing.
.Obey speed limit restrictions.
Do not drive faster than the
maximum posted speed for
trailers, or no more than 90 km/h
(55 mph), to reduce wear on the
vehicle.
.For vehicles with the Ultra Rear
Parking Assist (URPA) system,
turn the system off when towing
a trailer. If the tow bar is
installed while not towing a
trailer, change the URPA system
to the“Tow Bar” setting. See
Ultrasonic Parking Assist
on
page 8‑47for more information.
Driving with a Trailer
Towing a trailer requires experience.
Get familiar with handling and
braking with the added trailer
weight. The vehicle is now longer
and not as responsive as the
vehicle is by itself.
Check all trailer hitch parts and
attachments, safety chains,
electrical connectors, lamps, tires
and mirror adjustments. If the trailer
has electric brakes, start the vehicle
and trailer moving and then apply
the trailer brake controller by hand
to be sure the brakes are working.
During the trip, check regularly to be
sure that the load is secure, and the
lamps and trailer brakes are working
properly.
Page 269 of 410
Driving and Operating 8-61
Driving On Grades
Reduce speed and shift to a lower
gear before starting down a long
or steep downgrade. If the
transmission is not shifted down,
the brakes might have to be used
so much that they would get hot and
no longer work well.
The vehicle can tow in D (Drive).
Use a lower gear if the transmission
shifts too often.
When towing at high altitude on
steep uphill grades, engine coolant
will boil at a lower temperature than
at normal altitudes. If the engine is
turned off immediately after towing
at high altitude on steep uphill
grades, the vehicle may show
signs similar to engine overheating.To avoid this, let the engine run
while parked, preferably on level
ground, with the transmission in
P (Park) for a few minutes before
turning the engine off. If the
overheat warning comes on, see
Engine Overheating on page 9‑20.
Parking on Hills
{WARNING
Parking the vehicle on a hill with
the trailer attached can be
dangerous. If something goes
wrong, the rig could start to move.
People can be injured, and both
the vehicle and the trailer can be
damaged. When possible, always
park the rig on a flat surface.
If parking the rig on a hill:
1. Press the brake pedal, but do
not shift into P (Park) yet. Turn
the wheels into the curb if facing
downhill or into traffic if facing
uphill.
2. Have someone place chocks under the trailer wheels.
3. When the wheel chocks are in place, release the brake pedal
until the chocks absorb the load.
4. Reapply the brake pedal. Then apply the parking brake and shift
into P (Park).
5. Release the brake pedal.