transmission GMC YUKON XL 2011 Owners Manual
[x] Cancel search | Manufacturer: GMC, Model Year: 2011, Model line: YUKON XL, Model: GMC YUKON XL 2011Pages: 528, PDF Size: 7.64 MB
Page 2 of 528
Black plate (2,1)GMC Yukon/Yukon XL Owner Manual - 2011
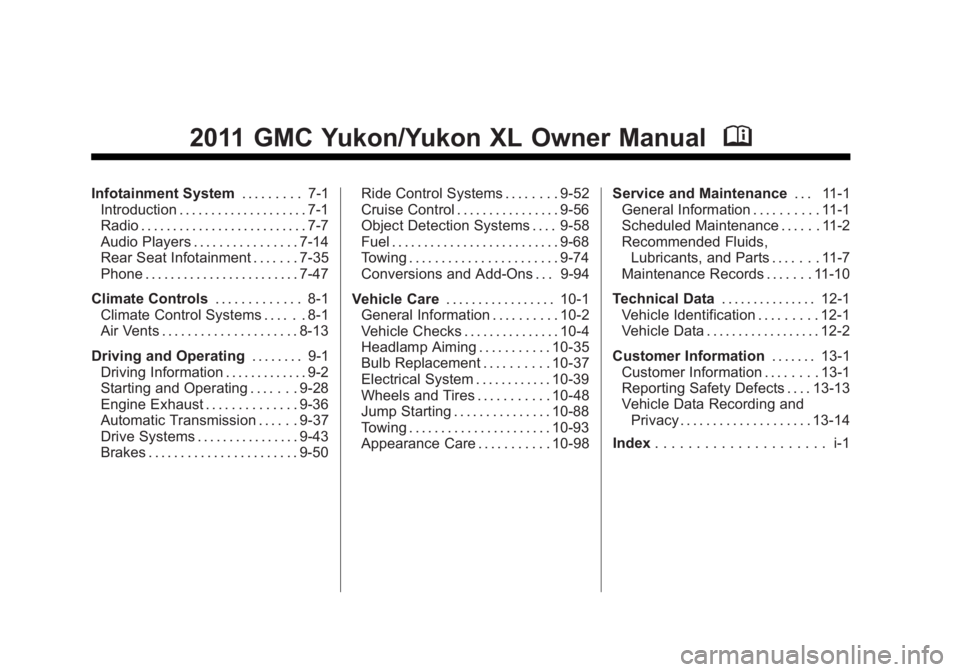
2011 GMC Yukon/Yukon XL Owner ManualM
Infotainment System. . . . . . . . . 7-1
Introduction . . . . . . . . . . . . . . . . . . . . 7-1
Radio . . . . . . . . . . . . . . . . . . . . . . . . . . 7-7
Audio Players . . . . . . . . . . . . . . . . 7-14
Rear Seat Infotainment . . . . . . . 7-35
Phone . . . . . . . . . . . . . . . . . . . . . . . . 7-47
Climate Controls . . . . . . . . . . . . . 8-1
Climate Control Systems . . . . . . 8-1
Air Vents . . . . . . . . . . . . . . . . . . . . . 8-13
Driving and Operating . . . . . . . . 9-1
Driving Information . . . . . . . . . . . . . 9-2
Starting and Operating . . . . . . . 9-28
Engine Exhaust . . . . . . . . . . . . . . 9-36
Automatic Transmission . . . . . . 9-37
Drive Systems . . . . . . . . . . . . . . . . 9-43
Brakes . . . . . . . . . . . . . . . . . . . . . . . 9-50 Ride Control Systems . . . . . . . . 9-52
Cruise Control . . . . . . . . . . . . . . . . 9-56
Object Detection Systems . . . . 9-58
Fuel . . . . . . . . . . . . . . . . . . . . . . . . . . 9-68
Towing . . . . . . . . . . . . . . . . . . . . . . . 9-74
Conversions and Add-Ons . . . 9-94
Vehicle Care . . . . . . . . . . . . . . . . . 10-1
General Information . . . . . . . . . . 10-2
Vehicle Checks . . . . . . . . . . . . . . . 10-4
Headlamp Aiming . . . . . . . . . . . 10-35
Bulb Replacement . . . . . . . . . . 10-37
Electrical System . . . . . . . . . . . . 10-39
Wheels and Tires . . . . . . . . . . . 10-48
Jump Starting . . . . . . . . . . . . . . . 10-88
Towing . . . . . . . . . . . . . . . . . . . . . . 10-93
Appearance Care . . . . . . . . . . . 10-98 Service and Maintenance
. . . 11-1
General Information . . . . . . . . . . 11-1
Scheduled Maintenance . . . . . . 11-2
Recommended Fluids,
Lubricants, and Parts . . . . . . . 11-7
Maintenance Records . . . . . . . 11-10
Technical Data . . . . . . . . . . . . . . . 12-1
Vehicle Identification . . . . . . . . . 12-1
Vehicle Data . . . . . . . . . . . . . . . . . . 12-2
Customer Information . . . . . . . 13-1
Customer Information . . . . . . . . 13-1
Reporting Safety Defects . . . . 13-13
Vehicle Data Recording and
Privacy . . . . . . . . . . . . . . . . . . . . 13-14
Index . . . . . . . . . . . . . . . . . . . . . i-1
Page 7 of 528
Black plate (1,1)GMC Yukon/Yukon XL Owner Manual - 2011
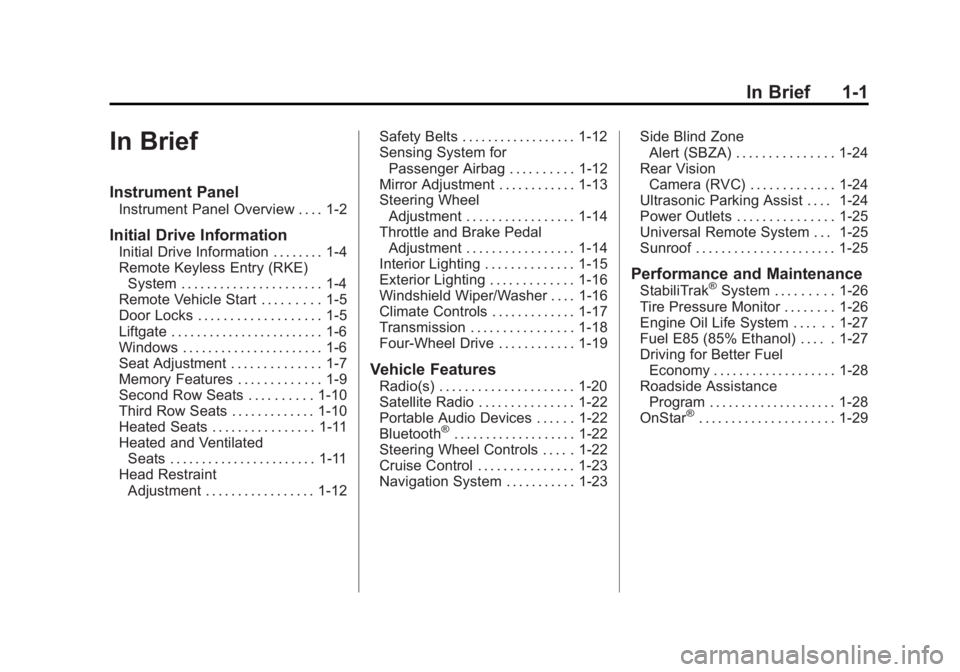
In Brief 1-1
In Brief
Instrument Panel
Instrument Panel Overview . . . . 1-2
Initial Drive Information
Initial Drive Information . . . . . . . . 1-4
Remote Keyless Entry (RKE)System . . . . . . . . . . . . . . . . . . . . . . 1-4
Remote Vehicle Start . . . . . . . . . 1-5
Door Locks . . . . . . . . . . . . . . . . . . . 1-5
Liftgate . . . . . . . . . . . . . . . . . . . . . . . . 1-6
Windows . . . . . . . . . . . . . . . . . . . . . . 1-6
Seat Adjustment . . . . . . . . . . . . . . 1-7
Memory Features . . . . . . . . . . . . . 1-9
Second Row Seats . . . . . . . . . . 1-10
Third Row Seats . . . . . . . . . . . . . 1-10
Heated Seats . . . . . . . . . . . . . . . . 1-11
Heated and Ventilated Seats . . . . . . . . . . . . . . . . . . . . . . . 1-11
Head Restraint Adjustment . . . . . . . . . . . . . . . . . 1-12 Safety Belts . . . . . . . . . . . . . . . . . . 1-12
Sensing System for
Passenger Airbag . . . . . . . . . . 1-12
Mirror Adjustment . . . . . . . . . . . . 1-13
Steering Wheel Adjustment . . . . . . . . . . . . . . . . . 1-14
Throttle and Brake Pedal Adjustment . . . . . . . . . . . . . . . . . 1-14
Interior Lighting . . . . . . . . . . . . . . 1-15
Exterior Lighting . . . . . . . . . . . . . 1-16
Windshield Wiper/Washer . . . . 1-16
Climate Controls . . . . . . . . . . . . . 1-17
Transmission . . . . . . . . . . . . . . . . 1-18
Four-Wheel Drive . . . . . . . . . . . . 1-19
Vehicle Features
Radio(s) . . . . . . . . . . . . . . . . . . . . . 1-20
Satellite Radio . . . . . . . . . . . . . . . 1-22
Portable Audio Devices . . . . . . 1-22
Bluetooth
®. . . . . . . . . . . . . . . . . . . 1-22
Steering Wheel Controls . . . . . 1-22
Cruise Control . . . . . . . . . . . . . . . 1-23
Navigation System . . . . . . . . . . . 1-23 Side Blind Zone
Alert (SBZA) . . . . . . . . . . . . . . . 1-24
Rear Vision Camera (RVC) . . . . . . . . . . . . . 1-24
Ultrasonic Parking Assist . . . . 1-24
Power Outlets . . . . . . . . . . . . . . . 1-25
Universal Remote System . . . 1-25
Sunroof . . . . . . . . . . . . . . . . . . . . . . 1-25
Performance and Maintenance
StabiliTrak®System . . . . . . . . . 1-26
Tire Pressure Monitor . . . . . . . . 1-26
Engine Oil Life System . . . . . . 1-27
Fuel E85 (85% Ethanol) . . . . . 1-27
Driving for Better Fuel Economy . . . . . . . . . . . . . . . . . . . 1-28
Roadside Assistance
Program . . . . . . . . . . . . . . . . . . . . 1-28
OnStar
®. . . . . . . . . . . . . . . . . . . . . 1-29
Page 9 of 528
Black plate (3,1)GMC Yukon/Yukon XL Owner Manual - 2011
In Brief 1-3
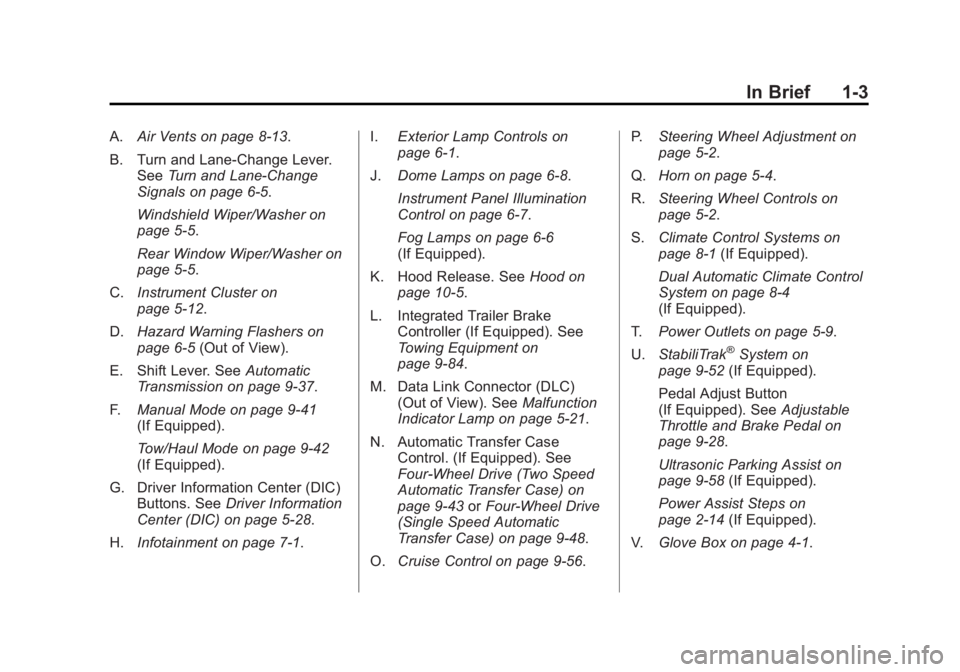
A.Air Vents on page 8‑13.
B. Turn and Lane‐Change Lever. See Turn and Lane-Change
Signals on page 6‑5.
Windshield Wiper/Washer on
page 5‑5.
Rear Window Wiper/Washer on
page 5‑5.
C. Instrument Cluster on
page 5‑12.
D. Hazard Warning Flashers on
page 6‑5 (Out of View).
E. Shift Lever. See Automatic
Transmission on page 9‑37.
F. Manual Mode on page 9‑41
(If Equipped).
Tow/Haul Mode on page 9‑42
(If Equipped).
G. Driver Information Center (DIC) Buttons. See Driver Information
Center (DIC) on page 5‑28.
H. Infotainment on page 7‑1. I.
Exterior Lamp Controls on
page 6‑1.
J. Dome Lamps on page 6‑8.
Instrument Panel Illumination
Control on page 6‑7.
Fog Lamps on page 6‑6
(If Equipped).
K. Hood Release. See Hood on
page 10‑5.
L. Integrated Trailer Brake Controller (If Equipped). See
Towing Equipment on
page 9‑84.
M. Data Link Connector (DLC) (Out of View). See Malfunction
Indicator Lamp on page 5‑21.
N. Automatic Transfer Case Control. (If Equipped). See
Four-Wheel Drive (Two Speed
Automatic Transfer Case) on
page 9‑43 orFour-Wheel Drive
(Single Speed Automatic
Transfer Case) on page 9‑48.
O. Cruise Control on page 9‑56. P.
Steering Wheel Adjustment on
page 5‑2.
Q. Horn on page 5‑4.
R. Steering Wheel Controls on
page 5‑2.
S. Climate Control Systems on
page 8‑1 (If Equipped).
Dual Automatic Climate Control
System on page 8‑4
(If Equipped).
T. Power Outlets on page 5‑9.
U. StabiliTrak
®System on
page 9‑52 (If Equipped).
Pedal Adjust Button
(If Equipped). See Adjustable
Throttle and Brake Pedal on
page 9‑28.
Ultrasonic Parking Assist on
page 9‑58 (If Equipped).
Power Assist Steps on
page 2‑14 (If Equipped).
V. Glove Box on page 4‑1.
Page 24 of 528
Black plate (18,1)GMC Yukon/Yukon XL Owner Manual - 2011
1-18 In Brief
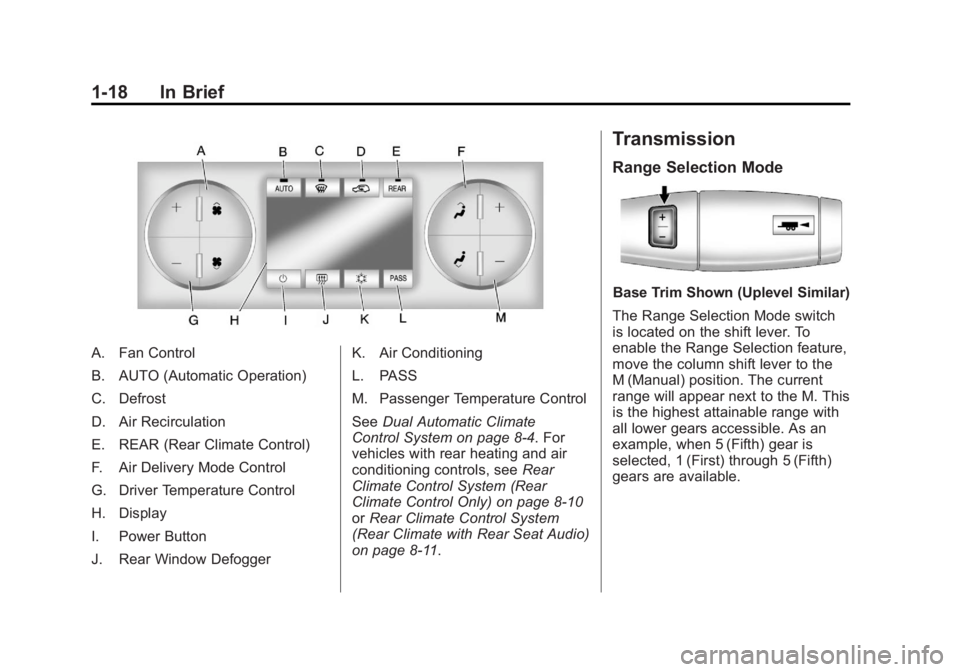
A. Fan Control
B. AUTO (Automatic Operation)
C. Defrost
D. Air Recirculation
E. REAR (Rear Climate Control)
F. Air Delivery Mode Control
G. Driver Temperature Control
H. Display
I. Power Button
J. Rear Window DefoggerK. Air Conditioning
L. PASS
M. Passenger Temperature Control
See
Dual Automatic Climate
Control System on page 8‑4. For
vehicles with rear heating and air
conditioning controls, see Rear
Climate Control System (Rear
Climate Control Only) on page 8‑10
or Rear Climate Control System
(Rear Climate with Rear Seat Audio)
on page 8‑11.
Transmission
Range Selection Mode
Base Trim Shown (Uplevel Similar)
The Range Selection Mode switch
is located on the shift lever. To
enable the Range Selection feature,
move the column shift lever to the
M (Manual) position. The current
range will appear next to the M. This
is the highest attainable range with
all lower gears accessible. As an
example, when 5 (Fifth) gear is
selected, 1 (First) through 5 (Fifth)
gears are available.
Page 48 of 528
Black plate (12,1)GMC Yukon/Yukon XL Owner Manual - 2011
2-12 Keys, Doors and Windows
The taillamps will flash and a chime
will sound when the power liftgate is
moving.
{WARNING
You or others could be injured if
caught in the path of the power
liftgate. Make sure there is no one
in the way of the liftgate as it is
opening and closing.
Notice: If you open the liftgate
without checking for overhead
obstructions such as a garage
door, you could damage the
liftgate or the liftgate glass.
Always check to make sure the
area above and behind the liftgate
is clear before opening it. The power liftgate can be power
opened and closed in the
following ways:
.Press and hold&on the
Remote Keyless Entry (RKE)
transmitter until the liftgate starts
moving. See Remote Keyless
Entry (RKE) System Operation
on page 2‑3.
.Press&on the overhead
console.
.Press the touchpad on the
outside liftgate handle.
Pressing the buttons, or touchpad
switch a second time while the
liftgate is moving reverses the
direction.
l: The liftgate can also be
closed by pressing this button next
to the liftgate latch.
Press the button a second time
during liftgate operation to reverse
that operation. The power liftgate may be
temporarily disabled under extreme
temperatures, or under low battery
conditions. If this occurs, the liftgate
can still be operated manually.
If the transmission is shifted out of
P (Park) while the power function
is in progress, the liftgate power
function will continue to completion.
If the transmission is shifted out of
P (Park) and the vehicle accelerates
before the power liftgate latches
closed, the liftgate may reverse to
the open position. Cargo could fall
out of the vehicle. Always make
sure the power liftgate is closed and
latched before you drive away.
If you power open the liftgate and
the liftgate support struts have lost
pressure, the lamps will flash and a
chime will sound. The liftgate will
stay open temporarily, then slowly
close. See your dealer for service
before using the liftgate.
Page 75 of 528
Black plate (15,1)GMC Yukon/Yukon XL Owner Manual - 2011
Seats and Restraints 3-15
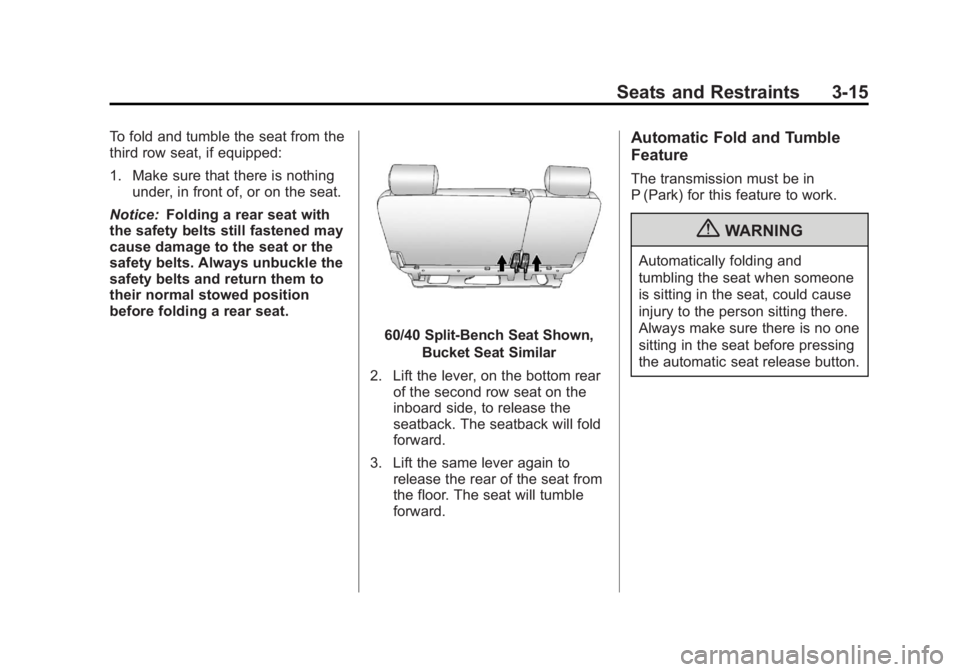
To fold and tumble the seat from the
third row seat, if equipped:
1. Make sure that there is nothingunder, in front of, or on the seat.
Notice: Folding a rear seat with
the safety belts still fastened may
cause damage to the seat or the
safety belts. Always unbuckle the
safety belts and return them to
their normal stowed position
before folding a rear seat.
60/40 Split-Bench Seat Shown,
Bucket Seat Similar
2. Lift the lever, on the bottom rear of the second row seat on the
inboard side, to release the
seatback. The seatback will fold
forward.
3. Lift the same lever again to release the rear of the seat from
the floor. The seat will tumble
forward.
Automatic Fold and Tumble
Feature
The transmission must be in
P (Park) for this feature to work.
{WARNING
Automatically folding and
tumbling the seat when someone
is sitting in the seat, could cause
injury to the person sitting there.
Always make sure there is no one
sitting in the seat before pressing
the automatic seat release button.
Page 142 of 528
Black plate (2,1)GMC Yukon/Yukon XL Owner Manual - 2011
5-2 Instruments and Controls
Transmission Messages . . . . . 5-46
Vehicle ReminderMessages . . . . . . . . . . . . . . . . . . 5-46
Washer Fluid Messages . . . . . 5-47
Vehicle Personalization
Vehicle Personalization (With DIC Buttons) . . . . . . . . . . . . . . . 5-47
Universal Remote System
Universal Remote System . . . 5-55
Universal Remote SystemProgramming . . . . . . . . . . . . . . . 5-55
Universal Remote System Operation . . . . . . . . . . . . . . . . . . 5-61
Controls
Steering Wheel
Adjustment
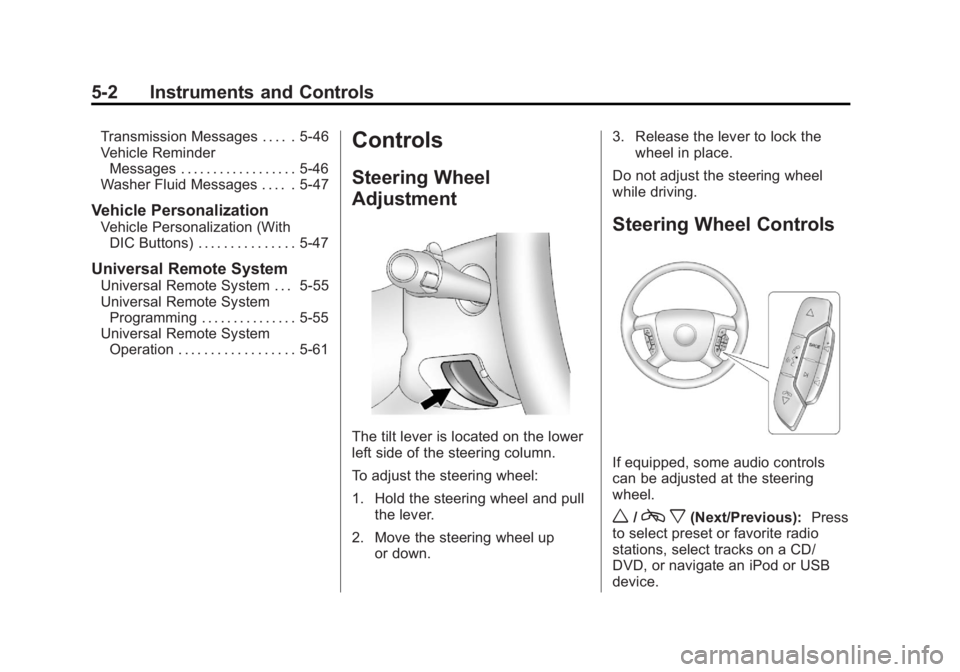
The tilt lever is located on the lower
left side of the steering column.
To adjust the steering wheel:
1. Hold the steering wheel and pull
the lever.
2. Move the steering wheel up or down. 3. Release the lever to lock the
wheel in place.
Do not adjust the steering wheel
while driving.
Steering Wheel Controls
If equipped, some audio controls
can be adjusted at the steering
wheel.
w/c x(Next/Previous): Press
to select preset or favorite radio
stations, select tracks on a CD/
DVD, or navigate an iPod or USB
device.
Page 161 of 528

Black plate (21,1)GMC Yukon/Yukon XL Owner Manual - 2011
Instruments and Controls 5-21
Malfunction
Indicator Lamp
A computer system called OBD II
(On-Board Diagnostics-Second
Generation) monitors operation of
the fuel, ignition, and emission
control systems. It ensures that
emissions are at acceptable levels
for the life of the vehicle, helping to
produce a cleaner environment.
This light should come on when the
ignition is on, but the engine is not
running, as a check to show it is
working. If it does not, have the
vehicle serviced by your dealer.If the malfunction indicator lamp
comes on and stays on while the
engine is running, this indicates that
there is an OBD II problem and
service is required.
Malfunctions often are indicated by
the system before any problem is
apparent. Being aware of the light
can prevent more serious damage
to the vehicle. This system assists
the service technician in correctly
diagnosing any malfunction.
Notice:
If the vehicle is
continually driven with this
light on, after a while, the
emission controls might not
work as well, the vehicle fuel
economy might not be as good,
and the engine might not run
as smoothly. This could lead to
costly repairs that might not be
covered by the vehicle warranty. Notice:
Modifications made
to the engine, transmission,
exhaust, intake, or fuel system
of the vehicle or the replacement
of the original tires with other
than those of the same Tire
Performance Criteria (TPC) can
affect the vehicle's emission
controls and can cause this light
to come on. Modifications to
these systems could lead to
costly repairs not covered
by the vehicle warranty. This
could also result in a failure
to pass a required Emission
Inspection/Maintenance test. See
Accessories and Modifications on
page 10‑3.
This light comes on during a
malfunction in one of two ways:
Light Flashing: A misfire
condition has been detected.
A misfire increases vehicle
emissions and could damage the
emission control system on the
vehicle. Diagnosis and service
might be required.
Page 169 of 528
Black plate (29,1)GMC Yukon/Yukon XL Owner Manual - 2011
Instruments and Controls 5-29
The DIC has different displays
which can be accessed by
pressing the DIC buttons located
on the instrument panel, next to
the steering wheel. If the vehicle
does not have DIC buttons, the
trip odometer reset stem can be
used to access some of the menu
items.
The DIC displays trip, fuel, and
vehicle system information, and
warning messages if a system
problem is detected.
The DIC also allows some
features to be customized. See
Vehicle Personalization (With DIC
Buttons) on page 5‑47for more
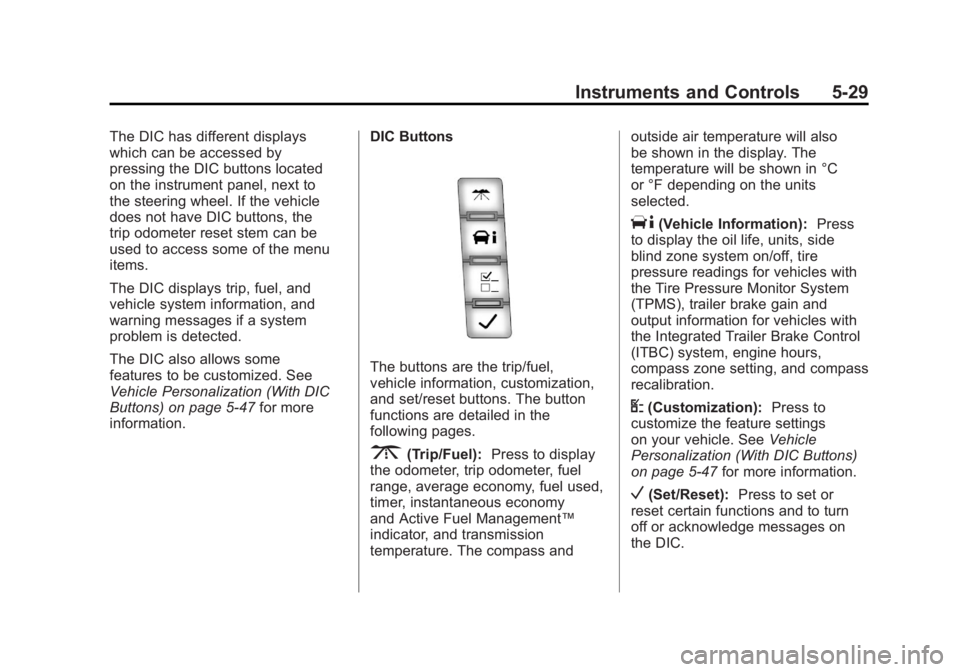
information. DIC Buttons
The buttons are the trip/fuel,
vehicle information, customization,
and set/reset buttons. The button
functions are detailed in the
following pages.
3(Trip/Fuel):
Press to display
the odometer, trip odometer, fuel
range, average economy, fuel used,
timer, instantaneous economy
and Active Fuel Management™
indicator, and transmission
temperature. The compass and outside air temperature will also
be shown in the display. The
temperature will be shown in °C
or °F depending on the units
selected.
T(Vehicle Information):
Press
to display the oil life, units, side
blind zone system on/off, tire
pressure readings for vehicles with
the Tire Pressure Monitor System
(TPMS), trailer brake gain and
output information for vehicles with
the Integrated Trailer Brake Control
(ITBC) system, engine hours,
compass zone setting, and compass
recalibration.
U(Customization): Press to
customize the feature settings
on your vehicle. See Vehicle
Personalization (With DIC Buttons)
on page 5‑47 for more information.
V(Set/Reset):Press to set or
reset certain functions and to turn
off or acknowledge messages on
the DIC.
Page 171 of 528
Black plate (31,1)GMC Yukon/Yukon XL Owner Manual - 2011
Instruments and Controls 5-31
For example, if driving in traffic
and making frequent stops, this
display may read one number,
but if the vehicle is driven on a
freeway, the number may change
even though the same amount
of fuel is in the fuel tank. This is
because different driving conditions
produce different fuel economies.
Generally, freeway driving produces
better fuel economy than city
driving. Fuel range cannot be reset.
Average Economy
Press the trip/fuel button until AVG
ECONOMY displays. This display
shows the approximate average
liters per 100 kilometers (L/100 km)
or miles per gallon (mpg). This
number is calculated based on
the number of L/100 km (mpg)
recorded since the last time this
menu item was reset. To reset
AVG ECONOMY, press and hold
the set/reset button.Fuel Used
Press the trip/fuel button until
FUEL USED displays. This display
shows the number of liters (L) or
gallons (gal) of fuel used since the
last reset of this menu item. To reset
the fuel used information, press and
hold the set/reset button while FUEL
USED is displayed.
Timer
Press the trip/fuel button until
TIMER displays. This display can
be used as a timer.
To start the timer, press the
set/reset button while TIMER is
displayed. The display will show
the amount of time that has passed
since the timer was last reset, not
including time the ignition is off.
Time will continue to be counted
as long as the ignition is on, even
if another display is being shown
on the DIC. The timer will record
up to 99 hours, 59 minutes and
59 seconds (99:59:59) after which
the display will return to zero.To stop the timer, press the set/reset
button briefly while TIMER is
displayed.
To reset the timer to zero, press
and hold the set/reset button while
TIMER is displayed.
Transmission Temperature
Press the trip/fuel button until
TRANS TEMP displays. This
display shows the temperature of
the automatic transmission fluid
in either degrees Celsius (°C) or
degrees Fahrenheit (°F).
Instantaneous Economy and
Active Fuel Management™
Indicator
If your vehicle has this display,
press the trip/fuel button until
INST ECON V8 displays. This
display shows the current fuel
economy at a particular moment
and will change frequently as
driving conditions change.