HONDA ACCORD SEDAN 2001 Owner's Manual (in English)
Manufacturer: HONDA, Model Year: 2001, Model line: ACCORD SEDAN, Model: HONDA ACCORD SEDAN 2001Pages: 372, PDF Size: 6.1 MB
Page 261 of 372
Spark Plugs (6-cylinder Models)
The spark plugs in your car should be replaced according to the timeand distance recommendations in
the maintenance schedule.
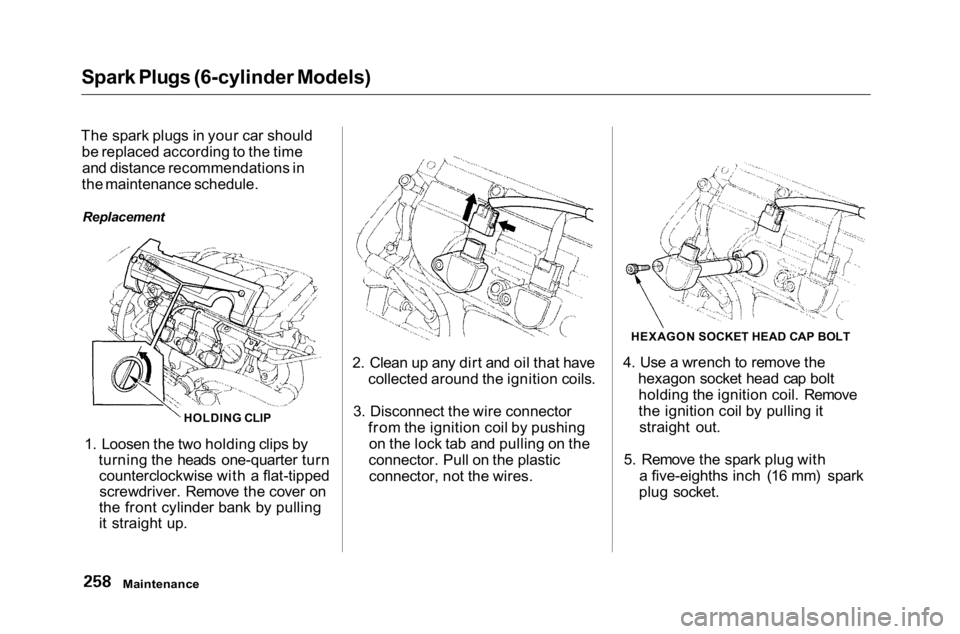
1. Loosen the two holding clips by turning the heads one-quarter turncounterclockwise with a flat-tippedscrewdriver. Remove the cover on
the front cylinder bank by pulling
it straight up. 2. Clean up any dirt and oil that have
collected around the ignition coils.
3. Disconnect the wire connector from the ignition coil by pushingon the lock tab and pulling on the
connector. Pull on the plastic connector, not the wires. 4. Use a wrench to remove the
hexagon socket head cap boltholding the ignition coil. Remove
the ignition coil by pulling it straight out.
5. Remove the spark plug with a five-eighths inch (16 mm) spark
plug socket.
Maintenance
Replacement
HEXAGON SOCKET HEAD CAP BOLT
HOLDING CLIP
Page 262 of 372
Spark Plugs (6-cylinder Models)
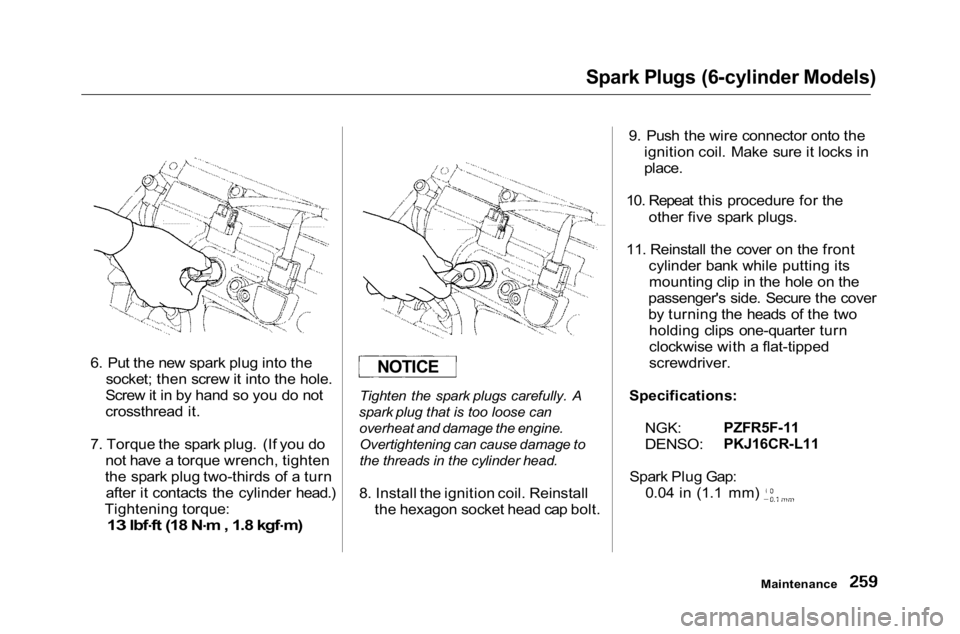
6. Put the new spark plug into the socket; then screw it into the hole.
Screw it in by hand so you do not
crossthread it.
7. Torque the spark plug. (If you do not have a torque wrench, tighten
the spark plug two-thirds of a turn after it contacts the cylinder head.)
Tightening torque:
13 lbf .
ft (18 N .
m , 1.8 kgf .
m)
Tighten the spark plugs carefully. A
spark plug that is too loose can overheat and damage the engine.Overtightening can cause damage to
the threads in the cylinder head.
8. Install the ignition coil. Reinstall the hexagon socket head cap bolt. 9. Push the wire connector onto the
ignition coil. Make sure it locks in
place.
10. Repeat this procedure for the other five spark plugs.
11. Reinstall the cover on the front cylinder bank while putting its
mounting clip in the hole on the
passenger's side. Secure the cover
by turning the heads of the two holding clips one-quarter turn clockwise with a flat-tipped
screwdriver.
Specifications:
NGK:
DENSO:
PZFR5F-11
PKJ16CR-L11
Spark Plug Gap:
0.04 in
(1.1
mm)
Maintenance
NOTICE
Page 263 of 372
Battery
Check the condition of your car's
battery monthly. You should check
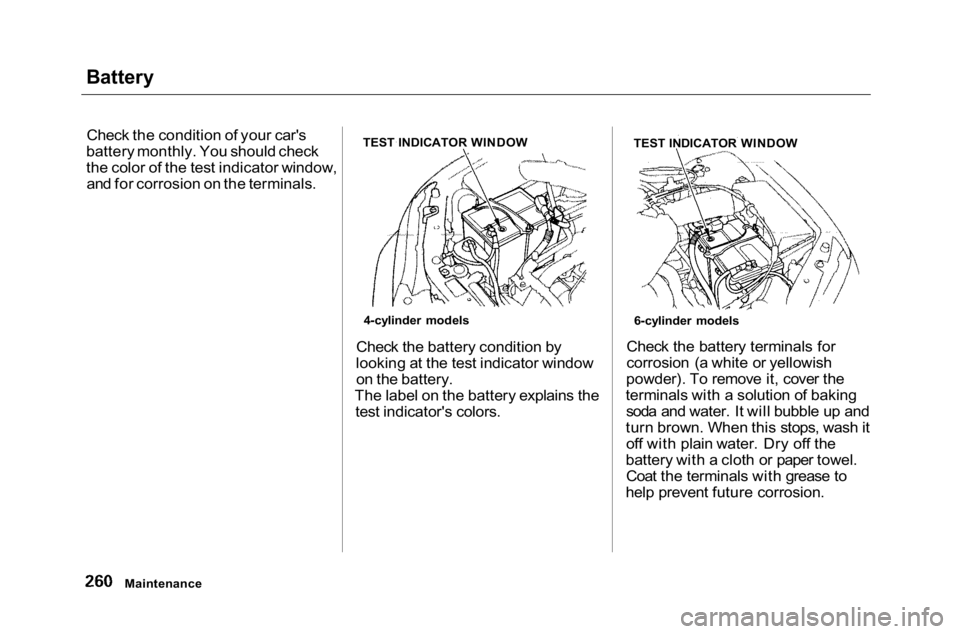
the color of the test indicator window, and for corrosion on the terminals.
Check the battery condition by
looking at the test indicator window on the battery.
The label on the battery explains the test indicator's colors. Check the battery terminals for
corrosion (a white or yellowish
powder). To remove it, cover the
terminals with a solution of baking soda and water. It will bubble up and
turn brown. When this stops, wash it off with plain water. Dry off the
battery with a cloth or paper towel. Coat the terminals with grease to
help prevent future corrosion.
Maintenance 4-cylinder models
TEST INDICATOR WINDOW
TEST INDICATOR WINDOW
6-cylinder models
Page 264 of 372
Battery
WARNING: Battery posts,
terminals and related accessories
contain lead and lead compounds.
Wash hands after handling.
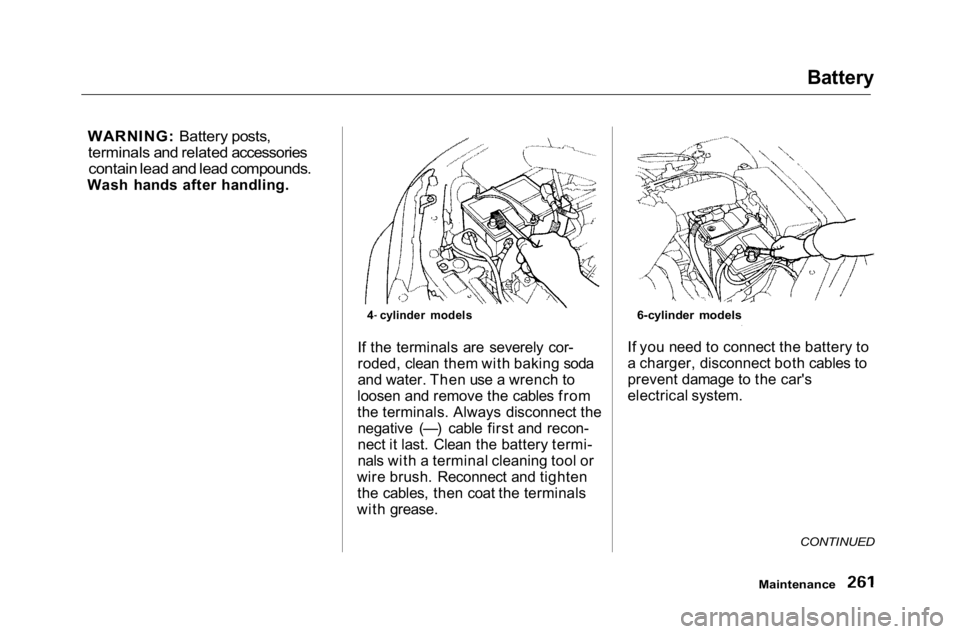
If the terminals are severely cor-
roded, clean them with baking soda
and water. Then use a wrench to
loosen and remove the cables from
the terminals. Always disconnect the negative (—) cable first and recon-
nect it last. Clean the battery termi-
nals with a terminal cleaning tool or
wire brush. Reconnect and tighten the cables, then coat the terminals
with grease. If you need to connect the battery to
a charger, disconnect both cables to
prevent damage to the car's
electrical system.
CONTINUED
Maintenance
4 cylinder models
6-cylinder models
Page 265 of 372
Battery
On EX and EX-V6 models
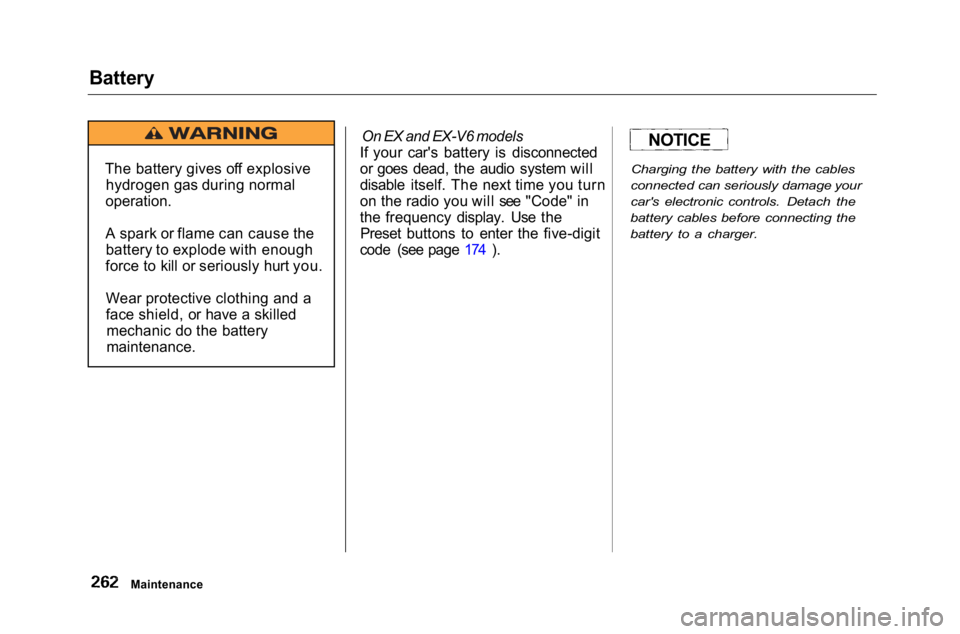
If your car's battery is disconnected
or goes dead, the audio system will
disable itself. The next time you turn
on the radio you will see "Code" in
the frequency display. Use the Preset buttons to enter the five-digit
code (see page 174 ).
Charging the battery with the cables
connected can seriously damage your
car's electronic controls. Detach the
battery cables before connecting the
battery to a charger.
Maintenance
The battery gives off explosive
hydrogen gas during normal
operation.
A spark or flame can cause the battery to explode with enough
force to kill or seriously hurt you.
Wear protective clothing and a
face shield, or have a skilled mechanic do the battery
maintenance.
NOTICE
Page 266 of 372
Wiper Blades
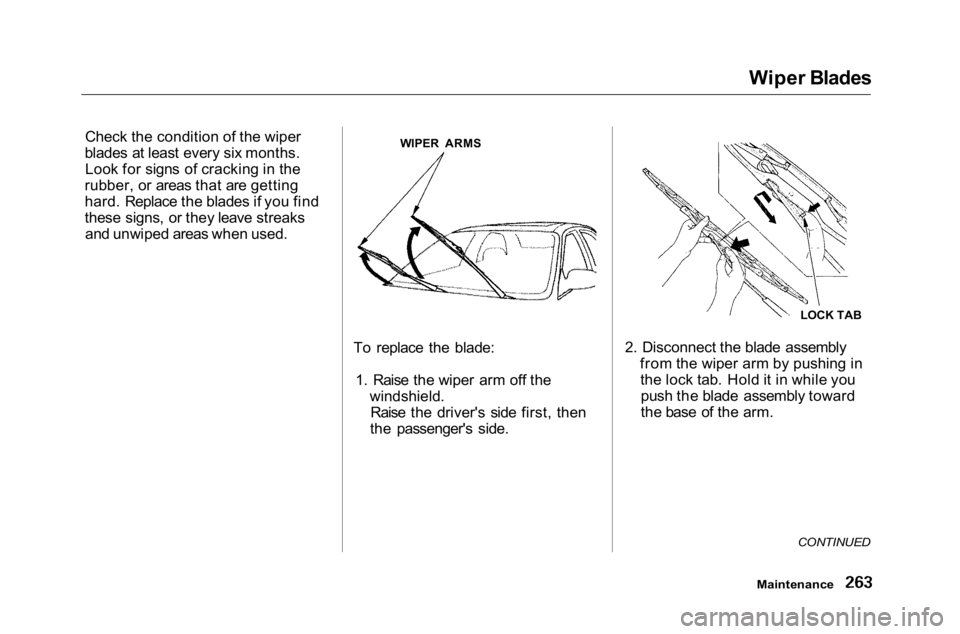
Check the condition of the wiper
blades at least every six months. Look for signs of cracking in the
rubber, or areas that are getting
hard. Replace the blades if you find
these signs, or they leave streaks and unwiped areas when used.
To replace the blade:1. Raise the wiper arm off the windshield.Raise the driver's side first, then
the passenger's side. 2. Disconnect the blade assembly
from the wiper arm by pushing inthe lock tab. Hold it in while youpush the blade assembly toward
the base of the arm.
CONTINUED
Maintenance
WIPER ARMS
LOCK TAB
Page 267 of 372
Wiper Blades
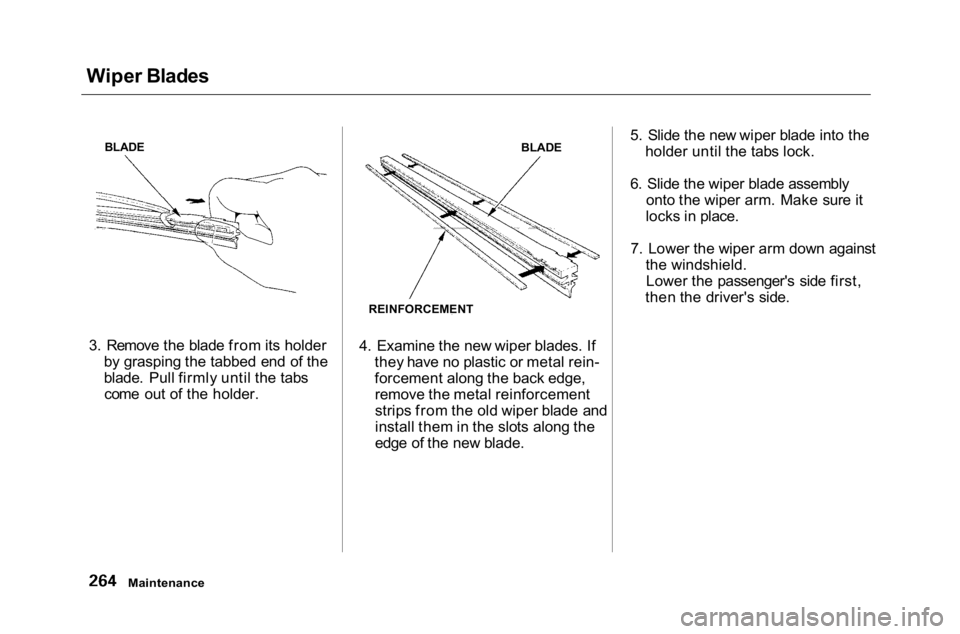
3. Remove the blade from its holder by grasping the tabbed end of the
blade. Pull firmly until the tabscome out of the holder. 4. Examine the new wiper blades. If
they have no plastic or metal rein-
forcement along the back edge,remove the metal reinforcement
strips from the old wiper blade and
install them in the slots along the
edge of the new blade. 5. Slide the new wiper blade into the
holder until the tabs lock.
6. Slide the wiper blade assembly onto the wiper arm. Make sure it
locks in place.
7. Lower the wiper arm down against the windshield.Lower the passenger's side first,
then the driver's side.
Maintenance
BLADE
REINFORCEMENTBLADE
Page 268 of 372
Air Conditioning System
Optional for U.S. DX model
Your car's air conditioning is a sealed system. Any major maintenance,
such as recharging, should be done
by a qualified mechanic. You can do a couple of things to make sure the
air conditioning works efficiently.
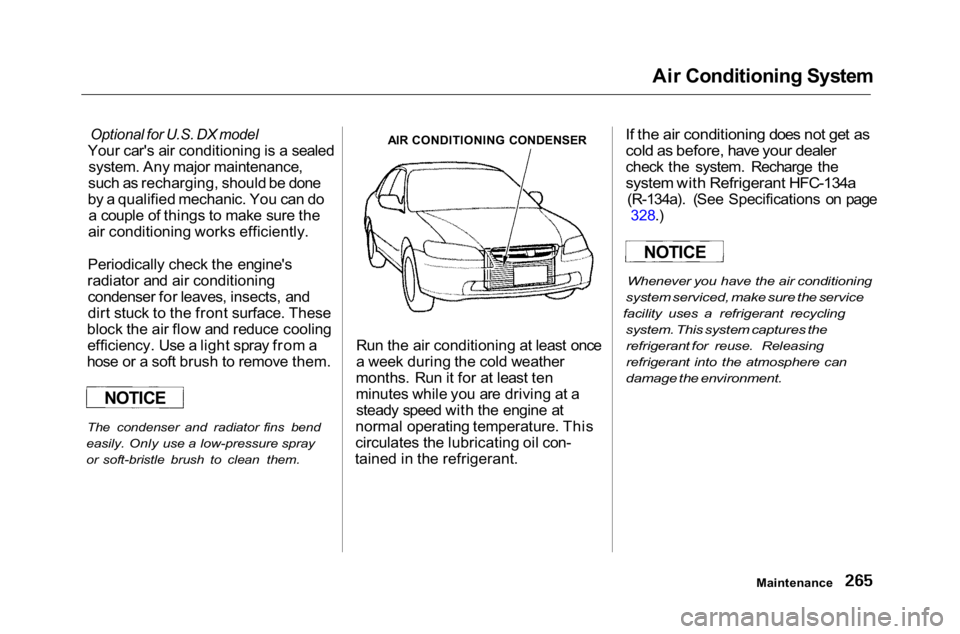
Periodically check the engine's
radiator and air conditioning condenser for leaves, insects, and
dirt stuck to the front surface. These
block the air flow and reduce cooling efficiency. Use a light spray from a
hose or a soft brush to remove them.
The condenser and radiator fins bend
easily. Only use a low-pressure spray
or soft-bristle brush to clean them.
AIR CONDITIONING CONDENSER
Run the air conditioning at least once
a week during the cold weather
months. Run it for at least ten
minutes while you are driving at a steady speed with the engine at
normal operating temperature. This
circulates the lubricating oil con-
tained in the refrigerant.
If the air conditioning does not get as
cold as before, have your dealer
check the system. Recharge the
system with Refrigerant HFC-134a
(R-134a). (See Specifications on page 328.)
Whenever you have the air conditioning
system serviced, make sure the service
facility uses a refrigerant recycling
system. This system captures the
refrigerant for reuse. Releasing
refrigerant into the atmosphere can
damage the environment.
Maintenance
NOTICE
NOTICE
Page 269 of 372
Air Conditioning Filter, Drive Belts
Air Conditioning FilterThe air conditioning filter removes pollen and dust that is brought in
from the outside through the heatingand cooling system.
This filter should be replaced every 30,000 miles (48,000 km) under
normal conditions. It should be replaced every 15,000 miles (24,000
km) if you drive primarily in urban areas that have high concentrationsof soot in the air from industry and
diesel-powered vehicles. Replace it
more often if air flow from the
climate control system becomes less
than usual. Have the air conditioning
filter replaced by your Honda dealer. Drive Belts
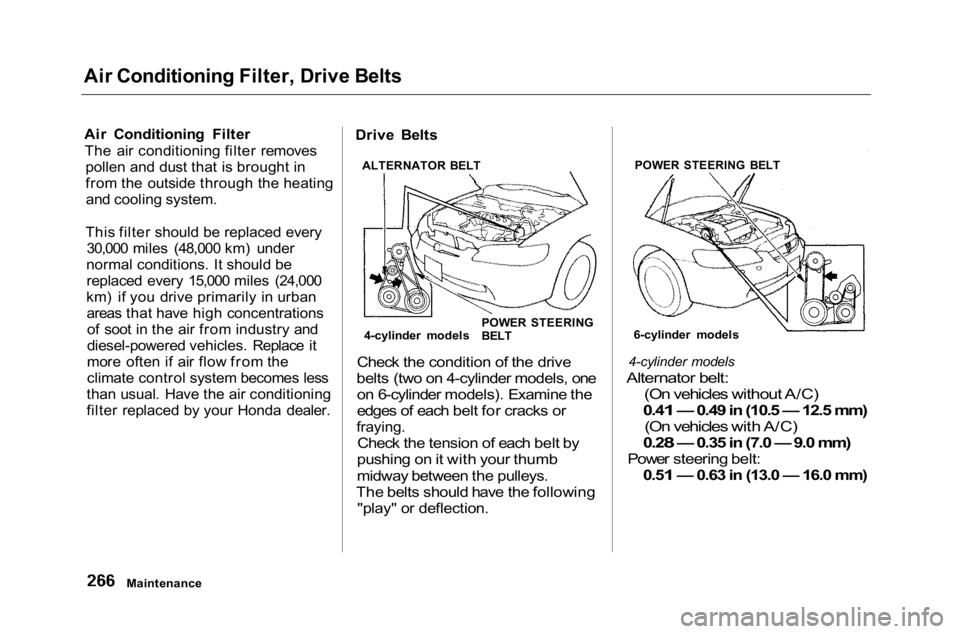
Check the condition of the drive
belts (two on 4-cylinder models, one
on 6-cylinder models). Examine the
edges of each belt for cracks or
fraying.
Check the tension of each belt by
pushing on it with your thumb
midway between the pulleys.
The belts should have the following
"play" or deflection.
4-cylinder models
Alternator belt: (On vehicles without A/C)
0.41 — 0.49 in (10.5 — 12.5 mm)
(On vehicles with A/C)
0.28 — 0.35 in (7.0 — 9.0 mm)
Power steering belt:
0.51 — 0.63 in (13.0 — 16.0 mm)
Maintenance
ALTERNATOR BELT
4-cylinder models
POWER STEERING
BELT
6-cylinder models
POWER STEERING BELT
Page 270 of 372
Drive Belts, Timing Belt, Tires
6-cylinder models
Power steering belt:
0.51 — 0.65 in (13.0 — 16.5 mm)
If you see signs of wear or looseness,
have your dealer adjust or replace
the belts.
Timing Belt
The timing belt and balancer belt
should normally be replaced at the
intervals shown in the maintenance
schedule.
Replace these belts at 60,000 miles
(U.S.) or 100,000 km (Canada) if you
regularly drive your car in one or
more of these conditions:
In very high temperatures
(over 110° F,43°C).
In very low temperatures
(under — 20°F, — 29°C).
Tires
To safely operate your car, your tires
must be the proper type and size, in
good condition with adequate tread,
and correctly inflated. The following
pages give more detailed information
on how and when to check air
pressure, how to inspect your tires
for damage and wear, and what to do
when your tires need to be replaced.
Maintenance
Using tires that are excessively
worn or improperly inflated can
cause a crash in which you can
be seriously hurt or killed.
Follow all instructions in this
owner's manual regarding tire
inflation and maintenance.