light HONDA CR-V 2000 RD1-RD3 / 1.G User Guide
[x] Cancel search | Manufacturer: HONDA, Model Year: 2000, Model line: CR-V, Model: HONDA CR-V 2000 RD1-RD3 / 1.GPages: 322, PDF Size: 4.64 MB
Page 67 of 322
Control
s Nea r th e Steerin g Whee l
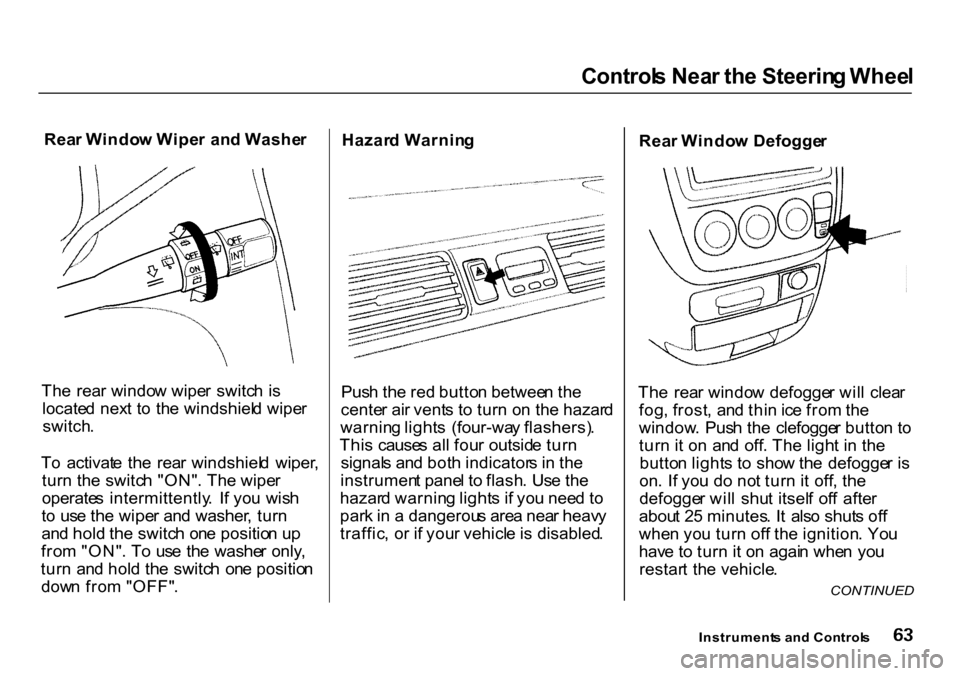
Rea r Windo w Wipe r an d Washe r
Th e rea r windo w wipe r switc h i s
locate d nex t t o th e windshiel d wipe r
switch .
T o activat e th e rea r windshiel d wiper ,
tur n th e switc h "ON" . Th e wipe r
operate s intermittently . I f yo u wis h
t o us e th e wipe r an d washer , tur n
an d hol d th e switc h on e positio n u p
fro m "ON" . T o us e th e washe r only ,
tur n an d hol d th e switc h on e positio n
dow n fro m "OFF" . Hazar
d Warnin g
Pus h th e re d butto n betwee n th e
cente r ai r vent s t o tur n o n th e hazar d
warnin g light s (four-wa y flashers) .
Thi s cause s al l fou r outsid e tur n
signal s an d bot h indicator s i n th e
instrumen t pane l t o flash . Us e th e
hazar d warnin g light s i f yo u nee d t o
par k in a dangerou s are a nea r heav y
traffic , o r i f you r vehicl e is disabled .Rea
r Windo w Defogge r
Th e rea r windo w defogge r wil l clea r
fog , frost , an d thi n ic e fro m th e
window . Pus h th e clefogge r butto n t o
tur n it o n an d off . Th e ligh t i n th e
butto n light s t o sho w th e defogge r i s
on . I f yo u d o no t tur n it off , th e
defogge r wil l shu t itsel f of f afte r
abou t 2 5 minutes . I t als o shut s of f
whe n yo u tur n of f th e ignition . Yo u
hav e t o tur n it o n agai n whe n yo u
restar t th e vehicle .
Instrument s an d Control s
CONTINUED
Page 69 of 322
Control
s Nea r th e Steerin g Whee l
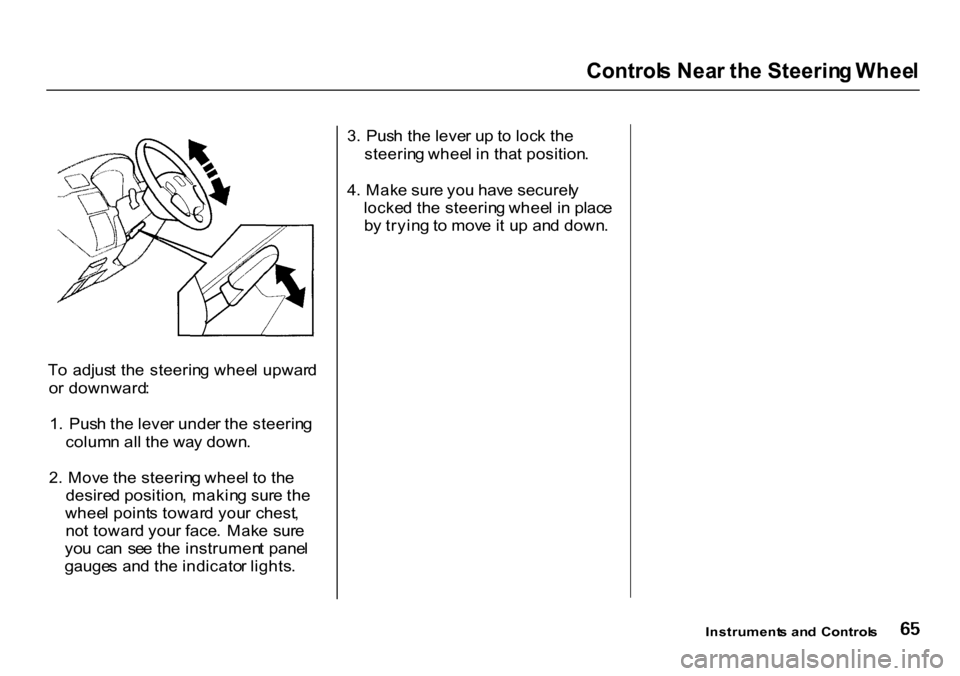
T o adjus t th e steerin g whee l upwar d
o r downward :
1 . Pus h th e leve r unde r th e steerin g
colum n al l th e wa y down .
2 . Mov e th e steerin g whee l t o th e
desire d position , makin g sur e th e
whee l point s towar d you r chest ,
no t towar d you r face . Mak e sur e
yo u ca n se e th e instrumen t pane l
gauge s an d th e indicato r lights . 3
. Pus h th e leve r u p to loc k th e
steerin g whee l i n tha t position .
4 . Mak e sur e yo u hav e securel y
locke d th e steerin g whee l i n plac e
b y tryin g to mov e it u p an d down .
Instruments an d Control s
Page 70 of 322
Steerin
g Whee l Control s
Cruis e Contro l
Cruis e contro l allow s yo u t o maintai n
a se t spee d abov e 2 5 mp h (4 0 km/h )
withou t keepin g you r foo t o n th e
accelerato r pedal . I t shoul d b e use d
fo r cruisin g o n straight , ope n
highways . I t i s no t recommende d fo r
condition s suc h a s cit y driving ,
windin g roads , slipper y roads , heav y
rain , o r ba d weather . Yo u shoul d
hav e ful l contro l o f th e vehicl e unde r
thos e conditions .
The
cruise control, as it operates,
moves the accelerator pedal. You can
damage your vehicle's accelerator
mechanism by resting your foot under
the pedal and blocking the movement.
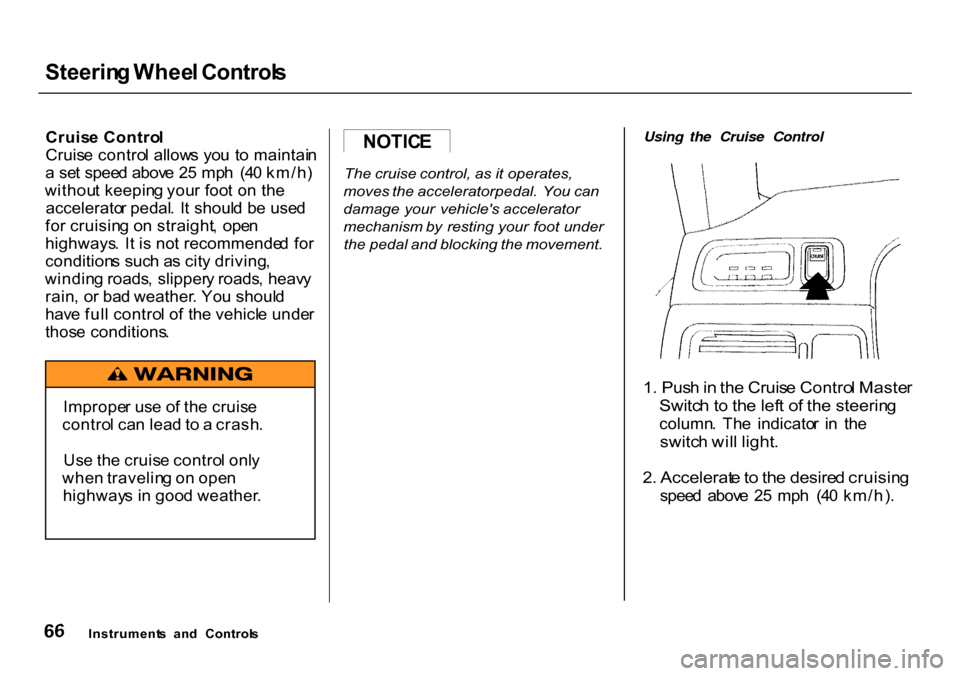
Using the Cruise Control
1 . Pus h in th e Cruis e Contro l Maste r
Switc h to th e lef t o f th e steerin g
column . Th e indicato r i n th e
switc h wil l light .
2 . Accelerat e to th e desire d cruisin g
spee d abov e 2 5 mp h (4 0 km/h) .
Instrument s an d Control s
NOTIC
E
Imprope r us e o f th e cruis e
contro l ca n lea d t o a crash .
Us e th e cruis e contro l onl y
whe n travelin g o n ope n
highway s i n goo d weather .
Page 71 of 322
Steerin
g Whee l Control s
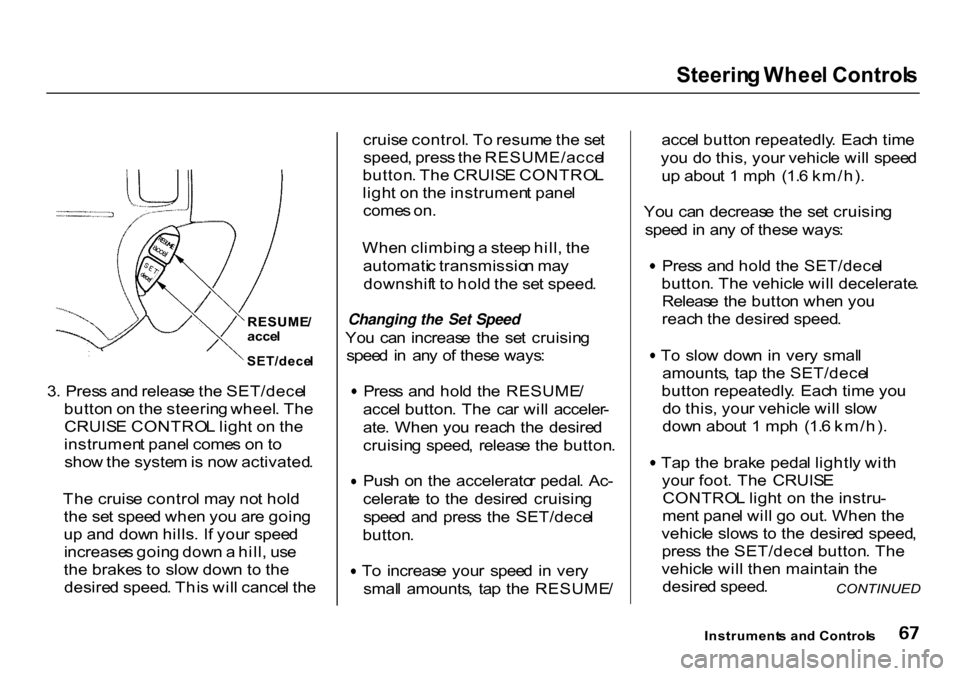
RESUME /
acce l
3 . Pres s an d releas e th e SET/dece l
butto n o n th e steerin g wheel . Th e
CRUIS E CONTRO L ligh t o n th e
instrumen t pane l come s o n to
sho w th e syste m is no w activated .
Th e cruis e contro l ma y no t hol d
th e se t spee d whe n yo u ar e goin g
u p an d dow n hills . I f you r spee d
increase s goin g dow n a hill , us e
th e brake s t o slo w dow n t o th e
desire d speed . Thi s wil l cance l th e cruis
e control . T o resum e th e se t
speed , pres s th e RESUME/acce l
button . Th e CRUIS E CONTRO L
ligh t o n th e instrumen t pane l
come s on .
Whe n climbin g a stee p hill , th e
automati c transmissio n ma y
downshif t t o hol d th e se t speed .
Changing the Set Speed
Yo u ca n increas e th e se t cruisin g
spee d in an y o f thes e ways : Pres
s an d hol d th e RESUME /
acce l button . Th e ca r wil l acceler -
ate . Whe n yo u reac h th e desire d
cruisin g speed , releas e th e button . Pus
h o n th e accelerato r pedal . Ac -
celerat e t o th e desire d cruisin g
spee d an d pres s th e SET/dece l
button . T
o increas e you r spee d i n ver y
smal l amounts , ta p th e RESUME /acce
l butto n repeatedly . Eac h tim e
yo u d o this , you r vehicl e wil l spee d
u p abou t 1 mp h (1. 6 km/h) .
Yo u ca n decreas e th e se t cruisin g
spee d in an y o f thes e ways : Pres
s an d hol d th e SET/dece l
button . Th e vehicl e wil l decelerate .
Releas e th e butto n whe n yo u
reac h th e desire d speed . T
o slo w dow n i n ver y smal l
amounts , ta p th e SET/dece l
butto n repeatedly . Eac h tim e yo u
d o this , you r vehicl e wil l slo w
dow n abou t 1 mp h (1. 6 km/h) . Ta
p th e brak e peda l lightl y wit h
you r foot . Th e CRUIS E
CONTRO L ligh t o n th e instru -
men t pane l wil l g o out . Whe n th e
vehicl e slow s t o th e desire d speed ,
pres s th e SET/dece l button . Th e
vehicl e wil l the n maintai n th e
desire d speed .
Instrument s an d Control s
SET/dece
l
CONTINUED
Page 74 of 322
Key
s an d Lock s
LOC K (0 ) - Yo u ca n inser t o r
remov e th e ke y onl y i n thi s position .
T o switc h fro m ACCESSOR Y to
LOCK , yo u mus t pus h th e ke y i n
slightl y a s yo u tur n it . I f you r vehicl e
ha s a n automati c transmission , i t
mus t als o b e in Park . Th e anti-thef t
loc k wil l loc k th e steerin g colum n
whe n yo u remov e th e key .
I f th e fron t wheel s ar e turned , th e
anti-thef t loc k ma y sometime s mak e
i t difficul t t o tur n th e ke y fro m
LOC K to ACCESSORY . Firml y tur n
th e steerin g whee l t o th e lef t o r t o
th e righ t a s yo u tur n th e key .
ACCESSORY (I) — In this position,
yo u ca n
operat
e th e audi o syste m
an d th e accessor y powe r socket .
O N (II ) — Thi s i s th e norma l ke y
positio n whe n driving . Al l feature s
an d accessorie s o n th e vehicl e ar e
usable . Severa l o f th e light s o n the
instrumen t pane l com e o n a s a tes t
whe n yo u tur n the ignitio n switc h
fro m ACCESSOR Y to ON .
STAR T (III ) — Us e thi s positio n
onl y t o star t th e engine . Th e switc h
return s t o O N (II ) whe n yo u le t g o o f
th e key .
Yo u wil l hea r a reminde r beepe r i f
yo u leav e th e ke y i n th e ignitio n
switc h in th e LOC K (0 ) o r
ACCESSOR Y (I ) positio n an d ope n
the driver' s door . Remov e th e ke y t o
tur n of f th e beeper . Doo
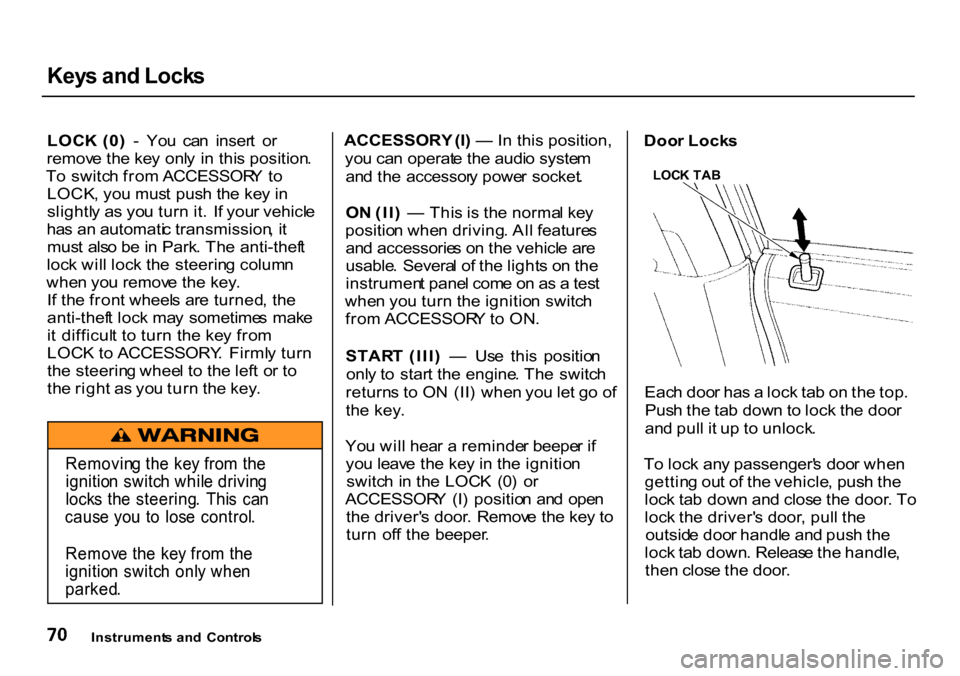
r Lock s
Eac h doo r ha s a loc k ta b o n th e top .
Pus h th e ta b dow n t o loc k th e doo r
an d pul l i t u p t o unlock .
T o loc k an y passenger' s doo r whe n
gettin g ou t o f th e vehicle , pus h th e
loc k ta b dow n an d clos e th e door . T o
loc k th e driver' s door , pul l th e
outsid e doo r handl e an d pus h th e
loc k ta b down . Releas e th e handle ,
the n clos e th e door .
Instrument s an d Control s
Removin
g th e ke y fro m th e
ignitio n switc h whil e drivin g
lock s th e steering . Thi s ca n
caus e yo u t o los e control .
Remov e th e ke y fro m th e
ignitio n switc h onl y whe n
parked .
LOC
K TA B
Page 80 of 322
Key
s an d Lock s
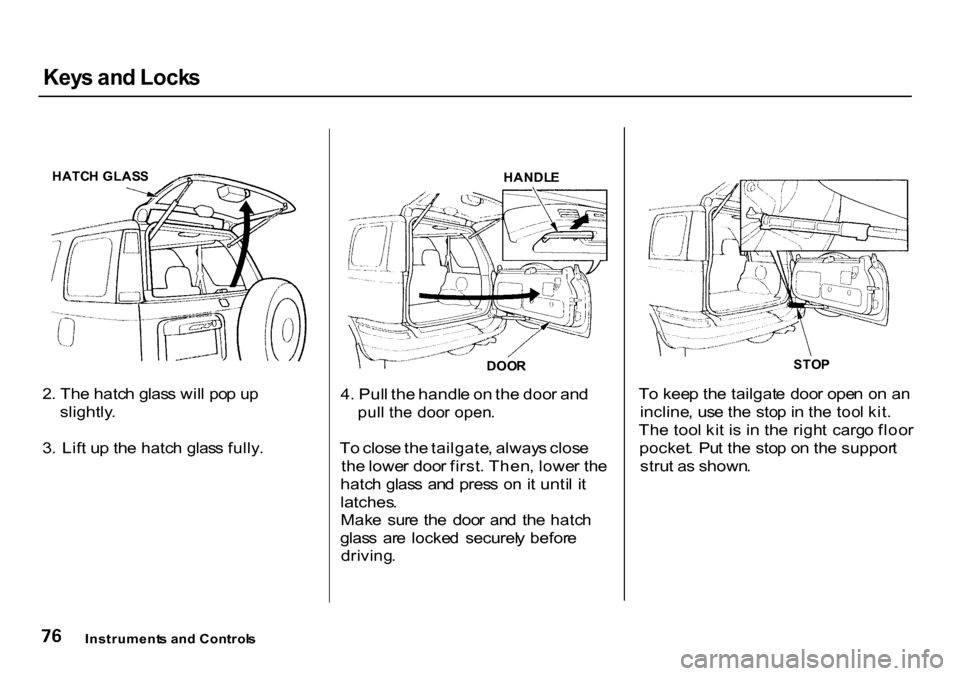
2 . Th e hatc h glas s wil l po p u p
slightly .
3 . Lif t u p th e hatc h glas s fully . 4
. Pul l th e handl e o n th e doo r an d
pul l th e doo r open .
T o clos e th e tailgate , alway s clos e
th e lowe r doo r first . Then , lowe r th e
hatc h glas s an d pres s o n it unti l i t
latches .
Mak e sur e th e doo r an d th e hatc h
glas s ar e locke d securel y befor e
driving . T
o kee p th e tailgat e doo r ope n o n a n
incline , us e th e sto p in th e too l kit .
Th e too l ki t i s i n th e righ t carg o floo r
pocket . Pu t th e sto p o n th e suppor t
stru t a s shown .
Instrument s an d Control s
HATC
H GLAS S
DOOR
HANDL
E
STOP
Page 89 of 322
Powe
r Windows , Mirror s
Th e maste r contro l pane l als o con -
tain s thes e extr a features :
AUT O — To ope n th e driver' s
windo w fully , pus h th e windo w
switc h firml y dow n an d releas e it .
Th e windo w automaticall y goe s al l
th e wa y down . T o sto p th e windo w
fro m goin g al l th e wa y down , pus h
th e windo w switc h u p briefly .
T o ope n th e driver' s windo w onl y
partially , pus h th e windo w switc h
dow n lightl y an d hol d it . Th e windo w
wil l sto p a s soo n a s yo u releas e th e
switch .
Th
e AUT O functio n onl y work s t o
lowe r th e driver' s window . T o rais e
th e window , yo u mus t pus h th e
windo w switc h u p an d hol d it unti l
th e windo w reache s th e desire d
position .
Th e MAI N switc h control s powe r t o
th e passengers ' windows . Wit h thi s
switc h off , th e passengers ' window s
canno t b e raise d o r lowered . Th e
MAI N switc h doe s no t affec t th e
driver' s window . Kee p th e MAI N
switc h of f whe n yo u hav e childre n in
th e vehicl e s o the y d o no t injur e
themselve s b y operatin g th e
window s unintentionally .
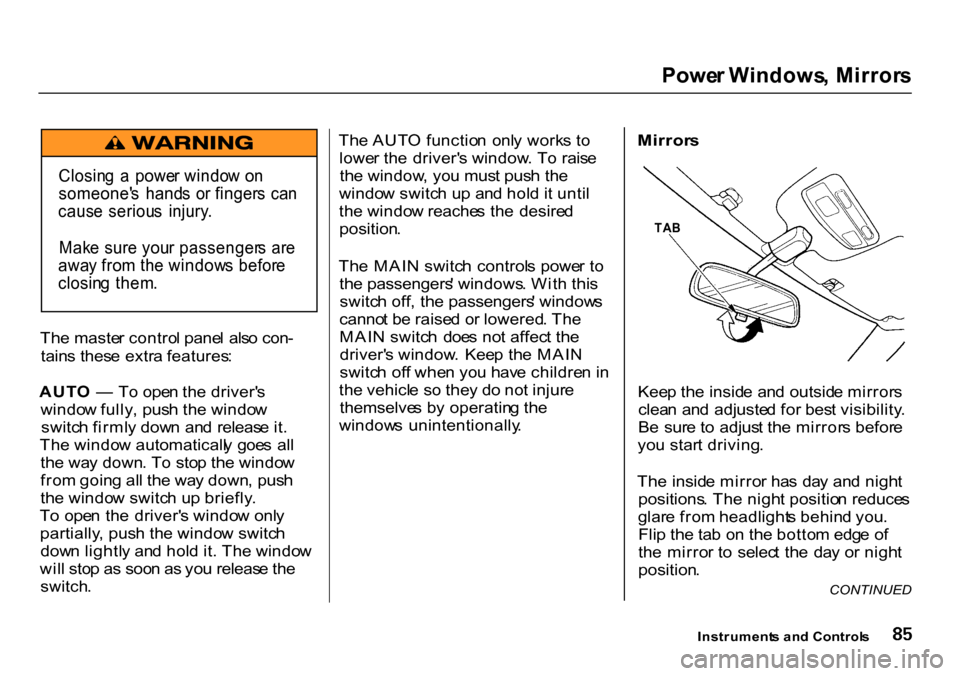
Mirror
s
Kee p th e insid e an d outsid e mirror s
clea n an d adjuste d fo r bes t visibility .
B e sur e t o adjus t th e mirror s befor e
yo u star t driving .
Th e insid e mirro r ha s da y an d nigh t
positions . Th e nigh t positio n reduce s
glar e fro m headlight s behin d you .
Fli p th e ta b o n th e botto m edg e o f
th e mirro r t o selec t th e da y o r nigh t
position .
Instrument s an d Control s
Closin
g a powe r windo w o n
someone' s hand s o r finger s ca n
caus e seriou s injury .
Mak e sur e you r passenger s ar e
awa y fro m th e window s befor e
closin g them .
CONTINUED
TA
B
Page 90 of 322
Mirrors
, Parkin g Brak e
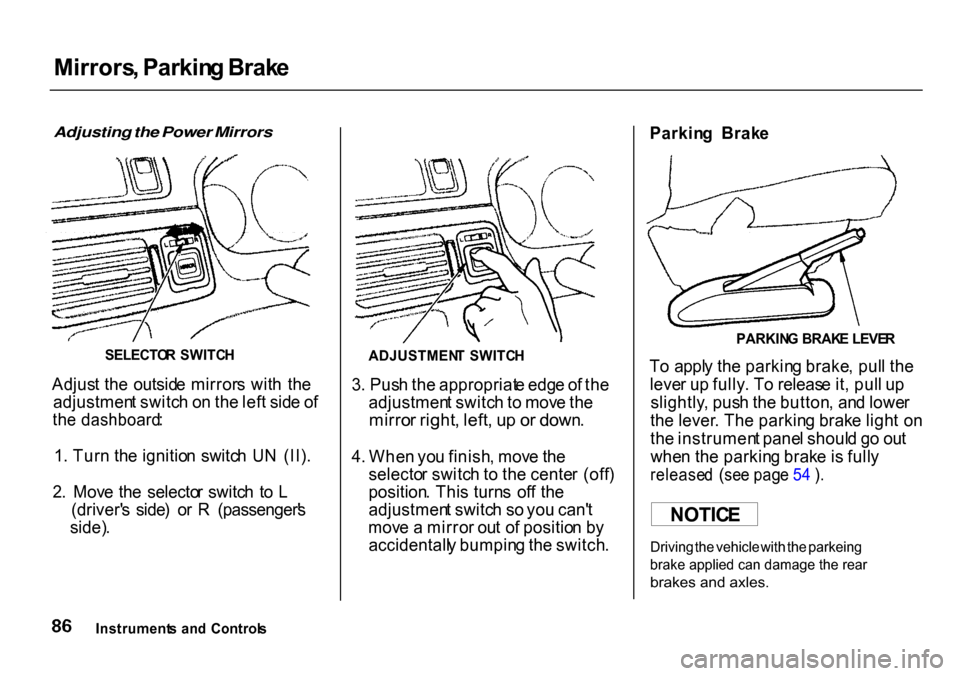
Adjusting the Power Mirrors
Adjus t th e outsid e mirror s wit h th e
adjustmen t switc h o n th e lef t sid e o f
th e dashboard :
1 . Tur n th e ignitio n switc h U N (II) .
2 . Mov e th e selecto r switc h t o L
(driver' s side ) o r R (passenger' s
side) . 3
. Pus h th e appropriat e edg e o f th e
adjustmen t switc h to mov e th e
mirro r right , left , u p o r down .
4 . Whe n yo u finish , mov e th e
selecto r switc h t o th e cente r (off )
position . Thi s turn s of f th e
adjustmen t switc h s o yo u can' t
mov e a mirro r ou t o f positio n b y
accidentall y bumpin g th e switch .Parkin
g Brak e
T o appl y th e parkin g brake , pul l th e
leve r u p fully . T o releas e it , pul l u p
slightly , pus h th e button , an d lowe r
th e lever . Th e parkin g brak e ligh t o n
th e instrumen t pane l shoul d g o ou t
whe n th e parkin g brak e is full y
release d (se e pag e 5 4 ) .
SELECTO
R SWITC H
ADJUSTMENT SWITC H PARKIN
G BRAK E LEVE R
NOTIC E
Driving the vehicle with the parkeing
brake applied can damage the rear
brakes and axles.
Instrument s an d Control s
Page 95 of 322
Built-i
n Table , Cente r Pocket , Storag e Bo x
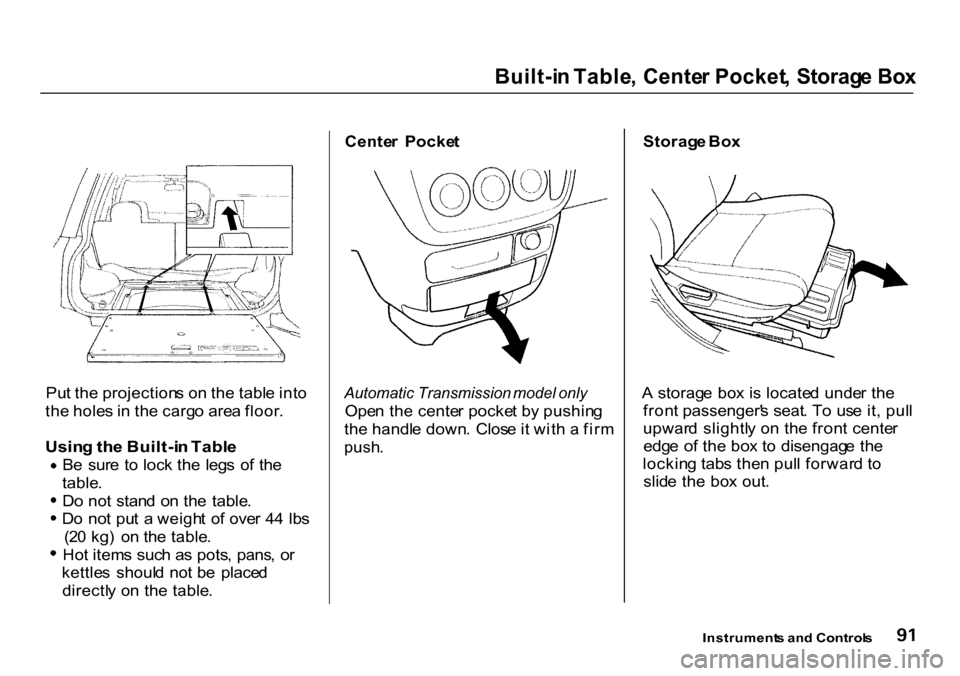
Pu t th e projection s o n th e tabl e int o
th e hole s i n th e carg o are a floor .
Usin g th e Built-i n Tabl e
B
e sur e t o loc k th e leg s o f th e
table . D
o no t stan d o n th e table . D
o no t pu t a weigh t o f ove r 4 4 Ib s
(2 0 kg ) o n th e table . Ho
t item s suc h a s pots , pans , o r
kettle s shoul d no t b e place d
directl y o n th e table . Cente
r Pocke t
Automatic Transmission model only
Ope n th e cente r pocke t b y pushin g
th e handl e down . Clos e it wit h a fir m
push .
Storag
e Bo x
A storag e bo x i s locate d unde r th e
fron t passenger' s seat . T o us e it , pul l
upwar d slightl y o n th e fron t cente r
edg e o f th e bo x t o disengag e th e
lockin g tab s the n pul l forwar d t o
slid e th e bo x out .
Instrument s an d Control s
Page 96 of 322
Carg
o Floo r Pockets , Accessor y Powe r Socke t
Carg o Floo r Pocket s
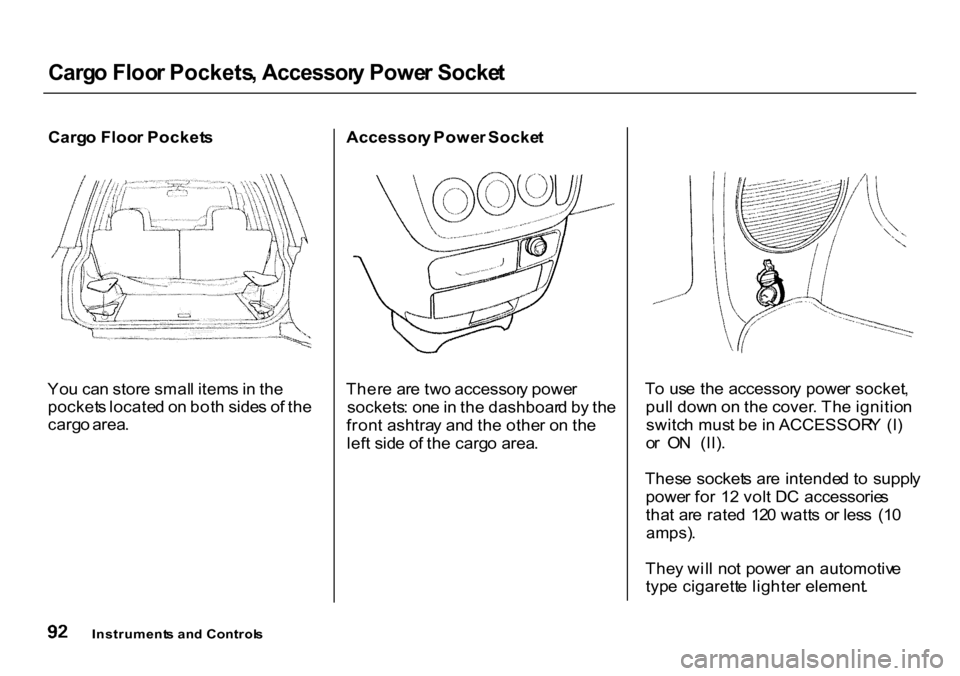
Yo u ca n stor e smal l item s i n th e
pocket s locate d o n bot h side s o f th e
carg o area . Accessor
y Powe r Socke t
Ther e ar e tw o accessor y powe r
sockets : on e in th e dashboar d b y th e
fron t ashtra y an d th e othe r o n th e
lef t sid e o f th e carg o area . T
o us e th e accessor y powe r socket ,
pul l dow n o n th e cover . Th e ignitio n
switc h mus t b e i n ACCESSOR Y (I )
o r O N (II) .
Thes e socket s ar e intende d t o suppl y
powe r fo r 1 2 vol t D C accessorie s
tha t ar e rate d 12 0 watt s o r les s (1 0
amps) .
The y wil l no t powe r a n automotiv e
typ e cigarett e lighte r element .
Instrument s an d Control s