Start HONDA CR-V 2013 RM1, RM3, RM4 / 4.G Owner's Guide
[x] Cancel search | Manufacturer: HONDA, Model Year: 2013, Model line: CR-V, Model: HONDA CR-V 2013 RM1, RM3, RM4 / 4.GPages: 361, PDF Size: 6.58 MB
Page 223 of 361
222
uuBluetooth® HandsFreeLink®uHFL Menus
Features
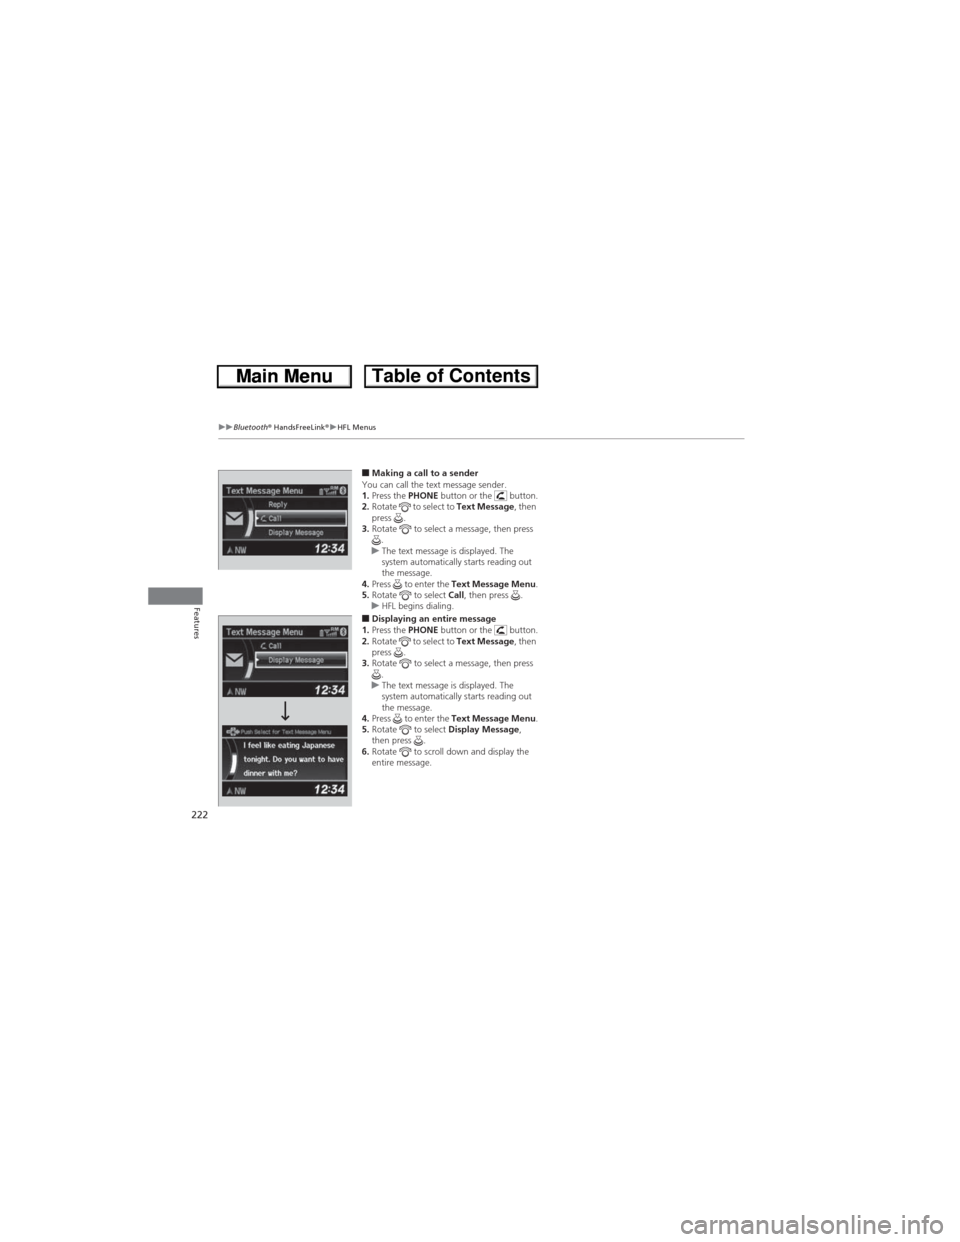
■Making a call to a sender
You can call the text message sender.
1.Press the PHONE button or the button.
2.Rotate to select to Text Message, then
press .
3.Rotate to select a message, then press
.
uThe text message is displayed. The
system automatically starts reading out
the message.
4.Press to enter the Text Message Menu.
5.Rotate to select Call, then press .
uHFL begins dialing.
■Displaying an entire message
1.Press the PHONE button or the button.
2.Rotate to select to Text Message, then
press .
3.Rotate to select a message, then press
.
uThe text message is displayed. The
system automatically starts reading out
the message.
4.Press to enter the Text Message Menu.
5.Rotate to select Display Message,
then press .
6.Rotate to scroll down and display the
entire message.
Page 224 of 361
223
Features
Compass
When you turn the ignition switch to ON (w, the compass self-calibrates, and the
compass display appears.
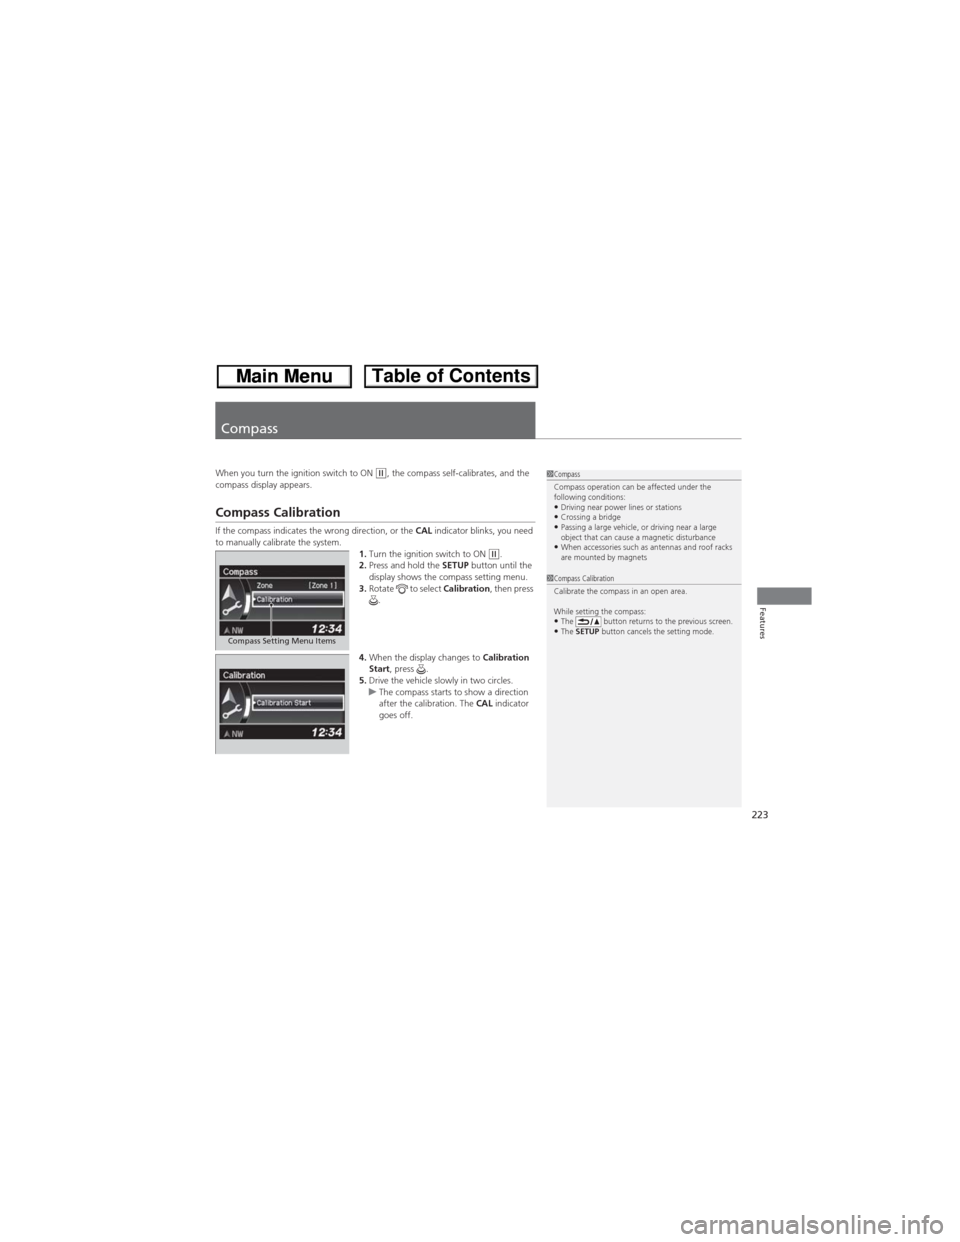
Compass Calibration
If the compass indicates the wrong direction, or the CAL indicator blinks, you need
to manually calibrate the system.
1.Turn the ignition switch to ON
(w.
2.Press and hold the SETUP button until the
display shows the compass setting menu.
3.Rotate to select Calibration, then press
.
4.When the display changes to Calibration
Start, press .
5.Drive the vehicle slowly in two circles.
uThe compass starts to show a direction
after the calibration. The CAL indicator
goes off.
1Compass
Compass operation can be affected under the
following conditions:
•Driving near power lines or stations•Crossing a bridge•Passing a large vehicle, or driving near a large
object that can cause a magnetic disturbance
•When accessories such as antennas and roof racks
are mounted by magnets
Compass Setting Menu Items
1Compass Calibration
Calibrate the compass in an open area.
While setting the compass:
•The button returns to the previous screen.•The SETUP button cancels the setting mode.
Page 225 of 361
224
uuCompassuCompass Zone Selection
Features
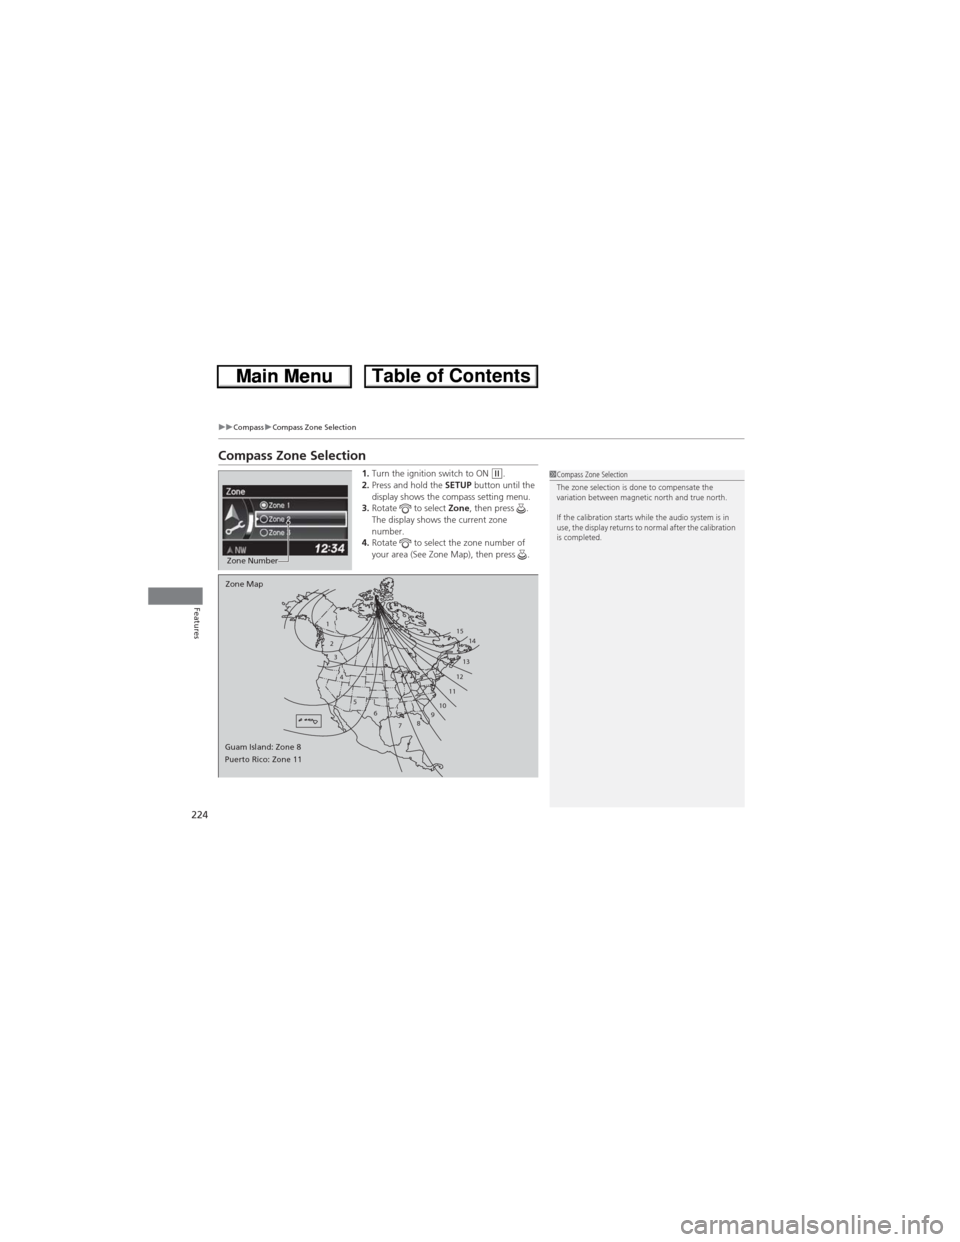
Compass Zone Selection
1.Turn the ignition switch to ON (w.
2.Press and hold the SETUP button until the
display shows the compass setting menu.
3.Rotate to select Zone, then press .
The display shows the current zone
number.
4.Rotate to select the zone number of
your area (See Zone Map), then press .
Zone Number
1
2
3
4
5
6
7891011121314 15
Zone Map
Guam Island: Zone 8
Puerto Rico: Zone 11
1Compass Zone Selection
The zone selection is done to compensate the
variation between magnetic north and true north.
If the calibration starts while the audio system is in
use, the display returns to normal after the calibration
is completed.
Page 226 of 361
225
Driving
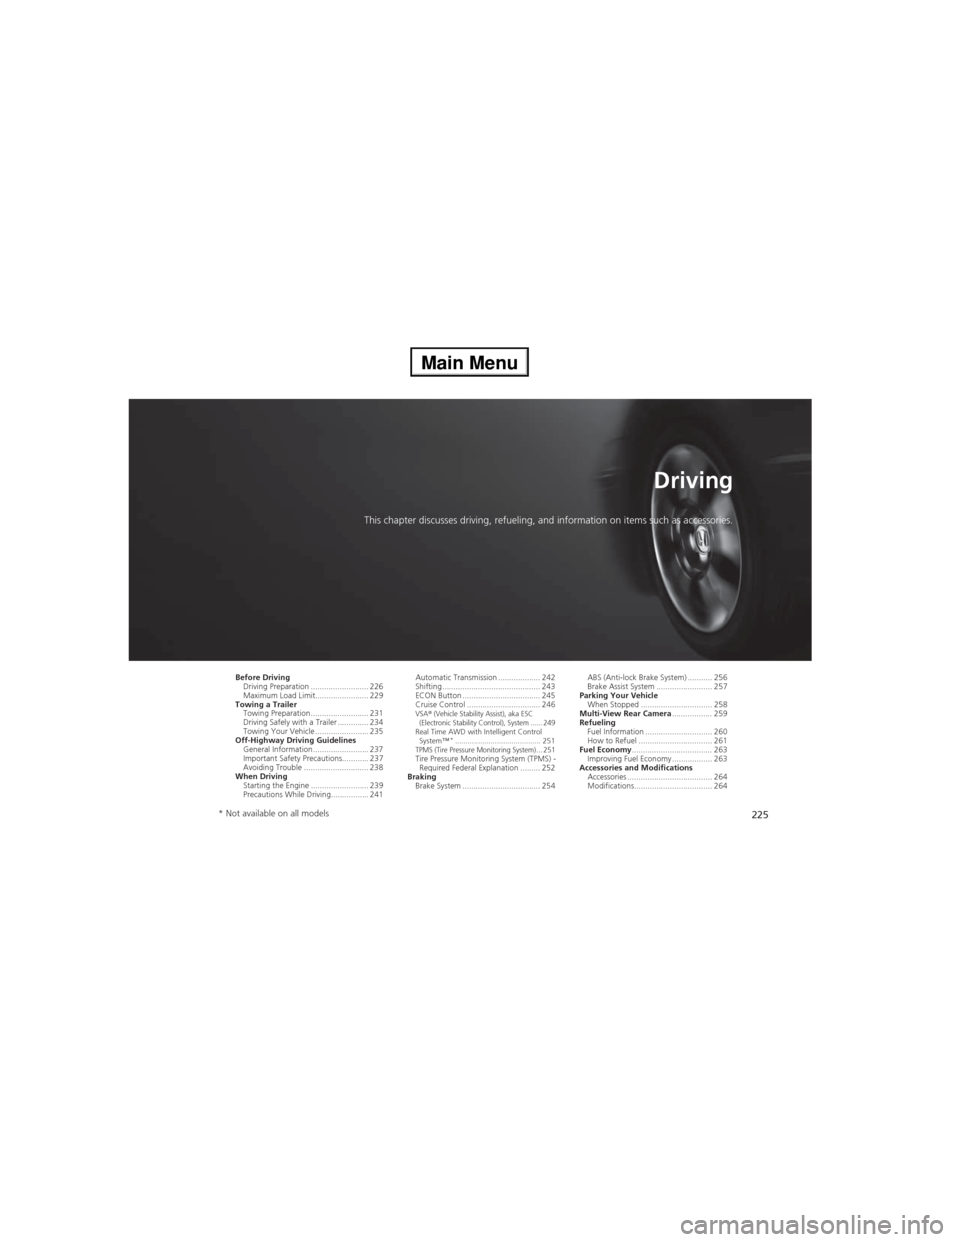
This chapter discusses driving, refueling, and information on items such as accessories.
Before Driving
Driving Preparation .......................... 226
Maximum Load Limit........................ 229
Towing a Trailer
Towing Preparation .......................... 231
Driving Safely with a Trailer .............. 234
Towing Your Vehicle ........................ 235
Off-Highway Driving Guidelines
General Information ......................... 237
Important Safety Precautions............ 237
Avoiding Trouble ............................. 238
When Driving
Starting the Engine .......................... 239
Precautions While Driving................. 241Automatic Transmission ................... 242
Shifting ............................................ 243
ECON Button ................................... 245
Cruise Control ................................. 246
VSA® (Vehicle Stability Assist), aka ESC
(Electronic Stability Control), System ...... 249
Real Time AWD with Intelligent Control
System™*......................................... 251TPMS (Tire Pressure Monitoring System) ... 251Tire Pressure Monitoring System (TPMS) -
Required Federal Explanation ......... 252
Braking
Brake System ................................... 254ABS (Anti-lock Brake System) ........... 256
Brake Assist System ......................... 257
Parking Your Vehicle
When Stopped ................................ 258
Multi-View Rear Camera.................. 259
Refueling
Fuel Information .............................. 260
How to Refuel ................................. 261
Fuel Economy.................................... 263
Improving Fuel Economy .................. 263
Accessories and Modifications
Accessories ...................................... 264
Modifications................................... 264
* Not available on all models
Page 227 of 361
226
Driving
Before Driving
Driving Preparation
Check the following items before you start driving.
•Make sure there are no obstructions on the windows, door mirrors, exterior
lights, or other parts of the vehicle.
uRemove any frost, snow, or ice.
uRemove any snow on the roof, as this can slip down and obstruct your field of
vision while driving. If frozen solid, remove ice once it has softened.
uWhen removing ice from around the wheels, be sure not to damage the wheel
or wheel components.
•Make sure the hood is securely closed.
uIf the hood opens while driving, your front view will be blocked.
•Make sure the tires are in good condition.
uCheck air pressures, and check for damage and excessive wear.
2Checking and Maintaining Tires P. 298•Make sure there are no people or objects behind or around the vehicle.
uThere are blind spots from the inside.
■Exterior Checks1Exterior ChecksNOTICEWhen doors are frozen shut, use warm water around
the door edges to melt any ice. Do not try to force
them open, as this can damage the rubber trim
around the doors. When done, wipe dry to avoid
further freezing.
Do not pour warm water into the key cylinder.
You will be unable to insert key if the water freezes in
the hole.
Heat from the engine and exhaust can ignite
flammable materials left under the hood, causing a
fire. If you've parked your vehicle for an extended
period, inspect and remove any debris that may have
collected, such as dried grass and leaves that have
fallen or have been carried in for use as a nest by a
small animal. Also check under the hood for leftover
flammable materials after you or someone else has
performed maintenance on your vehicle.
Page 229 of 361
228
uuBefore DrivinguDriving Preparation
Driving
•Be sure items placed on the floor behind the front seats cannot roll under the
seats.
uThey can interfere with the driver's ability to operate the pedals, the operation
of the seats, or the operation of the sensors under the seats.
•Everyone in the vehicle must fasten their seat belt.
2Fastening a Seat Belt P. 32•Make sure that the indicators in the instrument panel come on when you start the
vehicle, and go off soon after.
uAlways have a dealer check the vehicle if a problem is indicated.
2Indicators P. 68
Page 232 of 361
231Continued
Driving
Towing a Trailer
Towing Preparation
Your vehicle can tow a trailer if you carefully observe the load limits, use the proper
equipment, and follow the towing guidelines. Check the load limits before driving.
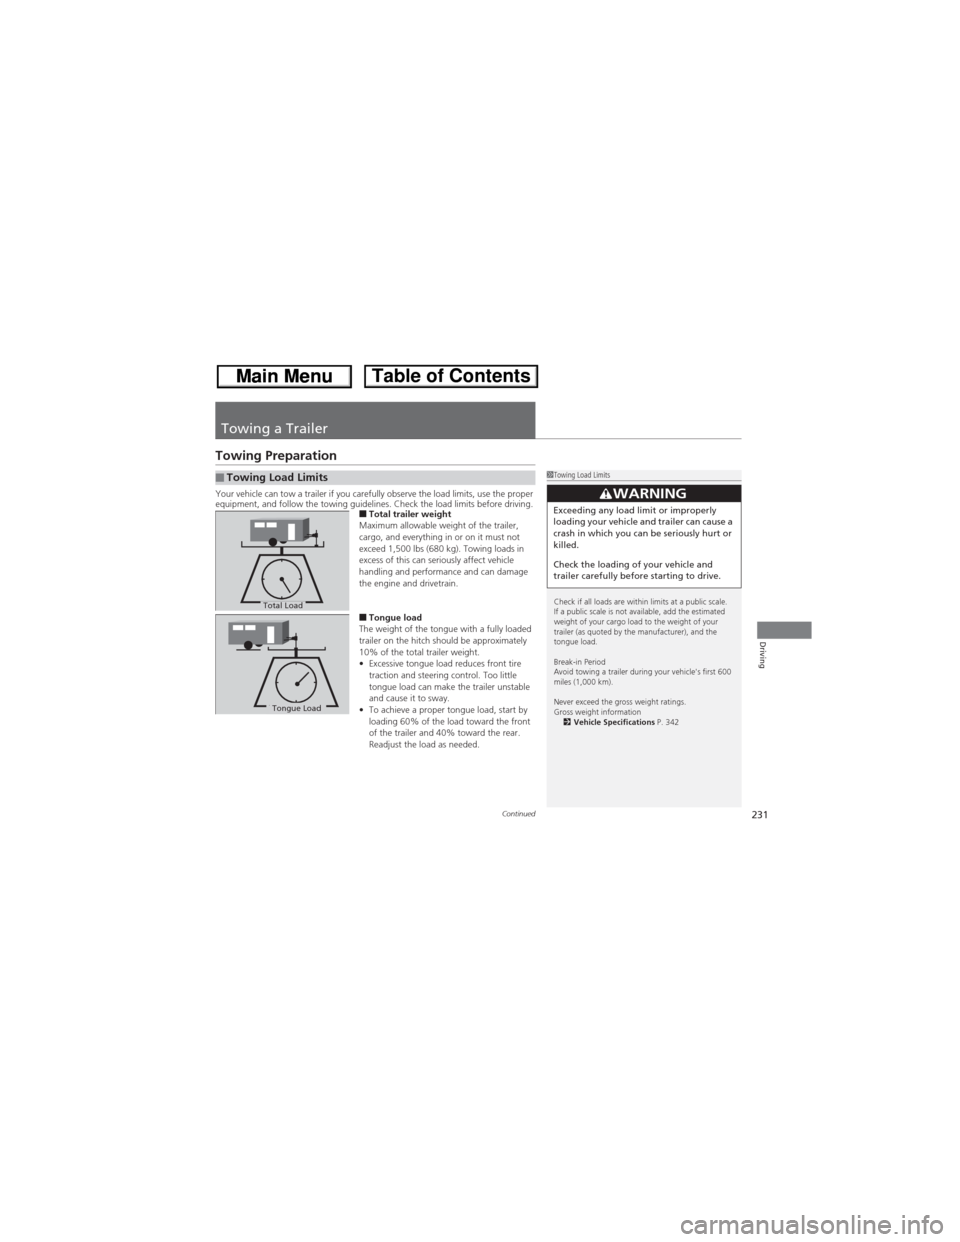
■Total trailer weight
Maximum allowable weight of the trailer,
cargo, and everything in or on it must not
exceed 1,500 lbs (680 kg). Towing loads in
excess of this can seriously affect vehicle
handling and performance and can damage
the engine and drivetrain.
■Tongue load
The weight of the tongue with a fully loaded
trailer on the hitch should be approximately
10% of the total trailer weight.
•Excessive tongue load reduces front tire
traction and steering control. Too little
tongue load can make the trailer unstable
and cause it to sway.
•To achieve a proper tongue load, start by
loading 60% of the load toward the front
of the trailer and 40% toward the rear.
Readjust the load as needed.
■Towing Load Limits1Towing Load Limits
Check if all loads are within limits at a public scale.
If a public scale is not available, add the estimated
weight of your cargo load to the weight of your
trailer (as quoted by the manufacturer), and the
tongue load.
Break-in Period
Avoid towing a trailer during your vehicle's first 600
miles (1,000 km).
Never exceed the gross weight ratings.
Gross weight information
2Vehicle Specifications P. 342
3WARNINGExceeding any load limit or improperly
loading your vehicle and trailer can cause a
crash in which you can be seriously hurt or
killed.
Check the loading of your vehicle and
trailer carefully before starting to drive.
Total Load
Tongue LoadTongue Load
Page 236 of 361
235
uuTowing a TraileruTowing Your Vehicle
Continued
Driving
Towing Your Vehicle
Your vehicle can be towed behind a motorhome.
Perform the following procedure before towing your vehicle.
1.Check the transmission fluid level.
uMake sure the fluid level is between the upper and lower marks.
2.Start the engine.
3.Depress the brake pedal. Move the shift lever through all its positions.
4.Shift to
(D and hold for five seconds, then to (N. Let the engine run for three
minutes, then turn it off.
5.Release the parking brake.
6.Leave the ignition switch in ACCESSORY
(q.
uMake sure the steering wheel does not lock.
7.Turn off all the electric devices. Do not use any accessory power sockets.
uThis can prevent the battery from running down.
■When Your Vehicle is Towed Behind a Motorhome
1Towing Your VehicleNOTICEFailure to follow the recommended instructions
exactly will result in severe automatic transmission
damage. If you cannot shift the transmission or start
the engine, your vehicle must be transported on a
flat-bed truck or trailer.
Do not exceed 65 mph (100 km/h).
To avoid damage to the AWD system, your vehicle
must be towed with all four wheels on the ground.
Consult your towing parts sales or rental agency if
any other items are recommended or required for
your towing situation.
If you tow your vehicle behind a motorhome, the
transmission fluid must be changed every 2 years or
30,000 miles (48,000 km), whichever comes first.
AWD models
1When Your Vehicle is Towed Behind a MotorhomeNOTICESevere transmission damage will occur if the vehicle is
shifted from (R to (N and then towed with the drive
wheels on the ground.
Page 237 of 361
236
uuTowing a TraileruTowing Your Vehicle
Driving
■Extended towing
If you tow more than eight hours in one day, you should repeat the “before towing
your vehicle procedure” at least every eight hours. You also need to perform the
following procedure to prevent the battery from running down.
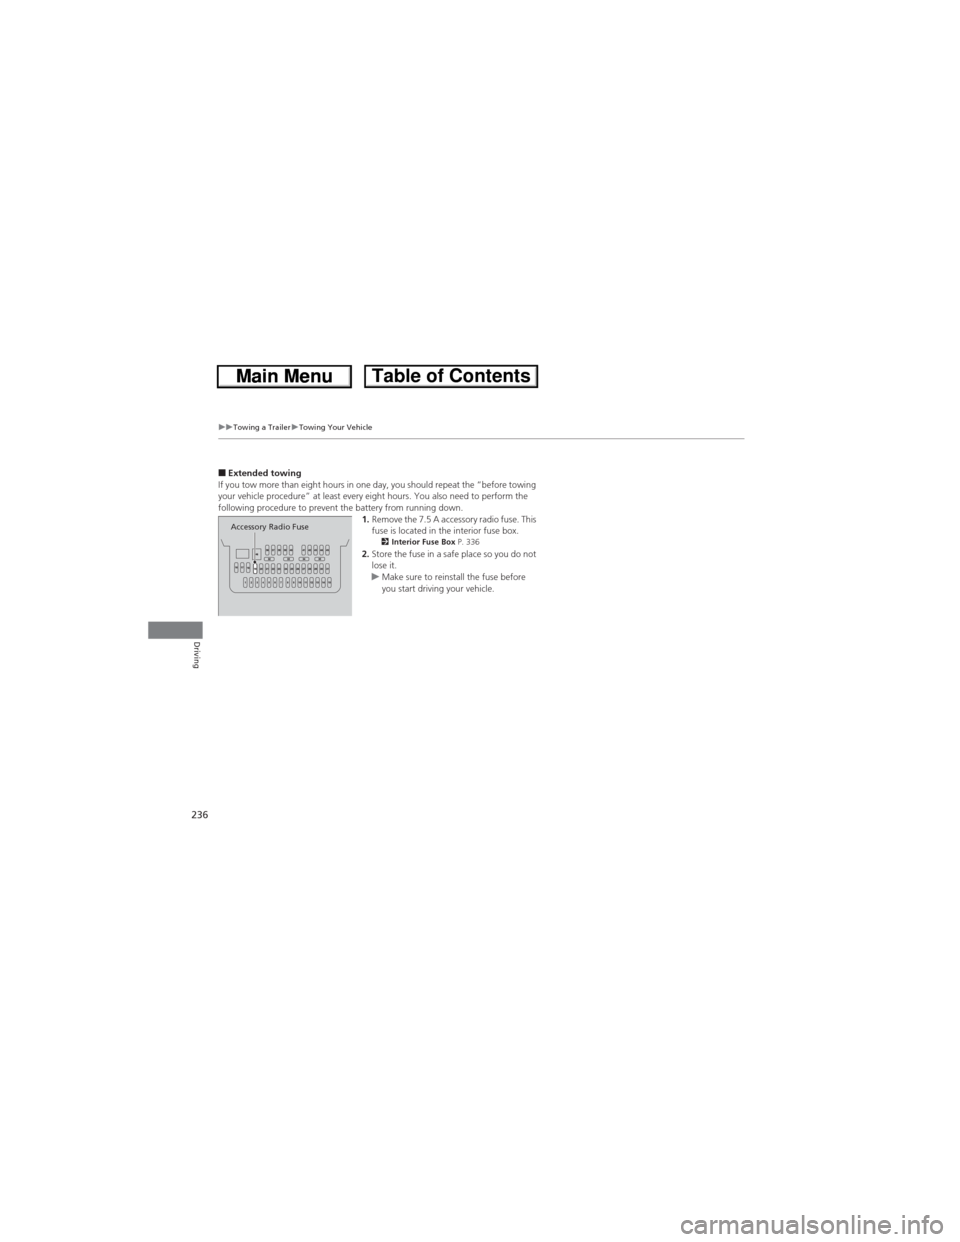
1.Remove the 7.5 A accessory radio fuse. This
fuse is located in the interior fuse box.
2Interior Fuse Box P. 3362.Store the fuse in a safe place so you do not
lose it.
uMake sure to reinstall the fuse before
you start driving your vehicle.
Accessory Radio Fuse
Page 239 of 361
238
uuOff-Highway Driving GuidelinesuAvoiding Trouble
Driving
Avoiding Trouble
•Check Out Your Vehicle before you leave the pavement and make sure that all
scheduled maintenance has been completed. Pay special attention to the
condition of the tires, and check the tire pressures.
•Remember the route you choose presents limits (too steep or bumpy), you have
limits (driving skill and comfort), and your vehicle has limits (traction, stability, and
power). Failing to recognize these limits will likely put you and your passengers in
a hazardous situation.
•Accelerating and Braking should be done slowly and gradually. Trying to start
or stop too fast can cause a loss of traction and you could lose control.
•Avoiding Obstacles and Debris in the road reduces the likelihood of a rollover
or damage to your suspension or other components.
•Driving on Slopes increases your risk of a rollover, particularly if you attempt to
drive across a slope that is too steep. Going straight or down a slope is usually the
safest. If you can’t clearly see all conditions or obstacles on a slope, walk it before
you drive it. If there is any doubt whether you can safely pass, don’t try it. Find
another route. If you get stuck when climbing, do not try to turn around. Back
down slowly following the same route you took up the hill.
•Crossing a Stream - Avoid driving through deep water. If you encounter water
in your route (a small stream or large puddle, for example), evaluate it carefully
before going ahead. Make sure it is shallow, flowing slowly, and has firm ground
underneath. If you are not sure of the depth or the ground, turn around and find
another route. Driving through deep water can also damage your vehicle. The
water can get into the transmission and differential, diluting the lubricant and
causing an eventual failure. It can also wash the grease out of the wheel bearings.
•If You Get Stuck, carefully go in the direction that you think will get you
unstuck. Do not spin the tires as this will only make things worse and could
damage the transmission. If you are unable to free yourself, your vehicle will need
to be towed. Front and rear tow hooks are provided for this purpose.