HONDA CR-V 2015 RM1, RM3, RM4 / 4.G Owners Manual
CR-V 2015 RM1, RM3, RM4 / 4.G
HONDA
HONDA
https://www.carmanualsonline.info/img/13/5802/w960_5802-0.png
HONDA CR-V 2015 RM1, RM3, RM4 / 4.G Owners Manual
Trending: fuel tank capacity, radio antenna, driver seat adjustment, inflation pressure, remote start, navigation system, suspension
Page 451 of 533
450
uuMaintenance Under the Hood uBrake Fluid
Maintenance
Brake Fluid
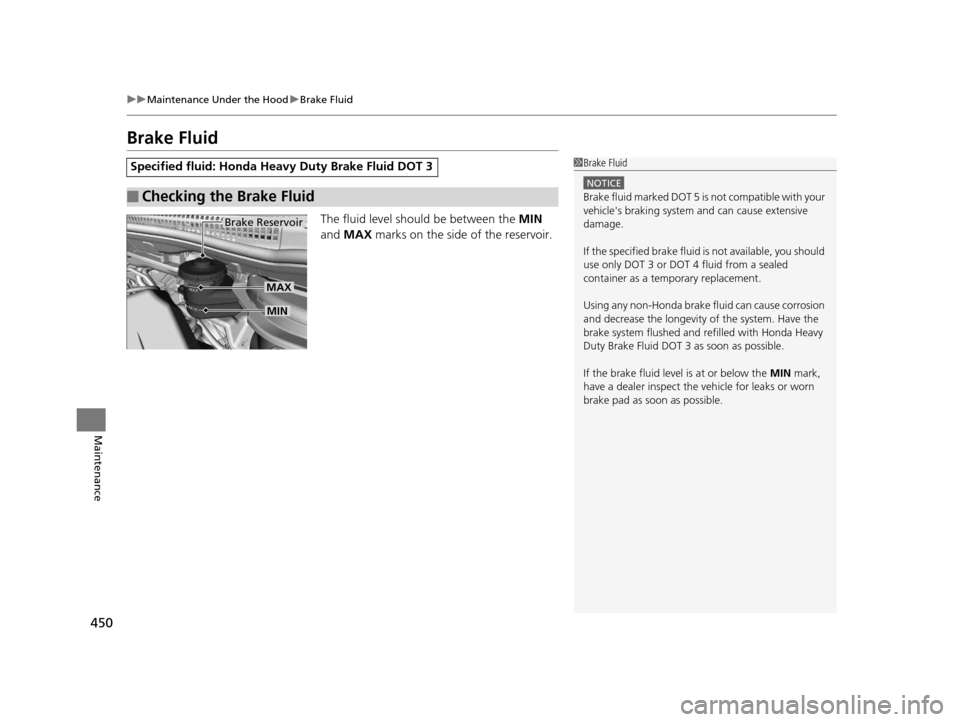
The fluid level should be between the MIN
and MAX marks on the side of the reservoir.
Specified fluid: Honda Heavy Duty Brake Fluid DOT 3
■Checking the Brake Fluid
1Brake Fluid
NOTICE
Brake fluid marked DOT 5 is not compatible with your
vehicle's braking system and can cause extensive
damage.
If the specified brake fluid is not available, you should
use only DOT 3 or DOT 4 fluid from a sealed
container as a temporary replacement.
Using any non-Honda brake fluid can cause corrosion
and decrease the longevity of the system. Have the
brake system flushed and re filled with Honda Heavy
Duty Brake Fluid DOT 3 as soon as possible.
If the brake fluid level is at or below the MIN mark,
have a dealer inspect the vehicle for leaks or worn
brake pad as soon as possible.
Brake Reservoir
MIN
MAX
15 CR-V-31T0A6300.book 450 ページ 2015年2月2日 月曜日 午前10時35分
Page 452 of 533
451
uuMaintenance Under the Hood uRefilling Window Washer Fluid
Maintenance
Refilling Window Washer Fluid
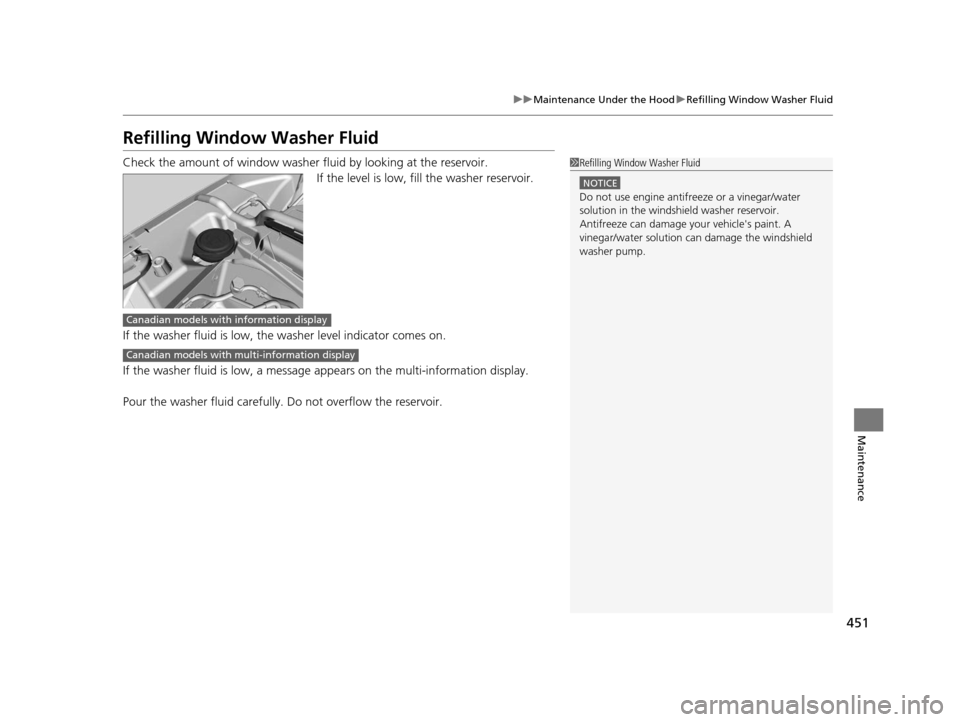
Check the amount of window washer fluid by looking at the reservoir.
If the level is low, fill the washer reservoir.
If the washer fluid is low, the washer level indicator comes on.
If the washer fluid is low, a message appears on the multi-information display.
Pour the washer fluid carefully. Do not overflow the reservoir.1Refilling Window Washer Fluid
NOTICE
Do not use engine antifreeze or a vinegar/water
solution in the windshield washer reservoir.
Antifreeze can damage y our vehicle's paint. A
vinegar/water solution ca n damage the windshield
washer pump.
Canadian models with information display
Canadian models with mu lti-information display
15 CR-V-31T0A6300.book 451 ページ 2015年2月2日 月曜日 午前10時35分
Page 453 of 533
452
Maintenance
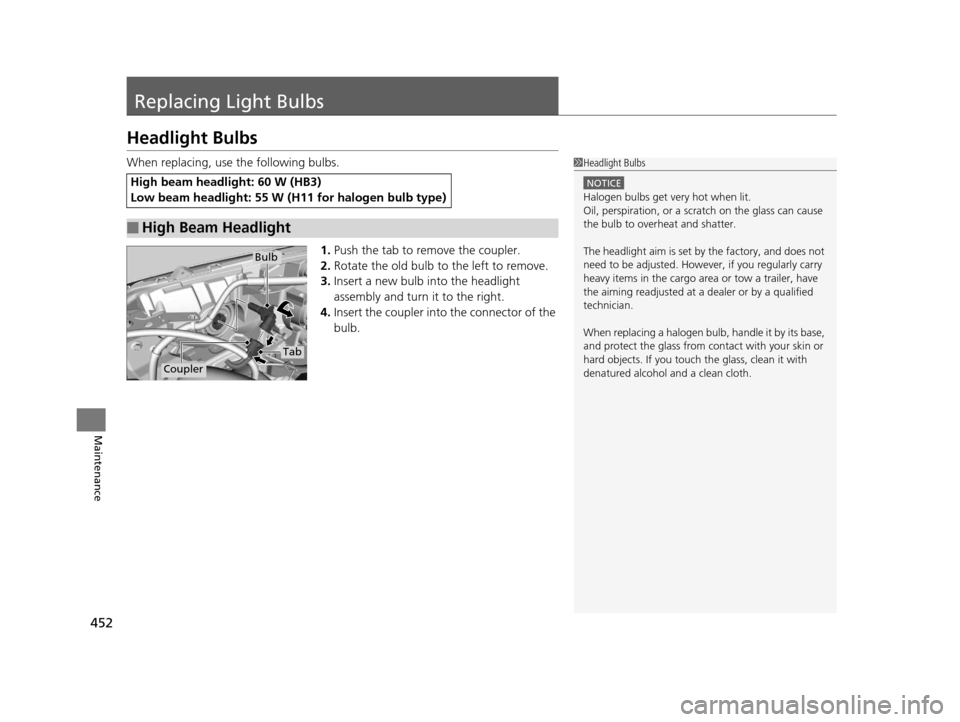
Replacing Light Bulbs
Headlight Bulbs
When replacing, use the following bulbs.1.Push the tab to remove the coupler.
2. Rotate the old bulb to the left to remove.
3. Insert a new bulb into the headlight
assembly and turn it to the right.
4. Insert the coupler into the connector of the
bulb.
High beam headlight: 60 W (HB3)
Low beam headlight: 55 W (H11 for halogen bulb type)
■High Beam Headlight
1Headlight Bulbs
NOTICE
Halogen bulbs get very hot when lit.
Oil, perspiration, or a scratch on the glass can cause
the bulb to overhe at and shatter.
The headlight aim is set by the factory, and does not
need to be adjusted. Howeve r, if you regularly carry
heavy items in the cargo area or tow a trailer, have
the aiming readjusted at a dealer or by a qualified
technician.
When replacing a halogen bulb, handle it by its base,
and protect the glass from c ontact with your skin or
hard objects. If you touch the glass, clean it with
denatured alcohol and a clean cloth.
Coupler
Bulb
Tab
15 CR-V-31T0A6300.book 452 ページ 2015年2月2日 月曜日 午前10時35分
Page 454 of 533
Continued453
uuReplacing Light Bulbs uFog Light Bulbs*
Maintenance
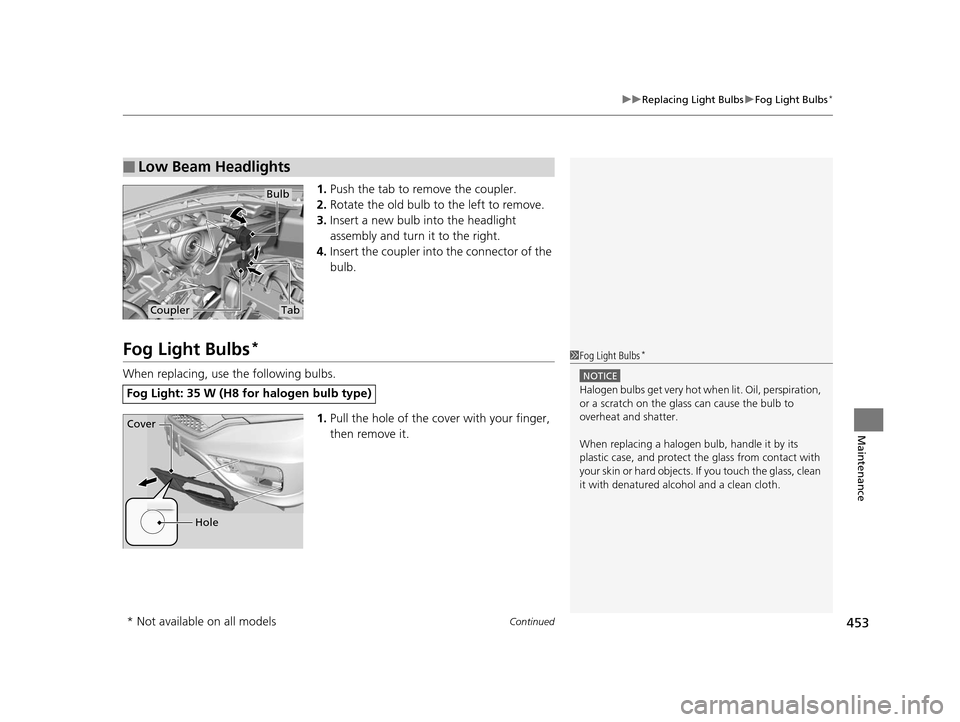
1. Push the tab to remove the coupler.
2. Rotate the old bulb to the left to remove.
3. Insert a new bulb into the headlight
assembly and turn it to the right.
4. Insert the coupler into the connector of the
bulb.
Fog Light Bulbs*
When replacing, use the following bulbs.
1.Pull the hole of the co ver with your finger,
then remove it.
■Low Beam Headlights
Coupler
Bulb
Tab
Fog Light: 35 W (H8 for halogen bulb type)
1 Fog Light Bulbs*
NOTICE
Halogen bulbs get very hot wh en lit. Oil, perspiration,
or a scratch on the glass can cause the bulb to
overheat and shatter.
When replacing a halogen bulb, handle it by its
plastic case, and protect th e glass from contact with
your skin or hard objects. If you touch the glass, clean
it with denatured alc ohol and a clean cloth.
Cover
Hole
* Not available on all models
15 CR-V-31T0A6300.book 453 ページ 2015年2月2日 月曜日 午前10時35分
Page 455 of 533
454
uuReplacing Light Bulbs uFog Light Bulbs*
Maintenance
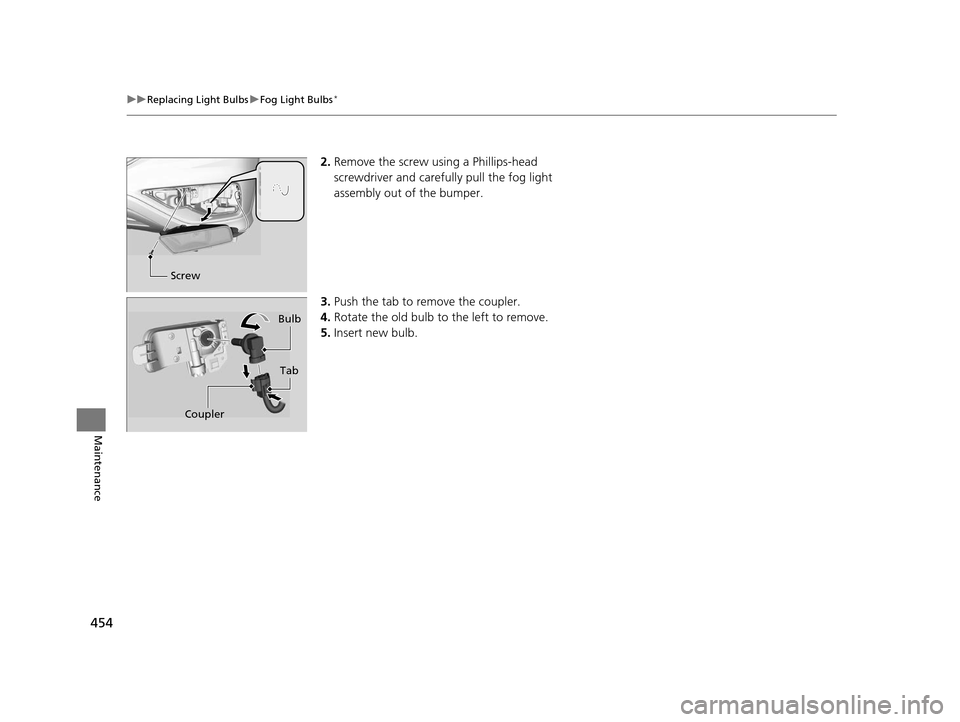
2. Remove the screw using a Phillips-head
screwdriver and carefu lly pull the fog light
assembly out of the bumper.
3. Push the tab to remove the coupler.
4. Rotate the old bulb to the left to remove.
5. Insert new bulb.
Screw
Bulb
Coupler Tab
15 CR-V-31T0A6300.book 454 ページ 2015年2月2日 月曜日 午前10時35分
Page 456 of 533
455
uuReplacing Light Bulbs uFront Turn Signal/Side Marker Light/Parking Light Bulbs
Maintenance
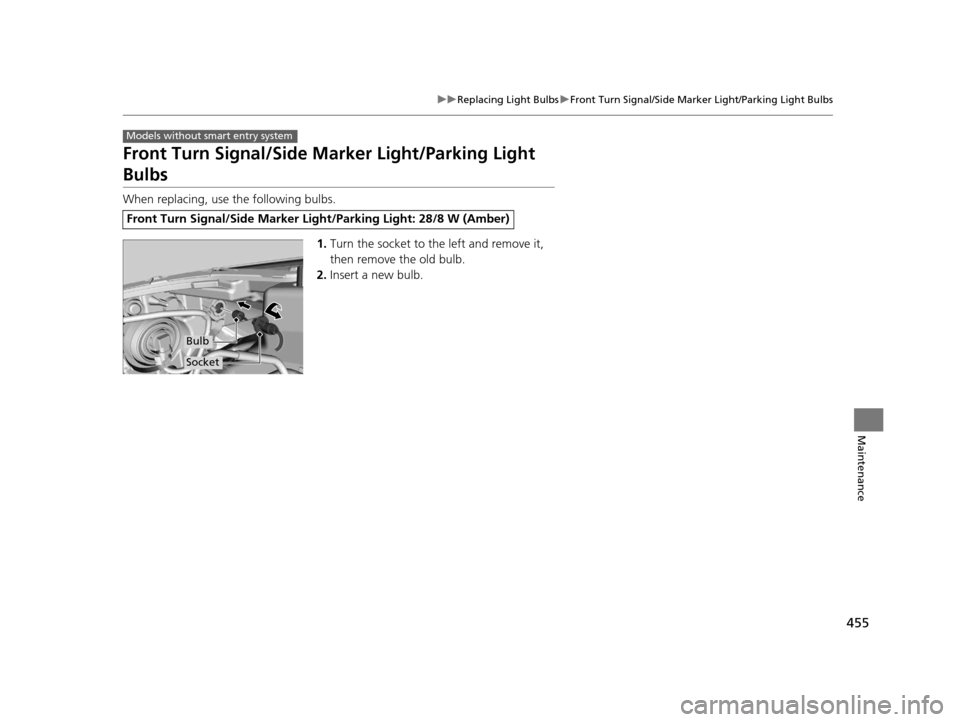
Front Turn Signal/Side Marker Light/Parking Light
Bulbs
When replacing, use the following bulbs.
1.Turn the socket to th e left and remove it,
then remove the old bulb.
2. Insert a new bulb.
Front Turn Signal/Side Marker Ligh t/Parking Light: 28/8 W (Amber)
Models without smart entry system
Bulb
Socket
15 CR-V-31T0A6300.book 455 ページ 2015年2月2日 月曜日 午前10時35分
Page 457 of 533
456
uuReplacing Light Bulbs uFront Turn Signal/Side Marker Light Bulbs
Maintenance
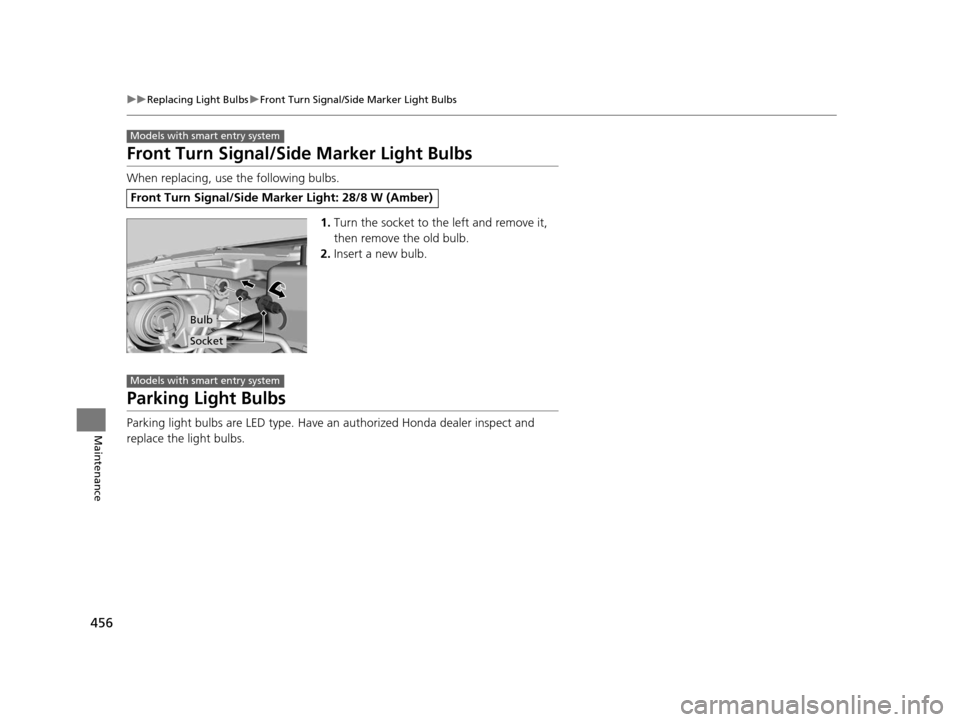
Front Turn Signal/Side Marker Light Bulbs
When replacing, use the following bulbs.
1.Turn the socket to the left and remove it,
then remove the old bulb.
2. Insert a new bulb.
Parking Light Bulbs
Parking light bulbs are LED type. Have an authorized Honda dealer inspect and
replace the light bulbs.
Front Turn Signal/Side Mark er Light: 28/8 W (Amber)
Models with smart entry system
Bulb
Socket
Models with smart entry system
15 CR-V-31T0A6300.book 456 ページ 2015年2月2日 月曜日 午前10時35分
Page 458 of 533
457
uuReplacing Light Bulbs uSide Turn Signal/Emergency Indicator Light Bulbs*
Continued
Maintenance
Side Turn Signal/Emerge ncy Indicator Light Bulbs*
Door mirrors have the side turn lights. Ha ve an authorized Honda dealer inspect and
replace the light assembly.
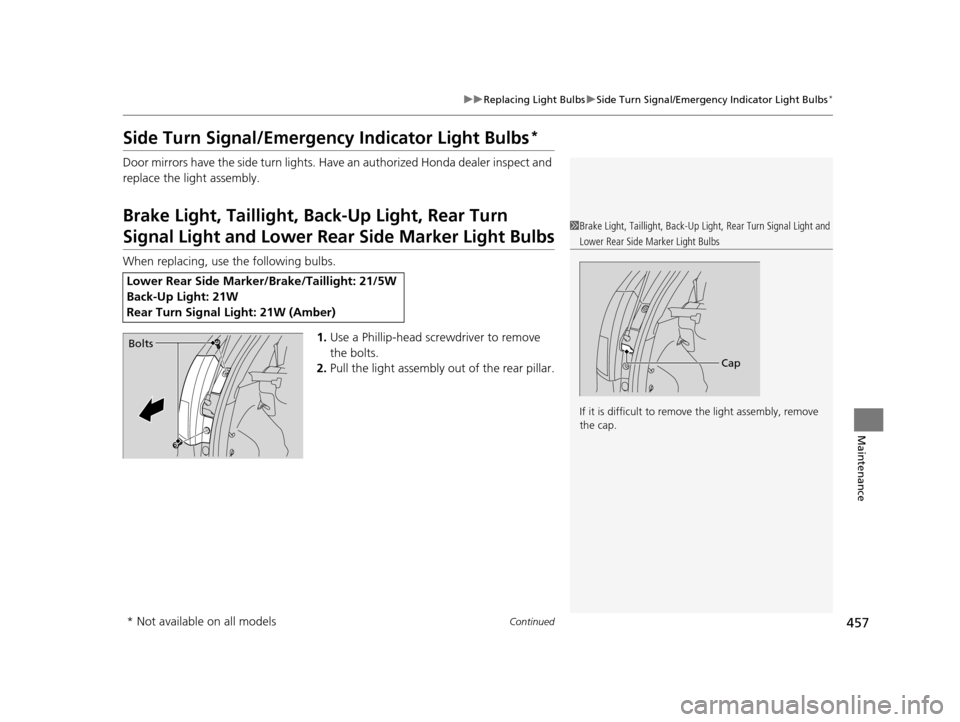
Brake Light, Taillight, Back-Up Light, Rear Turn
Signal Light and Lower Rear Side Marker Light Bulbs
When replacing, use the following bulbs.
1.Use a Phillip-head screwdriver to remove
the bolts.
2. Pull the light assembly out of the rear pillar.
Lower Rear Side Marker/Brake/Taillight: 21/5W
Back-Up Light: 21W
Rear Turn Signal Light: 21W (Amber)
1Brake Light, Taillight, Back-Up Light, Rear Turn Signal Light and
Lower Rear Side Marker Light Bulbs
If it is difficult to remove the light assembly, remove
the cap.
Cap
Bolts
* Not available on all models
15 CR-V-31T0A6300.book 457 ページ 2015年2月2日 月曜日 午前10時35分
Page 459 of 533
458
uuReplacing Light Bulbs uBrake Light, Taillight, Back-Up Light, Rear Turn Si gnal Light and Lower Rear Side Marker Light Bulbs
Maintenance
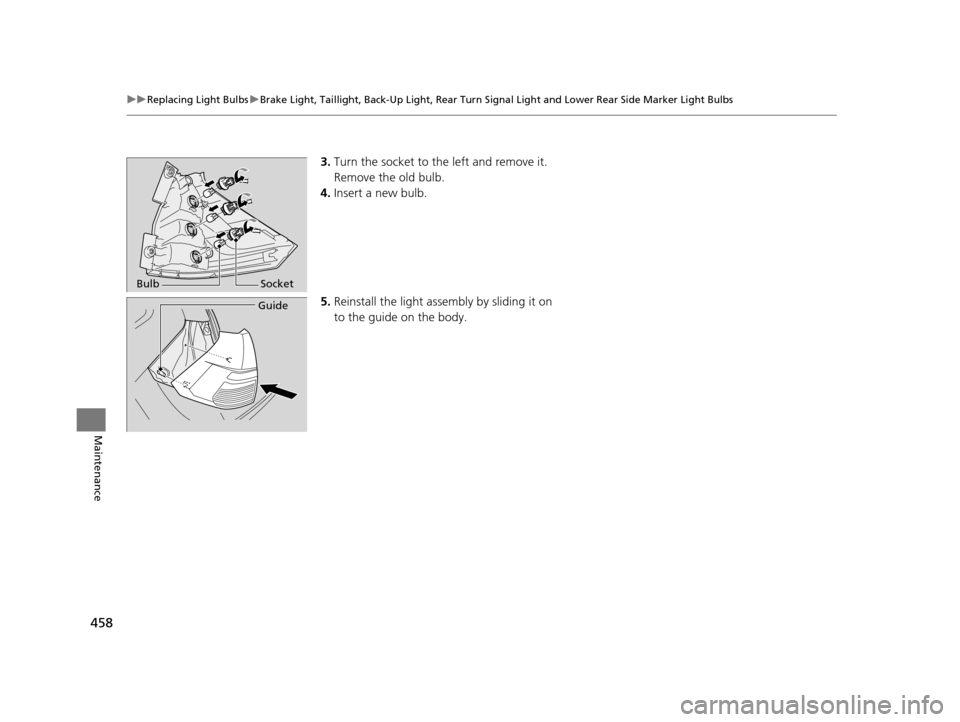
3.Turn the socket to the left and remove it.
Remove the old bulb.
4. Insert a new bulb.
5. Reinstall the light assembly by sliding it on
to the guide on the body.
Bulb Socket
Guide
15 CR-V-31T0A6300.book 458 ページ 2015年2月2日 月曜日 午前10時35分
Page 460 of 533
459
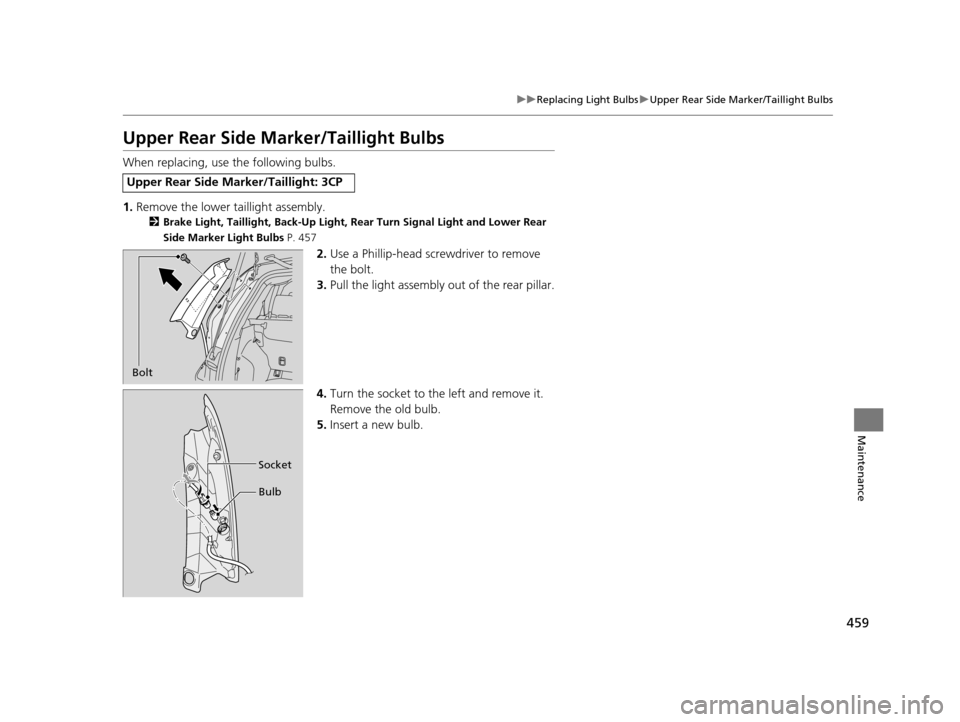
uuReplacing Light Bulbs uUpper Rear Side Marker/Taillight Bulbs
Maintenance
Upper Rear Side Ma rker/Taillight Bulbs
When replacing, use the following bulbs.
1.Remove the lower taillight assembly.
2 Brake Light, Taillight, Back-Up Light, Rear Turn Signal Light and Lower Rear
Side Marker Light Bulbs P. 457
2.Use a Phillip-head screwdriver to remove
the bolt.
3. Pull the light assembly out of the rear pillar.
4. Turn the socket to th e left and remove it.
Remove the old bulb.
5. Insert a new bulb.
Upper Rear Side Marker/Taillight: 3CP
Bolt
Bulb
Socket
15 CR-V-31T0A6300.book 459 ページ 2015年2月2日 月曜日 午前10時35分
Trending: air suspension, weight, fold seats, high beam, brake, fuel filter location, seat adjustment
