check engine HONDA CR-Z 2013 1.G User Guide
[x] Cancel search | Manufacturer: HONDA, Model Year: 2013, Model line: CR-Z, Model: HONDA CR-Z 2013 1.GPages: 325, PDF Size: 11.73 MB
Page 173 of 325
172
Driving
Before Driving
Driving Preparation
Check the following items before you start driving. •Make sure there are no obstructions on the windows, door mirrors, exterior
lights, or other parts of the vehicle.
uRemove any frost, snow, or ice.
uRemove any snow on the roof, as this can slip down and obstruct your field of
vision while driving. If frozen solid, remove ice once it has softened.
uWhen removing ice from around the wheels, be sure not to damage the wheel
or wheel components.
• Make sure the hood is securely closed.
uIf the hood opens while driving, your front view will be blocked.
• Make sure the tires are in good condition.
uCheck air pressures, and check for damage and excessive wear.
2 Checking and Maintaining Tires P. 253
• Make sure there are no people or objects behind or around the vehicle.
uThere are blind spots from the inside.
■Exterior Checks1Exterior Checks
NOTICE
When doors are frozen shut, use warm water around
the door edges to melt any ice. Do not try to force
them open, as this can damage the rubber trim
around the doors. When done, wipe dry to avoid further freezing.
Do not pour warm water into the key cylinder.
You will be unable to insert key if the water freezes in
the hole.
Heat from the engine and exhaust can ignite
flammable materials left under the hood, causing a
fire. If you've parked your vehicle for an extended
period, inspect and remove any debris that may have
collected, such as dried grass and leaves that have
fallen or have been carried in for use as a nest by a
small animal.
Also check under the hood for leftover flammable
materials after you or someone else has performed
maintenance on your vehicle.
Main MenuTable of Contents
Page 179 of 325
178
Driving
When Driving
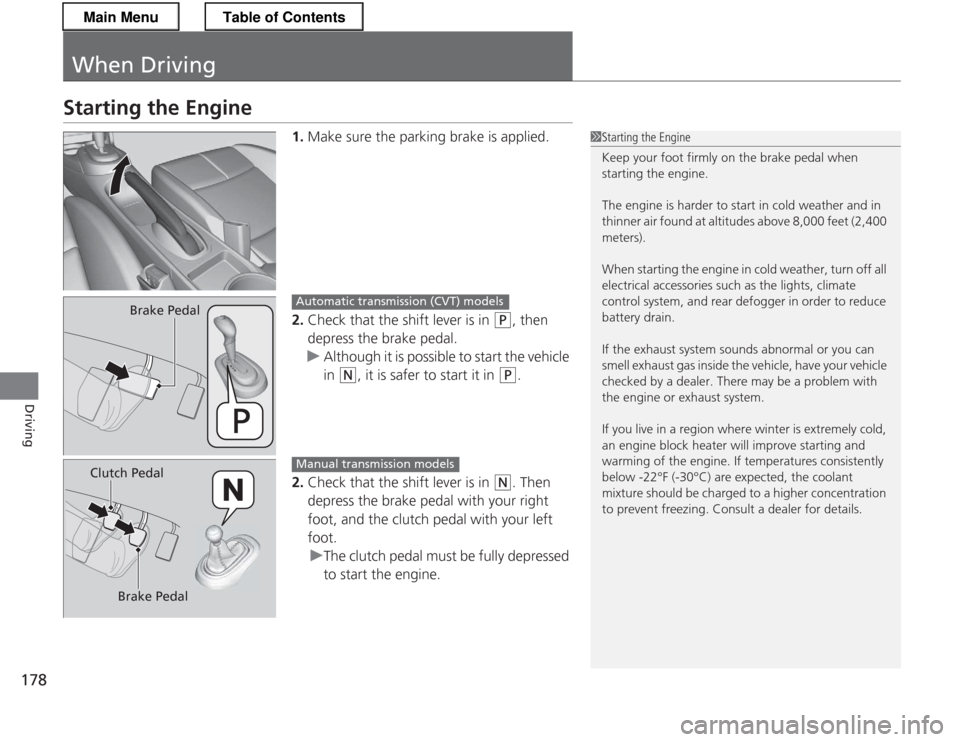
Starting the Engine1.Make sure the parking brake is applied.
2. Check that the shift lever is in
(P , then
depress the brake pedal.
uAlthough it is possible to start the vehicle in
(N , it is safer to start it in (P.
2. Check that the shift lever is in
(N . Then
depress the brake pedal with your right
foot, and the clutch pedal with your left foot.
uThe clutch pedal must be fully depressed
to start the engine.
1Starting the Engine
Keep your foot firmly on the brake pedal when starting the engine.
The engine is harder to start in cold weather and in
thinner air found at altitudes above 8,000 feet (2,400 meters).
When starting the engine in cold weather, turn off all
electrical accessories such as the lights, climate
control system, and rear defogger in order to reduce
battery drain.
If the exhaust system sounds abnormal or you can
smell exhaust gas inside the vehicle, have your vehicle
checked by a dealer. There may be a problem with
the engine or exhaust system.
If you live in a region where winter is extremely cold,
an engine block heater will improve starting and
warming of the engine. If temperatures consistently
below -22°F (-30°C) are expected, the coolant
mixture should be charged to a higher concentration
to prevent freezing. Consult a dealer for details.
Brake PedalAutomatic transmiss ion (CVT) models
Clutch Pedal
Brake PedalManual transmission models
Main MenuTable of Contents
Page 180 of 325
Continued179
uuWhen DrivinguStarting the Engine
Driving
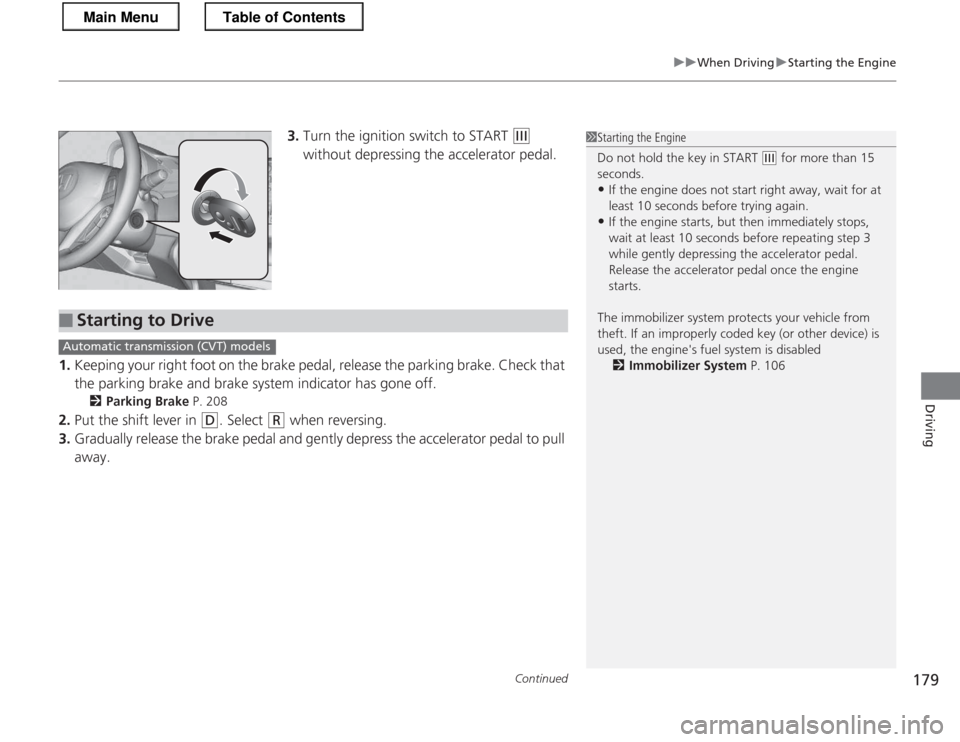
3.Turn the ignition switch to START (e
without depressing the accelerator pedal.
1. Keeping your right foot on the brake pedal, release the parking brake. Check that
the parking brake and brake system indicator has gone off.
2 Parking Brake P. 208
2. Put the shift lever in
(D . Select (R when reversing.
3. Gradually release the brake pedal and gently depress the accelerator pedal to pull
away.
1Starting the Engine
Do not hold the key in START
(e for more than 15
seconds.
• If the engine does not start right away, wait for at least 10 seconds before trying again.
• If the engine starts, but then immediately stops,
wait at least 10 seconds before repeating step 3
while gently depressing the acce lerator pedal.
Release the accelerator pedal once the engine
starts.
The immobilizer system protects your vehicle from
theft. If an improperly coded key (or other device) is
used, the engine's fuel system is disabled 2 Immobilizer System P. 106
■Starting to Drive
Automatic transmission (CVT) models
Main MenuTable of Contents
Page 182 of 325
181
uuWhen DrivinguPrecautions While Driving
Driving
Precautions While Driving
Avoid driving in deep water and on flooded roads. This can damage the engine and
driveline, and cause electrical component failure.
If there is a strong impact with something under the vehicle, stop in a safe location.
Check the underside of the vehicle for damage or any fluid leaks.
■In Rain
■Other Precautions
1Precautions While Driving
NOTICE
Do not operate the shift lever while pressing the
accelerator pedal. You could damage the
transmission.
If the ignition switch is turned to ACCESSORY
(q or
LOCK
(0 while driving, the engine will shut down
and all steering and brake power assist functions will
stop, making it difficult to control the vehicle.
Do not put the shift lever in
(N , as you will lose
engine braking (and acceleration) performance.
During the first 600 miles (1,000 km) of operation,
avoid sudden acceleration or full throttle operation so
as to not damage the engine or powertrain.
Avoid hard braking for the first 200 miles (300 km).
You should also follow this when the brake pads are replaced.
NOTICE
Following can damage the under spoiler: • Parking the vehicle by a parking block
• Parallel parking along the road shoulder
• Driving towards the bottom of a hill
• Driving up or down to a different surface level
(such as a road shoulder)
• Driving on a rutted or bumpy road
• Driving on a road with potholes
Main MenuTable of Contents
Page 185 of 325
uuWhen DrivinguShifting
184
Driving
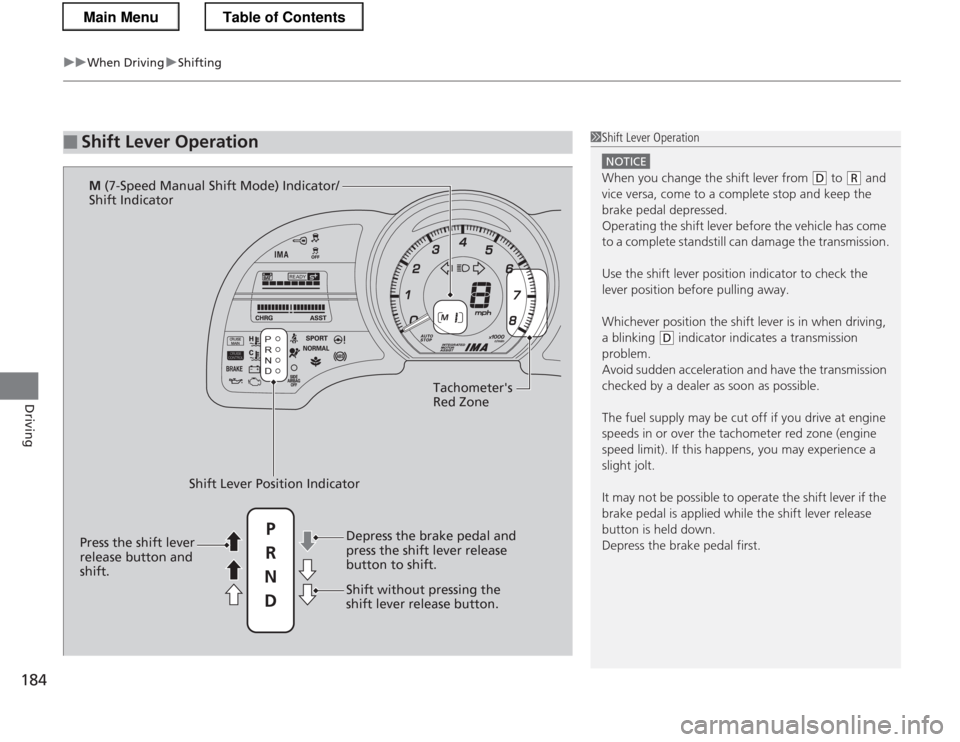
■Shift Lever Operation1Shift Lever Operation
NOTICE
When you change the shift lever from (D to (R and
vice versa, come to a complete stop and keep the brake pedal depressed.
Operating the shift lever before the vehicle has come
to a complete standstill can damage the transmission.
Use the shift lever position indicator to check the
lever position before pulling away.
Whichever position the shift lever is in when driving,
a blinking
(D indicator indicates a transmission
problem.
Avoid sudden acceleration and have the transmission
checked by a dealer as soon as possible.
The fuel supply may be cut off if you drive at engine
speeds in or over the tachometer red zone (engine
speed limit). If this happens, you may experience a
slight jolt.
It may not be possible to operate the shift lever if the
brake pedal is applied while the shift lever release
button is held down. Depress the brake pedal first.
READY
Tachometer's
Red Zone
Shift Lever Position Indicator Depress the brake pedal and
press the shift lever release
button to shift.
Shift without pressing the
shift lever release button.
Press the shift lever
release button and
shift. M
(7-Speed Manual Shift Mode) Indicator/
Shift Indicator
P
R
N D
Main MenuTable of Contents
Page 191 of 325
190
uuWhen DrivinguShifting
Driving
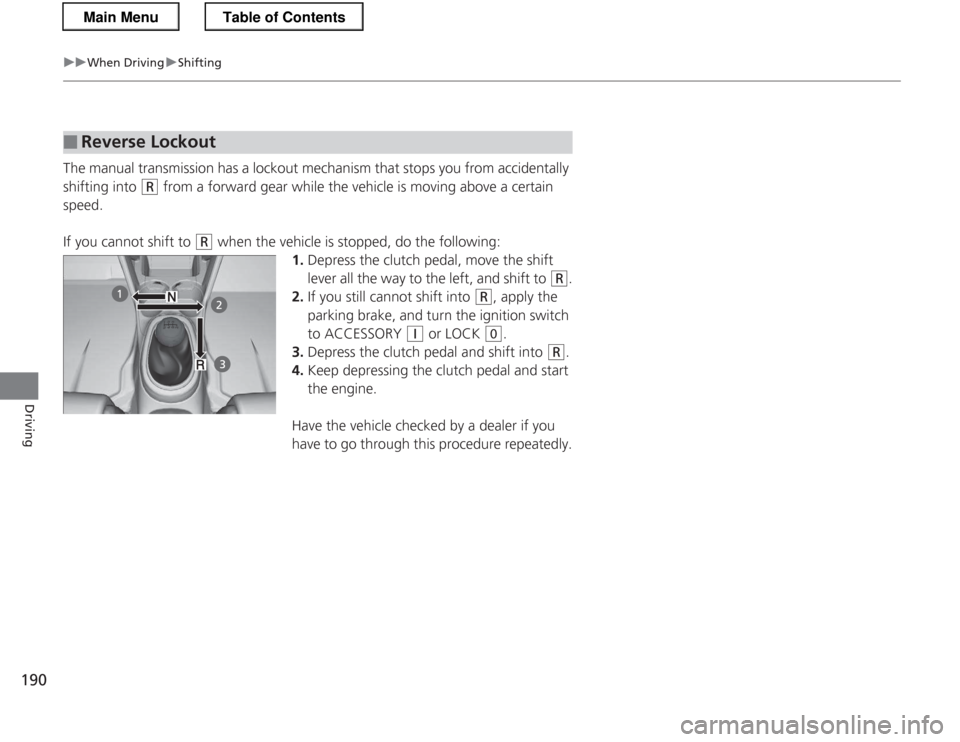
The manual transmission has a lockout mechanism that stops you from accidentally
shifting into
(R from a forward gear while the vehicle is moving above a certain
speed.
If you cannot shift to
(R when the vehicle is stopped, do the following:
1.Depress the clutch pedal, move the shift
lever all the way to the left, and shift to
(R .
2. If you still cannot shift into
(R , apply the
parking brake, and turn the ignition switch
to ACCESSORY
(q or LOCK (0 .
3. Depress the clutch pedal and shift into
(R .
4. Keep depressing the clutch pedal and start
the engine.
Have the vehicle checked by a dealer if you
have to go through this procedure repeatedly.
■Reverse Lockout
Main MenuTable of Contents
Page 204 of 325
203
uuWhen DrivinguVSA® (Vehicle Stability Assist), aka ESC (Electronic Stability Control), System
Continued
Driving
VSA ® (Vehicle Stability Assist), aka ESC (Electronic
Stability Control), System VSA ® helps to stabilize the vehicle during cornering if the vehicle turns more or less
than what was intended. It also assists in maintaining traction on slippery surfaces. It does so by regulating engine output and selectively applying the brakes.
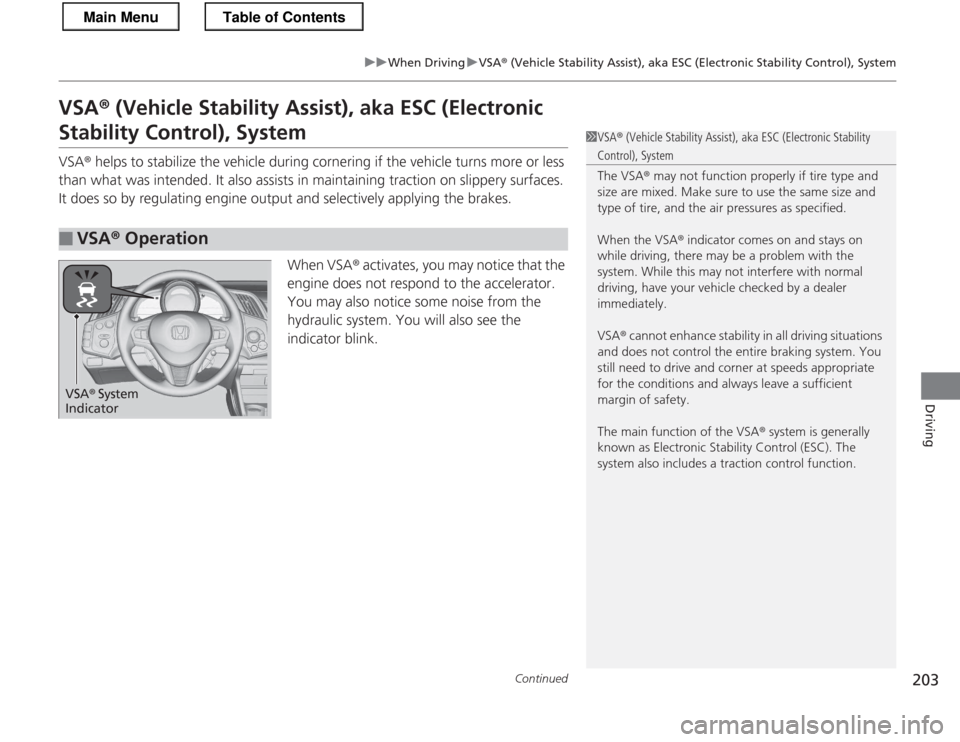
When VSA® activates, you may notice that the
engine does not respond to the accelerator.
You may also notice some noise from the
hydraulic system. You will also see the
indicator blink.
■VSA ® Operation
1VSA ® (Vehicle Stability Assist), aka ESC (Electronic Stability
Control), System
The VSA ® may not function properly if tire type and
size are mixed. Make sure to use the same size and
type of tire, and the ai r pressures as specified.
When the VSA ® indicator comes on and stays on
while driving, there may be a problem with the
system. While this may not interfere with normal
driving, have your vehicle checked by a dealer
immediately.
VSA ® cannot enhance stability in all driving situations
and does not control the entire braking system. You
still need to drive and cor ner at speeds appropriate
for the conditions and always leave a sufficient margin of safety.
The main function of the VSA ® system is generally
known as Electronic Stability Control (ESC). The
system also includes a traction control function.
VSA ® System
Indicator
Main MenuTable of Contents
Page 205 of 325
uuWhen DrivinguVSA® (Vehicle Stability Assist), aka ESC (Electronic Stability Control), System
204
Driving
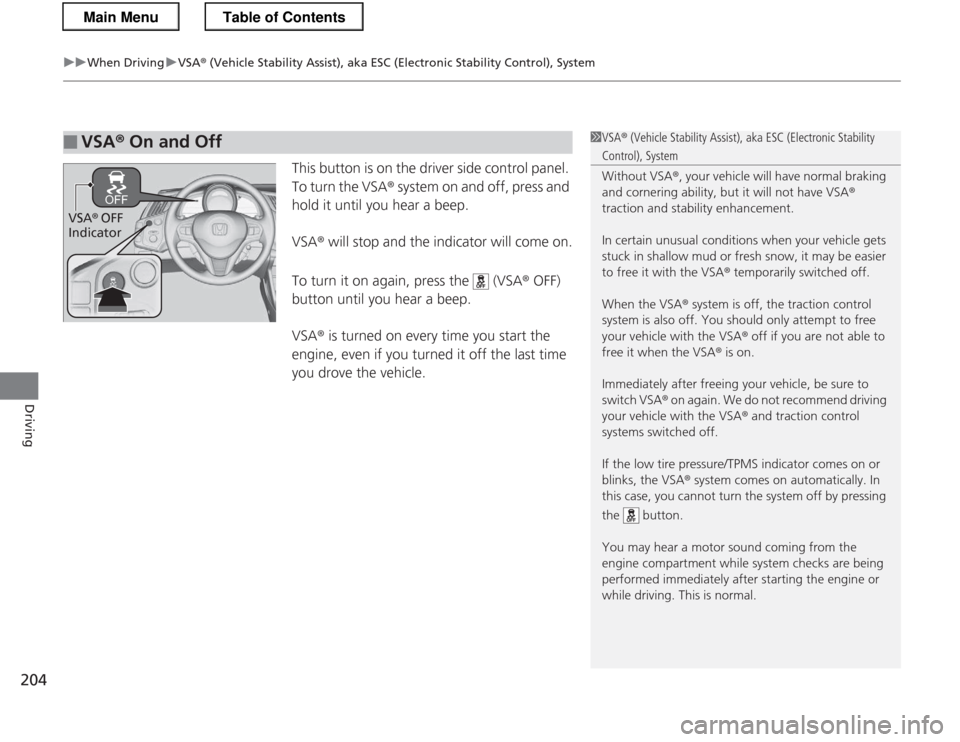
This button is on the driver side control panel.
To turn the VSA ® system on and off, press and
hold it until you hear a beep. VSA ® will stop and the indicator will come on.
To turn it on again, press the (VSA ® OFF)
button until you hear a beep.VSA ® is turned on every time you start the
engine, even if you turned it off the last time
you drove the vehicle.
■VSA ® On and Off1VSA ® (Vehicle Stability Assist), aka ESC (Electronic Stability
Control), System Without VSA ®, your vehicle will have normal braking
and cornering ability, but it will not have VSA ®
traction and stability enhancement.
In certain unusual conditions when your vehicle gets
stuck in shallow mud or fresh snow, it may be easier
to free it with the VSA ® temporarily switched off.
When the VSA ® system is off, the traction control
system is also off. You should only attempt to free
your vehicle with the VSA ® off if you are not able to
free it when the VSA ® is on.
Immediately after freeing your vehicle, be sure to
switch VSA ® on again. We do not recommend driving
your vehicle with the VSA ® and traction control
systems switched off.
If the low tire pressure/TPMS indicator comes on or
blinks, the VSA ® system comes on automatically. In
this case, you cannot turn the system off by pressing
the button.
You may hear a motor sound coming from the
engine compartment while system checks are being
performed immediatel y after starting the engine or
while driving. This is normal.
VSA ® OFF
Indicator
Main MenuTable of Contents
Page 210 of 325
209
uuBrakinguBrake System
Driving
Your vehicle is equipped with disc brakes at all four wheels. A vacuum power assist
helps reduce the effort needed on the brake pedal. The brake assist system increases
the stopping force when you depress the brake pedal hard in an emergency
situation. The anti-lock brake system (ABS) helps you retain steering control when braking very hard. 2 Brake Assist System P. 211
2 ABS (Anti-lock Brake System) P. 210
■Foot Brake1Foot Brake
Check the brakes after driving through deep water,
or if there is a buildup of road surface water. If
necessary, dry the brakes by lightly depressing the
pedal several times.
If you hear a continuous metallic friction sound when
applying the brakes, the brake pads need to be
replaced. Have the vehicle checked by a dealer.
Constantly using the brake pedal while going down a
long hill builds up heat, which reduces the brake
effectiveness. Apply engine braking by taking your
foot off the accelerator pedal and downshifting to a
lower gear. With manual transmission use a lower
gear for greater engine braking.
Do not rest your foot on the brake pedal while
driving, as it will lightly apply the brakes and cause
them to lose effectiveness over time and reduce pad
life. It will also confuse drivers behind you.
Main MenuTable of Contents
Page 211 of 325
210
uuBrakinguABS (Anti-lock Brake System)
Driving
ABS (Anti-lock Brake System)
Helps prevent the wheels from locking up, and helps you retain steering control by
pumping the brakes rapidly, much faster than you.
The electronic brake distribution (EBD) system, which is part of the ABS, also
balances the front-to-rear braking distribution according to vehicle loading.
You should never pump the brake pedal. Let the ABS work for you by always
keeping firm, steady pressure on the brake pedal. This is sometimes referred to as
“stomp and steer.” ■ ABS operation
The brake pedal may pulsate slightly when the ABS is working. Keep holding the
pedal firmly down. On dry pavement, you will need to press on the brake pedal very
hard before the ABS activates. However, you may feel the ABS activate immediately
if you are trying to stop on snow or ice.
When the vehicle speed goes under 6 mph (10 km/h), the ABS stops.
■ABS1ABS (Anti-lock Brake System)
NOTICE
The ABS may not function correctly if you use an
incorrect tire type and size.
When the ABS indicator comes on while driving,
there may be a problem with the system.
While normal braking is not affected, there is a
possibility of the ABS not operating. Have the vehicle
checked by a dealer immediately.
The ABS does not reduce the time or distance it takes
to stop the vehicle. It only helps with steering control
during hard braking.
In the following cases, your vehicle may need more
stopping distance than a vehicle without the ABS: • When driving on rough road surfaces, including
when driving on uneven surfaces, such as gravel or snow.
• When tire chains are installed.
You may hear a motor sound coming from the
engine compartment while system checks are being
performed immediatel y after starting the engine or
while driving. This is normal.
Main MenuTable of Contents