HONDA CROSSTOUR 2014 1.G Owners Manual
Manufacturer: HONDA, Model Year: 2014, Model line: CROSSTOUR, Model: HONDA CROSSTOUR 2014 1.GPages: 573, PDF Size: 21.2 MB
Page 191 of 573
uuAudio System Basic OperationuAudio/Information Screen
190Features
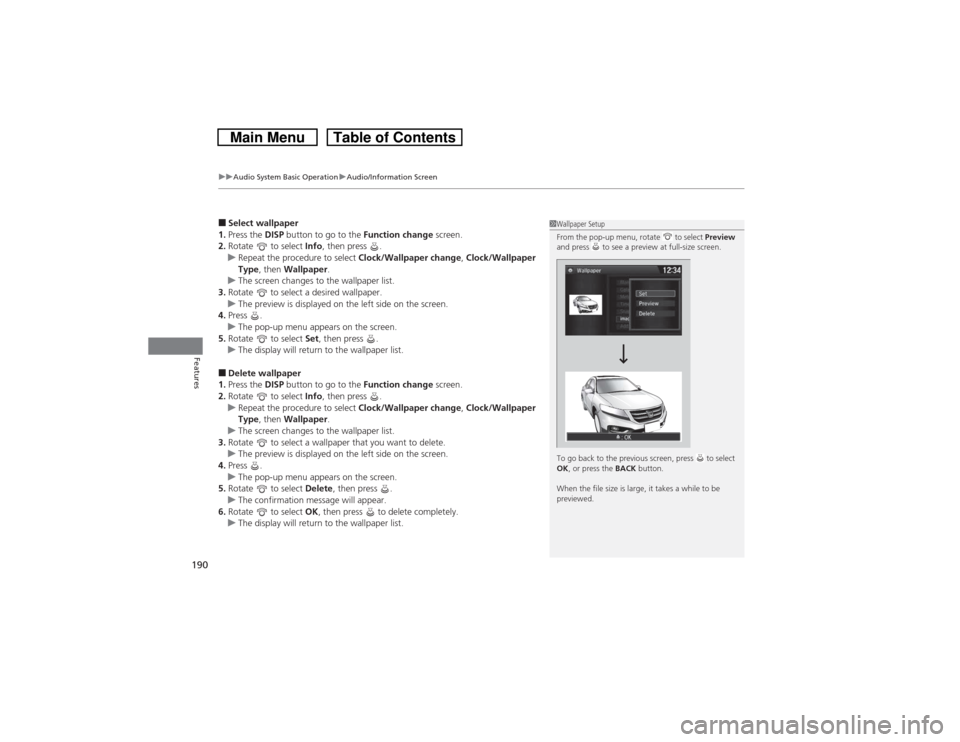
■Select wallpaper
1.Press the DISP button to go to the Function change screen.
2.Rotate to select Info, then press .
uRepeat the procedure to select Clock/Wallpaper change, Clock/Wallpaper
Type, then Wallpaper.
uThe screen changes to the wallpaper list.
3.Rotate to select a desired wallpaper.
uThe preview is displayed on the left side on the screen.
4.Press .
uThe pop-up menu appears on the screen.
5.Rotate to select Set, then press .
uThe display will return to the wallpaper list.■Delete wallpaper
1.Press the DISP button to go to the Function change screen.
2.Rotate to select Info, then press .
uRepeat the procedure to select Clock/Wallpaper change, Clock/Wallpaper
Type, then Wallpaper.
uThe screen changes to the wallpaper list.
3.Rotate to select a wallpaper that you want to delete.
uThe preview is displayed on the left side on the screen.
4.Press .
uThe pop-up menu appears on the screen.
5.Rotate to select Delete, then press .
uThe confirmation message will appear.
6.Rotate to select OK, then press to delete completely.
uThe display will return to the wallpaper list.
1Wallpaper Setup
From the pop-up menu, rotate to select Preview
and press to see a preview at full-size screen.
To go back to the previous screen, press to select
OK, or press the BACK button.
When the file size is large, it takes a while to be
previewed.
Page 192 of 573
191
uuAudio System Basic OperationuAdjusting the Sound
Features
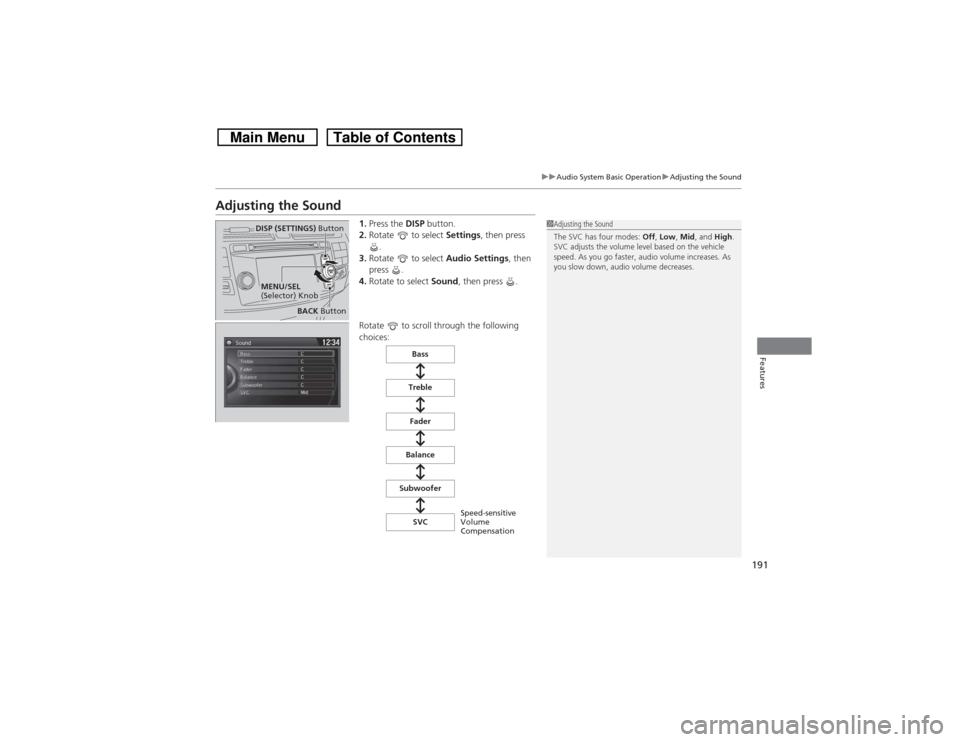
Adjusting the Sound
1.Press the DISP button.
2.Rotate to select Settings, then press
.
3.Rotate to select Audio Settings, then
press .
4.Rotate to select Sound, then press .
Rotate to scroll through the following
choices:
1Adjusting the Sound
The SVC has four modes: Off, Low, Mid, and High.
SVC adjusts the volume level based on the vehicle
speed. As you go faster, audio volume increases. As
you slow down, audio volume decreases.
DISP (SETTINGS) Button
BACK Button
MENU/SEL
(Selector) Knob
Speed-sensitive
Volume
Compensation Bass
Treble
Fader
Balance
Subwoofer
SVC
Page 193 of 573
192
uuAudio System Basic OperationuDisplay Setup
Features
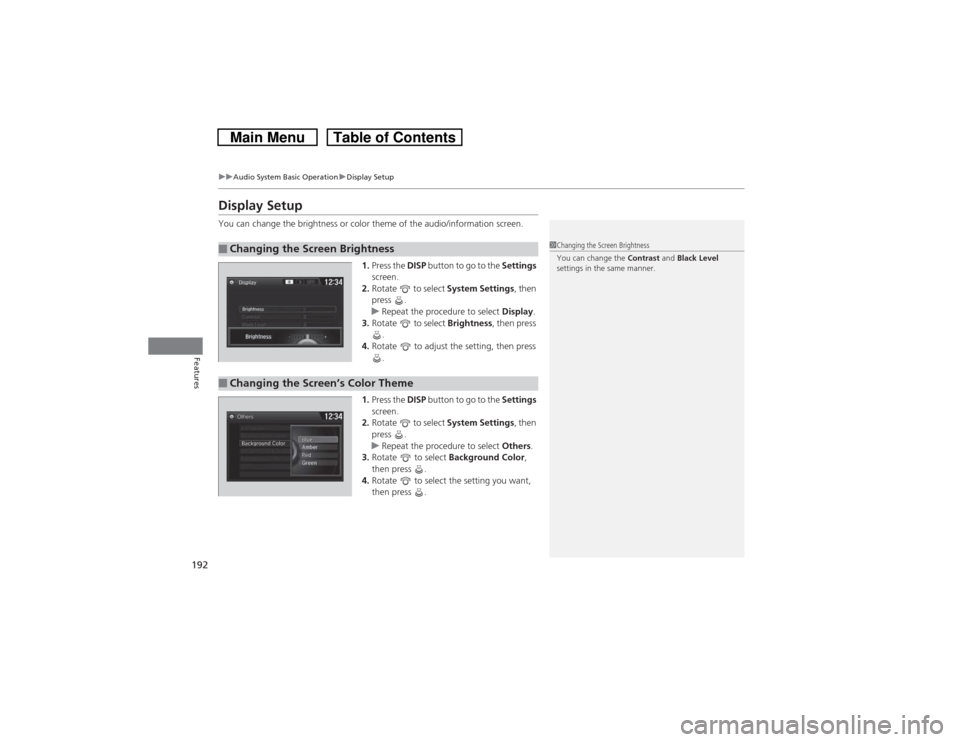
Display SetupYou can change the brightness or color theme of the audio/information screen.
1.Press the DISP button to go to the Settings
screen.
2.Rotate to select System Settings, then
press .
uRepeat the procedure to select Display.
3.Rotate to select Brightness, then press
.
4.Rotate to adjust the setting, then press
.
1.Press the DISP button to go to the Settings
screen.
2.Rotate to select System Settings, then
press .
uRepeat the procedure to select Others.
3.Rotate to select Background Color,
then press .
4.Rotate to select the setting you want,
then press .■Changing the Screen Brightness
1Changing the Screen Brightness
You can change the Contrast and Black Level
settings in the same manner.
■Changing the Screen’s Color Theme
Page 194 of 573
193
uuAudio System Basic OperationuPlaying AM/FM Radio
Continued
Features
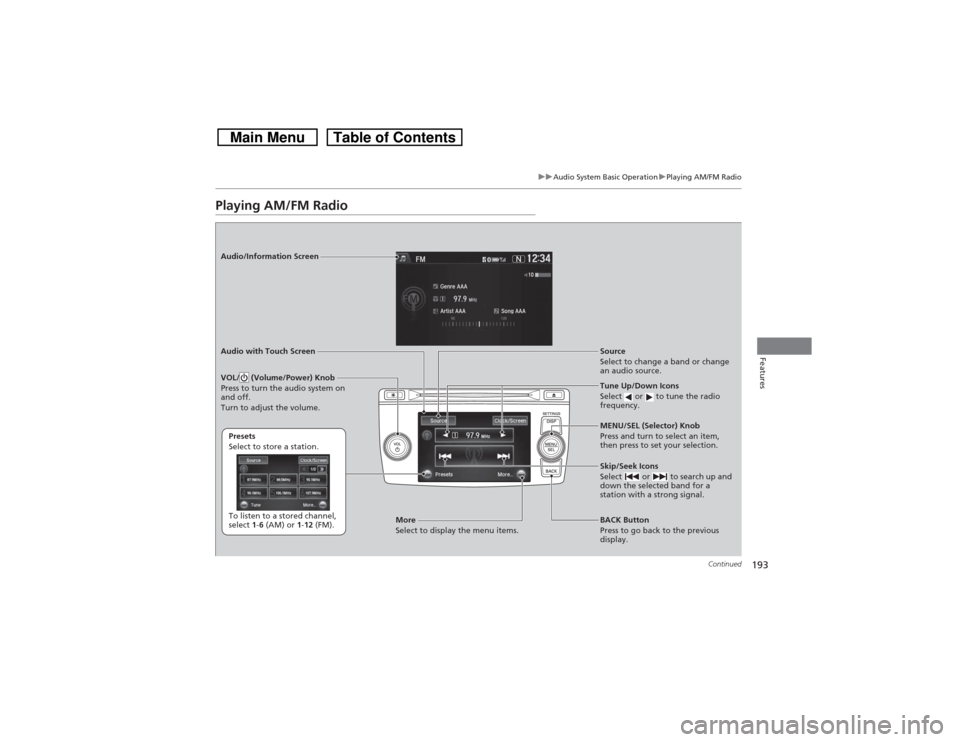
Playing AM/FM RadioAudio/Information Screen
Audio with Touch Screen
Tune Up/Down Icons
Select or to tune the radio
frequency.
BACK Button
Press to go back to the previous
display. MENU/SEL (Selector) Knob
Press and turn to select an item,
then press to set your selection.
VOL/ (Volume/Power) Knob
Press to turn the audio system on
and off.
Turn to adjust the volume.
Source
Select to change a band or change
an audio source.
To listen to a stored channel,
select 1-6 (AM) or 1-12 (FM). Presets
Select to store a station.
Skip/Seek Icons
Select or to search up and
down the selected band for a
station with a strong signal.
More
Select to display the menu items.
Page 195 of 573
uuAudio System Basic OperationuPlaying AM/FM Radio
194Features
To store a station:
1.Tune to the selected station.
2.Press to switch to the Audio menu screen.
3.Rotate to select Save Preset, then press .
4.Rotate to select the preset number you want to store that station, then press
.
2.Select More.
3.Select Save Preset.
4.Select the preset number you want to store that station.■Preset Memory
1Playing AM/FM Radio
The ST indicator appears on the display indicating
stereo FM broadcasts.
Stereo reproduction in AM is not available.
Switching the Audio Mode
Press the SOURCE button on the steering wheel.
2Audio Remote Controls P. 168
You can also switch the mode by pressing and
selecting Change Source on the Audio menu
screen.
You can store 6 AM stations and 12 FM stations into
the preset memory.
MENU/SEL (Selector) KnobAudio with Touch Screen
Page 196 of 573
Continued
195
uuAudio System Basic OperationuPlaying AM/FM Radio
Features
Provides text data information related to your selected RDS-capable FM station.■To find an RDS station from Station List
1.Press to switch to the Audio menu screen while listening to an FM station.
2.Rotate to select Station List, then press .
3.Rotate to select the station, then press .■Manual update
Updates your available station list at any time.
1.Press to switch to the Audio menu screen while listening to an FM station.
2.Rotate to select Station List, then press .
3.Rotate to select Refresh, then press .■Radio Data System (RDS)
1Radio Data System (RDS)
When you select an RDS-capable FM station, the RDS
automatically turns on, and the frequency display
changes to the station name. However, when the
signals of that station become weak, the display
changes from the station name to the frequency.
Page 197 of 573
196
uuAudio System Basic OperationuPlaying AM/FM Radio
Features
■Radio text
Displays the radio text information of the selected RDS station.
1.Press to switch to the Audio menu screen.
2.Rotate to select Radio Text, then press .■Scan
Samples each of the strongest stations on the selected band for 10 seconds.
1.Press to switch to the Audio menu screen.
2.Rotate to select Scan, then press .
To turn off scan, press to select Cancel Scan, or press the BACK button.
1.Select More.
2.Select Scan.
To turn off scan, select Cancel Scan.MENU/SEL (Selector) KnobAudio with Touch Screen
Page 198 of 573
197
uuAudio System Basic OperationuPlaying XM® Radio
*
Continued
Features
Playing XM® Radio
*
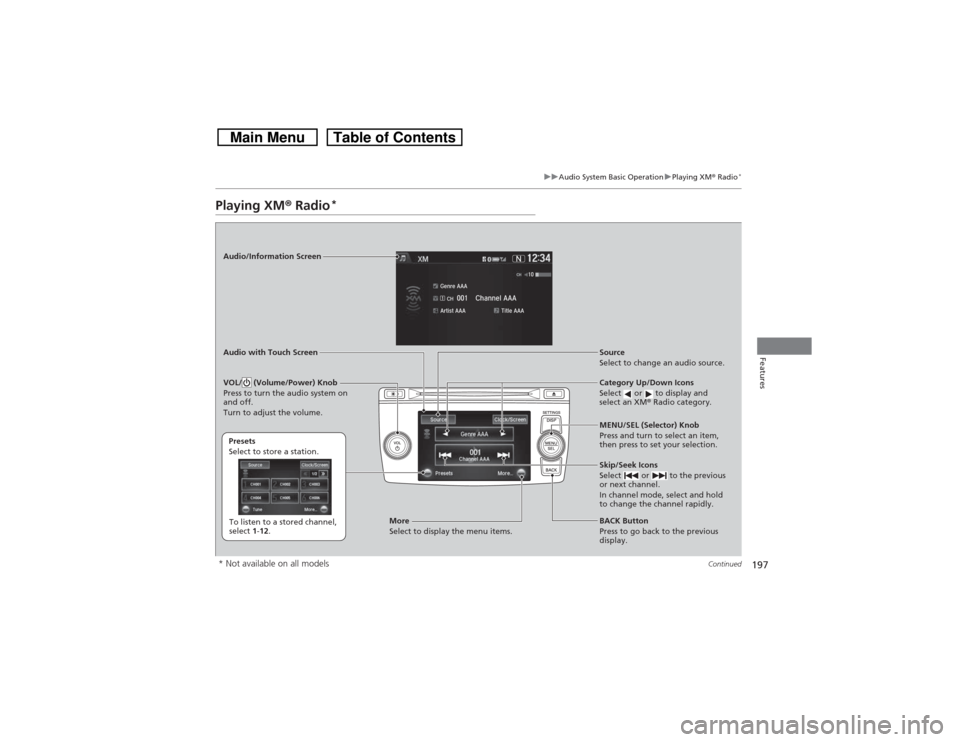
Audio/Information Screen
Audio with Touch Screen
Category Up/Down Icons
Select or to display and
select an XM® Radio category.
BACK Button
Press to go back to the previous
display. MENU/SEL (Selector) Knob
Press and turn to select an item,
then press to set your selection.
VOL/ (Volume/Power) Knob
Press to turn the audio system on
and off.
Turn to adjust the volume.
Source
Select to change an audio source.
To listen to a stored channel,
select 1-12. Presets
Select to store a station.
Skip/Seek Icons
Select or to the previous
or next channel.
In channel mode, select and hold
to change the channel rapidly.
More
Select to display the menu items.
* Not available on all models
Page 199 of 573
uuAudio System Basic OperationuPlaying XM® Radio
*
198Features
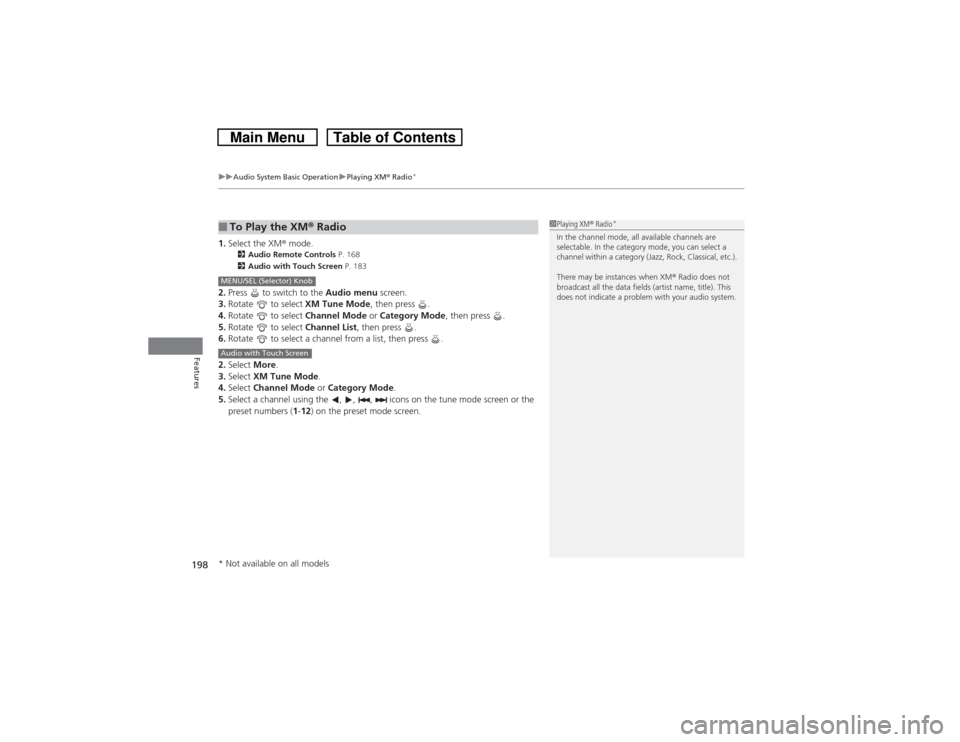
1.Select the XM® mode.
2Audio Remote Controls P. 168
2Audio with Touch Screen P. 183
2.Press to switch to the Audio menu screen.
3.Rotate to select XM Tune Mode, then press .
4.Rotate to select Channel Mode or Category Mode, then press .
5.Rotate to select Channel List, then press .
6.Rotate to select a channel from a list, then press .
2.Select More.
3.Select XM Tune Mode.
4.Select Channel Mode or Category Mode.
5.Select a channel using the , , , icons on the tune mode screen or the
preset numbers (1-12) on the preset mode screen.■To Play the XM® Radio
1Playing XM® Radio
*
In the channel mode, all available channels are
selectable. In the category mode, you can select a
channel within a category (Jazz, Rock, Classical, etc.).
There may be instances when XM® Radio does not
broadcast all the data fields (artist name, title). This
does not indicate a problem with your audio system.
MENU/SEL (Selector) KnobAudio with Touch Screen* Not available on all models
Page 200 of 573
199
uuAudio System Basic OperationuPlaying XM® Radio
*
Features
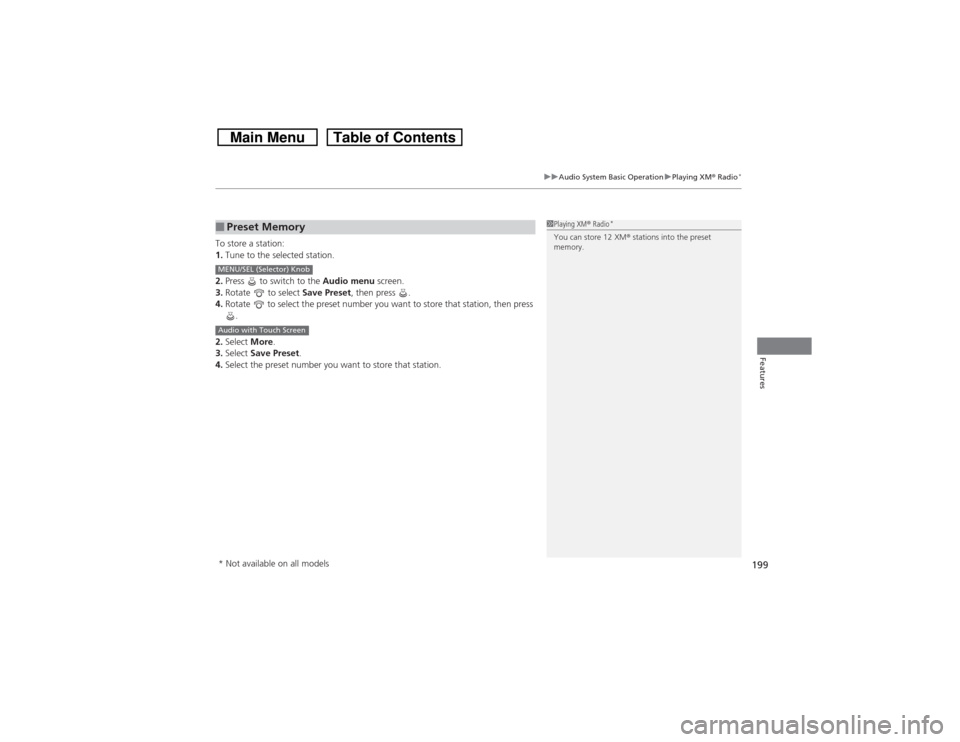
To store a station:
1.Tune to the selected station.
2.Press to switch to the Audio menu screen.
3.Rotate to select Save Preset, then press .
4.Rotate to select the preset number you want to store that station, then press
.
2.Select More.
3.Select Save Preset.
4.Select the preset number you want to store that station.■Preset Memory
1Playing XM® Radio
*
You can store 12 XM® stations into the preset
memory.
MENU/SEL (Selector) KnobAudio with Touch Screen* Not available on all models