clock setting HONDA ELEMENT 2010 1.G Owners Manual
[x] Cancel search | Manufacturer: HONDA, Model Year: 2010, Model line: ELEMENT, Model: HONDA ELEMENT 2010 1.GPages: 342, PDF Size: 5.76 MB
Page 9 of 342

Wearing a Lap/ShoulderBelt .................................. 14, 19
Seats ............................................ 83
Head Restraints ........................85
Seats, Adjusting the .....................83
Sensors Driver's Seat Position Sensor ...27
Front Passenger's Weight Sensors ................................ 27
Impact Sensors ...................22, 23
Serial Number ............................ 306
Service Intervals .........................243
Service Manual (U.S. only) ........325
Service Station Procedures ........199
Setting the Clock ........................189
Shifting the Automatic Transmission .......................... 219
Shift Lever Position Indicators ...219
Shift Lock Release ......................221
Side Airbags ................................. 28
How the Side Airbag Off
Indicator Works ...................32
How Your Side Airbags Work ..28
Side Curtain Airbags ....................30
How Your Side Curtain Airbags Work .................................... 30Side Marker Lights, Bulb
Replacement in .......................265
Signaling Turns ............................ 60
Snow Tires ................................. 275
Sound System ............................ 109
Spare Tire .................................. 282
Inflating ........................... 271, 282
Specifications .......................... 310
Spark Plugs ................................ 308
Specifications ............................. 308
Speed Control ............................ 193
Speed Limiter ......................218, 221
Speedometer ................................ 64
SRS, Additional Information .........22
Additional Safety Precautions ...34
Airbag Service .......................... 33
Airbag System Components .....22
How the Side Airbag Off Indicator Works ...................32
How the SRS Indicator Works ..31
How Your Front Airbags
Work .................................... 25
How Your Side Airbags Work ..28
How Your Side Curtain Airbags Work .................................... 30
SRS Indicator ......................... 31, 59START (Ignition Key Position)
.....79
Starting the Engine ....................216
In Cold Weather at High Altitude ................................ 216
With a Dead Battery ................291
State Emissions Testing .............319
Steam Coming from Engine .......293
Steering Wheel Adjustment ............................... 74
Anti-theft Column Lock ............79
Buttons ........................... 191, 193
Stereo Sound System .................109
Storing Your Vehicle ..................278
Sun Visor ................................... 100
Supplemental Restraint
System .............................. 9, 22
Servicing .................................. 33
SRS Indicator ...................... 31, 59
System Components ................22
Synthetic Oil .............................. 252
T
Tachometer .................................. 64
CONTINUED
Index
IX
INDEX
Page 119 of 342

The heating and air conditioning
system in your vehicle provides a
comfortable driving environment in all
weather conditions.
The standard audio system has many
features. This section describes those
features and how to use them. (If you
have an optional audio system, refer to
the operating instructions that came
with it.)
On EX and SC models
Your vehicle has an anti-theft audio
system that requires a code number to
enable it.
Vents, Heating, and A/C..............
104
Air Flow Controls .....................105
Ventilation ............................... 106
Using the Heater .....................106
Using the A/C ......................... 106
Dehumidify the Interior ...........
107 To Defog and Defrost
..............107
To Remove Exterior Frost or Ice From the Windows ..............108
To Turn Everything Off ............108
Audio System .............................. 109
Playing the FM/AM Radio (Models without navigation
system) ................................ 110
Playing the XM
®Radio (Models
without navigation system) ......113
Playing a Disc (Models without navigation system) ...................119
Disc Player Error Messages
(Models without navigationsystem) ................................ 125
Disc Changer Error Messages
(Models without navigationsystem) ................................ 126
Playing the FM/AM Radio
(Models with navigationsystem) ................................ 127
Playing the XM
®Radio (Models
with navigation system) ...........
132
Playing a Disc (Models with navigation system) ...................140Disc Player Error Messages
(Models with navigationsystem) ................................ 148
Playing a PC Card (Models with
navigation system) ...................149
PC Card Error Messages (Models with navigation system) ...........161
Playing an iPod
®(Models with
navigation system) ...................162
iPod
®Error Messages (Models
with navigation system) ...........
172
Playing a USB Flash Memory Device (Models with navigation
system) ................................ 173
USB Flash Memory Device Error
Messages (Models with
navigation system) ...............182
Protecting Your Discs ..................183
FM/AM Radio Reception .............186
Radio Theft Protection .................188
Setting the Clock .........................189
Remote Audio Controls ................191
Auxiliary Input Jack .....................
192
Cruise Control ............................. 193
Rearview Camera and Monitor .....196
Features
103
Features
Page 205 of 342

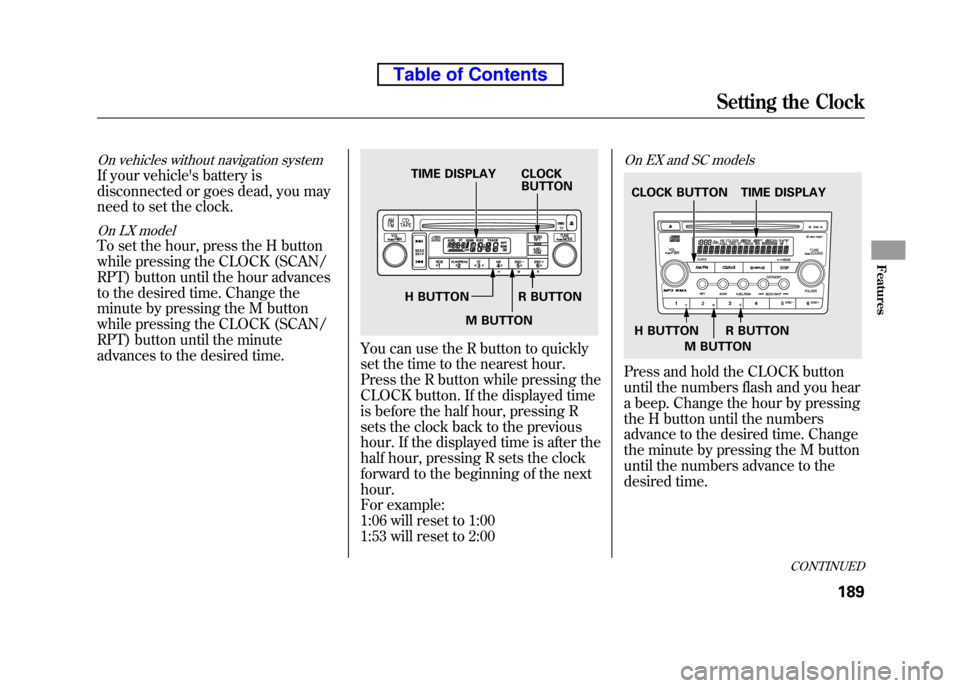
On vehicles without navigation system
If your vehicle's battery is
disconnected or goes dead, you may
need to set the clock.
On LX model
To set the hour, press the H button
while pressing the CLOCK (SCAN/
RPT) button until the hour advances
to the desired time. Change the
minute by pressing the M button
while pressing the CLOCK (SCAN/
RPT) button until the minute
advances to the desired time.
You can use the R button to quickly
set the time to the nearest hour.
Press the R button while pressing the
CLOCK button. If the displayed time
is before the half hour, pressing R
sets the clock back to the previous
hour. If the displayed time is after the
half hour, pressing R sets the clock
forward to the beginning of the nexthour.
For example:
1:06 will reset to 1:00
1:53 will reset to 2:00
On EX and SC models
Press and hold the CLOCK button
until the numbers flash and you hear
a beep. Change the hour by pressing
the H button until the numbers
advance to the desired time. Change
the minute by pressing the M button
until the numbers advance to the
desired time.
TIME DISPLAY CLOCKBUTTON
H BUTTON R BUTTON M BUTTON
TIME DISPLAY
CLOCK BUTTON
H BUTTON R BUTTON M BUTTON
CONTINUED
Setting the Clock
189
Features
Table of Contents
Page 206 of 342

You can quickly set the time to the
nearest hour. If the displayed time is
before the half hour, press the R
(RESET) button to set the clock back
to the previous hour. If the displayed
time is after the half hour, pressing R
sets the clock forward to the
beginning of the next hour.
For example:
1:06 will reset to 1:00
1:53 will reset to 2:00
When you are finished, press the
CLOCK button again.On vehicles with navigation system
The navigation system receives
signals from the global positioning
system (GPS), and the displayed
time is updated automatically by the
GPS. Refer to the navigation system
manual for how to adjust the time.
Setting the Clock
190
Table of Contents