ACC HONDA INSIGHT 2020 Owner's Manual (in English)
[x] Cancel search | Manufacturer: HONDA, Model Year: 2020, Model line: INSIGHT, Model: HONDA INSIGHT 2020Pages: 675, PDF Size: 36.95 MB
Page 510 of 675
uuHonda Sensing ®u Adaptive Cruise Control (ACC) with Low Speed Follow
508
Driving
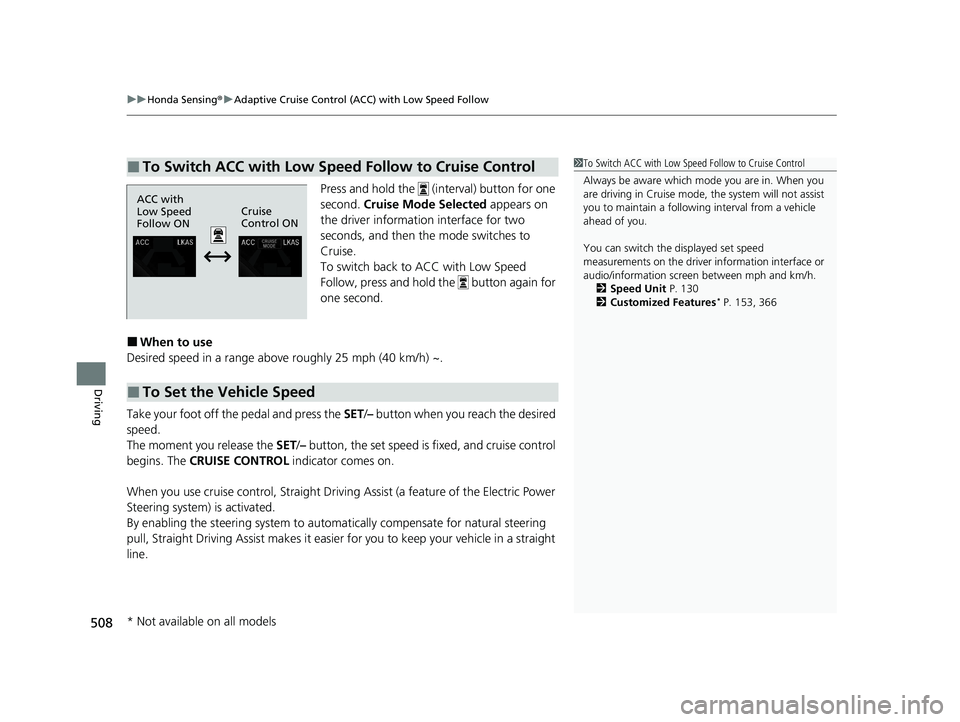
Press and hold the (interval) button for one
second. Cruise Mode Selected appears on
the driver information interface for two
seconds, and then the mode switches to
Cruise.
To switch back to ACC with Low Speed
Follow, press and hold the button again for
one second.
■When to use
Desired speed in a range above roughly 25 mph (40 km/h) ~.
Take your foot off the pedal and press the SET/– button when you reach the desired
speed.
The moment you release the SET /– button, the set speed is fixed, and cruise control
begins. The CRUISE CONTROL indicator comes on.
When you use cruise control, Straight Driv ing Assist (a feature of the Electric Power
Steering system) is activated.
By enabling the steering system to automa tically compensate for natural steering
pull, Straight Driving Assist makes it easier for you to keep your vehicle in a straight
line.
■To Switch ACC with Low Speed Follow to Cruise Control1 To Switch ACC with Low Speed Follow to Cruise Control
Always be aware which mode you are in. When you
are driving in Cruise mode, the system will not assist
you to maintain a followi ng interval from a vehicle
ahead of you.
You can switch the displayed set speed
measurements on the driver information interface or
audio/information screen between mph and km/h. 2 Speed Unit P. 130
2 Customized Features
* P. 153, 366
ACC with
Low Speed
Follow ON Cruise
Control ON
■To Set the Vehicle Speed
* Not available on all models
20 INSIGHT-31TXM6100.book 508 ページ 2019年4月24日 水曜日 午後2時2分
Page 511 of 675
509
uuHonda Sensing ®u Adaptive Cruise Control (ACC) with Low Speed Follow
Driving
Each time you press the RES/+ or SET/ – button, the vehicle speed is increased or
decreased by about 1 mph (1.6 km/h).
If you keep the RES/+ or SET/– button pressed, the vehi cle speed increases or
decreases until you release it . This speed is then set.
To cancel cruise control, do any of the following:
• Press the CANCEL button.
• Press the MAIN button.
• Depress the brake pedal.
The CRUISE CONTROL indicator goes off.
■To Adjust the Vehicle Speed
■To Cancel1To Cancel
Resuming the prior set speed:
After cruise control has be en canceled, you can still
resume the prior set speed by pressing the RES/+
button while driving at a speed of at least 25 mph (40
km/h) or more.
You cannot set or resume in the following situations:
•When vehicle speed is less than 25 mph (40 km/h)•When the MAIN button is turned off.
At vehicle speeds of 22 m ph (35 km/h) or less, cruise
control is canceled automatically.
20 INSIGHT-31TXM6100.book 509 ページ 2019年4月24日 水曜日 午後2時2分
Page 512 of 675
510
uuHonda Sensing ®u Lane Keeping Assist System (LKAS)
Driving
Lane Keeping Assist System (LKAS)
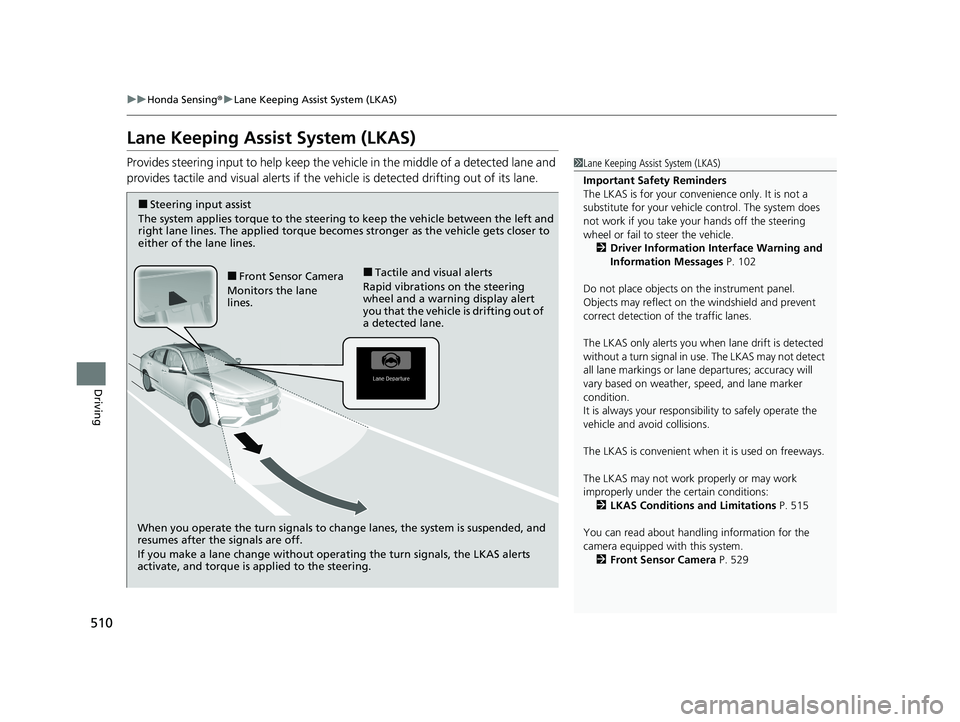
Provides steering input to help keep the vehicle in the middle of a detected lane and
provides tactile and visual alerts if the ve hicle is detected drifting out of its lane.1Lane Keeping Assist System (LKAS)
Important Safety Reminders
The LKAS is for your convenience only. It is not a
substitute for your vehicl e control. The system does
not work if you take y our hands off the steering
wheel or fail to steer the vehicle.
2 Driver Information Interface Warning and
Information Messages P. 102
Do not place objects on the instrument panel.
Objects may reflect on th e windshield and prevent
correct detection of the traffic lanes.
The LKAS only alerts you when lane drift is detected
without a turn signal in use. The LKAS may not detect
all lane markings or lane departures; accuracy will
vary based on weather, speed, and lane marker
condition.
It is always your responsibility to safely operate the
vehicle and avoid collisions.
The LKAS is convenient when it is used on freeways.
The LKAS may not work properly or may work
improperly under the certain conditions:
2 LKAS Conditions and Limitations P. 515
You can read about handling information for the
camera equipped with this system. 2 Front Sensor Camera P. 529
When you operate the turn signals to chan ge lanes, the system is suspended, and
resumes after the signals are off.
If you make a lane change without operating the turn signals, the LKAS alerts
activate, and torque is applied to the steering.
■Front Sensor Camera
Monitors the lane
lines.■Tactile and visual alerts
Rapid vibrations on the steering
wheel and a warning display alert
you that the vehicle is drifting out of
a detected lane.
■Steering input assist
The system applies torque to the steering to keep the vehicle between the left and
right lane lines. The applied torque become s stronger as the vehicle gets closer to
either of the lane lines.
20 INSIGHT-31TXM6100.book 510 ページ 2019年4月24日 水曜日 午後2時2分
Page 515 of 675
Continued513
uuHonda Sensing ®u Lane Keeping Assist System (LKAS)
Driving
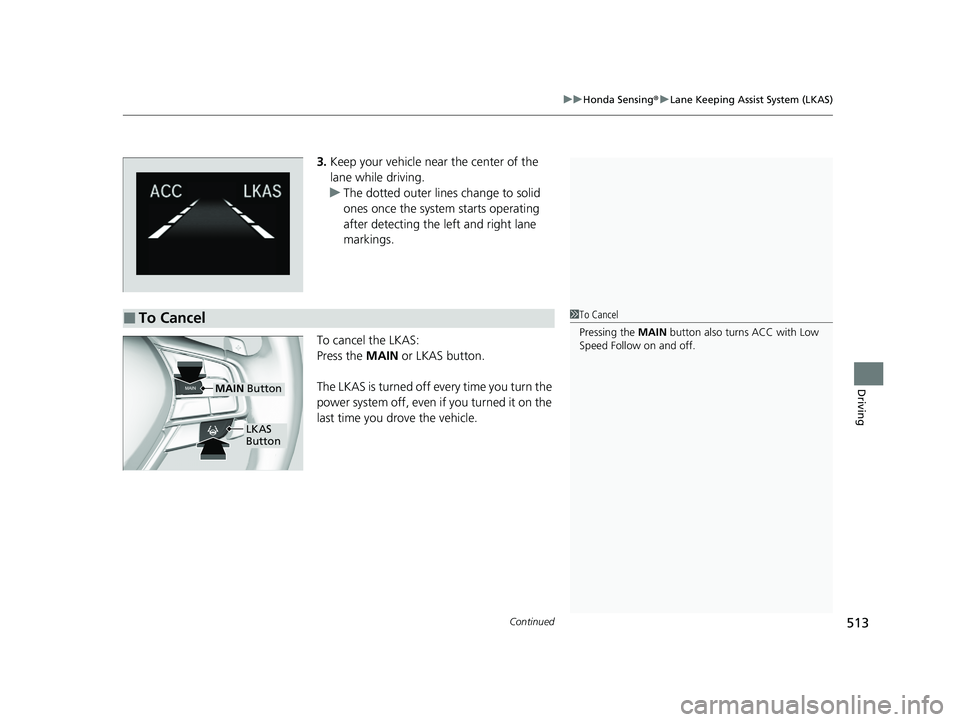
3. Keep your vehicle near the center of the
lane while driving.
u The dotted outer lines change to solid
ones once the system starts operating
after detecting the left and right lane
markings.
To cancel the LKAS:
Press the MAIN or LKAS button.
The LKAS is turned off every time you turn the
power system off, even if you turned it on the
last time you drove the vehicle.
■To Cancel1 To Cancel
Pressing the MAIN button also turns ACC with Low
Speed Follow on and off.
MAIN Button
LKAS
Button
20 INSIGHT-31TXM6100.book 513 ページ 2019年4月24日 水曜日 午後2時2分
Page 520 of 675
518
uuHonda Sensing ®u Road Departure Mitigation (RDM) System
Driving
Road Departure Mitigation (RDM) System
Alerts and helps to assist you when the system detects a possibility of your vehicle
unintentionally crossing over detected la ne markings and/or leaving the roadway
altogether.
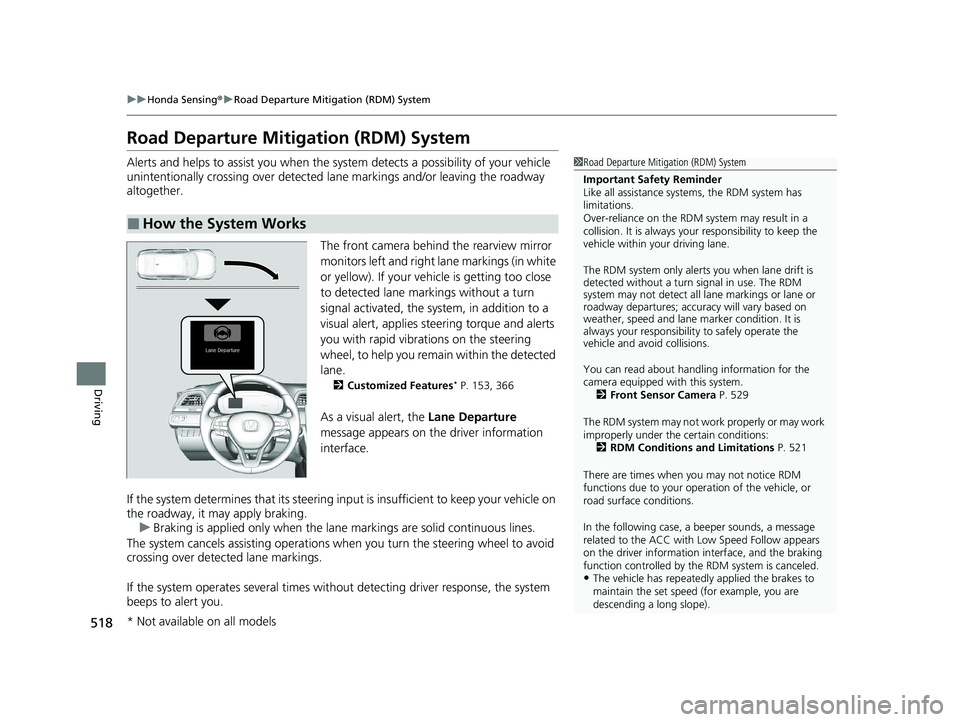
The front camera behind the rearview mirror
monitors left and right lane markings (in white
or yellow). If your vehicle is getting too close
to detected lane markings without a turn
signal activated, the system, in addition to a
visual alert, applies steering torque and alerts
you with rapid vibrations on the steering
wheel, to help you remain within the detected
lane.
2 Customized Features* P. 153, 366
As a visual alert, the Lane Departure
message appears on the driver information
interface.
If the system determines that its steering in put is insufficient to keep your vehicle on
the roadway, it may apply braking. u Braking is applied only when the lane markings are solid continuous lines.
The system cancels assisting operations when you turn th e steering wheel to avoid
crossing over detected lane markings.
If the system operates several times without detecting driver response, the system
beeps to alert you.
■How the System Works
1 Road Departure Mitigation (RDM) System
Important Safety Reminder
Like all assistance systems, the RDM system has
limitations.
Over-reliance on the RDM system may result in a
collision. It is always your responsibility to keep the
vehicle within your driving lane.
The RDM system only alerts you when lane drift is
detected without a turn signal in use. The RDM
system may not detect all la ne markings or lane or
roadway departures; accu racy will vary based on
weather, speed and lane marker condition. It is
always your responsibilit y to safely operate the
vehicle and avoid collisions.
You can read about handling information for the
camera equipped with this system.
2 Front Sensor Camera P. 529
The RDM system may not wo rk properly or may work
improperly under the certain conditions: 2 RDM Conditions and Limitations P. 521
There are times when you may not notice RDM
functions due to your opera tion of the vehicle, or
road surface conditions.
In the following case, a beeper sounds, a message
related to the ACC with Low Speed Follow appears
on the driver information interface, and the braking
function controlled by the RDM system is canceled.
•The vehicle has repeatedly applied the brakes to
maintain the set speed (for example, you are
descending a long slope).
* Not available on all models
20 INSIGHT-31TXM6100.book 518 ページ 2019年4月24日 水曜日 午後2時2分
Page 521 of 675
Continued519
uuHonda Sensing ®u Road Departure Mitigation (RDM) System
Driving
The system becomes ready to start sear ching for lane markings when all the
following conditions are met:
• The vehicle is traveling between about 45 and 90 mph (72 and 145 km/h).
• The vehicle is on a straight or slightly curved road.
• The turn signals are off.
• The brake pedal is not depressed.
• The wipers are not in continuous operation.
• The vehicle is not accelera ting or braking, and the steering wheel is not being
turned.
• The system makes a determination that th e driver is not actively accelerating,
braking or steering.
■How the System Activates1 Road Departure Mitigation (RDM) System
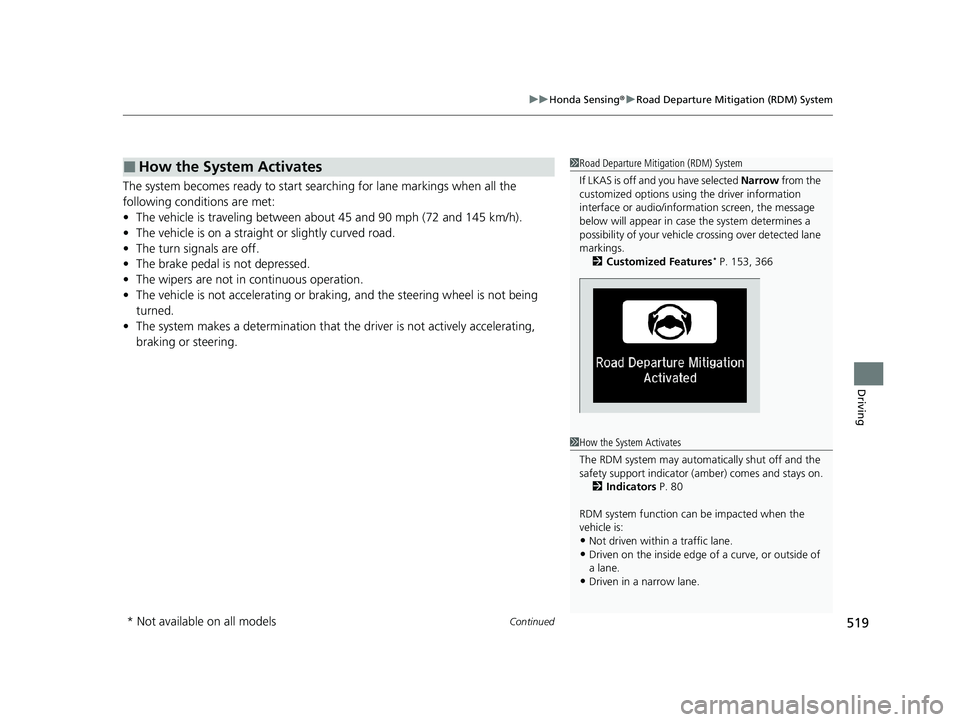
If LKAS is off and you have selected Narrow from the
customized options using the driver information
interface or audio/inform ation screen, the message
below will appear in case the system determines a
possibility of your vehicle crossing ov er detected lane
markings. 2 Customized Features
* P. 153, 366
1How the System Activates
The RDM system may automa tically shut off and the
safety support indicator (a mber) comes and stays on.
2 Indicators P. 80
RDM system function can be impacted when the
vehicle is:
•Not driven within a traffic lane.•Driven on the inside edge of a curve, or outside of
a lane.
•Driven in a narrow lane.
* Not available on all models
20 INSIGHT-31TXM6100.book 519 ページ 2019年4月24日 水曜日 午後2時2分
Page 522 of 675
uuHonda Sensing ®u Road Departure Mitigation (RDM) System
520
Driving
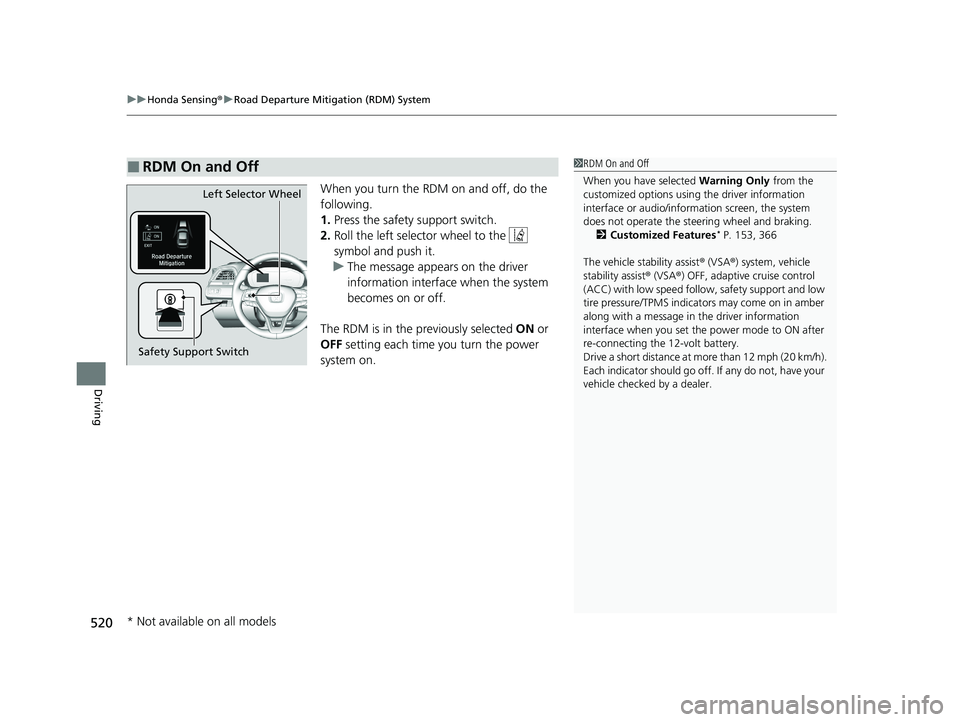
When you turn the RDM on and off, do the
following.
1. Press the safety support switch.
2. Roll the left selector wheel to the
symbol and push it.
u The message appears on the driver
information interface when the system
becomes on or off.
The RDM is in the previously selected ON or
OFF setting each time you turn the power
system on.
■RDM On and Off1 RDM On and Off
When you have selected Warning Only from the
customized options using the driver information
interface or audio/information screen, the system
does not operate the steering wheel and braking. 2 Customized Features
* P. 153, 366
The vehicle stability assist ® (VSA ®) system, vehicle
stability assist ® (VSA ®) OFF, adaptive cruise control
(ACC) with low speed follow, safety support and low
tire pressure/TPMS indicato rs may come on in amber
along with a message in the driver information
interface when you set the power mode to ON after
re-connecting the 12-volt battery.
Drive a short distance at mo re than 12 mph (20 km/h).
Each indicator should go off. If any do not, have your
vehicle checked by a dealer.
Safety Support Switch Left Selector Wheel
* Not available on all models
20 INSIGHT-31TXM6100.book 520 ページ 2019年4月24日 水曜日 午後2時2分
Page 531 of 675
529
uuHonda Sensing ®u Front Sensor Camera
Continued
Driving
Front Sensor Camera
The camera, used in systems such as LKAS, RDM, ACC with Low Speed Follow,
CMBSTM and traffic sign recognition system, is designed to detect an object that
triggers any of the system s to operate its functions.
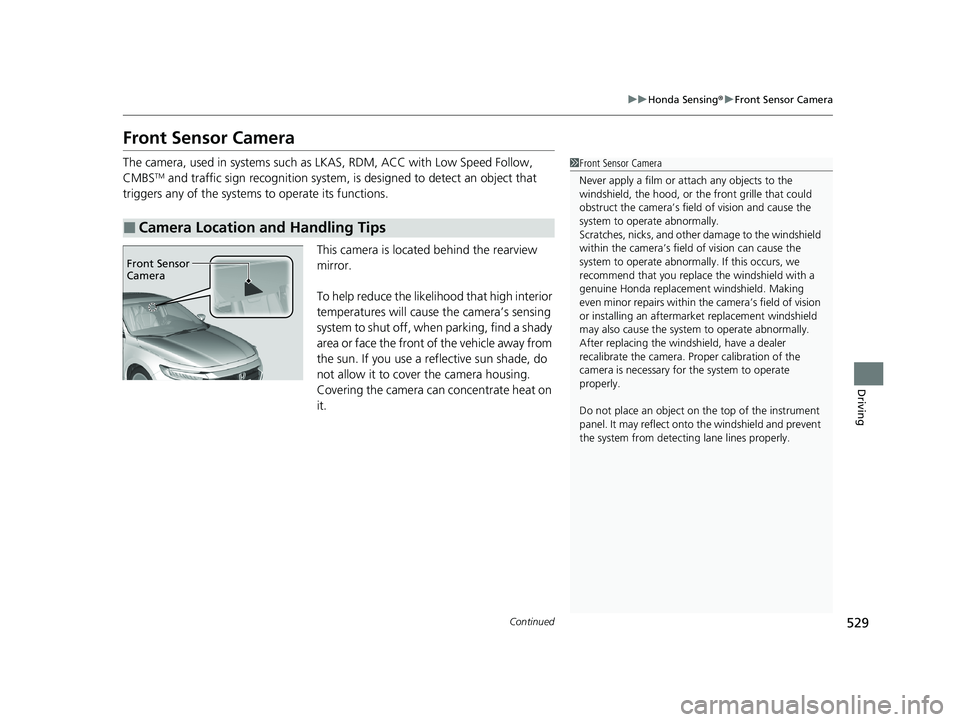
This camera is located behind the rearview
mirror.
To help reduce the likelihood that high interior
temperatures will cause the camera’s sensing
system to shut off, when parking, find a shady
area or face the front of the vehicle away from
the sun. If you use a reflective sun shade, do
not allow it to cover the camera housing.
Covering the camera can concentrate heat on
it.
■Camera Location and Handling Tips
1 Front Sensor Camera
Never apply a film or attach any objects to the
windshield, the hood, or th e front grille that could
obstruct the camera’s fiel d of vision and cause the
system to operate abnormally.
Scratches, nicks, and othe r damage to the windshield
within the camera’s fiel d of vision can cause the
system to operate abnormall y. If this occurs, we
recommend that you replac e the windshield with a
genuine Honda replacem ent windshield. Making
even minor repairs within th e camera’s field of vision
or installing an aftermarket replacement windshield
may also cause the system to operate abnormally.
After replacing the winds hield, have a dealer
recalibrate the camera. Pr oper calibration of the
camera is necessary for the system to operate
properly.
Do not place an object on the top of the instrument
panel. It may reflect onto the windshield and prevent
the system from detecting lane lines properly.
Front Sensor
Camera
20 INSIGHT-31TXM6100.book 529 ページ 2019年4月24日 水曜日 午後2時2分
Page 535 of 675
Continued533
uuBraking uBrake System
Driving
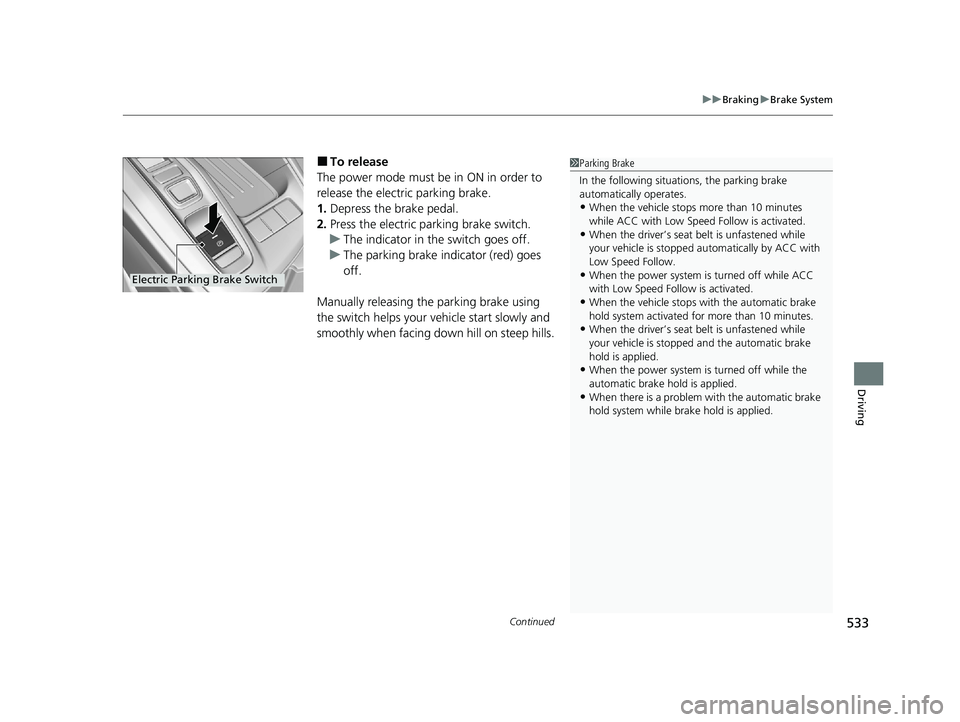
■To release
The power mode must be in ON in order to
release the electric parking brake.
1. Depress the brake pedal.
2. Press the electric parking brake switch.
u The indicator in the switch goes off.
u The parking brake indicator (red) goes
off.
Manually releasing the parking brake using
the switch helps your vehicle start slowly and
smoothly when facing down hill on steep hills.1 Parking Brake
In the following situations, the parking brake
automatically operates.
•When the vehicle stops more than 10 minutes
while ACC with Low Speed Follow is activated.
•When the driver’s seat belt is unfastened while
your vehicle is stopped au tomatically by ACC with
Low Speed Follow.
•When the power system is turned off while ACC
with Low Speed Follow is activated.
•When the vehicle stops with the automatic brake
hold system activated for more than 10 minutes.
•When the driver’s seat belt is unfastened while
your vehicle is stopped and the automatic brake
hold is applied.
•When the power system is turned off while the
automatic brake hold is applied.
•When there is a problem with the automatic brake
hold system while br ake hold is applied.
Electric Parking Brake Switch
20 INSIGHT-31TXM6100.book 533 ページ 2019年4月24日 水曜日 午後2時2分
Page 536 of 675
uuBraking uBrake System
534
Driving
■Automatic parking brake feature operation
If the automatic parking brake feature has been activated:
• The parking brake is applied automatica lly when you set the power mode to
VEHICLE OFF.
• To confirm that the parking brake is app lied, check if the parking brake indicator
(red) is on.
2 Activating and deactivating the automatic parking brake feature P. 535
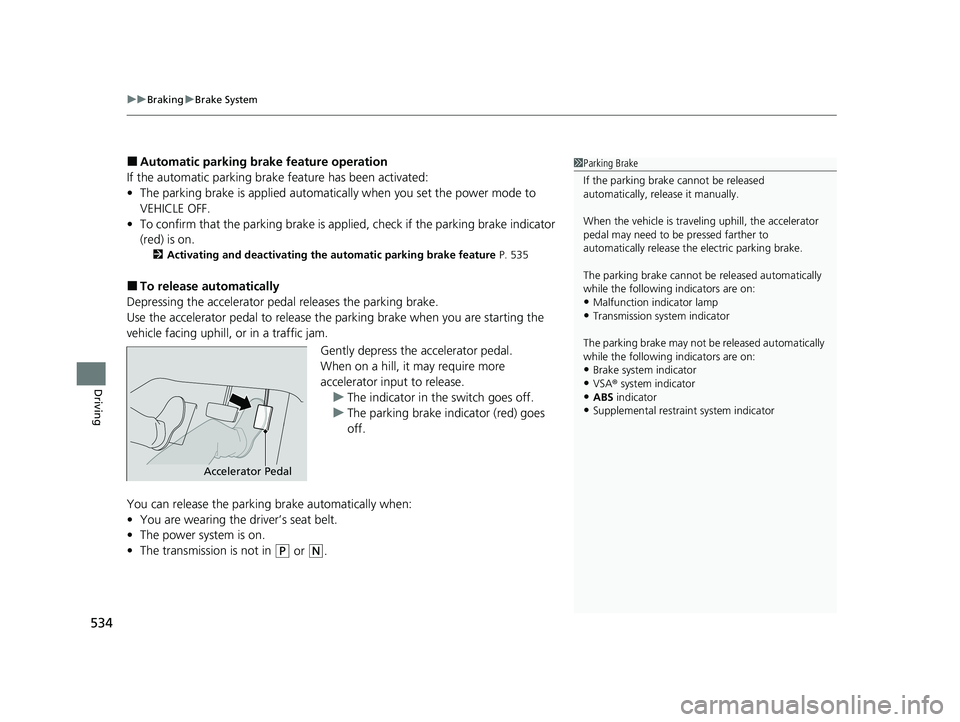
■To release automatically
Depressing the accelerator pedal releases the parking brake.
Use the accelerator pedal to release the parking brake when you are starting the
vehicle facing uphill, or in a traffic jam.
Gently depress the accelerator pedal.
When on a hill, it may require more
accelerator input to release.u The indicator in th e switch goes off.
u The parking brake indicator (red) goes
off.
You can release the parki ng brake automatically when:
• You are wearing the driver’s seat belt.
• The power system is on.
• The transmission is not in
(P or (N.
1Parking Brake
If the parking brake cannot be released
automatically, release it manually.
When the vehicle is travel ing uphill, the accelerator
pedal may need to be pressed farther to
automatically release the electric parking brake.
The parking brake cannot be released automatically
while the following indicators are on:
•Malfunction indicator lamp•Transmission system indicator
The parking brake may not be released automatically
while the following indicators are on:
•Brake system indicator
•VSA® system indicator•ABS indicator
•Supplemental restraint system indicator
Accelerator Pedal
20 INSIGHT-31TXM6100.book 534 ページ 2019年4月24日 水曜日 午後2時2分