System HONDA INSIGHT 2022 Owners Manual
[x] Cancel search | Manufacturer: HONDA, Model Year: 2022, Model line: INSIGHT, Model: HONDA INSIGHT 2022Pages: 609, PDF Size: 18.48 MB
Page 191 of 609
uuOperating the Switches Around the Steering Wheel uAuto High-Beam
190
Controls
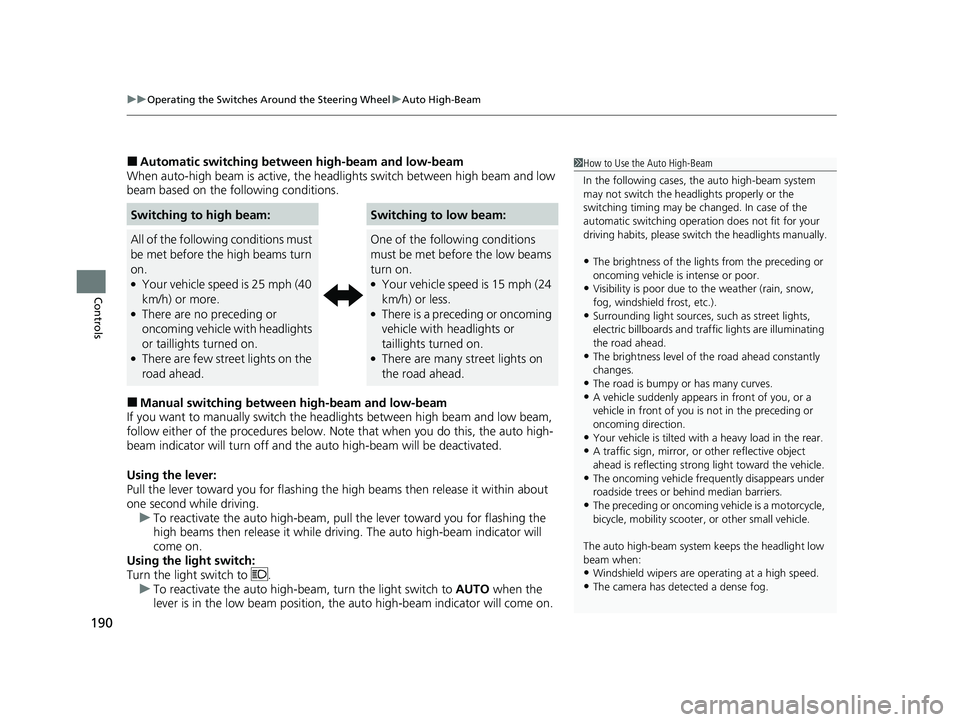
■Automatic switching between high-beam and low-beam
When auto-high beam is active, the headlights switch between high beam and low
beam based on the following conditions.
■Manual switching between high-beam and low-beam
If you want to manually switch the headlights between high beam and low beam,
follow either of the proced ures below. Note that when you do this, the auto high-
beam indicator will turn off and the auto high-beam will be deactivated.
Using the lever:
Pull the lever toward you fo r flashing the high beams th en release it within about
one second while driving. u To reactivate the auto high-beam, pull the lever toward you for flashing the
high beams then release it while driving. The auto high-beam indicator will
come on.
Using the light switch:
Turn the light switch to . u To reactivate the auto high-be am, turn the light switch to AUTO when the
lever is in the low beam position, the auto high-beam indicator will come on.
Switching to high beam:Switching to low beam:
All of the following conditions must
be met before the high beams turn
on.
●Your vehicle speed is 25 mph (40
km/h) or more.
●There are no preceding or
oncoming vehicle with headlights
or taillights turned on.
●There are few street lights on the
road ahead.
One of the following conditions
must be met before the low beams
turn on.
●Your vehicle speed is 15 mph (24
km/h) or less.
●There is a preceding or oncoming
vehicle with headlights or
taillights turned on.
●There are many street lights on
the road ahead.
1How to Use the Auto High-Beam
In the following cases, th e auto high-beam system
may not switch the head lights properly or the
switching timing may be ch anged. In case of the
automatic switching operation does not fit for your
driving habits, please swit ch the headlights manually.
•The brightness of the lights from the preceding or
oncoming vehicle is intense or poor.
•Visibility is poor due to the weather (rain, snow,
fog, windshield frost, etc.).
•Surrounding light sources, such as street lights,
electric billboards and traf fic lights are illuminating
the road ahead.
•The brightness level of th e road ahead constantly
changes.
•The road is bumpy or has many curves.•A vehicle suddenly appears in front of you, or a
vehicle in front of you is not in the preceding or
oncoming direction.
•Your vehicle is tilted with a heavy load in the rear.•A traffic sign, mirror, or other reflective object
ahead is reflecting strong light toward the vehicle.
•The oncoming vehicle freq uently disappears under
roadside trees or be hind median barriers.
•The preceding or oncoming vehicle is a motorcycle,
bicycle, mobility scooter, or other small vehicle.
The auto high-beam system keeps the headlight low
beam when:
•Windshield wipers are op erating at a high speed.
•The camera has detected a dense fog.
22 INSIGHT HMIN-31TXM6300.book 190 ページ 2021年2月24日 水曜日 午後3時45分
Page 192 of 609
191
uuOperating the Switches Around the Steering Wheel uAuto High-Beam
Controls
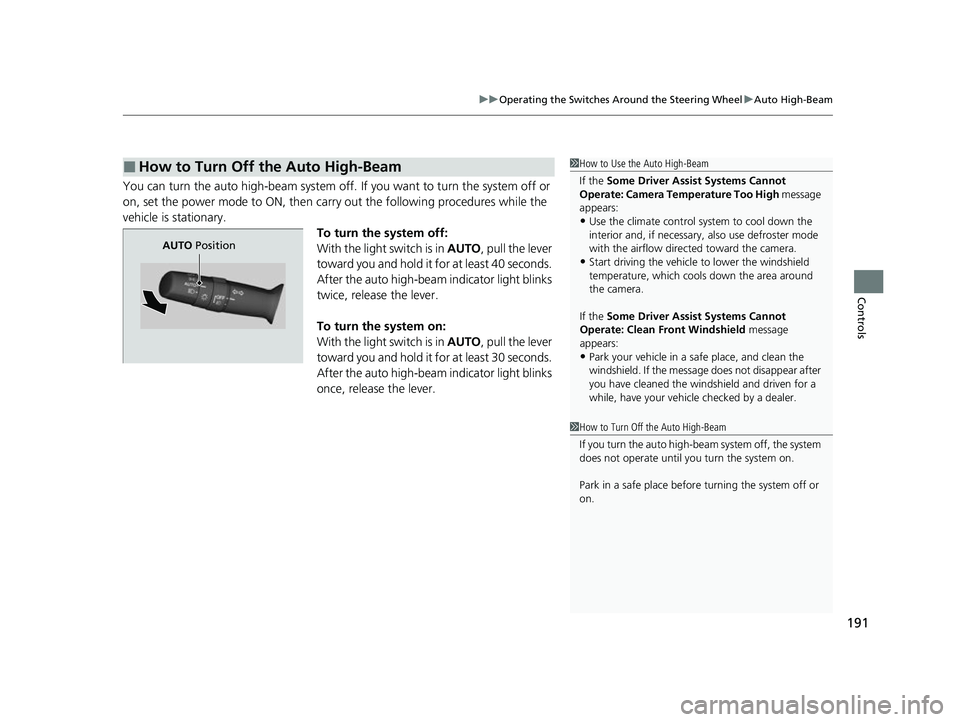
You can turn the auto high-beam system off. If you want to turn the system off or
on, set the power mode to ON, then carry out the following procedures while the
vehicle is stationary.
To turn the system off:
With the light switch is in AUTO, pull the lever
toward you and hold it for at least 40 seconds.
After the auto high-beam indicator light blinks
twice, release the lever.
To turn the system on:
With the light switch is in AUTO, pull the lever
toward you and hold it for at least 30 seconds.
After the auto high-beam indicator light blinks
once, release the lever.
■How to Turn Off the Auto High-Beam1 How to Use the Auto High-Beam
If the Some Driver Assist Systems Cannot
Operate: Camera Temperature Too High message
appears:
•Use the climate control system to cool down the
interior and, if necessary, also use defroster mode
with the airflow directed toward the camera.
•Start driving the vehicle to lower the windshield
temperature, which cool s down the area around
the camera.
If the Some Driver Assist Systems Cannot
Operate: Clean Front Windshield message
appears:
•Park your vehicle in a sa fe place, and clean the
windshield. If the message does not disappear after
you have cleaned the winds hield and driven for a
while, have your vehicle checked by a dealer.
1 How to Turn Off the Auto High-Beam
If you turn the au to high-beam system off, the system
does not operate until you turn the system on.
Park in a safe place before turning the system off or
on.
AUTO Position
22 INSIGHT HMIN-31TXM6300.book 191 ページ 2021年2月24日 水曜日 午後3時45分
Page 194 of 609
193
uuOperating the Switches Around the Steering Wheel uWipers and Washers
Controls
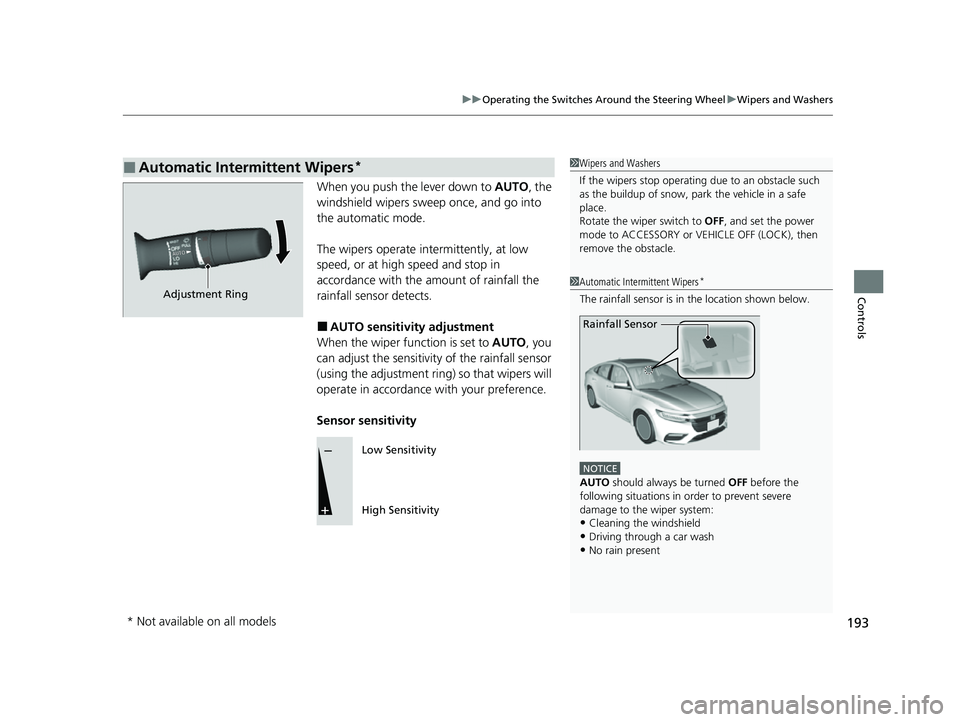
When you push the lever down to AUTO, the
windshield wipers sweep once, and go into
the automatic mode.
The wipers operate intermittently, at low
speed, or at high speed and stop in
accordance with the amount of rainfall the
rainfall sensor detects.
■AUTO sensitivity adjustment
When the wiper function is set to AUTO, you
can adjust the sensitivity of the rainfall sensor
(using the adjustment ring) so that wipers will
operate in accordance with your preference.
Sensor sensitivity
■Automatic Intermittent Wipers*1 Wipers and Washers
If the wipers st op operating due to an obstacle such
as the buildup of snow, park the vehicle in a safe
place.
Rotate the wiper switch to OFF, and set the power
mode to ACCESSORY or VEHICLE OFF (LOCK), then
remove the obstacle.
1 Automatic Intermittent Wipers*
The rainfall sensor is in the location shown below.
NOTICE
AUTO should always be turned OFF before the
following situations in order to prevent severe
damage to the wiper system:
•Cleaning the windshield
•Driving through a car wash
•No rain present
Rainfall Sensor
Adjustment Ring
Low Sensitivity
High Sensitivity
* Not available on all models
22 INSIGHT HMIN-31TXM6300.book 193 ページ 2021年2月24日 水曜日 午後3時45分
Page 195 of 609
194
uuOperating the Switches Around the Steering Wheel uRear Defogger/Heated Door Mirror Button
Controls
Rear Defogger/Heated Door Mirror Button
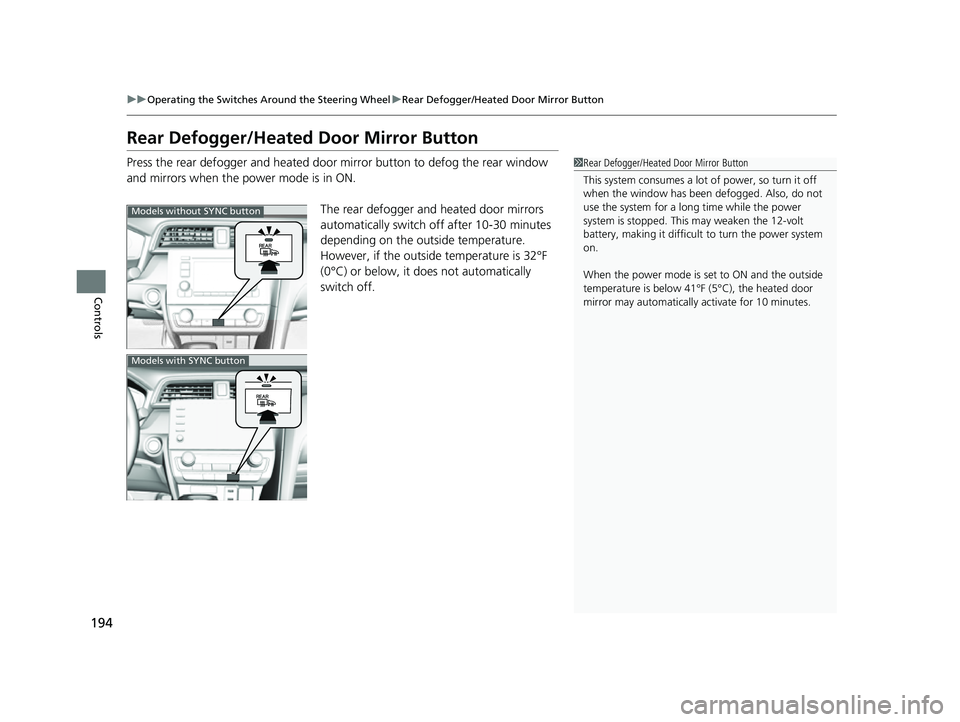
Press the rear defogger and heated door mirror button to defog the rear window
and mirrors when the power mode is in ON.
The rear defogger and heated door mirrors
automatically switch off after 10-30 minutes
depending on the outside temperature.
However, if the outside temperature is 32°F
(0°C) or below, it does not automatically
switch off.1Rear Defogger/Heated Door Mirror Button
This system consumes a lot of power, so turn it off
when the window has been defogged. Also, do not
use the system for a long time while the power
system is stopped. This may weaken the 12-volt
battery, making it difficult to turn the power system
on.
When the power mode is se t to ON and the outside
temperature is below 41°F (5°C), the heated door
mirror may automatically activate for 10 minutes.
Models without SYNC button
Models with SYNC button
22 INSIGHT HMIN-31TXM6300.book 194 ページ 2021年2月24日 水曜日 午後3時45分
Page 204 of 609
203
uuAdjusting the Seats uMaintain a Proper Sitting Position
Controls
Maintain a Proper Sitting Position
After all occupants have adjusted their s eats and head restraints, and put on their
seat belts, it is very important that they continue to sit upright, well back in their
seats, with their feet on the floor, until the vehicle is safely parked and the power
system is off.
Sitting improperly can increase the chance of injury during a crash. For example, if
an occupant slouches, lies down, turns si deways, sits forward, leans forward or
sideways, or puts one or both feet up, the chance of injury during a crash is greatly
increased.
In addition, an occupant who is out of posi tion in the front seat can be seriously or
fatally injured in a crash by striking interior parts of the vehicle or being struck by an
inflating front airbag.1 Maintain a Proper Sitting Position
3WARNING
Sitting improperly or out of position can
result in serious injury or death in a crash.
Always sit upright, well back in the seat,
with your feet on the floor.
22 INSIGHT HMIN-31TXM6300.book 203 ページ 2021年2月24日 水曜日 午後3時45分
Page 205 of 609
204
uuAdjusting the Seats uHead Restraints
Controls
Head Restraints
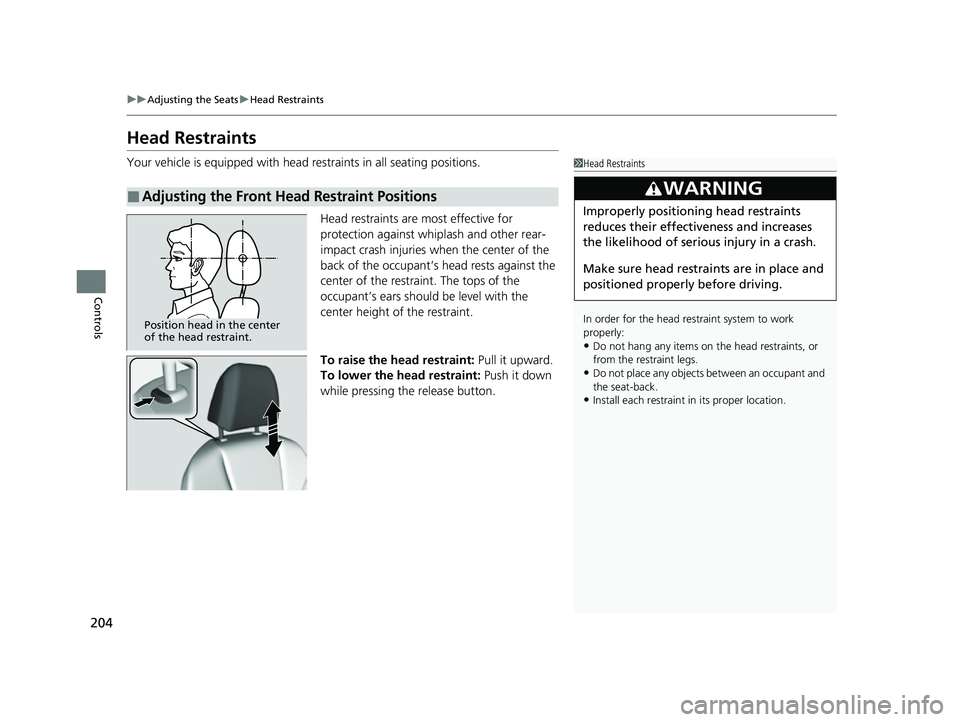
Your vehicle is equipped with head restraints in all seating positions.
Head restraints are most effective for
protection against whiplash and other rear-
impact crash injuries when the center of the
back of the occupant’s head rests against the
center of the restraint. The tops of the
occupant’s ears should be level with the
center height of the restraint.
To raise the head restraint: Pull it upward.
To lower the head restraint: Push it down
while pressing the release button.
■Adjusting the Front Head Restraint Positions
1 Head Restraints
In order for the head restraint system to work
properly:
•Do not hang any items on the head restraints, or
from the restraint legs.
•Do not place any objects between an occupant and
the seat-back.
•Install each restraint in its proper location.
3WARNING
Improperly positioning head restraints
reduces their effectiveness and increases
the likelihood of serious injury in a crash.
Make sure head restraints are in place and
positioned properly before driving.
Position head in the center
of the head restraint.
22 INSIGHT HMIN-31TXM6300.book 204 ページ 2021年2月24日 水曜日 午後3時45分
Page 208 of 609
207Continued
Controls
Interior Lights/Interior Convenience Items
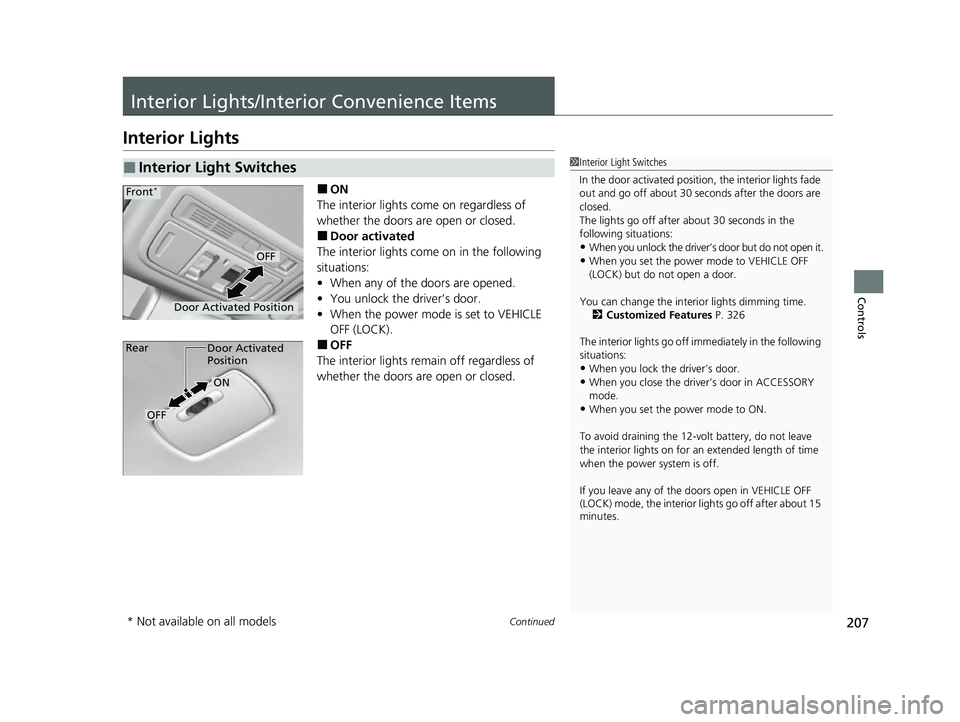
Interior Lights
■ON
The interior lights come on regardless of
whether the doors are open or closed.
■Door activated
The interior lights come on in the following
situations:
• When any of the doors are opened.
• You unlock the driver’s door.
• When the power mode is set to VEHICLE
OFF (LOCK).
■OFF
The interior lights remain off regardless of
whether the doors are open or closed.
■Interior Light Switches1 Interior Light Switches
In the door activated position, the interior lights fade
out and go off about 30 se conds after the doors are
closed.
The lights go off after about 30 seconds in the
following situations:
•When you unlock the driver’s door but do not open it.
•When you set the power mode to VEHICLE OFF
(LOCK) but do not open a door.
You can change the interi or lights dimming time.
2 Customized Features P. 326
The interior lights go off im mediately in the following
situations:
•When you lock the driver’s door.•When you close the driver’s door in ACCESSORY
mode.
•When you set the power mode to ON.
To avoid draining the 12-vo lt battery, do not leave
the interior lights on for an extended length of time
when the power system is off.
If you leave any of the doors open in VEHICLE OFF
(LOCK) mode, the interior lights go off after about 15
minutes.
Door Activated Position
OFF
Front*
Door Activated
Position
ON
OFF
Rear
* Not available on all models
22 INSIGHT HMIN-31TXM6300.book 207 ページ 2021年2月24日 水曜日 午後3時45分
Page 214 of 609
Continued213
uuInterior Lights/Interior Convenience Items uInterior Convenience Items
Controls
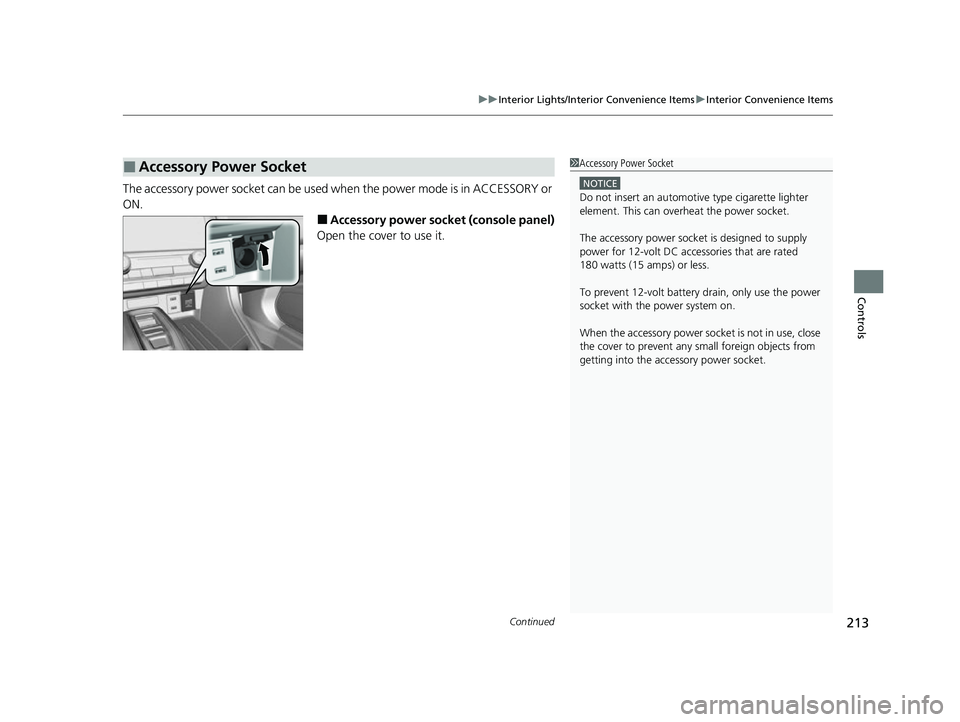
The accessory power socket can be used when the power mode is in ACCESSORY or
ON.
■Accessory power socket (console panel)
Open the cover to use it.
■Accessory Power Socket1 Accessory Power Socket
NOTICE
Do not insert an automotive type cigarette lighter
element. This can overheat the power socket.
The accessory power socket is designed to supply
power for 12-volt DC accessories that are rated
180 watts (15 amps) or less.
To prevent 12-volt battery drain, only use the power
socket with the power system on.
When the accessory power soc ket is not in use, close
the cover to prevent any small foreign objects from
getting into the accessory power socket.
22 INSIGHT HMIN-31TXM6300.book 213 ページ 2021年2月24日 水曜日 午後3時45分
Page 216 of 609
215
uuInterior Lights/Interior Convenience Items uInterior Convenience Items
Controls
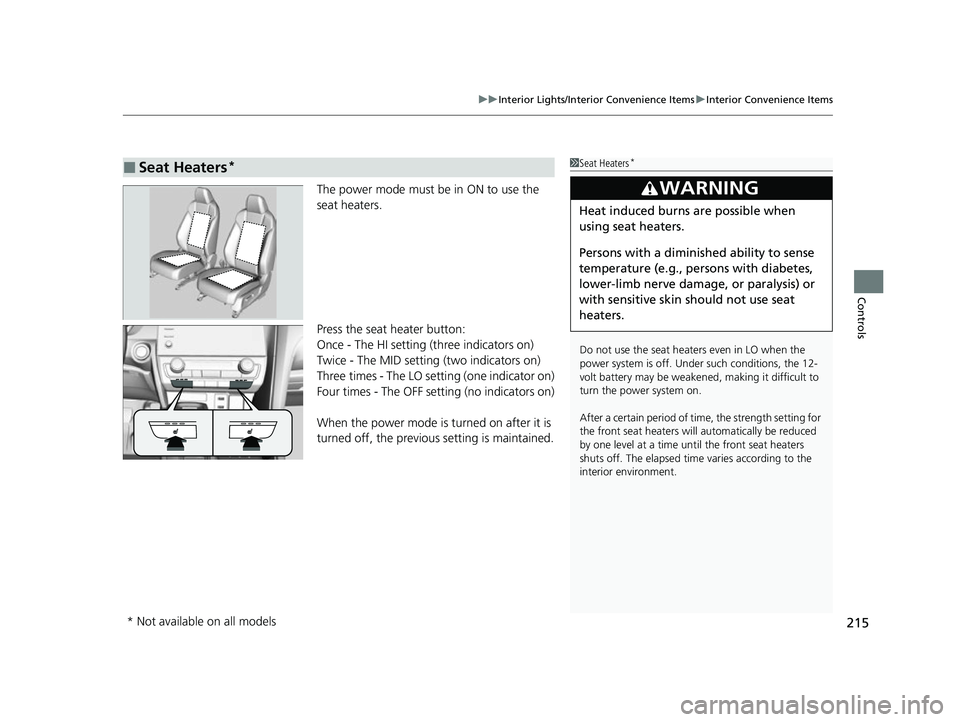
The power mode must be in ON to use the
seat heaters.
Press the seat heater button:
Once - The HI setting (three indicators on)
Twice - The MID setting (two indicators on)
Three times - The LO setting (one indicator on)
Four times - The OFF setting (no indicators on)
When the power mode is turned on after it is
turned off, the previous setting is maintained.
■Seat Heaters*1Seat Heaters*
Do not use the seat heaters even in LO when the
power system is off. U nder such conditions, the 12-
volt battery may be weakened , making it difficult to
turn the power system on.
After a certain period of time, the strength setting for
the front seat heaters will automatically be reduced
by one level at a time unt il the front seat heaters
shuts off. The elapsed time varies according to the
interior environment.
3WARNING
Heat induced burns are possible when
using seat heaters.
Persons with a diminished ability to sense
temperature (e.g., persons with diabetes,
lower-limb nerve damage, or paralysis) or
with sensitive skin should not use seat
heaters.
* Not available on all models
22 INSIGHT HMIN-31TXM6300.book 215 ページ 2021年2月24日 水曜日 午後3時45分
Page 217 of 609
216
Controls
Climate Control System
Using Automatic Climate Control
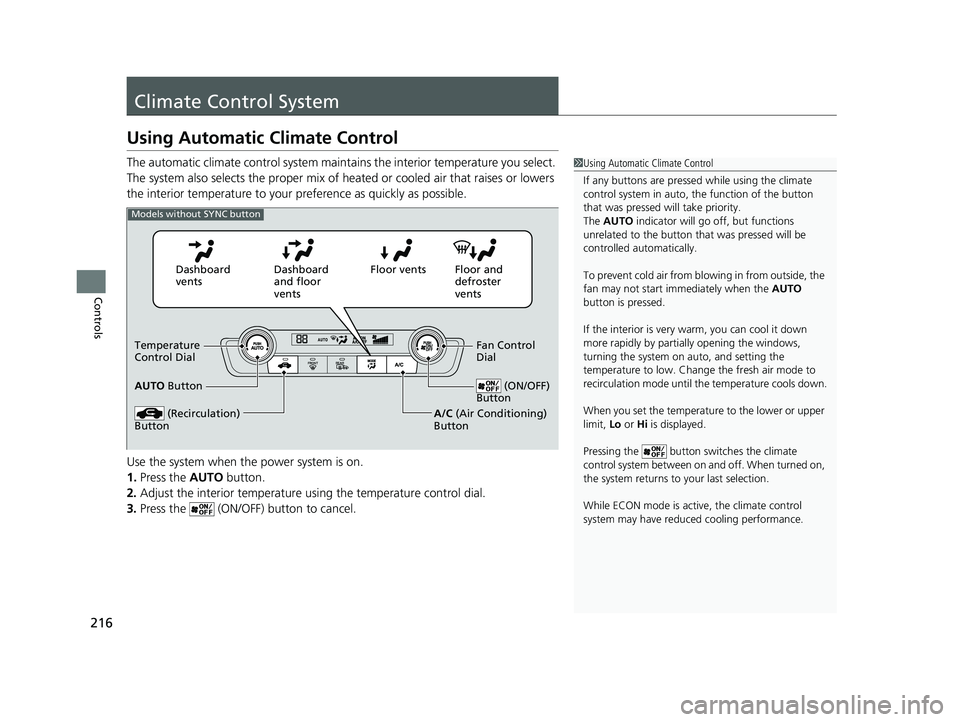
The automatic climate control system maintains the interior temperature you select.
The system also selects the proper mix of heated or cooled air that raises or lowers
the interior temperature to your pr eference as quickly as possible.
Use the system when the power system is on.
1. Press the AUTO button.
2. Adjust the interior temperature us ing the temperature control dial.
3. Press the (ON/OFF) button to cancel.1Using Automatic Climate Control
If any buttons are presse d while using the climate
control system in auto, the function of the button
that was pressed will take priority.
The AUTO indicator will go off, but functions
unrelated to the button th at was pressed will be
controlled automatically.
To prevent cold air from bl owing in from outside, the
fan may not start i mmediately when the AUTO
button is pressed.
If the interior is very warm, you can cool it down
more rapidly by partial ly opening the windows,
turning the system on auto, and setting the
temperature to low. Change the fresh air mode to
recirculation mode until the temperature cools down.
When you set the temperat ure to the lower or upper
limit, Lo or Hi is displayed.
Pressing the button switches the climate
control system between on and off. When turned on,
the system returns to your last selection.
While ECON mode is active, the climate control
system may have reduced cooling performance.
Floor and
defroster
vents
Floor vents
Dashboard
and floor
vents
Dashboard
vents
AUTO Button
(Recirculation)
Button
Fan Control
Dial
A/C (Air Conditioning)
Button (ON/OFF)
ButtonTemperature
Control Dial
Models without SYNC button
22 INSIGHT HMIN-31TXM6300.book 216 ページ 2021年2月24日 水曜日 午後3時45分