refill oil HONDA INTEGRA 1998 4.G Workshop Manual
[x] Cancel search | Manufacturer: HONDA, Model Year: 1998, Model line: INTEGRA, Model: HONDA INTEGRA 1998 4.GPages: 1681, PDF Size: 54.22 MB
Page 95 of 1681

15.
16.
17.
Install the timing belt (see page 6-12).
Adjust the valve clearance (see page 6-3).
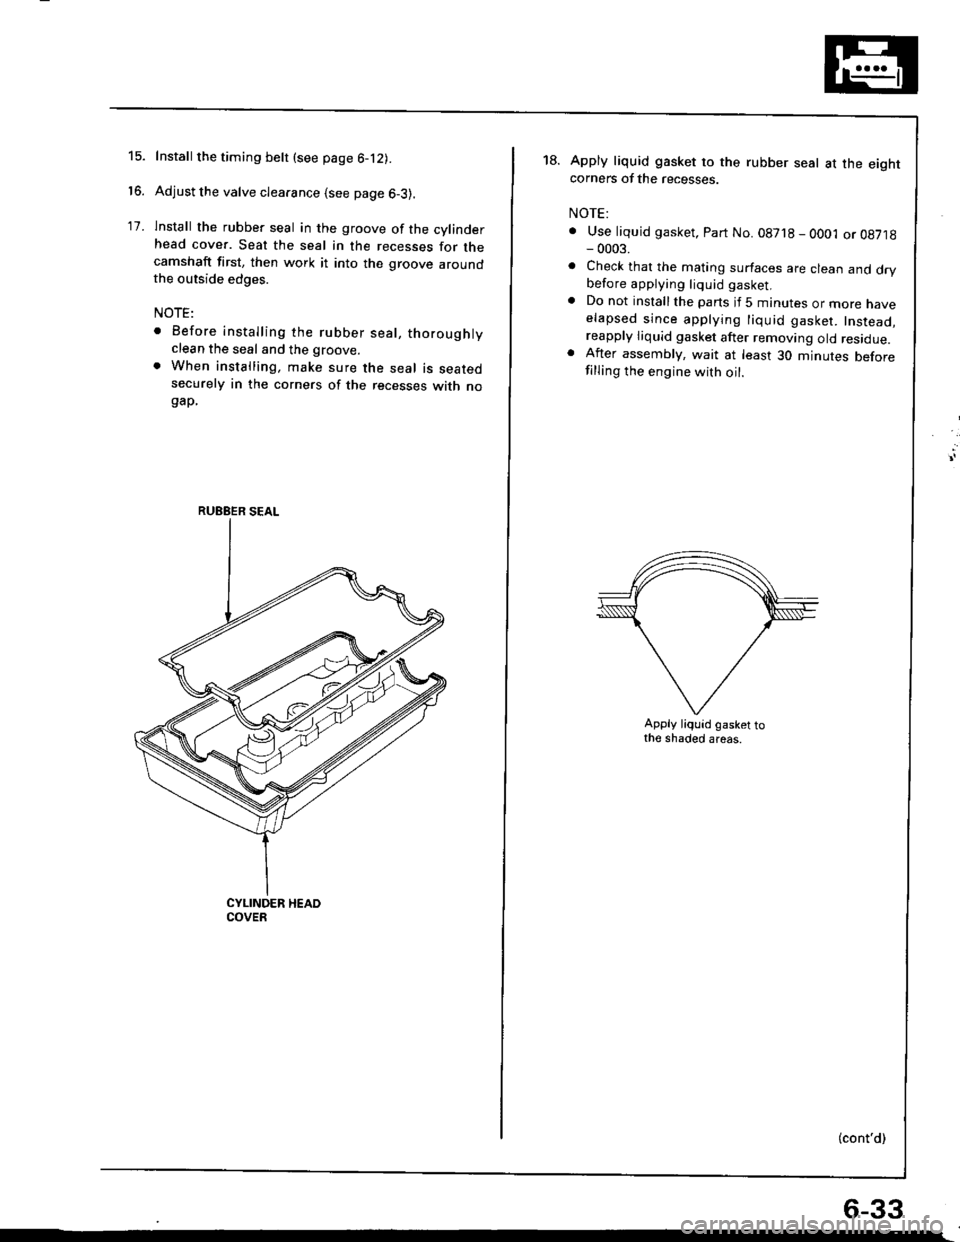
lnstall the rubber seal in the groove of the cylinderhead cover. Seat the seal in the recesses for thecamshaft first, then work it into the groove aroundthe outside edges.
NOTE:
. Before installing the rubber seal, thoroughlyclean the seal and the groove.
. When installing, make sure the seal is seatedsecurely in the corners of the recesses with nogap.
RUEBER SEAL
18.Apply liquid gasket to the rubber seal at the eightcorners of the recesses.
NOTE:
. Use liquid gasket, Part No. 08718 - OO01 or 08718- 0003.
. Check that the mating surfaces are clean and drybefore applying liquid gasket.. Do not installthe parts if 5 minutes or more naveelapsed since applying liquid gasket. Instead,reapply liquid gasket after removing old residue.. After assembly, wait at least 30 minutes beforefilling the engine with oil.
Apply liquid gasket tothe shaded areas.
(cont'd)
6-33
Page 179 of 1681

Inspection
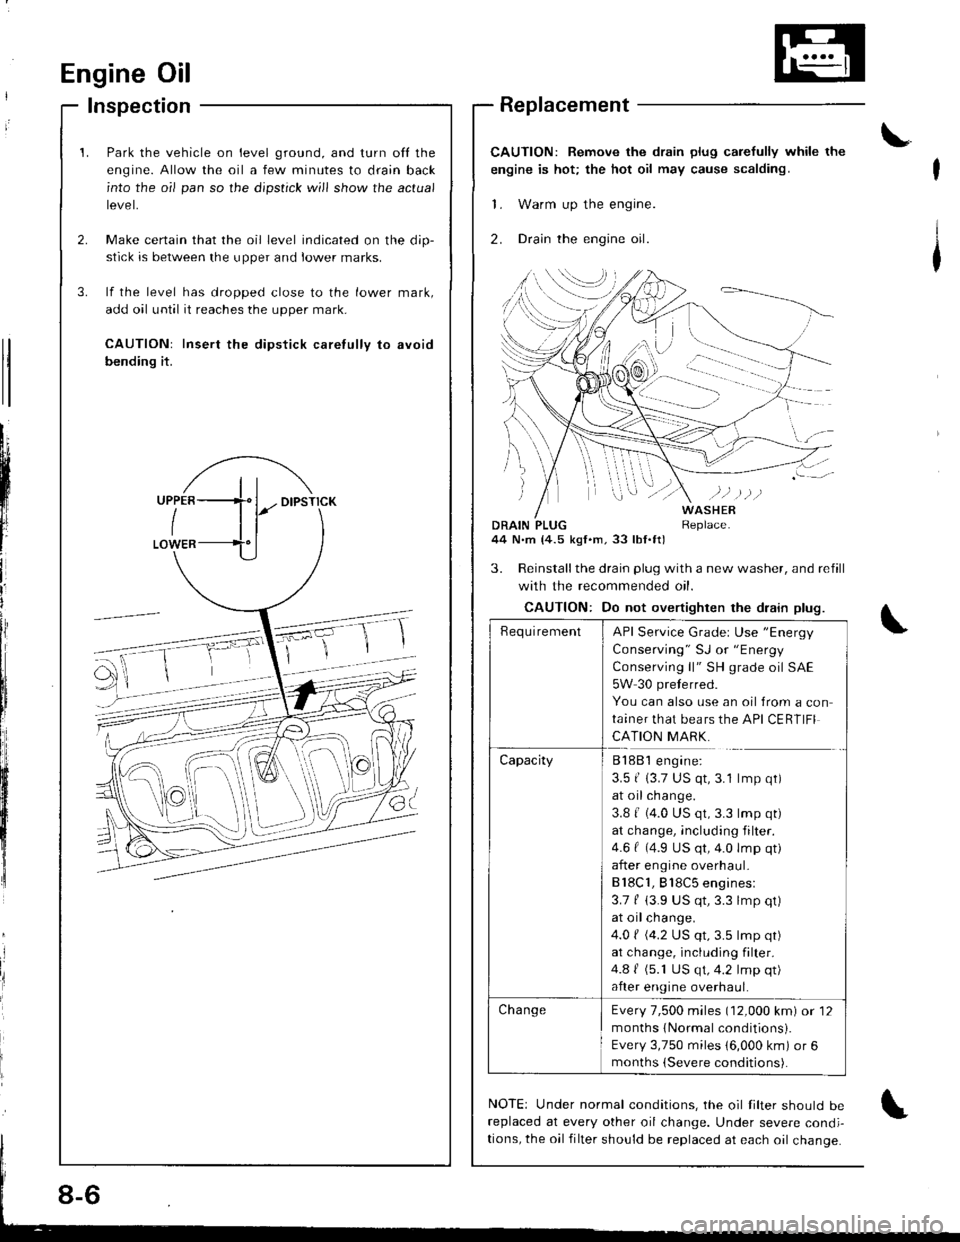
Park the vehicle on level ground, and turn ofl the
engine. Allow the oil a few minutes to drain back
into the oil pan so the dipstick will show the actual
tevet,
Make certain that the oil level indicated on the dip-
stick is between the upper and lower marks.
lf the level has dropped close to the lower mark,
add oil until it reaches the upper mark.
CAUTION: Insert the dipstick caretully to avoid
bending it.
Engine Oil
t'
Replacement
CAUTION: Remove the drain plug carefully while the
engine is hot; the hot oil may cause scalding.
'1. Warm up the engine.
2. Drcin the engine oil.
\
tl
tl
tl
Lii
t'l
lr
ii
I
iliIItl
J
DRAIN PLUG44 N.m (4.5 kgl.m,33 lbl.tt)
WASHERReplace.
3. Reinstallthe drain plug with a new washer, and refill
with the recommended oil.
CAUTION: Do not overtighten the drain plug.
NOTE: Under normal conditions, the oil filter should bereplaced at every other oil change. Under severe condi-
tions, the oil filter should be replaced at each oil change.
\
-Ff
_ ,€- @
'@
oE
RequirementAPI Service Grader Use "Energy
Consetuing " SJ or "Energy
Conserving ll" SH grade oil SAE
5W 30 preterred.
You can also use an oil {rom a con
ta,ner that bears the API CERTIFI
CATION MARK.
CapacityB188 l engine:
3.5 | 13.7 US qt,3.1 lmp qt)
at oil change.
3.8 | (4.0 US qt,3.3 lmp qt)
at change, including filter.
4.6 | (4.9 US qt,4.0 lmp qt)
after engine overhaul-
Bl8C1, Bl8C5 engines:
3.7 f (3.9 US qt,3.3 lmp qt)
at oil change.
4.0 ( (4.2 US qt,3.5 lmp qt)
at change, including filter.
4.8 | (5.1 US qt,4.2 lmp qt)
after engine overhaul.
Cha ngeEvery 7,500 miles (12,000 km) or 12
months {Normal conditionsi.
Every 3,750 miles 16,000 km) or 6
months (Severe conditions).
8-6
Page 372 of 1681

aintenance
Transmission Oil
NOTE: Check the transmission oil with the engine OFF
and the vehicle on level ground.
1. Remove the oil filler plug, then check the level and
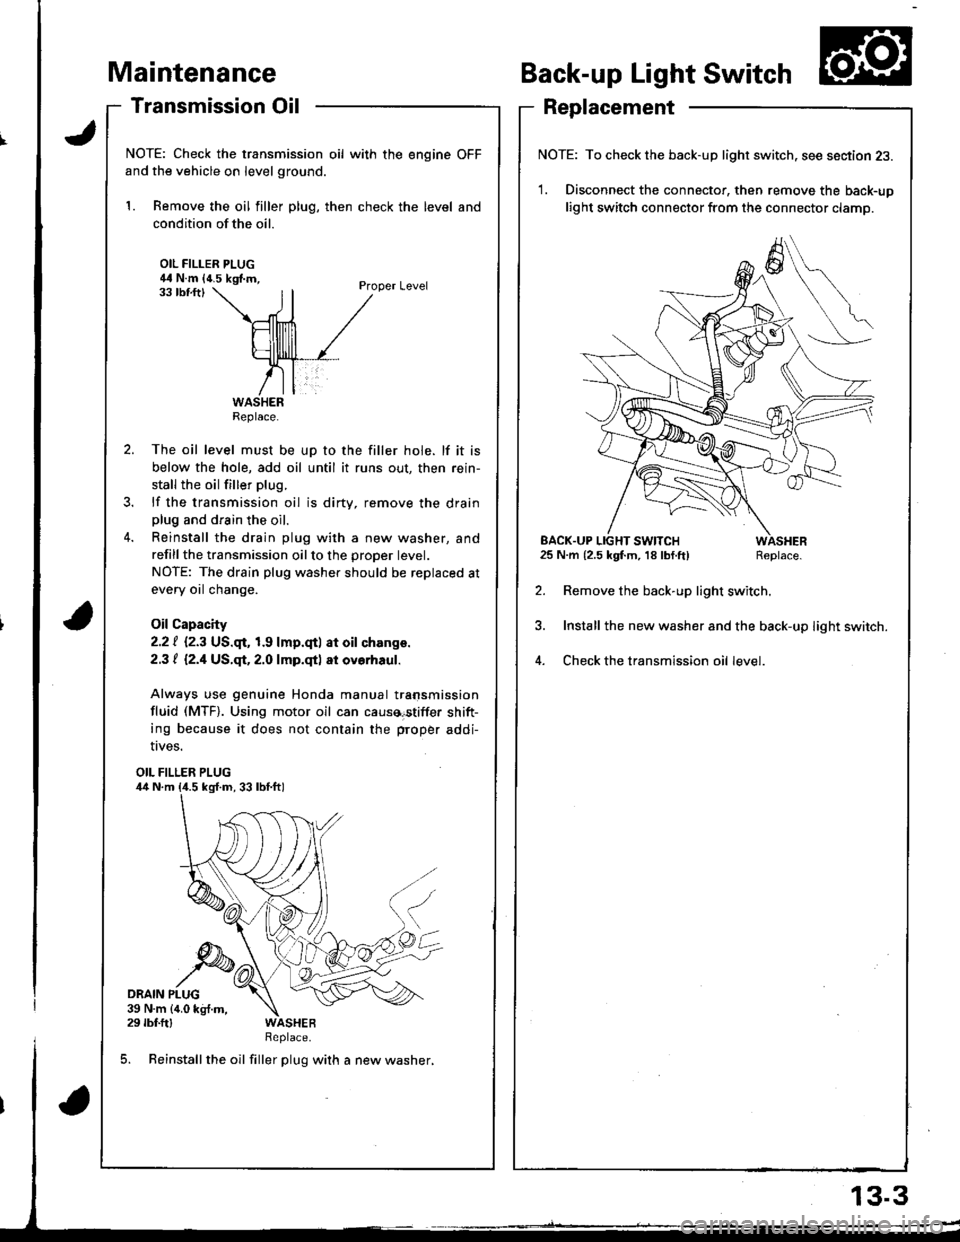
condition of the oil.
OIL FILLER PLUG44 N.m {4.5 kgf.m,Proper Level33 tbf.ftl
The oil level must be up to the filler hole. lf it is
below the hole, add oil until it runs out, then rein-
stall the oil filler plug.
lf the transmission oil is dirty, remove the drainplug and drain the oil.
Reinstall the drain plug with a new washer, and
refillthe transmission oilto the proper tevet.
NOTE: The drain plug washer should be replaced at
every oil change.
Oil Capacity
2.2 | i.2.3 US.qr,1.9 lmp.qtl at oil ch.nge.
2.3 t l2.1US.qt,2.O lmp.qtl at ovorhaul.
Always use genuine Honda manual transmission
fluid (MTF). Using motor oil can causa€tiffer shift-
ing because it does not contain the proper addi-
Back-up Light Switch
Replacement
NOTE: To check the back-up light switch. see section 23.
1. Disconnect the connector, then remove the back-up
light switch connector from the connector clamp.
l.m {2.5 kgf.m, 18lbf.ft) Replace.
Remove the back-up light switch.
Install the new washer and the back-up light switch.
Check the transmission oil level.
!ves.
OIL FILLER PLUG
DRAIN PLUG39 N.m {4.0 kg{.m,29 rbf.ftlReplace.
5. Reinstall the oil filler plug with a new washer,
Replace.
EACK.UP LIGHT SWITCH25 N.m {2.5 kgf.m, 18 lbf.ft)
13.3
Page 646 of 1681

Intermediate Shaft
Removal
Drain the transmission oil or fluid {see section 13 or
14t.
Remove the left driveshaft (see page 16-3).
Bemove the three dowel bolts.
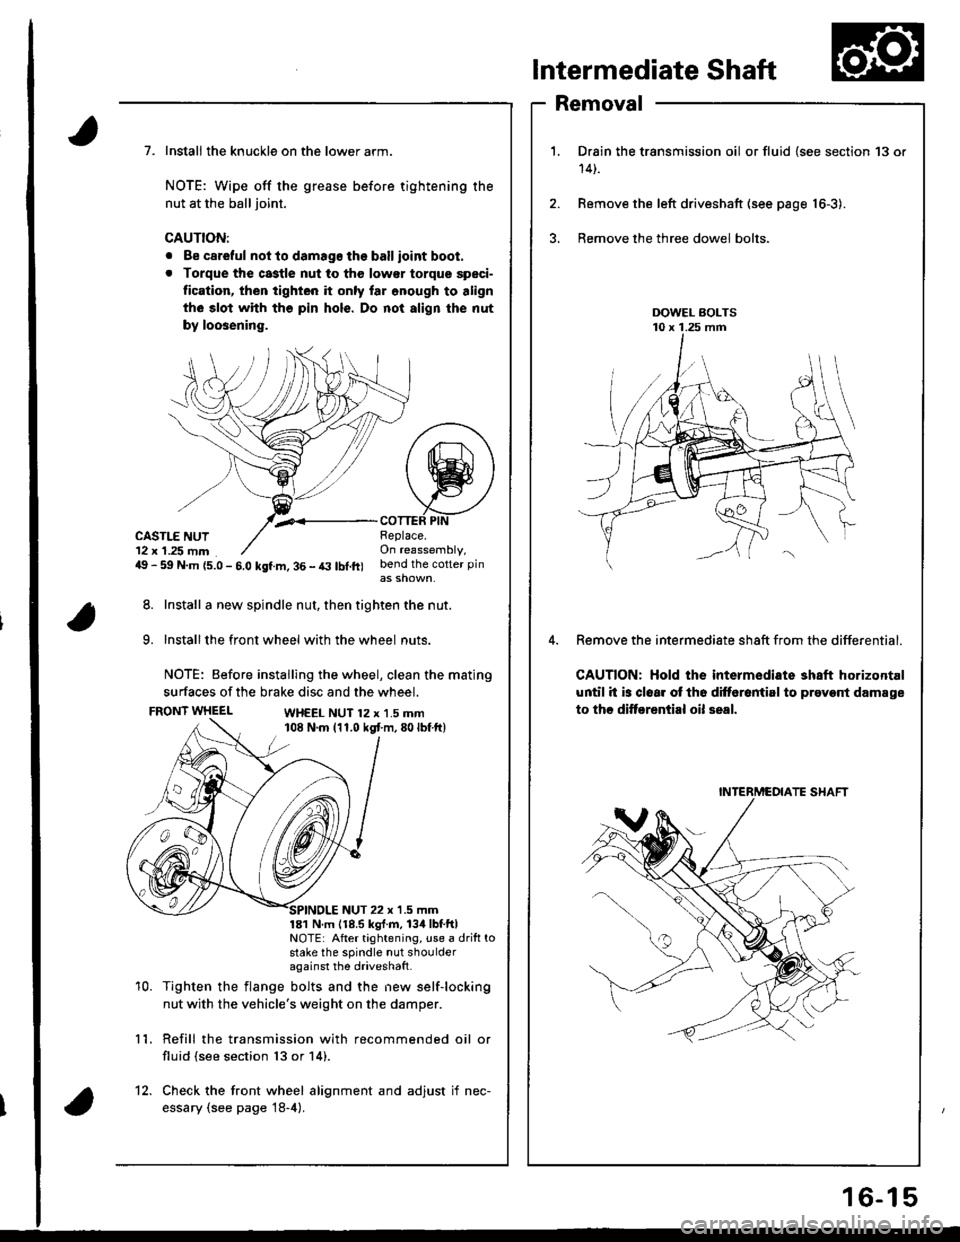
Remove the intermediate sh8ft from the differential.
CAUTION: Hold the intermediate shaft horizontal
until it is clear ot th6 difforantirl to prevont damage
to thc ditf€rential oil seal.
7. Install the knuckle on the lower arm.
NOTE: Wipe off the grease before tightening the
nut at the ball joint.
CAUTION:
. Be careful not to damago the ballioint boot.
. Torque the castle nut to tho low€r torque speci-
tication, then tighten it only lar onough to align
th6 slot whh tho pin hols. Do not align the nut
by loosening.
,.<__coTTEF PtNCASTLE NUT12 x 1.25 mm49 - 59 N.m {5.0 - 5.0 kgf.m, 36 - t3 lbl.ft)
Beplace.On reassembly,bend the cotter pin
8. Install a new spindle nut, then tighten the nut.
9. Installthe front wheel with the wheel nuts.
NOTE: Before installing the wheel, clean the mating
surfaces of the brake disc and the wheel.
FRONT WHEELWH€EL NUT 12 x 1.5 mm108 N.m (11.0 kgt m,80lbf ft)
10.
NUT 22 x '1.5 mm181 N m 118.5 kgl.m, 134lbtftlNOTE: After tightening, use a drift tostake the spindle nut shoulderagainst the driveshatt.
Tighten the flange bolts and the new self-locking
nut with the vehicle's weight on the damper.
Refill the transmission with recommended oil or
fluid (see section 13 or 14).
11.
12. Check the front wheel alignment and adjust if nec-
essary (see page 18-4).
INTERMCOIATE SHAFT
16-15