HONDA ODYSSEY 1999 Owners Manual
Manufacturer: HONDA, Model Year: 1999, Model line: ODYSSEY, Model: HONDA ODYSSEY 1999Pages: 343, PDF Size: 3.73 MB
Page 91 of 343
Sliding Doors
Power Sliding Doors
On EX model
The sliding doors on your vehicle are electrically-powered. You can openor close each power sliding door with
the switches on the dashboard, with
the inside or outside door handles, or
with the remote transmitter. The power sliding doors operate
with the ignition switch in anyposition. In addition: The shift lever must be in Park.
The MAIN switch on the
dashboard must be in the ON
position.
The sliding door you want to
operate must be unlocked. To open the door with the inside
handle, the childproof door lockon the door you want to operate
must be unlocked (see page 85).
You should close each sliding door before you start driving.
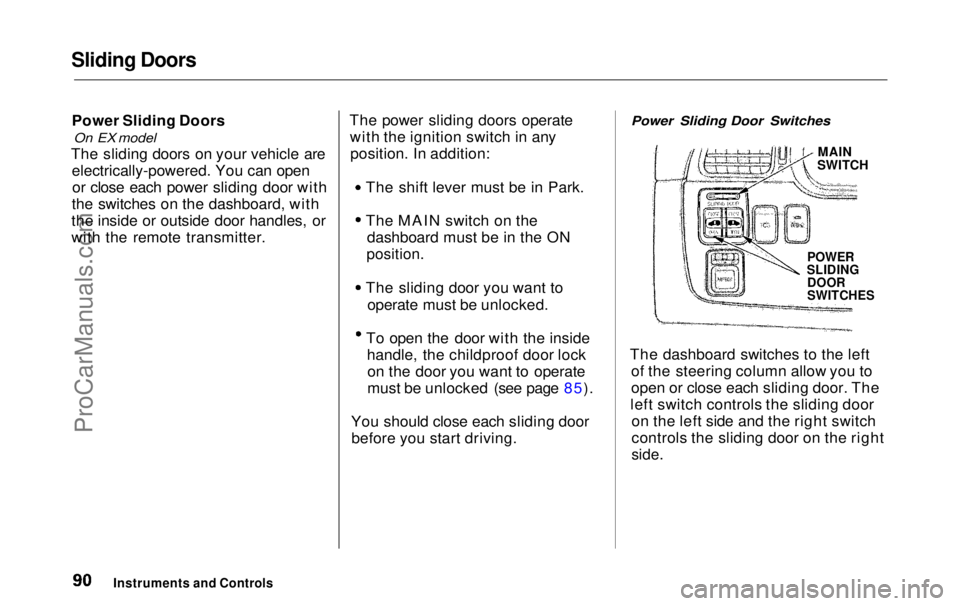
Power Sliding Door Switches
MAIN
SWITCH
POWER
SLIDING
DOOR
SWITCHES
The dashboard switches to the left of the steering column allow you to
open or close each sliding door. The
left switch controls the sliding door on the left side and the right switch
controls the sliding door on the right
side.
Instruments and ControlsProCarManuals.comMain Menu Table of Contents s t
Page 92 of 343
Sliding Doors
To close a sliding door, push the top of the appropriate switch, thenrelease it. To open the door, push
and release the bottom of the switch.
The MAIN switch on the dashboard controls door operation. With theMAIN switch off, automatic
operation with the power sliding
door switches, the door handles, and
the remote transmitter is disabled.
When the MAIN switch is off, you can operate each sliding door
manually. To open or close a door,
pull the inside or outside door handle and slide the door.
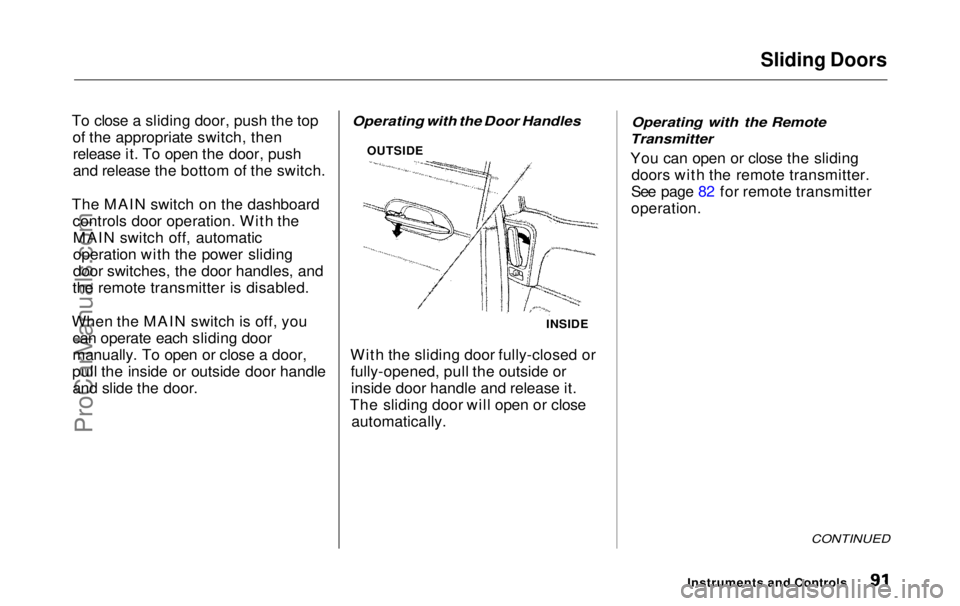
Operating with the Door Handles
With the sliding door fully-closed or fully-opened, pull the outside orinside door handle and release it.
The sliding door will open or close automatically.
Operating with the Remote
Transmitter
You can open or close the sliding doors with the remote transmitter.
See page 82 for remote transmitter
operation.
CONTINUED
Instruments and Controls
INSIDE
OUTSIDEProCarManuals.comMain Menu Table of Contents s t
Page 93 of 343
Sliding Doors
Stopping Power Sliding Door
Movement
To stop automatic operation: Push either side of the dashboard
power sliding door switch for the moving door. Push the button on the remote
transmitter for the moving door. If
you push the same button a second time, the door reverses
direction.
When you stop automatic operation with the dashboard
switch or the remote transmitter,
you will hear three beeps. If you try to open a locked sliding
door with the power sliding door
switch or the remote transmitter,
you will hear three beeps. Unlock the door, then try again.
If you shift out of Park while a door
is opening, you will hear a
continuous tone and the door willstop moving. If you keep driving with
the door open, the tone continues
until you stop and close the door.
If you shift out of Park while a door
is closing, the door will close
completely. You will hear a beep
until the door is completely closed. When parked on steep hills, the
power sliding doors may not open or
close as they do normally.
If a power sliding door runs into any
obstacle while it is closing, the doorwill stop, and then reverse direction.
You will hear three beeps.
Even with this safety feature, you
should still check that all passengers
and objects are away from the sliding
doors before closing them as this
feature stops working when the door is almost closed.
Instruments and ControlsProCarManuals.comMain Menu Table of Contents s t
Page 94 of 343
Sliding Doors
Before refueling, make sure the driver's side sliding door is fully
closed. When you release the fuel fill
door with the handle, the sliding door automatically locks so it cannot
be opened and interfere with the fuel fill door. After you close the fuel filldoor, the sliding door does not
automatically unlock; you must
unlock it manually.
When you drive with children in your vehicle, use the childproof doorlocks. This will prevent children
from opening the doors accidentally (see page 85).
How to Reset the Power Sliding
Doors
If your vehicle's battery is disconnected or goes dead while the
sliding doors are open, the power
sliding door system needs to besynchronized. After reconnecting
the battery: Close each sliding door completely
by hand; or Move the MAIN switch on the
dashboard to the ON position.
Push and hold the upper side of
each door switch until each sliding
door closes completely.
If the power sliding doors are closed,
the system will reset itself automatically once the battery has
been reconnected. If the power sliding doors do not
operate properly after resetting,
have your vehicle checked by a Honda dealer.
CONTINUED
Instruments and ControlsProCarManuals.comMain Menu Table of Contents s t
Page 95 of 343
Sliding Doors
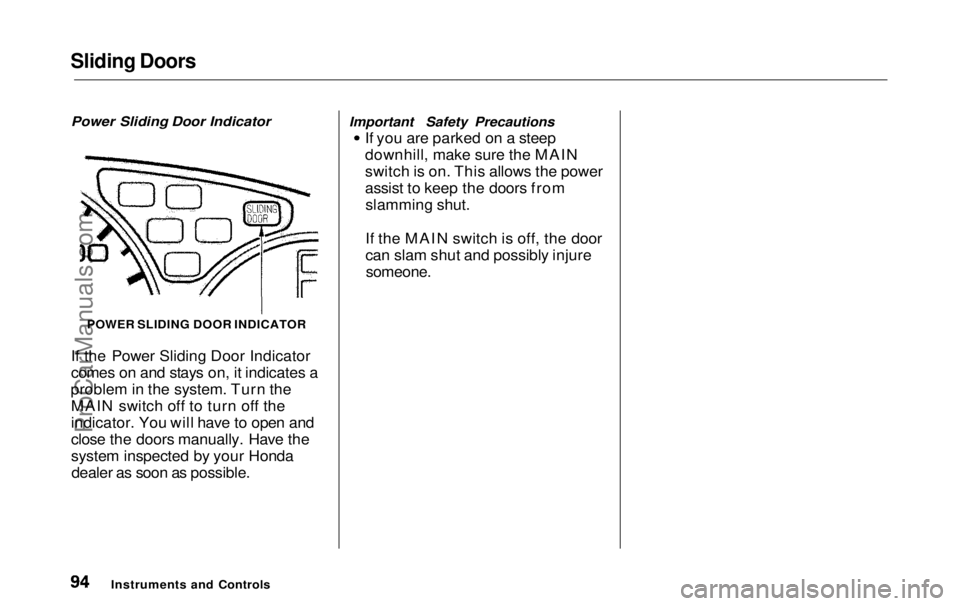
Power Sliding Door Indicator
POWER SLIDING DOOR INDICATOR
If the Power Sliding Door Indicator
comes on and stays on, it indicates a
problem in the system. Turn the MAIN switch off to turn off the
indicator. You will have to open and
close the doors manually. Have the
system inspected by your Hondadealer as soon as possible. Important Safety Precautions If you are parked on a steep
downhill, make sure the MAIN
switch is on. This allows the power
assist to keep the doors from
slamming shut.
If the MAIN switch is off, the door
can slam shut and possibly injure
someone.
Instruments and ControlsProCarManuals.comMain Menu Table of Contents s t
Page 96 of 343
HomeLink Universal Transmitter
On EX model
The HomeLink Universal Transmit- ter built into your vehicle can be
programmed to operate remotely-controlled devices around your home,
such as garage doors, lighting, or
home security systems. It can
replace up to three remote
transmitters.
Customer Assistance
If you have problems with training
the HomeLink Universal
Transmitter, or would like information on home products that
can be operated by the transmitter,
call (800) 355-3515.
Important Safety Precautions
Always refer to the operating instruc- tions and safety information thatcame with your garage door opener
or other equipment you intend to
operate with the HomeLink
Universal Transmitter. If you do not
have this information, you should contact the manufacturer of the
equipment.
While training or using the transmitter, make sure you have a
clear view of the garage door or gate,and that no one will be injured by its
movement.
If your garage door opener was
manufactured before April 1982, you
may not be able to program the
HomeLink Universal Transmitter to operate it. Garage door openers
manufactured before that date do
not have a safety feature that causes
them to stop and reverse if an obstacle is detected during closing,
increasing the risk of injury. If you
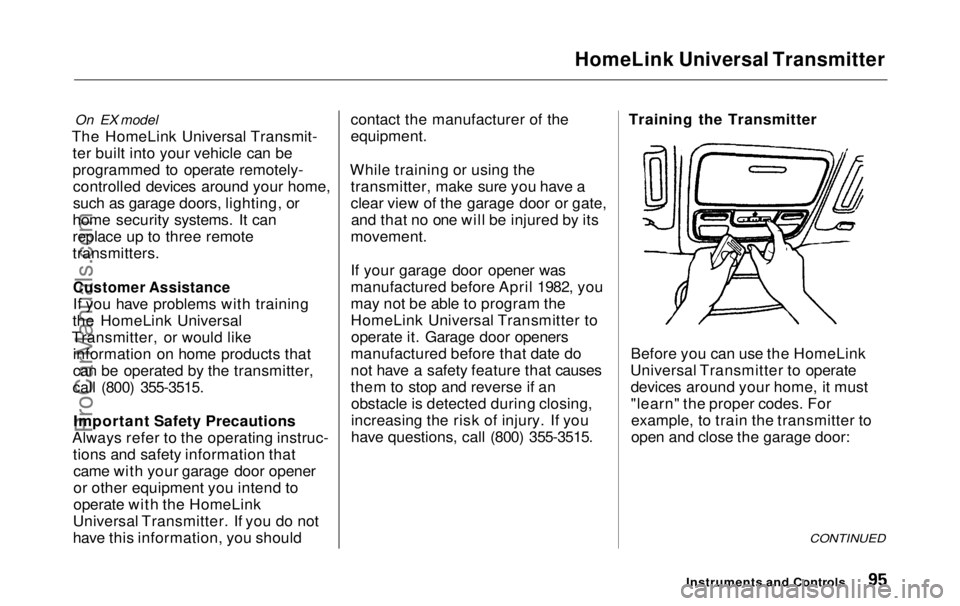
have questions, call (800) 355-3515. Training the Transmitter
Before you can use the HomeLink
Universal Transmitter to operate devices around your home, it must
"learn" the proper codes. Forexample, to train the transmitter to
open and close the garage door:
CONTINUED
Instruments and ControlsProCarManuals.comMain Menu Table of Contents s t
Page 97 of 343

HomeLink Universal Transmitter
1. This step erases all previously learned
codes. Perform this step before
training the transmitter for the very
first time. Press and hold the two
outside buttons until the red light
in the transmitter flashes (approximately 20 seconds).
Release the buttons.
2. Hold the end of the garage door opener remote control 1 to 3
inches from the HomeLink
transmitter. Make sure you are
not blocking your view of the redlight in the transmitter.
3. Select the transmitter button you want to train.
4. Press the button on the remote control and the button on the
transmitter at the same time. Holddown both buttons. 5. The red light in the transmitter
should begin flashing. It will flashslowly at first, then rapidly.
6. When the red light flashes rapidly, release both buttons. The
transmitter should have learned
the code from the remote control.
7. Test the transmitter button by pushing it. It should operate the
garage door.
8. Repeat these steps to train the other two transmitter buttons to
operate any other remotely-
controlled devices around your
home (lighting, automatic gate, security system, etc.).
Canadian Owners:
The remote control you are training from may stop transmitting after twoseconds. This is not long enough for
the HomeLink transmitter to learn
the code. Release and press the
button on the remote control every
two seconds until the transmitter has
learned the code.
If you are programming the
transmitter to operate a garage door or gate, it is recommended that you
unplug the motor for that device during programming. Repeatedly
pressing the remote control button could burn out the motor.
The HomeLink transmitter stores the code in a permanent memory.
There should be no need to retrain the transmitter if your vehicle's
battery goes dead or is disconnected.
Instruments and ControlsProCarManuals.comMain Menu Table of Contents s t
Page 98 of 343
HomeLink Universal Transmitter
Retrainings Button
To train an already programmed transmitter button to operate a new
device:
1. Select the transmitter button you want to train.
2. Press and hold the transmitter button until the red light begins to
flash slowly (approximately 20
seconds).
3. While continuing to hold the transmitter button, place the
remote control for the device 1 to 3 inches from the HomeLink
transmitter.
4. Press and hold the button on the remote control. Hold both buttons
until the red light begins to flash
rapidly.
5. Release both buttons. The transmitter, should now be trained
to operate the device. Training With a Rolling Code
System
For security purposes, newer garage
door opening systems use a "rolling"
or variable code. If you know that
your garage door opener has a rolling code, or you have been
unable to train the transmitter afterseveral attempts, use the following
procedure. You will need someone to
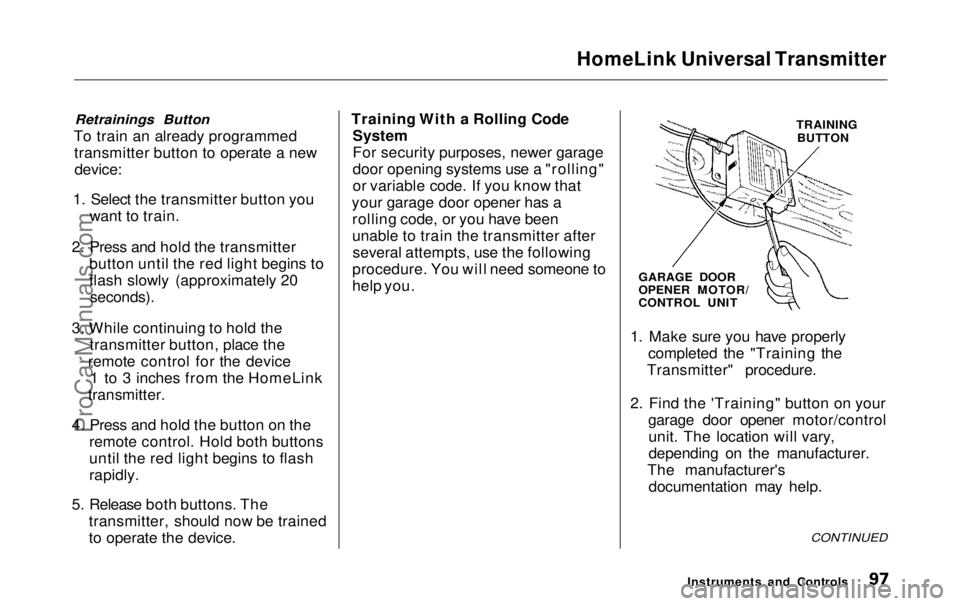
help you. TRAINING
BUTTON
GARAGE DOOR
OPENER MOTOR/
CONTROL UNIT
1. Make sure you have properly completed the "Training the
Transmitter" procedure.
2. Find the 'Training" button on your garage door opener motor/controlunit. The location will vary,
depending on the manufacturer.
The manufacturer's documentation may help.
CONTINUED
Instruments and ControlsProCarManuals.comMain Menu Table of Contents s t
Page 99 of 343

HomeLink Universal Transmitter
3. Press the Training button on the motor/control unit until the
Training light comes on, then release it.
4. Press and release the desired button on the HomeLink
transmitter.
5. Press and release the HomeLink transmitter button again. Thisshould turn off the training light
on the motor/control unit. (Some
systems may require you to press
and release the button three times.)
6. Press the transmitter button again. It should operate the garage door.
Erasing Codes
To erase the codes stored in all three buttons, press and hold the two outside buttons until the red light
begins to flash, then release the
buttons.
You should erase all three codes before selling the vehicle. As required by the FCC:
This device complies with Part 15 of the
FCC rules. Operation is subject to the
following two conditions: (1) This device
may not cause harmful interference, and (2) this device must accept any
interference received, including
interference that may cause undesired
operation.
This device complies with DOC
regulations in Canada.
Changes or modifications not expressly
approved by the party responsible for compliance could void the user's
authority to operate the equipment.
Instruments and ControlsProCarManuals.comMain Menu Table of Contents s t
Page 100 of 343
Seats
Passenger Seating
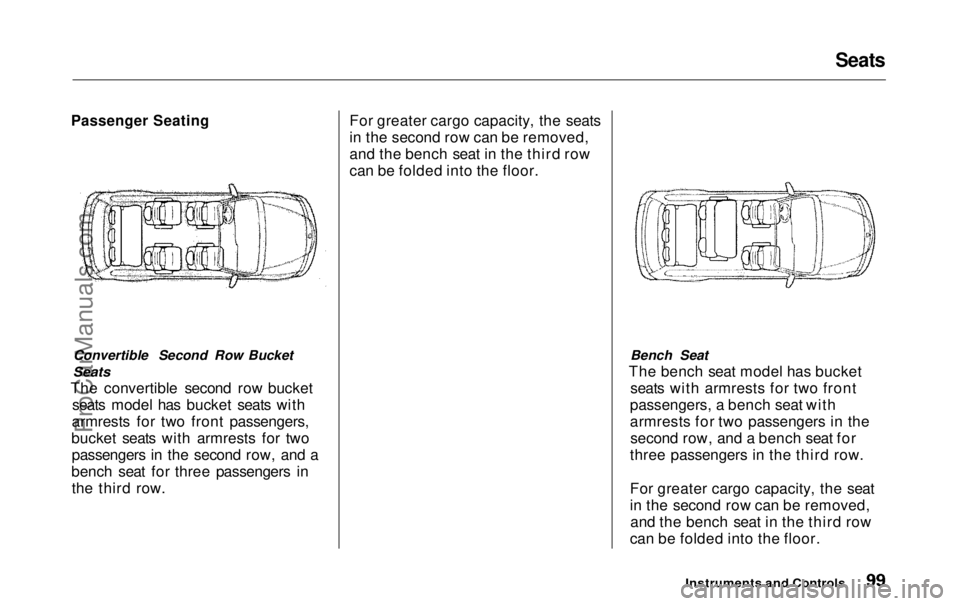
Convertible Second Row Bucket
Seats
The convertible second row bucket seats model has bucket seats with
armrests for two front passengers,
bucket seats with armrests for two passengers in the second row, and a
bench seat for three passengers in the third row. For greater cargo capacity, the seats
in the second row can be removed,
and the bench seat in the third row
can be folded into the floor.
Bench Seat
The bench seat model has bucket seats with armrests for two front
passengers, a bench seat with
armrests for two passengers in the second row, and a bench seat for
three passengers in the third row.
For greater cargo capacity, the seat
in the second row can be removed, and the bench seat in the third row
can be folded into the floor.
Instruments and ControlsProCarManuals.comMain Menu Table of Contents s t