change time HONDA ODYSSEY 2012 RB3-RB4 / 4.G Owner's Manual
[x] Cancel search | Manufacturer: HONDA, Model Year: 2012, Model line: ODYSSEY, Model: HONDA ODYSSEY 2012 RB3-RB4 / 4.GPages: 441, PDF Size: 14.07 MB
Page 217 of 441
216
uuAudio System Basic OperationuPlaying CD Library
Features
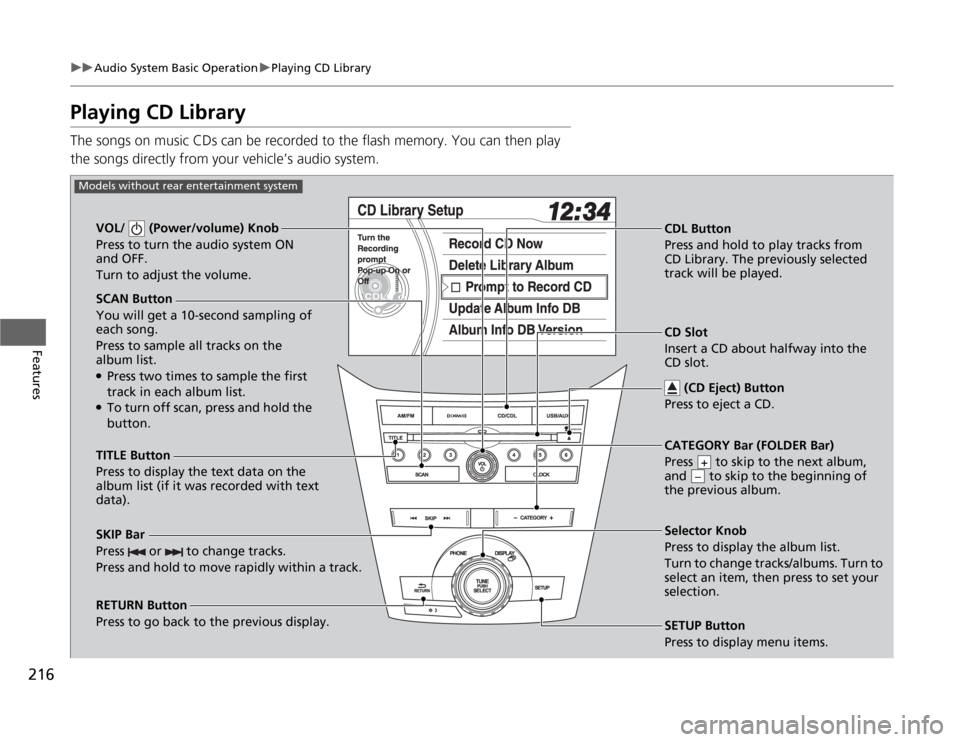
Playing CD LibraryThe songs on music CDs can be recorded to the flash memory. You can then play
the songs directly from your vehicle’s audio system.
SCAN Button
You will get a 10-second sampling of
each song.
Press to sample all tracks on the
album list.●Press two times to sample the first
track in each album list.●To turn off scan, press and hold the
button. VOL/ (Power/volume) Knob
Press to turn the audio system ON
and OFF.
Turn to adjust the volume.
CDL Button
Press and hold to play tracks from
CD Library. The previously selected
track will be played.
TITLE Button
Press to display the text data on the
album list (if it was recorded with text
data).
RETURN Button
Press to go back to the previous display.Selector Knob
Press to display the album list.
Turn to change tracks/albums. Turn to
select an item, then press to set your
selection.
SETUP Button
Press to display menu items.
Models without rear entertainment system
CD Slot
Insert a CD about halfway into the
CD slot.
(CD Eject) Button
Press to eject a CD.
SKIP Bar
Press or to change tracks.
Press and hold to move rapidly within a track.
CATEGORY Bar (FOLDER Bar)
Press to skip to the next album,
and to skip to the beginning of
the previous album.
+–
Page 218 of 441
217
uuAudio System Basic OperationuPlaying CD Library
Continued
Features
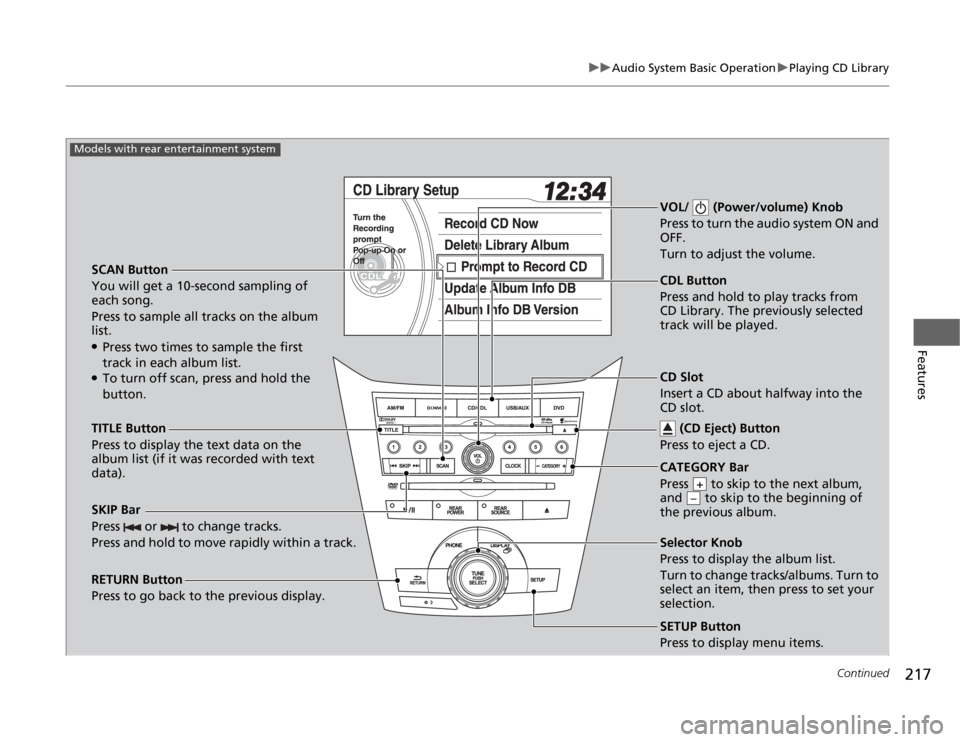
SCAN Button
You will get a 10-second sampling of
each song.
Press to sample all tracks on the album
list.●Press two times to sample the first
track in each album list.●To turn off scan, press and hold the
button.VOL/ (Power/volume) Knob
Press to turn the audio system ON and
OFF.
Turn to adjust the volume.SKIP Bar
Press or to change tracks.
Press and hold to move rapidly within a track.TITLE Button
Press to display the text data on the
album list (if it was recorded with text
data).
RETURN Button
Press to go back to the previous display.
SETUP Button
Press to display menu items.
Models with rear entertainment system
CDL Button
Press and hold to play tracks from
CD Library. The previously selected
track will be played.
Selector Knob
Press to display the album list.
Turn to change tracks/albums. Turn to
select an item, then press to set your
selection. CD Slot
Insert a CD about halfway into the
CD slot.
(CD Eject) Button
Press to eject a CD.CATEGORY Bar
Press to skip to the next album,
and to skip to the beginning of
the previous album.
+–
Page 219 of 441
uuAudio System Basic OperationuPlaying CD Library
218Features
■
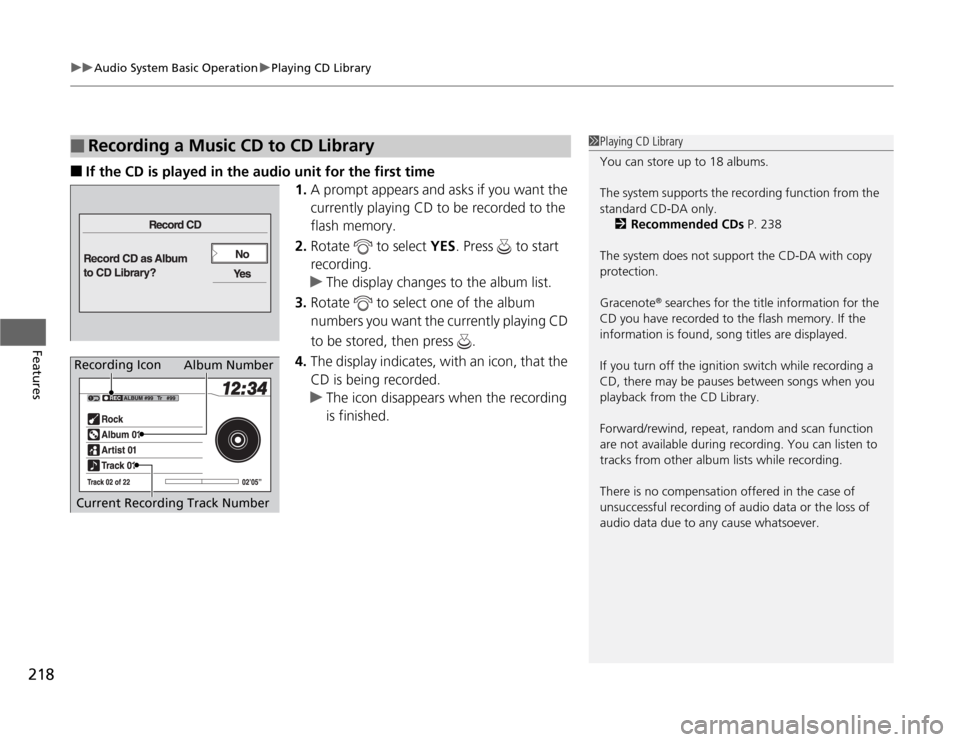
If the CD is played in the audio unit for the first time
1.A prompt appears and asks if you want the
currently playing CD to be recorded to the
flash memory.
2.Rotate to select YES. Press to start
recording.
uThe display changes to the album list.
3.Rotate to select one of the album
numbers you want the currently playing CD
to be stored, then press .
4.The display indicates, with an icon, that the
CD is being recorded.
uThe icon disappears when the recording
is finished.
■
Recording a Music CD to CD Library
1Playing CD Library
You can store up to 18 albums.
The system supports the recording function from the
standard CD-DA only.
2Recommended CDs P. 238
The system does not support the CD-DA with copy
protection.
Gracenote
® searches for the title information for the
CD you have recorded to the flash memory. If the
information is found, song titles are displayed.
If you turn off the ignition switch while recording a
CD, there may be pauses between songs when you
playback from the CD Library.
Forward/rewind, repeat, random and scan function
are not available during recording. You can listen to
tracks from other album lists while recording.
There is no compensation offered in the case of
unsuccessful recording of audio data or the loss of
audio data due to any cause whatsoever.
Album Number
Current Recording Track Number
Recording Icon
Page 220 of 441
219
uuAudio System Basic OperationuPlaying CD Library
Continued
Features
■
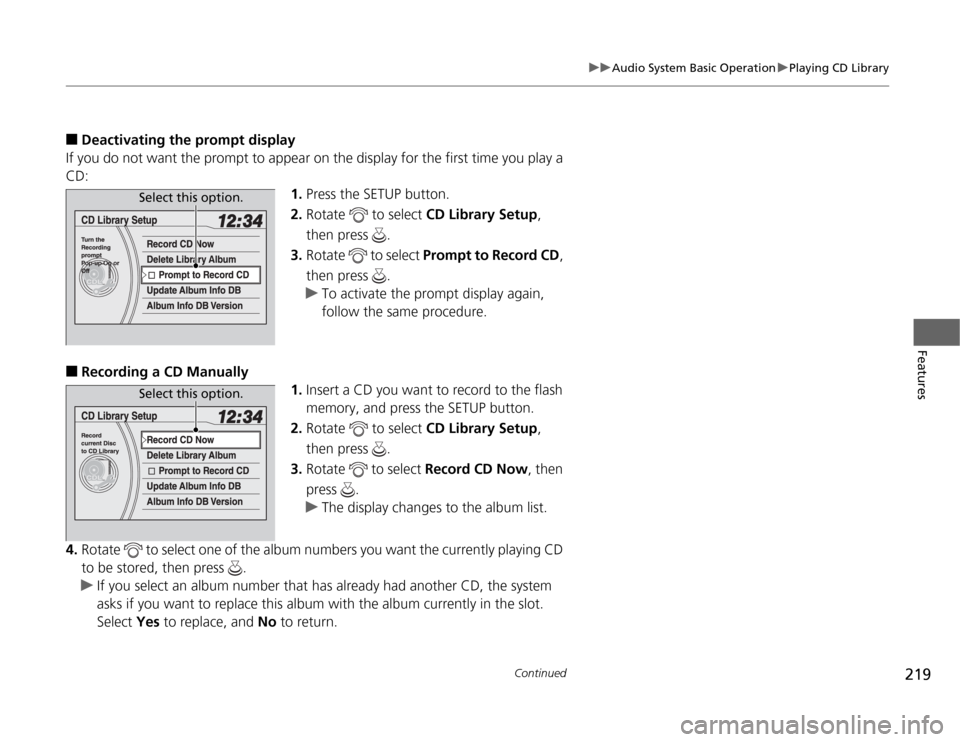
Deactivating the prompt display
If you do not want the prompt to appear on the display for the first time you play a
CD:
1.Press the SETUP button.
2.Rotate to select CD Library Setup,
then press .
3.Rotate to select Prompt to Record CD,
then press .
uTo activate the prompt display again,
follow the same procedure.
■
Recording a CD Manually
1.Insert a CD you want to record to the flash
memory, and press the SETUP button.
2.Rotate to select CD Library Setup,
then press .
3.Rotate to select Record CD Now, then
press .
uThe display changes to the album list.
4.Rotate to select one of the album numbers you want the currently playing CD
to be stored, then press .
uIf you select an album number that has already had another CD, the system
asks if you want to replace this album with the album currently in the slot.
Select Yes to replace, and No to return.
Select this option.Select this option.
Page 243 of 441
uuRear Entertainment System
*uOperating the System
242Features
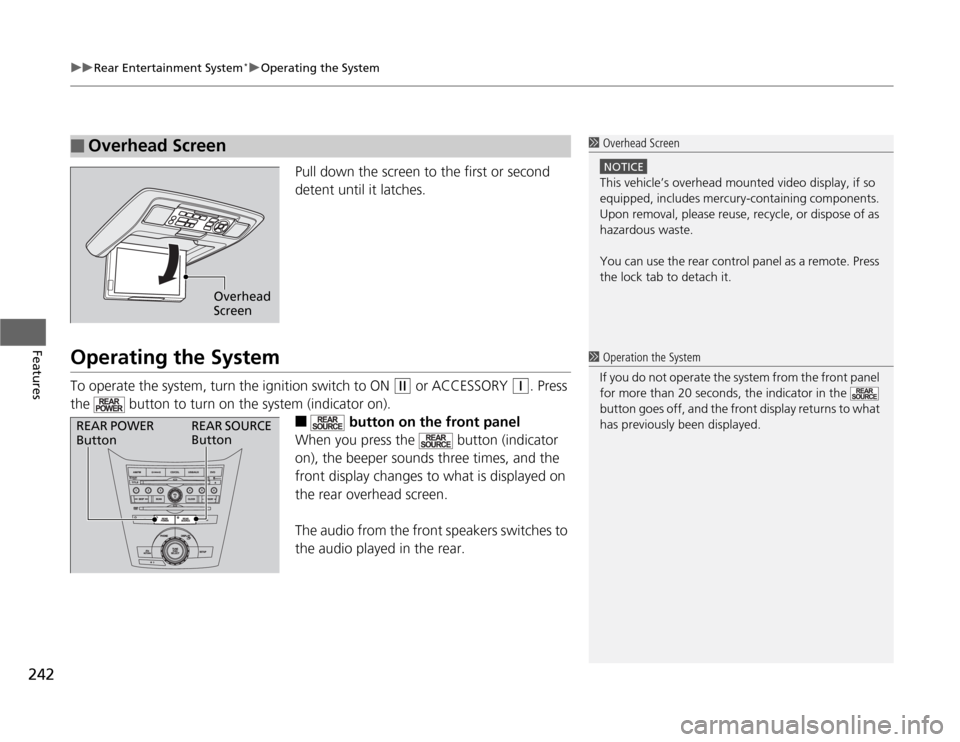
Pull down the screen to the first or second
detent until it latches.
Operating the SystemTo operate the system, turn the ignition switch to ON
(w
or ACCESSORY
(q
. Press
the button to turn on the system (indicator on).
■
button on the front panel
When you press the button (indicator
on), the beeper sounds three times, and the
front display changes to what is displayed on
the rear overhead screen.
The audio from the front speakers switches to
the audio played in the rear.
■
Overhead Screen
1 Overhead Screen
NOTICEThis vehicle’s overhead mounted video display, if so
equipped, includes mercury-containing components.
Upon removal, please reuse, recycle, or dispose of as
hazardous waste.
You can use the rear control panel as a remote. Press
the lock tab to detach it.
Overhead
Screen
1 Operation the System
If you do not operate the system from the front panel
for more than 20 seconds, the indicator in the
button goes off, and the front display returns to what
has previously been displayed.
REAR POWER
ButtonREAR SOURCE
Button
Page 248 of 441
Continued
247
uuRear Entertainment System
*uOperating the System
Features
Initial Settings:
You can configure the initial Language, Dynamic Range, and Angle Mark settings
before playing DVD.
1.Select the language setting.
2.Select the language from English, French, Spanish, Arabic, German, Italian,
Dutch, Chinese, Korean, Thai, Japanese, and other.
3.If you select other, you need to enter the four digit language code number to
configure the language that is not listed. Select Yes to go to the number input
screen.
uTo return to the language Setting screen, select No.
4.Press the ENTER button each time you input digit.
uIf you want to delete a number, select DEL.
5.The cursor automatically goes to ENT after you input four digits. Press the ENTER
button to command. Language
Settings -Select the language for the DVD’s displayed menus (Menu Language),
the DVD’s audio (Audio Language), and the DVD’s subtitle (Subtitle
Language).
Dynamic
Range -The feature reduces the difference between the loud and quiet sound
levels. Select ON or OFF.
Angle
Mark -You can select whether to display the angle mark appearing in the
upper right corner of the screen when you change the view angle while
the DVD is playing. Select ON or OFF.
1MENU button on the remote
Initial Settings:
The prior language varies by disc. You may not be
able to configure your selected language setting.
Page 268 of 441
Continued
267
uuBluetooth
® HandsFreeLink
®*uHFL Menus
Features
■
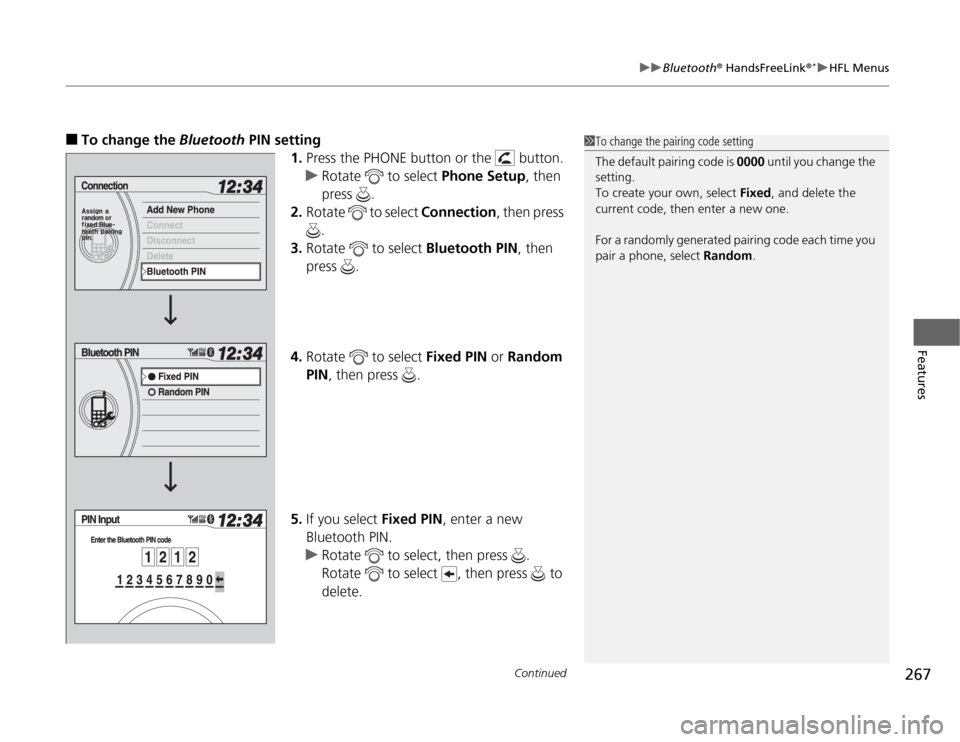
To change the Bluetooth PIN setting
1.Press the PHONE button or the button.
uRotate to select Phone Setup, then
press .
2.Rotate to select Connection, then press
.
3.Rotate to select Bluetooth PIN, then
press .
4.Rotate to select Fixed PIN or Random
PIN, then press .
5.If you select Fixed PIN, enter a new
Bluetooth PIN.
uRotate to select, then press .
Rotate to select , then press to
delete.
1To change the pairing code setting
The default pairing code is 0000 until you change the
setting.
To create your own, select Fixed, and delete the
current code, then enter a new one.
For a randomly generated pairing code each time you
pair a phone, select Random.
Page 314 of 441
313
uuWhen DrivinguBSI (Blind Spot Information) System
*
Driving
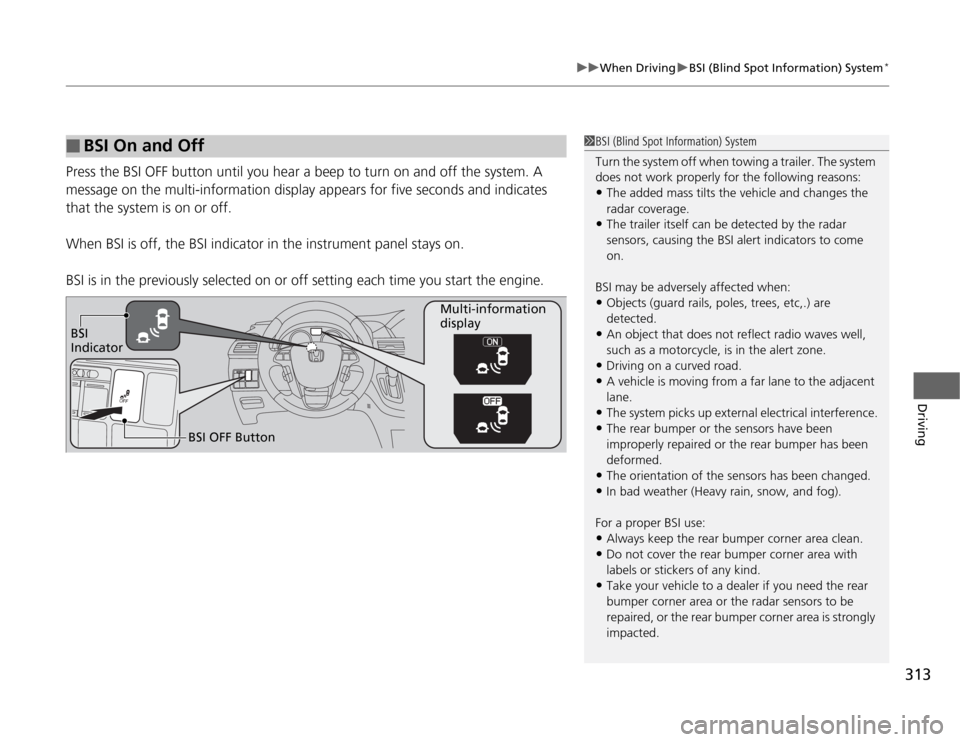
Press the BSI OFF button until you hear a beep to turn on and off the system. A
message on the multi-information display appears for five seconds and indicates
that the system is on or off.
When BSI is off, the BSI indicator in the instrument panel stays on.
BSI is in the previously selected on or off setting each time you start the engine.■
BSI On and Off
1BSI (Blind Spot Information) System
Turn the system off when towing a trailer. The system
does not work properly for the following reasons:•The added mass tilts the vehicle and changes the
radar coverage.•The trailer itself can be detected by the radar
sensors, causing the BSI alert indicators to come
on.
BSI may be adversely affected when:•Objects (guard rails, poles, trees, etc,.) are
detected.•An object that does not reflect radio waves well,
such as a motorcycle, is in the alert zone.•Driving on a curved road.•A vehicle is moving from a far lane to the adjacent
lane.•The system picks up external electrical interference.•The rear bumper or the sensors have been
improperly repaired or the rear bumper has been
deformed.•The orientation of the sensors has been changed.•In bad weather (Heavy rain, snow, and fog).
For a proper BSI use:•Always keep the rear bumper corner area clean.•Do not cover the rear bumper corner area with
labels or stickers of any kind. •Take your vehicle to a dealer if you need the rear
bumper corner area or the radar sensors to be
repaired, or the rear bumper corner area is strongly
impacted.
BSI
IndicatorMulti-information
display
BSI OFF Button
Page 323 of 441
uuParking Your VehicleuParking Sensor System
*
322Driving
■
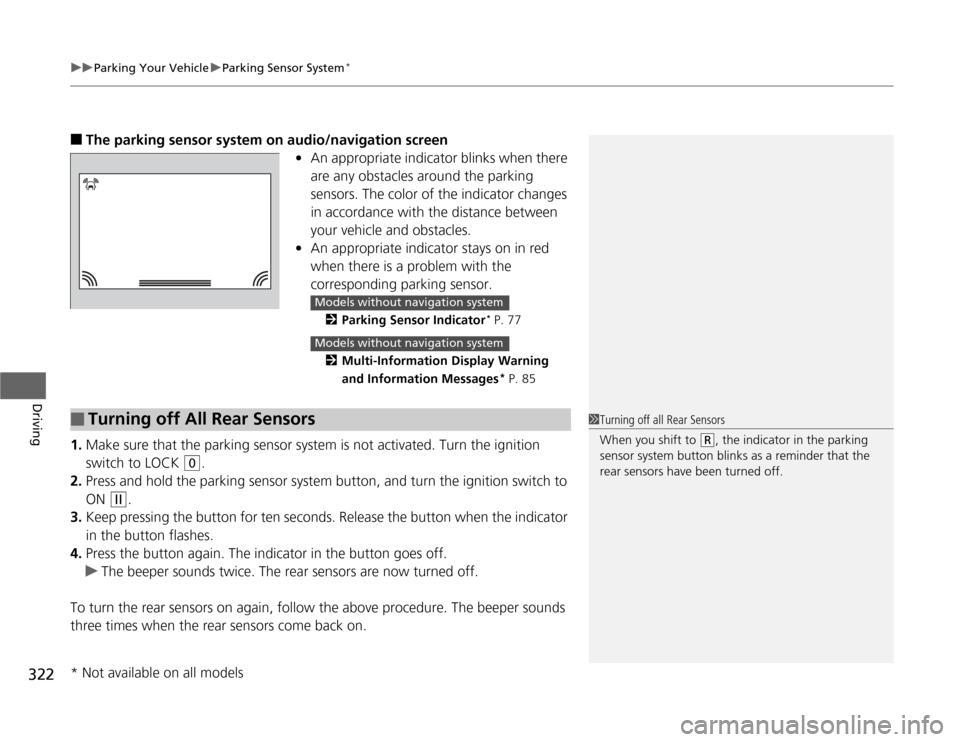
The parking sensor system on audio/navigation screen
•An appropriate indicator blinks when there
are any obstacles around the parking
sensors. The color of the indicator changes
in accordance with the distance between
your vehicle and obstacles.
•An appropriate indicator stays on in red
when there is a problem with the
corresponding parking sensor.
2Parking Sensor Indicator
* P. 77
2Multi-Information Display Warning
and Information Messages* P. 85
1.Make sure that the parking sensor system is not activated. Turn the ignition
switch to LOCK
(0
.
2.Press and hold the parking sensor system button, and turn the ignition switch to
ON
(w
.
3.Keep pressing the button for ten seconds. Release the button when the indicator
in the button flashes.
4.Press the button again. The indicator in the button goes off.
uThe beeper sounds twice. The rear sensors are now turned off.
To turn the rear sensors on again, follow the above procedure. The beeper sounds
three times when the rear sensors come back on.
Models without navigation systemModels without navigation system
■
Turning off All Rear Sensors
1Turning off all Rear Sensors
When you shift to
(R
, the indicator in the parking
sensor system button blinks as a reminder that the
rear sensors have been turned off.
* Not available on all models
Page 336 of 441
335
Continued
Maintenance
Maintenance Minder™If the engine oil life is less than 15%, you will see the Maintenance Minder messages
appear on the information display
* or the multi-information display
* every time you
turn the ignition switch to ON
(w
. The messages notify you when to change the
engine oil, or when to bring your vehicle to a dealer for indicated maintenance
services.
To Use Maintenance Minder
TM
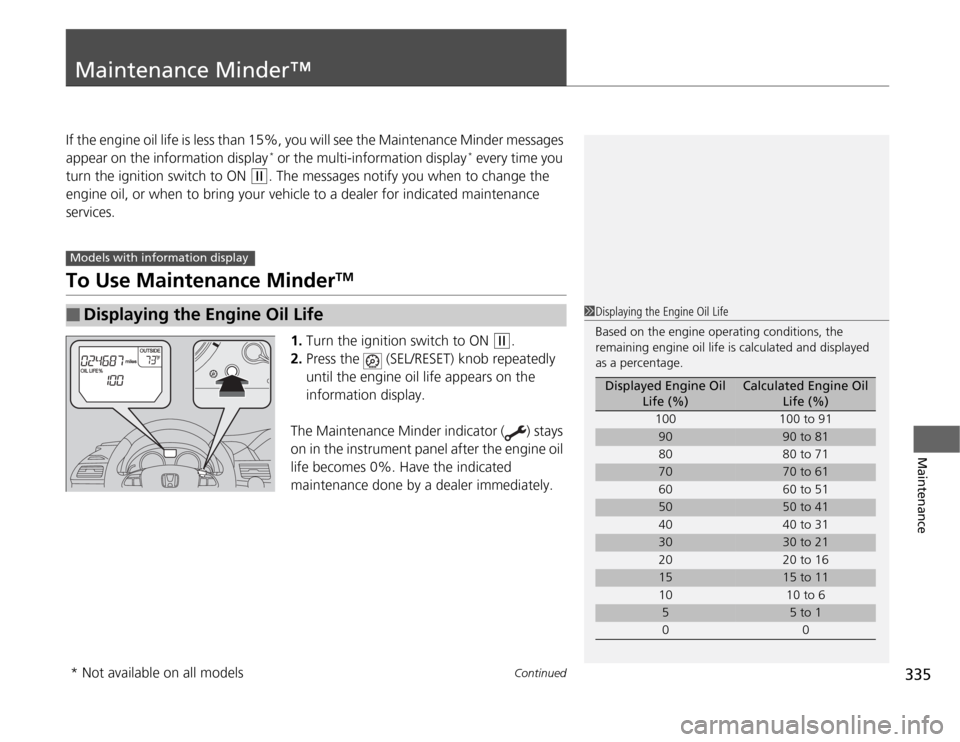
1.Turn the ignition switch to ON
(w
.
2.Press the (SEL/RESET) knob repeatedly
until the engine oil life appears on the
information display.
The Maintenance Minder indicator ( ) stays
on in the instrument panel after the engine oil
life becomes 0%. Have the indicated
maintenance done by a dealer immediately.
■
Displaying the Engine Oil Life
Models with information display
1Displaying the Engine Oil Life
Based on the engine operating conditions, the
remaining engine oil life is calculated and displayed
as a percentage.
Displayed Engine Oil
Life (%)
Calculated Engine Oil
Life (%)
100 100 to 91
90
90 to 81
80 80 to 71
70
70 to 61
60 60 to 51
50
50 to 41
40 40 to 31
30
30 to 21
20 20 to 16
15
15 to 11
10 10 to 6
5
5 to 1
00
* Not available on all models