heater HONDA PRELUDE 1992 Owners Manual
[x] Cancel search | Manufacturer: HONDA, Model Year: 1992, Model line: PRELUDE, Model: HONDA PRELUDE 1992Pages: 225, PDF Size: 2.1 MB
Page 29 of 225
Instruments and Controls
This section gives information
about the controls and displays that
contribute to the daily operation of
your Honda. All the essential
controls are within easy reach.
Control Locations......................... 30
Indicator Lights.............................. 31
Gauges............................................. 37
Speedometer
.............................
37
Tachometer................................. 37
Odometer
.................................... 37
Trip Meter................................... 37
Fuel Gauge..................................
38
Temperature Gauge
..................
38
Controls Near the
Steering
Wheel
....................................... 39
Headlights................................... 40
Daytime Running Lights.......... 40
Instrument Panel Brightness... 41
Turn Signals................................ 41
Windshield Wipers.....................
42
Windshield Washers.................
42
Steering Wheel Adjustment ....
. 43
Steering Wheel Controls............... 44
Cruise Control............................ 44
Horn ............................................ 47
Keys and Locks.............................. 47
Keys.............................................. 47
Ignition Switch........................... 47
Door Locks.................................. 48
Power Door Locks ..................... 48
Trunk.......................................... 50
Seat Adjustments........................... 51
Rear Seat Access........................ 52
Additional Driver' s
Seat
Adjustments...........................
53
Seat Heaters.................................... 54
Folding Rea r
Seat.......................... 55
Hazard Warning............................ 56
Rear Window Defogger ................ 56
Power Windows.............................. 57
Sunroof ...........................................
58
Mirrors ........................................... 59
Parking Brake................................ .
61
Glove Box........................................
.
62
Digital Clock..................................
.
63
Center Console Compartment .... 64
Vanity
Mirror
..............................
64
Cigarette Lighter
..........................
.
65
Ashtray........................................... 65
Interior Lights...............................
.
66
Instruments an
d
ControlsProCarManuals.comMain Menu s t
Page 54 of 225
Seat Adjustments, Seat Heaters
Seat-back Angle Memory
After you have adjusted the seat-
back angle, press the MEMORY
button. This retains the setting so the seat-back will return to thatposition after you tilt it forward for
rear seat access. If you do not press
the MEMORY button, the seat-
back will return to about the midpoint of its adjustment range.
You will then have to readjust the
angle to your preference.
Seat Heaters
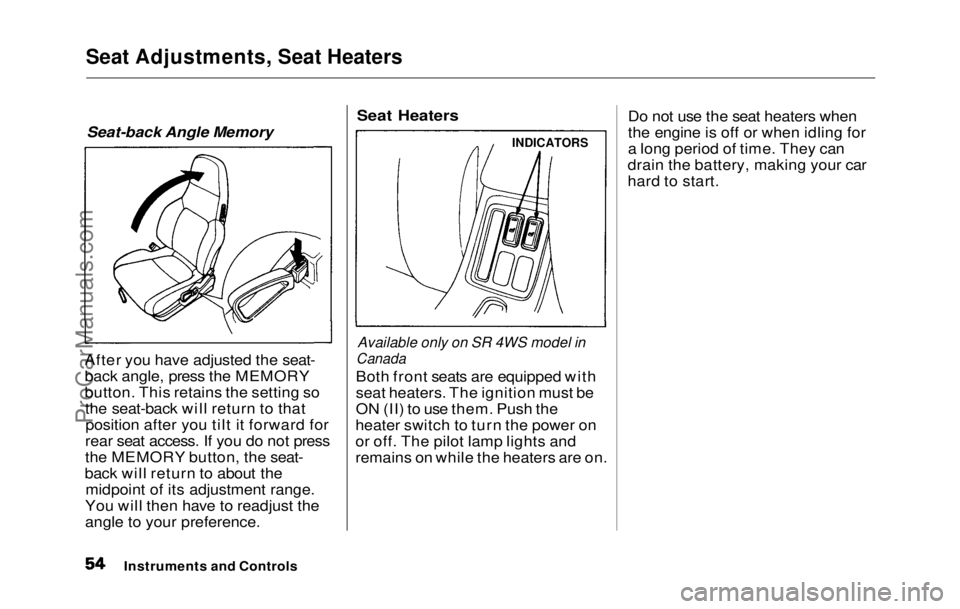
Available only on SR 4WS model in
Canada
Both fron
t
seats are equipped with
seat heaters. The ignition must be
ON (II) to use them. Push the
heater switch to turn the power on
or off. The pilot lamp lights and
remains on while the heaters are on. Do not use the seat heaters when
the engine is off or when idling for
a long period of time. They can
drain the battery, making your car
hard to start.
Instruments and Controls
INDICATORSProCarManuals.comMain Menu Table of Contents s t
Page 61 of 225
Mirrors, Parking Brake
Available on all Canadian models
The outside mirrors are heated to
remove fog and frost. Press the
mirror defroster button to turn on
the heaters. The light in the button
comes on as a reminder. Press the
button again to turn the heaters off.
Parking Brake
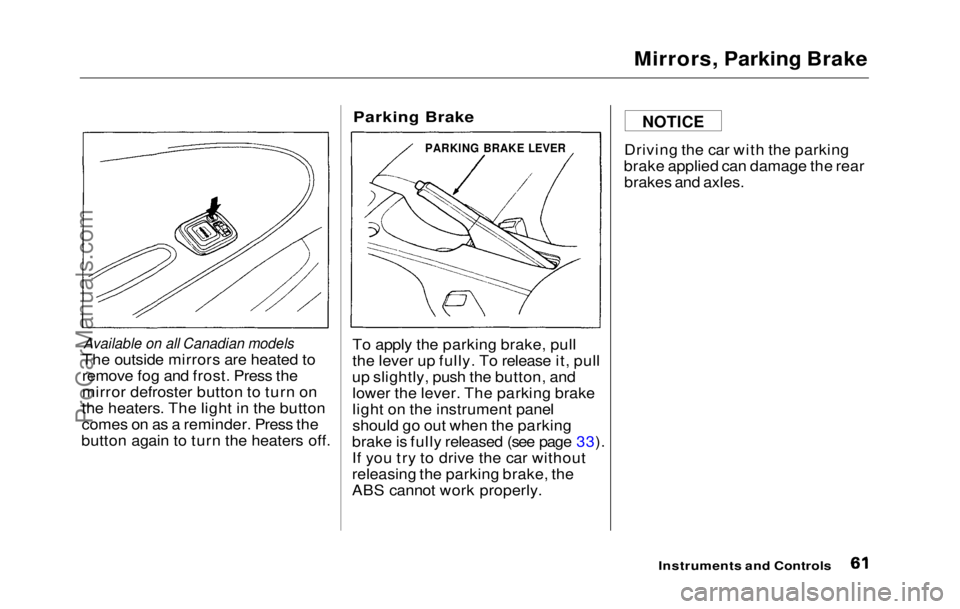
To apply the parking brake, pull
the lever up fully. To release it, pull
up slightly, push the button, and lower the lever. The parking brake
light on the instrument panel
should go out when the parking
brake is fully released (see page 33).
If you try to drive the car without
releasing the parking brake, the
ABS cannot work properly. Driving the car with the parking
brake applied can damage the rear brakes and axles.
Instruments and Controls
NOTICE
PARKING BRAKE LEVERProCarManuals.comMain Menu Table of Contents s t
Page 71 of 225
Heating and Cooling
How to Use the System
This section covers the best way to
use the system for ventilation, cooling, dehumidifying, defrosting
and heating. In most cases, the
mode and air source selections are
only recommendations. You may
prefer different settings.
Use the Recirculation mode to heat
or cool the interior more quickly, or
to keep out smoke and dust.
Leaving the system in recirculation
mode with the A/C off can cause
the windows to fog up. Switch to
the Fresh Air mode as soon as the
interior reaches a comfortable
temperature or the outside smoky,
dusty condition clears.
The engine must be running for the
heater and air conditioner to pro-
vide hot and cold air. The heater
uses engine coolant to warm the air.
If the engine is cold, it will be sever-
al minutes before you feel warm air
circulating.
The air conditioner does not de-
pend on engine temperature. It can produce cold air almost immedi-
ately.
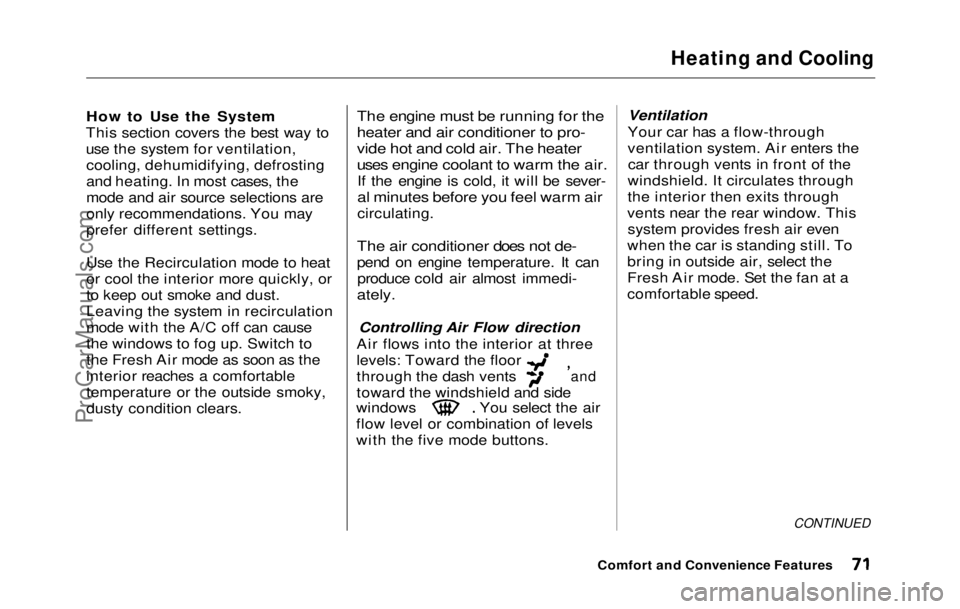
Controlling Air Flow direction
Air flows into the interior at three
levels: Toward the floor
through the dash vents
toward the windshield and side windows You select the air
flow level or combination of levels
with th
e five mode buttons. Ventilation
Your car has a flow-through
ventilation system. Air enters the car through vents in front of the
windshield. I
t circulates through
the interior then exits through
vents nea
r the rear window. This
system provides fresh air even
when th
e car is standing still. To
bring i
n outside air, select the
Fresh Air mode. Set the fan at a
comfortable speed
.
CONTINUED
Comfort an
d Convenience Features
and
ProCarManuals.comMain Menu Table of Contents s t
Page 72 of 225
Heating and Cooling
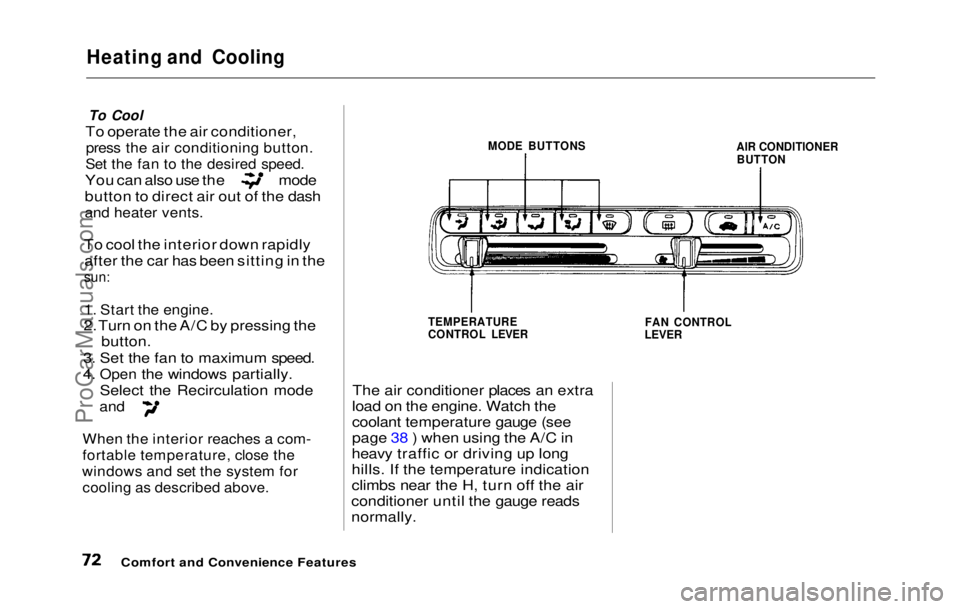
To Cool
To operate the air conditioner,
press the air conditioning button.
Set the fan to the desired speed.
You can also use the mode
button to direct air out of the dash
and heater vents.
To cool the interior down rapidly after the car has been sitting in the
sun:
1. Start the engine.
2. Turn o
n the A/C by pressing the
button.
3. Set
the fan to maximum speed.
4.
Open the windows partially.
Select the Recirculation mode
and
When the
interior reaches a com-
fortable temperature, close the
windows and set the system for
cooling as described above.
MODE BUTTONS
AIR CONDITIONER
BUTTON
TEMPERATURE
CONTROL LEVER
The air conditioner places an extra
load on the engine. Watch the
coolant temperature gauge (see
page 38 ) when using the A/C in
heavy traffic or driving up long
hills. If the temperature indication
climbs near the H, turn off the air
conditioner until the gauge reads
normally.
FAN CONTROL
LEVER
Comfort and Convenience FeaturesProCarManuals.comMain Menu Table of Contents s t
Page 73 of 225
Heating and Cooling
To Dehumidify and Defog
with A/C
An air conditioner removes mois-
ture from the air as it operates.
You can use it to defog the win-
dows quickly in cool or damp wea-
ther. Used in combination with the
heater, it also makes the interior
warm and dry. This setting is best
for all driving conditions whenever
the outside temperature is above
32°F (0°C).
1. Set the fa n to a medium speed.
2. Tur n
on the air conditioner.
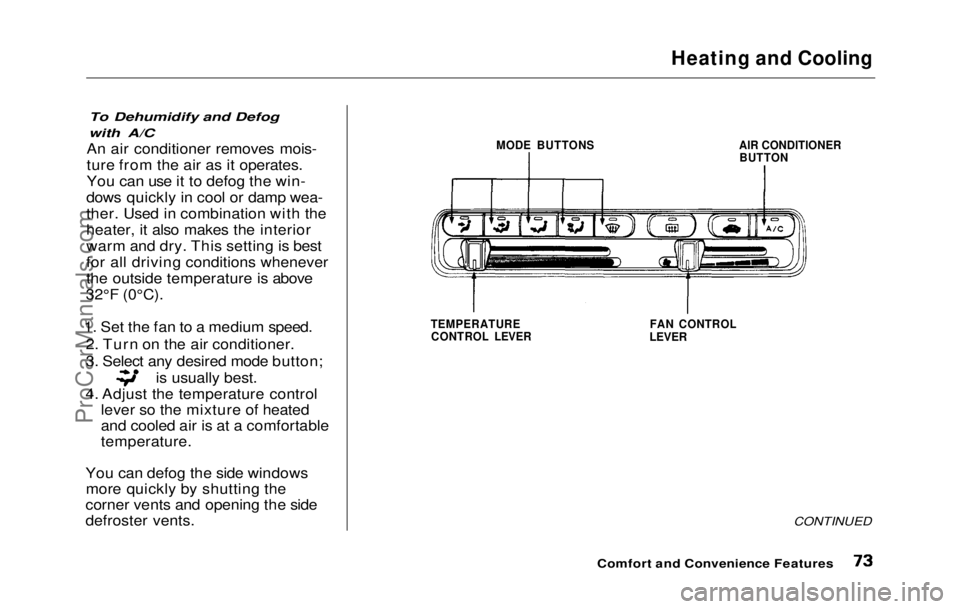
3. Select any desired mode button; is usually best.
4. Adjust the temperature control lever so the mixture of heated
and cooled air is at a comfortable
temperature.
You can defog the side windows more quickly by shutting the
corner vents and opening the side
defroster vents.
MODE BUTTONS
AIR CONDITIONER
BUTTON
TEMPERATURE CONTROL LEVER FAN CONTROL
LEVER
CONTINUED
Comfort and Convenience FeaturesProCarManuals.comMain Menu Table of Contents s t
Page 74 of 225
Heating and Cooling
To Heat
To warm the interior, press and select the Fresh Air
mode. Set the fan to the desired
speed. Adjust the warmth of the air
with the temperature control lever.
To warm the interior rapidly after
the car has been sitting out in cold
weather.
1. Start the engine.
2. Select
the Recirculation mode
and
3. Slide the temperature control
lever to maximum heat.
4. Leave
the fan OFF for the first
few minutes. When the tempera-
ture gauge rises above the bot-
tom white mark, set the fan to
medium speed.
5. Whe
n
the interior warms up,
switch to fresh air mode and
adjust the temperature control
lever to a comfortable setting.
To Defrost
To remove frost or ice from the
windshield and side windows after the car has been sitting out in cold
weather.
1. Start the engine.
2. Selec t
the Recirculation mode
and
3. Open
the side defroster vents.
4. Set the fan and temperature
controls to maximum.
These settings
direct all the air
flow to the defroster vents at the
base of the windshield and the side
window defroster vents. The air
flow will get warmer and clear the
windows faster as the engine
warms up. You can close the corner
vents with the dial beside each vent.
That will send more warm air to
the side defroster vents.
For safety, make sure you have a
clear view through all the windows
before driving away.
To Turn Everything Off
To shut off the system temporarily,
slide the fan speed and temperature
control levers all the way to the left.
You should only shut the system completely off for the first few
minutes of driving in cold weather,
until the engine coolant warms up
enough to operate the heater. Keep
the fan on at all other times so stale
air does not build up in the interior.
Comfort and Convenience FeaturesProCarManuals.comMain Menu Table of Contents s t
Page 139 of 225
Cooling System
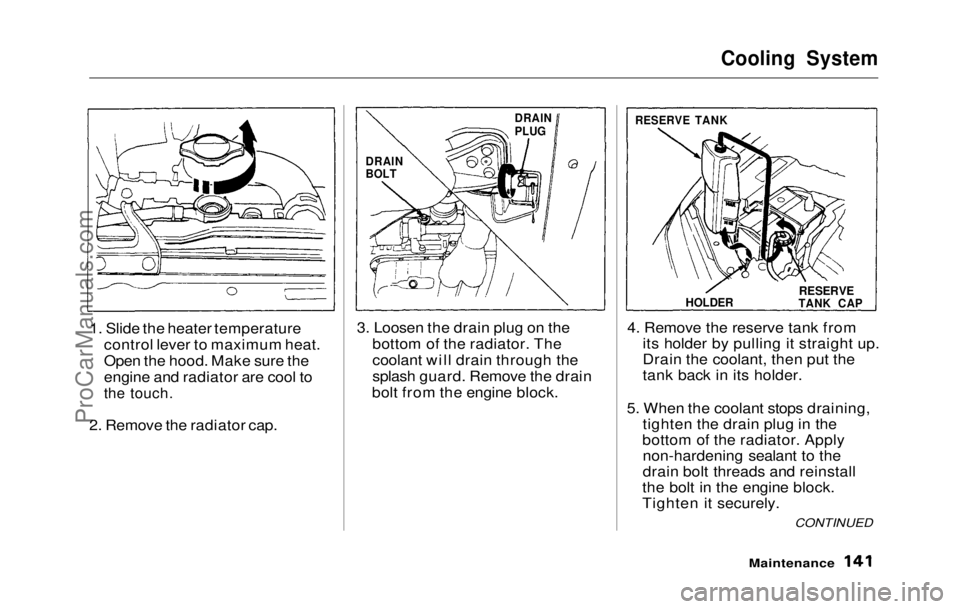
1. Slide the heater temperature control lever to maximum heat.
Open the hood. Make sure the
engine and radiator are cool to
the touch.
2. Remove the radiator cap. 3. Loosen the drain plug on the
bottom of the radiator. The
coolant will drain through the
splash guard. Remove the drain
bolt from the engine block. 4. Remove the reserve tank from
its holder by pulling it straight up.
Drain the coolant, then put the
tank back in its holder.
5. When the coolant stops draining, tighten the drain plug in the
bottom of the radiator. Apply non-hardening sealant to the
drain bolt threads and reinstall
the bolt in the engine block.
Tighten it securely.
Maintenance
DRAIN
PLUG
DRAIN
BOLT RESERVE TANK
HOLDER
RESERVE
TANK CAP
CONTINUEDProCarManuals.comMain Menu Table of Contents s t
Page 187 of 225
If Your Engine Won't Start, Jump Starting
The Starter Operates
Normally
In this case, the starter motor
sounds normal when you turn the
ignition switch to START (III), but
the engine does not run. Are you using the proper starting
procedure? Refer to Starting
the Engine on page 109 . Do you have gas? Turn the
ignition switch to ON (II) for a
minute and watch the fuel gauge.
There may be an electrical
problem, such as no power to the
fuel pump. Check all the fuses
(see page 199 ).
If you find nothing wrong, you will
need a qualified technician to find
the problem. See Towing on page
202.
Jump Starting
If your car's battery has run down,
you may be able to start the engine
by using a booster battery. Although this seems like a simple
procedure, there are several precau-
tions you should take. Follow the
directions closely.
You cannot start a Honda with an
automatic transmision by pushingor pulling it. To jump start your car:
1. Open the hood and check the physical condition of the battery
(see page 152 ). In very cold
weather, check the condition of the electrolyte. If it seems slushy
or like ice, do not try jump
starting until it thaws.
If a battery sits in extreme cold, the
electrolyte inside can freeze.
Attempting to jump start with a frozen battery can cause it to
rupture or explode.
2. Turn off all the electrical acces- sories: heater, A/C, stereo system,
lights, etc. Put the transmission in Neutral
or Park and set the parking
brake.
Taking Care of the Unexpected
CONTINUED
A battery can explode if you
do not follow the correct
procedure, seriously injuring
anyone nearby.
Keep all sparks, open flames,
and smoking materials away
from the battery.
NOTICE
ProCarManuals.comMain Menu Table of Contents s t
Page 190 of 225

If Your Engine Overheats
6. Look for any obvious coolant
leaks, such as a split radiator
hose. Everything is still extreme-
ly hot, so use caution. If you find
a leak, it must be repaired before
you continue driving (see
Towing on page 202 ).
7. If
you don't find an obvious leak,
check the coolant level in the
radiator reserve tank (see page
139). If the level is below the
MIN mark, add coolant to half-
way between the MIN and MAX
marks.
8. I f
there was no coolant in the
reserve tank, you may also have
to add coolant to the radiator. Let the engine cool down until
the temperature gauge registers
below the midpoint, or lower,
before checking the radiator. 9. Using gloves or a large heavy
cloth, turn the radiator cap
counterclockwise, without
pushing down, to the first stop.
This releases any remaining
pressure in the cooling system.
After the pressure releases, push down on the cap and turn it until
it comes off.
10.Start th e
engine and set the
heater control lever to maximum.
Add coolant to the radiator up to
the base of the filler neck. If you
do not have the proper coolant
mixture available, you can add
plain water. Remember to have
the cooling system drained and
refilled with the proper mixture as soon as you can.
11.Put the radiato
r cap back on
tightly. Run the engine and
watch the temperature gauge. If
it illuminates the red marker
again, the engine needs repair.
(See Towing on page
202.)
12.If th e
temperature stays normal,
check the coolant level in the
radiator reserve tank. If it has
gone down, add coolant to the MAX mark. Put the cap back on
tightly.
Taking Care of the Unexpected
Removing the radiator cap
while the engine is hot can
cause the coolant to spray out, seriously scalding you.
Always let the engine and radiator cool down before
removing the radiator cap.ProCarManuals.comMain Menu Table of Contents s t