HONDA PRELUDE 1998 Service Manual
Manufacturer: HONDA, Model Year: 1998, Model line: PRELUDE, Model: HONDA PRELUDE 1998Pages: 278, PDF Size: 2.61 MB
Page 41 of 278
Additional Information About Your Seat Belts
Seat Belt System Components
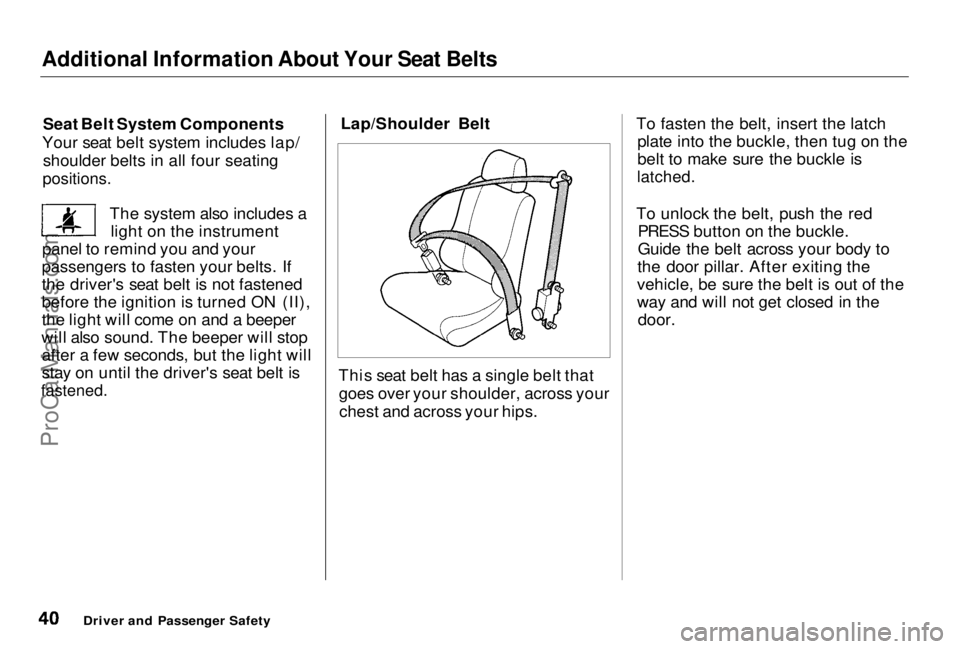
Your seat belt system includes lap/ shoulder belts in all four seating
positions.
The system also includes alight on the instrument
panel to remind you and your
passengers to fasten your belts. If
the driver's seat belt is not fastened
before the ignition is turned ON (II),
the light will come on and a beeper
will also sound. The beeper will stop after a few seconds, but the light will
stay on until the driver's seat belt is
fastened.
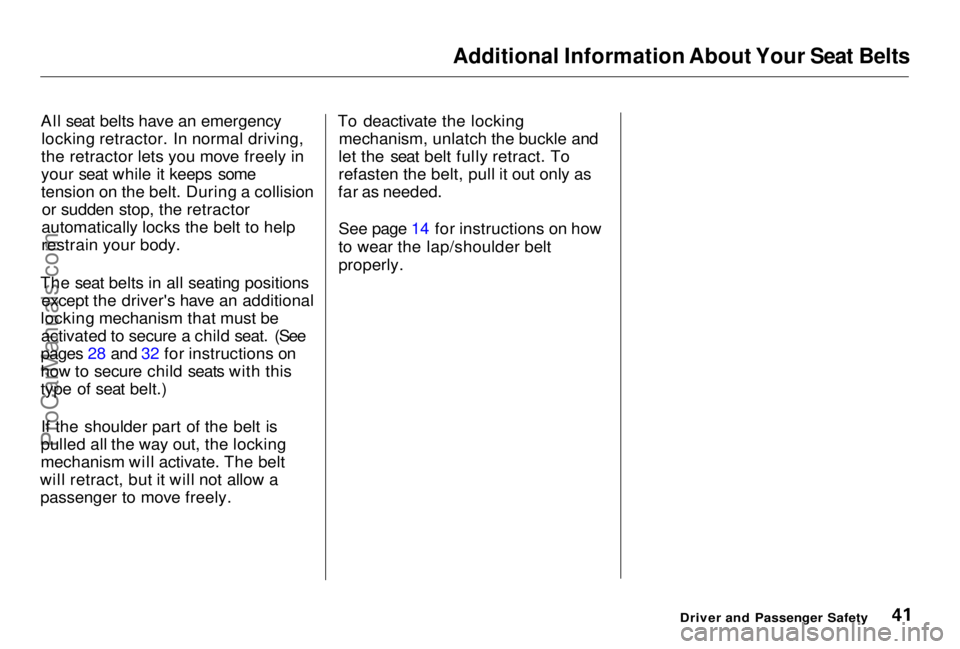
Lap/Shoulder Belt
This seat belt has a single belt that goes over your shoulder, across yourchest and across your hips. To fasten the belt, insert the latch
plate into the buckle, then tug on the
belt to make sure the buckle is
latched.
To unlock the belt, push the red PRESS button on the buckle.
Guide the belt across your body to
the door pillar. After exiting the
vehicle, be sure the belt is out of the
way and will not get closed in the
door.
Driver and Passenger SafetyProCarManuals.comMain Menu Table of Contents s t
Page 42 of 278
Additional Information About Your Seat Belts
All seat belts have an emergency locking retractor. In normal driving,
the retractor lets you move freely in
your seat while it keeps some
tension on the belt. During a collision or sudden stop, the retractor
automatically locks the belt to help
restrain your body.
The seat belts in all seating positions except the driver's have an additional
locking mechanism that must be activated to secure a child seat. (See
pages 28 and 32 for instructions on
how to secure child seats with this
type of seat belt.)
If the shoulder part of the belt is
pulled all the way out, the locking
mechanism will activate. The belt
will retract, but it will not allow a passenger to move freely. To deactivate the locking
mechanism, unlatch the buckle and
let the seat belt fully retract. To
refasten the belt, pull it out only as
far as needed.
See page 14 for instructions on how
to wear the lap/shoulder belt
properly.
Driver and Passenger SafetyProCarManuals.comMain Menu Table of Contents s t
Page 43 of 278
Additional Information About Your Seat Belts
Seat Belt Maintenance
For safety, you should check the
condition of your seat belts regularly.
Pull each belt out fully and look for
frays, cuts
, burns, and wear. Check
that the latches work smoothly and
that th
e lap/shoulder belts retract
easily. Any belt not in good condition
or not working properly will not
provide good protection and should
be replaced
as soon as possible.
Honda provides a lifetime warranty
on seat belts. Honda will repair or
replace
any seat belt component that
fails t
o function properly during
normal use.
Please see your Honda Warranty Information booklet for details.
If a seat belt is worn during a crash,
yo
u should have your dealer inspect
the belt, and
replace it if necessary.
A belt that has been worn during a crash may not
provide the same level
of protection in a subsequent crash.
The
dealer should also inspect the
anchors for damage and replace
the
m if needed.
For information on how to clean your sea
t belts, see page 223.
Driver an
d Passenger Safety
Not checking or maintaining
seat belt
s can result in serious
injury or death if the seat belts
do not work properly when
needed
.
Check your seat belts regularly
and
have any problem
corrected a
s soon as possible.
ProCarManuals.comMain Menu Table of Contents s t
Page 44 of 278
Additional Information About Your SRS
SRS Components
Your Supplemental Restraint System (SRS) includes:
Two frontal airbags. The driver'sairbag is stored in the center of
the steering wheel; the front
passenger's airbag is stored in the dashboard. Both are marked
"SRS".
Sensors that can detect a severe
frontal collision. A sophisticated electronic system
that continually monitors thesensors, control unit, the airbag
activators, and all related wiring
when the ignition is ON (II). An indicator light on the
instrument panel to alert you to a
possible problem with the system (see page 45). Emergency backup power in case
your vehicle's electrical system is disconnected in a crash. How Your Airbags Work
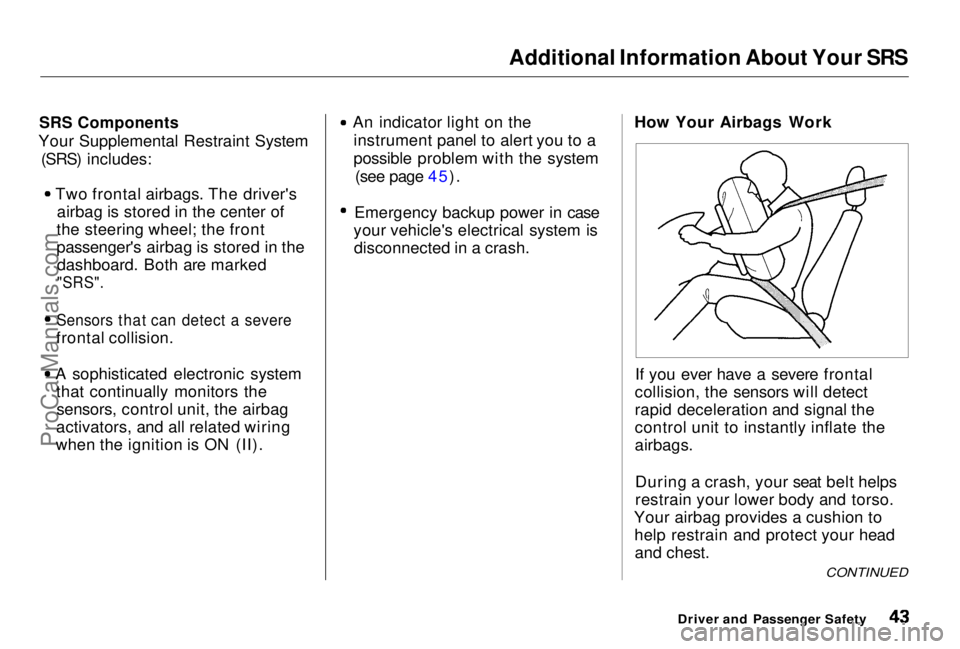
If you ever have a severe frontal
collision, the sensors will detect
rapid deceleration and signal the
control unit to instantly inflate the
airbags.
During a crash, your seat belt helps
restrain your lower body and torso.
Your airbag provides a cushion to help restrain and protect your headand chest.
Driver and Passenger Safety
CONTINUEDProCarManuals.comMain Menu Table of Contents s t
Page 45 of 278
Additional Information About Your SRS
Since both airbags use the same
sensors, both airbags normally
inflate at the same time. However, it
is possible for only one airbag to inflate.
This can occur when the severity of a collision is at the margin, or
threshold, that determines whether or not the airbags will deploy. In
such cases, the seat belt will provide
sufficient protection, and the
supplemental protection offered by
the airbag would be minimal.
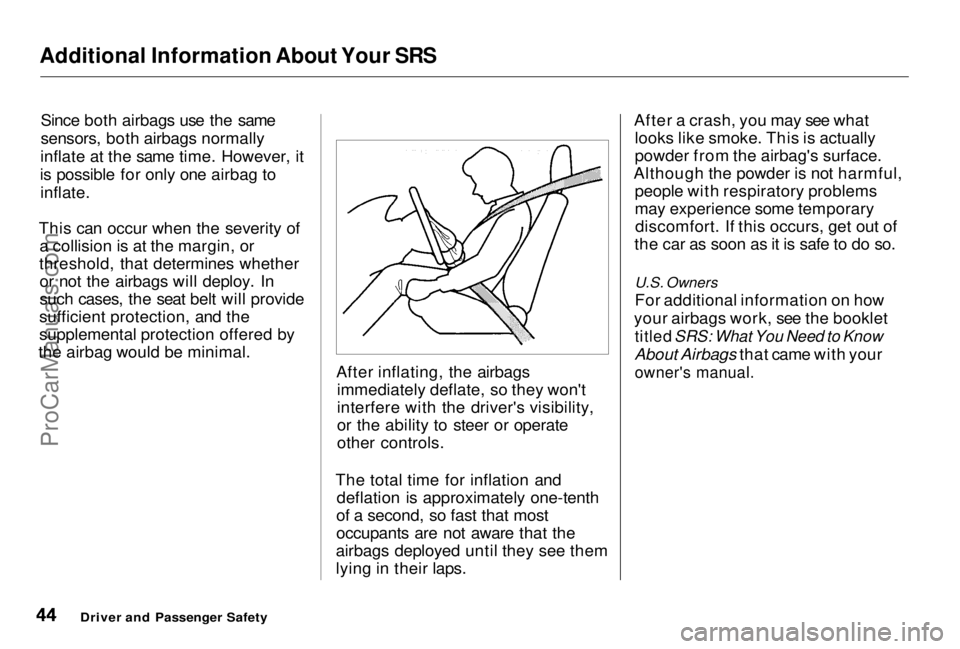
After inflating, the airbagsimmediately deflate, so they won't
interfere with the driver's visibility,
or the ability to steer or operate
other controls.
The total time for inflation and deflation is approximately one-tenth
of a second, so fast that most
occupants are not aware that the
airbags deployed until they see them
lying in their laps. After a crash, you may see what
looks like smoke. This is actually
powder from the airbag's surface.
Although the powder is not harmful, people with respiratory problems
may experience some temporarydiscomfort. If this occurs, get out of
the car as soon as it is safe to do so.
U.S. Owners
For additional information on how
your airbags work, see the booklet
titled SRS: What You Need to Know
About Airbags that came with your
owner's manual.
Driver and Passenger SafetyProCarManuals.comMain Menu Table of Contents s t
Page 46 of 278
Additional Information About Your SRS
How Your SRS Indicator Light
Works The purpose of the SRSindicator light is to alert
you to a potential problem with your Supplemental Restraint System.
When you turn the ignition ON (II), this indicator will light up briefly
then go out. This tells you that the system is working properly.
However, if the light comes on at any other time, you should have your
system checked by your dealer. For
example:
If the SRS indicator light does not
come on after you turn the ignition
ON (II). If the light stays on after the
engine starts.
If the light comes on or flashes on
and off while you drive.
If you see any of these indications,
your airbags may not deploy when
you need them. See your Honda
dealer as soon as possible.
SRS Service
Your Supplemental Restraint System is virtually maintenance-free, and
there are no parts you can safely service. However, you must have
your vehicle serviced if:
Your airbags ever inflate. The
airbags and the control unit must
be replaced. Do not try to remove or replace the airbags yourself.
This must be done by a Honda dealer or a knowledgeable body
shop.
The SRS indicator light alerts you
to a problem. Take your vehicle to
an authorized Honda dealer as soon as possible. If you ignore this
indication, the airbags might not
inflate when you need them.
Driver and Passenger Safety
Ignoring the SRS indicator light
can result in serious injury or
death if the airbags do not inflate when needed.
Have your vehicle checked by a
dealer as soon as possible if
the SRS light alerts you to a potential problem.
SRS
ProCarManuals.comMain Menu Table of Contents s t
Page 47 of 278
Additional Information About Your SRS
Additional Safety Precautions Do not attempt to deactivate yourairbags. Together, airbags and
seat belts provide the best
protection in a severe frontal
collision.
Do not tamper with SRS
components or wiring for any
reason. Tampering could cause
the airbags to deploy, possibly causing very serious injury.
See page 127 for further information
and precautions relating to your SRS.
Driver and Passenger SafetyProCarManuals.comMain Menu Table of Contents s t
Page 48 of 278
Carbon Monoxide Hazard
Your vehicle's exhaust contains carbon monoxide gas. You should
have no problem with carbon monoxide entering the vehicle in
normal driving if you maintain your
vehicle properly.
Have the exhaust system inspected
for leaks whenever:
The vehicle is raised for an oilchange.
You notice a change in the sound of the exhaust. The vehicle was in an accident
that may have damaged the under-
side.
High levels of carbon monoxide can
collect rapidly in enclosed areas,
such as a garage. Do not run the
engine with the garage door closed.
Even with the door open, run the
engine only long enough to move the
vehicle out of the garage. With the trunk lid open, air flow can
pull exhaust gas into your vehicle'sinterior and create a hazardous
condition. If you must drive with the
trunk lid open, open all the windows and set the heating and coolingsystem as shown below.
If you must sit in your parked vehicle, even in an unconfined area, with the
engine running, adjust the heating
and cooling system as follows:
1. Select the Fresh Air mode. 2. Select the mode.
3. Turn the fan on high speed.
4. Set the temperature control to a
comfortable setting.
Driver and Passenger Safety
Carbon monoxide gas is toxic.
Breathing it can cause
unconsciousness and even kill
you.
Avoid any enclosed areas or activities that expose you to
carbon monoxide.ProCarManuals.comMain Menu Table of Contents s t
Page 49 of 278
Safety Labels
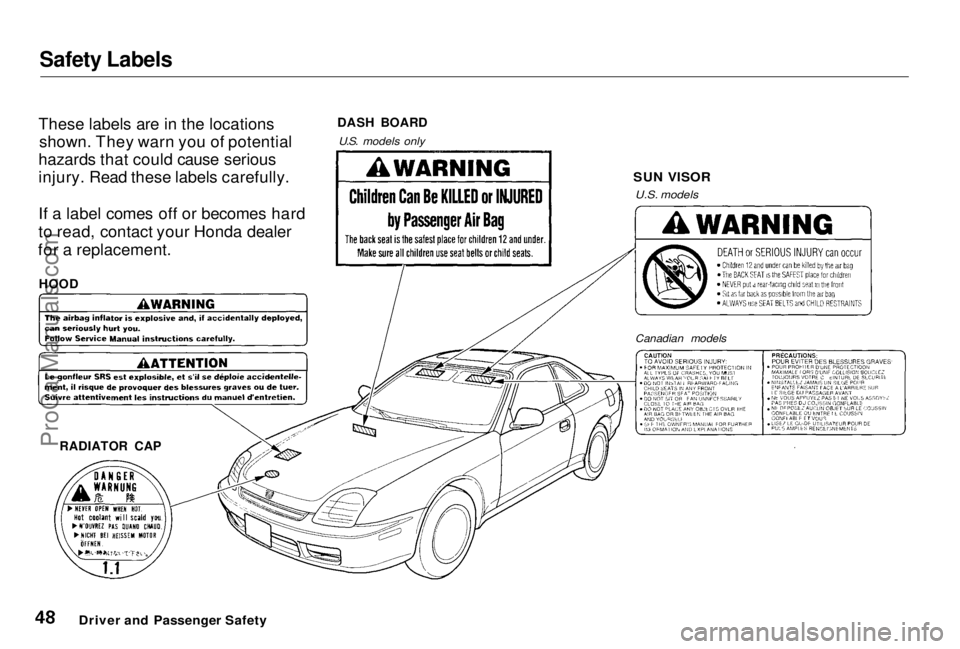
These labels are in the locations shown. They warn you of potential
hazards that could cause serious
injury. Read these labels carefully.
If a label comes off or becomes hard
to read, contact your Honda dealer
for a replacement.
Driver and Passenger Safety
HOOD
RADIATOR CAP
Canadian models
SUN VISOR
U.S. models
DASH BOARD
U.S. models onlyProCarManuals.comMain Menu Table of Contents s t
Page 50 of 278
Instruments and Controls
This section gives information about the controls and displays that
contribute to the daily operation of
your Honda. All the essential controls are within easy reach.
Control Locations............................ 50
Indicator Lights................................ 51
Gauges.............................................. 56
Speedometer................................ 56
Tachometer.................................. 56
Odometer...................................... 56
Trip Meter.................................... 56
Fuel Gauge................................... 57
Temperature Gauge.................... 57 Maintenance Required Indicator.................................... 58
Controls Near the Steering
Wheel........................................ 59
Headlights.................................... 60
Daytime Running Lights............. 60
Instrument Panel Brightness..... 61
Turn Signals................................. 61
Windshield Wipers...................... 62
Windshield Washers................... 63
Hazard Warning........................... 63
Rear Window Defogger.............. 63
Steering Wheel Adjustment....... 64
Steering Wheel Controls ................ 65
Cruise Control.............................. 65
Keys and Locks................................ 68
Keys...............................................68
Learning Key................................ 69
Immobilizer System..................... 69
Ignition Switch............................. 70
Power Door Locks....................... 72
Lockout Prevention..................... 73
Trunk............................................73
Glove Box.....................................74
Seat Adjustments............................. 75 Front Seat Adjustments.............. 75Driver's Seat Height Adjustment............................... 76
Rear Seat Access .........................
76
Head Restraints...........................
77
Seat Heaters..................................... 78
Folding Rear Seat............................ 79
Power Windows............................... 80
Moonroof..........................................82
Mirrors.............................................. 83
Adjusting the Power Mirrors.....
83
Parking Brake..................................
84
Digital Clock..................................... 85
Beverage Holder.............................. 86 Console Compartment.................... 87
Coin Box........................................... 88
Accessory Power Socket................ 88
Ashtrays............................................ 89
Interior Lights.................................. 89 Ceiling Lights............................... 89
Courtesy Lights........................... 90
Instruments and ControlsProCarManuals.comMain Menu s t