engine HONDA PRELUDE 1998 Owners Manual
[x] Cancel search | Manufacturer: HONDA, Model Year: 1998, Model line: PRELUDE, Model: HONDA PRELUDE 1998Pages: 278, PDF Size: 2.61 MB
Page 1 of 278

1998 Prelude Online Reference Owner's Manual
Use these links (and links throughout this manual) to navigate through\
this reference.
For a printed owner's manual, click on authorized manuals or go to www.h\
elminc.com.
Contents
Introduction ........................................................................\
................................................................. i
A Few Words About Safet y........................................................................\
.........................................ii
Driver and Passenger Safety ........................................................................\
......................................3
Proper use and care of your vehicle's seat belts, and Supplemental Restr\
aint System.
Instruments and Control s........................................................................\
.........................................49
Instrument panel indicator and gauge, and how to use dashboard and steering colu\
mn controls.
Comfort and Convenience Features ........................................................................\
..................... 91
How to operate the climate control system, the audio system, and other c\
onvenience features.
Before Driving........................................................................\
..........................................................119
What gasoline to use, how to break-in your new vehicle, and how to load luggage and other cargo.
Driving ........................................................................\
......................................................................131
The proper way to start the engine, shift the transmission, and park, pl\
us towing a trailer.
Maintenance........................................................................\
.............................................................159
The Maintenance Schedule shows you when you need to take your vehicle to the dealer.
Appearance Car e........................................................................\
..................................................... .219
Tips on cleaning and protecting your vehicle. Things to look for if your\
vehicle ever needs body repairs.
Taking Care of the Unexpecte d........................................................................\
..............................227
This section covers several problems motorists sometimes experience, and how to handle them.
Technical Informatio n........................................................................\
.............................................251
ID numbers, dimensions, capacities, and technical information.
Warranty and Customer Relations (U.S. and Canada)................................................................265
A summary of the warranties covering your new Acura, and how to contact \
us.
Authorized Manu als (U.S. only)........................................................................\
..............................271
How to order manuals and other technical literature.
Index........................................................................\
.............................................................................. I
Service Information Summary
A summary of information you need when you pull up to the fuel pump.
Accord Value Package Audio System Owner's Identification Form
ProCarManuals.com
Page 17 of 278

Protecting Adults
7. Maintain a Proper Sitting Position
After all occupants have adjusted their seats and put on seat belts, it is
very important that they continue to sit upright, with their bodies well
back in their seats and both feet on
the floor, until the car is parked and
the engine is off.
Sitting improperly can increase the
chance of injury during a crash. For
example, if an occupant slouches,
lies down, turns sideways, sits
forward, leans forward, or puts one or both feet up, their chance of
injury during a crash is greatly
increased.
In addition, if an occupant is out of
position in the front seat, they can be seriously or fatally injured by
striking interior parts of the vehicle,
or by being struck by an inflating
airbag.
Remember, to get the best
protection from your vehicle's airbags and other safety features,
you must sit properly and wear your seat belt properly.
Driver and Passenger Safety
Sitting improperly or out of
position can result in serious
injury or death in a crash.
Always sit upright, well back in
the seat, with your feet on the
floor.ProCarManuals.comMain Menu Table of Contents s t
Page 46 of 278
Additional Information About Your SRS
How Your SRS Indicator Light
Works The purpose of the SRSindicator light is to alert
you to a potential problem with your Supplemental Restraint System.
When you turn the ignition ON (II), this indicator will light up briefly
then go out. This tells you that the system is working properly.
However, if the light comes on at any other time, you should have your
system checked by your dealer. For
example:
If the SRS indicator light does not
come on after you turn the ignition
ON (II). If the light stays on after the
engine starts.
If the light comes on or flashes on
and off while you drive.
If you see any of these indications,
your airbags may not deploy when
you need them. See your Honda
dealer as soon as possible.
SRS Service
Your Supplemental Restraint System is virtually maintenance-free, and
there are no parts you can safely service. However, you must have
your vehicle serviced if:
Your airbags ever inflate. The
airbags and the control unit must
be replaced. Do not try to remove or replace the airbags yourself.
This must be done by a Honda dealer or a knowledgeable body
shop.
The SRS indicator light alerts you
to a problem. Take your vehicle to
an authorized Honda dealer as soon as possible. If you ignore this
indication, the airbags might not
inflate when you need them.
Driver and Passenger Safety
Ignoring the SRS indicator light
can result in serious injury or
death if the airbags do not inflate when needed.
Have your vehicle checked by a
dealer as soon as possible if
the SRS light alerts you to a potential problem.
SRS
ProCarManuals.comMain Menu Table of Contents s t
Page 48 of 278

Carbon Monoxide Hazard
Your vehicle's exhaust contains carbon monoxide gas. You should
have no problem with carbon monoxide entering the vehicle in
normal driving if you maintain your
vehicle properly.
Have the exhaust system inspected
for leaks whenever:
The vehicle is raised for an oilchange.
You notice a change in the sound of the exhaust. The vehicle was in an accident
that may have damaged the under-
side.
High levels of carbon monoxide can
collect rapidly in enclosed areas,
such as a garage. Do not run the
engine with the garage door closed.
Even with the door open, run the
engine only long enough to move the
vehicle out of the garage. With the trunk lid open, air flow can
pull exhaust gas into your vehicle'sinterior and create a hazardous
condition. If you must drive with the
trunk lid open, open all the windows and set the heating and coolingsystem as shown below.
If you must sit in your parked vehicle, even in an unconfined area, with the
engine running, adjust the heating
and cooling system as follows:
1. Select the Fresh Air mode. 2. Select the mode.
3. Turn the fan on high speed.
4. Set the temperature control to a
comfortable setting.
Driver and Passenger Safety
Carbon monoxide gas is toxic.
Breathing it can cause
unconsciousness and even kill
you.
Avoid any enclosed areas or activities that expose you to
carbon monoxide.ProCarManuals.comMain Menu Table of Contents s t
Page 54 of 278
Indicator Lights
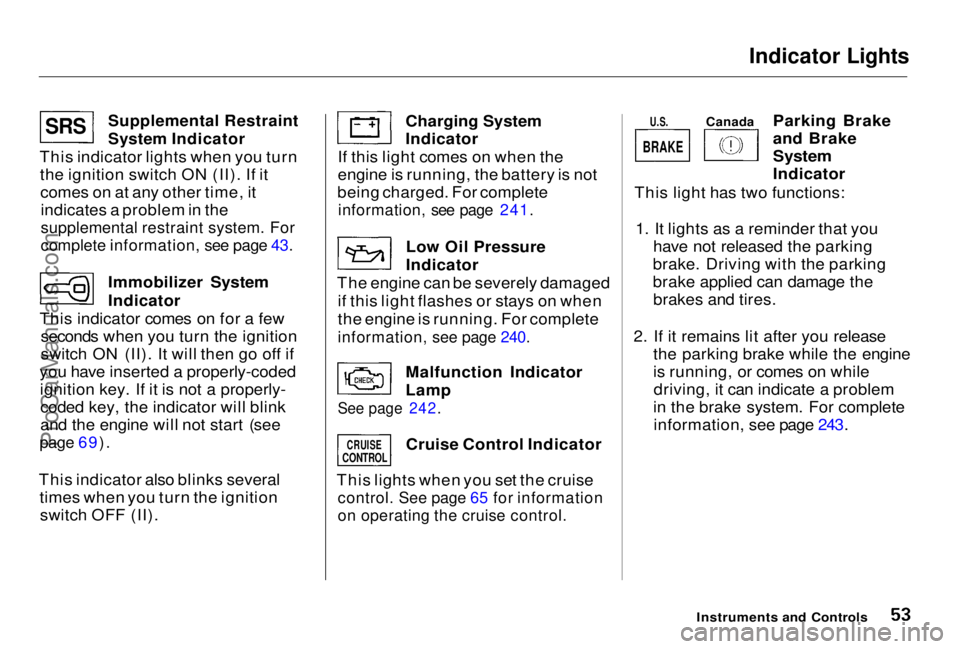
Supplemental Restraint
System Indicator
This indicator lights when you turn the ignition switch ON (II). If itcomes on at any other time, itindicates a problem in the
supplemental restraint system. For
complete information, see page 43.
Immobilizer System
Indicator
This indicator comes on for a few seconds when you turn the ignition
switch ON (II). It will then go off if
you have inserted a properly-coded ignition key. If it is not a properly-coded key, the indicator will blink
and the engine will not start (see
page 69).
This indicator also blinks several times when you turn the ignitionswitch OFF (II). Charging System
Indicator
If this light comes on when the
engine is running, the battery is not
being charged. For complete
information, see page 241.
Low Oil Pressure
Indicator
The engine can be severely damaged if this light flashes or stays on when
the engine is running. For complete
information, see page 240.
Malfunction Indicator
Lamp
See page 242.
Cruise Control Indicator
This lights when you set the cruise
control. See page 65 for information
on operating the cruise control.
Parking Brake
and Brake
System
Indicator
This light has two functions:
1. It lights as a reminder that you have not released the parking
brake. Driving with the parking
brake applied can damage the brakes and tires.
2. If it remains lit after you release the parking brake while the engine
is running, or comes on whiledriving, it can indicate a problem
in the brake system. For complete information, see page 243.
Instruments and Controls
S R S
BRAKE
CRUISE
CONTROL
U.S.
Canada
ProCarManuals.comMain Menu Table of Contents s t
Page 57 of 278
Gauges
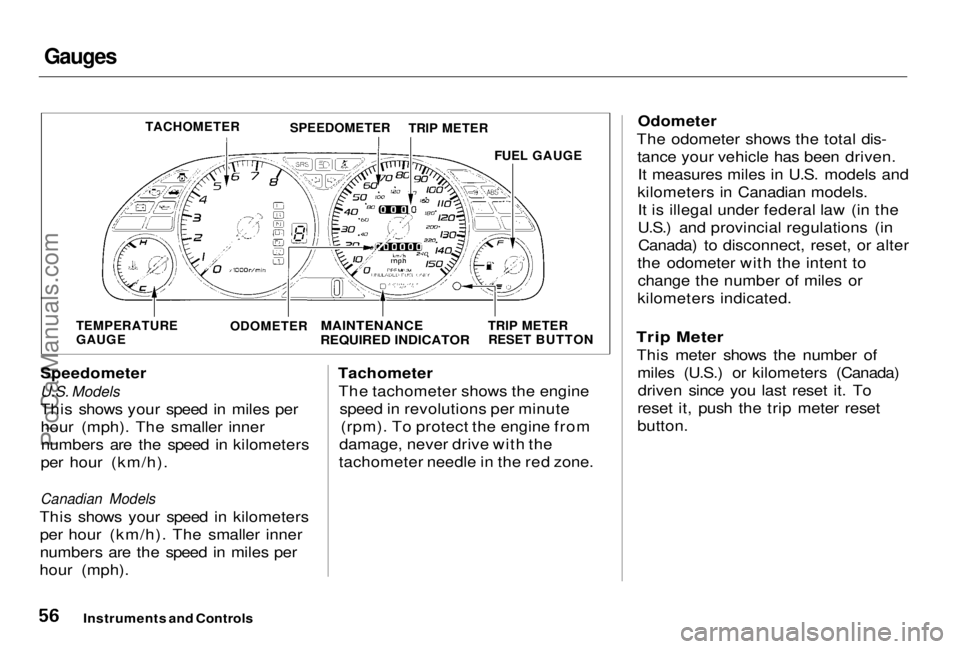
Speedometer
U.S. Models
This shows your speed in miles per hour (mph). The smaller innernumbers are the speed in kilometers
per hour (km/h).
Canadian Models
This shows your speed in kilometers per hour (km/h). The smaller inner
numbers are the speed in miles per
hour (mph). Tachometer
The tachometer shows the engine speed in revolutions per minute(rpm). To protect the engine from
damage, never drive with the
tachometer needle in the red zone. Odometer
The odometer shows the total dis- tance your vehicle has been driven.It measures miles in U.S. models and
kilometers in Canadian models. It is illegal under federal law (in the
U.S.) and provincial regulations (inCanada) to disconnect, reset, or alter
the odometer with the intent to change the number of miles or
kilometers indicated.
Trip Meter
This meter shows the number of miles (U.S.) or kilometers (Canada)driven since you last reset it. To
reset it, push the trip meter reset
button.
Instruments and Controls
TACHOMETER
SPEEDOMETER
TRIP METER
FUEL GAUGE
TEMPERATURE
GAUGE
ODOMETER
MAINTENANCE
REQUIRED INDICATOR
TRIP METER
RESET BUTTONProCarManuals.comMain Menu Table of Contents s t
Page 58 of 278
Gauges
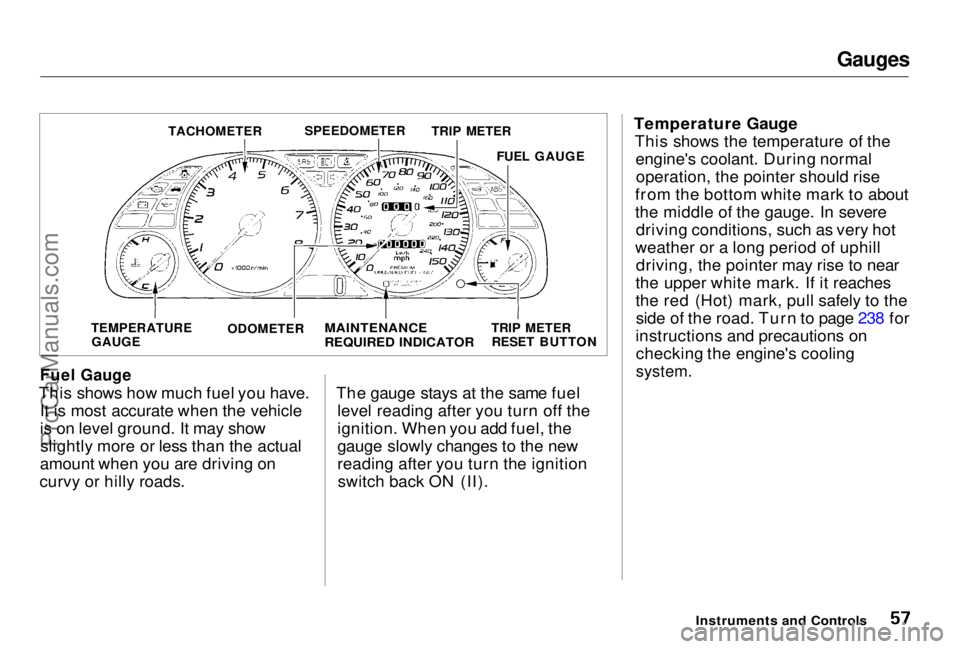
Fuel Gauge
This shows how much fuel you have. It is most accurate when the vehicle
is on level ground. It may showslightly more or less than the actual
amount when you are driving on
curvy or hilly roads. The gauge stays at the same fuel
level reading after you turn off the
ignition. When you add fuel, the
gauge slowly changes to the new
reading after you turn the ignitionswitch back ON (II). Temperature Gauge
This shows the temperature of theengine's coolant. During normaloperation, the pointer should rise
from the bottom white mark to about
the middle of the gauge. In severe driving conditions, such as very hot
weather or a long period of uphill driving, the pointer may rise to near
the upper white mark. If it reaches
the red (Hot) mark, pull safely to the side of the road. Turn to page 238 for
instructions and precautions on checking the engine's cooling
system.
Instruments and Controls
TACHOMETER
SPEEDOMETER
TRIP METER
FUEL GAUGE
TEMPERATURE GAUGE ODOMETER
MAINTENANCE
REQUIRED INDICATOR
TRIP METER
RESET BUTTONProCarManuals.comMain Menu Table of Contents s t
Page 69 of 278
Keys and Locks
Keys
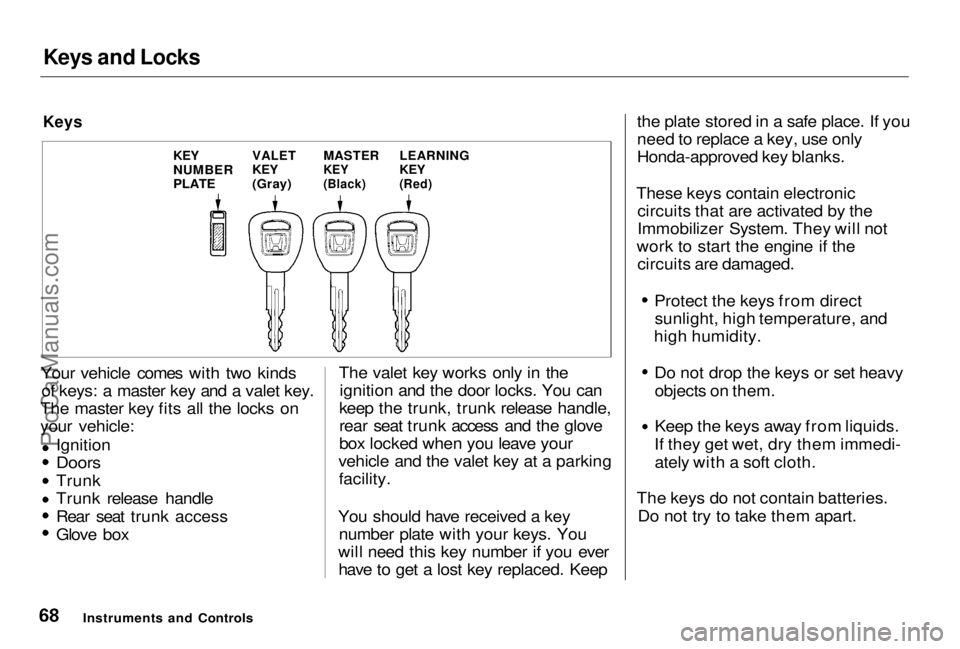
Your vehicle comes with two kinds of keys: a master key and a valet key.
The master key fits all the locks on
your vehicle:
Ignition
Doors
Trunk Trunk release handle
Rear seat trunk access
Glove box The valet key works only in the
ignition and the door locks. You can
keep the trunk, trunk release handle,
rear seat trunk access and the glove
box locked when you leave your
vehicle and the valet key at a parking facility.
You should have received a key number plate with your keys. You
will need this key number if you ever have to get a lost key replaced. Keep the plate stored in a safe place. If you
need to replace a key, use only
Honda-approved key blanks.
These keys contain electronic circuits that are activated by the
Immobilizer System. They will not
work to start the engine if the circuits are damaged. Protect the keys from direct
sunlight, high temperature, and
high humidity. Do not drop the keys or set heavy
objects on them. Keep the keys away from liquids.
If they get wet, dry them immedi- ately with a soft cloth.
The keys do not contain batteries. Do not try to take them apart.
Instruments and Controls
LEARNING
KEY
(Red)
MASTER
KEY
(Black)
VALET
KEY
(Gray)
KEY
NUMBER
PLATEProCarManuals.comMain Menu Table of Contents s t
Page 70 of 278
Keys and Locks
Learning Key
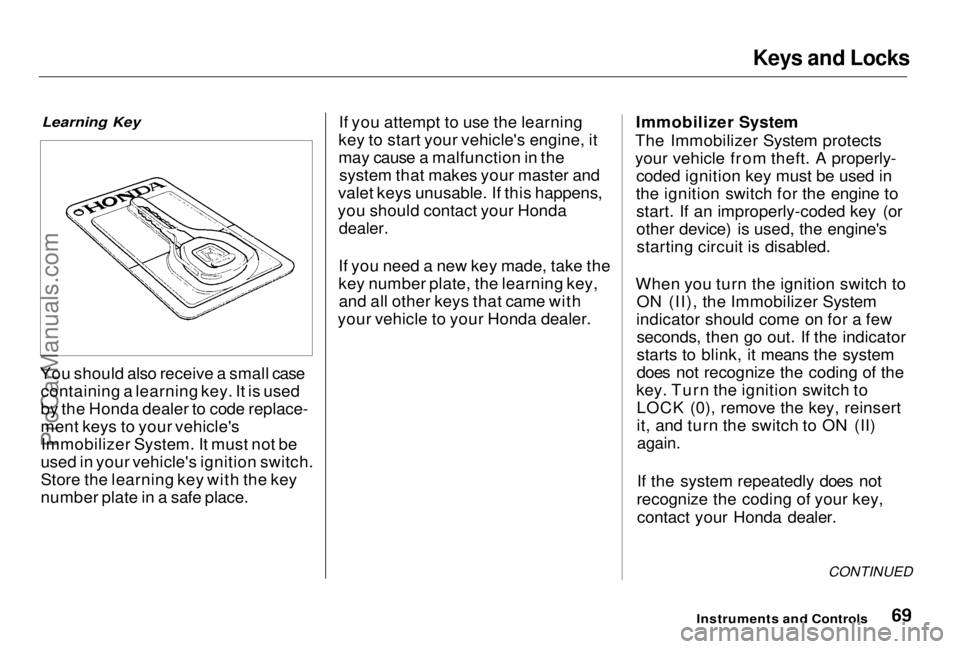
You should also receive a small case containing a learning key. It is used
by the Honda dealer to code replace-
ment keys to your vehicle'sImmobilizer System. It must not be
used in your vehicle's ignition switch.
Store the learning key with the key
number plate in a safe place. If you attempt to use the learning
key to start your vehicle's engine, it
may cause a malfunction in the system that makes your master and
valet keys unusable. If this happens,
you should contact your Honda
dealer.
If you need a new key made, take the
key number plate, the learning key, and all other keys that came with
your vehicle to your Honda dealer. Immobilizer System
The Immobilizer System protects
your vehicle from theft. A properly- coded ignition key must be used in
the ignition switch for the engine to start. If an improperly-coded key (or
other device) is used, the engine'sstarting circuit is disabled.
When you turn the ignition switch to ON (II), the Immobilizer System
indicator should come on for a few seconds, then go out. If the indicator
starts to blink, it means the system
does not recognize the coding of the
key. Turn the ignition switch to LOCK (0), remove the key, reinsert
it, and turn the switch to ON (II)
again.
If the system repeatedly does not
recognize the coding of your key, contact your Honda dealer.
CONTINUED
Instruments and ControlsProCarManuals.comMain Menu Table of Contents s t
Page 71 of 278
Keys and Locks
This indicator will also blink several times when you turn the ignition switch from ON (II) to ACCESSORY (I) or LOCK (0).
The system may not recognize your key's coding if the key is in contact
with a key from another immobilizer system. If you have a key from
another vehicle's immobilizer system,
keep it separate.
Do not attempt to alter this system
or add other devices to it. Electrical
problems could result that may make
your vehicle undriveable.
If you have lost your key and you
cannot start the engine, contact your
Honda dealer.
As required by the FCC:
This device complies with Part 15 of the
FCC rules. Operation is subject to the
following two conditions: (1) This device
way not cause harmful interference, and (2) this device must accept any
interference received, including
interference that may cause undesired operation.This device complies with DOC rules in
Canada.
Changes or modifications not expressly
approved by the party responsible for
compliance could void the user's
authority to operate the equipment.
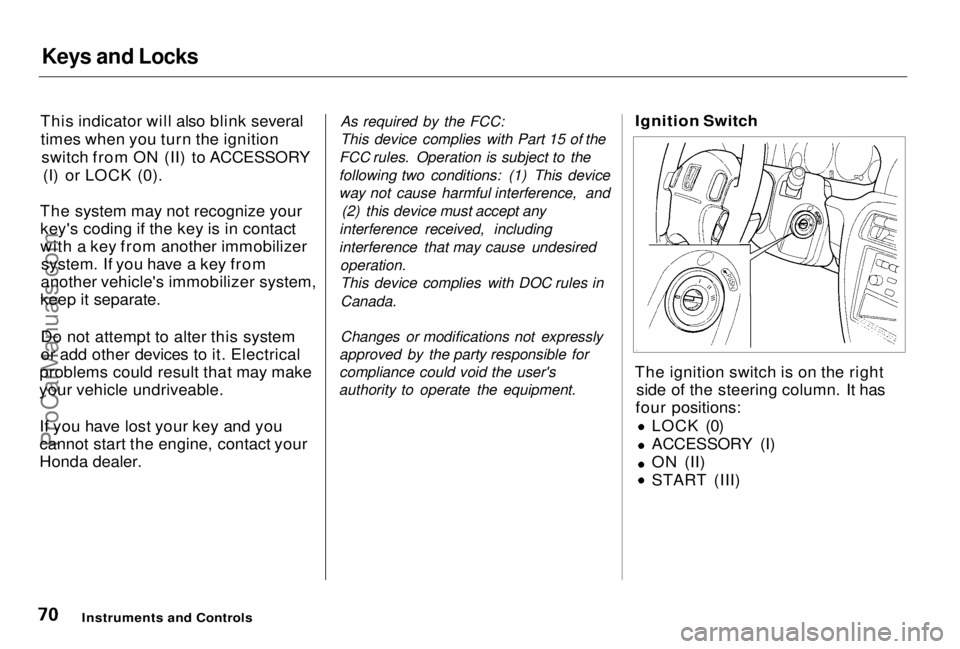
Ignition Switch
The ignition switch is on the right side of the steering column. It has
four positions:
LOCK (0)
ACCESSORY (I)
ON (II) START (III)
Instruments and ControlsProCarManuals.comMain Menu Table of Contents s t