turn off engine HONDA RIDGELINE 2022 Owners Manual
[x] Cancel search | Manufacturer: HONDA, Model Year: 2022, Model line: RIDGELINE, Model: HONDA RIDGELINE 2022Pages: 598, PDF Size: 12.42 MB
Page 23 of 598
21
Quick Reference Guide
Driving (P363)
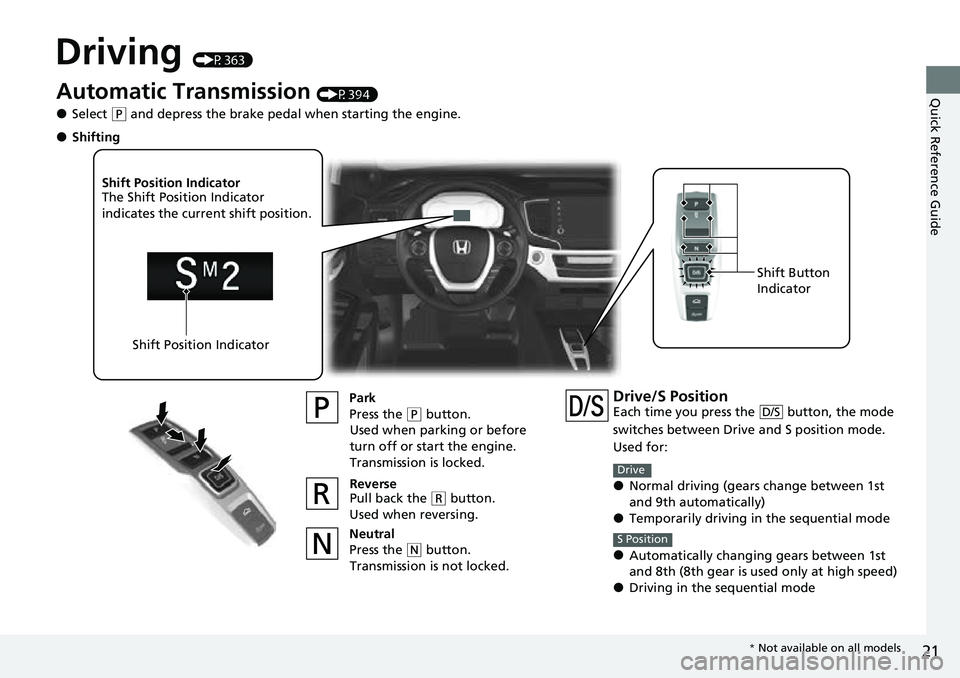
Automatic Transmission (P394)
●Select (P and depress the brake pedal when starting the engine.
Park
Press the
(P button.
Used when parking or before
turn off or start the engine.
Transmission is locked.
Reverse
Pull back the
( R button.
Used when reversing.
Neutral
Press the
( N button.
Transmission is not locked.
Shift Position Indicator
The Shift Position Indicator
indicates the current shift position.
Shift Position Indicator Shift Button
Indicator
●Shifting
Drive/S PositionEach time you press the button, the mode
switches between Drive
and S position mode.
Used for:
●Normal driving (gears change between 1st
and 9th automatically)
●Temporarily driving in the sequential mode
●Automatically changing gears between 1st
and 8th (8th gear is used only at high speed)
●Driving in the sequential mode
D/S
Drive
S Position
* Not available on all models
Page 25 of 598
23
Quick Reference Guide
CMBSTM On and Off
(P429)
●When a possible frontal collision is likely
unavoidable, the CMBSTM can help you to
reduce the vehicle speed and the severity
of the collision.
●The CMBSTM is turned on every time you
start the engine.
●To turn the CMBSTM on or off, press and
hold the button until you hear a beep.
VSA ® On and Off (P413)
●The Vehicle Stability AssistTM (VSA® )
system helps stabilize the vehicle during
cornering, and helps maintain traction
while accelerating on loose or slippery
road surfaces.
●VSA ® comes on automatically every time
you start the engine.
●To partially disable or fully restore VSA®
function, press and ho ld the button until
you hear a beep.
Tire Pressure Monitoring System (TPMS) with Tire
Fill Assist
(P416, 560)
●The TPMS monitors tire pressure.●The TPMS is turned on automatically every time you start the engine.●The TPMS fill assist provides audible and visual guidance during tire pressure adjustment.
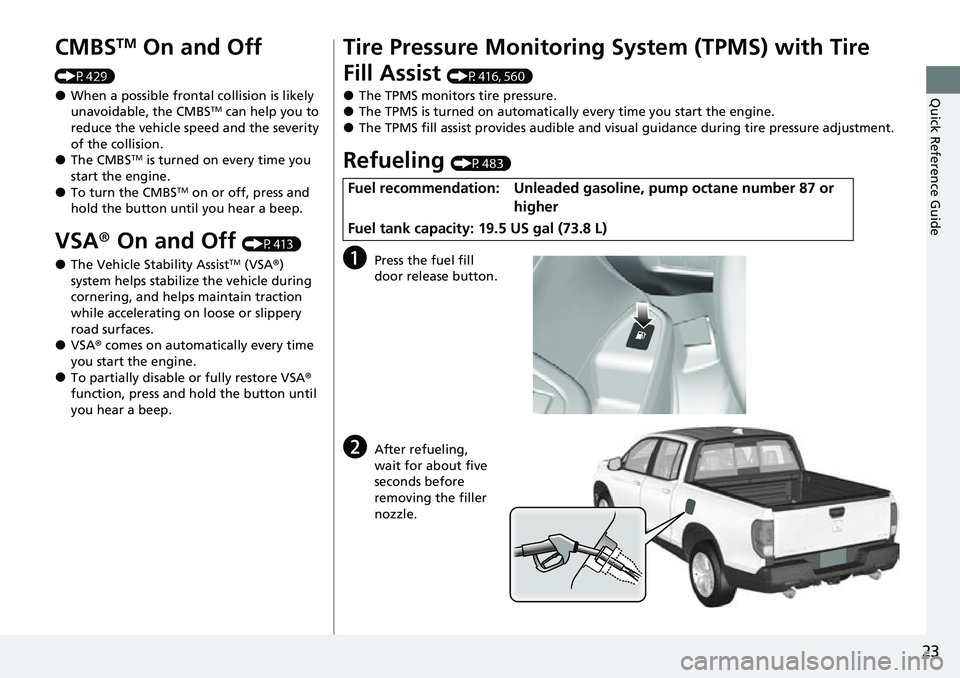
Refueling (P483)
aPress the fuel fill
door release button.
bAfter refueling,
wait for about five
seconds before
removing the filler
nozzle.
Fuel recommendation: Unleaded gaso line, pump octane number 87 or
higher
Fuel tank capacity: 19.5 US gal (73.8 L)
Page 81 of 598
79
uuIndicators u
Continued
Instrument Panel
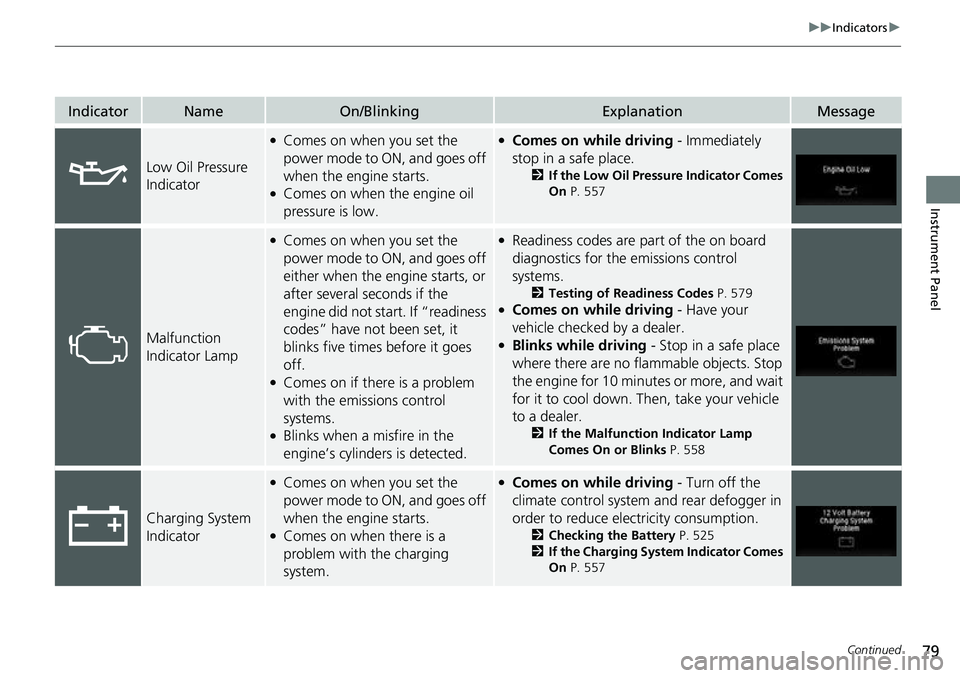
IndicatorNameOn/BlinkingExplanationMessage
Low Oil Pressure
Indicator
●Comes on when you set the
power mode to ON, and goes off
when the engine starts.
●Comes on when the engine oil
pressure is low.
●Comes on while driving - Immediately
stop in a safe place.
2 If the Low Oil Pressure Indicator Comes
On P. 557
Malfunction
Indicator Lamp
●Comes on when you set the
power mode to ON, and goes off
either when the engine starts, or
after several seconds if the
engine did not start. If “readiness
codes” have not been set, it
blinks five times before it goes
off.
●Comes on if there is a problem
with the emissions control
systems.
●Blinks when a misfire in the
engine’s cylinders is detected.
●Readiness codes are part of the on board
diagnostics for the emissions control
systems.
2 Testing of Readiness Codes P. 579●Comes on while driving - Have your
vehicle checked by a dealer.
●Blinks while driving - Stop in a safe place
where there are no flammable objects. Stop
the engine for 10 minutes or more, and wait
for it to cool down. Then, take your vehicle
to a dealer.
2 If the Malfunction Indicator Lamp
Comes On or Blinks P. 558
Charging System
Indicator
●Comes on when you set the
power mode to ON, and goes off
when the engine starts.
●Comes on when there is a
problem with the charging
system.
●Comes on while driving - Turn off the
climate control system and rear defogger in
order to reduce electricity consumption.
2 Checking the Battery P. 525
2 If the Charging System Indicator Comes
On P. 557
Page 87 of 598
85
uuIndicators u
Continued
Instrument Panel
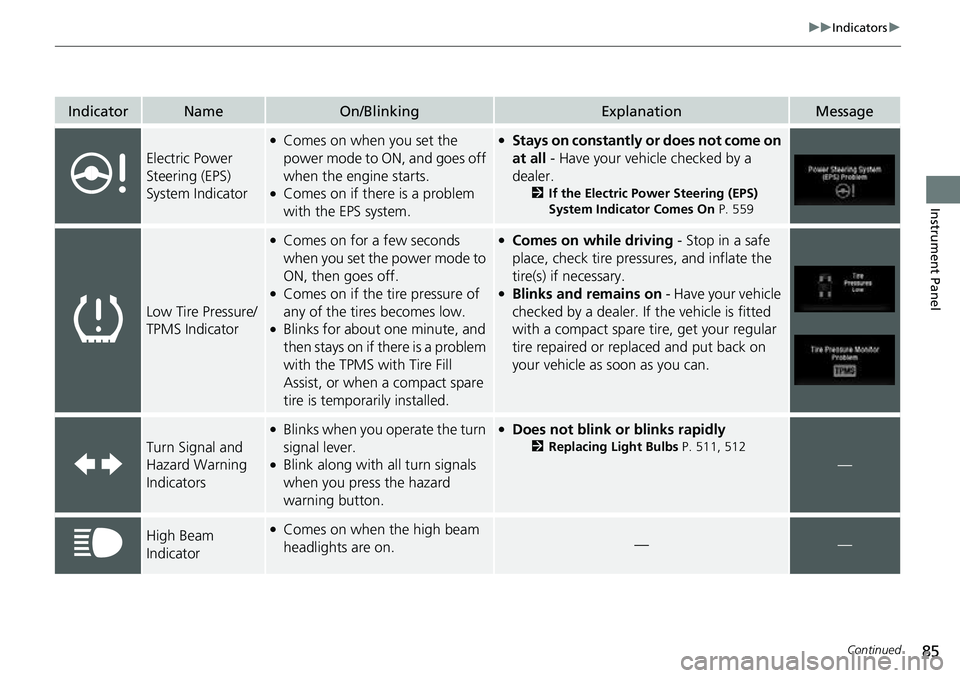
IndicatorNameOn/BlinkingExplanationMessage
Electric Power
Steering (EPS)
System Indicator
●Comes on when you set the
power mode to ON, and goes off
when the engine starts.
●Comes on if there is a problem
with the EPS system.
●Stays on constantly or does not come on
at all - Have your vehicle checked by a
dealer.
2 If the Electric Power Steering (EPS)
System Indicator Comes On P. 559
Low Tire Pressure/
TPMS Indicator
●Comes on for a few seconds
when you set the power mode to
ON, then goes off.
●Comes on if the tire pressure of
any of the tires becomes low.
●Blinks for about one minute, and
then stays on if there is a problem
with the TPMS with Tire Fill
Assist, or when a compact spare
tire is temporarily installed.
●Comes on while driving - Stop in a safe
place, check tire pressures, and inflate the
tire(s) if necessary.
●Blinks and remains on - Have your vehicle
checked by a dealer. If the vehicle is fitted
with a compact spare ti re, get your regular
tire repaired or replaced and put back on
your vehicle as soon as you can.
Turn Signal and
Hazard Warning
Indicators
●Blinks when you operate the turn
signal lever.
●Blink along with all turn signals
when you press the hazard
warning button.
●Does not blink or blinks rapidly
2 Replacing Light Bulbs P. 511, 512
—
High Beam
Indicator●Comes on when the high beam
headlights are on.——
Page 91 of 598
89
uuIndicators u
Continued
Instrument Panel
IndicatorNameOn/BlinkingExplanationMessage
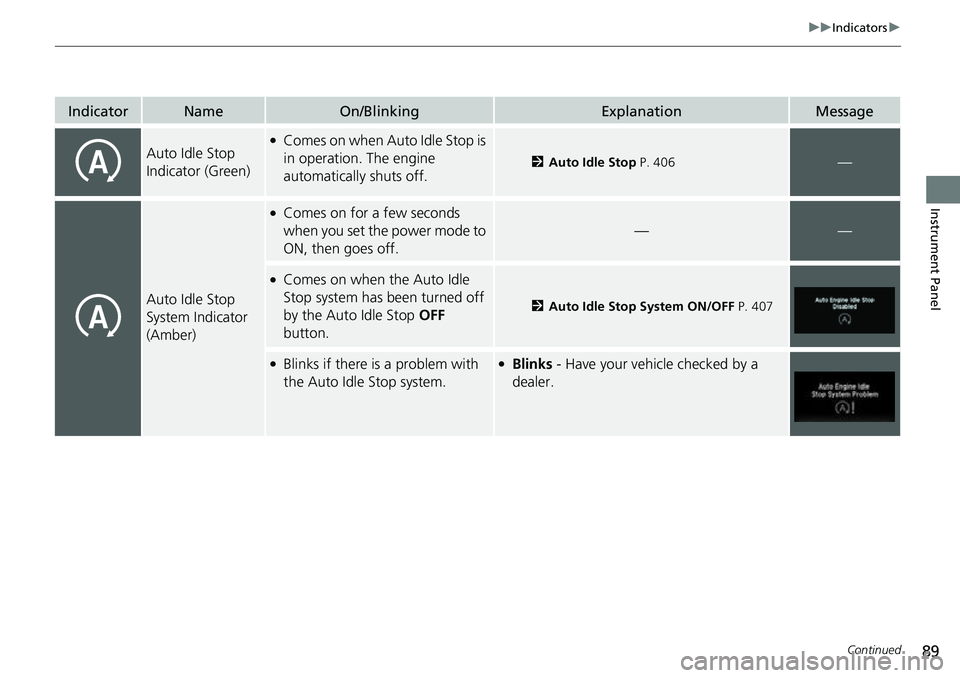
Auto Idle Stop
Indicator (Green)●Comes on when Auto Idle Stop is
in operation. The engine
automatically shuts off.
2Auto Idle Stop P. 406—
Auto Idle Stop
System Indicator
(Amber)
●Comes on for a few seconds
when you set the power mode to
ON, then goes off.
——
●Comes on when the Auto Idle
Stop system has been turned off
by the Auto Idle Stop OFF
button.
2 Auto Idle Stop System ON/OFF P. 407
●Blinks if there is a problem with
the Auto Idle Stop system.●Blinks - Have your vehicle checked by a
dealer.
Page 147 of 598
145Continued
Controls
Operating the Switches Around the Steering Wheel
ENGINE START/STOP Button
*1:Canadian models
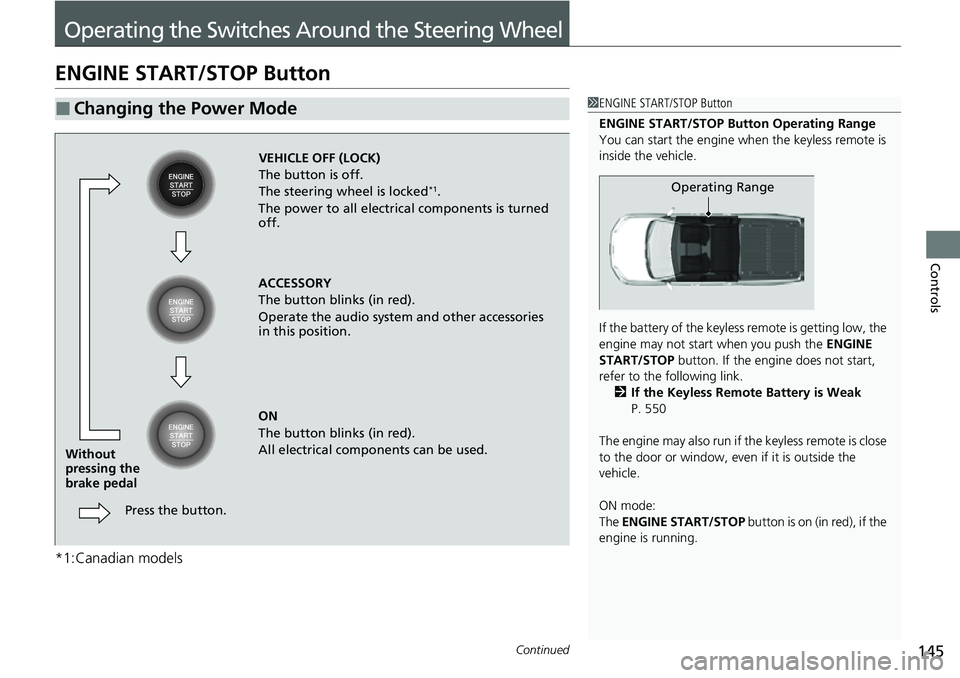
■Changing the Power Mode1ENGINE START/STOP Button
ENGINE START/STOP Button Operating Range
You can start the engine when the keyless remote is
inside the vehicle.
If the battery of the keyless remote is getting low, the
engine may not start when you push the ENGINE
START/STOP button. If the engi ne does not start,
refer to the following link. 2 If the Keyless Remote Battery is Weak
P. 550
The engine may also run if the keyless remote is close
to the door or window, even if it is outside the
vehicle.
ON mode:
The ENGINE START/STOP button is on (in red), if the
engine is running.
Operating Range
VEHICLE OFF (LOCK)
The button is off.
The steering wheel is locked
*1.
The power to all electrical components is turned
off.
ACCESSORY
The button blinks (in red).
Operate the audio system and other accessories
in this position.
ON
The button blinks (in red).
All electrical components can be used.
Press the button.
Without
pressing the
brake pedal
Page 151 of 598
149
uuOperating the Switches Around the Steering Wheel uLight Switches
Continued
Controls
Light Switches
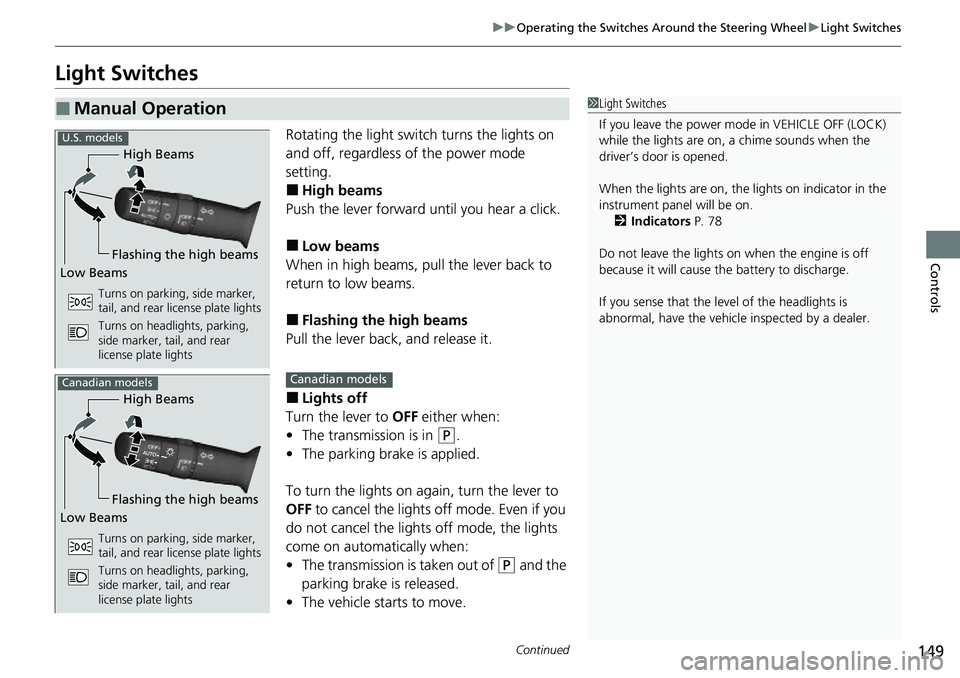
Rotating the light switch turns the lights on
and off, regardless of the power mode
setting.
■High beams
Push the lever forward until you hear a click.
■Low beams
When in high beams, pull the lever back to
return to low beams.
■Flashing the high beams
Pull the lever back, and release it.
■Lights off
Turn the lever to OFF either when:
• The transmission is in
(P.
• The parking brake is applied.
To turn the light s on again, turn the lever to
OFF to cancel the lights off mode. Even if you
do not cancel the lights off mode, the lights
come on automatically when:
• The transmission is taken out of
(P and the
parking brake is released.
• The vehicle starts to move.
■Manual Operation1Light Switches
If you leave the power mode in VEHICLE OFF (LOCK)
while the lights are on, a chime sounds when the
driver’s door is opened.
When the lights are on, the lights on indicator in the
instrument pane l will be on.
2 Indicators P. 78
Do not leave the lights on when the engine is off
because it will cause the battery to discharge.
If you sense that the le vel of the headlights is
abnormal, have the vehicl e inspected by a dealer.
High Beams
Flashing the high beams
Low Beams
Turns on parking, side marker,
tail, and rear license plate lights
Turns on headlights, parking,
side marker, tail, and rear
license plate lights
U.S. models
High Beams
Flashing the high beams
Low Beams
Turns on parking, side marker,
tail, and rear license plate lights
Turns on headlights, parking,
side marker, tail, and rear
license plate lights
Canadian modelsCanadian models
Page 161 of 598
159
uuOperating the Switches Around the Steering Wheel uRear Defogger/Heated Door Mirror* Button
Controls
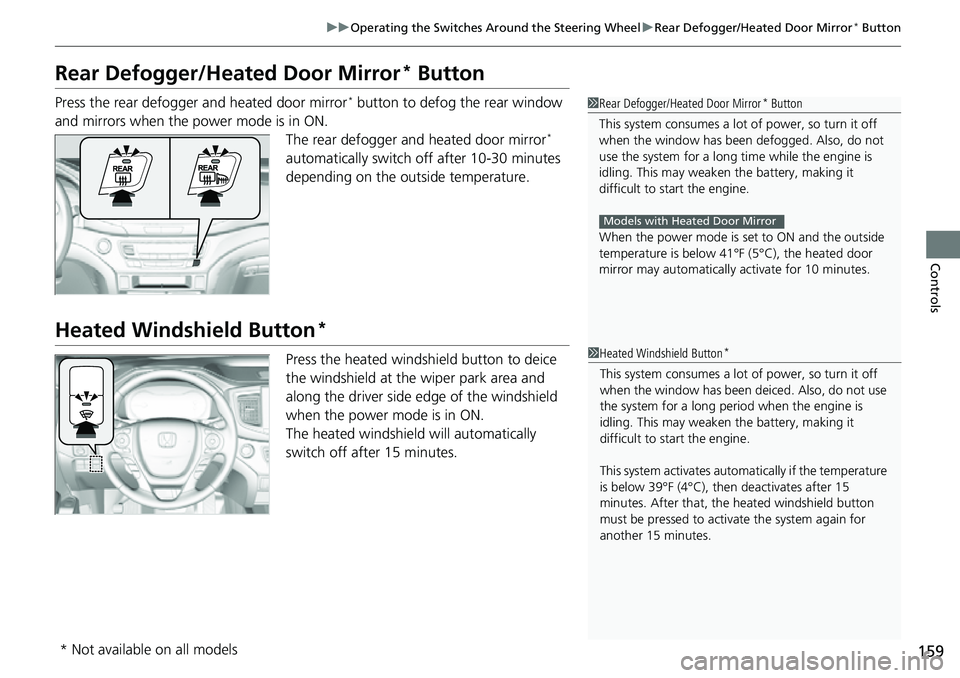
Rear Defogger/Heated Door Mirror* Button
Press the rear defogger and heated door mirror* button to defog the rear window
and mirrors when the power mode is in ON. The rear defogger and heated door mirror
*
automatically switch of f after 10-30 minutes
depending on the outside temperature.
Heated Windshield Button*
Press the heated windshield button to deice
the windshield at the wiper park area and
along the driver side edge of the windshield
when the power mode is in ON.
The heated windshield will automatically
switch off after 15 minutes.
1 Rear Defogger/Heated Door Mirror* Button
This system consumes a lot of power, so turn it off
when the window has been defogged. Also, do not
use the system for a long ti me while the engine is
idling. This may weaken the battery, making it
difficult to start the engine.
When the power mode is se t to ON and the outside
temperature is below 41°F (5°C), the heated door
mirror may automatically activate for 10 minutes.
Models with Heated Door Mirror
1 Heated Windshield Button*
This system consumes a lot of power, so turn it off
when the window has been deiced. Also, do not use
the system for a long peri od when the engine is
idling. This may weaken the battery, making it
difficult to start the engine.
This system activates automa tically if the temperature
is below 39°F (4°C), then deactivates after 15
minutes. After that, the heated windshield button
must be pressed to activate the system again for
another 15 minutes.
* Not available on all models
Page 163 of 598
161
uuOperating the Switches Around the Steering Wheel uDriving Position Memory System*
Continued
Controls
Driving Position Memory System*
You can store two driver’s seat (except for power lumbar) and door mirror positions
with the driving position memory system.
When you unlock and open the driver’s door with a remote transmitter or keyless
access system, the seat and door mirrors adjust automatically to one of the two
preset positions.
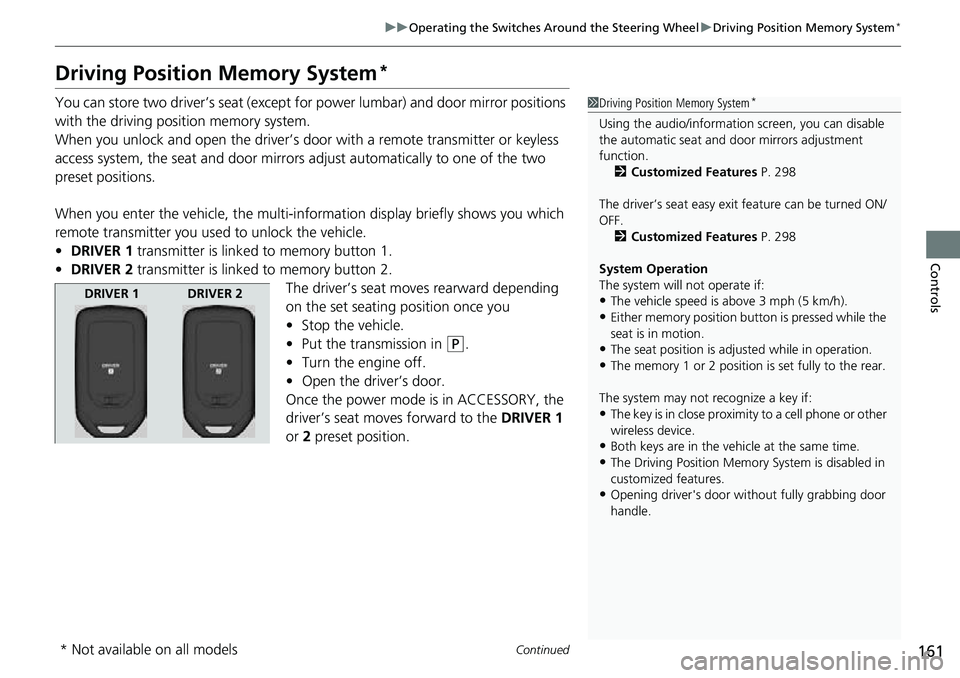
When you enter the vehicle, the multi-in formation display briefly shows you which
remote transmitter you used to unlock the vehicle.
• DRIVER 1 transmitter is linked to memory button 1.
• DRIVER 2 transmitter is linked to memory button 2.
The driver’s seat moves rearward depending
on the set seating position once you
•Stop the vehicle.
• Put the transmission in
(P.
• Turn the engine off.
• Open the driv er’s door.
Once the power mode is in ACCESSORY, the
driver’s seat moves forward to the DRIVER 1
or 2 preset position.
1 Driving Position Memory System*
Using the audio/informati on screen, you can disable
the automatic seat and d oor mirrors adjustment
function. 2 Customized Features P. 298
The driver’s seat easy exit feature can be turned ON/
OFF. 2 Customized Features P. 298
System Operation
The system will not operate if:
•The vehicle speed is above 3 mph (5 km/h).•Either memory position button is pressed while the
seat is in motion.
•The seat position is adju sted while in operation.•The memory 1 or 2 position is set fully to the rear.
The system may not recognize a key if:
•The key is in close proximity to a cell phone or other
wireless device.
•Both keys are in the vehicle at the same time.•The Driving Position Memory System is disabled in
customized features.
•Opening driver's door wi thout fully grabbing door
handle.
DRIVER 1 DRIVER 2
* Not available on all models
Page 172 of 598
170
uuSeats uMaintain a Proper Sitting Position
Controls
Maintain a Proper Sitting Position
After all occupants have adjusted their seats and head restraints, and put on their
seat belts, it is very important that they continue to sit upright, well back in their
seats, with their feet on the floor, until the vehicle is safely parked and the engine is
off.
Sitting improperly can increase the chance of injury during a crash. For example, if
an occupant slouches, lies down, turns si deways, sits forward, leans forward or
sideways, or puts one or both feet up, the chance of injury during a crash is greatly
increased.
In addition, an occupant who is out of position in the front seat can be seriously or
fatally injured in a crash by striking interior parts of the vehicle or being struck by an
inflating front airbag.1 Maintain a Proper Sitting Position
3WARNING
Sitting improperly or out of position can
result in serious injury or death in a crash.
Always sit upright, well back in the seat,
with your feet on the floor.