Automatic Hyundai Accent 2016 Owner's Manual
[x] Cancel search | Manufacturer: HYUNDAI, Model Year: 2016, Model line: Accent, Model: Hyundai Accent 2016Pages: 456, PDF Size: 16.41 MB
Page 10 of 456
13
Introduction
Your new vehicle is designed to use only
unleaded fuel having a pump octane
number ((R+M)/2) of 87 (Research
Octane Number 91) or higher. (Do not
use methanol blended fuels.)
Your new vehicle is designed to obtain
maximum performance with UNLEADED
FUEL, as well as minimize exhaust emis-
sions and spark plug fouling.Gasoline containing alcohol andmethanol
Gasohol, a mixture of gasoline and
ethanol (also known as grain alcohol),
and gasoline or gasohol containing
methanol (also known as wood alcohol)
are being marketed along with or instead
of leaded or unleaded gasoline.
Do not use gasohol containing more than
10% ethanol, and do not use gasoline or
gasohol containing any methanol. Either
of these fuels may cause drivability prob-
lems and damage to the fuel system,
engine control system and emission con-
trol system.
Discontinue using gasohol of any kind if
drivability problems occur.
Vehicle damage or drivability problems
may not be covered by the manufacturer’s
warranty if they result from the use of:
1. Gasohol containing more than 10% ethanol.
2. Gasoline or gasohol containing methanol.
3. Leaded fuel or leaded gasohol. "E85" fuel is an alternative fuel com-
prised of 85 percent ethanol and 15 per-
cent gasoline, and is manufactured
exclusively for use in Flexible Fuel
Vehicles. “E85” is not compatible with
your vehicle. Use of “E85” may result in
poor engine performance and damage to
your vehicle's engine and fuel system.
HYUNDAI recommends that customers
do not use fuel with an ethanol content
exceeding 10 percent.
FUEL REQUIREMENTS
CAUTION
Never add any fuel system cleaning
agents to the fuel tank other thanwhat has been specified. (Consultan authorized HYUNDAI dealer fordetails.)
WARNING
• Do not "top off" after the nozzle automatically shuts off when
refueling.
Tighten the cap fully clockwise until it clicks one time and stops
turning, otherwise the fuel cap
open warning light " " will illu-
minate. (if equipped)
Always check that the fuel cap is installed securely to prevent fuel
spillage in the event of an acci-
dent.CAUTION
Never use gasohol which contains
methanol. Discontinue use of any gasohol product which impairs dri-vability.
CAUTION
Your New Vehicle Limited Warrantydoes not cover damage to the fuel system or any performance prob-lems caused by the use of “E85” fuel.
Page 30 of 456
313
Safety features of your vehicle
WARNING- Cargo
Cargo should always be secured to
prevent it from being thrown about
the vehicle in a collision and caus-
ing injury to the vehicle occupants.
Do not place objects in the rear
seats, since they cannot be proper-
ly secured and may hit the front
seat occupants in a collision.
WARNING - Cargo loading
Make sure the engine is off, the
automatic transaxle is in P (Park)
or the manual transaxle is in R
(Reverse) or 1st, and the parking
brake is securely applied whenever
loading or unloading cargo. Failure
to take these steps may allow the
vehicle to move if the shift lever is
inadvertently moved to another
position.
Page 33 of 456
Safety features of your vehicle
16
3
Seat belt - Driver's 3-point system
with emergency locking retractor
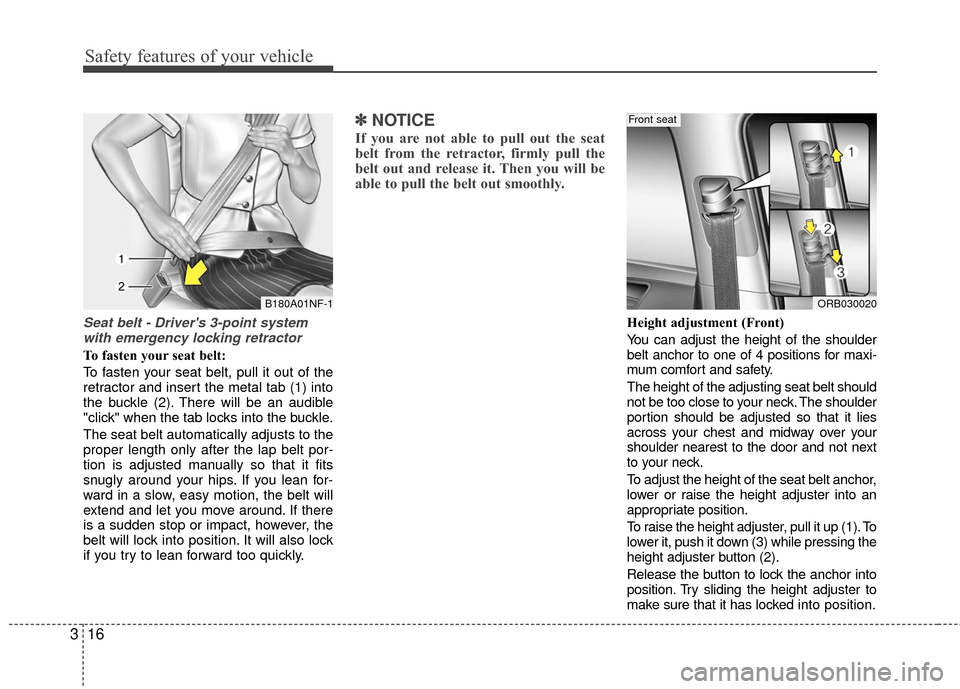
To fasten your seat belt:
To fasten your seat belt, pull it out of the
retractor and insert the metal tab (1) into
the buckle (2). There will be an audible
"click" when the tab locks into the buckle.
The seat belt automatically adjusts to the
proper length only after the lap belt por-
tion is adjusted manually so that it fits
snugly around your hips. If you lean for-
ward in a slow, easy motion, the belt will
extend and let you move around. If there
is a sudden stop or impact, however, the
belt will lock into position. It will also lock
if you try to lean forward too quickly.
✽ ✽ NOTICE
If you are not able to pull out the seat
belt from the retractor, firmly pull the
belt out and release it. Then you will be
able to pull the belt out smoothly.
Height adjustment (Front)
You can adjust the height of the shoulder
belt anchor to one of 4 positions for maxi-
mum comfort and safety.
The height of the adjusting seat belt should
not be too close to your neck. The shoulder
portion should be adjusted so that it lies
across your chest and midway over your
shoulder nearest to the door and not next
to your neck.
To adjust the height of the seat belt anchor,
lower or raise the height adjuster into an
appropriate position.
To raise the height adjuster, pull it up (1). To
lower it, push it down (3) while pressing the
height adjuster button (2).
Release the button to lock the anchor into
position. Try sliding the height adjuster to
make sure that it has locked into position.
B180A01NF-1ORB030020
Front seat
Page 34 of 456
317
Safety features of your vehicle
Seat belts - Front passenger and rearseat 3-point system with combination locking retractor
To fasten your seat belt:
Combination retractor type seat belts are
installed in the rear seat positions to help
accommodate the installation of child
restraint systems. Although a combina-
tion retractor is also installed in the front
passenger seat position, it is strongly
recommended that children always be
seated in the rear seat. NEVER place
any infant restraint system in the front
seat of the vehicle.
This type of seat belt combines the fea-
tures of both an emergency locking
retractor seat belt and an automatic lock-
ing retractor seat belt. To fasten your seat
belt, pull it out of the retractor and insert
the metal tab into the buckle. There will
be an audible "click" when the tab locks
into the buckle. When not securing a
child restraint, the seat belt operates in
the same way as the driver's seat belt
(Emergency Locking Retractor Type). It
automatically adjusts to the proper length
only after the lap belt portion of the seat
belt is adjusted manually so that it fits
snugly around your hips.
WARNING
Verify the shoulder belt anchor is locked into position at the appro-
priate height. Never position the
shoulder belt across your neck or
face. Improperly positioned seat
belts can cause serious injuries
in an accident.
Failure to replace seat belts after an accident could leave you with
damaged seat belts that will not
provide protection in the event of
another collision leading to per-
sonal injury or death. Replace
your seat belts after being in an
accident as soon as possible.
B200A02NF
WARNING
You should place the lap belt por-
tion as low as possible and snugly
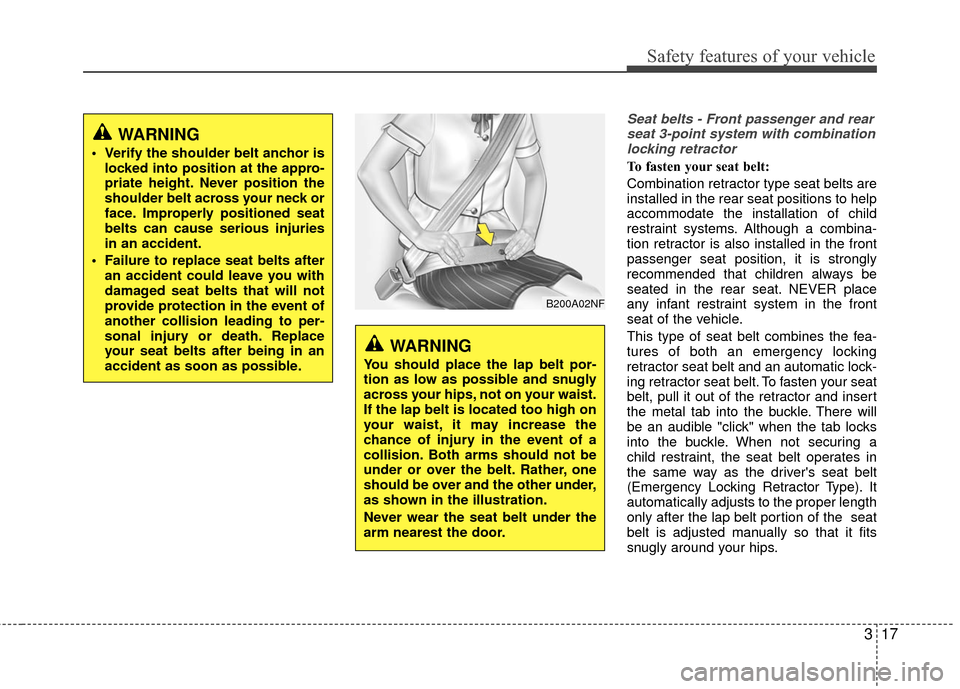
across your hips, not on your waist.
If the lap belt is located too high on
your waist, it may increase the
chance of injury in the event of a
collision. Both arms should not be
under or over the belt. Rather, one
should be over and the other under,
as shown in the illustration.
Never wear the seat belt under the
arm nearest the door.
Page 35 of 456
Safety features of your vehicle
18
3
When the seat belt is fully extended from
the retractor to allow the installation of a
child restraint system, the seat belt oper-
ation changes to allow the belt to retract,
but not to extend (Automatic Locking
Retractor Type). Refer to “Using a child
restraint system” in this section.
✽ ✽
NOTICE
Although the combination retractor
provides the same level of protection for
seated passengers in either emergency
or automatic locking modes, it is recom-
mended that seated passengers use the
emergency locking feature for improved
convenience. The automatic locking
function is intended to facilitate child
restraint installation. To convert from
the automatic locking feature to the
emergency locking operation mode,
allow the unbuckled seat belt to fully
retract.
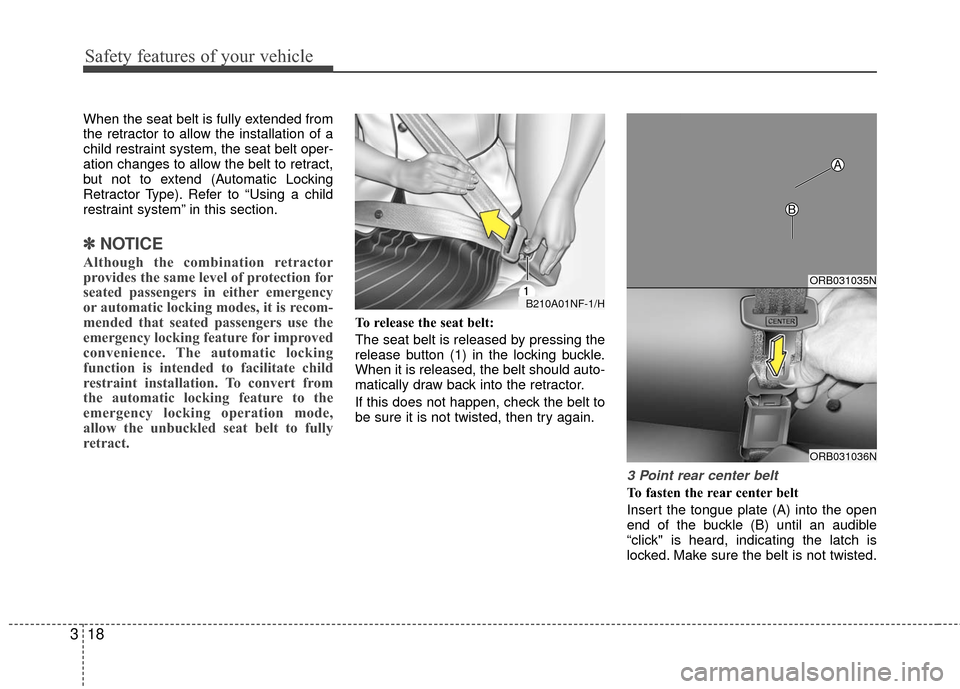
To release the seat belt:
The seat belt is released by pressing the
release button (1) in the locking buckle.
When it is released, the belt should auto-
matically draw back into the retractor.
If this does not happen, check the belt to
be sure it is not twisted, then try again.
3 Point rear center belt
To fasten the rear center belt
Insert the tongue plate (A) into the open
end of the buckle (B) until an audible
“click" is heard, indicating the latch is
locked. Make sure the belt is not twisted.
B210A01NF-1/H
ORB031035N
ORB031036N
A
B
Page 36 of 456
319
Safety features of your vehicle
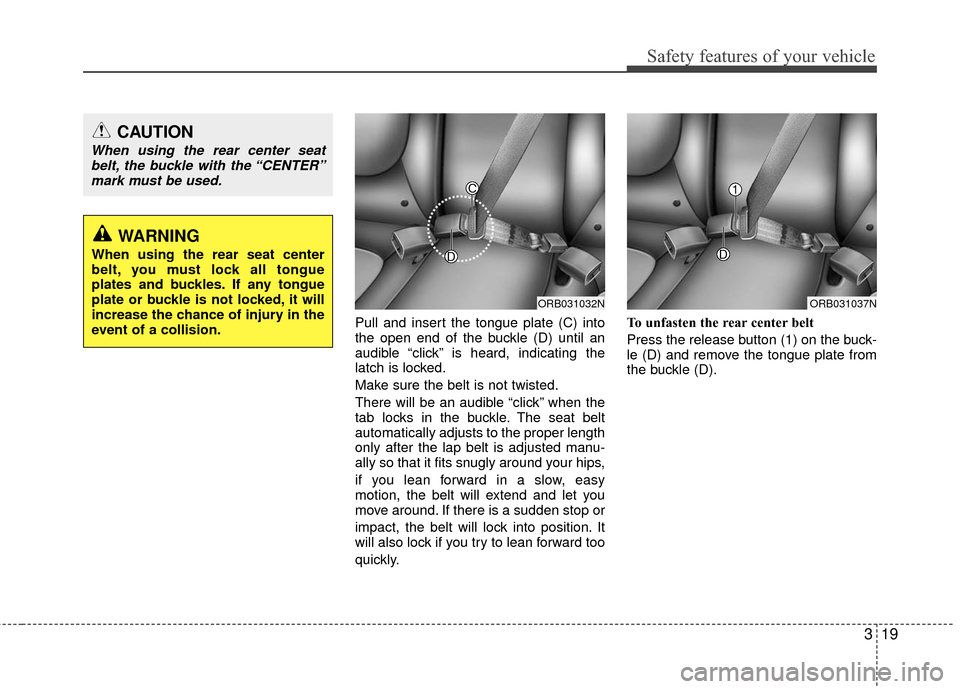
Pull and insert the tongue plate (C) into
the open end of the buckle (D) until an
audible “click” is heard, indicating the
latch is locked.
Make sure the belt is not twisted.
There will be an audible “click” when the
tab locks in the buckle. The seat belt
automatically adjusts to the proper length
only after the lap belt is adjusted manu-
ally so that it fits snugly around your hips,
if you lean forward in a slow, easy
motion, the belt will extend and let you
move around. If there is a sudden stop or
impact, the belt will lock into position. It
will also lock if you try to lean forward too
quickly.To unfasten the rear center belt
Press the release button (1) on the buck-
le (D) and remove the tongue plate from
the buckle (D).
CAUTION
When using the rear center seat
belt, the buckle with the “CENTER”mark must be used.
WARNING
When using the rear seat center
belt, you must lock all tongue
plates and buckles. If any tongue
plate or buckle is not locked, it will
increase the chance of injury in the
event of a collision.
ORB031032NORB031037N
D
C
D
1
Page 45 of 456
Safety features of your vehicle
28
3
For safety reasons, we recommend that
the child restraint system be used in the
rear seats.
Since all passenger seat belts move
freely under normal conditions and only
lock under extreme or emergency condi-
tions (emergency locking mode), you
must manually change these seat belts
to the automatic locking mode to secure
a child restraint.
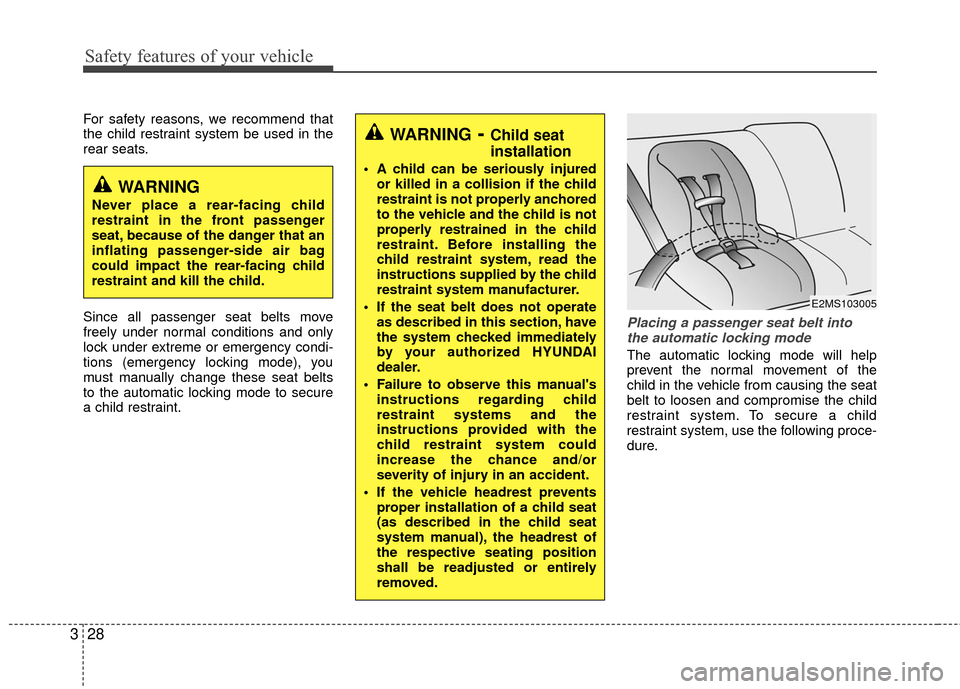
Placing a passenger seat belt into
the automatic locking mode
The automatic locking mode will help
prevent the normal movement of the
child in the vehicle from causing the seat
belt to loosen and compromise the child
restraint system. To secure a child
restraint system, use the following proce-
dure.
WARNING- Child seat
installation
A child can be seriously injured or killed in a collision if the child
restraint is not properly anchored
to the vehicle and the child is not
properly restrained in the child
restraint. Before installing the
child restraint system, read the
instructions supplied by the child
restraint system manufacturer.
If the seat belt does not operate as described in this section, have
the system checked immediately
by your authorized HYUNDAI
dealer.
Failure to observe this manual's instructions regarding child
restraint systems and the
instructions provided with the
child restraint system could
increase the chance and/or
severity of injury in an accident.
If the vehicle headrest prevents proper installation of a child seat
(as described in the child seat
system manual), the headrest of
the respective seating position
shall be readjusted or entirely
removed.
WARNING
Never place a rear-facing child
restraint in the front passenger
seat, because of the danger that an
inflating passenger-side air bag
could impact the rear-facing child
restraint and kill the child.
E2MS103005
Page 46 of 456
329
Safety features of your vehicle
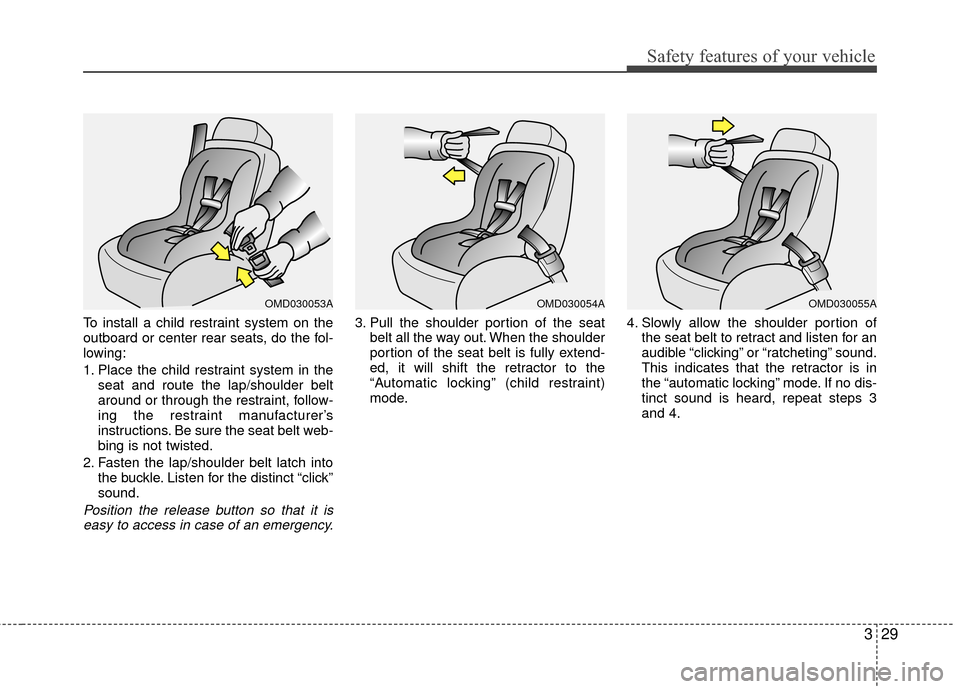
To install a child restraint system on the
outboard or center rear seats, do the fol-
lowing:
1. Place the child restraint system in theseat and route the lap/shoulder belt
around or through the restraint, follow-
ing the restraint manufacturer’s
instructions. Be sure the seat belt web-
bing is not twisted.
2. Fasten the lap/shoulder belt latch into the buckle. Listen for the distinct “click”
sound.
Position the release button so that it iseasy to access in case of an emergency.
3. Pull the shoulder portion of the seat belt all the way out. When the shoulder
portion of the seat belt is fully extend-
ed, it will shift the retractor to the
“Automatic locking” (child restraint)
mode. 4. Slowly allow the shoulder portion of
the seat belt to retract and listen for an
audible “clicking” or “ratcheting” sound.
This indicates that the retractor is in
the “automatic locking” mode. If no dis-
tinct sound is heard, repeat steps 3
and 4.
OMD030054AOMD030053AOMD030055A
Page 47 of 456
Safety features of your vehicle
30
3
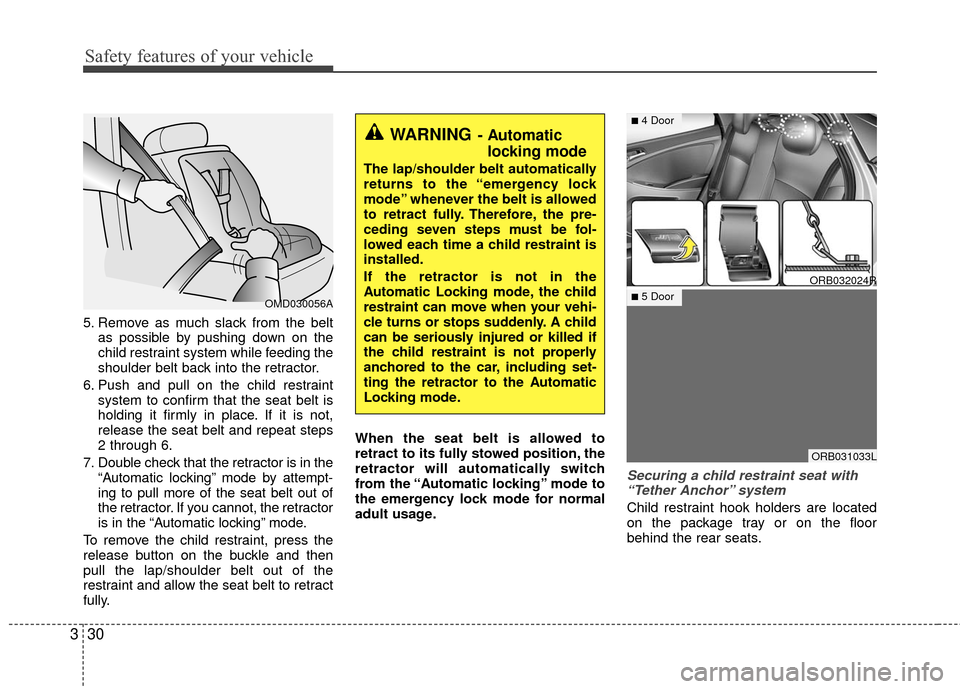
5. Remove as much slack from the belt
as possible by pushing down on the
child restraint system while feeding the
shoulder belt back into the retractor.
6. Push and pull on the child restraint system to confirm that the seat belt is
holding it firmly in place. If it is not,
release the seat belt and repeat steps
2 through 6.
7. Double check that the retractor is in the “Automatic locking” mode by attempt-
ing to pull more of the seat belt out of
the retractor. If you cannot, the retractor
is in the “Automatic locking” mode.
To remove the child restraint, press the
release button on the buckle and then
pull the lap/shoulder belt out of the
restraint and allow the seat belt to retract
fully. When the seat belt is allowed to
retract to its fully stowed position, the
retractor will automatically switch
from the “Automatic locking” mode to
the emergency lock mode for normal
adult usage.
Securing a child restraint seat with
“Tether Anchor” system
Child restraint hook holders are located
on the package tray or on the floor
behind the rear seats.
OMD030056A
WARNING- Automatic locking mode
The lap/shoulder belt automatically
returns to the “emergency lock
mode” whenever the belt is allowed
to retract fully. Therefore, the pre-
ceding seven steps must be fol-
lowed each time a child restraint is
installed.
If the retractor is not in the
Automatic Locking mode, the child
restraint can move when your vehi-
cle turns or stops suddenly. A child
can be seriously injured or killed if
the child restraint is not properly
anchored to the car, including set-
ting the retractor to the Automatic
Locking mode.
ORB032024R
ORB031033L
■4 Door
■5 Door
Page 55 of 456
Safety features of your vehicle
38
3
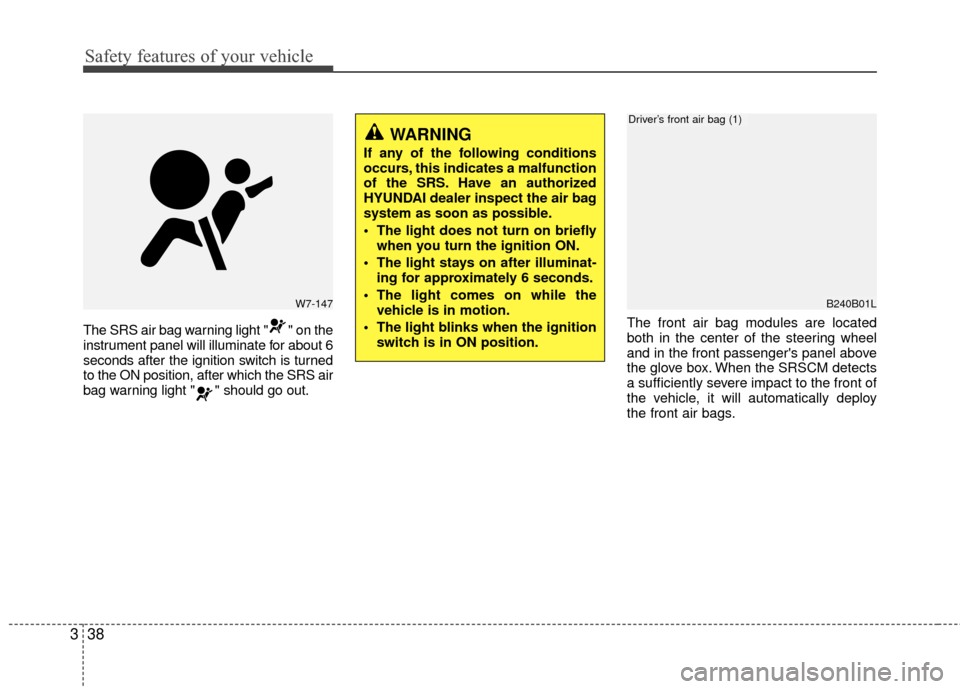
The SRS air bag warning light " " on the
instrument panel will illuminate for about 6
seconds after the ignition switch is turned
to the ON position, after which the SRS air
bag warning light " " should go out. The front air bag modules are located
both in the center of the steering wheel
and in the front passenger's panel above
the glove box. When the SRSCM detects
a sufficiently severe impact to the front of
the vehicle, it will automatically deploy
the front air bags.
W7-147
WARNING
If any of the following conditions
occurs, this indicates a malfunction
of the SRS. Have an authorized
HYUNDAI dealer inspect the air bag
system as soon as possible.
The light does not turn on briefly
when you turn the ignition ON.
The light stays on after illuminat- ing for approximately 6 seconds.
The light comes on while the vehicle is in motion.
The light blinks when the ignition switch is in ON position.
B240B01L
Driver’s front air bag (1)