set clock Hyundai Atos 2002 Owner's Manual
[x] Cancel search | Manufacturer: HYUNDAI, Model Year: 2002, Model line: Atos, Model: Hyundai Atos 2002Pages: 249, PDF Size: 3.11 MB
Page 35 of 249
FEATURES OF YOUR HYUNDAI
FEATURES OF YOUR HYUNDAI FEATURES OF YOUR HYUNDAI
FEATURES OF YOUR HYUNDAI
FEATURES OF YOUR HYUNDAI
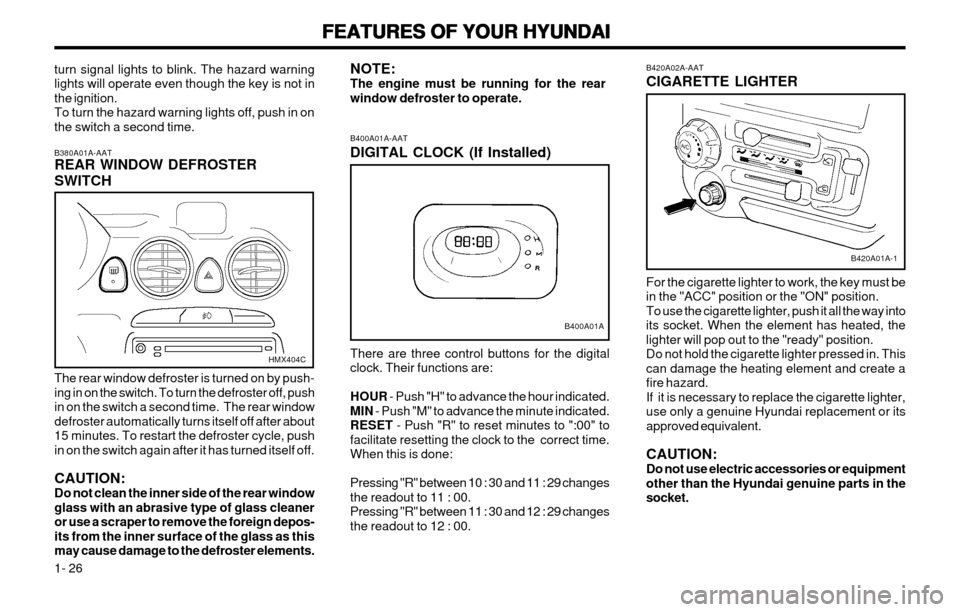
1- 26 B420A02A-AAT CIGARETTE LIGHTER For the cigarette lighter to work, the key must be in the "ACC" position or the "ON" position.To use the cigarette lighter, push it all the way intoits socket. When the element has heated, thelighter will pop out to the "ready" position.Do not hold the cigarette lighter pressed in. Thiscan damage the heating element and create afire hazard.If it is necessary to replace the cigarette lighter,use only a genuine Hyundai replacement or itsapproved equivalent. CAUTION: Do not use electric accessories or equipmentother than the Hyundai genuine parts in thesocket.
B420A01A-1
B400A01A-AAT DIGITAL CLOCK (If Installed) There are three control buttons for the digital clock. Their functions are: HOUR
- Push "H" to advance the hour indicated.
MIN - Push "M" to advance the minute indicated.
RESET - Push "R" to reset minutes to ":00" to
facilitate resetting the clock to the correct time. When this is done: Pressing "R" between 10 : 30 and 11 : 29 changes the readout to 11 : 00.Pressing "R" between 11 : 30 and 12 : 29 changesthe readout to 12 : 00.
NOTE:The engine must be running for the rearwindow defroster to operate.
B400A01A
turn signal lights to blink. The hazard warning lights will operate even though the key is not inthe ignition.To turn the hazard warning lights off, push in onthe switch a second time. B380A01A-AAT REAR WINDOW DEFROSTER SWITCH The rear window defroster is turned on by push- ing in on the switch. To turn the defroster off, pushin on the switch a second time. The rear windowdefroster automatically turns itself off after about15 minutes. To restart the defroster cycle, pushin on the switch again after it has turned itself off. CAUTION: Do not clean the inner side of the rear windowglass with an abrasive type of glass cleaneror use a scraper to remove the foreign depos-its from the inner surface of the glass as thismay cause damage to the defroster elements.
HMX404C
Page 52 of 249
FEATURES OF YOUR HYUNDAI
FEATURES OF YOUR HYUNDAI FEATURES OF YOUR HYUNDAI
FEATURES OF YOUR HYUNDAI
FEATURES OF YOUR HYUNDAI
1- 43
B901B02X-GAT
1. POWER ON-OFF/VOLUME CON-
TROL KNOB
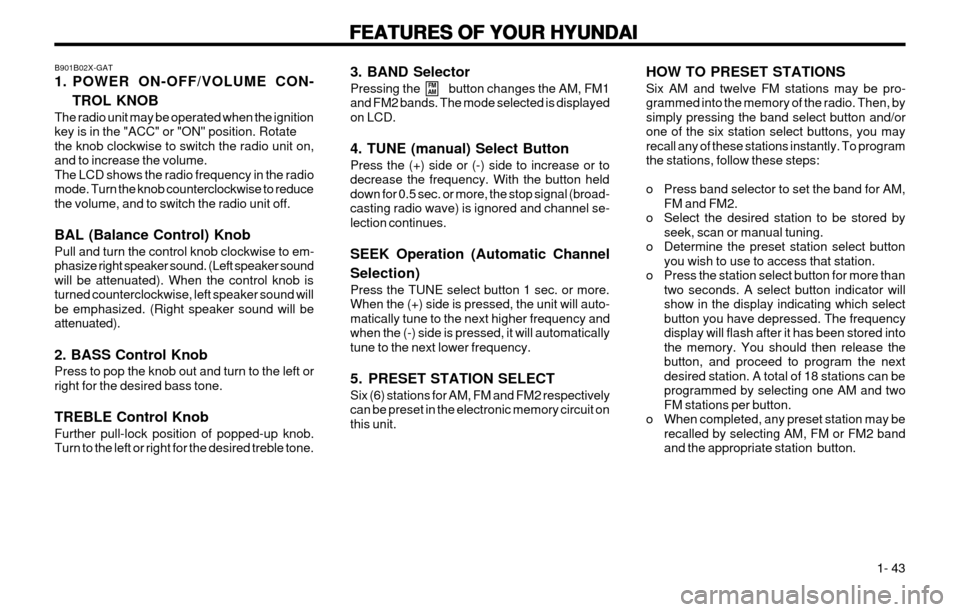
The radio unit may be operated when the ignition key is in the "ACC" or "ON" position. Rotatethe knob clockwise to switch the radio unit on,and to increase the volume.The LCD shows the radio frequency in the radiomode. Turn the knob counterclockwise to reducethe volume, and to switch the radio unit off. BAL (Balance Control) Knob Pull and turn the control knob clockwise to em- phasize right speaker sound. (Left speaker soundwill be attenuated). When the control knob isturned counterclockwise, left speaker sound willbe emphasized. (Right speaker sound will beattenuated). 2. BASS Control Knob Press to pop the knob out and turn to the left or right for the desired bass tone. TREBLE Control Knob Further pull-lock position of popped-up knob. Turn to the left or right for the desired treble tone. 3. BAND Selector Pressing the button changes the AM, FM1 and FM2 bands. The mode selected is displayedon LCD. 4. TUNE (manual) Select Button Press the (+) side or (-) side to increase or to decrease the frequency. With the button helddown for 0.5 sec. or more, the stop signal (broad-casting radio wave) is ignored and channel se-lection continues. SEEK Operation (Automatic Channel Selection) Press the TUNE select button 1 sec. or more. When the (+) side is pressed, the unit will auto-matically tune to the next higher frequency andwhen the (-) side is pressed, it will automaticallytune to the next lower frequency.
5. PRESET STATION SELECT Six (6) stations for AM, FM and FM2 respectively can be preset in the electronic memory circuit onthis unit.
FM
AMHOW TO PRESET STATIONS Six AM and twelve FM stations may be pro- grammed into the memory of the radio. Then, bysimply pressing the band select button and/orone of the six station select buttons, you mayrecall any of these stations instantly. To programthe stations, follow these steps:
o Press band selector to set the band for AM,
FM and FM2.
o Select the desired station to be stored by seek, scan or manual tuning.
o Determine the preset station select button you wish to use to access that station.
o Press the station select button for more than two seconds. A select button indicator will show in the display indicating which selectbutton you have depressed. The frequencydisplay will flash after it has been stored intothe memory. You should then release thebutton, and proceed to program the nextdesired station. A total of 18 stations can beprogrammed by selecting one AM and twoFM stations per button.
o When completed, any preset station may be recalled by selecting AM, FM or FM2 bandand the appropriate station button.
Page 54 of 249
FEATURES OF YOUR HYUNDAI
FEATURES OF YOUR HYUNDAI FEATURES OF YOUR HYUNDAI
FEATURES OF YOUR HYUNDAI
FEATURES OF YOUR HYUNDAI
1- 45
B900B02X-GAT
1. POWER ON-OFF/VOLUME CON-
TROL KNOB
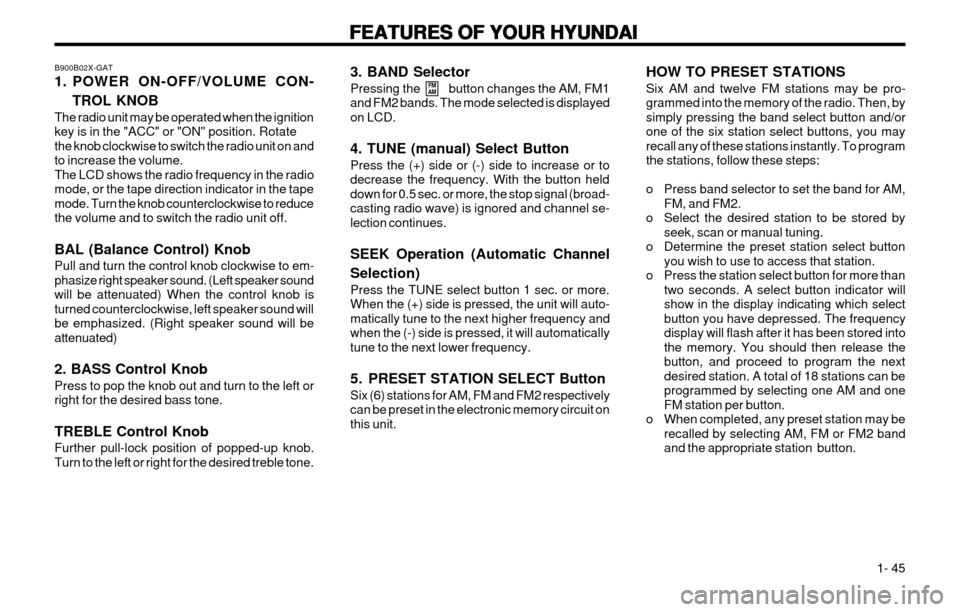
The radio unit may be operated when the ignition key is in the "ACC" or "ON" position. Rotatethe knob clockwise to switch the radio unit on andto increase the volume.The LCD shows the radio frequency in the radiomode, or the tape direction indicator in the tapemode. Turn the knob counterclockwise to reducethe volume and to switch the radio unit off. BAL (Balance Control) Knob Pull and turn the control knob clockwise to em- phasize right speaker sound. (Left speaker soundwill be attenuated) When the control knob isturned counterclockwise, left speaker sound willbe emphasized. (Right speaker sound will beattenuated) 2. BASS Control Knob Press to pop the knob out and turn to the left or right for the desired bass tone. TREBLE Control Knob Further pull-lock position of popped-up knob. Turn to the left or right for the desired treble tone. 3. BAND Selector Pressing the button changes the AM, FM1 and FM2 bands. The mode selected is displayedon LCD. 4. TUNE (manual) Select Button Press the (+) side or (-) side to increase or to decrease the frequency. With the button helddown for 0.5 sec. or more, the stop signal (broad-casting radio wave) is ignored and channel se-lection continues. SEEK Operation (Automatic Channel Selection) Press the TUNE select button 1 sec. or more. When the (+) side is pressed, the unit will auto-matically tune to the next higher frequency andwhen the (-) side is pressed, it will automaticallytune to the next lower frequency.
5. PRESET STATION SELECT Button Six (6) stations for AM, FM and FM2 respectively can be preset in the electronic memory circuit onthis unit.
FM
AMHOW TO PRESET STATIONS Six AM and twelve FM stations may be pro- grammed into the memory of the radio. Then, bysimply pressing the band select button and/orone of the six station select buttons, you mayrecall any of these stations instantly. To programthe stations, follow these steps:
o Press band selector to set the band for AM,
FM, and FM2.
o Select the desired station to be stored by seek, scan or manual tuning.
o Determine the preset station select button you wish to use to access that station.
o Press the station select button for more than two seconds. A select button indicator will show in the display indicating which selectbutton you have depressed. The frequencydisplay will flash after it has been stored intothe memory. You should then release thebutton, and proceed to program the nextdesired station. A total of 18 stations can beprogrammed by selecting one AM and oneFM station per button.
o When completed, any preset station may be recalled by selecting AM, FM or FM2 bandand the appropriate station button.
Page 57 of 249
FEATURES OF YOUR HYUNDAI
FEATURES OF YOUR HYUNDAI FEATURES OF YOUR HYUNDAI
FEATURES OF YOUR HYUNDAI
FEATURES OF YOUR HYUNDAI
1- 48
B922B03X-GAT
1. POWER ON-OFF/VOLUME
CONTROL KNOB
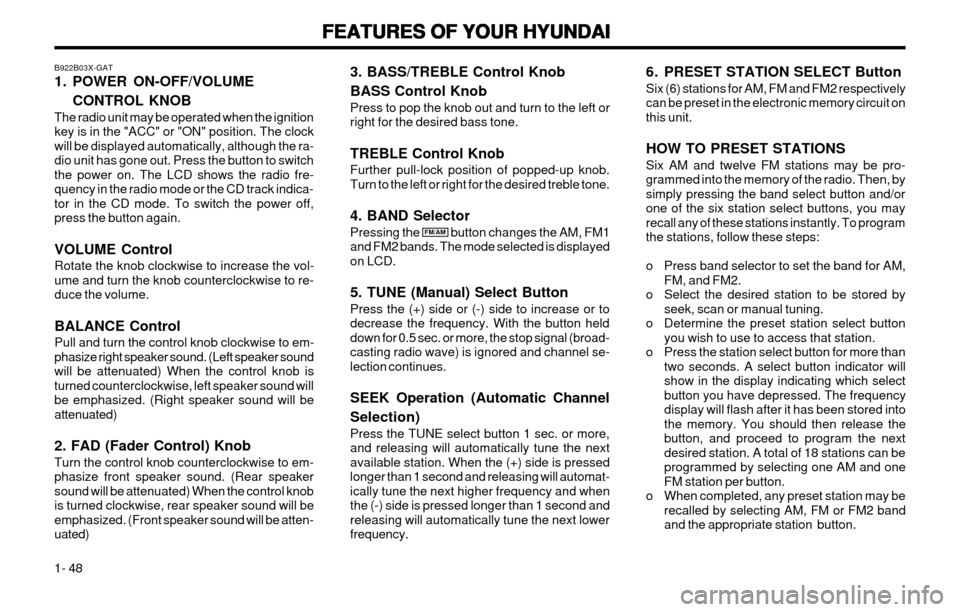
The radio unit may be operated when the ignition key is in the "ACC" or "ON" position. The clockwill be displayed automatically, although the ra-dio unit has gone out. Press the button to switchthe power on. The LCD shows the radio fre-quency in the radio mode or the CD track indica-tor in the CD mode. To switch the power off,press the button again. VOLUME Control Rotate the knob clockwise to increase the vol- ume and turn the knob counterclockwise to re-duce the volume. BALANCE Control Pull and turn the control knob clockwise to em- phasize right speaker sound. (Left speaker soundwill be attenuated) When the control knob isturned counterclockwise, left speaker sound willbe emphasized. (Right speaker sound will beattenuated) 2. FAD (Fader Control) Knob Turn the control knob counterclockwise to em- phasize front speaker sound. (Rear speakersound will be attenuated) When the control knobis turned clockwise, rear speaker sound will beemphasized. (Front speaker sound will be atten-uated)
FM/AM 6. PRESET STATION SELECT Button Six (6) stations for AM, FM and FM2 respectively can be preset in the electronic memory circuit onthis unit. HOW TO PRESET STATIONS Six AM and twelve FM stations may be pro- grammed into the memory of the radio. Then, bysimply pressing the band select button and/orone of the six station select buttons, you mayrecall any of these stations instantly. To programthe stations, follow these steps:
o Press band selector to set the band for AM,
FM, and FM2.
o Select the desired station to be stored by seek, scan or manual tuning.
o Determine the preset station select button you wish to use to access that station.
o Press the station select button for more than two seconds. A select button indicator will show in the display indicating which selectbutton you have depressed. The frequencydisplay will flash after it has been stored intothe memory. You should then release thebutton, and proceed to program the nextdesired station. A total of 18 stations can beprogrammed by selecting one AM and oneFM station per button.
o When completed, any preset station may be recalled by selecting AM, FM or FM2 bandand the appropriate station button.
3. BASS/TREBLE Control Knob BASS Control Knob Press to pop the knob out and turn to the left or right for the desired bass tone. TREBLE Control Knob Further pull-lock position of popped-up knob. Turn to the left or right for the desired treble tone. 4. BAND Selector Pressing the button changes the AM, FM1 and FM2 bands. The mode selected is displayedon LCD. 5. TUNE (Manual) Select Button Press the (+) side or (-) side to increase or to decrease the frequency. With the button helddown for 0.5 sec. or more, the stop signal (broad-casting radio wave) is ignored and channel se-lection continues. SEEK Operation (Automatic Channel Selection) Press the TUNE select button 1 sec. or more, and releasing will automatically tune the nextavailable station. When the (+) side is pressedlonger than 1 second and releasing will automat-ically tune the next higher frequency and whenthe (-) side is pressed longer than 1 second andreleasing will automatically tune the next lowerfrequency.
Page 100 of 249
DO-IT-YOURSELF MAINTENANCE
DO-IT-YOURSELF MAINTENANCE DO-IT-YOURSELF MAINTENANCE
DO-IT-YOURSELF MAINTENANCE
DO-IT-YOURSELF MAINTENANCE
6-4 G040A03X-GAT
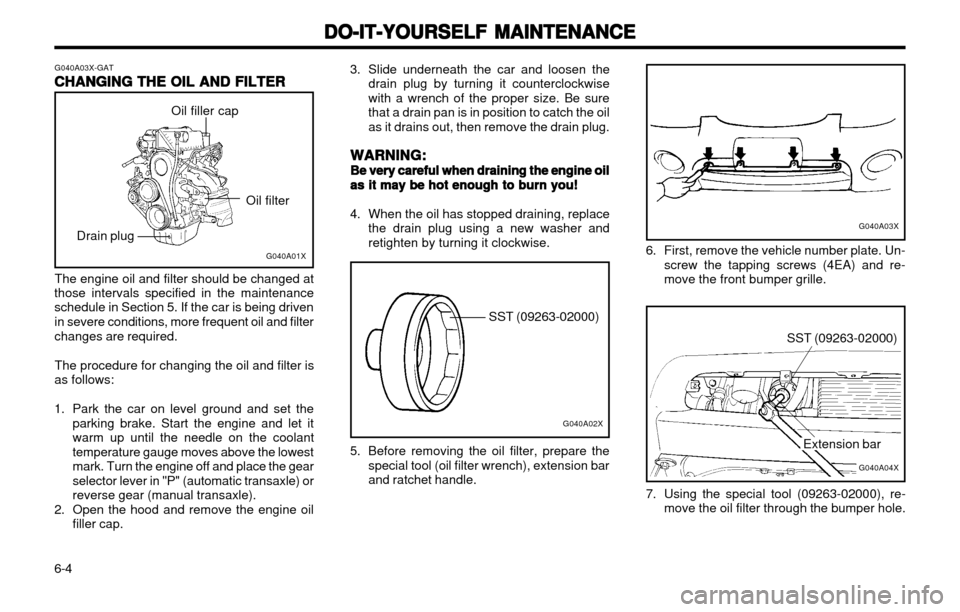
CHANGING THE OIL AND FILTER
CHANGING THE OIL AND FILTER CHANGING THE OIL AND FILTER
CHANGING THE OIL AND FILTER
CHANGING THE OIL AND FILTER 3. Slide underneath the car and loosen the
drain plug by turning it counterclockwise with a wrench of the proper size. Be surethat a drain pan is in position to catch the oilas it drains out, then remove the drain plug.
WARNING:
WARNING: WARNING:
WARNING:
WARNING:
Be very careful when draining the engine oil
Be very careful when draining the engine oil Be very careful when draining the engine oil
Be very careful when draining the engine oil
Be very careful when draining the engine oil
as it may be hot
as it may be hot as it may be hot
as it may be hot
as it may be hot enough to burn you!
enough to burn you! enough to burn you!
enough to burn you!
enough to burn you!
4. When the oil has stopped draining, replace the drain plug using a new washer andretighten by turning it clockwise. 6. First, remove the vehicle number plate. Un-
screw the tapping screws (4EA) and re-move the front bumper grille.
Oil filler cap
Oil filter
Drain plug
The engine oil and filter should be changed at
those intervals specified in the maintenance schedule in Section 5. If the car is being driven
in severe conditions, more frequent oil and filter
changes are required.
The procedure for changing the oil and filter is
as follows:
1. Park the car on level ground and set the parking brake. Start the engine and let it warm up until the needle on the coolanttemperature gauge moves above the lowest
mark. Turn the engine off and place the gearselector lever in "P" (automatic transaxle) orreverse gear (manual transaxle).
2. Open the hood and remove the engine oil filler cap.
G040A01X
G040A02X
SST (09263-02000)
5. Before removing the oil filter, prepare the special tool (oil filter wrench), extension bar and ratchet handle.
G040A03X
SST (09263-02000)
G040A04X
Extension bar
7. Using the special tool (09263-02000), re- move the oil filter through the bumper hole.
Page 125 of 249
INDEX
INDEX INDEX
INDEX
INDEX
10-1
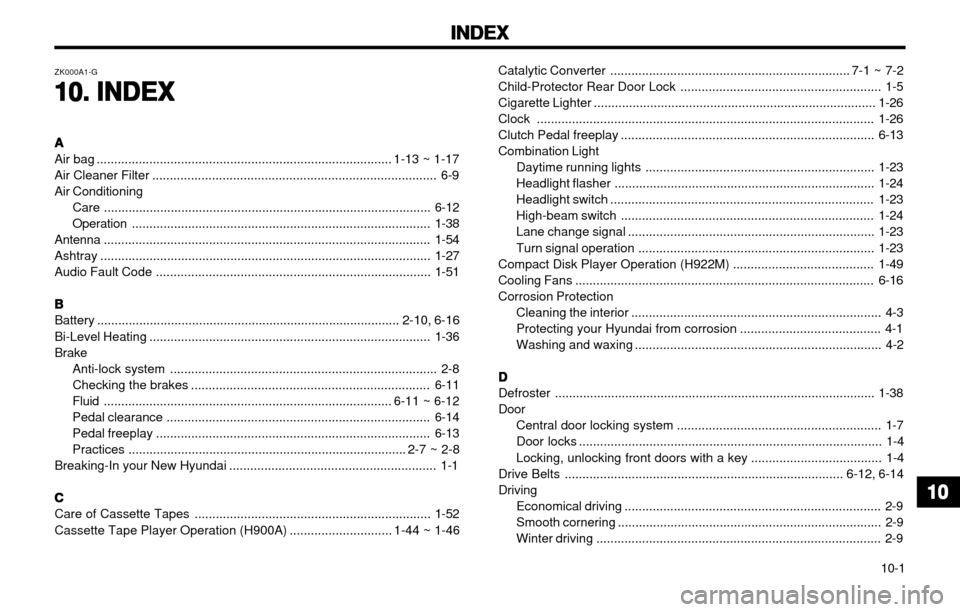
Catalytic Converter .................................................................... 7-1 ~ 7-2
Child-Protector Rear Door Lock ......................................................... 1-5
Cigarette Lighter ................................................................................
1-26
Clock ................................................................................................ 1-26
Clutch Pedal freeplay ........................................................................ 6-13
Combination Light Daytime running lights ................................................................. 1-23
Headlight flasher .......................................................................... 1-24
Headlight switch ........................................................................... 1-23
High-beam switch ........................................................................ 1-24
Lane change signal ...................................................................... 1-23
Turn signal operation ................................................................... 1-23
Compact Disk Player Operation (H922M) ........................................ 1-49
Cooling Fans ..................................................................................... 6-16
Corrosion Protection Cleaning the interior ....................................................................... 4-3
Protecting your Hyundai from corrosion ........................................ 4-1
Washing and waxing ...................................................................... 4-2
DD
DD
D
Defroster ........................................................................................... 1-38
Door Central door locking system .......................................................... 1-7
Door locks ...................................................................................... 1-4
Locking, unlocking front doors with a key ..................................... 1-4
Drive Belts ............................................................................... 6-12, 6-14 Driving Economical driving ......................................................................... 2-9
Smooth cornering ........................................................................... 2-9
Winter driving ................................................................................. 2-9
ZK000A1-G
10. INDEX
10. INDEX 10. INDEX
10. INDEX
10. INDEX
AA
AA
A
Air bag .................................................................................... 1-13 ~ 1-17
Air Cleaner Filter ................................................................................. 6-9Air Conditioning
Care ............................................................................................. 6-12
Operation ..................................................................................... 1-38
Antenna ............................................................................................. 1-54
Ashtray .............................................................................................. 1-27
Audio Fault Code .............................................................................. 1-51
BB
BB
B
Battery ...................................................................................... 2-10, 6-16
Bi-Level Heating ................................................................................ 1-36
Brake Anti-lock system ............................................................................ 2-8
Checking the brakes .................................................................... 6-11
Fluid .................................................................................. 6-11 ~ 6-12
Pedal clearance ........................................................................... 6-14
Pedal freeplay .............................................................................. 6-13
Practices ............................................................................... 2-7 ~ 2-8
Breaking-In your New Hyundai ........................................................... 1-1
CC
CC
C
Care of Cassette Tapes ................................................................... 1-52
Cassette Tape Player Operation (H900A) ............................. 1-44 ~ 1-46
1010
1010
10
Page 161 of 249
FEATURES OF YOUR HYUNDAI
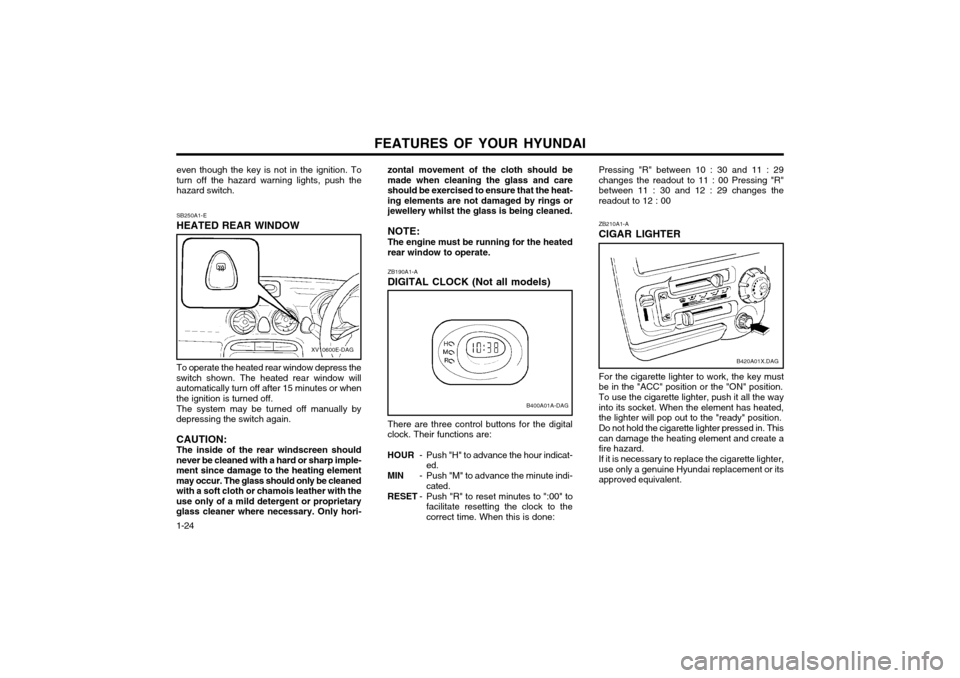
1-24 ZB210A1-A CIGAR LIGHTER
B420A01X.DAG
For the cigarette lighter to work, the key must be in the "ACC" position or the "ON" position. To use the cigarette lighter, push it all the way into its socket. When the element has heated,the lighter will pop out to the "ready" position. Do not hold the cigarette lighter pressed in. This can damage the heating element and create afire hazard. If it is necessary to replace the cigarette lighter, use only a genuine Hyundai replacement or itsapproved equivalent.
Pressing "R" between 10 : 30 and 11 : 29changes the readout to 11 : 00 Pressing "R"between 11 : 30 and 12 : 29 changes thereadout to 12 : 00
ZB190A1-A DIGITAL CLOCK (Not all models)
B400A01A-DAG
There are three control buttons for the digital clock. Their functions are:
HOUR - Push "H" to advance the hour indicat-
ed.
MIN - Push "M" to advance the minute indi-
cated.
RESET - Push "R" to reset minutes to ":00" to
facilitate resetting the clock to thecorrect time. When this is done:
zontal movement of the cloth should bemade when cleaning the glass and careshould be exercised to ensure that the heat-ing elements are not damaged by rings orjewellery whilst the glass is being cleaned. NOTE: The engine must be running for the heated rear window to operate.
SB250A1-E HEATED REAR WINDOW
XV10600E-DAG
To operate the heated rear window depress the
switch shown. The heated rear window will automatically turn off after 15 minutes or whenthe ignition is turned off.
The system may be turned off manually by
depressing the switch again. CAUTION: The inside of the rear windscreen should
never be cleaned with a hard or sharp imple- ment since damage to the heating elementmay occur. The glass should only be cleanedwith a soft cloth or chamois leather with theuse only of a mild detergent or proprietaryglass cleaner where necessary. Only hori- even though the key is not in the ignition. Toturn off the hazard warning lights, push thehazard switch.
Page 178 of 249
FEATURES OF YOUR HYUNDAI 1-41
3. BAND Selector Pressing the button changes the AM, FM1
and FM2 bands. The mode selected is dis- played on LCD.
4. TUNE (Manual) Select Button Press the (+) side or (-) side to increase or to
decrease the frequency. With the button held down for 0.5 sec. or more, the stop signal(broadcasting radio wave) is ignored and chan-nel selection continues.
SEEK Operation (Automatic Channel
Selection) Press the TUNE select button 1 sec. or more.
When the (+) side is pressed, the unit willautomatically tune to the next higher frequencyand when the (-) side is pressed, it will automat-ically tune to the next lower frequency.
5. PRESET STATION SELECT Six (6) stations for AM, FM and FM2 respec-
tively can be preset in the electronic memory circuit on this unit.
HOW TO PRESET STATIONS Six AM and twelve FM stations may be pro-
grammed into the memory of the radio. Then, by simply pressing the band select button and/or one of the six station select buttons, you mayrecall any of these stations instantly. To pro-gram the stations, follow these steps:
B901B02X-GAT
1. POWER ON-OFF/VOLUME CON-
TROL KNOB
The radio unit may be operated when the igni-
tion key is in the "ACC" or "ON" position. Rotate the knob clockwise to switch the radio unit on,
and to increase the volume.
The LCD shows the radio frequency in the radio
mode. Turn the knob counterclockwise to re-duce the volume, and to switch the radio unitoff.
BAL (Balance Control) Knob Pull and turn the control knob clockwise to
emphasize right speaker sound (Left speaker sound will be attenuated). When the controlknob is turned counterclockwise, left speakersound will be emphasized (Right speaker sound
will be attenuated). 2. BASS Control Knob Press to pop the knob out and turn to the left or
right for the desired bass tone.
TREBLE Control Knob Further pull-lock position of popped-up knob.
Turn to the left or right for the desired treble tone.
FM
AMo Press band selector to set the band for AM,
FM and FM2.
o Select the desired station to be stored by seek, scan or manual tuning.
o Determine the preset station select button you wish to use to access that station.
o Press the station select button for more than two seconds. A select button indicator will show in the display indicating which selectbutton you have depressed. The frequencydisplay will flash after it has been stored intothe memory. You should then release thebutton, and proceed to program the nextdesired station. A total of 18 stations can beprogrammed by selecting one AM and twoFM stations per button.
o When completed, any preset station may be recalled by selecting AM, FM or FM2 bandand the appropriate station button.
Page 180 of 249
FEATURES OF YOUR HYUNDAI 1-43
B900B02X-GAT
1. POWER ON-OFF/VOLUME CON-
TROL KNOB
The radio unit may be operated when the igni-
tion key is in the "ACC" or "ON" position. Rotate the knob clockwise to switch the radio unit on
and to increase the volume.
The LCD shows the radio frequency in the radio
mode, or the tape direction indicator in the tape mode. Turn the knob counterclockwise to re-duce the volume and to switch the radio unit off.
BAL (Balance Control) Knob Pull and turn the control knob clockwise to
emphasize right speaker sound. (Left speaker sound will be attenuated) When the controlknob is turned counterclockwise, left speakersound will be emphasized. (Right speaker sound
will be attenuated) 2. BASS Control Knob Press to pop the knob out and turn to the left or
right for the desired bass tone.
TREBLE Control Knob Further pull-lock position of popped-up knob.
Turn to the left or right for the desired treble tone. 3. BAND Selector Pressing the button changes the AM, FM1
and FM2 bands. The mode selected is dis- played on LCD.
4. TUNE (manual) Select Button Press the (+) side or (-) side to increase or to
decrease the frequency. With the button held down for 0.5 sec. or more, the stop signal(broadcasting radio wave) is ignored and chan-nel selection continues.
SEEK Operation (Automatic Channel
Selection) Press the TUNE select button 1 sec. or more.
When the (+) side is pressed, the unit willautomatically tune to the next higher frequencyand when the (-) side is pressed, it will automat-ically tune to the next lower frequency.
5. PRESET STATION SELECT Button Six (6) stations for AM, FM and FM2 respec-
tively can be preset in the electronic memory circuit on this unit.
HOW TO PRESET STATIONS Six AM and twelve FM stations may be pro-
grammed into the memory of the radio. Then, by simply pressing the band select button and/or one of the six station select buttons, you mayrecall any of these stations instantly. To pro-gram the stations, follow these steps:
FM AMo Press band selector to set the band for AM, FM, and FM2.
o Select the desired station to be stored by seek, scan or manual tuning.
o Determine the preset station select button you wish to use to access that station.
o Press the station select button for more than two seconds. A select button indicator will show in the display indicating which selectbutton you have depressed. The frequencydisplay will flash after it has been stored intothe memory. You should then release thebutton, and proceed to program the nextdesired station. A total of 18 stations can beprogrammed by selecting one AM and oneFM station per button.
o When completed, any preset station may be recalled by selecting AM, FM or FM2 bandand the appropriate station button.
6. TAPE EJECT Button To elect the tape, press the button. 7. TAPE PROGRAM When you press the button whose arrow is in
the same direction as the tape play arrow in the display the tape will advance at high speed.When you press the button whose arrow is inthe opposite direction to the tape play arrow inthe display the tape will rewind at high speed. To stop FF or REW action, press the opposite
button. When you press two buttons simulta-neously you play the reverse side of the tape
Page 183 of 249
FEATURES OF YOUR HYUNDAI
1-46 B922B02X-GAT
1. POWER ON-OFF/VOLUME CON-
TROL KNOB
The radio unit may be operated when the igni-
tion key is in the "ACC" or "ON" position. The clock will be displayed automatically, althoughthe radio unit has gone out. Press the button toswitch the power on. The LCD shows the radio frequency in the radio mode or the CD track
indicator in the CD mode. To switch the poweroff, press the button again.
VOLUME Control Rotate the knob clockwise to increase the vol-
ume and turn the knob counterclockwise to reduce the volume.
BALANCE Control Pull and turn the control knob clockwise to
emphasize right speaker sound. (Left speaker sound will be attenuated) When the controlknob is turned counterclockwise, left speakersound will be emphasized. (Right speaker sound
will be attenuated) 2. FAD (Fader Control) Knob Turn the control knob counterclockwise to em-
phasize front speaker sound. (Rear speaker sound will be attenuated) When the controlknob is turned clockwise, rear speaker soundwill be emphasized. (Front speaker sound willbe attenuated)
FM/AM 6. PRESET STATION SELECT Button Six (6) stations for AM, FM and FM2 respec- tively can be preset in the electronic memorycircuit on this unit. HOW TO PRESET STATIONS Six AM and twelve FM stations may be pro- grammed into the memory of the radio. Then,by simply pressing the band select button and/or one of the six station select buttons, you mayrecall any of these stations instantly. To pro-gram the stations, follow these steps:
o Press band selector to set the band for AM, FM, and FM2.
o Select the desired station to be stored by seek, scan or manual tuning.
o Determine the preset station select button you wish to use to access that station.
o Press the station select button for more than two seconds. A select button indicator willshow in the display indicating which selectbutton you have depressed. The frequencydisplay will flash after it has been stored intothe memory. You should then release thebutton, and proceed to program the nextdesired station. A total of 18 stations can beprogrammed by selecting one AM and oneFM station per button.
o When completed, any preset station may be recalled by selecting AM, FM or FM2 bandand the appropriate station button.
3. BASS/TREBLE Control Knob BASS Control Knob Press to pop the knob out and turn to the left or right for the desired bass tone. TREBLE Control Knob Further pull-lock position of popped-up knob. Turn to the left or right for the desired trebletone. 4. BAND Selector Pressing the button changes the AM, FM1 and FM2 bands. The mode selected isdisplayed on LCD. 5. TUNE (Manual) Select Button Press the (+) side or (-) side to increase or to decrease the frequency. With the button helddown for 0.5 sec. or more, the stop signal(broadcasting radio wave) is ignored and chan-nel selection continues. SEEK Operation (Automatic Channel Selection) Press the TUNE select button 1 sec. or more, and releasing will automatically tune the nextavailable station. When the (+) side is pressedlonger than 1 second and releasing will auto-matically tune the next higher frequency andwhen the (-) side is pressed longer than 1second and releasing will automatically tunethe next lower frequency.