stop start Hyundai Atos 2002 Owner's Guide
[x] Cancel search | Manufacturer: HYUNDAI, Model Year: 2002, Model line: Atos, Model: Hyundai Atos 2002Pages: 249, PDF Size: 3.11 MB
Page 185 of 249
FEATURES OF YOUR HYUNDAI
1-48 B922F01X-GAT 1. STOP
o Insert the CD to start CD playback, during the radio operation.
o Press the button to stop CD playback and to change the source to Radio.
2. FF/REWWhile the disc is playing, press and hold FF
button to quickly move forward until you reach the desired section of the track and vice versa.
3. TRACK UP/DOWN
o The desired track on the disc currently being played can be selected using the track num-ber.
o Pressing the button once increases the track number by one and pressing the button decreases it.
4. REPEAT
o To repeat the music you are listening to, press the RPT button and to cancel musicrepeat, press again.
FM/AM
5. EJECT Button When the EJECT button is pressed with the CD loaded, the CD is ejected. NOTE:
o To assure proper operation of the unit, keep the vehicle interior temperature with- in a normal range by using the vehicle’sair conditioning or heating system.
o When replacing the fuse, replace it with a fuse having the correct capacity.
o The preset station frequencies are all erased when the car battery is discon-nected. Therefore, all data will have to beset again if this should occur.
o Do not add any oil to the rotating parts.
o This equipment is designed to be used only in a 12 volt DC battery system with negative ground.
o This unit is made of precision parts. Do not attempt to disassemble or adjust anyparts.
o When driving your vehicle, be sure to keep the volume of the unit set lowenough to allow you to hear sounds com-ing from the outside.
o Do not expose this equipment (including the speakers and tape) to water or exces-sive moisture.
Page 193 of 249
DRIVING YOUR HYUNDAI
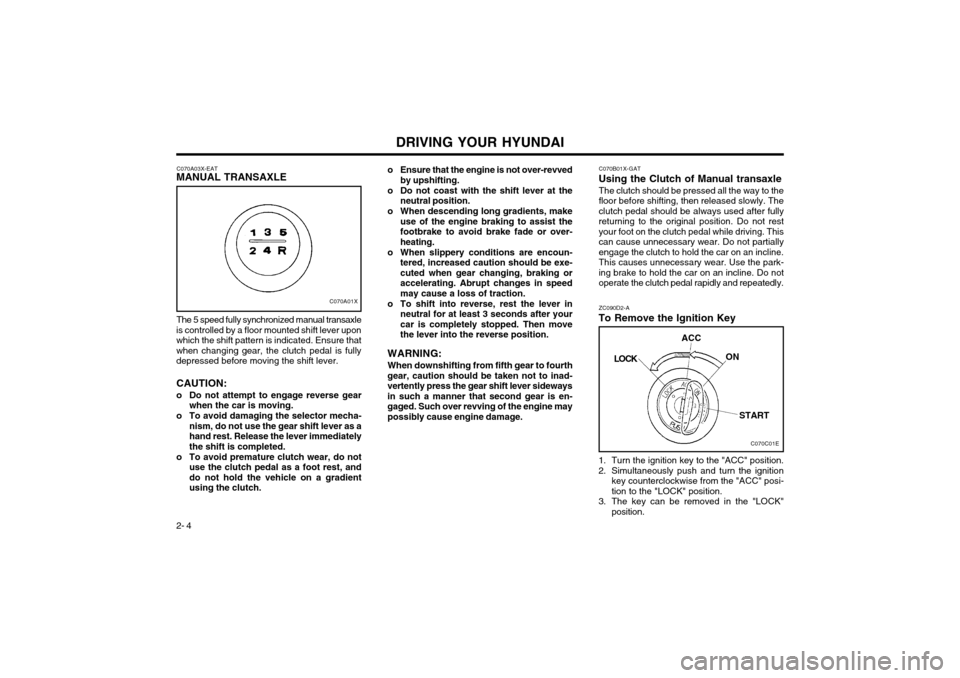
2- 4 1. Turn the ignition key to the "ACC" position.
2. Simultaneously push and turn the ignition
key counterclockwise from the "ACC" posi- tion to the "LOCK" position.
3. The key can be removed in the "LOCK" position.
C070B01X-GAT
Using the Clutch of Manual transaxle
The clutch should be pressed all the way to thefloor before shifting, then released slowly. Theclutch pedal should be always used after fullyreturning to the original position. Do not restyour foot on the clutch pedal while driving. Thiscan cause unnecessary wear. Do not partiallyengage the clutch to hold the car on an incline.This causes unnecessary wear. Use the park-
ing brake to hold the car on an incline. Do not
operate the clutch pedal rapidly and repeatedly. ZC090D2-A
To Remove the Ignition Key
C070A03X-EAT
MANUAL TRANSAXLE
C070A01X
The 5 speed fully synchronized manual transaxle
is controlled by a floor mounted shift lever upon which the shift pattern is indicated. Ensure thatwhen changing gear, the clutch pedal is fullydepressed before moving the shift lever. CAUTION:
o Do not attempt to engage reverse gear when the car is moving.
o To avoid damaging the selector mecha- nism, do not use the gear shift lever as a hand rest. Release the lever immediatelythe shift is completed.
o To avoid premature clutch wear, do not use the clutch pedal as a foot rest, anddo not hold the vehicle on a gradientusing the clutch. o Ensure that the engine is not over-revved
by upshifting.
o Do not coast with the shift lever at the neutral position.
o When descending long gradients, make use of the engine braking to assist thefootbrake to avoid brake fade or over-heating.
o When slippery conditions are encoun- tered, increased caution should be exe-cuted when gear changing, braking oraccelerating. Abrupt changes in speedmay cause a loss of traction.
o To shift into reverse, rest the lever in neutral for at least 3 seconds after yourcar is completely stopped. Then movethe lever into the reverse position.
WARNING: When downshifting from fifth gear to fourth
gear, caution should be taken not to inad-vertently press the gear shift lever sidewaysin such a manner that second gear is en-gaged. Such over revving of the engine maypossibly cause engine damage.
C070C01E
LOCK
ACC
ON
START
Page 194 of 249
DRIVING YOUR HYUNDAI 2- 5
1-2 2-3 3-44-5
Recommended
mph (km/h)
C070E02-GAT
RECOMMENDED SHIFT POINTS
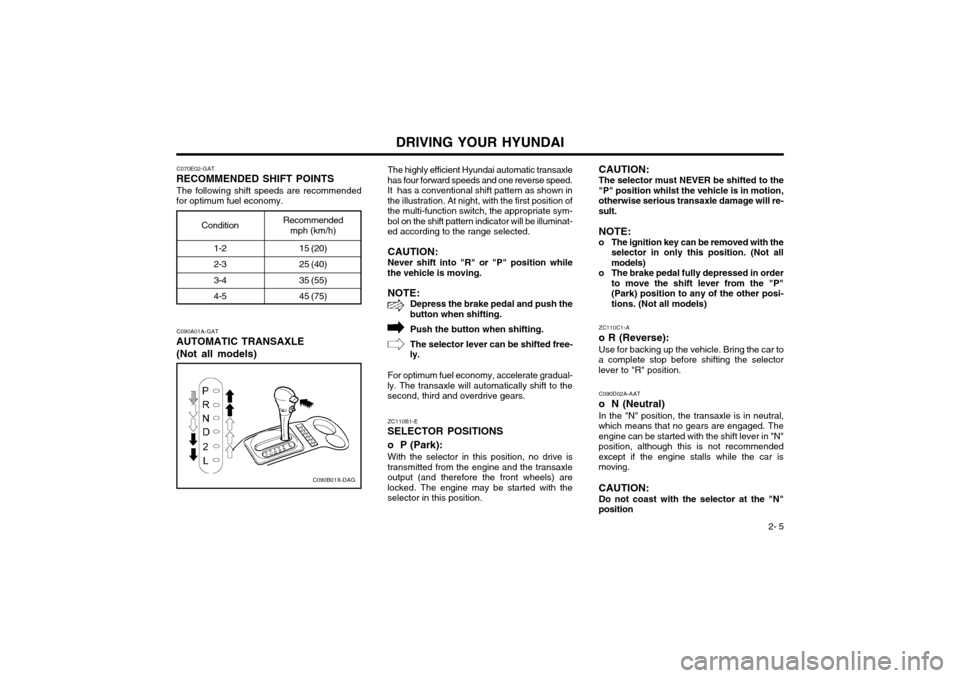
The following shift speeds are recommended
for optimum fuel economy.
C090A01A-GAT
AUTOMATIC TRANSAXLE
(Not all models)
C090B01X-DAG
Condition
15 (20) 25 (40) 35 (55)45 (75)The highly efficient Hyundai automatic transaxle
has four forward speeds and one reverse speed. It has a conventional shift pattern as shown inthe illustration. At night, with the first position ofthe multi-function switch, the appropriate sym-bol on the shift pattern indicator will be illuminat-ed according to the range selected.
CAUTION: Never shift into "R" or "P" position while
the vehicle is moving.
NOTE: Depress the brake pedal and push the
button when shifting.
Push the button when shifting. The selector lever can be shifted free-
ly.
For optimum fuel economy, accelerate gradual-
ly. The transaxle will automatically shift to the second, third and overdrive gears.
CAUTION: The selector must NEVER be shifted to the
"P" position whilst the vehicle is in motion, otherwise serious transaxle damage will re-sult.
NOTE:
o The ignition key can be removed with the selector in only this position. (Not allmodels)
o The brake pedal fully depressed in order to move the shift lever from the "P"(Park) position to any of the other posi-tions. (Not all models)
ZC110B1-E
SELECTOR POSITIONS o P (Park):
With the selector in this position, no drive is
transmitted from the engine and the transaxle output (and therefore the front wheels) arelocked. The engine may be started with theselector in this position. ZC110C1-A
o R (Reverse):
Use for backing up the vehicle. Bring the car to
a complete stop before shifting the selectorlever to "R" position.
C090D02A-AAT
o N (Neutral) In the "N" position, the transaxle is in neutral,
which means that no gears are engaged. Theengine can be started with the shift lever in "N"position, although this is not recommendedexcept if the engine stalls while the car ismoving. CAUTION:
Do not coast with the selector at the "N"
position
Page 195 of 249
DRIVING YOUR HYUNDAI
2- 6 C090I01E-EAT
CAUTION:
o Shift into "R" and "P" only when the vehicle has completely stopped.
o Do not accelerate the engine in the re- verse or any of the forward positions
with the brakes applied.
o Always apply the footbrake when shift- ing from "P" or "N", to "R", "D", "2" or "L".
o Do not use the "P" (Park) position in place of the parking brake. Always setthe park-ing brake, shift the transaxleinto "P" (Park) and turn off the ignitionwhen you leave the vehicle, even mo-mentarily. Never leave the vehicle unat-tended whilst the engine is running.
C090H01E-EAT
NOTE:
o The brake pedal should be depressed when shifting from NEUTRAL to a for- ward or reverse gear.
o The brake pedal fully depressed in order to move the shift lever from the "P"(Park) position to any of the other posi-tions.
o It is always possible to shift from "R", "N", "D", "2", "L" position.
C090P01X-DAG
SC130A1-E
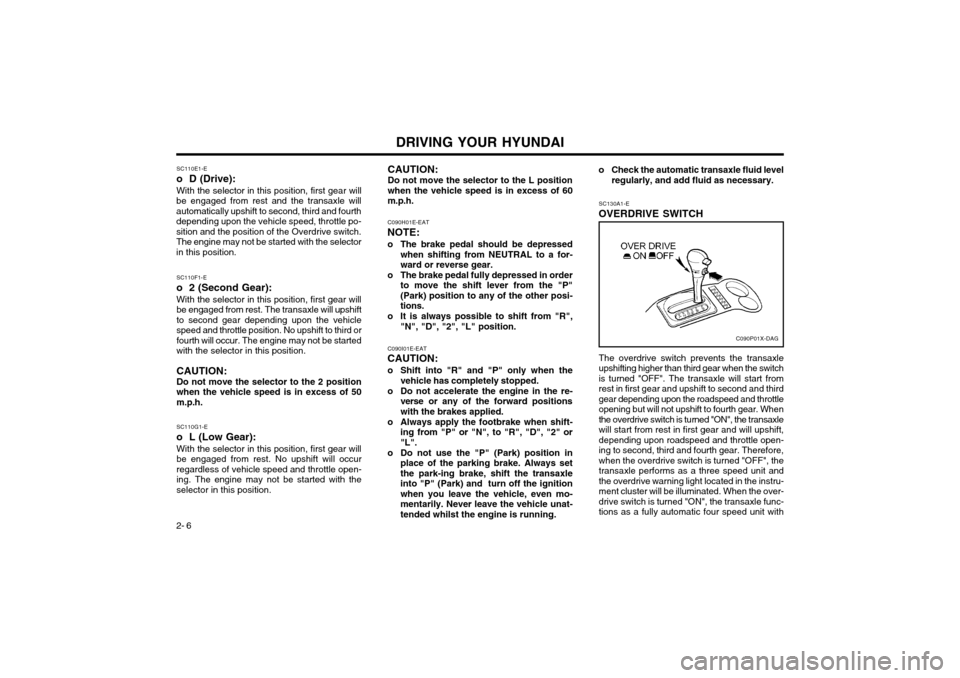
OVERDRIVE SWITCH
SC110E1-E
o D (Drive):
With the selector in this position, first gear will
be engaged from rest and the transaxle will automatically upshift to second, third and fourthdepending upon the vehicle speed, throttle po-sition and the position of the Overdrive switch.The engine may not be started with the selectorin this position.
SC110G1-E
o L (Low Gear): With the selector in this position, first gear willbe engaged from rest. No upshift will occurregardless of vehicle speed and throttle open-ing. The engine may not be started with theselector in this position.
SC110F1-E
o 2 (Second Gear): With the selector in this position, first gear willbe engaged from rest. The transaxle will upshiftto second gear depending upon the vehiclespeed and throttle position. No upshift to third orfourth will occur. The engine may not be startedwith the selector in this position. CAUTION: Do not move the selector to the 2 positionwhen the vehicle speed is in excess of 50m.p.h. CAUTION: Do not move the selector to the L position when the vehicle speed is in excess of 60m.p.h.
o Check the automatic transaxle fluid level
regularly, and add fluid as necessary.
The overdrive switch prevents the transaxleupshifting higher than third gear when the switchis turned "OFF". The transaxle will start fromrest in first gear and upshift to second and thirdgear depending upon the roadspeed and throttleopening but will not upshift to fourth gear. Whenthe overdrive switch is turned "ON", the transaxlewill start from rest in first gear and will upshift,depending upon roadspeed and throttle open-ing to second, third and fourth gear. Therefore,when the overdrive switch is turned "OFF", thetransaxle performs as a three speed unit andthe overdrive warning light located in the instru-ment cluster will be illuminated. When the over-drive switch is turned "ON", the transaxle func-tions as a fully automatic four speed unit with
Page 196 of 249
DRIVING YOUR HYUNDAI 2- 7
o Ensure that the overdrive switch is at the
"ON" position for maximum economy.
o If rapid acceleration is required, fully de- press the accelerator pedal. In this condi- tion, the kickdown mechanism will be oper-ated and the transaxle will automaticallydownshift according to the vehicle speed.
o Do not depress the accelerator pedal with the brakes applied and the selector at the"R" "D" "2" or "L" position.
o Turn the overdrive switch on for good fuel economy and smooth driving. But if enginebraking is needed in the "D" range or ifrepeated upshifting and downshifting be-tween the 3rd and 4th gear is needed whenclimbing a gentle slope, it is recommendedthat the overdrive switch be turned off. Turnthe overdrive switch back on immediatelyafterward.
the maximum fuel economy potential of thevehicle being realized.
SC140A1-E
EFFECTIVE BRAKING Braking system performance and friction mate-
rial life are greatly affected by the driving styleadopted. The following suggestions are madeto assist in achieving the best results from thebraking system.
o Anticipate the road and conditions ahead in order that heavy braking may be avoided.
o When descending long gradients, use the engine to assist in retarding the vehicle to minimize the possibility of brake fade occur-ring.
ZC120D1-E
General Operating Instructions
o The button in the selector handle must be depressed before the selector can be moved.
o The engine may only be started when the selector is at position "P" or "N".
o Ensure that the footbrake is firmly applied when shifting from "P" or "N" to "D", "2" or "L" and vice versa.
o Always engage the parking brake when the vehicle is unattended, never use the "P"position in place of the parking brake.
o Under normal circumstances, the selector should be placed in the "D" position and thetransaxle allowed to select the most idealratio for the circumstances. In this positionmaximum fuel economy will be achieved.
o When descending steep gradients where engine braking is required, the selectorshould be placed at the "2" or "L" positiondepending upon the vehicle speed.
o When ascending steep gradients and using large throttle openings, the transaxle mayrepeatedly change between two adjacentratios. This is a normal characteristic andmay be prevented by selecting "2" or "L"depending upon the vehicle speed.
o Never move the selector to or from the "P" or "N" position with the accelerator de-pressed. o When trailer towing, ensure that the trailer
brakes function correctly and use enginebrak-ing to assist the vehicle braking system.
o Use only genuine Hyundai replacement brake pads and shoes to ensure consistentfriction characteristics and wear rates.
o After driving through deep water (e.g. fording), the brakes may become wet andperformance reduced. Always check brakeefficiency after emerging from the water anddry the brakes by lightly depressing thebrake pedal several times whilst driving slow-ly.
o Apply the parking brake only when the vehi- cle is at rest.
o Since the power assistance provided by the brake servo is derived from the engine,coast-ing with the engine turned off or tow-ing of the vehicle with the engine turned offwill result in greatly increased pedal pres-sures being re-quired to stop the vehicle.
o Do not hold the vehicle on the upgrade with the accelerator pedal. This can cause thetransmission to overheat. Always use thebrake pedal or parking brake.
YC250A1-A
ANTI-LOCK BRAKE SYSTEM
(Not all models) The Anti-Lock Brake System (ABS) is designed
to prevent wheel lock-up during sudden braking or on hazardous road surfaces. The ABS con-trol module monitors the wheel speed and con-trols the pressure applied to each brake. Thus,
Page 197 of 249
DRIVING YOUR HYUNDAI
2- 8 in emergency situations or on slick roads, ABS will increase vehicle control during braking. NOTE: During ABS operation, a slight pulsation may be felt in the brake pedal when thebrakes are applied. Also, a noise may beheard in the engine compartment while brak-ing. These conditions are normal and indi-cate that the anti-lock brake system is func-tioning properly. WARNING: Your ABS will not prevent accidents due to improper or dangerous driving maneuvers.Even though vehicle control is improvedduring emergency braking, always maintaina safe distance between you and objectsahead. Vehicle speeds should always bereduced during extreme road conditions.The braking distance for cars equipped withan anti-lock braking system may be longerthan for those without it in the followingroad conditions.
o Driving on rough, gravel or snow-cov- ered roads.
o Driving with tire chains installed.
o Driving on roads where the road surface is pitted or has different surface height.
These roads should be driven at reduced speeds. The safety features of an ABSequipped vehicle should not be tested by high speed driving or cornering. This couldendanger the safety of yourself or others.
unnecessary tire wear. Check the tire pres-sures at least once a month.
o Be sure that the wheels are aligned cor- rectly. Improper alignment can result fromhitting curbs or driving too fast over irregularsurfaces. Poor alignment causes faster tirewear and may also result in other problemsas well as greater fuel consumption.
o Keep your car in good condition. For better fuel economy and reduced maintenancecosts, maintain your car in accordance withthe maintenance schedule in Section 5. Ifyou drive your car in severe conditions,more frequent maintenance is required (seeSection 5 for details).
o Keep your car clean. For maximum service, your car should be kept clean and free ofcorrosive materials. It is especially impor-tant that mud, dirt, ice, etc. not be allowed toaccumulate on the underside of the car. Thisextra weight can result in increased fuelconsumption and also contribute to corro-sion.
o Travel lightly. Don’t carry unnecessary weight in your car. Weight is an enemy of good fueleconomy.
o Don’t let the engine idle longer than neces- sary. If you are waiting (and not in traffic),turn off your engine and restart only whenyou’re ready to go.
o Remember, your car does not require ex- tended warm-up. As soon as the engine isrunning smoothly, you can drive away. Invery cold weather, however, give your en-gine a slightly longer warm-up period.
SC150A1-F
DRIVING FOR ECONOMY You can save fuel and get more miles from yourcar if you follow these suggestions:
o Drive smoothly. Accelerate at a moderate rate. Don’t make "jack-rabbit" starts or full-throttle shifts and maintain a steady cruisingspeed. Don’t race between stoplights. Try toadjust your speed to that of the other trafficso you don’t have to change speeds unnec-essarily. Avoid heavy traffic whenever possible. Al- ways maintain a safe distance from othervehicles so you can avoid unnecessary brak-ing. This also reduces brake wear.
o Drive at a moderate speed. The faster you drive, the more fuel your car uses. Driving ata moderate speed, especially on the high-way, is one of the most effective ways toreduce fuel consumption.
o Don’t "ride" the brake or clutch pedal. This can increase fuel consumption and alsoincrease wear on these components. In ad-dition, driving with your foot resting on thebrake pedal may cause the brakes to over-heat, which reduces their effectiveness andmay lead to more serious consequences.
o Take care of your tires. Keep them inflated to the recommended pressure. Incorrect infla-tion, either too much or too little, results in
Page 201 of 249
DRIVING YOUR HYUNDAI
2- 12 15. If you have to stop while going uphill, do not
hold the vehicle in place by pressing on the accelerator. This can cause the automatictransaxle to overheat. Use the parking brakeor footbrake.
NOTE: When towing, check transaxle fluid more frequently. CAUTION: If overheating should occur when towing,
(temperature gauge reads near red zone),taking the following action may reduce oreliminate the problem.
1. Turn off the air conditioner.
2. Reduce highway speed.
3. Select a lower gear when going uphill.
4. While in stop and go traffic, place the gear selection in park or neutral and idle theengine at a higher speed.
being passed by a large vehicle, keep aconstant speed and steer straight ahead. If there is too much wind buffeting, slow
down to get out of the other vehicle's airturbulence.
8. When parking your car and trailer, especial- ly on a hill, be sure to follow all the normalprecautions. Turn your front wheel into thecurb, set the parking brake firmly, and putthe transaxle in 1st or Reverse (manual) orPark (automatic). In addition, place wheelchocks at each of the trailer's tyres.
9. If the trailer has electric brakes, start your vehicle and trailer moving, and then applythe trailer brake controller by hand to be
sure the brakes are working. This lets you
check your electrical connection at the sametime.
10. During your trip, check occasionally to be sure that the load is secure, and that thelights and any trailer brakes are still working.
11. Avoid jerky starts, sudden acceleration or sudden stops.
12. Avoid sharp turns and rapid lane changes.
13. Avoid holding the brake pedal down too long or too frequently. This could cause the brakes to overheat, resulting in reduced brakingefficiency.
14. When going down a hill, shift into a lower gear and use the engine braking effect.When ascending a long grade, downshift thetransaxle to a lower gear and reduce speedto reduce chances of engine overloading
and or overheating.
WARNING:
o The tongue load should never exceed;
Auto Transaxle : 55.1 lb Manual Transaxle 9: 61.7 lb
o Maximun permissible mass of the cou- pling device (ATOS VAN only) : 44 lb
o Improperly loading your car and trailer can serious affect its steering and brak- ing performance causing a crash in which
you may be seriously injured or killed.
YC200E1-A
Trailer or Vehicle Towing Tips
1. Before towing, check hitch and safety chain connections as well as proper operation of the trailer running lights, brake lights, andturn signals.
2. Always drive your vehicle at a moderate speed (Less than 62 MPH).
3. Trailer towing requires more fuel than nor- mal conditions.
4. To maintain engine braking efficiency and electrical charging performance, do not usefifth gear (manual transaxle) or overdrive(automatic transaxle).
5. Always secure items in the trailer to prevent load shift while driving.
6. Check the condition and air pressure of all tires on the trailer and your car. Low tyrepressure can seriously affect the handling.Also check the spare tyre.
7. The vehicle/trailer combination is more af- fected by crosswind and buffeting. When
Page 203 of 249
WHAT TO DO IN AN EMERGENCY
3-2 3. If coolant is running out under the car or
steam is coming out from under the bonnet stop the engine. Do not open the bonnetuntil the coolant has stopped running or thesteaming has stopped. If there is no visibleloss of coolant and no steam, leave theengine running and check to be sure theengine cooling fan is operating. If the fan isnot running, turn the engine off.
4. Check to see if the water pump drive belt is missing. If it is not missing, check to see thatit is tight. If the drive belt seems to besatisfactory, check for coolant leaking fromthe radiator, hoses or under the car. (If theair conditioner had been in use, it is normalfor cold water to be draining from it).
WARNING: While the engine is running, keep hands andclothing away from moving parts such asthe fan and drive belts to prevent injury.
5. If the water pump drive belt is broken or coolant is leaking out, stop the engine imme-diately and call the nearest Hyundai dealerfor assistance.
WARNING: Do not remove the radiator cap when theengine is hot since steam and boiling watermay be ejected from the radiator resulting inburns or scalding.
CAUTION:
Personal injury and damage to the vehicle
may occur if jump starting is not performedcorrectly. If any doubt exists as to how thisoperation should be performed, seek assis-tance from qualified personnel. WARNING:
Motor vehicle batteries contain sulphuric
acid and emit hydrogen gas. Protective cloth- ing should be worn and care exercised toprevent the acid from coming into contactwith skin or clothing and the vehicle. Nakedlights should not be permitted in the vicinityof the battery. Care should be exercised topreventsparks occurring during connection.If acid accidentally comes into contact withskin or eyes, the affected area should imme-diately be flushed with copious amounts ofwater and medical assistance sought.
1. Ensure that the booster battery is 12 volt type. If the booster battery is installed in another vehicle, ensure that the two vehi-cles are not touching.
2. Turn off all unnecessary electrical equip- ment in both vehicles.
3. Ensure that the engine of the vehicle provid- ing the jump start is running prior to connec-tion of the jump cables.
4. Connect the red jump cable to the positive (+) terminal of the booster battery and theother end to the positive (+) terminal of thedischarged battery. 5. Attach the black jump cable to the negative
(-) terminal of the booster battery, and theother end to a ground point within the enginecompartment of the vehicle with the flat bat-tery. Do not connect to the negative batteryterminal of the flat battery since sparks maybe generated with the subsequent risk ofexplosion.
6. Raise the booster vehicle engine speed to 2,000 r.p.m. and start the engine of thevehicle with the flat battery.
7. Remove jump cables in the reverse order of installation (black cable first).
NOTE: If the jump cable is incorrectly installed, damage to the vehicle electrical system mayoccur, in particular the electronic compo-nents such as the Fuel Injection systemcomputer and the Automatic Transaxle com-puter. The battery must never be discon-nected whilst the engine is running. XD040A1-E
IF THE ENGINE OVERHEATS If the temperature gauge indicates overheating:
1. Pull off the road and stop as soon as it is safe to do so.
2. Place the gear selector lever in "P" (auto- matic), or neutral (manual transaxle, semi- automatic transalxe) and set the parkingbrake. If the air conditioner is on, turn it off.
Page 217 of 249
VEHICLE MAINTENANCE REQUIREMENTS
5-6 F070B01A-GAT
o Cooling SystemCheck the cooling system part, such as radia-
tor, coolant reservoir, hoses and connections for leakage and damage. Replace any dam-aged parts.
F070C01A-AAT
o Engine coolant The coolant should be changed at the intervals
specified in the maintenance schedule.
F070D01X-GAT
o Manual or semi-automatic transaxle
oil
Inspect the manual or semi-automatic transaxle
oil according to the maintenance schedule.
NOTE: If the oil level is low, check for possible
leaks before adding oil. Do not overfill.
F070E01X-AAT
o Automatic transaxle fluidThe fluid level should be in the “HOT” range of
the dipstick, after engine and transaxle are at
normal operating temperature. Check the Auto-matic Transaxle Fluid level with the engine
running and the transaxle in neutral, with theparking brake properly applied. Use ESSOJWS3314 when adding or changing fluid. F070F01A-AAT o Brake hoses and linesVisually check for proper installation, chafing, cracks, deterioration and any leakage. Replaceany deteriorated or damaged parts immediate-ly. F070G02A-AAT
o Brake fluid Check brake fluid level in the brake fluid reser- voir. The level should be between "MIN" and"MAX" marks on the side of the reservoir. Use only hydraulic brake fluid conforming to DOT 3 or DOT 4. F070H01A-AAT
o Rear brake drums/linings, parking
brake
Check the rear brake drums and linings for
scoring, burning, leaking fluid, broken parts,and excessive wear. Inspect the parking brake
system including the parking brake lever andcables. For detailed service procedures, referto the Shop Manual. F070J01A-AAT
o Brake pads, calipers and rotorsCheck the pads for excessive wear, discs for run out and wear, and calipers for fluid leakage. F070K01A-AAT
o Exhaust pipe and mufflerVisually inspect the exhaust pipes, muffler and hangers for cracks, deterioration, or damage.Start the engine and listen carefully for any
exhaust gas leakage. Tighten connections orreplace parts as necessary. F070L01A-AAT
o Suspension mounting bolts Check the suspension connections for loose- ness or damage. Retighten to the specifiedtorque. F070M01A-AAT
o Steering gear box, linkage & boots/
lower arm ball joint
With the vehicle stopped and engine off, check for excessive free-play in the steering wheel.Check the linkage for bends or damage. Check
the dust boots and ball joints for deterioration,cracks, or damage. Replace any damagedparts. F070N01A-AAT
o Power steering pump, belt and hos-
es
Check the power steering pump and hoses for leakage and damage. Replace any damagedor leaking parts immediately. Inspect the powersteering belt for evidence of cuts, cracks, ex-cessive wear, oiliness and proper tension.Replace or adjust it if necessary.
Page 222 of 249
DO-IT-YOURSELF MAINTENANCE
6-4 G040A01X-GAT
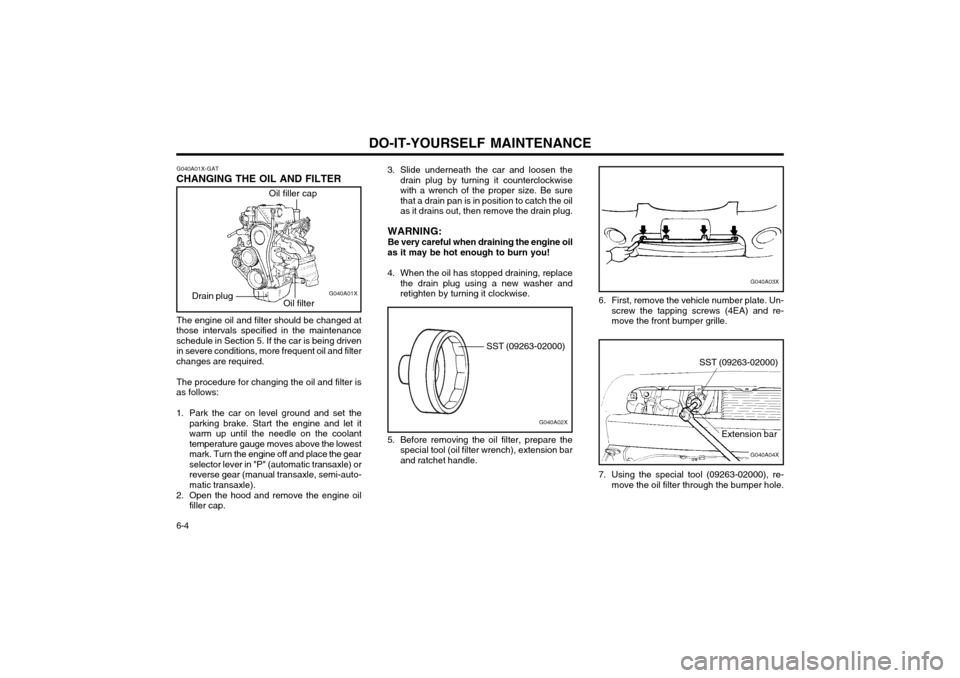
CHANGING THE OIL AND FILTER
Oil filler cap
Oil filter G040A01X
Drain plug
The engine oil and filter should be changed at
those intervals specified in the maintenance schedule in Section 5. If the car is being driven in severe conditions, more frequent oil and filter
changes are required.
The procedure for changing the oil and filter is
as follows:
1. Park the car on level ground and set the parking brake. Start the engine and let it warm up until the needle on the coolanttemperature gauge moves above the lowest
mark. Turn the engine off and place the gearselector lever in "P" (automatic transaxle) orreverse gear (manual transaxle, semi-auto-matic transaxle).
2. Open the hood and remove the engine oil filler cap. 3. Slide underneath the car and loosen the
drain plug by turning it counterclockwisewith a wrench of the proper size. Be sure
that a drain pan is in position to catch the oilas it drains out, then remove the drain plug.
WARNING: Be very careful when draining the engine oil
as it may be hot enough to burn you!
4. When the oil has stopped draining, replace the drain plug using a new washer and retighten by turning it clockwise.
G040A03X
6. First, remove the vehicle number plate. Un- screw the tapping screws (4EA) and re- move the front bumper grille.
G040A04X
SST (09263-02000)
Extension bar
7. Using the special tool (09263-02000), re- move the oil filter through the bumper hole.
G040A02X
SST (09263-02000)
5. Before removing the oil filter, prepare the special tool (oil filter wrench), extension bar and ratchet handle.