fluid Hyundai Azera 2006 Owner's Manual
[x] Cancel search | Manufacturer: HYUNDAI, Model Year: 2006, Model line: Azera, Model: Hyundai Azera 2006Pages: 307, PDF Size: 12.62 MB
Page 14 of 307

YOUR VEHICLE AT A GLANCEB255A01TG-AATINDICATOR SYMBOLS ON THE INSTRUMENT CLUSTER* More detailed explanations of these items will be found beginning on page 1-66.
Turn Signal Indicator LightsHigh Beam Indicator LightLow Oil Pressure Warning LightParking Brake/Low Brake Fluid Level
Warning Light
Charging System Warning LightDoor Ajar Warning LightTrunk Lid Open Warning LightLow Fuel Level Warning Light
Low Windshield Washer Fluid Level Warning Light
Seat Belt Warning LightFront Fog Light Indicator LightCheck Engine - Malfunction Indicator Light (MIL)SRS (Airbag) Warning LightABS Service Reminder Indicator (If Installed)
Electronic Stability Control (ESC) Indicator
Lights (If Installed)Cruise Indicator LightCruise SET Indicator Light
Immobilizer Warning Light
Page 77 of 307
1
FEATURES OF YOUR HYUNDAI
63
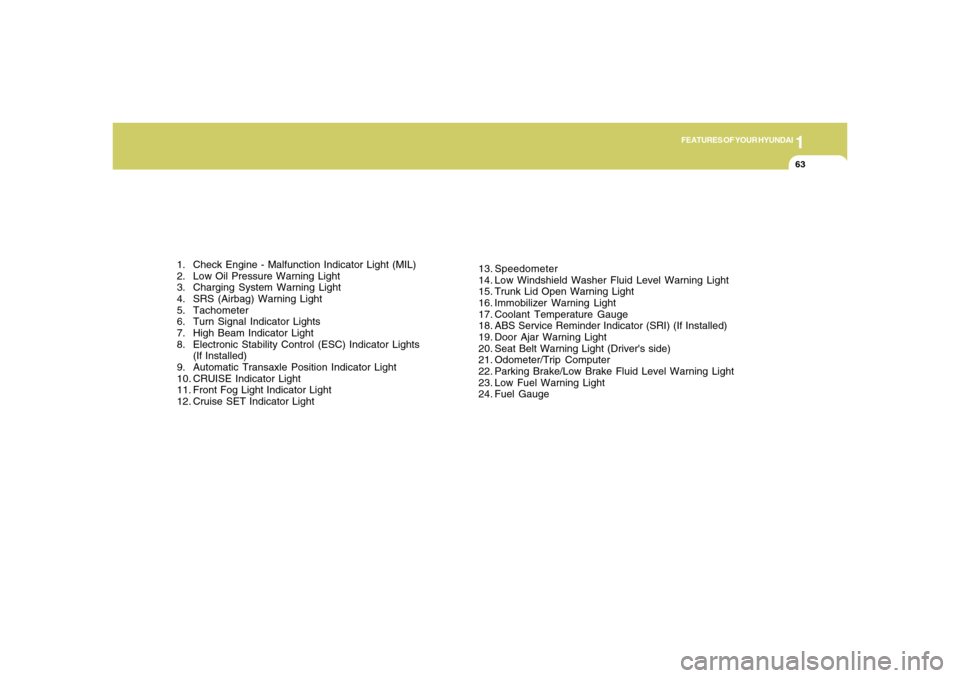
1. Check Engine - Malfunction Indicator Light (MIL)
2. Low Oil Pressure Warning Light
3. Charging System Warning Light
4. SRS (Airbag) Warning Light
5. Tachometer
6. Turn Signal Indicator Lights
7. High Beam Indicator Light
8. Electronic Stability Control (ESC) Indicator Lights
(If Installed)
9. Automatic Transaxle Position Indicator Light
10. CRUISE Indicator Light
11. Front Fog Light Indicator Light
12. Cruise SET Indicator Light13. Speedometer
14. Low Windshield Washer Fluid Level Warning Light
15. Trunk Lid Open Warning Light
16. Immobilizer Warning Light
17. Coolant Temperature Gauge
18. ABS Service Reminder Indicator (SRI) (If Installed)
19. Door Ajar Warning Light
20. Seat Belt Warning Light (Driver's side)
21. Odometer/Trip Computer
22. Parking Brake/Low Brake Fluid Level Warning Light
23. Low Fuel Warning Light
24. Fuel Gauge
Page 79 of 307
1
FEATURES OF YOUR HYUNDAI
65
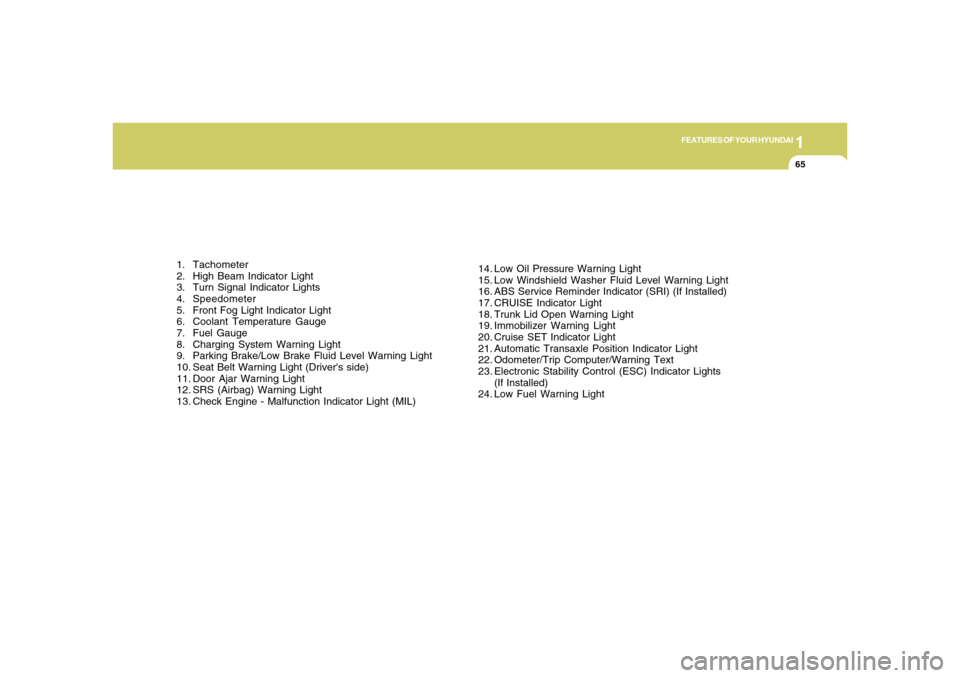
1. Tachometer
2. High Beam Indicator Light
3. Turn Signal Indicator Lights
4. Speedometer
5. Front Fog Light Indicator Light
6. Coolant Temperature Gauge
7. Fuel Gauge
8. Charging System Warning Light
9. Parking Brake/Low Brake Fluid Level Warning Light
10. Seat Belt Warning Light (Driver's side)
11. Door Ajar Warning Light
12. SRS (Airbag) Warning Light
13. Check Engine - Malfunction Indicator Light (MIL)14. Low Oil Pressure Warning Light
15. Low Windshield Washer Fluid Level Warning Light
16. ABS Service Reminder Indicator (SRI) (If Installed)
17. CRUISE Indicator Light
18. Trunk Lid Open Warning Light
19. Immobilizer Warning Light
20. Cruise SET Indicator Light
21. Automatic Transaxle Position Indicator Light
22. Odometer/Trip Computer/Warning Text
23. Electronic Stability Control (ESC) Indicator Lights
(If Installed)
24. Low Fuel Warning Light
Page 81 of 307
1
FEATURES OF YOUR HYUNDAI
67
!
B260H02A-AAT
Parking Brake/Low Brake
Fluid Level Warning Light
Your Hyundai is equipped with dual-di-
agonal braking systems. This means you
still have braking on two wheels even if
one of the dual systems should fail. With
only one of the dual systems working,
more than normal pedal travel and greater
pedal pressure are required to stop the
car. Also, the car will not stop in as short a
distance with only half of the brake system
working. If the brakes fail while you are
driving, shift to a lower gear for additional
engine braking and stop the car as soon as
it is safe to do so.
WARNING:
If you suspect brake trouble, have your
brakes checked by a Hyundai dealer as
soon as possible. Driving your car with
a problem in either the brake electrical
system or brake hydraulic system is
dangerous, and could result in a serious
injury or death.
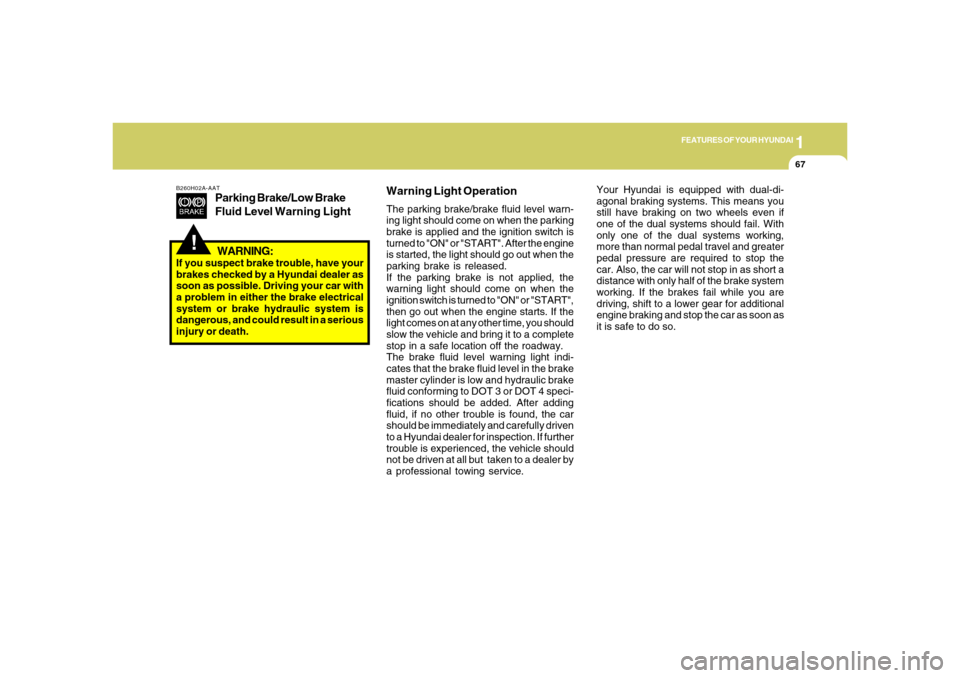
Warning Light OperationThe parking brake/brake fluid level warn-
ing light should come on when the parking
brake is applied and the ignition switch is
turned to "ON" or "START". After the engine
is started, the light should go out when the
parking brake is released.
If the parking brake is not applied, the
warning light should come on when the
ignition switch is turned to "ON" or "START",
then go out when the engine starts. If the
light comes on at any other time, you should
slow the vehicle and bring it to a complete
stop in a safe location off the roadway.
The brake fluid level warning light indi-
cates that the brake fluid level in the brake
master cylinder is low and hydraulic brake
fluid conforming to DOT 3 or DOT 4 speci-
fications should be added. After adding
fluid, if no other trouble is found, the car
should be immediately and carefully driven
to a Hyundai dealer for inspection. If further
trouble is experienced, the vehicle should
not be driven at all but taken to a dealer by
a professional towing service.
Page 84 of 307
1FEATURES OF YOUR HYUNDAI70
B260S01TG-AAT
Low Windshield Washer
Fluid Level Warning Light
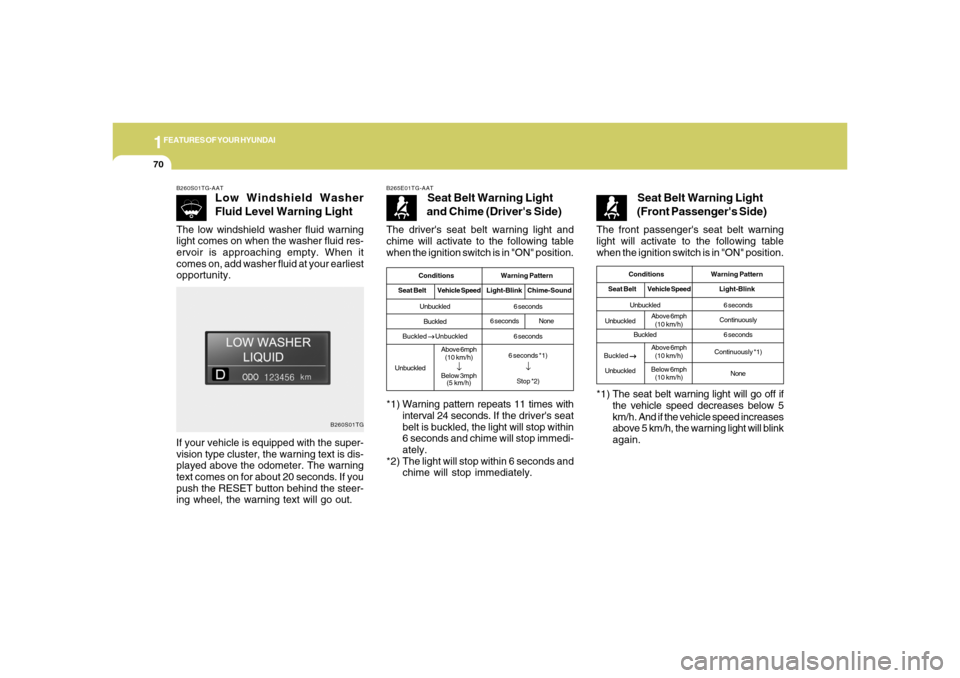
The low windshield washer fluid warning
light comes on when the washer fluid res-
ervoir is approaching empty. When it
comes on, add washer fluid at your earliest
opportunity.
B260S01TG
If your vehicle is equipped with the super-
vision type cluster, the warning text is dis-
played above the odometer. The warning
text comes on for about 20 seconds. If you
push the RESET button behind the steer-
ing wheel, the warning text will go out.The driver's seat belt warning light and
chime will activate to the following table
when the ignition switch is in "ON" position.
B265E01TG-AAT
Seat Belt Warning Light
and Chime (Driver's Side)
*1) Warning pattern repeats 11 times with
interval 24 seconds. If the driver's seat
belt is buckled, the light will stop within
6 seconds and chime will stop immedi-
ately.
*2) The light will stop within 6 seconds and
chime will stop immediately.
Conditions Warning Pattern
Seat BeltVehicle SpeedLight-Blink Chime-SoundUnbuckled
Buckled
Buckled
→ →→ →
→ Unbuckled
UnbuckledAbove 6mph
(10 km/h)
↓
Below 3mph
(5 km/h)6 seconds
6 seconds
6 seconds *1)
↓Stop *2)
6 secondsNone
The front passenger's seat belt warning
light will activate to the following table
when the ignition switch is in "ON" position.
Seat Belt Warning Light
(Front Passenger's Side)
*1) The seat belt warning light will go off if
the vehicle speed decreases below 5
km/h. And if the vehicle speed increases
above 5 km/h, the warning light will blink
again.
Conditions Warning Pattern
Seat BeltVehicle SpeedLight-BlinkUnbuckled
Buckled6 seconds
Continuously
6 seconds
Continuously *1)
None
UnbuckledAbove 6mph
(10 km/h)
Buckled
→ →→ →
→
UnbuckledAbove 6mph
(10 km/h)
Below 6mph
(10 km/h)
Page 86 of 307
1FEATURES OF YOUR HYUNDAI72
B260B01JM-AAT
SRS (Airbag) Warning Light
The SRS warning light comes on for ap-
proximately 6 seconds after the key is
turned to the "ON" position or after the
engine is started, after which it will go out.
This light also comes on when the SRS is
not working properly. If the AIRBAG warn-
ing light does not come on, or continuously
remains on after operating for about 6
seconds when you turned the ignition key
to the "ON" position or started the engine,
or if it comes on while driving, have the
SRS inspected by an authorized Hyundai
dealer.
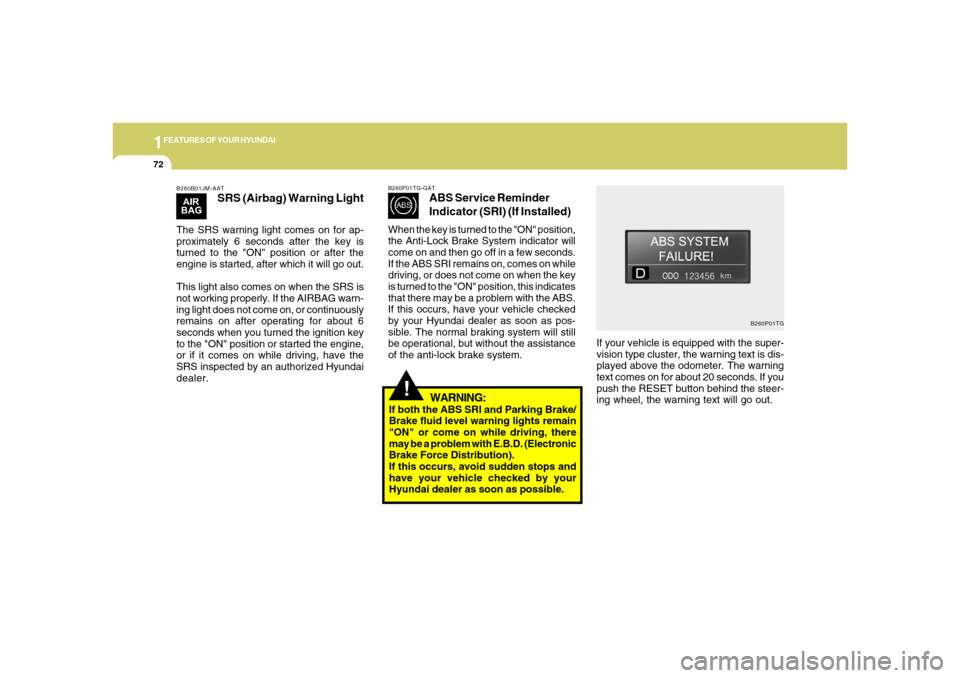
If your vehicle is equipped with the super-
vision type cluster, the warning text is dis-
played above the odometer. The warning
text comes on for about 20 seconds. If you
push the RESET button behind the steer-
ing wheel, the warning text will go out.
B260P01TG B260P01TG-GAT
ABS Service Reminder
Indicator (SRI) (If Installed)
When the key is turned to the "ON" position,
the Anti-Lock Brake System indicator will
come on and then go off in a few seconds.
If the ABS SRI remains on, comes on while
driving, or does not come on when the key
is turned to the "ON" position, this indicates
that there may be a problem with the ABS.
If this occurs, have your vehicle checked
by your Hyundai dealer as soon as pos-
sible. The normal braking system will still
be operational, but without the assistance
of the anti-lock brake system.
!
WARNING:
If both the ABS SRI and Parking Brake/
Brake fluid level warning lights remain
"ON" or come on while driving, there
may be a problem with E.B.D. (Electronic
Brake Force Distribution).
If this occurs, avoid sudden stops and
have your vehicle checked by your
Hyundai dealer as soon as possible.
Page 99 of 307
1
FEATURES OF YOUR HYUNDAI
85
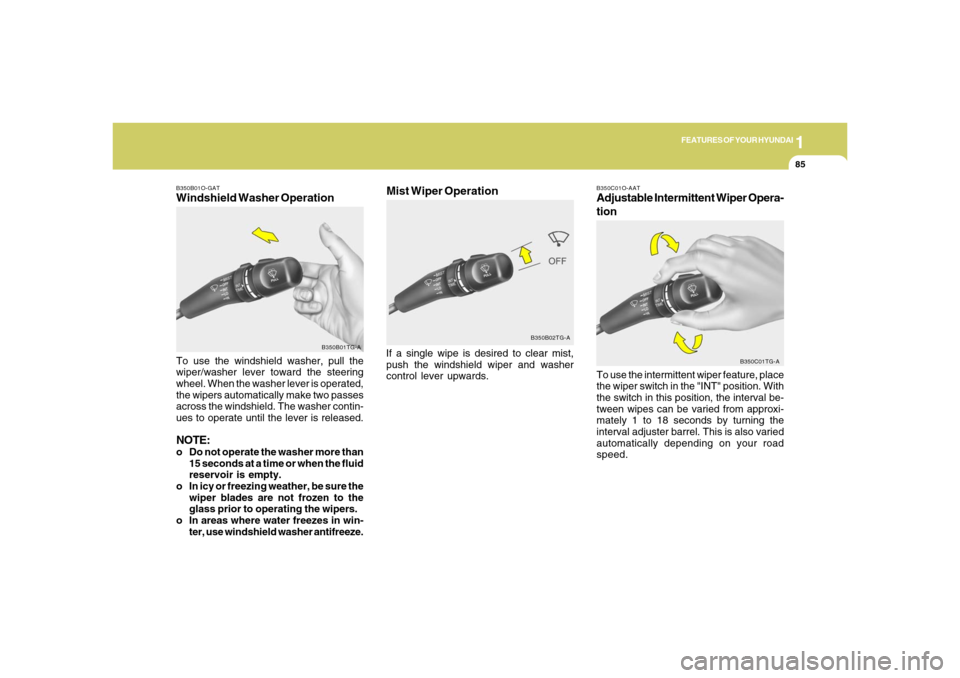
B350B01O-GATWindshield Washer OperationTo use the windshield washer, pull the
wiper/washer lever toward the steering
wheel. When the washer lever is operated,
the wipers automatically make two passes
across the windshield. The washer contin-
ues to operate until the lever is released.NOTE:o Do not operate the washer more than
15 seconds at a time or when the fluid
reservoir is empty.
o In icy or freezing weather, be sure the
wiper blades are not frozen to the
glass prior to operating the wipers.
o In areas where water freezes in win-
ter, use windshield washer antifreeze.
B350B01TG-A
B350B02TG-A
Mist Wiper OperationIf a single wipe is desired to clear mist,
push the windshield wiper and washer
control lever upwards.
B350C01O-AATAdjustable Intermittent Wiper Opera-
tionTo use the intermittent wiper feature, place
the wiper switch in the "INT" position. With
the switch in this position, the interval be-
tween wipes can be varied from approxi-
mately 1 to 18 seconds by turning the
interval adjuster barrel. This is also varied
automatically depending on your road
speed.
B350C01TG-A
Page 125 of 307
1
FEATURES OF YOUR HYUNDAI
111
!
WARNING:
o The fuel cap must be tightened until
the cap clicks, otherwise " " light
will illuminate.
o Gasoline vapors are dangerous. Be-
fore refueling, always stop the engine
and never allow sparks or open flames
near the filler area. If you need to
replace the filler cap, use a genuine
Hyundai replacement part.
HTG2023
REMOTE FUEL-FILLER LID
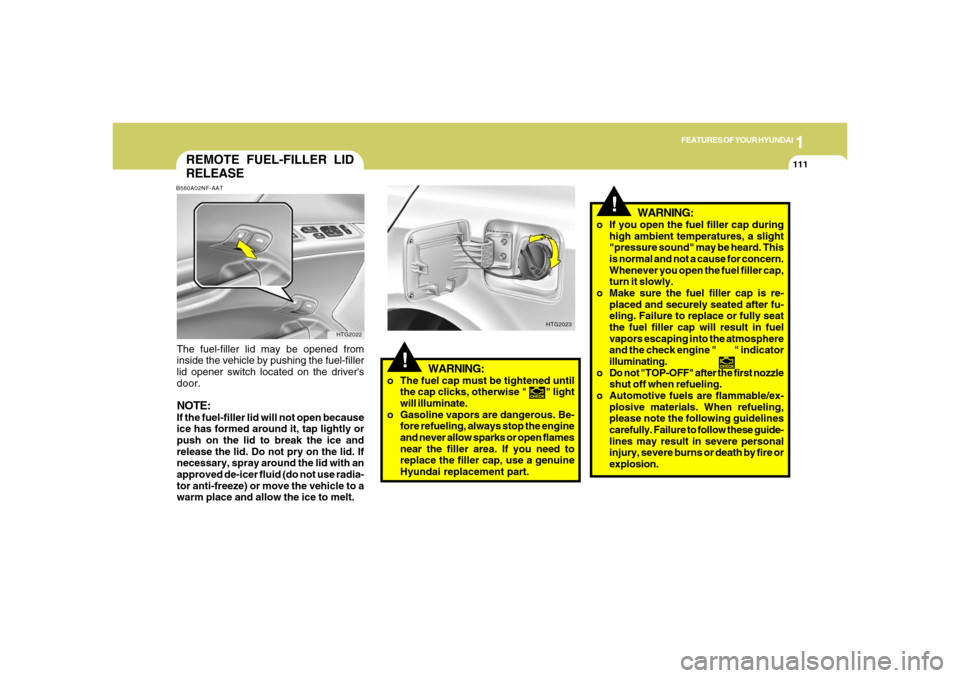
RELEASEB560A02NF-AATThe fuel-filler lid may be opened from
inside the vehicle by pushing the fuel-filler
lid opener switch located on the driver's
door.NOTE:If the fuel-filler lid will not open because
ice has formed around it, tap lightly or
push on the lid to break the ice and
release the lid. Do not pry on the lid. If
necessary, spray around the lid with an
approved de-icer fluid (do not use radia-
tor anti-freeze) or move the vehicle to a
warm place and allow the ice to melt.
HTG2022
WARNING:
o If you open the fuel filler cap during
high ambient temperatures, a slight
"pressure sound" may be heard. This
is normal and not a cause for concern.
Whenever you open the fuel filler cap,
turn it slowly.
o Make sure the fuel filler cap is re-
placed and securely seated after fu-
eling. Failure to replace or fully seat
the fuel filler cap will result in fuel
vapors escaping into the atmosphere
and the check engine " " indicator
illuminating.
o Do not "TOP-OFF" after the first nozzle
shut off when refueling.
o Automotive fuels are flammable/ex-
plosive materials. When refueling,
please note the following guidelines
carefully. Failure to follow these guide-
lines may result in severe personal
injury, severe burns or death by fire or
explosion.
!
Page 183 of 307
2
DRIVING YOUR HYUNDAI
3
!
PROPOSITION 65 WARNING:
Engine exhaust and a wide variety of
automobile components and parts, in-
cluding components found in the interior
furnishings in a vehicle, contain or emit
chemicals known to the State of Califor-
nia to cause cancer and birth defects
and reproductive harm. In addition, cer-
tain fluids contained in vehicles and cer-
tain products of component wear con-
tain or emit chemicals known to the State
of California to cause cancer and birth
defects or other reproductive harm.
BEFORE STARTING
THE ENGINEC020A01A-AATBefore you start the engine, you should
always:
1. Look around the vehicle to be sure
there are no flat tires, puddles of oil,
water or other indications of possible
trouble.
2. After entering the car, check to be sure
the parking brake is engaged.
3. Check that all windows and lights are
clean.
4. Check that the interior and exterior
mirrors are clean and in position.
5. Check your seat, seatback and head-
rest to be sure they are in their proper
positions.
6. Lock all the doors.
7. Fasten your seat belt and be sure that
all other occupants have fastened
theirs.
8. Turn off all lights and accessories that
are not needed.
9. When you turn the ignition switch to
"ON", check that all appropriate warn-
ing lights are operating and that you
have sufficient fuel.
10. Check the operation of warning lights
and all bulbs when key is in the "ON"
position.
TO START THE ENGINEC030A01TG-AATCOMBINATION IGNITION SWITCHo Place the shift lever in "P" (park) and
depress the brake pedal fully.
o To start the engine, insert the ignition
key and turn it to the "START" position.
Release it as soon as the engine starts.
Do not hold the key in the "START"
position for more than 15 seconds.NOTE:o For safety, the engine will not start if
the shift lever is not in "P" or "N"
Position.
o The ignition key cannot be turned from
"ACC" position to "LOCK" position
unless the shift lever is in the "P"
(Park) position or the negative bat-
tery terminal is disconnected from
the battery. To remove the key, al-
ways confirm that the shift lever is
securely positioned in "P" (Park).
o For additional information about start-
ing, see page 2-5.
Page 188 of 307
2
DRIVING YOUR HYUNDAI
8
NOTE:o In sports mode, only the five forward
gears can be selected. To reverse or
park the vehicle, move the selector
lever to the "R" or "P" position as
required.
o In sports mode, downward shifts are
made automatically when the vehicle
slows down. When the vehicle stops,
1st gear is automatically selected.
o To maintain the required levels of ve-
hicle performance and safety, the sys-
tem may not execute certain gear-
shifts when the selector lever is oper-
ated.
o Before driving away from a stop on a
slippery road, push the selector lever
forward into the +(UP) position. This
causes the transaxle to shift into 2nd
gear which is better for smooth driv-
ing away on a slippery road. Push the
selector lever to the -(DOWN) side to
shift back to 1st gear.
C090H01L-GATNOTE:o For smooth and safe operation, de-
press the brake pedal when shifting
from "Neutral" position or "Park"
position to a forward or reverse gear.
o The ignition key must be in the "ON"
position and the brake pedal fully de-
pressed in order to move the shift
lever from the "P" (Park) position to
any of the other positions.
o It is always possible to shift from "R",
"N", or "D" position to "P" position.
The vehicle must be fully stopped to
avoid transaxle damage.
!
C090I03L-GAT
CAUTION:
o Shift into "R" and "P" position only
when the vehicle has completely
stopped.
o Do not accelerate the engine in re-
verse or any of the forward positions
with the brakes applied.o Always apply the footbrake when
shifting from "P" or "N", to "R" or
"D"position.
o Do not use the "P" (Park) position in
place of the parking brake. Always
set the parking brake, shift the
transaxle into "P" (Park) position and
turn off the ignition when you leave the
vehicle, even momentarily. Never
leave the vehicle unattended while
the engine is running.
o When accelerating from a stop on a
steep hill, the vehicle may have a
tendency to roll backwards. Shifting
the shift lever into 2nd gear while in
Sport mode will help prevent the ve-
hicle from rolling backwards.
o Check the automatic transaxle fluid
level regularly, and add fluid as nec-
essary.
o See the maintenance schedule for
the proper fluid recommendation.