set Hyundai Azera 2015 Owner's Guide
[x] Cancel search | Manufacturer: HYUNDAI, Model Year: 2015, Model line: Azera, Model: Hyundai Azera 2015Pages: 473, PDF Size: 11.92 MB
Page 143 of 473
Features of your vehicle
66 4
✽NOTICE
• If the vehicle is not on level ground or
the battery power has been interrupt-
ed, the distance to empty function
may not operate correctly.
• The distance to empty may differ
from the actual driving distance as it
is an estimate of the available driving
distance.
• The trip computer may not register
additional fuel if less than 6 liters (1.6
gallons) of fuel are added to the vehi-
cle.
• The fuel economy and distance to
empty may vary significantly based
on driving conditions, driving habits,
and condition of the vehicle.
Average Fuel Economy (2)
• The average fuel economy is calculat-
ed by the total driving distance and fuel
consumption since the last average fuel
economy reset.
- Fuel economy range: 0.0 ~ 99.9
L/100km, km/L or MPG
• The average fuel economy can be
reset both manually and automatically.
Manual reset
To clear the average fuel economy manu-
ally, press the [OK] button on the steering
wheel for more than 1 second when the
average fuel economy is displayed.Automatic reset
To make the average fuel economy be
reset automatically whenever refueling,
select the “Auto Reset” mode in User
Setting menu of the LCD display (Refer
to “LCD Display”).
Under “Auto Reset” mode, the average
fuel economy will be cleared to zero (---)
when the vehicle speed exceeds 1 km/h
after refueling more than 6 liters (1.6 gal-
lons).
✽NOTICE
The average fuel economy is not dis-
played for more accurate calculation if
the vehicle does not drive more than 10
seconds or 300 meters (0.19 miles) since
the ignition switch or the Engine
Start/Stop button is turned to ON.
Instant Fuel Economy (3)
• This mode displays the instant fuel
economy during the last few seconds
when the vehicle speed is more than
10 km/h (6.2 MPH).
- Fuel economy range: 0 ~ 30
L/100km, km/L or 0 ~ 50 MPG
Page 153 of 473
Features of your vehicle
76 4
Cruise indicator (if equipped)
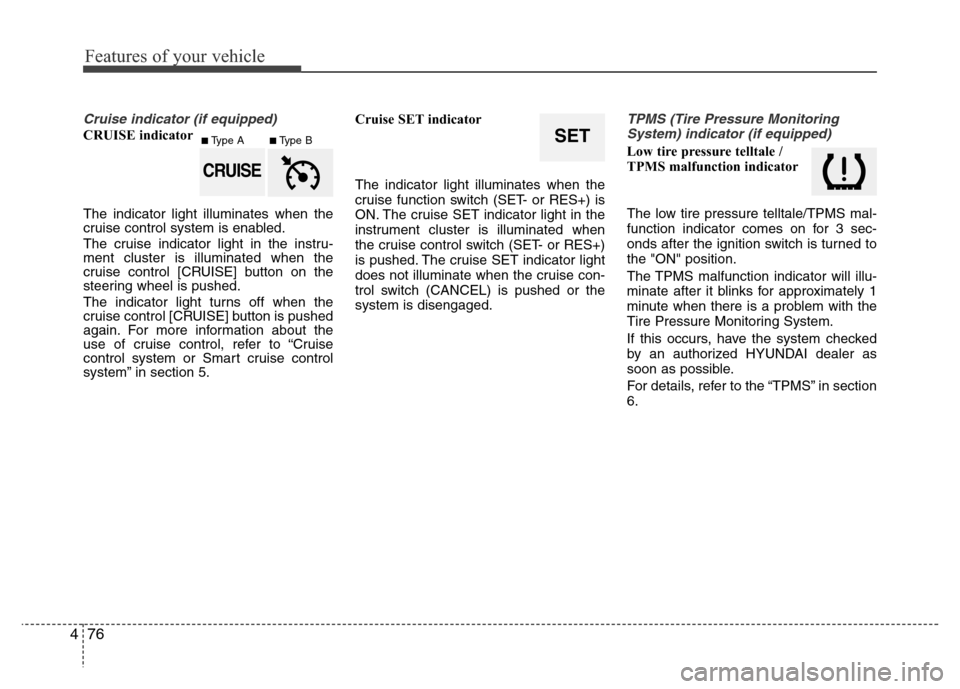
CRUISE indicator
The indicator light illuminates when the
cruise control system is enabled.
The cruise indicator light in the instru-
ment cluster is illuminated when the
cruise control [CRUISE] button on the
steering wheel is pushed.
The indicator light turns off when the
cruise control [CRUISE] button is pushed
again. For more information about the
use of cruise control, refer to “Cruise
control system or Smart cruise control
system” in section 5.Cruise SET indicator
The indicator light illuminates when the
cruise function switch (SET- or RES+) is
ON. The cruise SET indicator light in the
instrument cluster is illuminated when
the cruise control switch (SET- or RES+)
is pushed. The cruise SET indicator light
does not illuminate when the cruise con-
trol switch (CANCEL) is pushed or the
system is disengaged.
TPMS (Tire Pressure Monitoring
System) indicator (if equipped)
Low tire pressure telltale /
TPMS malfunction indicator
The low tire pressure telltale/TPMS mal-
function indicator comes on for 3 sec-
onds after the ignition switch is turned to
the "ON" position.
The TPMS malfunction indicator will illu-
minate after it blinks for approximately 1
minute when there is a problem with the
Tire Pressure Monitoring System.
If this occurs, have the system checked
by an authorized HYUNDAI dealer as
soon as possible.
For details, refer to the “TPMS” in section
6.SET
CRUISE
■Type A■Type B
Page 171 of 473
Features of your vehicle
94 4
Battery saver function
• The purpose of this feature is to pre-
vent the battery from being dis-
charged. The system automatically
turns off the parking lights when the
driver removes the ignition key (smart
key: turns off the engine) and opens
the driver-side door.
• With this feature, the parking lights will
be turned off automatically if the driver
parks on the side of road at night.
If necessary, to keep the lights on
when the ignition key is removed,
(smart key: turns off the engine) per-
form the following:
1) Open the driver-side door.
2) Turn the parking lights OFF and ON
again using the light switch on the
steering column.
Headlight escort function
(if equipped)
If you turn the ignition switch to the ACC
or OFF position with the headlights ON,
the headlights (and/or tail lights) remain
on for about 5 minutes. However, if the
driver’s door is opened and closed, the
headlights are turned off after 15 sec-
onds.
The headlights can be turned off by
pressing the lock button on the transmit-
ter (or smart key) twice or turning the
light switch to the OFF or parking light
position.
Headlight welcome function
When the headlight is ON or AUTO posi-
tion and all doors (and trunk) are closed
and locked, if you press the door unlock
button on the transmitter (or the smart
key), the headlights will come on for
about 15 seconds. At this time, if you
press the door lock or unlock button, the
headlights will turn off immediately.
Daytime running light
(if equipped)
Daytime Running Lights (DRL) can make
it easier for others to see the front of your
vehicle during the day. DRL can be help-
ful in many different driving conditions,
and it is especially helpful after dawn and
before sunset.
The DRL system turns OFF when:
1. The headlights are ON.
2. The turn signal is ON. (the blinking
side of the DRL will turn off)
3. The hazard warning light is ON.
4. The parking brake is applied.
5. Engine stops.
LIGHTING
CAUTION
If the driver gets out of the vehicle
through other doors, the battery
saver function does not operate.
Therefore, it causes the battery to
be discharged. In this case, make
sure to turn off the lamp before get-
ting out of the vehicle.
Page 174 of 473
497
Features of your vehicle
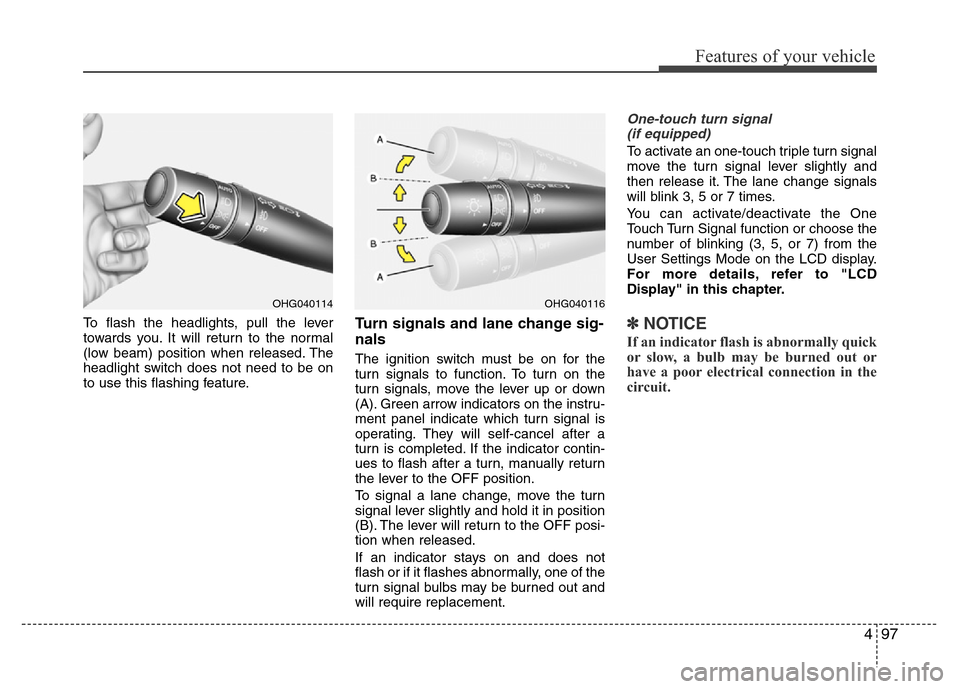
To flash the headlights, pull the lever
towards you. It will return to the normal
(low beam) position when released. The
headlight switch does not need to be on
to use this flashing feature.Turn signals and lane change sig-
nals
The ignition switch must be on for the
turn signals to function. To turn on the
turn signals, move the lever up or down
(A). Green arrow indicators on the instru-
ment panel indicate which turn signal is
operating. They will self-cancel after a
turn is completed. If the indicator contin-
ues to flash after a turn, manually return
the lever to the OFF position.
To signal a lane change, move the turn
signal lever slightly and hold it in position
(B). The lever will return to the OFF posi-
tion when released.
If an indicator stays on and does not
flash or if it flashes abnormally, one of the
turn signal bulbs may be burned out and
will require replacement.
One-touch turn signal
(if equipped)
To activate an one-touch triple turn signal
move the turn signal lever slightly and
then release it. The lane change signals
will blink 3, 5 or 7 times.
You can activate/deactivate the One
Touch Turn Signal function or choose the
number of blinking (3, 5, or 7) from the
User Settings Mode on the LCD display.
For more details, refer to "LCD
Display" in this chapter.
✽NOTICE
If an indicator flash is abnormally quick
or slow, a bulb may be burned out or
have a poor electrical connection in the
circuit.
OHG040116OHG040114
Page 175 of 473
Features of your vehicle
98 4
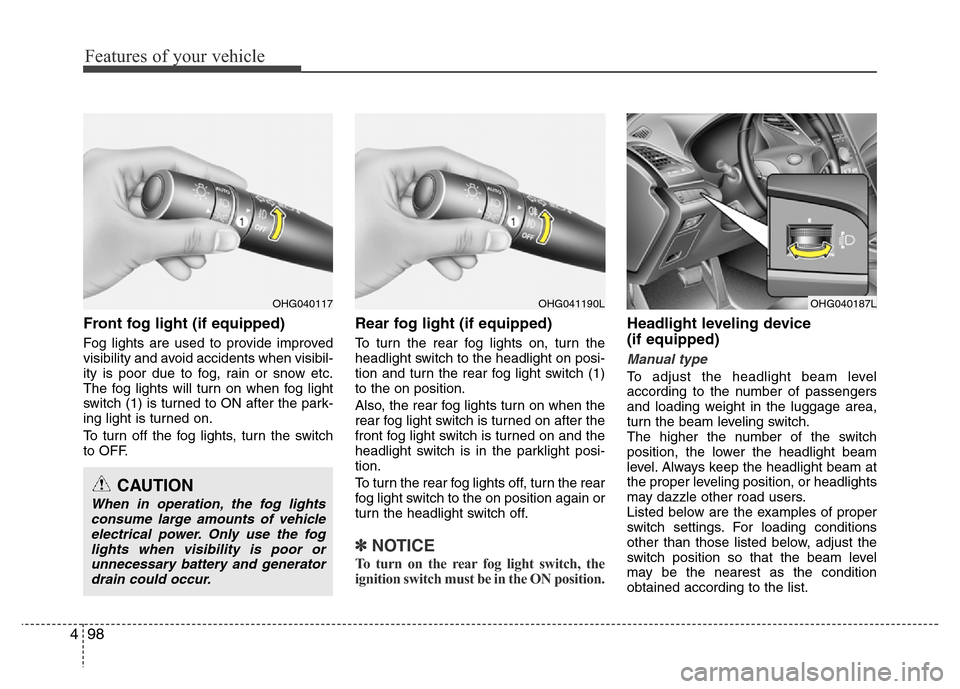
Front fog light (if equipped)
Fog lights are used to provide improved
visibility and avoid accidents when visibil-
ity is poor due to fog, rain or snow etc.
The fog lights will turn on when fog light
switch (1) is turned to ON after the park-
ing light is turned on.
To turn off the fog lights, turn the switch
to OFF.
Rear fog light (if equipped)
To turn the rear fog lights on, turn the
headlight switch to the headlight on posi-
tion and turn the rear fog light switch (1)
to the on position.
Also, the rear fog lights turn on when the
rear fog light switch is turned on after the
front fog light switch is turned on and the
headlight switch is in the parklight posi-
tion.
To turn the rear fog lights off, turn the rear
fog light switch to the on position again or
turn the headlight switch off.
✽NOTICE
To turn on the rear fog light switch, the
ignition switch must be in the ON position.
Headlight leveling device
(if equipped)
Manual type
To adjust the headlight beam level
according to the number of passengers
and loading weight in the luggage area,
turn the beam leveling switch.
The higher the number of the switch
position, the lower the headlight beam
level. Always keep the headlight beam at
the proper leveling position, or headlights
may dazzle other road users.
Listed below are the examples of proper
switch settings. For loading conditions
other than those listed below, adjust the
switch position so that the beam level
may be the nearest as the condition
obtained according to the list.
OHG040117
CAUTION
When in operation, the fog lights
consume large amounts of vehicle
electrical power. Only use the fog
lights when visibility is poor or
unnecessary battery and generator
drain could occur.
OHG040187LOHG041190L
Page 177 of 473
Features of your vehicle
100 4
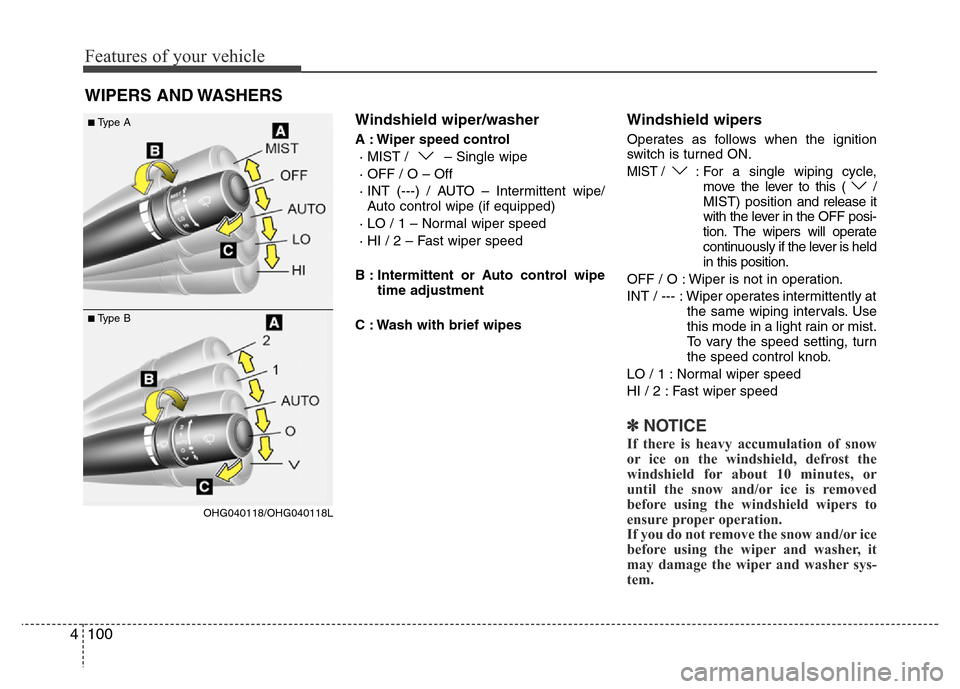
Windshield wiper/washer
A : Wiper speed control
· MIST / – Single wipe
· OFF / O – Off
· INT (---) / AUTO – Intermittent wipe/
Auto control wipe (if equipped)
· LO / 1 – Normal wiper speed
· HI / 2 – Fast wiper speed
B : Intermittent or Auto control wipe
time adjustment
C : Wash with brief wipes
Windshield wipers
Operates as follows when the ignition
switch is turned ON.
MIST / : For a single wiping cycle,
move the lever to this ( /
MIST) position and release it
with the lever in the OFF posi-
tion. The wipers will operate
continuously if the lever is held
in this position.
OFF / O : Wiper is not in operation.
INT / --- : Wiper operates intermittently at
the same wiping intervals. Use
this mode in a light rain or mist.
To vary the speed setting, turn
the speed control knob.
LO / 1 : Normal wiper speed
HI / 2 : Fast wiper speed
✽NOTICE
If there is heavy accumulation of snow
or ice on the windshield, defrost the
windshield for about 10 minutes, or
until the snow and/or ice is removed
before using the windshield wipers to
ensure proper operation.
If you do not remove the snow and/or ice
before using the wiper and washer, it
may damage the wiper and washer sys-
tem.
WIPERS AND WASHERS
OHG040118/OHG040118L
■Type A
■Type B
Page 178 of 473
4101
Features of your vehicle
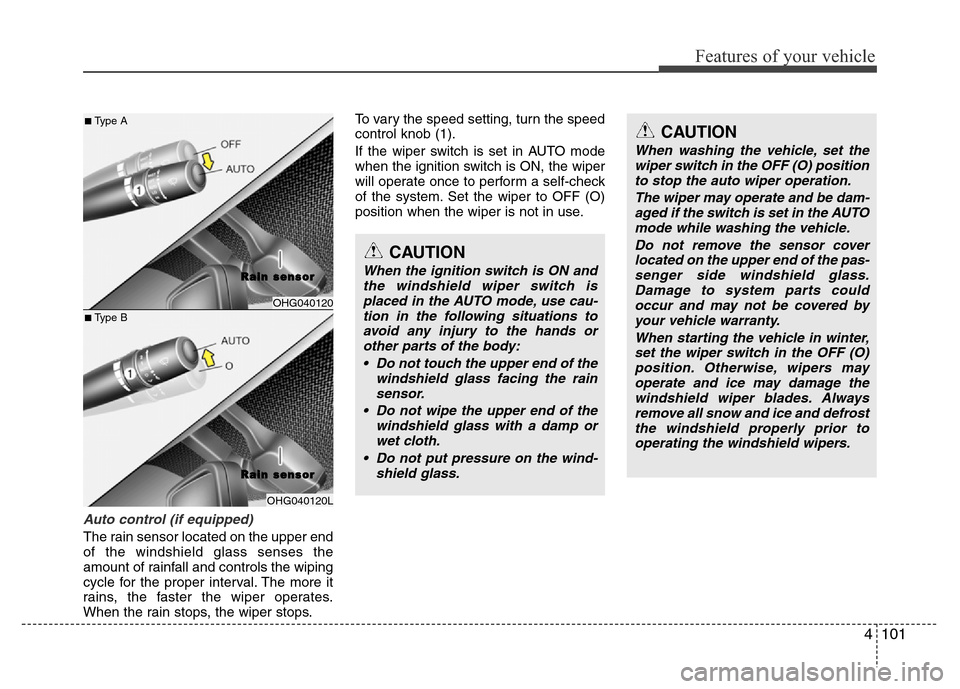
Auto control (if equipped)
The rain sensor located on the upper end
of the windshield glass senses the
amount of rainfall and controls the wiping
cycle for the proper interval. The more it
rains, the faster the wiper operates.
When the rain stops, the wiper stops.To vary the speed setting, turn the speed
control knob (1).
If the wiper switch is set in AUTO mode
when the ignition switch is ON, the wiper
will operate once to perform a self-check
of the system. Set the wiper to OFF (O)
position when the wiper is not in use.
OHG040120
R R
a a
i i
n n
s s
e e
n n
s s
o o
r r
OHG040120L
CAUTION
When the ignition switch is ON and
the windshield wiper switch is
placed in the AUTO mode, use cau-
tion in the following situations to
avoid any injury to the hands or
other parts of the body:
• Do not touch the upper end of the
windshield glass facing the rain
sensor.
• Do not wipe the upper end of the
windshield glass with a damp or
wet cloth.
• Do not put pressure on the wind-
shield glass.
CAUTION
When washing the vehicle, set the
wiper switch in the OFF (O) position
to stop the auto wiper operation.
The wiper may operate and be dam-
aged if the switch is set in the AUTO
mode while washing the vehicle.
Do not remove the sensor cover
located on the upper end of the pas-
senger side windshield glass.
Damage to system parts could
occur and may not be covered by
your vehicle warranty.
When starting the vehicle in winter,
set the wiper switch in the OFF (O)
position. Otherwise, wipers may
operate and ice may damage the
windshield wiper blades. Always
remove all snow and ice and defrost
the windshield properly prior to
operating the windshield wipers.
■Type A
■Type B
R R
a a
i i
n n
s s
e e
n n
s s
o o
r r
Page 183 of 473
Features of your vehicle
106 4
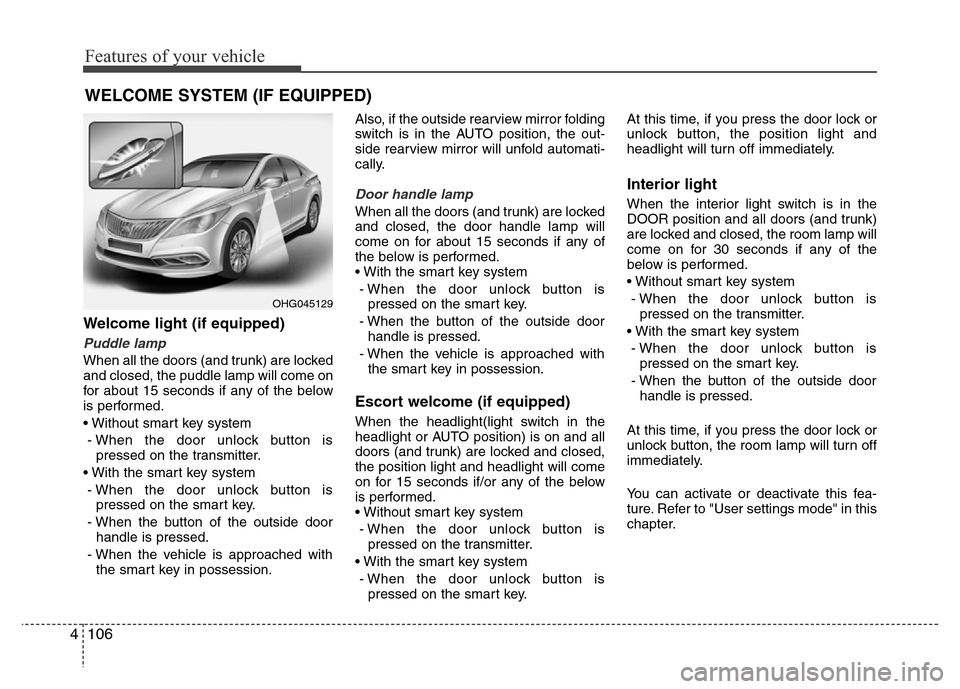
Welcome light (if equipped)
Puddle lamp
When all the doors (and trunk) are locked
and closed, the puddle lamp will come on
for about 15 seconds if any of the below
is performed.
• Without smart key system
- When the door unlock button is
pressed on the transmitter.
• With the smart key system
- When the door unlock button is
pressed on the smart key.
- When the button of the outside door
handle is pressed.
- When the vehicle is approached with
the smart key in possession.Also, if the outside rearview mirror folding
switch is in the AUTO position, the out-
side rearview mirror will unfold automati-
cally.
Door handle lamp
When all the doors (and trunk) are locked
and closed, the door handle lamp will
come on for about 15 seconds if any of
the below is performed.
• With the smart key system
- When the door unlock button is
pressed on the smart key.
- When the button of the outside door
handle is pressed.
- When the vehicle is approached with
the smart key in possession.
Escort welcome (if equipped)
When the headlight(light switch in the
headlight or AUTO position) is on and all
doors (and trunk) are locked and closed,
the position light and headlight will come
on for 15 seconds if/or any of the below
is performed.
• Without smart key system
- When the door unlock button is
pressed on the transmitter.
• With the smart key system
- When the door unlock button is
pressed on the smart key.At this time, if you press the door lock or
unlock button, the position light and
headlight will turn off immediately.
Interior light
When the interior light switch is in the
DOOR position and all doors (and trunk)
are locked and closed, the room lamp will
come on for 30 seconds if any of the
below is performed.
• Without smart key system
- When the door unlock button is
pressed on the transmitter.
• With the smart key system
- When the door unlock button is
pressed on the smart key.
- When the button of the outside door
handle is pressed.
At this time, if you press the door lock or
unlock button, the room lamp will turn off
immediately.
You can activate or deactivate this fea-
ture. Refer to "User settings mode" in this
chapter.
WELCOME SYSTEM (IF EQUIPPED)
OHG045129
Page 186 of 473
4109
Features of your vehicle
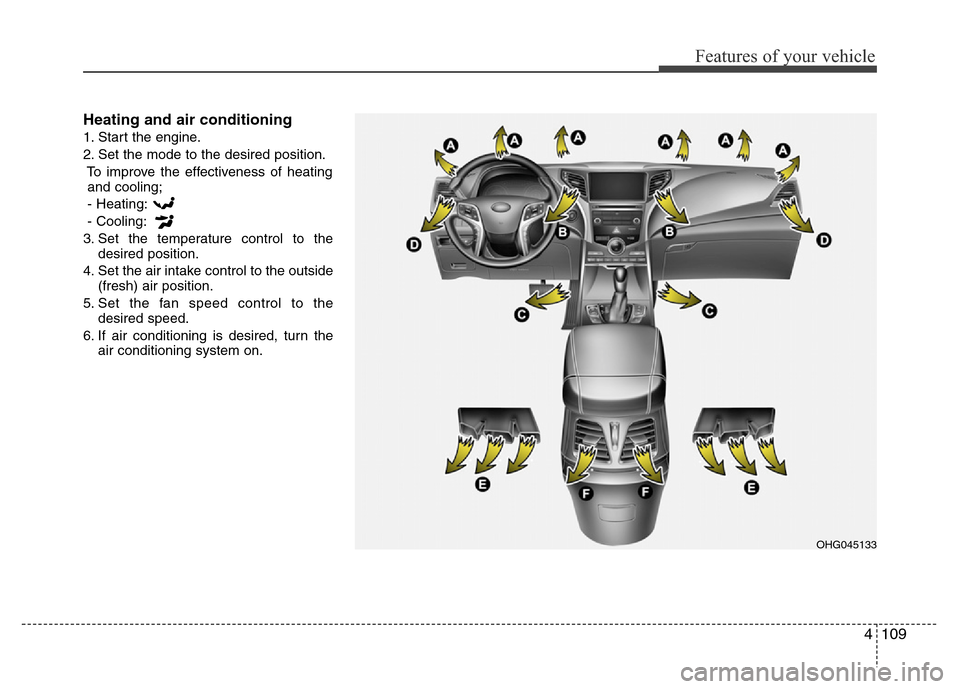
Heating and air conditioning
1. Start the engine.
2. Set the mode to the desired position.
To improve the effectiveness of heating
and cooling;
- Heating:
- Cooling:
3. Set the temperature control to the
desired position.
4. Set the air intake control to the outside
(fresh) air position.
5. Set the fan speed control to the
desired speed.
6. If air conditioning is desired, turn the
air conditioning system on.
OHG045133
Page 189 of 473
Features of your vehicle
112 4
Temperature conversion
You can switch the temperature mode
between Centigrade to Fahrenheit as fol-
lows:
1. Select mode.
2. Press the OFF button.
3. Press the air intake control button
( ) 5 times within 3 seconds.
The display will change from Centigrade
to Fahrenheit, or from Fahrenheit to
Centigrade.
If the battery has been discharged or dis-
connected, the temperature mode dis-
play will reset to Centigrade.
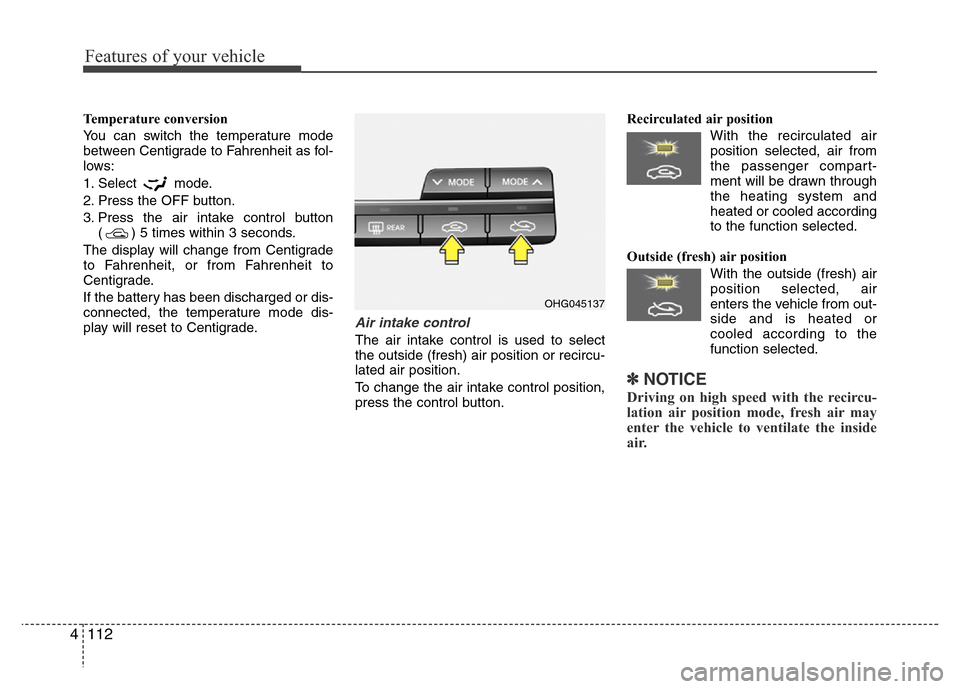
Air intake control
The air intake control is used to select
the outside (fresh) air position or recircu-
lated air position.
To change the air intake control position,
press the control button.Recirculated air position
With the recirculated air
position selected, air from
the passenger compart-
ment will be drawn through
the heating system and
heated or cooled according
to the function selected.
Outside (fresh) air position
With the outside (fresh) air
position selected, air
enters the vehicle from out-
side and is heated or
cooled according to the
function selected.
✽NOTICE
Driving on high speed with the recircu-
lation air position mode, fresh air may
enter the vehicle to ventilate the inside
air.
OHG045137