stop light Hyundai Elantra 2003 Owner's Manual
[x] Cancel search | Manufacturer: HYUNDAI, Model Year: 2003, Model line: Elantra, Model: Hyundai Elantra 2003Pages: 172, PDF Size: 2.82 MB
Page 11 of 172
FEATURES OF YOUR HYUNDAI FEATURES OF YOUR HYUNDAIFEATURES OF YOUR HYUNDAI FEATURES OF YOUR HYUNDAI
FEATURES OF YOUR HYUNDAI
1- 2
B030A01A-AAT
KEYS KEYSKEYS KEYS
KEYS
For greater convenience, the same key oper-
ates all the locks in your Hyundai. However,
because the doors can be locked without a key,
carrying a spare key is recommended in case
you accidentally lock one key inside the car.
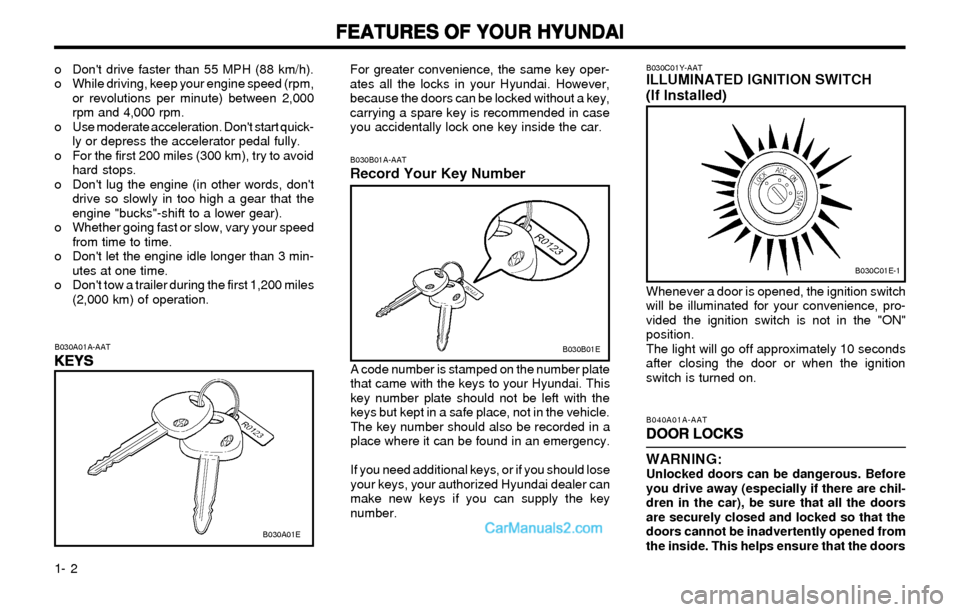
B030B01A-AATRecord Your Key Number
A code number is stamped on the number plate
that came with the keys to your Hyundai. This
key number plate should not be left with the
keys but kept in a safe place, not in the vehicle.
The key number should also be recorded in a
place where it can be found in an emergency.
If you need additional keys, or if you should lose
your keys, your authorized Hyundai dealer can
make new keys if you can supply the key
number.
B040A01A-AAT
DOOR LOCKS DOOR LOCKSDOOR LOCKS DOOR LOCKS
DOOR LOCKS
WARNING:
Unlocked doors can be dangerous. Before
you drive away (especially if there are chil-
dren in the car), be sure that all the doors
are securely closed and locked so that the
doors cannot be inadvertently opened from
the inside. This helps ensure that the doors o Don't drive faster than 55 MPH (88 km/h).
o While driving, keep your engine speed (rpm,
or revolutions per minute) between 2,000
rpm and 4,000 rpm.
o Use moderate acceleration. Don't start quick-
ly or depress the accelerator pedal fully.
o For the first 200 miles (300 km), try to avoid
hard stops.
o Don't lug the engine (in other words, don't
drive so slowly in too high a gear that the
engine "bucks"-shift to a lower gear).
o Whether going fast or slow, vary your speed
from time to time.
o Don't let the engine idle longer than 3 min-
utes at one time.
o Don't tow a trailer during the first 1,200 miles
(2,000 km) of operation.
B030A01E
B030B01E
B030C01Y-AATILLUMINATED IGNITION SWITCH
(If Installed)
Whenever a door is opened, the ignition switch
will be illuminated for your convenience, pro-
vided the ignition switch is not in the "ON"
position.
The light will go off approximately 10 seconds
after closing the door or when the ignition
switch is turned on.
B030C01E-1
Page 13 of 172
FEATURES OF YOUR HYUNDAI FEATURES OF YOUR HYUNDAIFEATURES OF YOUR HYUNDAI FEATURES OF YOUR HYUNDAI
FEATURES OF YOUR HYUNDAI
1- 4
B040G01E-AATCENTRAL DOOR LOCK (If Installed) CENTRAL DOOR LOCK (If Installed)CENTRAL DOOR LOCK (If Installed) CENTRAL DOOR LOCK (If Installed)
CENTRAL DOOR LOCK (If Installed)
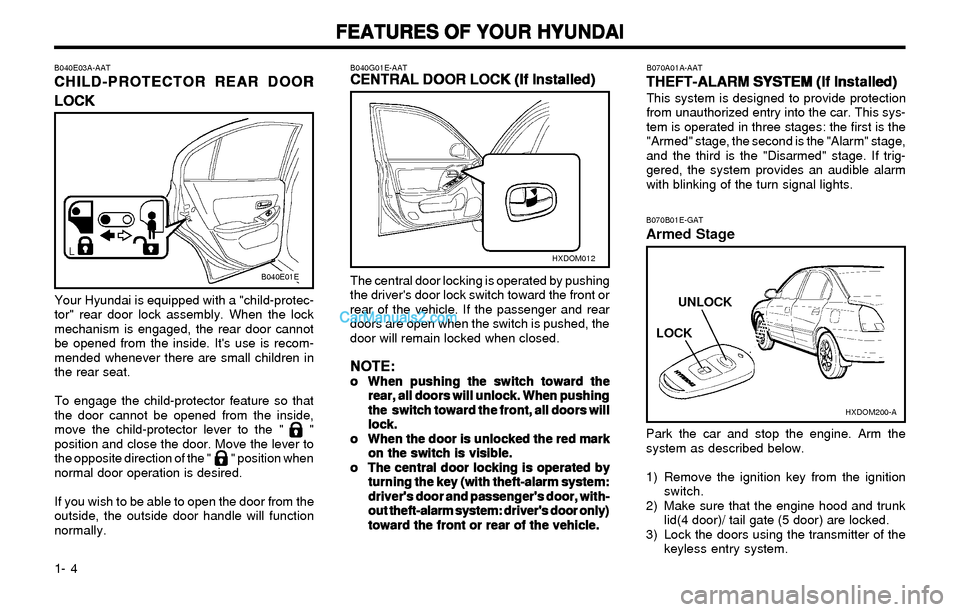
The central door locking is operated by pushing
the driver's door lock switch toward the front or
rear of the vehicle. If the passenger and rear
doors are open when the switch is pushed, the
door will remain locked when closed.
NOTE: NOTE:NOTE: NOTE:
NOTE:o oo o
o
When pushing the switch toward the When pushing the switch toward theWhen pushing the switch toward the When pushing the switch toward the
When pushing the switch toward the
rear, all doors will unlock. When pushing rear, all doors will unlock. When pushingrear, all doors will unlock. When pushing rear, all doors will unlock. When pushing
rear, all doors will unlock. When pushing
the switch toward the front, all doors will the switch toward the front, all doors willthe switch toward the front, all doors will the switch toward the front, all doors will
the switch toward the front, all doors will
lock. lock.lock. lock.
lock.
o oo o
o
When the door is unlocked the red mark When the door is unlocked the red markWhen the door is unlocked the red mark When the door is unlocked the red mark
When the door is unlocked the red mark
on the switch is visible. on the switch is visible.on the switch is visible. on the switch is visible.
on the switch is visible.
o oo o
o
The central door locking is operated by The central door locking is operated byThe central door locking is operated by The central door locking is operated by
The central door locking is operated by
turning the key (with theft-alarm system: turning the key (with theft-alarm system:turning the key (with theft-alarm system: turning the key (with theft-alarm system:
turning the key (with theft-alarm system:
driver's door and passenger's door, with- driver's door and passenger's door, with-driver's door and passenger's door, with- driver's door and passenger's door, with-
driver's door and passenger's door, with-
out theft-alarm system: driver's door only) out theft-alarm system: driver's door only)out theft-alarm system: driver's door only) out theft-alarm system: driver's door only)
out theft-alarm system: driver's door only)
toward the front or rear of the vehicle. toward the front or rear of the vehicle.toward the front or rear of the vehicle. toward the front or rear of the vehicle.
toward the front or rear of the vehicle.
B040E03A-AAT
CHILD-PROTECTOR REAR DOOR CHILD-PROTECTOR REAR DOORCHILD-PROTECTOR REAR DOOR CHILD-PROTECTOR REAR DOOR
CHILD-PROTECTOR REAR DOOR
LOCK LOCKLOCK LOCK
LOCK
Your Hyundai is equipped with a "child-protec-
tor" rear door lock assembly. When the lock
mechanism is engaged, the rear door cannot
be opened from the inside. It's use is recom-
mended whenever there are small children in
the rear seat.
To engage the child-protector feature so that
the door cannot be opened from the inside,
move the child-protector lever to the " "
position and close the door. Move the lever to
the opposite direction of the " " position when
normal door operation is desired.
If you wish to be able to open the door from the
outside, the outside door handle will function
normally.
B040E01E
HXDOM012
B070A01A-AAT
THEFT-ALARM SYSTEM (If Installed) THEFT-ALARM SYSTEM (If Installed)THEFT-ALARM SYSTEM (If Installed) THEFT-ALARM SYSTEM (If Installed)
THEFT-ALARM SYSTEM (If Installed)This system is designed to provide protection
from unauthorized entry into the car. This sys-
tem is operated in three stages: the first is the
"Armed" stage, the second is the "Alarm" stage,
and the third is the "Disarmed" stage. If trig-
gered, the system provides an audible alarm
with blinking of the turn signal lights.
HXDOM200-A
LOCKUNLOCK
B070B01E-GAT
Armed Stage
Park the car and stop the engine. Arm the
system as described below.
1) Remove the ignition key from the ignition
switch.
2) Make sure that the engine hood and trunk
lid(4 door)/ tail gate (5 door) are locked.
3) Lock the doors using the transmitter of the
keyless entry system.
Page 22 of 172
FEATURES OF YOUR HYUNDAI FEATURES OF YOUR HYUNDAIFEATURES OF YOUR HYUNDAI FEATURES OF YOUR HYUNDAI
FEATURES OF YOUR HYUNDAI
1- 13
B160D01A-AAT
When to Replace Seat Belts When to Replace Seat BeltsWhen to Replace Seat Belts When to Replace Seat Belts
When to Replace Seat BeltsEntire in-use seat belt assembly or assemblies
should be replaced if the vehicle has been
involved in an accident. This should be done
even if no damage is visible. Additional ques-
tions concerning seat belt operation should be
directed to your Hyundai Dealer.
B160B01A-AAT
Periodic Inspection Periodic InspectionPeriodic Inspection Periodic Inspection
Periodic InspectionIt is recommended that all seat belts be in-
spected periodically for wear or damage of any
kind. Parts of the system that are damaged
should be replaced as soon as possible.
B160C01A-AAT
Keep Belts Clean and Dry Keep Belts Clean and DryKeep Belts Clean and Dry Keep Belts Clean and Dry
Keep Belts Clean and DrySeat belts should be kept clean and dry. If belts
become dirty, they can be cleaned by using a
mild soap solution and warm water. Bleach,
dye, strong detergents or abrasives should not
be used because they may damage and weaken
the fabric.
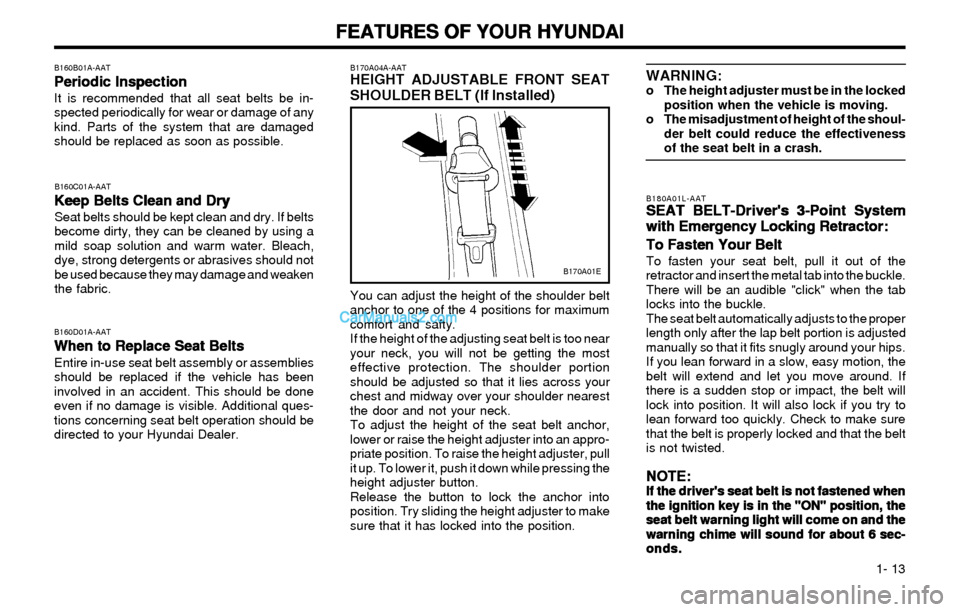
B170A04A-AATHEIGHT ADJUSTABLE FRONT SEAT
SHOULDER BELT (If Installed)
You can adjust the height of the shoulder belt
anchor to one of the 4 positions for maximum
comfort and safty.
If the height of the adjusting seat belt is too near
your neck, you will not be getting the most
effective protection. The shoulder portion
should be adjusted so that it lies across your
chest and midway over your shoulder nearest
the door and not your neck.
To adjust the height of the seat belt anchor,
lower or raise the height adjuster into an appro-
priate position. To raise the height adjuster, pull
it up. To lower it, push it down while pressing the
height adjuster button.
Release the button to lock the anchor into
position. Try sliding the height adjuster to make
sure that it has locked into the position.
B170A01E
B180A01L-AATSEAT BELT-Driver's 3-Point System SEAT BELT-Driver's 3-Point SystemSEAT BELT-Driver's 3-Point System SEAT BELT-Driver's 3-Point System
SEAT BELT-Driver's 3-Point System
with Emergency Locking Retractor: with Emergency Locking Retractor:with Emergency Locking Retractor: with Emergency Locking Retractor:
with Emergency Locking Retractor:
To Fasten Your Belt To Fasten Your BeltTo Fasten Your Belt To Fasten Your Belt
To Fasten Your Belt
To fasten your seat belt, pull it out of the
retractor and insert the metal tab into the buckle.
There will be an audible "click" when the tab
locks into the buckle.
The seat belt automatically adjusts to the proper
length only after the lap belt portion is adjusted
manually so that it fits snugly around your hips.
If you lean forward in a slow, easy motion, the
belt will extend and let you move around. If
there is a sudden stop or impact, the belt will
lock into position. It will also lock if you try to
lean forward too quickly. Check to make sure
that the belt is properly locked and that the belt
is not twisted.
NOTE: NOTE:NOTE: NOTE:
NOTE:If the driver's seat belt is not fastened when If the driver's seat belt is not fastened whenIf the driver's seat belt is not fastened when If the driver's seat belt is not fastened when
If the driver's seat belt is not fastened when
the ignition key is in the "ON" position, the the ignition key is in the "ON" position, thethe ignition key is in the "ON" position, the the ignition key is in the "ON" position, the
the ignition key is in the "ON" position, the
seat belt warning light will come on and the seat belt warning light will come on and theseat belt warning light will come on and the seat belt warning light will come on and the
seat belt warning light will come on and the
warning chime will sound for about 6 sec- warning chime will sound for about 6 sec-warning chime will sound for about 6 sec- warning chime will sound for about 6 sec-
warning chime will sound for about 6 sec-
onds. onds.onds. onds.
onds.
WARNING:o The height adjuster must be in the locked
position when the vehicle is moving.
o The misadjustment of height of the shoul-
der belt could reduce the effectiveness
of the seat belt in a crash.
Page 29 of 172
FEATURES OF YOUR HYUNDAI FEATURES OF YOUR HYUNDAIFEATURES OF YOUR HYUNDAI FEATURES OF YOUR HYUNDAI
FEATURES OF YOUR HYUNDAI
1- 20
NOTE: NOTE:NOTE: NOTE:
NOTE:o oo o
o
Both the driver's and front passenger's Both the driver's and front passenger'sBoth the driver's and front passenger's Both the driver's and front passenger's
Both the driver's and front passenger's
pre-tensioner seat belts will be activated pre-tensioner seat belts will be activatedpre-tensioner seat belts will be activated pre-tensioner seat belts will be activated
pre-tensioner seat belts will be activated
in certain frontal collisions. The pre- in certain frontal collisions. The pre-in certain frontal collisions. The pre- in certain frontal collisions. The pre-
in certain frontal collisions. The pre-
tensioner seat belts can be activated tensioner seat belts can be activatedtensioner seat belts can be activated tensioner seat belts can be activated
tensioner seat belts can be activated
alone or, where the frontal collision is alone or, where the frontal collision isalone or, where the frontal collision is alone or, where the frontal collision is
alone or, where the frontal collision is
severe enough, together with the airbags. severe enough, together with the airbags.severe enough, together with the airbags. severe enough, together with the airbags.
severe enough, together with the airbags.
The pre-tensioners will be activated un- The pre-tensioners will be activated un-The pre-tensioners will be activated un- The pre-tensioners will be activated un-
The pre-tensioners will be activated un-
der these conditions even if the seat der these conditions even if the seatder these conditions even if the seat der these conditions even if the seat
der these conditions even if the seat
belts are not being worn at the time of the belts are not being worn at the time of thebelts are not being worn at the time of the belts are not being worn at the time of the
belts are not being worn at the time of the
collision. collision.collision. collision.
collision.
o oo o
o
When the pre-tensioner seat belts are When the pre-tensioner seat belts areWhen the pre-tensioner seat belts are When the pre-tensioner seat belts are
When the pre-tensioner seat belts are
activated, a loud noise may be heard and activated, a loud noise may be heard andactivated, a loud noise may be heard and activated, a loud noise may be heard and
activated, a loud noise may be heard and
fine dust, which may appear to be smoke, fine dust, which may appear to be smoke,fine dust, which may appear to be smoke, fine dust, which may appear to be smoke,
fine dust, which may appear to be smoke,
may be visible in the passenger compart- may be visible in the passenger compart-may be visible in the passenger compart- may be visible in the passenger compart-
may be visible in the passenger compart-
ment. These are normal operating condi- ment. These are normal operating condi-ment. These are normal operating condi- ment. These are normal operating condi-
ment. These are normal operating condi-
tions and are not hazardous. tions and are not hazardous.tions and are not hazardous. tions and are not hazardous.
tions and are not hazardous.
o oo o
o
Although it is harmless, the fine dust Although it is harmless, the fine dustAlthough it is harmless, the fine dust Although it is harmless, the fine dust
Although it is harmless, the fine dust
may cause skin irritation and should not may cause skin irritation and should notmay cause skin irritation and should not may cause skin irritation and should not
may cause skin irritation and should not
be breathed for prolonged periods. Wash be breathed for prolonged periods. Washbe breathed for prolonged periods. Wash be breathed for prolonged periods. Wash
be breathed for prolonged periods. Wash
your hands and face thoroughly after an your hands and face thoroughly after anyour hands and face thoroughly after an your hands and face thoroughly after an
your hands and face thoroughly after an
accident in which the pre-tensioner seat accident in which the pre-tensioner seataccident in which the pre-tensioner seat accident in which the pre-tensioner seat
accident in which the pre-tensioner seat
belts were activated. belts were activated.belts were activated. belts were activated.
belts were activated.
CAUTION: CAUTION:CAUTION: CAUTION:
CAUTION:o oo o
o
Because the sensor that activates the Because the sensor that activates theBecause the sensor that activates the Because the sensor that activates the
Because the sensor that activates the
SRS airbag is connected with the pre- SRS airbag is connected with the pre-SRS airbag is connected with the pre- SRS airbag is connected with the pre-
SRS airbag is connected with the pre-
tensioner seat belt, the SRS airbag warn- tensioner seat belt, the SRS airbag warn-tensioner seat belt, the SRS airbag warn- tensioner seat belt, the SRS airbag warn-
tensioner seat belt, the SRS airbag warn-
ing light on the instrument panel will ing light on the instrument panel willing light on the instrument panel will ing light on the instrument panel will
ing light on the instrument panel will
blink for approximately 6 seconds after blink for approximately 6 seconds afterblink for approximately 6 seconds after blink for approximately 6 seconds after
blink for approximately 6 seconds after
the ignition key has been turned to the the ignition key has been turned to thethe ignition key has been turned to the the ignition key has been turned to the
the ignition key has been turned to the
"ON" position, and then it should turn "ON" position, and then it should turn"ON" position, and then it should turn "ON" position, and then it should turn
"ON" position, and then it should turn
off. off.off. off.
off.
B180B04S-AAT
Pre-tensioner Seat Belt Pre-tensioner Seat BeltPre-tensioner Seat Belt Pre-tensioner Seat Belt
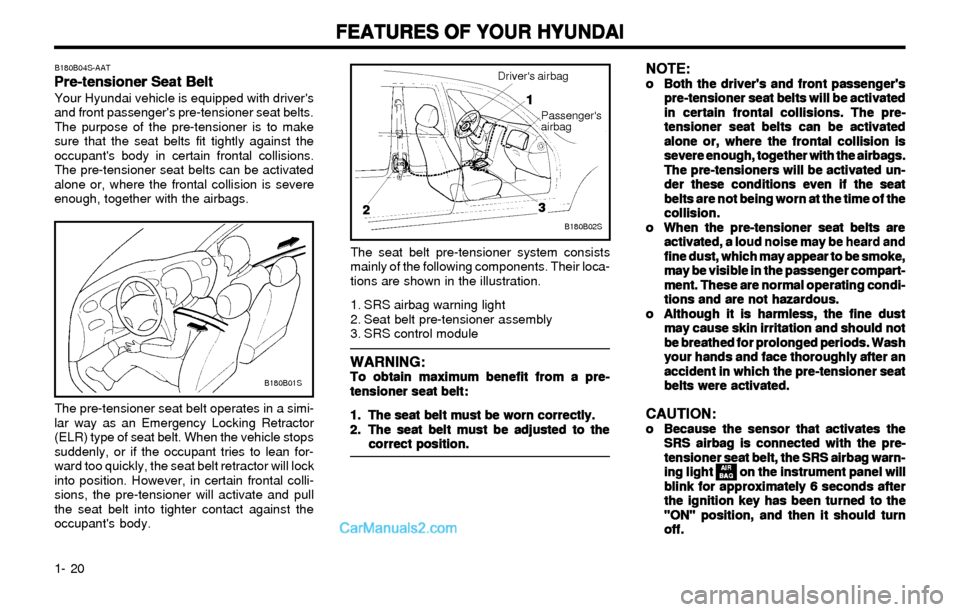
Pre-tensioner Seat BeltYour Hyundai vehicle is equipped with driver's
and front passenger's pre-tensioner seat belts.
The purpose of the pre-tensioner is to make
sure that the seat belts fit tightly against the
occupant's body in certain frontal collisions.
The pre-tensioner seat belts can be activated
alone or, where the frontal collision is severe
enough, together with the airbags.
B180B01S
The pre-tensioner seat belt operates in a simi-
lar way as an Emergency Locking Retractor
(ELR) type of seat belt. When the vehicle stops
suddenly, or if the occupant tries to lean for-
ward too quickly, the seat belt retractor will lock
into position. However, in certain frontal colli-
sions, the pre-tensioner will activate and pull
the seat belt into tighter contact against the
occupant's body.
B180B02S
Driver's airbag
1 11 1
1
2 22 2
2
3 33 3
3
Passenger's
airbag
The seat belt pre-tensioner system consists
mainly of the following components. Their loca-
tions are shown in the illustration.
1. SRS airbag warning light
2. Seat belt pre-tensioner assembly
3. SRS control module
WARNING: WARNING:WARNING: WARNING:
WARNING:To obtain maximum benefit from a pre- To obtain maximum benefit from a pre-To obtain maximum benefit from a pre- To obtain maximum benefit from a pre-
To obtain maximum benefit from a pre-
tensioner seat belt: tensioner seat belt:tensioner seat belt: tensioner seat belt:
tensioner seat belt:
1. 1.1. 1.
1.
The seat belt must be worn correctly. The seat belt must be worn correctly.The seat belt must be worn correctly. The seat belt must be worn correctly.
The seat belt must be worn correctly.
2. 2.2. 2.
2.
The seat belt must be adjusted to the The seat belt must be adjusted to theThe seat belt must be adjusted to the The seat belt must be adjusted to the
The seat belt must be adjusted to the
correct position. correct position.correct position. correct position.
correct position.
AIR AIRAIR AIR
AIR
BAG BAGBAG BAG
BAG
Page 39 of 172
FEATURES OF YOUR HYUNDAI FEATURES OF YOUR HYUNDAIFEATURES OF YOUR HYUNDAI FEATURES OF YOUR HYUNDAI
FEATURES OF YOUR HYUNDAI
1- 30
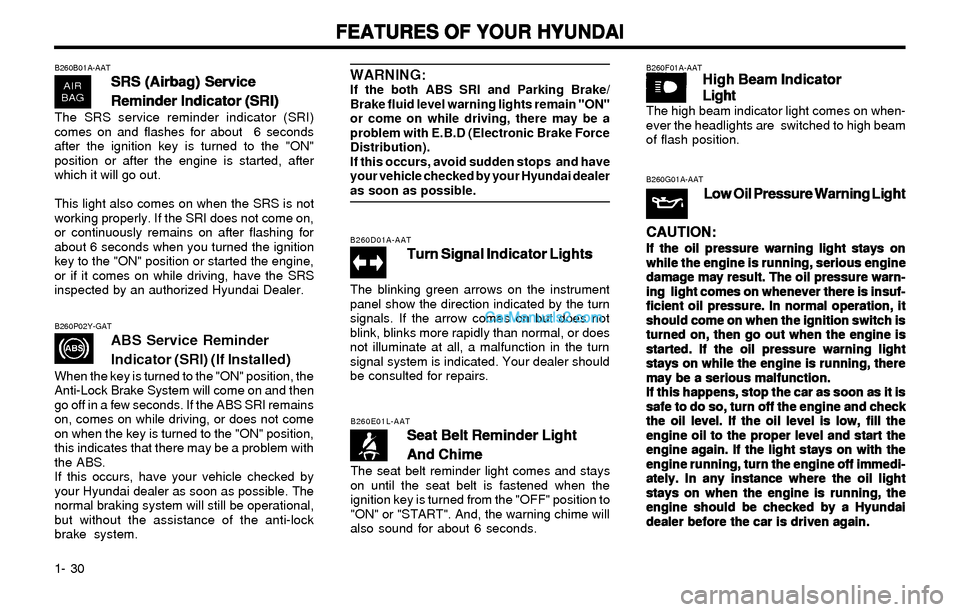
B260D01A-AAT
Turn Signal Indicator Lights Turn Signal Indicator LightsTurn Signal Indicator Lights Turn Signal Indicator Lights
Turn Signal Indicator Lights
The blinking green arrows on the instrument
panel show the direction indicated by the turn
signals. If the arrow comes on but does not
blink, blinks more rapidly than normal, or does
not illuminate at all, a malfunction in the turn
signal system is indicated. Your dealer should
be consulted for repairs.
B260E01L-AAT
Seat Belt Reminder Light Seat Belt Reminder LightSeat Belt Reminder Light Seat Belt Reminder Light
Seat Belt Reminder Light
And Chime And ChimeAnd Chime And Chime
And Chime
The seat belt reminder light comes and stays
on until the seat belt is fastened when the
ignition key is turned from the "OFF" position to
"ON" or "START". And, the warning chime will
also sound for about 6 seconds.
B260F01A-AATHigh Beam Indicator High Beam IndicatorHigh Beam Indicator High Beam Indicator
High Beam Indicator
Light LightLight Light
Light
The high beam indicator light comes on when-
ever the headlights are switched to high beam
of flash position.
B260G01A-AAT
Low Oil Pressure Warning Light Low Oil Pressure Warning LightLow Oil Pressure Warning Light Low Oil Pressure Warning Light
Low Oil Pressure Warning Light
CAUTION: CAUTION:CAUTION: CAUTION:
CAUTION:
If the oil pressure warning light stays on If the oil pressure warning light stays onIf the oil pressure warning light stays on If the oil pressure warning light stays on
If the oil pressure warning light stays on
while the engine is running, serious engine while the engine is running, serious enginewhile the engine is running, serious engine while the engine is running, serious engine
while the engine is running, serious engine
damage may result. The oil pressure warn- damage may result. The oil pressure warn-damage may result. The oil pressure warn- damage may result. The oil pressure warn-
damage may result. The oil pressure warn-
ing light comes on whenever there is insuf- ing light comes on whenever there is insuf-ing light comes on whenever there is insuf- ing light comes on whenever there is insuf-
ing light comes on whenever there is insuf-
ficient oil pressure. In normal operation, it ficient oil pressure. In normal operation, itficient oil pressure. In normal operation, it ficient oil pressure. In normal operation, it
ficient oil pressure. In normal operation, it
should come on when the ignition switch is should come on when the ignition switch isshould come on when the ignition switch is should come on when the ignition switch is
should come on when the ignition switch is
turned on, then go out when the engine is turned on, then go out when the engine isturned on, then go out when the engine is turned on, then go out when the engine is
turned on, then go out when the engine is
started. If the oil pressure warning light started. If the oil pressure warning lightstarted. If the oil pressure warning light started. If the oil pressure warning light
started. If the oil pressure warning light
stays on while the engine is running, there stays on while the engine is running, therestays on while the engine is running, there stays on while the engine is running, there
stays on while the engine is running, there
may be a serious malfunction. may be a serious malfunction.may be a serious malfunction. may be a serious malfunction.
may be a serious malfunction.
If this happens, stop the car as soon as it is If this happens, stop the car as soon as it isIf this happens, stop the car as soon as it is If this happens, stop the car as soon as it is
If this happens, stop the car as soon as it is
safe to do so, turn off the engine and check safe to do so, turn off the engine and checksafe to do so, turn off the engine and check safe to do so, turn off the engine and check
safe to do so, turn off the engine and check
the oil level. If the oil level is low, fill the the oil level. If the oil level is low, fill thethe oil level. If the oil level is low, fill the the oil level. If the oil level is low, fill the
the oil level. If the oil level is low, fill the
engine oil to the proper level and start the engine oil to the proper level and start theengine oil to the proper level and start the engine oil to the proper level and start the
engine oil to the proper level and start the
engine again. If the light stays on with the engine again. If the light stays on with theengine again. If the light stays on with the engine again. If the light stays on with the
engine again. If the light stays on with the
engine running, turn the engine off immedi- engine running, turn the engine off immedi-engine running, turn the engine off immedi- engine running, turn the engine off immedi-
engine running, turn the engine off immedi-
ately. In any instance where the oil light ately. In any instance where the oil lightately. In any instance where the oil light ately. In any instance where the oil light
ately. In any instance where the oil light
stays on when the engine is running, the stays on when the engine is running, thestays on when the engine is running, the stays on when the engine is running, the
stays on when the engine is running, the
engine should be checked by a Hyundai engine should be checked by a Hyundaiengine should be checked by a Hyundai engine should be checked by a Hyundai
engine should be checked by a Hyundai
dealer before the car is driven again. dealer before the car is driven again.dealer before the car is driven again. dealer before the car is driven again.
dealer before the car is driven again.
B260B01A-AAT
SRS (Airbag) Service SRS (Airbag) ServiceSRS (Airbag) Service SRS (Airbag) Service
SRS (Airbag) Service
Reminder Indicator (SRI) Reminder Indicator (SRI)Reminder Indicator (SRI) Reminder Indicator (SRI)
Reminder Indicator (SRI)
The SRS service reminder indicator (SRI)
comes on and flashes for about 6 seconds
after the ignition key is turned to the "ON"
position or after the engine is started, after
which it will go out.
This light also comes on when the SRS is not
working properly. If the SRI does not come on,
or continuously remains on after flashing for
about 6 seconds when you turned the ignition
key to the "ON" position or started the engine,
or if it comes on while driving, have the SRS
inspected by an authorized Hyundai Dealer.
B260P02Y-GATABS Service Reminder
Indicator (SRI) (If Installed)
When the key is turned to the "ON" position, the
Anti-Lock Brake System will come on and then
go off in a few seconds. If the ABS SRI remains
on, comes on while driving, or does not come
on when the key is turned to the "ON" position,
this indicates that there may be a problem with
the ABS.
If this occurs, have your vehicle checked by
your Hyundai dealer as soon as possible. The
normal braking system will still be operational,
but without the assistance of the anti-lock
brake system.
WARNING:If the both ABS SRI and Parking Brake/
Brake fluid level warning lights remain "ON"
or come on while driving, there may be a
problem with E.B.D (Electronic Brake Force
Distribution).
If this occurs, avoid sudden stops and have
your vehicle checked by your Hyundai dealer
as soon as possible.
Page 40 of 172
FEATURES OF YOUR HYUNDAI FEATURES OF YOUR HYUNDAIFEATURES OF YOUR HYUNDAI FEATURES OF YOUR HYUNDAI
FEATURES OF YOUR HYUNDAI
1- 31
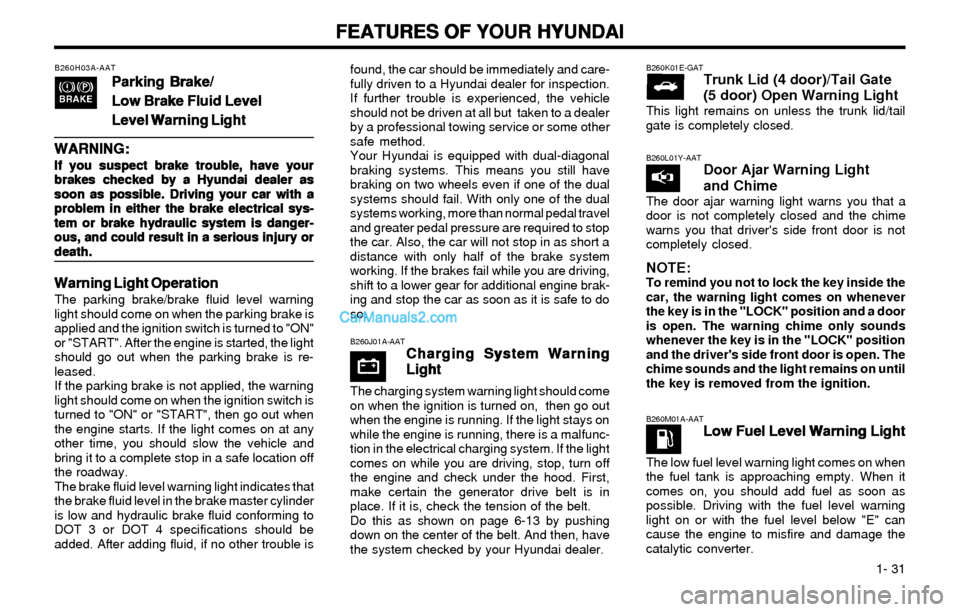
B260H03A-AAT
Parking Brake/ Parking Brake/Parking Brake/ Parking Brake/
Parking Brake/
Low Brake Fluid Level Low Brake Fluid LevelLow Brake Fluid Level Low Brake Fluid Level
Low Brake Fluid Level
Level Warning Light Level Warning LightLevel Warning Light Level Warning Light
Level Warning Light
WARNING: WARNING:WARNING: WARNING:
WARNING:
If you suspect brake trouble, have your If you suspect brake trouble, have yourIf you suspect brake trouble, have your If you suspect brake trouble, have your
If you suspect brake trouble, have your
brakes checked by a Hyundai dealer as brakes checked by a Hyundai dealer asbrakes checked by a Hyundai dealer as brakes checked by a Hyundai dealer as
brakes checked by a Hyundai dealer as
soon as possible. Driving your car with a soon as possible. Driving your car with asoon as possible. Driving your car with a soon as possible. Driving your car with a
soon as possible. Driving your car with a
problem in either the brake electrical sys- problem in either the brake electrical sys-problem in either the brake electrical sys- problem in either the brake electrical sys-
problem in either the brake electrical sys-
tem or brake hydraulic system is danger- tem or brake hydraulic system is danger-tem or brake hydraulic system is danger- tem or brake hydraulic system is danger-
tem or brake hydraulic system is danger-
ous, and could result in a serious injury or ous, and could result in a serious injury orous, and could result in a serious injury or ous, and could result in a serious injury or
ous, and could result in a serious injury or
death. death.death. death.
death.
Warning Light Operation Warning Light OperationWarning Light Operation Warning Light Operation
Warning Light OperationThe parking brake/brake fluid level warning
light should come on when the parking brake is
applied and the ignition switch is turned to "ON"
or "START". After the engine is started, the light
should go out when the parking brake is re-
leased.
If the parking brake is not applied, the warning
light should come on when the ignition switch is
turned to "ON" or "START", then go out when
the engine starts. If the light comes on at any
other time, you should slow the vehicle and
bring it to a complete stop in a safe location off
the roadway.
The brake fluid level warning light indicates that
the brake fluid level in the brake master cylinder
is low and hydraulic brake fluid conforming to
DOT 3 or DOT 4 specifications should be
added. After adding fluid, if no other trouble isfound, the car should be immediately and care-
fully driven to a Hyundai dealer for inspection.
If further trouble is experienced, the vehicle
should not be driven at all but taken to a dealer
by a professional towing service or some other
safe method.
Your Hyundai is equipped with dual-diagonal
braking systems. This means you still have
braking on two wheels even if one of the dual
systems should fail. With only one of the dual
systems working, more than normal pedal travel
and greater pedal pressure are required to stop
the car. Also, the car will not stop in as short a
distance with only half of the brake system
working. If the brakes fail while you are driving,
shift to a lower gear for additional engine brak-
ing and stop the car as soon as it is safe to do
so.
B260J01A-AATCharging System Warning Charging System WarningCharging System Warning Charging System Warning
Charging System Warning
Light LightLight Light
Light
The charging system warning light should come
on when the ignition is turned on, then go out
when the engine is running. If the light stays on
while the engine is running, there is a malfunc-
tion in the electrical charging system. If the light
comes on while you are driving, stop, turn off
the engine and check under the hood. First,
make certain the generator drive belt is in
place. If it is, check the tension of the belt.
Do this as shown on page 6-13 by pushing
down on the center of the belt. And then, have
the system checked by your Hyundai dealer.
B260M01A-AATLow Fuel Level Warning Light Low Fuel Level Warning LightLow Fuel Level Warning Light Low Fuel Level Warning Light
Low Fuel Level Warning Light
The low fuel level warning light comes on when
the fuel tank is approaching empty. When it
comes on, you should add fuel as soon as
possible. Driving with the fuel level warning
light on or with the fuel level below "E" can
cause the engine to misfire and damage the
catalytic converter.
B260L01Y-AATDoor Ajar Warning Light
and Chime
The door ajar warning light warns you that a
door is not completely closed and the chime
warns you that driver's side front door is not
completely closed.
NOTE:To remind you not to lock the key inside the
car, the warning light comes on whenever
the key is in the "LOCK" position and a door
is open. The warning chime only sounds
whenever the key is in the "LOCK" position
and the driver's side front door is open. The
chime sounds and the light remains on until
the key is removed from the ignition.
B260K01E-GATTrunk Lid (4 door)/Tail Gate
(5 door) Open Warning Light
This light remains on unless the trunk lid/tail
gate is completely closed.
Page 48 of 172
FEATURES OF YOUR HYUNDAI FEATURES OF YOUR HYUNDAIFEATURES OF YOUR HYUNDAI FEATURES OF YOUR HYUNDAI
FEATURES OF YOUR HYUNDAI
1- 39
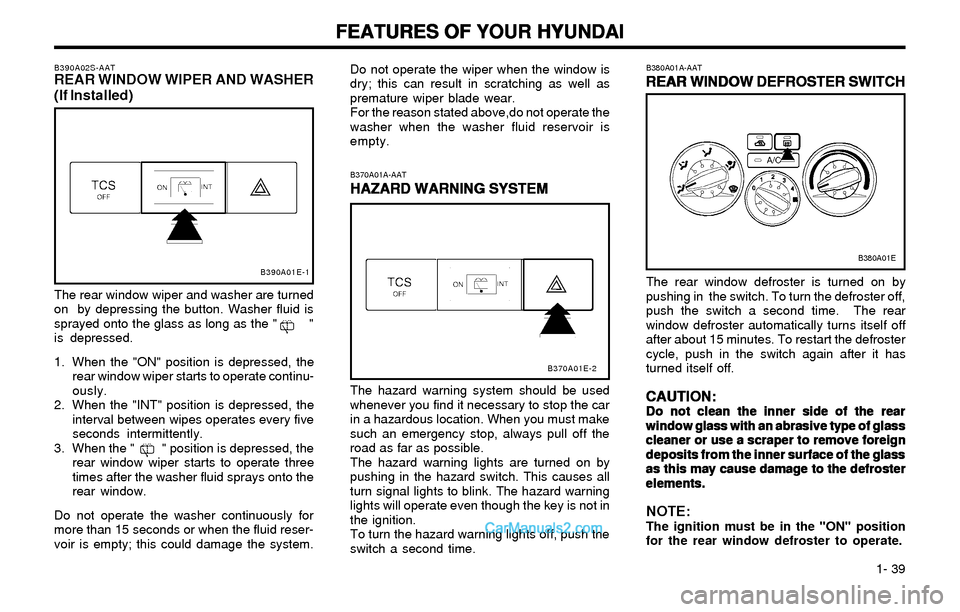
B380A01A-AAT
REAR WINDOW DEFROSTER SWITCH REAR WINDOW DEFROSTER SWITCHREAR WINDOW DEFROSTER SWITCH REAR WINDOW DEFROSTER SWITCH
REAR WINDOW DEFROSTER SWITCH
The rear window defroster is turned on by
pushing in the switch. To turn the defroster off,
push the switch a second time. The rear
window defroster automatically turns itself off
after about 15 minutes. To restart the defroster
cycle, push in the switch again after it has
turned itself off.
CAUTION: CAUTION:CAUTION: CAUTION:
CAUTION:Do not clean the inner side of the rear Do not clean the inner side of the rearDo not clean the inner side of the rear Do not clean the inner side of the rear
Do not clean the inner side of the rear
window glass with an abrasive type of glass window glass with an abrasive type of glasswindow glass with an abrasive type of glass window glass with an abrasive type of glass
window glass with an abrasive type of glass
cleaner or use a scraper to remove foreign cleaner or use a scraper to remove foreigncleaner or use a scraper to remove foreign cleaner or use a scraper to remove foreign
cleaner or use a scraper to remove foreign
deposits from the inner surface of the glass deposits from the inner surface of the glassdeposits from the inner surface of the glass deposits from the inner surface of the glass
deposits from the inner surface of the glass
as this may cause damage to the defroster as this may cause damage to the defrosteras this may cause damage to the defroster as this may cause damage to the defroster
as this may cause damage to the defroster
elements. elements.elements. elements.
elements.
NOTE:The ignition must be in the "ON" position
for the rear window defroster to operate.
B370A01A-AAT
HAZARD WARNING SYSTEM HAZARD WARNING SYSTEMHAZARD WARNING SYSTEM HAZARD WARNING SYSTEM
HAZARD WARNING SYSTEM
The hazard warning system should be used
whenever you find it necessary to stop the car
in a hazardous location. When you must make
such an emergency stop, always pull off the
road as far as possible.
The hazard warning lights are turned on by
pushing in the hazard switch. This causes all
turn signal lights to blink. The hazard warning
lights will operate even though the key is not in
the ignition.
To turn the hazard warning lights off, push the
switch a second time.
B380A01E
B370A01E-2
Do not operate the wiper when the window is
dry; this can result in scratching as well as
premature wiper blade wear.
For the reason stated above,do not operate the
washer when the washer fluid reservoir is
empty.B390A02S-AATREAR WINDOW WIPER AND WASHER
(If Installed)
B390A01E-1
The rear window wiper and washer are turned
on by depressing the button. Washer fluid is
sprayed onto the glass as long as the " "
is depressed.
1. When the "ON" position is depressed, the
rear window wiper starts to operate continu-
ously.
2. When the "INT" position is depressed, the
interval between wipes operates every five
seconds intermittently.
3. When the " " position is depressed, the
rear window wiper starts to operate three
times after the washer fluid sprays onto the
rear window.
Do not operate the washer continuously for
more than 15 seconds or when the fluid reser-
voir is empty; this could damage the system.
Page 53 of 172
FEATURES OF YOUR HYUNDAI FEATURES OF YOUR HYUNDAIFEATURES OF YOUR HYUNDAI FEATURES OF YOUR HYUNDAI
FEATURES OF YOUR HYUNDAI
1- 44
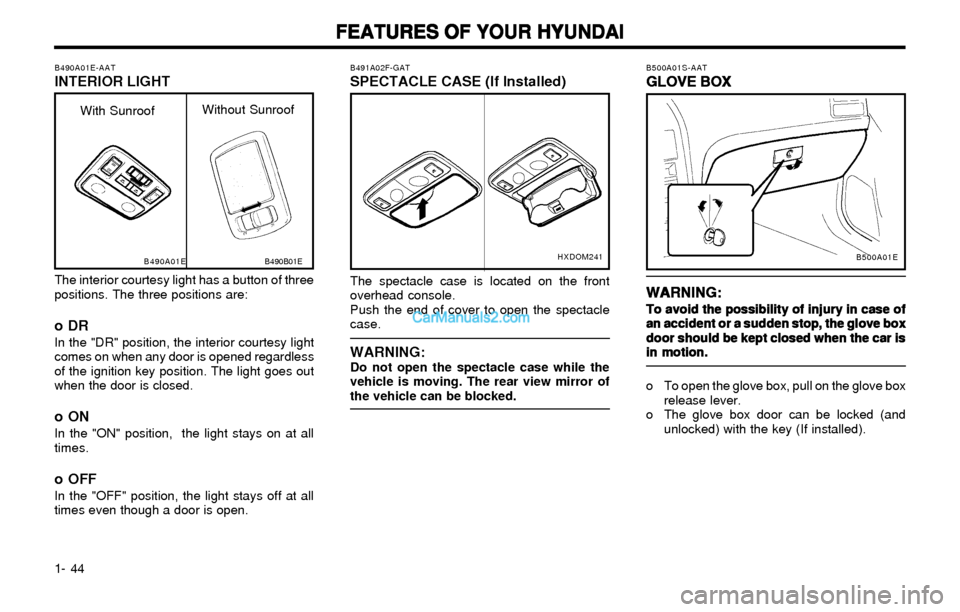
B500A01S-AAT
GLOVE BOX GLOVE BOXGLOVE BOX GLOVE BOX
GLOVE BOX
WARNING: WARNING:WARNING: WARNING:
WARNING:
To avoid the possibility of injury in case of To avoid the possibility of injury in case ofTo avoid the possibility of injury in case of To avoid the possibility of injury in case of
To avoid the possibility of injury in case of
an accident or a sudden stop, the glove box an accident or a sudden stop, the glove boxan accident or a sudden stop, the glove box an accident or a sudden stop, the glove box
an accident or a sudden stop, the glove box
door should be kept closed when the car is door should be kept closed when the car isdoor should be kept closed when the car is door should be kept closed when the car is
door should be kept closed when the car is
in motion. in motion.in motion. in motion.
in motion.
o To open the glove box, pull on the glove box
release lever.
o The glove box door can be locked (and
unlocked) with the key (If installed).
B491A02F-GATSPECTACLE CASE (If Installed)
HXDOM241
The spectacle case is located on the front
overhead console.
Push the end of cover to open the spectacle
case.
WARNING:Do not open the spectacle case while the
vehicle is moving. The rear view mirror of
the vehicle can be blocked.
B500A01E
The interior courtesy light has a button of three
positions. The three positions are:
oDR
In the "DR" position, the interior courtesy light
comes on when any door is opened regardless
of the ignition key position. The light goes out
when the door is closed.
oON
In the "ON" position, the light stays on at all
times.
o OFF
In the "OFF" position, the light stays off at all
times even though a door is open.
B490A01E-AATINTERIOR LIGHT
B490A01E
With SunroofWithout Sunroof
B490B01E
Page 56 of 172
FEATURES OF YOUR HYUNDAI FEATURES OF YOUR HYUNDAIFEATURES OF YOUR HYUNDAI FEATURES OF YOUR HYUNDAI
FEATURES OF YOUR HYUNDAI
1- 47
B550A01S-GAT
HIGH-MOUNTED REAR STOP LIGHT HIGH-MOUNTED REAR STOP LIGHTHIGH-MOUNTED REAR STOP LIGHT HIGH-MOUNTED REAR STOP LIGHT
HIGH-MOUNTED REAR STOP LIGHT
(If Installed) (If Installed)(If Installed) (If Installed)
(If Installed)
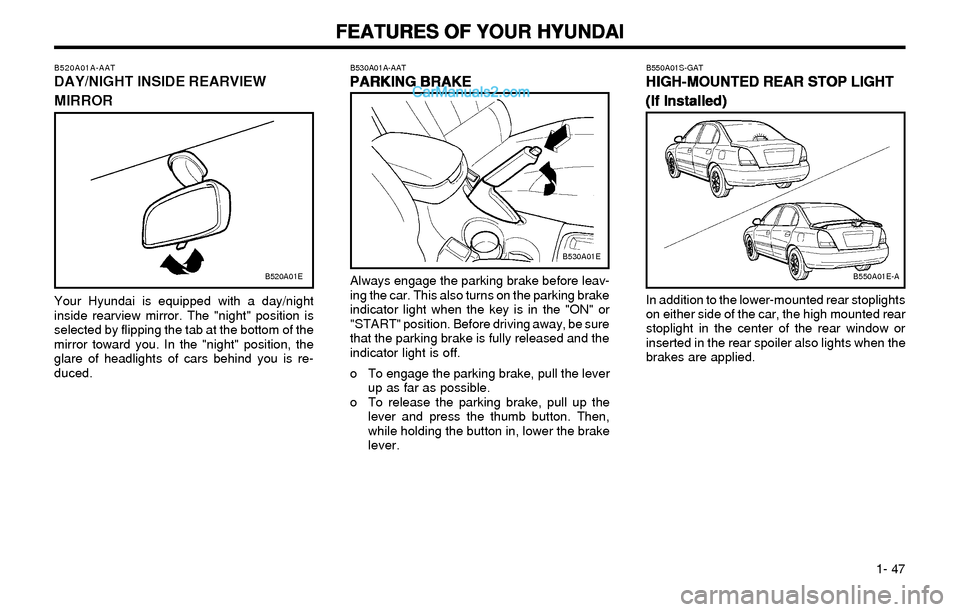
In addition to the lower-mounted rear stoplights
on either side of the car, the high mounted rear
stoplight in the center of the rear window or
inserted in the rear spoiler also lights when the
brakes are applied. Always engage the parking brake before leav-
ing the car. This also turns on the parking brake
indicator light when the key is in the "ON" or
"START" position. Before driving away, be sure
that the parking brake is fully released and the
indicator light is off.
o To engage the parking brake, pull the lever
up as far as possible.
o To release the parking brake, pull up the
lever and press the thumb button. Then,
while holding the button in, lower the brake
lever.
B530A01A-AAT
PARKING BRAKE PARKING BRAKEPARKING BRAKE PARKING BRAKE
PARKING BRAKE
B550A01E-A
B530A01E
B520A01A-AATDAY/NIGHT INSIDE REARVIEW
MIRROR
B520A01E
Your Hyundai is equipped with a day/night
inside rearview mirror. The "night" position is
selected by flipping the tab at the bottom of the
mirror toward you. In the "night" position, the
glare of headlights of cars behind you is re-
duced.
Page 58 of 172
FEATURES OF YOUR HYUNDAI FEATURES OF YOUR HYUNDAIFEATURES OF YOUR HYUNDAI FEATURES OF YOUR HYUNDAI
FEATURES OF YOUR HYUNDAI
1- 49
WARNING: WARNING:WARNING: WARNING:
WARNING:o oo o
o
The fuel cap must be tightened at least 3 The fuel cap must be tightened at least 3The fuel cap must be tightened at least 3 The fuel cap must be tightened at least 3
The fuel cap must be tightened at least 3
clicks, otherwise light will illuminate. clicks, otherwise light will illuminate.clicks, otherwise light will illuminate. clicks, otherwise light will illuminate.
clicks, otherwise light will illuminate.
o oo o
o
Gasoline vapors are dangerous. Before Gasoline vapors are dangerous. BeforeGasoline vapors are dangerous. Before Gasoline vapors are dangerous. Before
Gasoline vapors are dangerous. Before
refueling, always stop the engine and refueling, always stop the engine andrefueling, always stop the engine and refueling, always stop the engine and
refueling, always stop the engine and
never allow sparks or open flames near never allow sparks or open flames nearnever allow sparks or open flames near never allow sparks or open flames near
never allow sparks or open flames near
the filler area. If you need to replace the the filler area. If you need to replace thethe filler area. If you need to replace the the filler area. If you need to replace the
the filler area. If you need to replace the
filler cap, use a genuine Hyundai re- filler cap, use a genuine Hyundai re-filler cap, use a genuine Hyundai re- filler cap, use a genuine Hyundai re-
filler cap, use a genuine Hyundai re-
placement part. placement part.placement part. placement part.
placement part.
o oo o
o
If you open the fuel filler cap during high If you open the fuel filler cap during highIf you open the fuel filler cap during high If you open the fuel filler cap during high
If you open the fuel filler cap during high
ambient temperatures, a slight "pres- ambient temperatures, a slight "pres-ambient temperatures, a slight "pres- ambient temperatures, a slight "pres-
ambient temperatures, a slight "pres-
sure sound" may be heard. This is nor- sure sound" may be heard. This is nor-sure sound" may be heard. This is nor- sure sound" may be heard. This is nor-
sure sound" may be heard. This is nor-
mal and not a cause for concern. mal and not a cause for concern.mal and not a cause for concern. mal and not a cause for concern.
mal and not a cause for concern.
Whenever you open the fuel filler cap, Whenever you open the fuel filler cap,Whenever you open the fuel filler cap, Whenever you open the fuel filler cap,
Whenever you open the fuel filler cap,
turn it slowly. turn it slowly.turn it slowly. turn it slowly.
turn it slowly.
o oo o
o
Make sure the fuel filler cap is replaced and Make sure the fuel filler cap is replaced andMake sure the fuel filler cap is replaced and Make sure the fuel filler cap is replaced and
Make sure the fuel filler cap is replaced and
securely seated after fueling. Failure to securely seated after fueling. Failure tosecurely seated after fueling. Failure to securely seated after fueling. Failure to
securely seated after fueling. Failure to
replace or fully seat the fuel filler cap will replace or fully seat the fuel filler cap willreplace or fully seat the fuel filler cap will replace or fully seat the fuel filler cap will
replace or fully seat the fuel filler cap will
result in fuel vapors escaping into the atmo- result in fuel vapors escaping into the atmo-result in fuel vapors escaping into the atmo- result in fuel vapors escaping into the atmo-
result in fuel vapors escaping into the atmo-
sphere and the MIL indicator sphere and the MIL indicator sphere and the MIL indicator sphere and the MIL indicator
sphere and the MIL indicator
illu illuillu illu
illu
- -- -
-
minating. minating.minating. minating.
minating.
B560B01E
B560A02S-AAT
REMOTE FUEL-FILLER LID RELEASE REMOTE FUEL-FILLER LID RELEASEREMOTE FUEL-FILLER LID RELEASE REMOTE FUEL-FILLER LID RELEASE
REMOTE FUEL-FILLER LID RELEASE
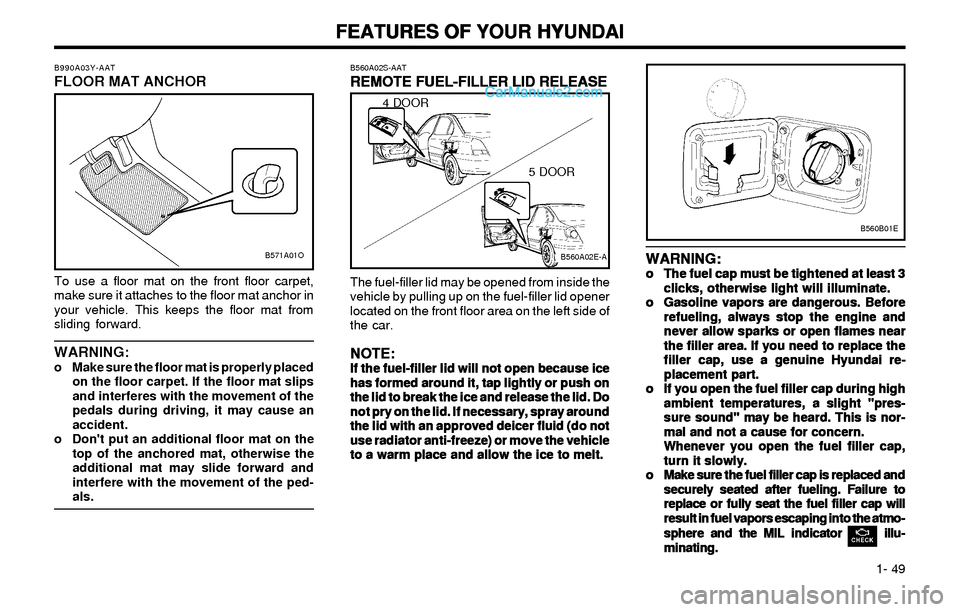
The fuel-filler lid may be opened from inside the
vehicle by pulling up on the fuel-filler lid opener
located on the front floor area on the left side of
the car.
NOTE: NOTE:NOTE: NOTE:
NOTE:If the fuel-filler lid will not open because ice If the fuel-filler lid will not open because iceIf the fuel-filler lid will not open because ice If the fuel-filler lid will not open because ice
If the fuel-filler lid will not open because ice
has formed around it, tap lightly or push on has formed around it, tap lightly or push onhas formed around it, tap lightly or push on has formed around it, tap lightly or push on
has formed around it, tap lightly or push on
the lid to break the ice and release the lid. Do the lid to break the ice and release the lid. Dothe lid to break the ice and release the lid. Do the lid to break the ice and release the lid. Do
the lid to break the ice and release the lid. Do
not pry on the lid. If necessary, spray around not pry on the lid. If necessary, spray aroundnot pry on the lid. If necessary, spray around not pry on the lid. If necessary, spray around
not pry on the lid. If necessary, spray around
the lid with an approved deicer fluid (do not the lid with an approved deicer fluid (do notthe lid with an approved deicer fluid (do not the lid with an approved deicer fluid (do not
the lid with an approved deicer fluid (do not
use radiator anti-freeze) or move the vehicle use radiator anti-freeze) or move the vehicleuse radiator anti-freeze) or move the vehicle use radiator anti-freeze) or move the vehicle
use radiator anti-freeze) or move the vehicle
to a warm place and allow the ice to melt. to a warm place and allow the ice to melt.to a warm place and allow the ice to melt. to a warm place and allow the ice to melt.
to a warm place and allow the ice to melt.
B560A02E-A
4 DOOR
5 DOOR
B571A01O B990A03Y-AAT
FLOOR MAT ANCHOR
To use a floor mat on the front floor carpet,
make sure it attaches to the floor mat anchor in
your vehicle. This keeps the floor mat from
sliding forward.
WARNING:o Make sure the floor mat is properly placed
on the floor carpet. If the floor mat slips
and interferes with the movement of the
pedals during driving, it may cause an
accident.
o Don't put an additional floor mat on the
top of the anchored mat, otherwise the
additional mat may slide forward and
interfere with the movement of the ped-
als.