tow Hyundai Elantra 2009 Инструкция по эксплуатации (in Russian)
[x] Cancel search | Manufacturer: HYUNDAI, Model Year: 2009, Model line: Elantra, Model: Hyundai Elantra 2009Pages: 308, PDF Size: 15.03 MB
Page 105 of 308
Features of your vehicle
50
4
LO : Normal wiper speed
HI : Fast wiper speed
✽✽
NOTICE
If there is heavy accumulation of snow
or ice on the windshield, defrost the
windshield for about 10 minutes, or
until the snow and/or ice is removed
before using the windshield wipers to
ensure proper operation.
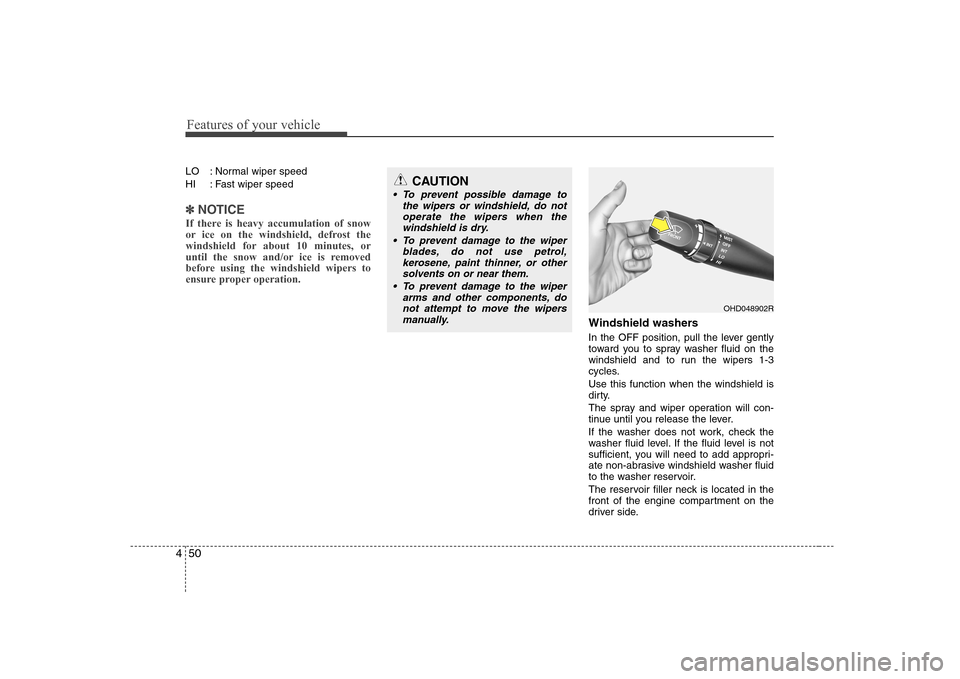
Windshield washers
In the OFF position, pull the lever gently
toward you to spray washer fluid on the
windshield and to run the wipers 1-3
cycles. Use this function when the windshield is
dirty.
The spray and wiper operation will con-
tinue until you release the lever.
If the washer does not work, check the
washer fluid level. If the fluid level is not
sufficient, you will need to add appropri-
ate non-abrasive windshield washer fluid
to the washer reservoir.
The reservoir filler neck is located in the
front of the engine compartment on the
driver side.
OHD048902R
CAUTION
To prevent possible damage to the wipers or windshield, do notoperate the wipers when the
windshield is dry.
To prevent damage to the wiper blades, do not use petrol,kerosene, paint thinner, or other
solvents on or near them.
To prevent damage to the wiper arms and other components, donot attempt to move the wipers
manually.
Page 112 of 308
457
Features of your vehicle
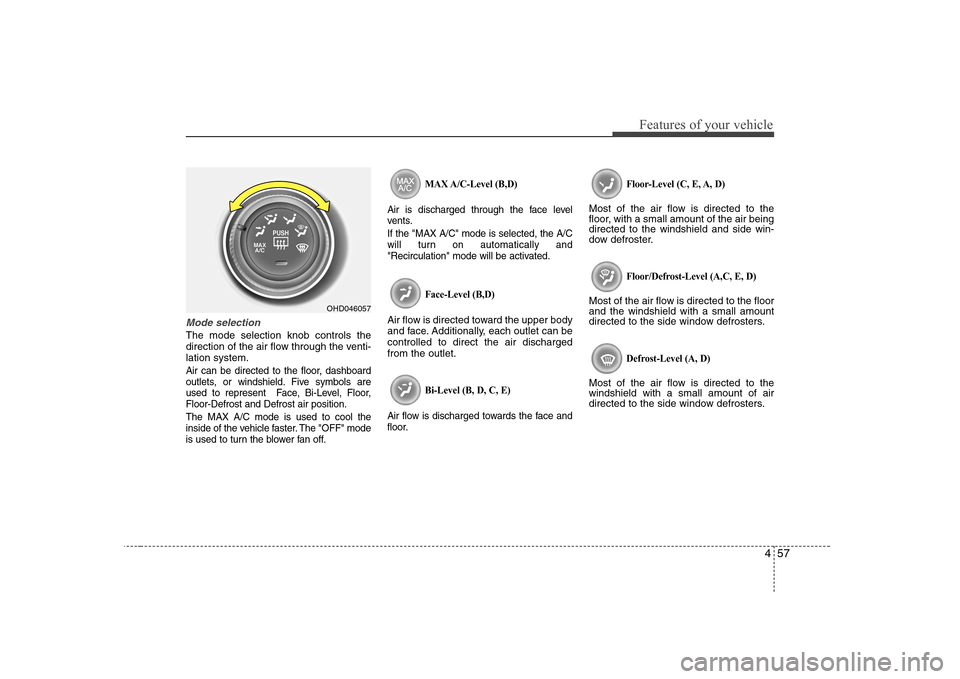
Mode selection
The mode selection knob controls the
direction of the air flow through the venti-lation system.
Air can be directed to the floor, dashboard
outlets, or windshield. Five symbols are
used to represent Face, Bi-Level, Floor,Floor-Defrost and Defrost air position. The MAX A/C mode is used to cool the
inside of the vehicle faster. The "OFF" mode
is used to turn the blower fan off.MAX A/C-Level (B,D)
Air is discharged through the face level
vents. If the "MAX A/C" mode is selected, the A/C
will turn on automatically and
"Recirculation" mode will be activated.
Face-Level (B,D)
Air flow is directed toward the upper body
and face. Additionally, each outlet can becontrolled to direct the air dischargedfrom the outlet.
Bi-Level (B, D, C, E)
Air flow is discharged towards the face and
floor. Floor-Level (C, E, A, D)
Most of the air flow is directed to the
floor, with a small amount of the air beingdirected to the windshield and side win-
dow defroster.
Floor/Defrost-Level (A,C, E, D)
Most of the air flow is directed to the floorand the windshield with a small amount
directed to the side window defrosters.
Defrost-Level (A, D)
Most of the air flow is directed to thewindshield with a small amount of air
directed to the side window defrosters.
OHD046057
Page 121 of 308
Features of your vehicle
66
4
Manual heating and air condition- ing The heating and cooling system can be
controlled manually as well by pushing
buttons other than the AUTO button. In
this case, the system works sequentially
according to the order of buttons select-ed.
When pressing any button except AUTO
button while automatic operation, the
functions of the buttons not selected will
be controlled automatically.
1. Start the engine.
2. Set the mode to the desired position.
3. Set the temperature control to the
desired position.
4. Set the air intake control to the outside (fresh) air position.
5. Set the fan speed control to the desired speed.
6. If air conditioning is desired, turn the air conditioning system (if equipped) on.
Press the AUTO button in order to con-
vert to full automatic control of the sys-tem.
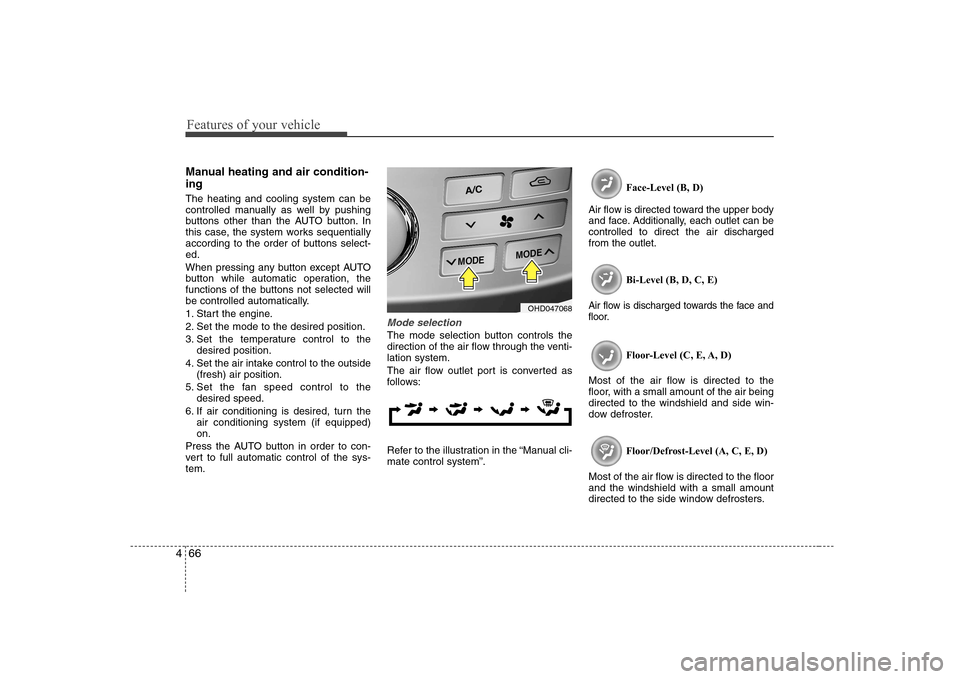
Mode selection
The mode selection button controls the
direction of the air flow through the venti-lation system.
The air flow outlet port is converted as
follows:
Refer to the illustration in the “Manual cli- mate control system”. Face-Level (B, D)
Air flow is directed toward the upper body
and face. Additionally, each outlet can becontrolled to direct the air dischargedfrom the outlet.
Bi-Level (B, D, C, E)
Air flow is discharged towards the face and
floor.
Floor-Level (C, E, A, D)
Most of the air flow is directed to the
floor, with a small amount of the air beingdirected to the windshield and side win-
dow defroster.
Floor/Defrost-Level (A, C, E, D)
Most of the air flow is directed to the floorand the windshield with a small amount
directed to the side window defrosters.
OHD047068
Page 139 of 308
Features of your vehicle
84
4
How car audio works
AM and FM radio signals are broadcast
from transmitter towers located around your
city. They are intercepted by the radio anten-
na on your car. This signal is then received
by the radio and sent to your car speakers.
When a strong radio signal has reached
your vehicle, the precise engineering of
your audio system ensures the best pos-
sible quality reproduction. However, in
some cases the signal coming to your
vehicle may not be strong and clear. This
can be due to factors such as the dis-
tance from the radio station, closeness of
other strong radio stations or the pres-
ence of buildings, bridges or other large
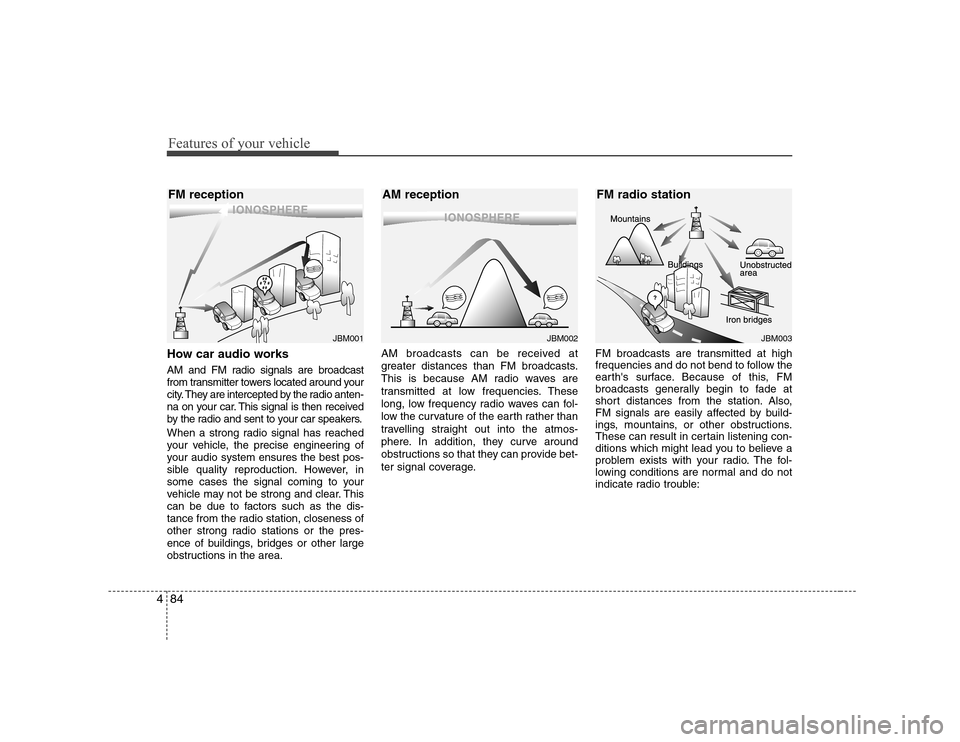
obstructions in the area. AM broadcasts can be received at
greater distances than FM broadcasts.
This is because AM radio waves are
transmitted at low frequencies. These
long, low frequency radio waves can fol-
low the curvature of the earth rather than
travelling straight out into the atmos-
phere. In addition, they curve around
obstructions so that they can provide bet-
ter signal coverage.
FM broadcasts are transmitted at high
frequencies and do not bend to follow the
earth's surface. Because of this, FM
broadcasts generally begin to fade at
short distances from the station. Also,
FM signals are easily affected by build-
ings, mountains, or other obstructions.
These can result in certain listening con-
ditions which might lead you to believe a
problem exists with your radio. The fol-
lowing conditions are normal and do not
indicate radio trouble:
¢¢¢
JBM001
¢¢¢¢¢¢
JBM002JBM003
FM reception AM reception FM radio station
Page 163 of 308
5
Before driving / 5-3 Key positions / 5-4
Starting the engine / 5-5Manual transaxle / 5-6Automatic transaxle / 5-9Brake system / 5-15
Cruise control system / 5-25Economical operation / 5-29Special driving conditions / 5-31
Winter driving / 5-34
Trailer towing / 5-38
Weight of the vehicle / 5-46
Driving your vehicle
Page 166 of 308
Driving your vehicle
4
5
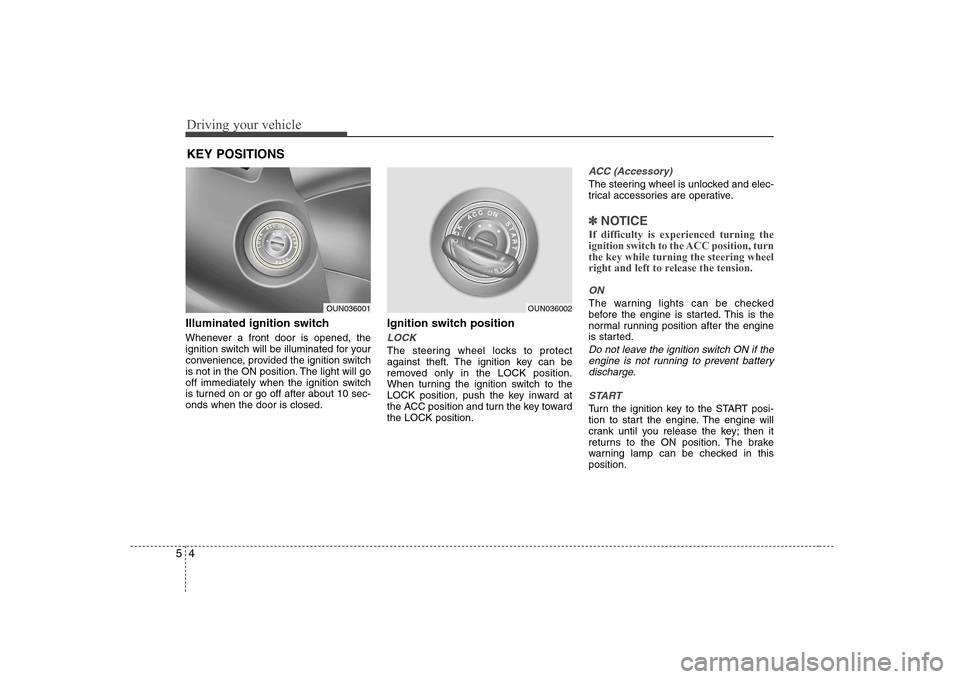
Illuminated ignition switch
Whenever a front door is opened, the
ignition switch will be illuminated for your
convenience, provided the ignition switch
is not in the ON position. The light will go
off immediately when the ignition switch
is turned on or go off after about 10 sec-onds when the door is closed. Ignition switch position
LOCK
The steering wheel locks to protect
against theft. The ignition key can be
removed only in the LOCK position.
When turning the ignition switch to the
LOCK position, push the key inward at
the ACC position and turn the key towardthe LOCK position.
ACC (Accessory)
The steering wheel is unlocked and elec-
trical accessories are operative.
✽✽
NOTICE
If difficulty is experienced turning the
ignition switch to the ACC position, turnthe key while turning the steering wheel
right and left to release the tension.
ON
The warning lights can be checked
before the engine is started. This is the
normal running position after the engine
is started.
Do not leave the ignition switch ON if the engine is not running to prevent batterydischarge.
START
Turn the ignition key to the START posi-
tion to start the engine. The engine will
crank until you release the key; then it
returns to the ON position. The brake
warning lamp can be checked in thisposition.
KEY POSITIONS
OUN036001OUN036002
Page 174 of 308
Driving your vehicle
12
5
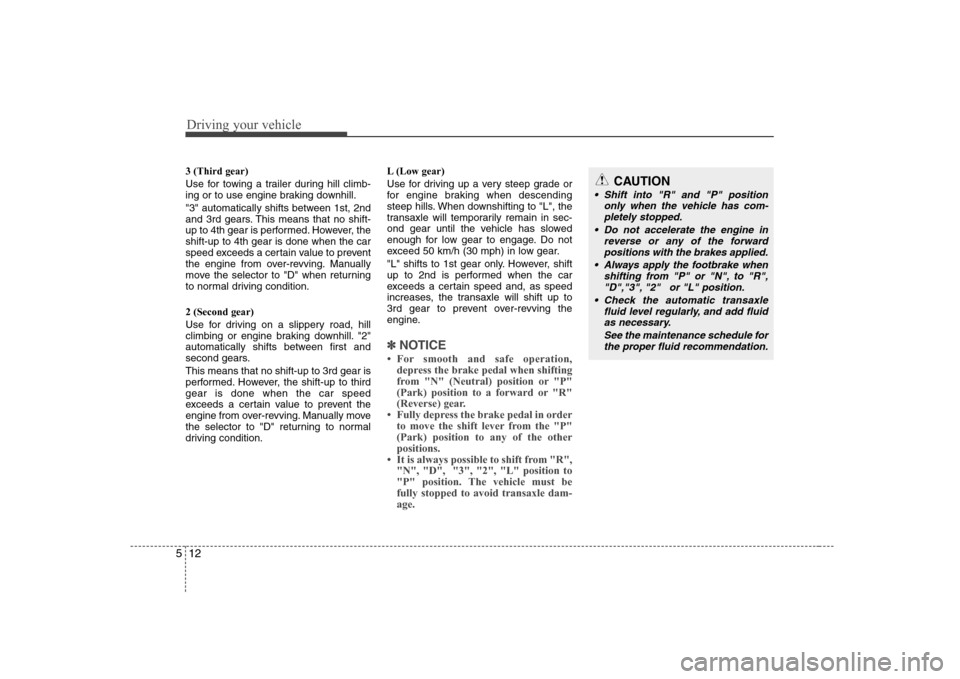
3 (Third gear)
Use for towing a trailer during hill climb-
ing or to use engine braking downhill.
"3" automatically shifts between 1st, 2nd
and 3rd gears. This means that no shift-
up to 4th gear is performed. However, theshift-up to 4th gear is done when the car
speed exceeds a certain value to prevent
the engine from over-revving. Manually
move the selector to "D" when returning
to normal driving condition. 2 (Second gear)
Use for driving on a slippery road, hill
climbing or engine braking downhill. "2"
automatically shifts between first and
second gears. This means that no shift-up to 3rd gear is
performed. However, the shift-up to thirdgear is done when the car speed
exceeds a certain value to prevent the
engine from over-revving. Manually move
the selector to "D" returning to normal
driving condition. L (Low gear)
Use for driving up a very steep grade or
for engine braking when descending
steep hills. When downshifting to "L", the
transaxle will temporarily remain in sec-
ond gear until the vehicle has slowed
enough for low gear to engage. Do not
exceed 50 km/h (30 mph) in low gear.
"L" shifts to 1st gear only. However, shift
up to 2nd is performed when the car
exceeds a certain speed and, as speed
increases, the transaxle will shift up to
3rd gear to prevent over-revving the
engine.
✽✽
NOTICE
Page 193 of 308
531
Driving your vehicle
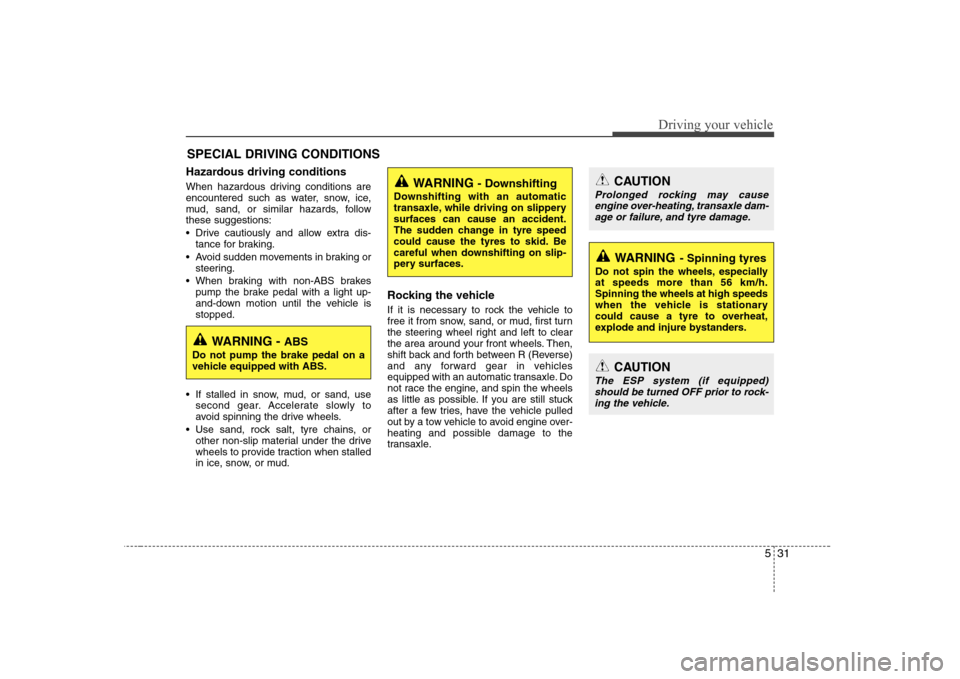
Hazardous driving conditions
When hazardous driving conditions are
encountered such as water, snow, ice,
mud, sand, or similar hazards, followthese suggestions:
Drive cautiously and allow extra dis-tance for braking.
Avoid sudden movements in braking or steering.
When braking with non-ABS brakes pump the brake pedal with a light up-
and-down motion until the vehicle isstopped.
If stalled in snow, mud, or sand, use second gear. Accelerate slowly to
avoid spinning the drive wheels.
Use sand, rock salt, tyre chains, or other non-slip material under the drive
wheels to provide traction when stalled
in ice, snow, or mud. Rocking the vehicle
If it is necessary to rock the vehicle to
free it from snow, sand, or mud, first turn
the steering wheel right and left to clear
the area around your front wheels. Then,
shift back and forth between R (Reverse)
and any forward gear in vehicles
equipped with an automatic transaxle. Do
not race the engine, and spin the wheels
as little as possible. If you are still stuck
after a few tries, have the vehicle pulled
out by a tow vehicle to avoid engine over-
heating and possible damage to the
transaxle.
SPECIAL DRIVING CONDITIONS
WARNING
- Downshifting
Downshifting with an automatic
transaxle, while driving on slipperysurfaces can cause an accident.
The sudden change in tyre speed
could cause the tyres to skid. Be
careful when downshifting on slip-
pery surfaces.
WARNING - ABS
Do not pump the brake pedal on a
vehicle equipped with ABS.
CAUTION
Prolonged rocking may cause engine over-heating, transaxle dam-age or failure, and tyre damage.
CAUTION
The ESP system (if equipped)
should be turned OFF prior to rock-ing the vehicle.
WARNING - Spinning tyres
Do not spin the wheels, especially at speeds more than 56 km/h.Spinning the wheels at high speeds
when the vehicle is stationary
could cause a tyre to overheat,
explode and injure bystanders.
Page 199 of 308
537
Driving your vehicle
Don't let your hand brake freeze
Under some conditions your hand brake
can freeze in the engaged position. This
is most likely to happen when there is an
accumulation of snow or ice around or
near the rear brakes or if the brakes are
wet. If there is a risk the hand brake may
freeze, apply it only temporarily while you
put the gear selector lever in P (automat-
ic transaxle) or in first or reverse gear
(manual transaxle) and block the rear
wheels so the car cannot roll. Then
release the hand brake.
Don't let ice and snow accumu- late underneath
Under some conditions, snow and ice
can build up under the fenders and inter-
fere with the steering. When driving in
severe winter conditions where this may
happen, you should periodically check
underneath the car to be sure the move-
ment of the front wheels and the steering
components is not obstructed.Carry emergency equipment
Depending on the severity of the weath-
er where you drive your car, you should
carry appropriate emergency equipment.
Some of the items you may want to carry
include tyre chains, tow straps or chains,
flashlight, emergency flares, sand, a
shovel, jumper cables, a window scraper,
gloves, ground cloth, coveralls, a blanket,etc.
Page 200 of 308
Driving your vehicle
38
5
If you are considering towing your car,
you should first check with your country's
Department of Motor Vehicles to deter-
mine their legal requirements.
Since laws vary the requirements for tow-
ing trailers, cars, or other types of vehi-
cles or apparatus may differ. Ask an
authorised Hyundai dealer for further
details before towing.
Your vehicle can tow a trailer. To identify
what the vehicle trailering capacity is for
your vehicle, you should read the infor-
mation in “Weight of the trailer” thatappears later in this section.
Remember that trailering is different than
just driving your vehicle by itself.
Trailering means changes in handling,
durability, and fuel economy. Successful,
safe trailering requires correct equip-
ment, and it has to be used properly.This section contains many time-tested,
important trailering tips and safety rules.
Many of these are important for your
safety and that of your passengers.
Please read this section carefully before
you pull a trailer. Load-pulling components such as the
engine, transaxle, wheel assemblies, and
tyres are forced to work harder against
the load of the added weight. The engine
is required to operate at relatively higher
speeds and under greater loads. This
additional burden generates extra heat.
The trailer also adds considerably to
wind resistance, increasing the pulling
requirements.
TRAILER TOWING
WARNING
- Towing a trail-
er
If you don't use the correct equip-
ment and drive improperly, you can
lose control when you pull a trailer.
For example, if the trailer is too
heavy, the brakes may not work
well - or even at all. You and your
passengers could be seriously or
fatally injured. Pull a trailer only if
you have followed all the steps inthis section.
WARNING - Weight limits
Before towing, make sure the total
trailer weight, gross combination
weight, gross vehicle weight, grossaxle weight and trailer tongue loadare all within the limits.
CAUTION
Pulling a trailer improperly can damage your vehicle and result incostly repairs not covered by your warranty. To pull a trailer correctly,
follow the advice in this section.