Hyundai Elantra 2012 Owner's Manual - RHD (UK. Australia)
Manufacturer: HYUNDAI, Model Year: 2012, Model line: Elantra, Model: Hyundai Elantra 2012Pages: 384, PDF Size: 26.92 MB
Page 311 of 384
Maintenance
24
7
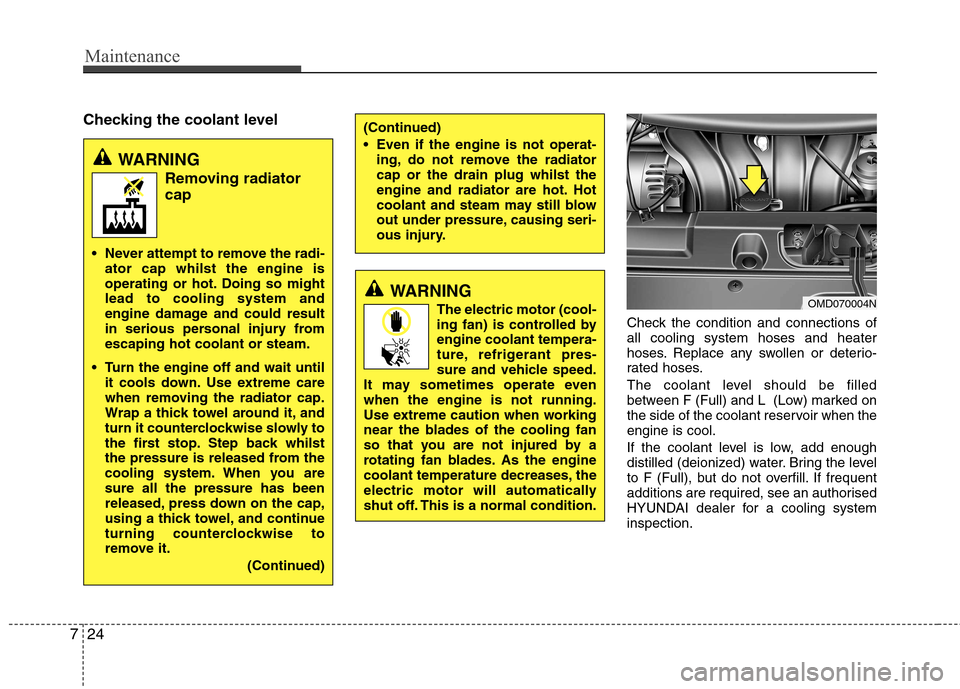
Checking the coolant level
Check the condition and connections of all cooling system hoses and heater
hoses. Replace any swollen or deterio-
rated hoses.
The coolant level should be filled
between F (Full) and L (Low) marked on
the side of the coolant reservoir when theengine is cool.
If the coolant level is low, add enough
distilled (deionized) water. Bring the level
to F (Full), but do not overfill. If frequent
additions are required, see an authorised
HYUNDAI dealer for a cooling systeminspection.
WARNING The electric motor (cool-
ing fan) is controlled byengine coolant tempera-
ture, refrigerant pres-
sure and vehicle speed.
It may sometimes operate evenwhen the engine is not running.
Use extreme caution when working
near the blades of the cooling fan
so that you are not injured by a
rotating fan blades. As the engine
coolant temperature decreases, the
electric motor will automatically
shut off. This is a normal condition.
(Continued)
Even if the engine is not operat- ing, do not remove the radiator cap or the drain plug whilst the
engine and radiator are hot. Hot
coolant and steam may still blow
out under pressure, causing seri-
ous injury.
OMD070004N
WARNING
Removing radiatorcap
Never attempt to remove the radi- ator cap whilst the engine is
operating or hot. Doing so mightlead to cooling system and
engine damage and could result
in serious personal injury fromescaping hot coolant or steam.
Turn the engine off and wait until it cools down. Use extreme care
when removing the radiator cap.
Wrap a thick towel around it, and
turn it counterclockwise slowly to
the first stop. Step back whilst
the pressure is released from the
cooling system. When you aresure all the pressure has been
released, press down on the cap,
using a thick towel, and continue
turning counterclockwise to
remove it.
(Continued)
Page 312 of 384
725
Maintenance
Recommended engine coolant
Use only soft (distilled) water in thecoolant mixture.
The engine in your vehicle has alu- minum engine parts and must be pro-
tected by an ethylene-glycol-based
coolant to prevent corrosion and freez-ing.
DO NOT USE alcohol or methanol coolant or mix them with the specifiedcoolant.
Do not use a solution that contains more than 60% antifreeze or less than
35% antifreeze, which would reduce
the effectiveness of the solution.
For mixture percentage, refer to the fol-
lowing table. Changing the coolant
Have the coolant changed by an autho-
rised HYUNDAI dealer according to theMaintenance Schedule at the beginningof this section.
CAUTION
Put a thick cloth or fabric around
the radiator cap before refilling thecoolant in order to prevent the coolant from overflowing into
engine parts such as the alternator.
WARNING - Coolant
Do not use radiator coolant or antifreeze in the washer fluid
reservoir.
Radiator coolant can severely obscure visibility when sprayed
on the windscreen and may
cause loss of vehicle control or
damage to paint and body trim.
WARNING
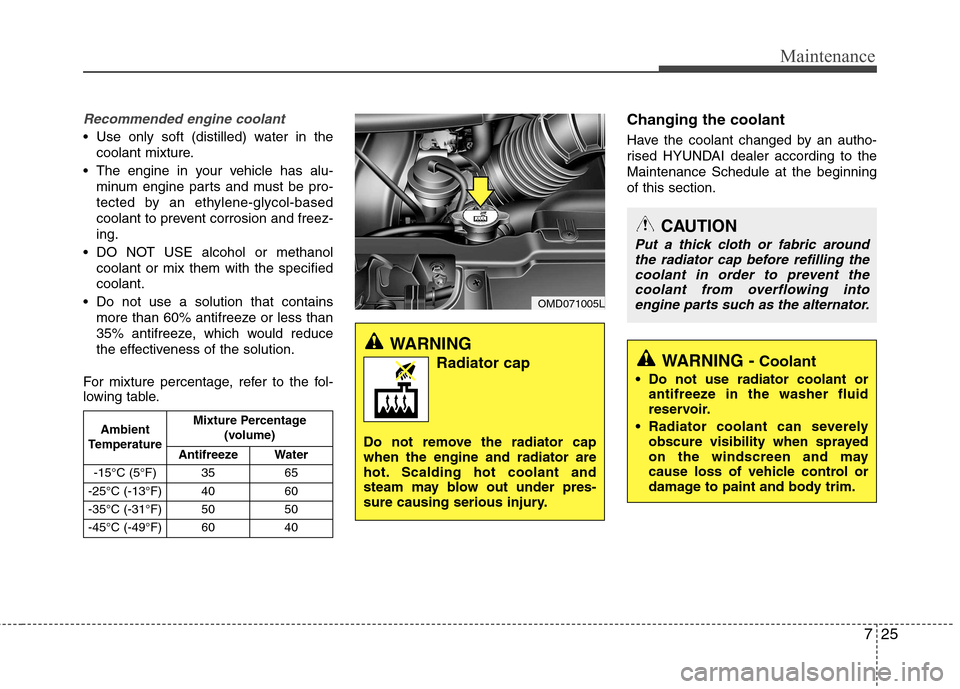
Radiator cap
Do not remove the radiator cap when the engine and radiator are
hot. Scalding hot coolant and
steam may blow out under pres-
sure causing serious injury.
OMD071005L
Ambient
Temperature Mixture Percentage
(volume)
Antifreeze Water
-15°C (5°F) 35 65
-25°C (-13°F) 40 60
-35°C (-31°F) 50 50
-45°C (-49°F) 60 40
Page 313 of 384
Maintenance
26
7
BRAKE/CLUTCH FLUID (IF EQUIPPED)
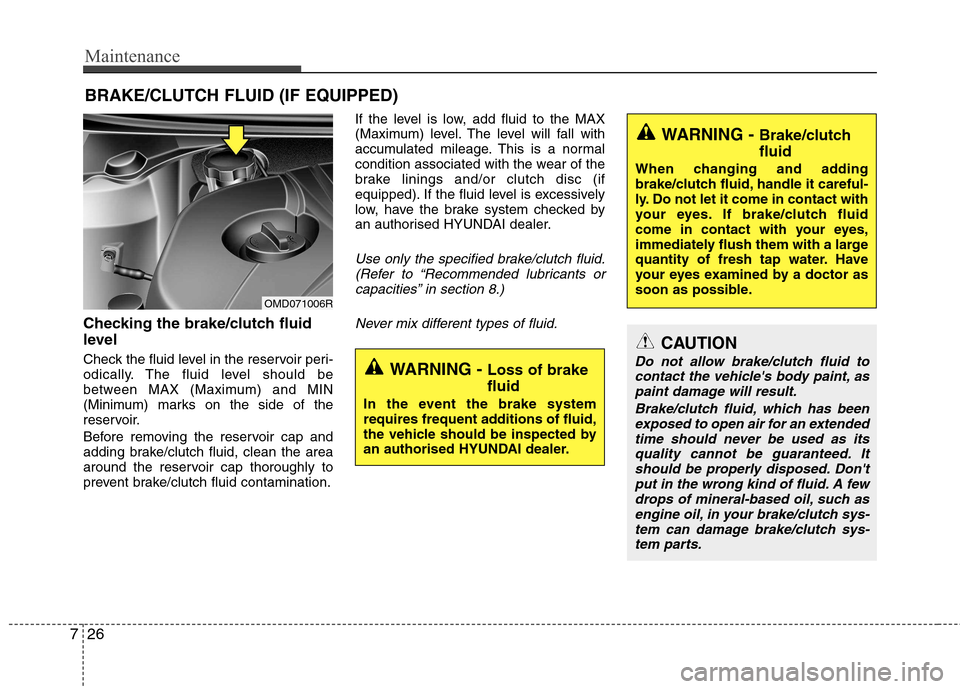
Checking the brake/clutch fluid
level
Check the fluid level in the reservoir peri-
odically. The fluid level should be
between MAX (Maximum) and MIN
(Minimum) marks on the side of the
reservoir.
Before removing the reservoir cap and
adding brake/clutch fluid, clean the area
around the reservoir cap thoroughly to
prevent brake/clutch fluid contamination. If the level is low, add fluid to the MAX
(Maximum) level. The level will fall with
accumulated mileage. This is a normal
condition associated with the wear of the
brake linings and/or clutch disc (if
equipped). If the fluid level is excessively
low, have the brake system checked by
an authorised HYUNDAI dealer.
Use only the specified brake/clutch fluid.
(Refer to “Recommended lubricants or
capacities” in section 8.)
Never mix different types of fluid.
WARNING - Loss of brake fluid
In the event the brake system
requires frequent additions of fluid,
the vehicle should be inspected by
an authorised HYUNDAI dealer.
WARNING - Brake/clutch fluid
When changing and adding
brake/clutch fluid, handle it careful-
ly. Do not let it come in contact with
your eyes. If brake/clutch fluid
come in contact with your eyes,
immediately flush them with a large
quantity of fresh tap water. Have
your eyes examined by a doctor as
soon as possible.
CAUTION
Do not allow brake/clutch fluid to contact the vehicle's body paint, as
paint damage will result.
Brake/clutch fluid, which has beenexposed to open air for an extendedtime should never be used as its quality cannot be guaranteed. It
should be properly disposed. Don'tput in the wrong kind of fluid. A few drops of mineral-based oil, such asengine oil, in your brake/clutch sys-
tem can damage brake/clutch sys-tem parts.
OMD071006R
Page 314 of 384
727
Maintenance
WASHER FLUID
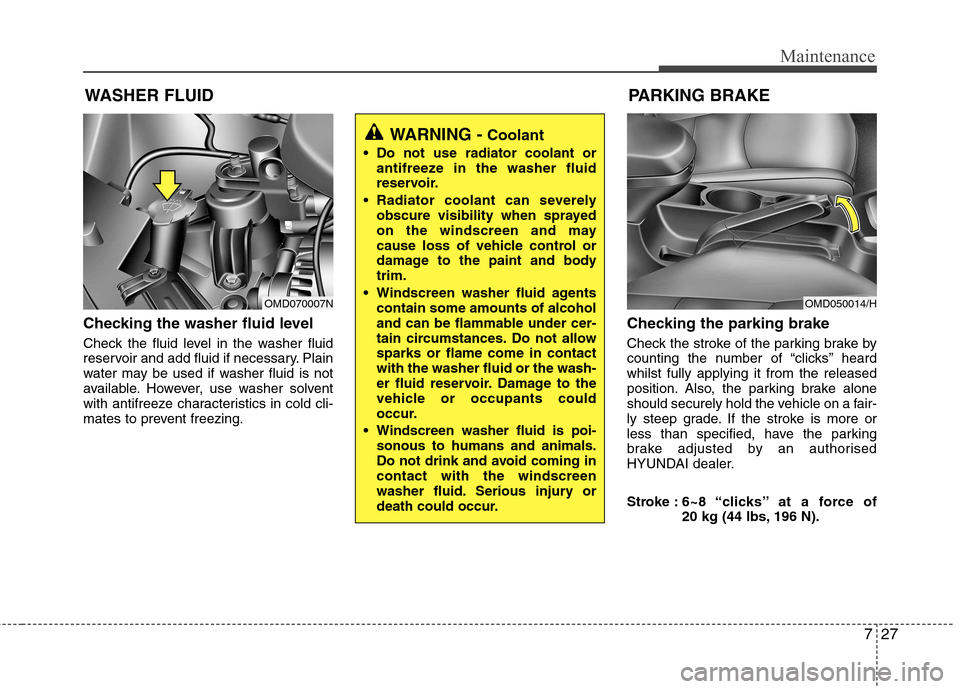
Checking the washer fluid level
Check the fluid level in the washer fluid
reservoir and add fluid if necessary. Plain
water may be used if washer fluid is not
available. However, use washer solvent
with antifreeze characteristics in cold cli-
mates to prevent freezing. Checking the parking brake
Check the stroke of the parking brake by
counting the number of “clicks’’ heardwhilst fully applying it from the released
position. Also, the parking brake alone
should securely hold the vehicle on a fair-
ly steep grade. If the stroke is more or
less than specified, have the parking
brake adjusted by an authorised
HYUNDAI dealer.
Stroke :
6~8 “clicks’’ at a force of
20 kg (44 lbs, 196 N).
PARKING BRAKE
WARNING -
Coolant
Do not use radiator coolant or antifreeze in the washer fluid
reservoir.
Radiator coolant can severely obscure visibility when sprayed
on the windscreen and may
cause loss of vehicle control or
damage to the paint and bodytrim.
Windscreen washer fluid agents contain some amounts of alcohol
and can be flammable under cer-
tain circumstances. Do not allowsparks or flame come in contactwith the washer fluid or the wash-
er fluid reservoir. Damage to the
vehicle or occupants could
occur.
Windscreen washer fluid is poi- sonous to humans and animals.
Do not drink and avoid coming incontact with the windscreen
washer fluid. Serious injury or
death could occur.
OMD070007NOMD050014/H
Page 315 of 384
Maintenance
28
7
AIR CLEANER
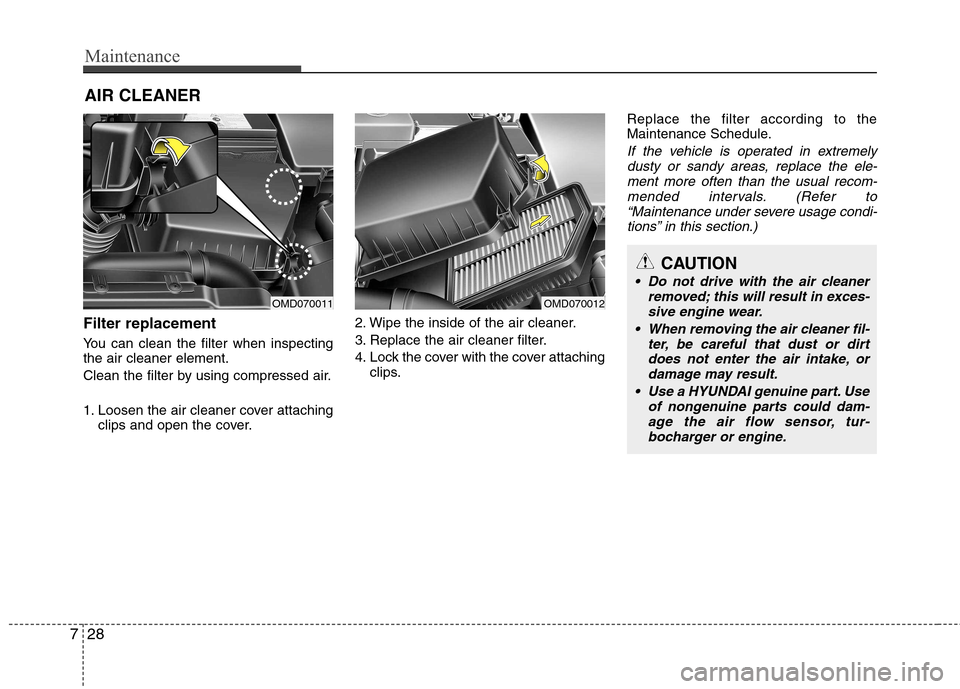
Filter replacement
You can clean the filter when inspecting the air cleaner element.
Clean the filter by using compressed air.
1. Loosen the air cleaner cover attaching clips and open the cover. 2. Wipe the inside of the air cleaner.
3. Replace the air cleaner filter.
4. Lock the cover with the cover attaching
clips. Replace the filter according to the
Maintenance Schedule.
If the vehicle is operated in extremely
dusty or sandy areas, replace the ele- ment more often than the usual recom-
mended intervals. (Refer to“Maintenance under severe usage condi- tions” in this section.)
CAUTION
Do not drive with the air cleaner removed; this will result in exces-sive engine wear.
When removing the air cleaner fil- ter, be careful that dust or dirt
does not enter the air intake, ordamage may result.
Use a HYUNDAI genuine part. Use of nongenuine parts could dam-age the air flow sensor, tur-
bocharger or engine.
OMD070011OMD070012
Page 316 of 384
729
Maintenance
CLIMATE CONTROL AIR FILTER (IF EQUIPPED)
Filter inspection
If the vehicle is operated in the severely air-polluted cities or on dusty rough
roads for a long period, it should beinspected more frequently and replaced
earlier. When replacing the climate con-
trol air filter, replace it performing the fol-
lowing procedure, and be careful to avoid
damaging other components. Replace the filter according to the main-
tenance Schedule.
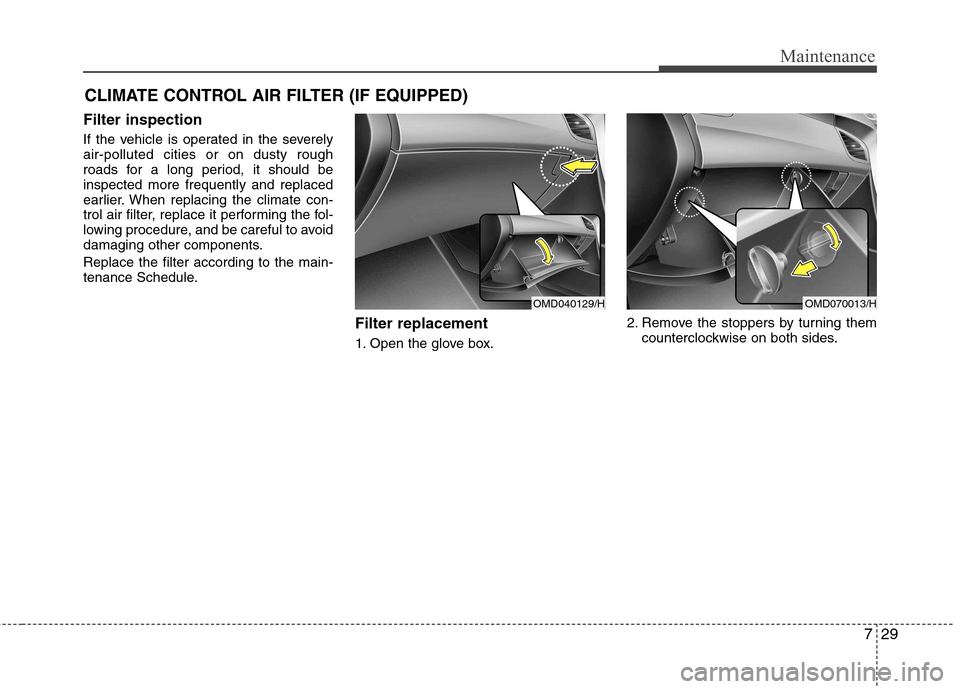
Filter replacement
1. Open the glove box.2. Remove the stoppers by turning them
counterclockwise on both sides.
OMD070013/HOMD040129/H
Page 317 of 384
Maintenance
30
7
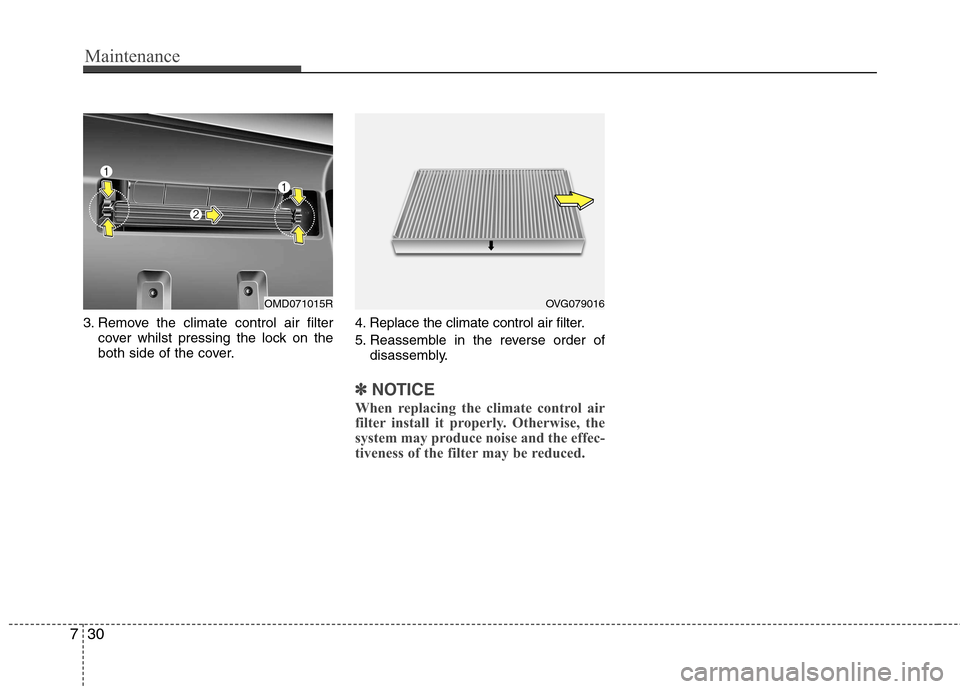
3. Remove the climate control air filter
cover whilst pressing the lock on the
both side of the cover. 4. Replace the climate control air filter.
5. Reassemble in the reverse order of
disassembly.
✽✽ NOTICE
When replacing the climate control air
filter install it properly. Otherwise, the
system may produce noise and the effec-
tiveness of the filter may be reduced.
OMD071015ROVG079016
Page 318 of 384
731
Maintenance
WIPER BLADES
CAUTION
To prevent damage to the wiperarms or other components, do not
attempt to move the wipers manual-ly.
CAUTION
The use of a non-specified wiperblade could result in wiper malfunc- tion and failure.Blade inspection
✽✽ NOTICE
Commercial hot waxes applied by auto-
matic car washes have been known to
make the windscreen difficult to clean.
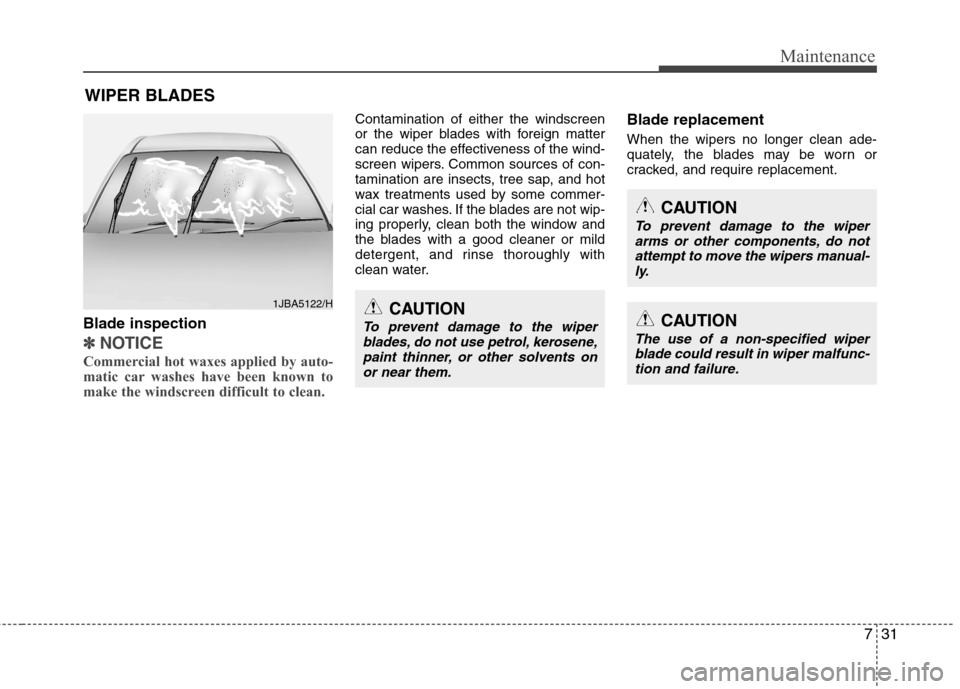
Contamination of either the windscreen
or the wiper blades with foreign matter
can reduce the effectiveness of the wind-
screen wipers. Common sources of con-
tamination are insects, tree sap, and hot
wax treatments used by some commer-
cial car washes. If the blades are not wip-
ing properly, clean both the window and
the blades with a good cleaner or mild
detergent, and rinse thoroughly with
clean water. Blade replacement When the wipers no longer clean ade-
quately, the blades may be worn or
cracked, and require replacement.
1JBA5122/HCAUTION
To prevent damage to the wiper
blades, do not use petrol, kerosene,paint thinner, or other solvents on
or near them.
Page 319 of 384
Maintenance
32
7
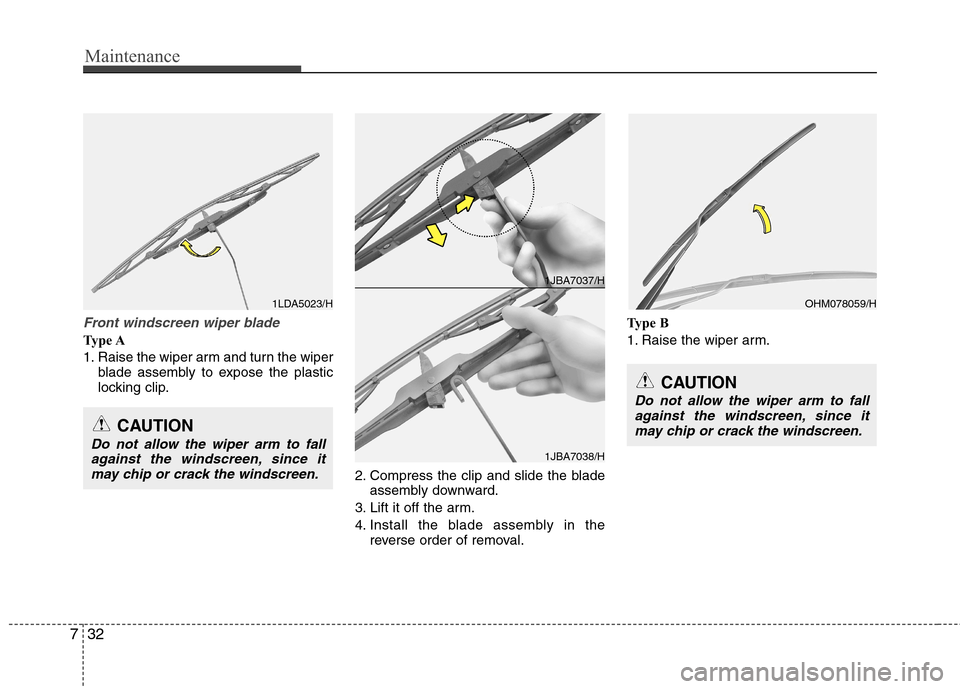
Front windscreen wiper blade
Type A
1. Raise the wiper arm and turn the wiper
blade assembly to expose the plastic
locking clip.
2. Compress the clip and slide the bladeassembly downward.
3. Lift it off the arm.
4. Install the blade assembly in the reverse order of removal. Type B
1. Raise the wiper arm.
1LDA5023/H
CAUTION
Do not allow the wiper arm to fall
against the windscreen, since itmay chip or crack the windscreen.
1JBA7037/H
1JBA7038/H
OHM078059/H
CAUTION
Do not allow the wiper arm to fallagainst the windscreen, since it
may chip or crack the windscreen.
Page 320 of 384
733
Maintenance
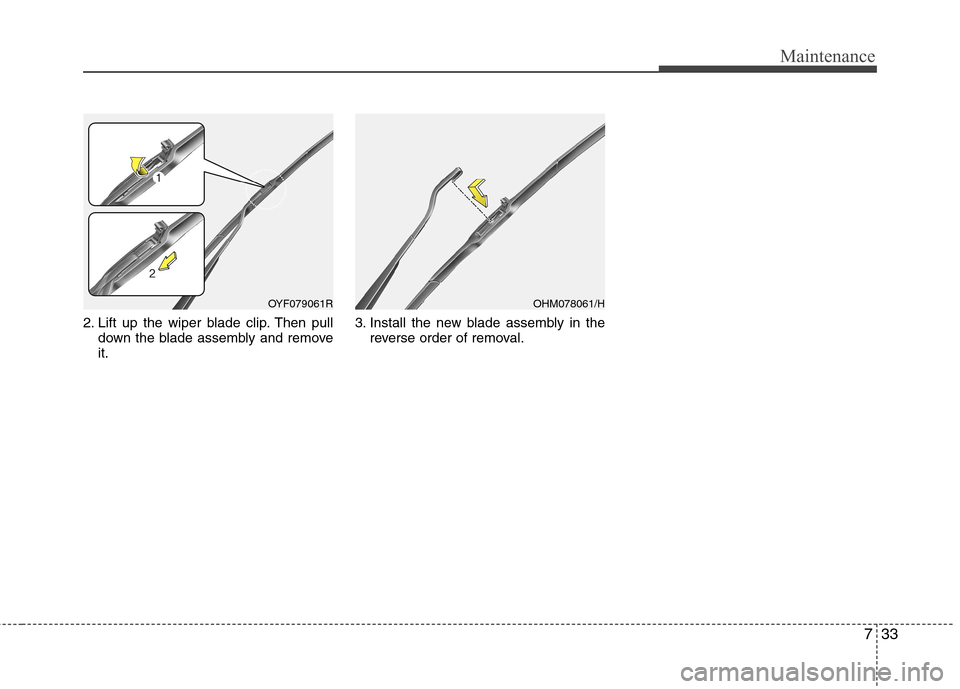
2. Lift up the wiper blade clip. Then pulldown the blade assembly and remove it. 3. Install the new blade assembly in the
reverse order of removal.
OYF079061ROHM078061/H