manual trans Hyundai Elantra 2016 Owner's Manual
[x] Cancel search | Manufacturer: HYUNDAI, Model Year: 2016, Model line: Elantra, Model: Hyundai Elantra 2016Pages: 669, PDF Size: 31.96 MB
Page 4 of 669
F4
FOREWORD
Thank you for choosing HYUNDAI. We are pleased to welcome you to the growing number of discriminating people who
drive HYUNDAI. The advanced engineering and high-quality construction of each HYUNDAI we build is something of
which we're very proud.
Your Owner's Manual will introduce you to the features and operation of your new HYUNDAI. It is suggested that you
read it carefully because the information it contains can contribute greatly to the satisfaction you receive from your new
car.
The manufacturer also recommends that all service and maintenance on your car be performed by an authorized
HYUNDAI dealer. HYUNDAI dealers are prepared to provide high-quality service, maintenance and any other assistance
that may be required.
HYUNDAI MOTOR AMERICA
Note: Because future owners will also need the information included in this manual, if you sell this HYUNDAI, please
leave the manual in the vehicle for their use. Thank you.
Copyright 2015 HYUNDAI Motor America. All rights reserved. No part of this publication may be reproduced, stored
in any retrieval system or transmitted in any form or by any means without the prior written permission of HYUNDAI
Motor America.
CAUTION
Severe engine and transaxle damage may result from the use of poor quality fuels and lubricants that do not meet HYUNDAI specifications. You must always use high quality fuels and lubricants that meet the spec-ifications listed on Page 8-4 in the Vehicle Specifications section of the Owner's Manual.
Page 7 of 669
1
2
3
4
5
6
7
8I
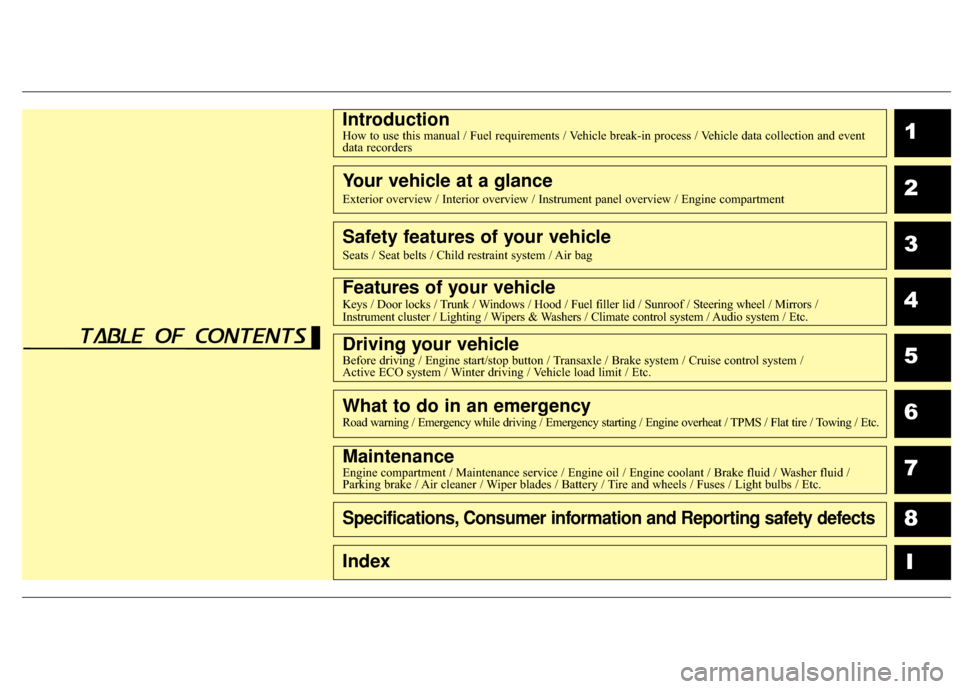
IntroductionHow to use this manual / Fuel requirements / Vehicle break-in process / Vehicle data collection and eventdata recorders
Your vehicle at a glance
Exterior overview / Interior overview / Instrument panel overview / Engi\
ne compartment
Safety features of your vehicle
Seats / Seat belts / Child restraint system / Air bag
Features of your vehicleKeys / Door locks / Trunk / Windows / Hood / Fuel filler lid / Sunroof / Steering wheel / Mirrors /
Instrument cluster / Lighting / Wipers & Washers / Climate control system / Audio system / Etc.
Driving your vehicleBefore driving / Engine start/stop button / Transaxle / Brake system / Cruise control system /
Active ECO system / Winter driving / Vehicle load limit / Etc.
What to do in an emergencyRoad warning / Emergency while driving / Emergency starting / Engine overheat / TPMS / Flat tire / Towing / Etc.
MaintenanceEngine compartment / Maintenance service / Engine oil / Engine coolant /\
Brake fluid / Washer fluid /
Parking brake / Air cleaner / Wiper blades / Battery / Tire and wheels / Fuses / Light bulbs / Etc.
Specifications, Consumer information and Reporting safety defects
Index
table of contents
Page 104 of 669
Features of your vehicle
18
4
Auto door lock/unlock features
Impact sensing door unlock sys-
tem (if equipped)
All doors will be automatically
unlocked when an impact causes the
air bags to deploy.
Speed sensing door lock system(if equipped)
All doors will be automatically locked
when vehicle speed exceeds 9 mph
(15 km/h).
WARNING - Always
secure your vehicle
Leaving your vehicle unlocked
increases the potential risk to
you or others from someone
hiding in your vehicle.
To secure your vehicle, while
depressing the brake, move the
shift lever to the P (Park) posi-
tion (for automatic transaxle) or
first gear or R (Reverse, for
manual transaxle), engage the
parking brake, and place the
ignition switch in the LOCK/OFF
position, close all windows,
lock all doors, and always take
the key with you.WARNING
Opening a door when something
is approaching may cause dam-
age or injury. Be careful when
opening doors and watch for
vehicles, motorcycles, bicycles
or pedestrians approaching the
vehicle in the path of the door.
Page 107 of 669
421
Features of your vehicle
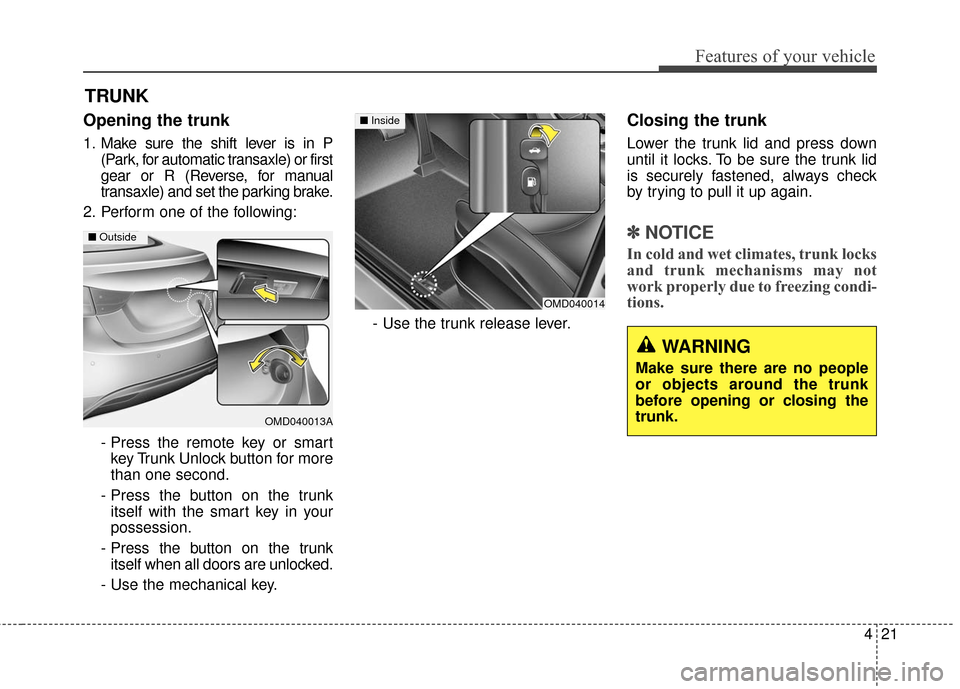
Opening the trunk
1. Make sure the shift lever is in P(Park, for automatic transaxle) or first
gear or R (Reverse, for manual
transaxle) and set the parking brake.
2. Perform one of the following:
- Press the remote key or smartkey Trunk Unlock button for more
than one second.
- Press the button on the trunk itself with the smart key in your
possession.
- Press the button on the trunk itself when all doors are unlocked.
- Use the mechanical key. - Use the trunk release lever.
Closing the trunk
Lower the trunk lid and press down
until it locks. To be sure the trunk lid
is securely fastened, always check
by trying to pull it up again.
✽ ✽
NOTICE
In cold and wet climates, trunk locks
and trunk mechanisms may not
work properly due to freezing condi-
tions.
TRUNK
OMD040013A
■ Outside
WARNING
Make sure there are no people
or objects around the trunk
before opening or closing the
trunk.
OMD040014
■ Inside
Page 115 of 669
429
Features of your vehicle
Opening the hood
1. Make sure the shift lever is in P(Park, for automatic transaxle) or
first gear or R (Reverse, for manual
transaxle) and set the parking
brake.
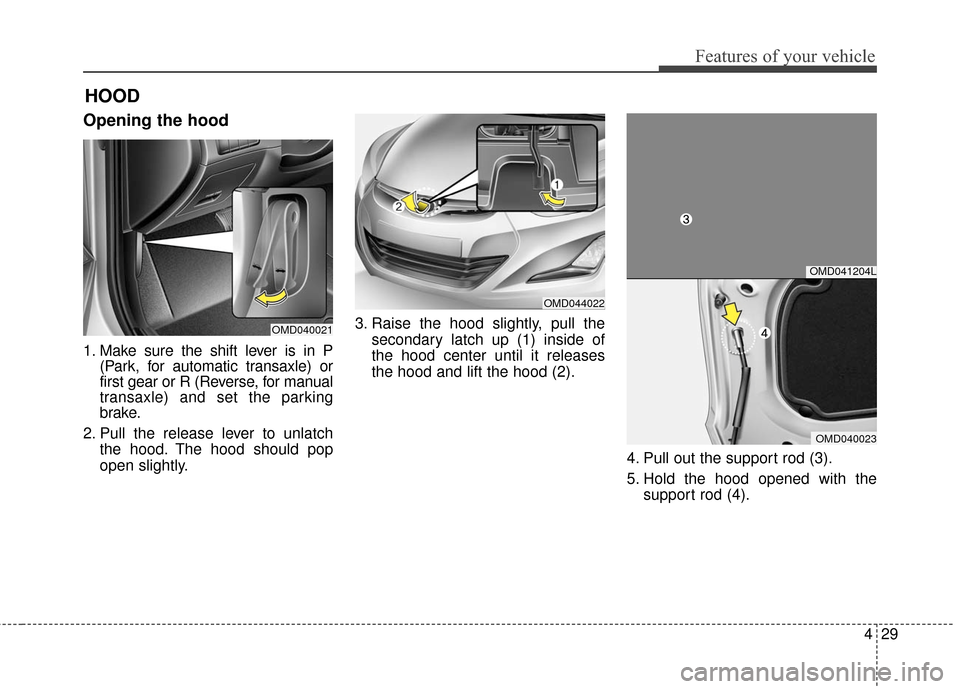
2. Pull the release lever to unlatch the hood. The hood should pop
open slightly. 3. Raise the hood slightly, pull the
secondary latch up (1) inside of
the hood center until it releases
the hood and lift the hood (2).
4. Pull out the support rod (3).
5. Hold the hood opened with thesupport rod (4).
HOOD
OMD040021
OMD041204L
OMD040023
OMD044022
Page 119 of 669
433
Features of your vehicle
✽
✽NOTICE
• Make sure to refuel your
vehicle according to the "Fuel
Requirements" suggested in chap-
ter 1.
• Do not spill fuel on the exterior surfaces of the vehicle. Any type of
fuel spilled on painted surfaces
may damage the paint.(Continued)
When refueling, always move
the shift lever to the P (Park)
position (for automatic
transaxle) or first gear or R
(Reverse, for manual transaxle),
set the parking brake, and place
the ignition switch to the
LOCK/OFF position. Sparks
produced by electrical compo-
nents related to the engine can
ignite fuel vapors causing a fire.
Do not use matches or a lighter and do not smoke or
leave a lit cigarette in your
vehicle while at a gas station,
especially during refueling.
Do not over-fill or top-off your vehicle tank, which can cause
gasoline spillage.
(Continued)(Continued)
If a fire breaks out during refu-eling, leave the vicinity of the
vehicle, and immediately con-
tact the manager of the gas
station and then contact the
local fire department. Follow
any safety instructions they
provide.
If pressurized fuel sprays out, it can cover your clothes or
skin and thus subject you to
the risk of fire and burns.
Always remove the fuel cap
carefully and slowly. If the cap
is venting fuel or if you hear a
hissing sound, wait until the
condition stops before com-
pletely removing the cap.
Always check that the fuel cap is installed securely to pre-
vent fuel spillage in the event
of an accident.
CAUTION
If the fuel filler cap requiresreplacement, use only a genuineHYUNDAI cap or the equivalentspecified for your vehicle. Anincorrect fuel filler cap canresult in a serious malfunctionof the fuel system or emissioncontrol system.
Page 131 of 669
445
Features of your vehicle
Programming HomeLink®
Please note the following:
When programming a garage dooropener, it is advised to park the
vehicle outside of the garage.
It is recommended that a new bat- tery be placed in the hand-held
transmitter of the device being pro-
grammed to HomeLink
®for quicker
training and accurate transmission
of the radio-frequency signal.
Some vehicles may require the ignition switch to be placed in the
ACC (or "Accessories") position for
programming and/or operation of
HomeLink
®.
In the event that there are still pro- gramming difficulties or questions
after following the programming
steps listed below, contact
HomeLink
®at: www.homelink.com
or by calling 1-800-355-3515.
Rolling code programming
Rolling code devices which are
"code-protected" and manufactured
after 1996 may be determined by the
following:
Reference the device owner's manual for verification.
The handheld transmitter appears to program the HomeLink
®
Universal Transceiver but does not
activate the device.
Press and hold the trained HomeLink button. The device has
the rolling code feature if the indi-
cator light flashes rapidly and then
turns solid after 2 seconds. To train rolling code devices, follow
these instructions:
1. At the garage door opener receiv-
er (motor-head unit) in the garage,
locate the "learn" or "smart" but-
ton. This can usually be found
where the hanging antenna wire is
attached to the motor-head unit.
Exact location and color of the but-
ton may vary by garage door
opener brand. If there is difficulty
locating the training button, refer-
ence the device owner's manual or
please visit our Web site at
www.homelink.com.
2. Firmly press and release the "learn" or "smart" button (which
activates the "training light"). You
will have 30 seconds to initiate
step 3.
3. Return to the vehicle and firmly press, hold for two seconds and
then release the desired
HomeLink
®button. Repeat the
"press/hold/release" sequence a
second time to complete the pro-
gramming. (Some devices may
require you to repeat this
sequence a third time to complete
the programming.)
Page 145 of 669
459
Features of your vehicle
✽
✽NOTICE
• If the vehicle is not on level ground
or the battery power has been
interrupted, the “Distance to
empty” function may not operate
correctly.
The trip computer may not register
additional fuel if less than 1.6 gal-
lons (6 liters) of fuel are added to
the vehicle.
• The fuel consumption and dis- tance to empty values may vary
significantly based on driving con-
ditions, driving habits, and condi-
tion of the vehicle.
• The distance to empty value is an estimate of the available driving
distance. This value may differ
from the actual driving distance
available.
ECO ON/OFF mode (if equipped)
You can turn the Manual transaxle
shift indicator ON/OFF on the instru-
ment cluster in this mode.
If you push the RESET button for
more than 1 second in the ECO ON
mode, ECO OFF is displayed on the
screen and the Manual transaxle
shift indicator turns off while driving.
If you want to display the Manual
transaxle shift indicator again, press
the RESET button for more than 1
second in the ECO OFF mode and
then ECO ON mode is displayed in
the screen.
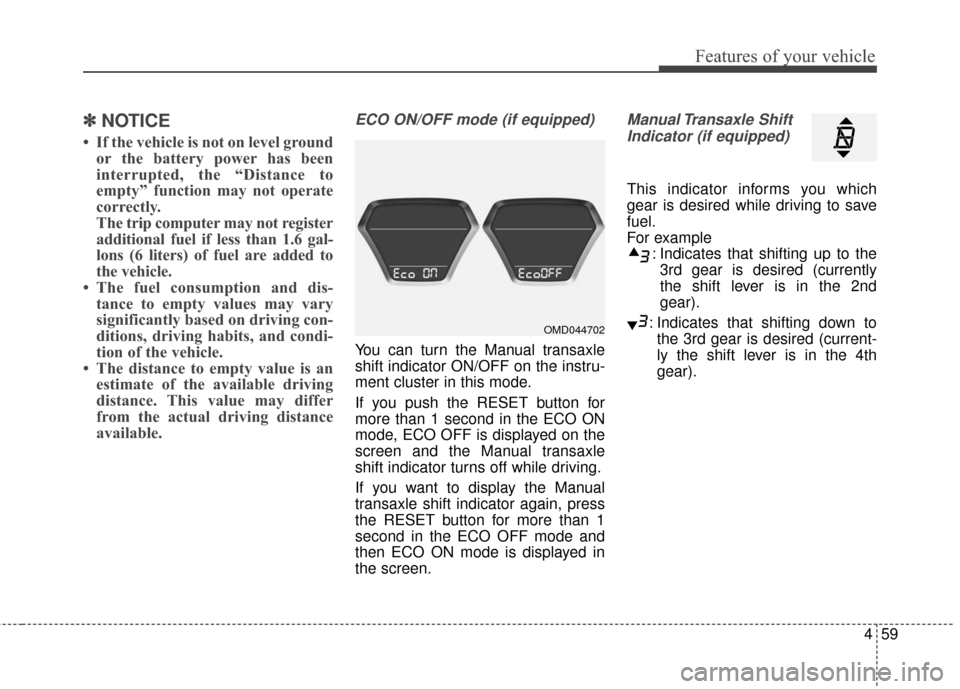
Manual Transaxle Shift
Indicator (if equipped)
This indicator informs you which
gear is desired while driving to save
fuel.
For example : Indicates that shifting up to the3rd gear is desired (currently
the shift lever is in the 2nd
gear).
: Indicates that shifting down to the 3rd gear is desired (current-
ly the shift lever is in the 4th
gear).
OMD044702
Page 217 of 669
4131
Features of your vehicle
✽
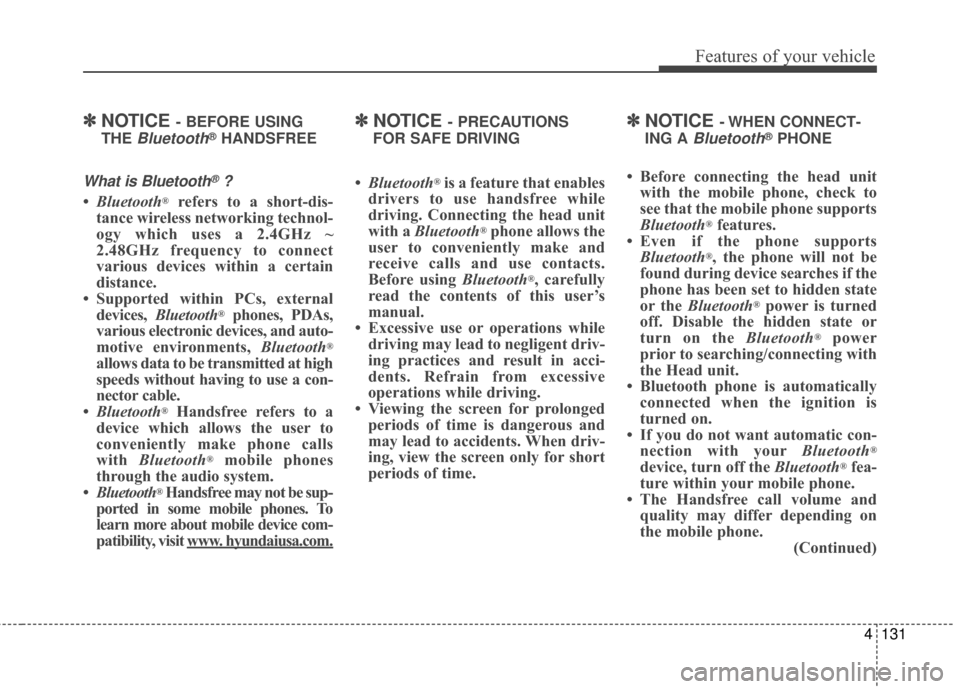
✽NOTICE - BEFORE USING
THE
Bluetooth®HANDSFREE
What is Bluetooth®?
• Bluetooth®refers to a short-dis-
tance wireless networking technol-
ogy which uses a 2.4GHz ~
2.48GHz frequency to connect
various devices within a certain
distance.
• Supported within PCs, external devices, Bluetooth
®phones, PDAs,
various electronic devices, and auto-
motive environments, Bluetooth
®
allows data to be transmitted at high
speeds without having to use a con-
nector cable.
• Bluetooth
®Handsfree refers to a
device which allows the user to
conveniently make phone calls
with Bluetooth
®mobile phones
through the audio system.
• Bluetooth
®Handsfree may not be sup-
ported in some mobile phones. To
learn more about mobile device com-
patibility, visit www
. hyundaiusa.com.
✽ ✽ NOTICE - PRECAUTIONS
FOR SAFE DRIVING
• Bluetooth®is a feature that enables
drivers to use handsfree while
driving. Connecting the head unit
with a Bluetooth
®phone allows the
user to conveniently make and
receive calls and use contacts.
Before using Bluetooth
®, carefully
read the contents of this user’s
manual.
• Excessive use or operations while driving may lead to negligent driv-
ing practices and result in acci-
dents. Refrain from excessive
operations while driving.
• Viewing the screen for prolonged periods of time is dangerous and
may lead to accidents. When driv-
ing, view the screen only for short
periods of time.
✽ ✽ NOTICE - WHEN CONNECT-
ING A
Bluetooth®PHONE
• Before connecting the head unit with the mobile phone, check to
see that the mobile phone supports
Bluetooth
®features.
• Even if the phone supports Bluetooth
®, the phone will not be
found during device searches if the
phone has been set to hidden state
or the Bluetooth
®power is turned
off. Disable the hidden state or
turn on the Bluetooth
®power
prior to searching/connecting with
the Head unit.
• Bluetooth phone is automatically connected when the ignition is
turned on.
• If you do not want automatic con- nection with your Bluetooth
®
device, turn off the Bluetooth®fea-
ture within your mobile phone.
• The Handsfree call volume and quality may differ depending on
the mobile phone. (Continued)
Page 458 of 669
Driving your vehicle
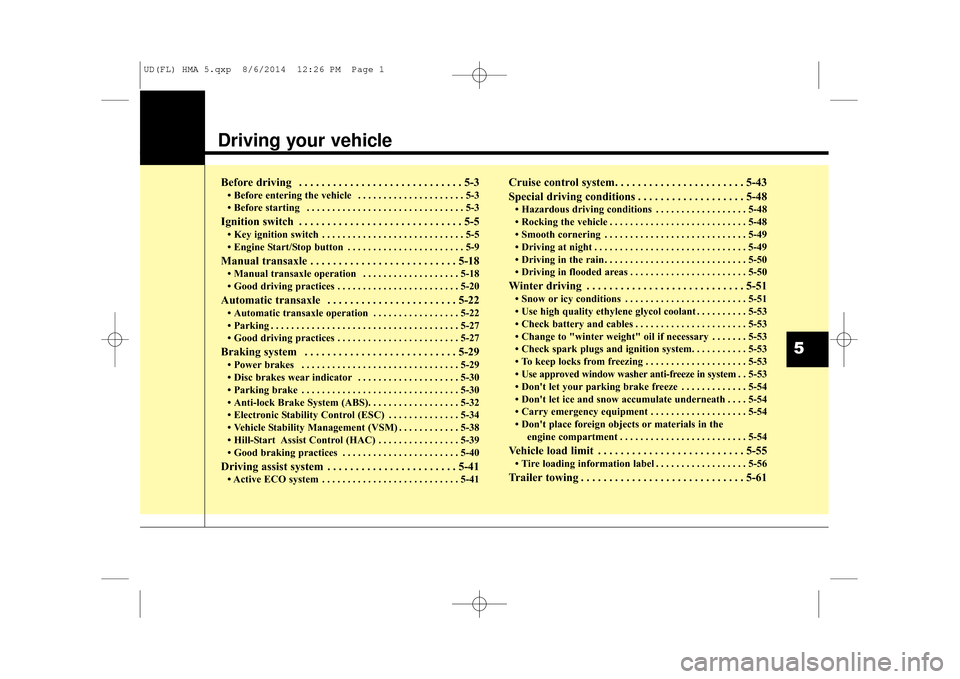
Before driving . . . . . . . . . . . . . . . . . . . . . . . . . . . . . 5-3
• Before entering the vehicle . . . . . . . . . . . . . . . . . . . . . 5-3
• Before starting . . . . . . . . . . . . . . . . . . . . . . . . . . . . . . . 5-3
Ignition switch . . . . . . . . . . . . . . . . . . . . . . . . . . . . . 5-5
• Key ignition switch . . . . . . . . . . . . . . . . . . . . . . . . . . . . 5-5
• Engine Start/Stop button . . . . . . . . . . . . . . . . . . . . . . . 5-9
Manual transaxle . . . . . . . . . . . . . . . . . . . . . . . . . . 5-18
• Manual transaxle operation . . . . . . . . . . . . . . . . . . . 5-18
• Good driving practices . . . . . . . . . . . . . . . . . . . . . . . . 5-20
Automatic transaxle . . . . . . . . . . . . . . . . . . . . . . . 5-22
• Automatic transaxle operation . . . . . . . . . . . . . . . . . 5-22
• Parking . . . . . . . . . . . . . . . . . . . . . . . . . . . . . . . . . . . . \
. 5-27
• Good driving practices . . . . . . . . . . . . . . . . . . . . . . . . 5-27
Braking system . . . . . . . . . . . . . . . . . . . . . . . . . . . 5-29
• Power brakes . . . . . . . . . . . . . . . . . . . . . . . . . . . . . . . 5-29
• Disc brakes wear indicator . . . . . . . . . . . . . . . . . . . . 5-30
• Parking brake . . . . . . . . . . . . . . . . . . . . . . . . . . . . . . . 5-30
• Anti-lock Brake System (ABS). . . . . . . . . . . . . . . . . . 5-32
• Electronic Stability Control (ESC) . . . . . . . . . . . . . . 5-34
• Vehicle Stability Management (VSM) . . . . . . . . . . . . 5-38
• Hill-Start Assist Control (HAC) . . . . . . . . . . . . . . . . 5-39
• Good braking practices . . . . . . . . . . . . . . . . . . . . . . . 5-40
Driving assist system . . . . . . . . . . . . . . . . . . . . . . . 5-41
• Active ECO system . . . . . . . . . . . . . . . . . . . . . . . . . . . 5-41
Cruise control system. . . . . . . . . . . . . . . . . . . . . . . 5-43
Special driving conditions . . . . . . . . . . . . . . . . . . . 5-48
• Hazardous driving conditions . . . . . . . . . . . . . . . . . . 5-48
• Rocking the vehicle . . . . . . . . . . . . . . . . . . . . . . . . . . . 5-48
• Smooth cornering . . . . . . . . . . . . . . . . . . . . . . . . . . . . 5-49
• Driving at night . . . . . . . . . . . . . . . . . . . . . . . . . . . . . . 5-49
• Driving in the rain . . . . . . . . . . . . . . . . . . . . . . . . . . . . 5-50
• Driving in flooded areas . . . . . . . . . . . . . . . . . . . . . . . 5-50
Winter driving . . . . . . . . . . . . . . . . . . . . . . . . . . . . 5-51
• Snow or icy conditions . . . . . . . . . . . . . . . . . . . . . . . . 5-51
• Use high quality ethylene glycol coolant . . . . . . . . . . 5-53
• Check battery and cables . . . . . . . . . . . . . . . . . . . . . . 5-53
• Change to "winter weight" oil if necessary . . . . . . . 5-53
• Check spark plugs and ignition system. . . . . . . . . . . 5-53
• To keep locks from freezing . . . . . . . . . . . . . . . . . . . . 5-53
• Use approved window washer anti-freeze in system . . 5-53
• Don't let your parking brake freeze . . . . . . . . . . . . . 5-54
• Don't let ice and snow accumulate underneath . . . . 5-54
• Carry emergency equipment . . . . . . . . . . . . . . . . . . . 5-54
• Don't place foreign objects or materials in the engine compartment . . . . . . . . . . . . . . . . . . . . . . . . . 5-54
Vehicle load limit . . . . . . . . . . . . . . . . . . . . . . . . . . 5-55
• Tire loading information label . . . . . . . . . . . . . . . . . . 5-56
Trailer towing . . . . . . . . . . . . . . . . . . . . . . . . . . . . . 5-61
5
UD(FL) HMA 5.qxp 8/6/2014 12:26 PM Page 1