HYUNDAI ENTOURAGE 2009 Repair Manual
Manufacturer: HYUNDAI, Model Year: 2009, Model line: ENTOURAGE, Model: HYUNDAI ENTOURAGE 2009Pages: 402, PDF Size: 9.08 MB
Page 61 of 402
345
Features of your vehicle
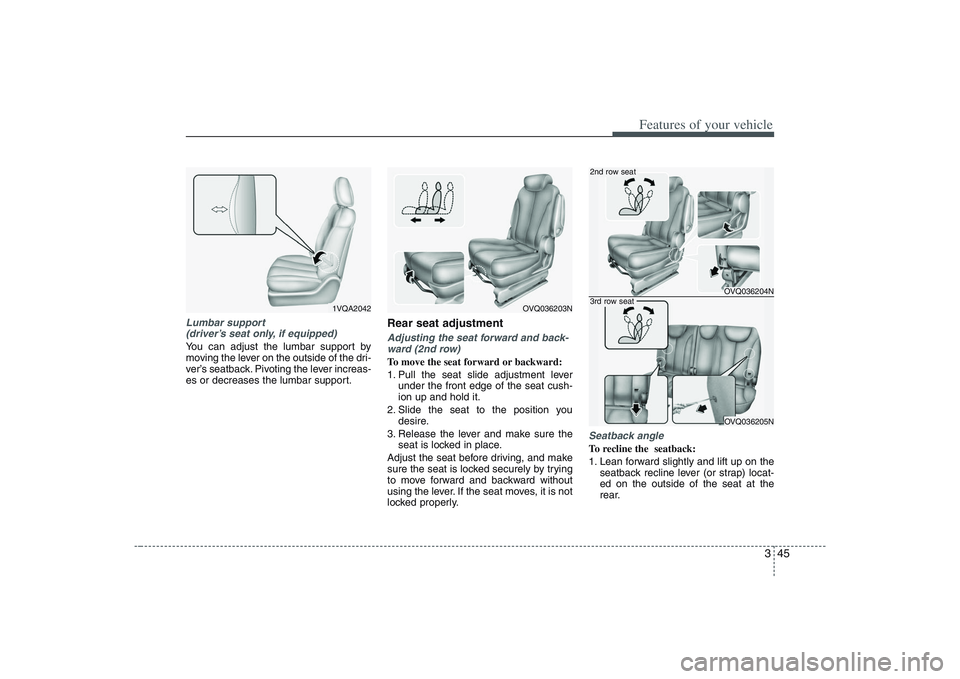
Lumbar support
(driver’s seat only, if equipped)You can adjust the lumbar support by
moving the lever on the outside of the dri-
ver’s seatback. Pivoting the lever increas-
es or decreases the lumbar support.
Rear seat adjustmentAdjusting the seat forward and back-
ward (2nd row)To move the seat forward or backward:
1. Pull the seat slide adjustment lever
under the front edge of the seat cush-
ion up and hold it.
2. Slide the seat to the position you
desire.
3. Release the lever and make sure the
seat is locked in place.
Adjust the seat before driving, and make
sure the seat is locked securely by trying
to move forward and backward without
using the lever. If the seat moves, it is not
locked properly.
Seatback angleTo recline the seatback:
1. Lean forward slightly and lift up on the
seatback recline lever (or strap) locat-
ed on the outside of the seat at the
rear.
1VQA2042
OVQ036203N
OVQ036204NOVQ036205N
2nd row seat3rd row seat
Page 62 of 402
Features of your vehicle46 32. Carefully lean back on the seat and
adjust the seatback of the seat to the
position you desire.
3. Release the lever (or strap) and make
sure the seatback is locked in place.
(The lever MUST return to its original
position for the seatback to lock.)
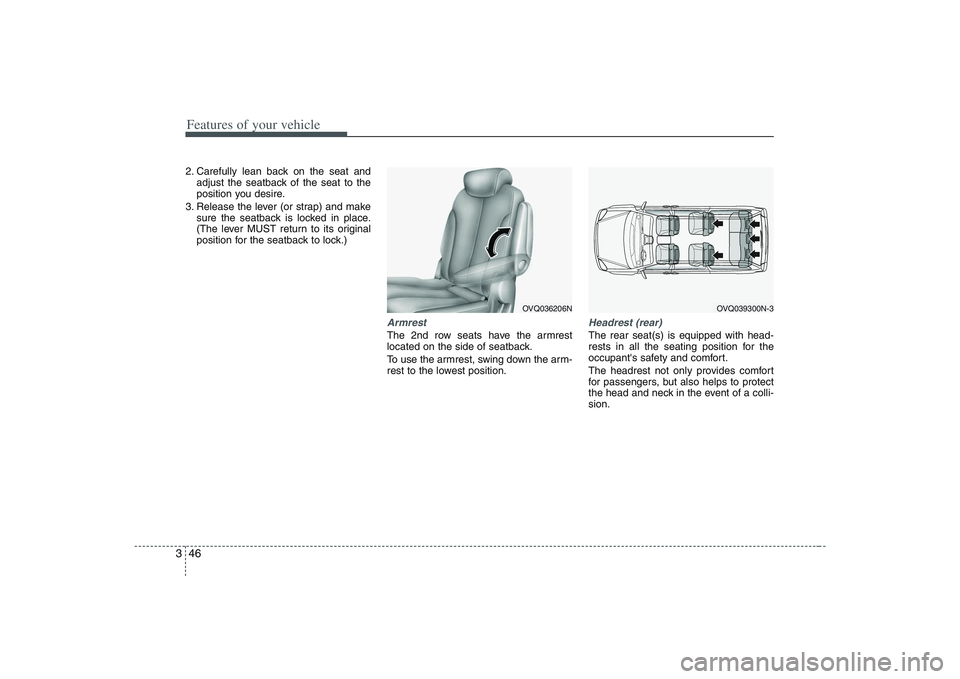
ArmrestThe 2nd row seats have the armrest
located on the side of seatback.
To use the armrest, swing down the arm-
rest to the lowest position.
Headrest (rear)The rear seat(s) is equipped with head-
rests in all the seating position for the
occupant's safety and comfort.
The headrest not only provides comfort
for passengers, but also helps to protect
the head and neck in the event of a colli-
sion.
OVQ036206N
OVQ039300N-3
Page 63 of 402
347
Features of your vehicle
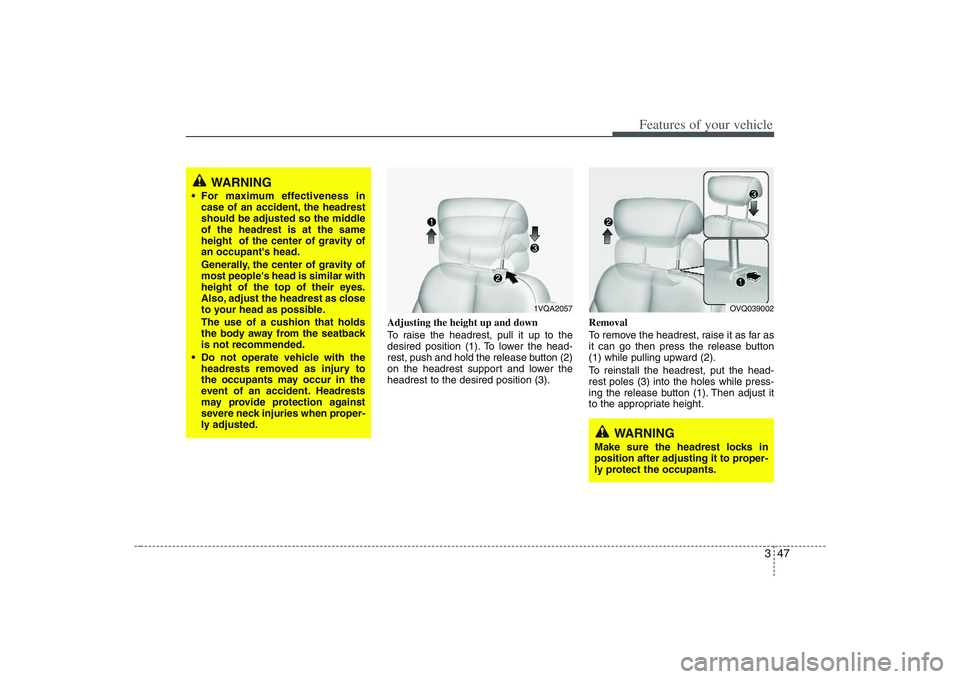
Adjusting the height up and down
To raise the headrest, pull it up to the
desired position (1). To lower the head-
rest, push and hold the release button (2)
on the headrest support and lower the
headrest to the desired position (3).Removal
To remove the headrest, raise it as far as
it can go then press the release button
(1) while pulling upward (2).
To reinstall the headrest, put the head-
rest poles (3) into the holes while press-
ing the release button (1). Then adjust it
to the appropriate height.
OVQ039002
1VQA2057
WARNING
Make sure the headrest locks in
position after adjusting it to proper-
ly protect the occupants.
WARNING
For maximum effectiveness in
case of an accident, the headrest
should be adjusted so the middle
of the headrest is at the same
height of the center of gravity of
an occupant's head.
Generally, the center of gravity of
most people's head is similar with
height of the top of their eyes.
Also, adjust the headrest as close
to your head as possible.
The use of a cushion that holds
the body away from the seatback
is not recommended.
Do not operate vehicle with the
headrests removed as injury to
the occupants may occur in the
event of an accident. Headrests
may provide protection against
severe neck injuries when proper-
ly adjusted.
Page 64 of 402
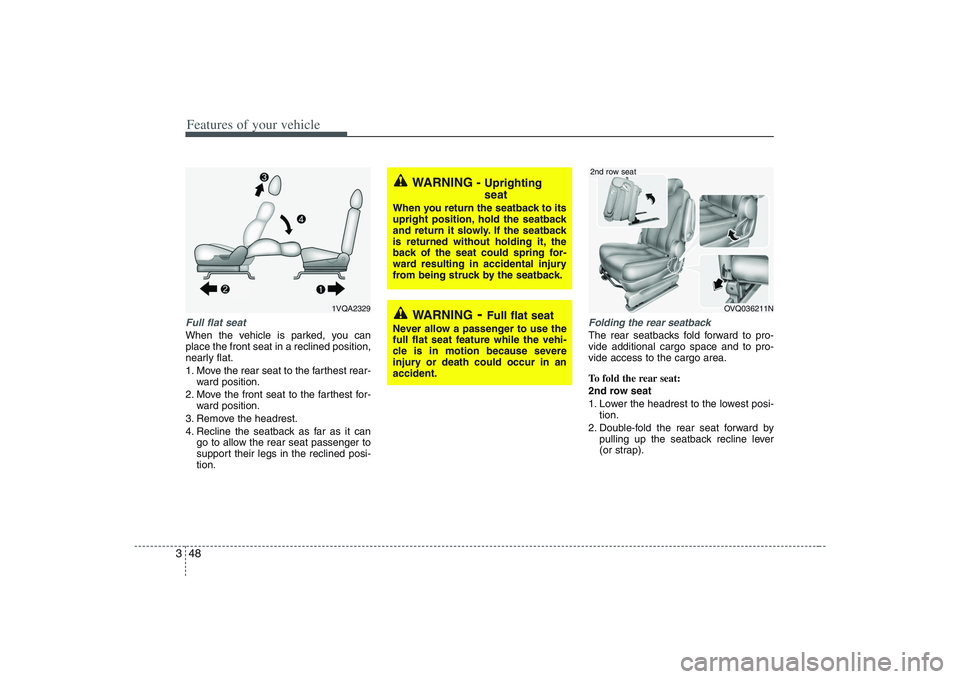
Features of your vehicle48 3Full flat seatWhen the vehicle is parked, you can
place the front seat in a reclined position,
nearly flat.
1. Move the rear seat to the farthest rear-
ward position.
2. Move the front seat to the farthest for-
ward position.
3. Remove the headrest.
4. Recline the seatback as far as it can
go to allow the rear seat passenger to
support their legs in the reclined posi-
tion.
Folding the rear seatbackThe rear seatbacks fold forward to pro-
vide additional cargo space and to pro-
vide access to the cargo area.
To fold the rear seat:
2nd row seat
1. Lower the headrest to the lowest posi-
tion.
2. Double-fold the rear seat forward by
pulling up the seatback recline lever
(or strap).
WARNING
- Full flat seat
Never allow a passenger to use the
full flat seat feature while the vehi-
cle is in motion because severe
injury or death could occur in an
accident.
WARNING -
Uprighting
seat
When you return the seatback to its
upright position, hold the seatback
and return it slowly. If the seatback
is returned without holding it, the
back of the seat could spring for-
ward resulting in accidental injury
from being struck by the seatback.
1VQA2329
OVQ036211N
2nd row seat
Page 65 of 402
349
Features of your vehicle
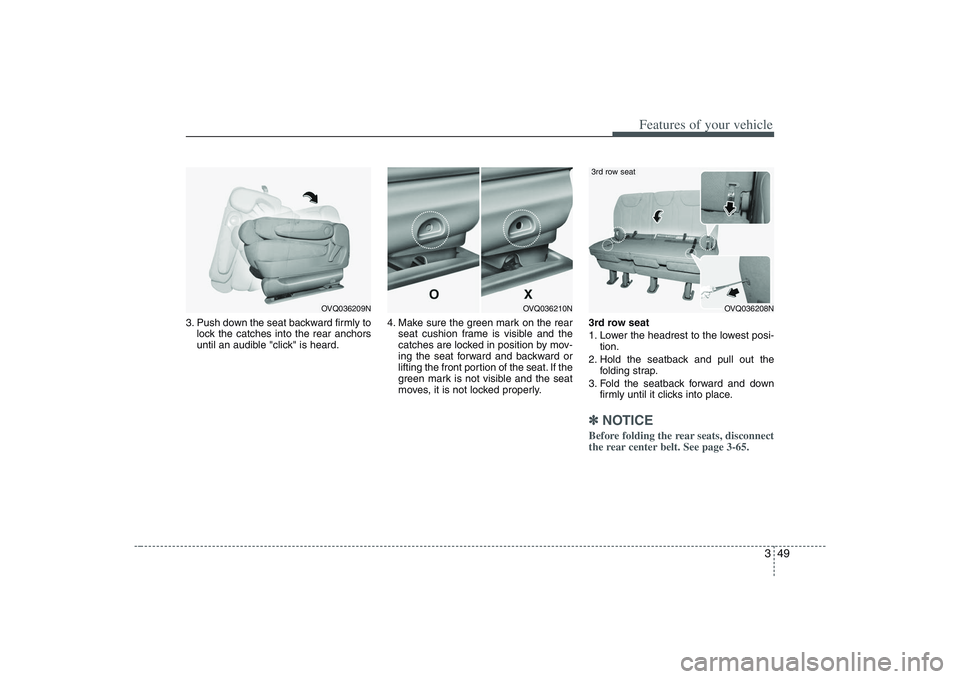
3. Push down the seat backward firmly to
lock the catches into the rear anchors
until an audible "click" is heard.4. Make sure the green mark on the rear
seat cushion frame is visible and the
catches are locked in position by mov-
ing the seat forward and backward or
lifting the front portion of the seat. If the
green mark is not visible and the seat
moves, it is not locked properly.3rd row seat
1. Lower the headrest to the lowest posi-
tion.
2. Hold the seatback and pull out the
folding strap.
3. Fold the seatback forward and down
firmly until it clicks into place.
✽ ✽
NOTICEBefore folding the rear seats, disconnect
the rear center belt. See page 3-65.
OVQ036209N
OVQ036210N
OVQ036208N
3rd row seat
Page 66 of 402
Features of your vehicle50 3To unfold the rear seat:
1. Pull up the seatback recline lever (or
folding strap).
2. Lift and push the seatback backward
firmly until it clicks into place.
Make sure the seatback is locked in
place.
3. Return the rear seat belt to the proper
position.
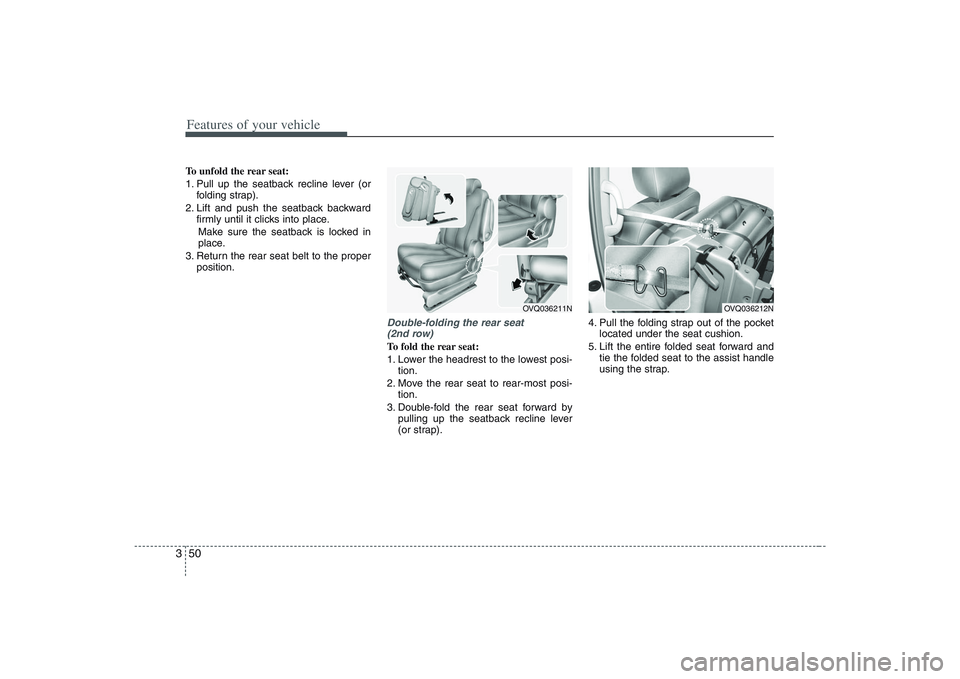
Double-folding the rear seat
(2nd row)To fold the rear seat:
1. Lower the headrest to the lowest posi-
tion.
2. Move the rear seat to rear-most posi-
tion.
3. Double-fold the rear seat forward by
pulling up the seatback recline lever
(or strap).4. Pull the folding strap out of the pocket
located under the seat cushion.
5. Lift the entire folded seat forward and
tie the folded seat to the assist handle
using the strap.
OVQ036211N
OVQ036212N
Page 67 of 402
351
Features of your vehicle
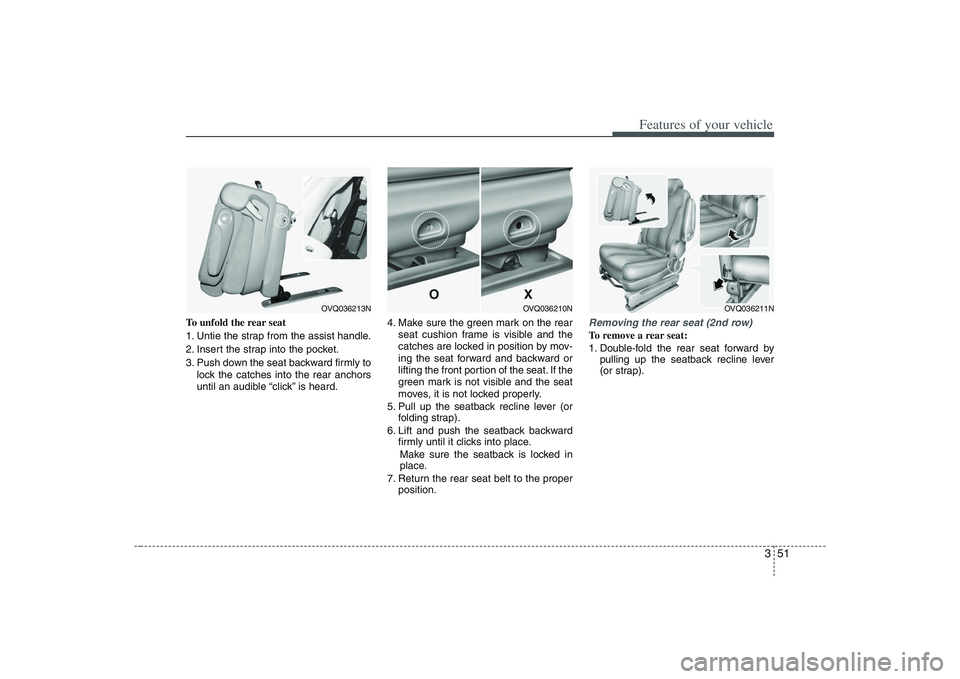
To unfold the rear seat
1. Untie the strap from the assist handle.
2. Insert the strap into the pocket.
3. Push down the seat backward firmly to
lock the catches into the rear anchors
until an audible “click” is heard.4. Make sure the green mark on the rear
seat cushion frame is visible and the
catches are locked in position by mov-
ing the seat forward and backward or
lifting the front portion of the seat. If the
green mark is not visible and the seat
moves, it is not locked properly.
5. Pull up the seatback recline lever (or
folding strap).
6. Lift and push the seatback backward
firmly until it clicks into place.
Make sure the seatback is locked in
place.
7. Return the rear seat belt to the proper
position.
Removing the rear seat (2nd row)To remove a rear seat:
1. Double-fold the rear seat forward by
pulling up the seatback recline lever
(or strap).
OVQ036213N
OVQ036211N
OVQ036210N
Page 68 of 402
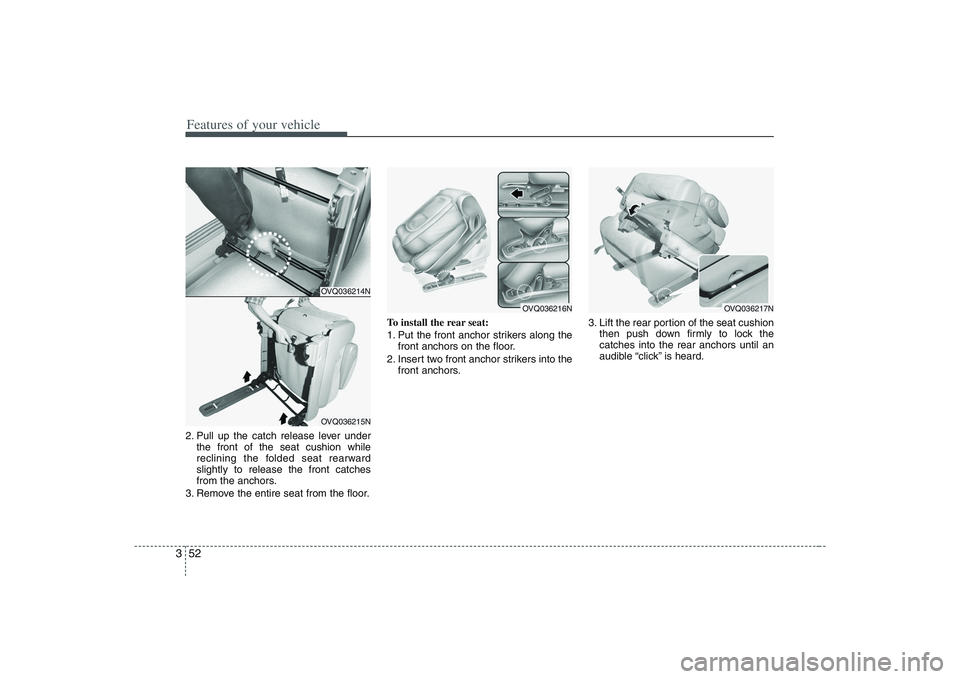
Features of your vehicle52 32. Pull up the catch release lever under
the front of the seat cushion while
reclining the folded seat rearward
slightly to release the front catches
from the anchors.
3. Remove the entire seat from the floor.To install the rear seat:
1. Put the front anchor strikers along the
front anchors on the floor.
2. Insert two front anchor strikers into the
front anchors.3. Lift the rear portion of the seat cushion
then push down firmly to lock the
catches into the rear anchors until an
audible “click” is heard.
OVQ036214NOVQ036215N
OVQ036216N
OVQ036217N
Page 69 of 402
353
Features of your vehicle
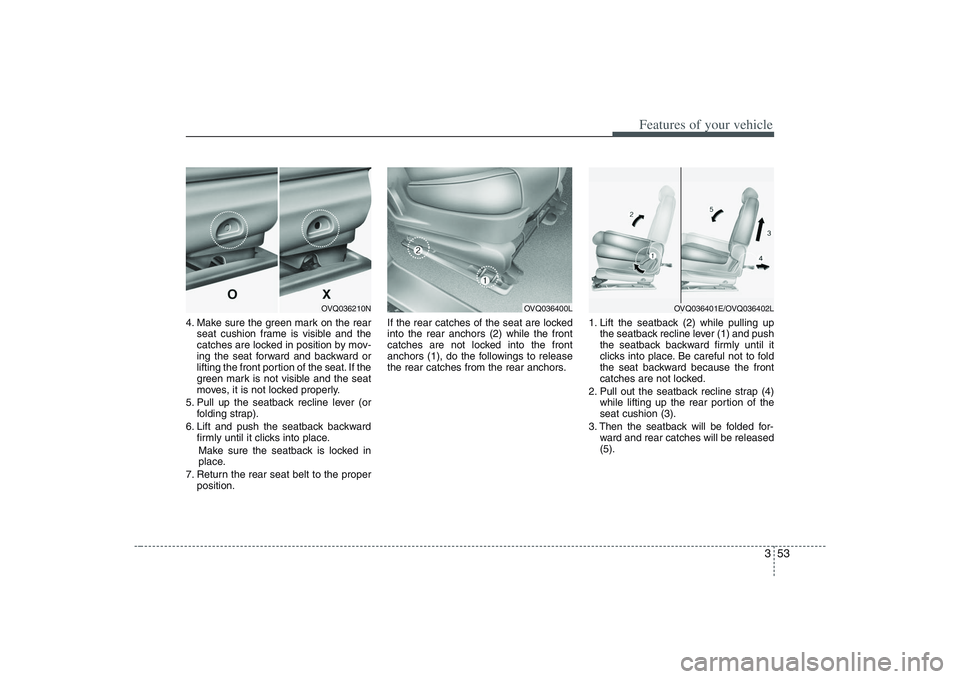
4. Make sure the green mark on the rear
seat cushion frame is visible and the
catches are locked in position by mov-
ing the seat forward and backward or
lifting the front portion of the seat. If the
green mark is not visible and the seat
moves, it is not locked properly.
5. Pull up the seatback recline lever (or
folding strap).
6. Lift and push the seatback backward
firmly until it clicks into place.
Make sure the seatback is locked in
place.
7. Return the rear seat belt to the proper
position.If the rear catches of the seat are locked
into the rear anchors (2) while the front
catches are not locked into the front
anchors (1), do the followings to release
the rear catches from the rear anchors.1. Lift the seatback (2) while pulling up
the seatback recline lever (1) and push
the seatback backward firmly until it
clicks into place. Be careful not to fold
the seat backward because the front
catches are not locked.
2. Pull out the seatback recline strap (4)
while lifting up the rear portion of the
seat cushion (3).
3. Then the seatback will be folded for-
ward and rear catches will be released
(5).
OVQ036210N
OVQ036400L
OVQ036401E/OVQ036402L
Page 70 of 402
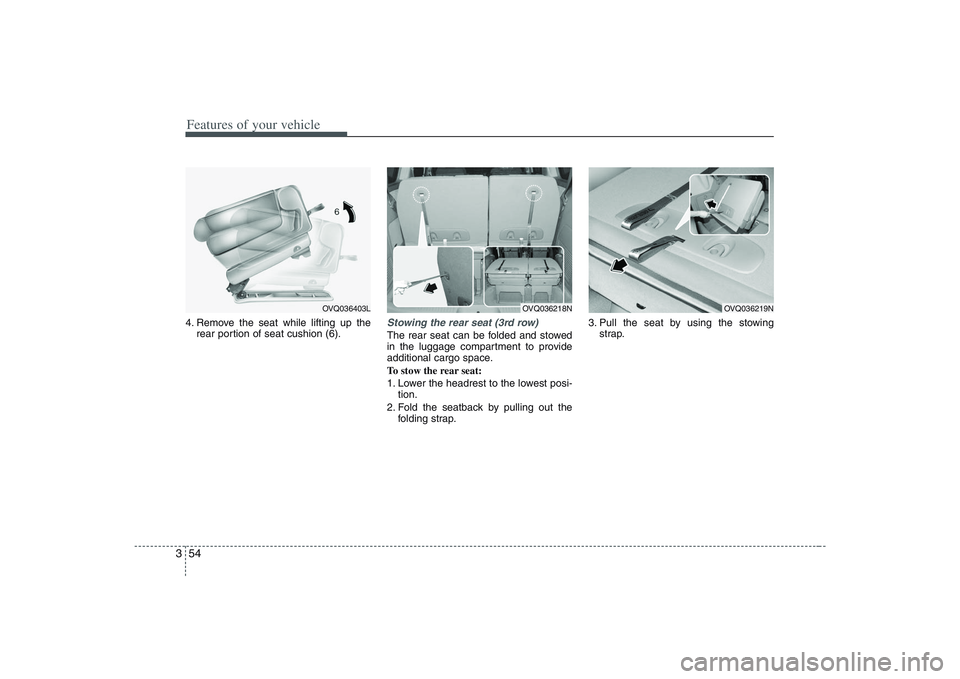
Features of your vehicle54 34. Remove the seat while lifting up the
rear portion of seat cushion (6).
Stowing the rear seat (3rd row)The rear seat can be folded and stowed
in the luggage compartment to provide
additional cargo space.
To stow the rear seat:
1. Lower the headrest to the lowest posi-
tion.
2. Fold the seatback by pulling out the
folding strap.3. Pull the seat by using the stowing
strap.
OVQ036218N
OVQ036219N
OVQ036403L