tow Hyundai Genesis Coupe 2015 User Guide
[x] Cancel search | Manufacturer: HYUNDAI, Model Year: 2015, Model line: Genesis Coupe, Model: Hyundai Genesis Coupe 2015Pages: 438, PDF Size: 40.35 MB
Page 91 of 438

47
Features of your vehicle
Unlocking
Pressing the button of the driver’s
outside door handle with all doors
closed and locked, unlocks the dri-
ver’s door. The hazard warning lights
blink and the chime sounds twice to
indicate that the driver’s door is
unlocked. All doors are unlocked if
the button is pressed once more
within 4 seconds. The hazard warn-
ing lights will blink and the chime will
sound twice to indicate that all doors
are unlocked.
Pressing the button of the front pas-
senger’s outside door handle with all
doors closed and locked, unlocks all
doors. The hazard warning lights
blink and the chime sounds once to
indicate that all doors are unlocked.
The button will only operate when
the smart key is within 28~40 in.
(0.7~1 m) from the outside door han-
dle.
When the smart key is recognized in
the area of 28~40 in. (0.7~1 m) from
the front outside door handle, other
people can also open the doors with-
out possession of the smart key.
Start-up
You can start the engine without
inserting the key. For detailed infor-
mation refer to the “Engine start/stop
button” in section 5.
Smart key precautions
✽ ✽
NOTICE
• If, for some reason, you happen to
lose your smart key, you will not
be able to start the engine. Tow
the vehicle, if necessary, and con-
tact an authorized HYUNDAI
dealer.
• A maximum of 2 smart keys can
be registered to a single vehicle. If
you lose a smart key, you should
immediately take the vehicle and
key to your authorized HYUNDAI
dealer to protect it from potential
theft.
• The smart key will not work if any
of following occur:
- The smart key is close to a radio
transmitter such as a radio sta-
tion or an airport which can
interfere with normal operation
of the smart key.
- You keep the smart key near a
mobile two-way radio system or
a cellular phone.
- Another vehicle’s smart key is
being operated close to your
vehicle.
(Continued)
Page 94 of 438
Features of your vehicle
10 4
✽
✽
NOTICE
• Using the wrong battery can cause
the smart key to malfunction. Be
sure to use the correct battery.
• Circuits inside the smart key may
develop problems when dropped,
exposed to moisture or static elec-
tricity.
• If you suspect that your smart key
might have sustained some dam-
age, or you feel your smart key is
not working correctly, contact an
authorized HYUNDAI dealer.
Door lock/unlock in an emer-
gency situation
If the smart key does not operate
normally, you can lock or unlock the
doors by using the mechanical key.
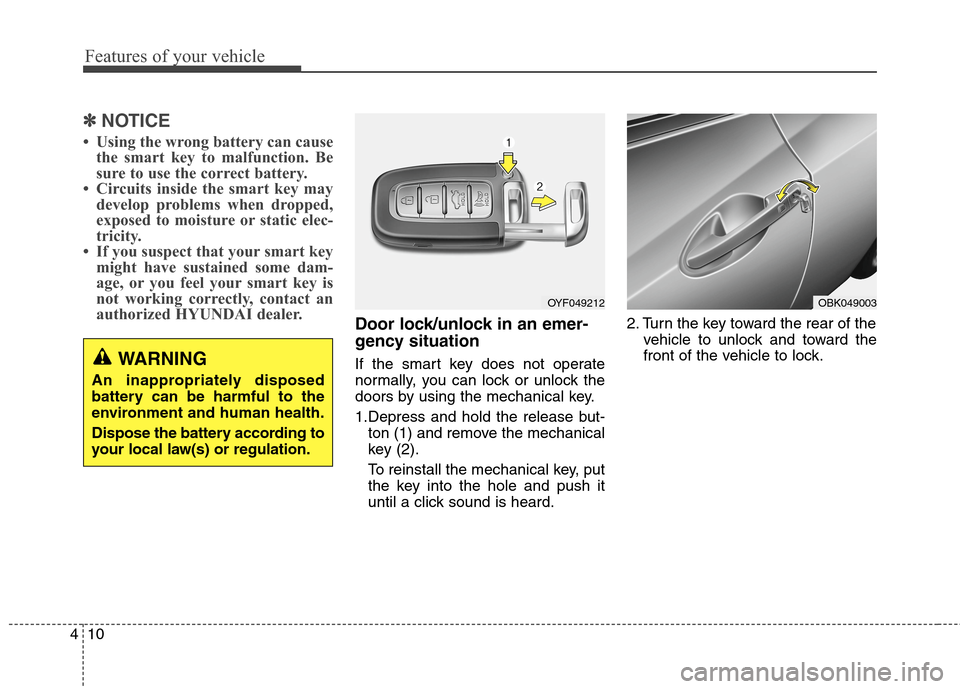
1.Depress and hold the release but-
ton (1) and remove the mechanical
key (2).
To reinstall the mechanical key, put
the key into the hole and push it
until a click sound is heard.2. Turn the key toward the rear of the
vehicle to unlock and toward the
front of the vehicle to lock.
OYF049212OBK049003
WARNING
An inappropriately disposed
battery can be harmful to the
environment and human health.
Dispose the battery according to
your local law(s) or regulation.
Page 100 of 438
Features of your vehicle
16 4
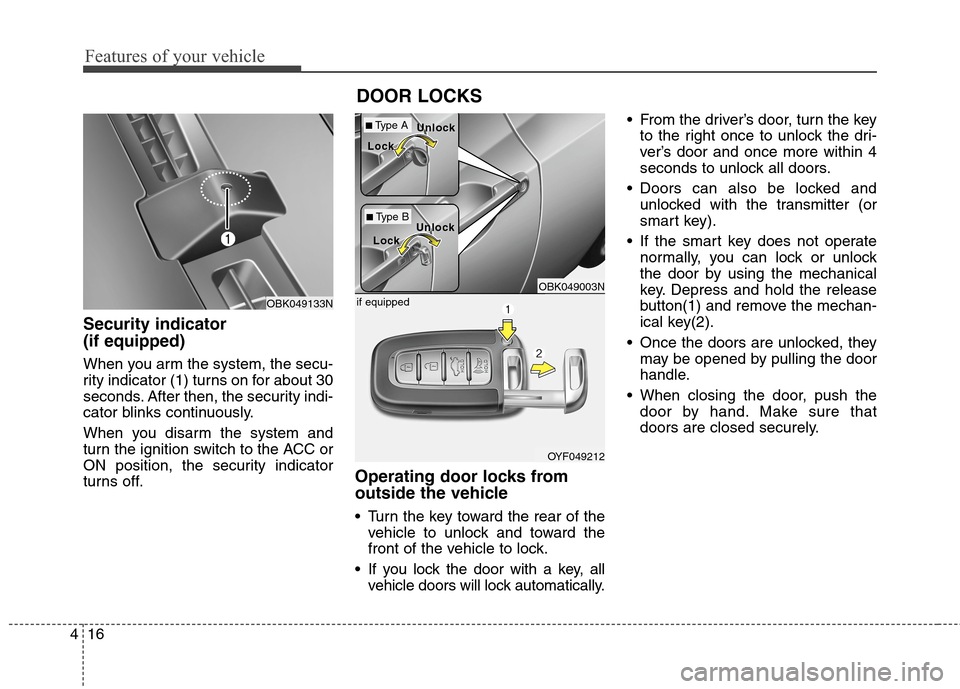
Security indicator
(if equipped)
When you arm the system, the secu-
rity indicator (1) turns on for about 30
seconds. After then, the security indi-
cator blinks continuously.
When you disarm the system and
turn the ignition switch to the ACC or
ON position, the security indicator
turns off.
Operating door locks from
outside the vehicle
Turn the key toward the rear of the
vehicle to unlock and toward the
front of the vehicle to lock.
If you lock the door with a key, all
vehicle doors will lock automatically. From the driver’s door, turn the key
to the right once to unlock the dri-
ver’s door and once more within 4
seconds to unlock all doors.
Doors can also be locked and
unlocked with the transmitter (or
smart key).
If the smart key does not operate
normally, you can lock or unlock
the door by using the mechanical
key. Depress and hold the release
button(1) and remove the mechan-
ical key(2).
Once the doors are unlocked, they
may be opened by pulling the door
handle.
When closing the door, push the
door by hand. Make sure that
doors are closed securely.
DOOR LOCKS
OBK049133N
OBK049003N
OYF049212
if equipped
■Type A
■Type B
Loc Loc
k k
Loc Loc
k kUnloc Unloc
k k
Unloc Unloc
k k
Page 119 of 438
435
Features of your vehicle
MIRRORS
Inside rearview mirror
Adjust the rearview mirror to center
on the view through the rear window.
Make this adjustment before you
start driving.
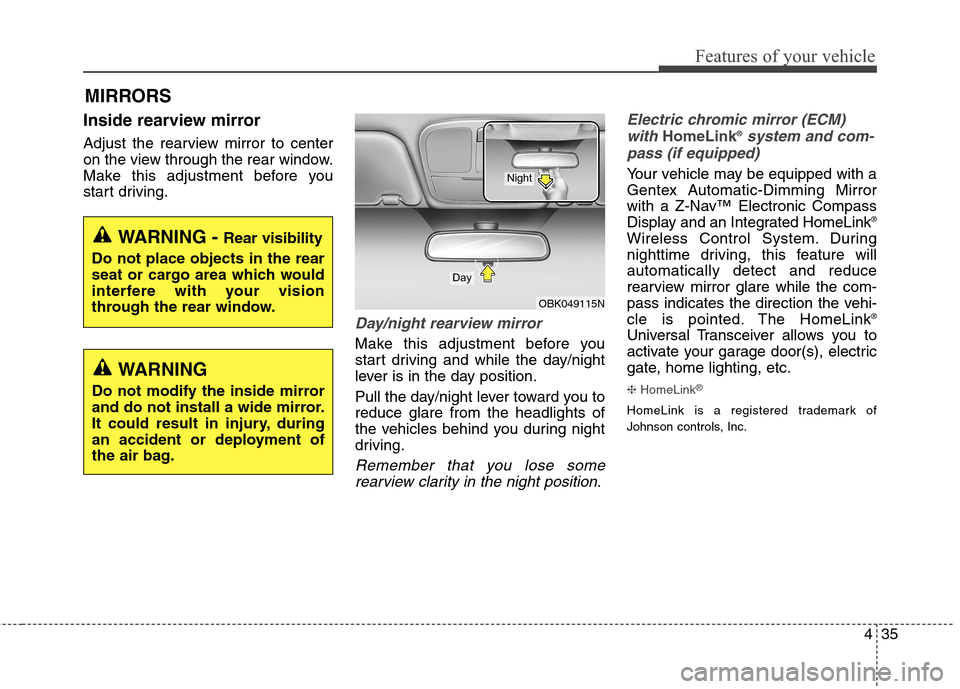
Day/night rearview mirror
Make this adjustment before you
start driving and while the day/night
lever is in the day position.
Pull the day/night lever toward you to
reduce glare from the headlights of
the vehicles behind you during night
driving.
Remember that you lose some
rearview clarity in the night position.Electric chromic mirror (ECM)
with
HomeLink®system and com-
pass (if equipped)
Your vehicle may be equipped with a
Gentex Automatic-Dimming Mirror
with a Z-Nav™ Electronic Compass
Display and an Integrated HomeLink
®
Wireless Control System. During
nighttime driving, this feature will
automatically detect and reduce
rearview mirror glare while the com-
pass indicates the direction the vehi-
cle is pointed. The HomeLink
®
Universal Transceiver allows you to
activate your garage door(s), electric
gate, home lighting, etc.
❈HomeLink®
HomeLink is a registered trademark of
Johnson controls, Inc.
WARNING - Rear visibility
Do not place objects in the rear
seat or cargo area which would
interfere with your vision
through the rear window.
OBK049115N
Day
Night
WARNING
Do not modify the inside mirror
and do not install a wide mirror.
It could result in injury, during
an accident or deployment of
the air bag.
Page 128 of 438
Features of your vehicle
44 4
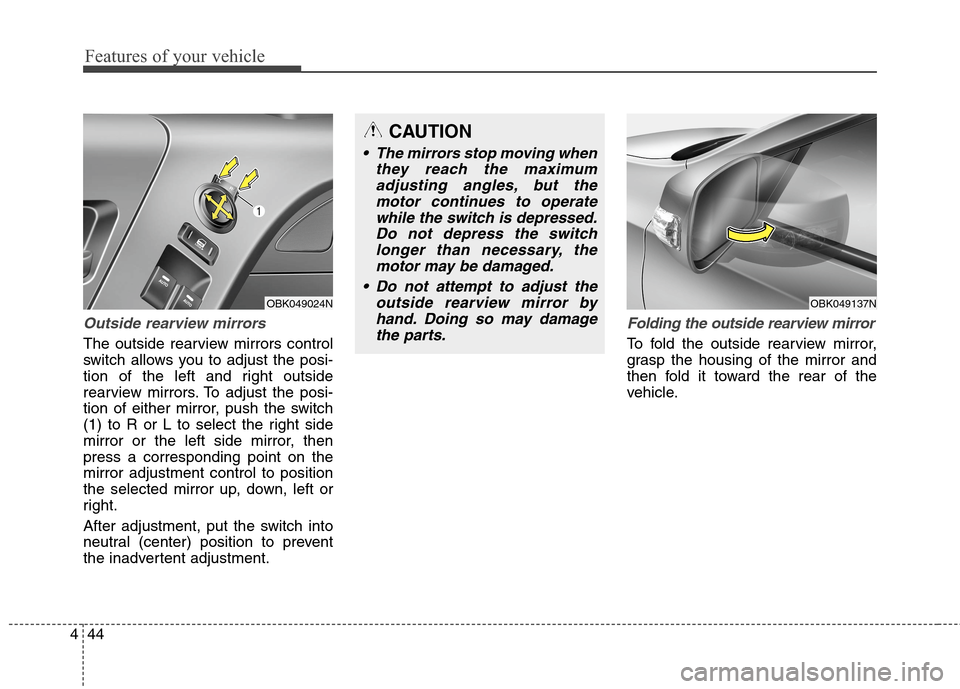
Outside rearview mirrors
The outside rearview mirrors control
switch allows you to adjust the posi-
tion of the left and right outside
rearview mirrors. To adjust the posi-
tion of either mirror, push the switch
(1) to R or L to select the right side
mirror or the left side mirror, then
press a corresponding point on the
mirror adjustment control to position
the selected mirror up, down, left or
right.
After adjustment, put the switch into
neutral (center) position to prevent
the inadvertent adjustment.
Folding the outside rearview mirror
To fold the outside rearview mirror,
grasp the housing of the mirror and
then fold it toward the rear of the
vehicle.
CAUTION
The mirrors stop moving when
they reach the maximum
adjusting angles, but the
motor continues to operate
while the switch is depressed.
Do not depress the switch
longer than necessary, the
motor may be damaged.
Do not attempt to adjust the
outside rearview mirror by
hand. Doing so may damage
the parts.
OBK049024NOBK049137N
Page 131 of 438
447
Features of your vehicle
When the door is open, or if the
engine is not started within 1 minute,
the tachometer pointer may move
slightly in ON position with the
engine OFF. This movement is nor-
mal and will not affect the accuracy
of the tachometer once the engine is
running.
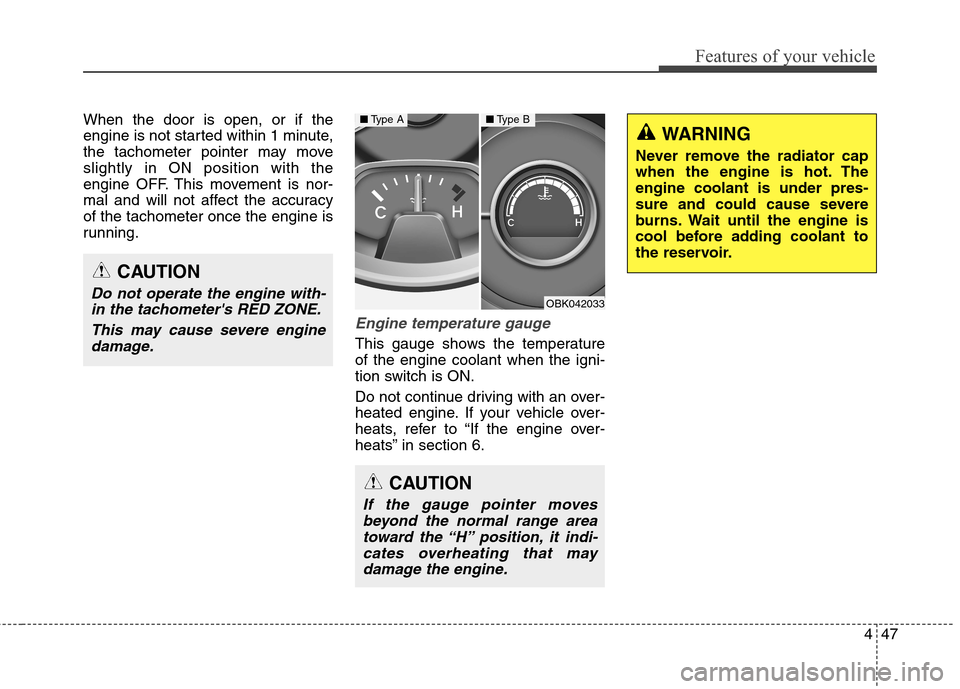
Engine temperature gauge
This gauge shows the temperature
of the engine coolant when the igni-
tion switch is ON.
Do not continue driving with an over-
heated engine. If your vehicle over-
heats, refer to “If the engine over-
heats” in section 6.
CAUTION
Do not operate the engine with-
in the tachometer's RED ZONE.
This may cause severe engine
damage.
CAUTION
If the gauge pointer moves
beyond the normal range area
toward the “H” position, it indi-
cates overheating that may
damage the engine.
OBK042033
■Type A■Type B
WARNING
Never remove the radiator cap
when the engine is hot. The
engine coolant is under pres-
sure and could cause severe
burns. Wait until the engine is
cool before adding coolant to
the reservoir.
Page 148 of 438
Features of your vehicle
64 4
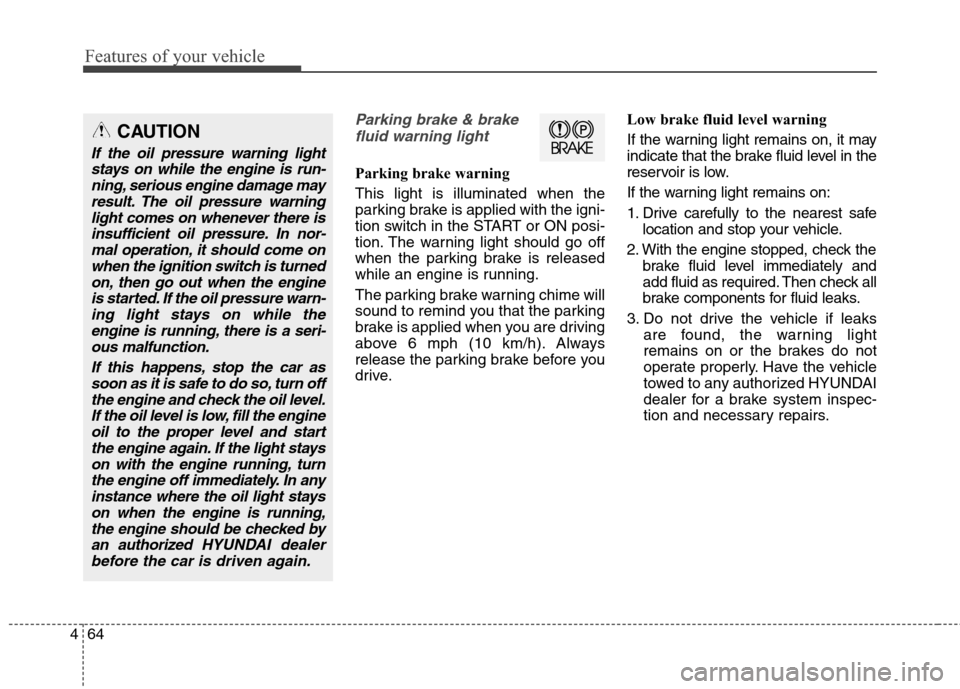
Parking brake & brake
fluid warning light
Parking brake warning
This light is illuminated when the
parking brake is applied with the igni-
tion switch in the START or ON posi-
tion. The warning light should go off
when the parking brake is released
while an engine is running.
The parking brake warning chime will
sound to remind you that the parking
brake is applied when you are driving
above 6 mph (10 km/h). Always
release the parking brake before you
drive.Low brake fluid level warning
If the warning light remains on, it may
indicate that the brake fluid level in the
reservoir is low.
If the warning light remains on:
1. Drive carefully to the nearest safe
location and stop your vehicle.
2. With the engine stopped, check the
brake fluid level immediately and
add fluid as required. Then check all
brake components for fluid leaks.
3. Do not drive the vehicle if leaks
are found, the warning light
remains on or the brakes do not
operate properly. Have the vehicle
towed to any authorized HYUNDAI
dealer for a brake system inspec-
tion and necessary repairs.
CAUTION
If the oil pressure warning light
stays on while the engine is run-
ning, serious engine damage may
result. The oil pressure warning
light comes on whenever there is
insufficient oil pressure. In nor-
mal operation, it should come on
when the ignition switch is turned
on, then go out when the engine
is started. If the oil pressure warn-
ing light stays on while the
engine is running, there is a seri-
ous malfunction.
If this happens, stop the car as
soon as it is safe to do so, turn off
the engine and check the oil level.
If the oil level is low, fill the engine
oil to the proper level and start
the engine again. If the light stays
on with the engine running, turn
the engine off immediately. In any
instance where the oil light stays
on when the engine is running,
the engine should be checked by
an authorized HYUNDAI dealer
before the car is driven again.
Page 169 of 438
485
Features of your vehicle
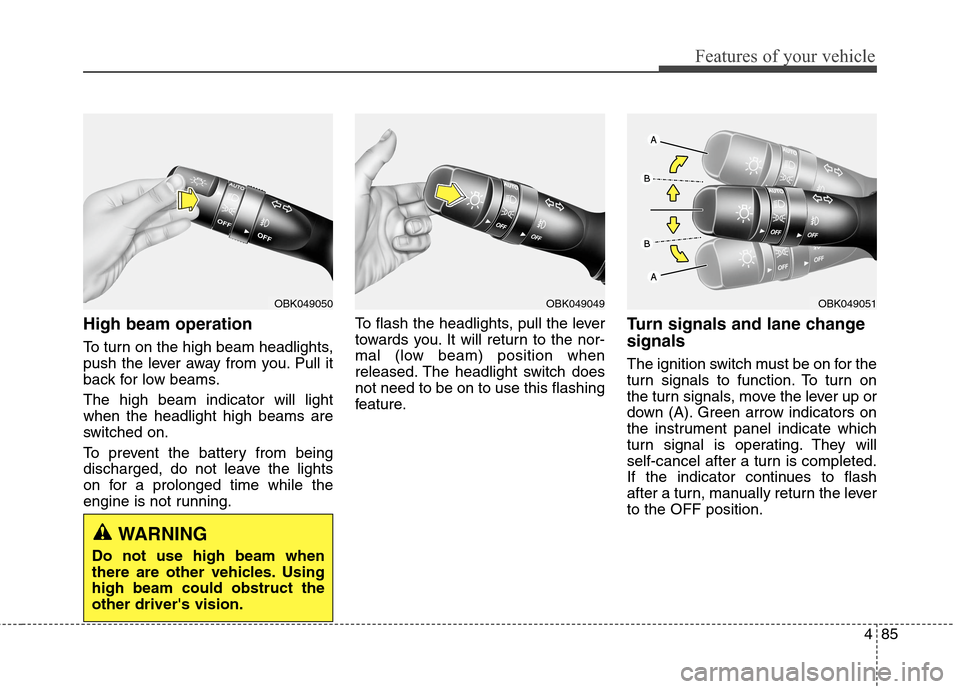
High beam operation
To turn on the high beam headlights,
push the lever away from you. Pull it
back for low beams.
The high beam indicator will light
when the headlight high beams are
switched on.
To prevent the battery from being
discharged, do not leave the lights
on for a prolonged time while the
engine is not running.To flash the headlights, pull the lever
towards you. It will return to the nor-
mal (low beam) position when
released. The headlight switch does
not need to be on to use this flashing
feature.
Turn signals and lane change
signals
The ignition switch must be on for the
turn signals to function. To turn on
the turn signals, move the lever up or
down (A). Green arrow indicators on
the instrument panel indicate which
turn signal is operating. They will
self-cancel after a turn is completed.
If the indicator continues to flash
after a turn, manually return the lever
to the OFF position.
OBK049051OBK049049OBK049050
WARNING
Do not use high beam when
there are other vehicles. Using
high beam could obstruct the
other driver's vision.
Page 172 of 438
Features of your vehicle
88 4
Windshield washers
In the OFF position, pull the lever
gently toward you to spray washer
fluid on the windshield and to run the
wipers 1-3 cycles.
Use this function when the wind-
shield is dirty.
The spray and wiper operation will
continue until you release the lever.
If the washer does not work, check
the washer fluid level. If the fluid level
is not sufficient, you will need to add
appropriate non-abrasive windshield
washer fluid to the washer reservoir.
The reservoir filler neck is located in
the front of the engine compartment
on the passenger side.
CAUTION
To prevent possible damage to
the washer pump, do not oper-
ate the washer when the fluid
reservoir is empty.
WARNING
Do not use the washer in freez-
ing temperatures without first
warming the windshield with the
defrosters; the washer solution
could freeze on contact with the
windshield and obscure your
vision.
CAUTION
To prevent possible damage
to the wipers or windshield,
do not operate the wipers
when the windshield is dry.
To prevent damage to the
wiper blades, do not use gaso-
line, kerosene, paint thinner,
or other solvents on or near
them.
To prevent damage to the
wiper arms and other compo-
nents, do not attempt to move
the wipers manually.
Page 178 of 438
Features of your vehicle
94 4
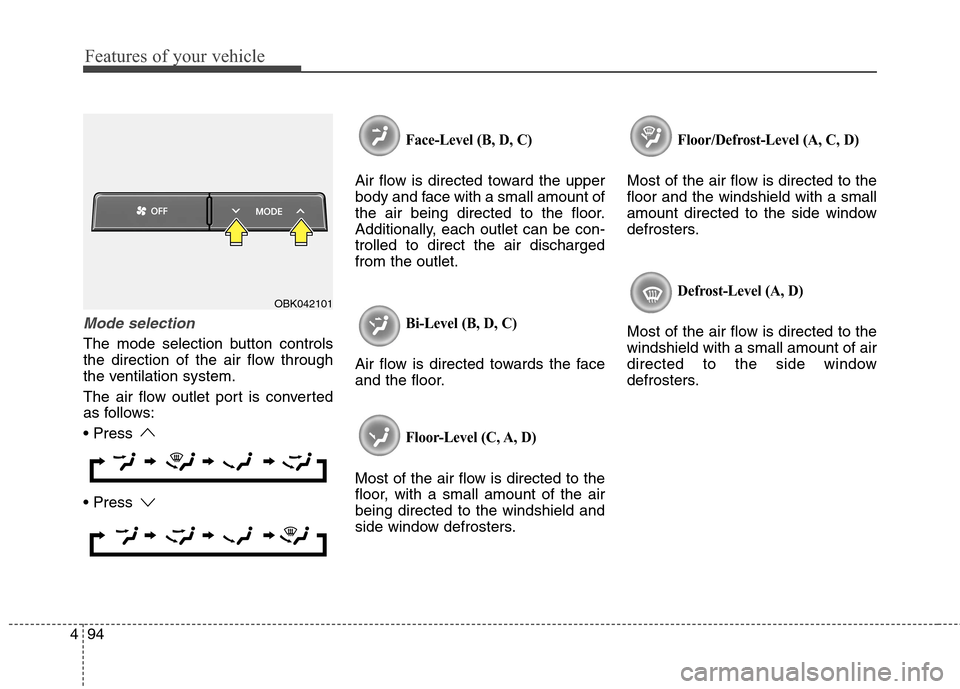
Mode selection
The mode selection button controls
the direction of the air flow through
the ventilation system.
The air flow outlet port is converted
as follows:
Face-Level (B, D, C)
Air flow is directed toward the upper
body and face with a small amount of
the air being directed to the floor.
Additionally, each outlet can be con-
trolled to direct the air discharged
from the outlet.
Bi-Level (B, D, C)
Air flow is directed towards the face
and the floor.
Floor-Level (C, A, D)
Most of the air flow is directed to the
floor, with a small amount of the air
being directed to the windshield and
side window defrosters.
Floor/Defrost-Level (A, C, D)
Most of the air flow is directed to the
floor and the windshield with a small
amount directed to the side window
defrosters.
Defrost-Level (A, D)
Most of the air flow is directed to the
windshield with a small amount of air
directed to the side window
defrosters.
OBK042101