fuel pressure Hyundai Getz 2009 Owner's Manual - RHD (UK, Australia)
[x] Cancel search | Manufacturer: HYUNDAI, Model Year: 2009, Model line: Getz, Model: Hyundai Getz 2009Pages: 191, PDF Size: 6.3 MB
Page 10 of 191

YOUR VEHICLE AT A GLANCE
F10
G255A01TB-DAT INDICATOR SYMBOLS ON THE INSTRUMENT PANEL * A detailed explanation of these items will be found on page 1-37
SRS (Airbag) Service Reminder Indicator ABS Service Reminder Indicator Turn Signal Indicator Lights High Beam Indicator Light Oil Pressure Warning Light Hand Brake/Brake Fluid Level Warning Light Charging System Warning LightTail Gate Open Warning Light
Door Ajar Warning Light and Chime
Low Fuel Level Warning Light Malfunction Indicator Light Seat Belt Reminder Light
O/D OFF Indicator (Automatic transaxle only)
Immobiliser Indicator Light
Electronic Stability Program Indicator Lights (If Installed)
Engine Coolant Temperature Indicator
Page 46 of 191
FEATURES OF YOUR HYUNDAI 1- 35
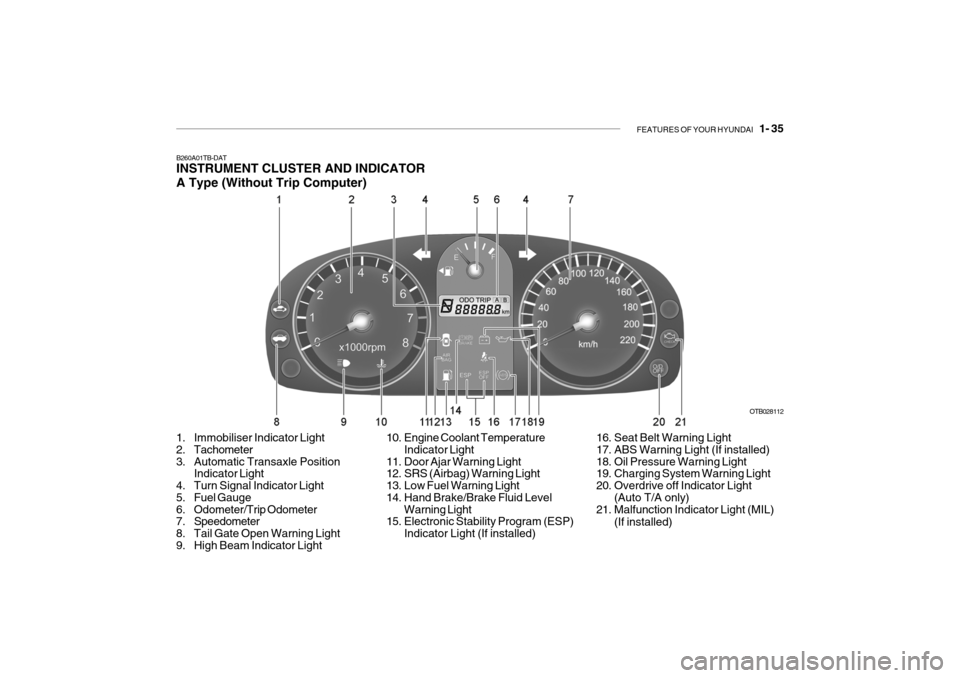
B260A01TB-DAT INSTRUMENT CLUSTER AND INDICATOR A Type (Without Trip Computer)
1. Immobiliser Indicator Light
2. Tachometer
3. Automatic Transaxle Position Indicator Light
4. Turn Signal Indicator Light
5. Fuel Gauge
6. Odometer/Trip Odometer
7. Speedometer
8. Tail Gate Open Warning Light
9. High Beam Indicator Light OTB028112
10. Engine Coolant Temperature Indicator Light
11. Door Ajar Warning Light
12. SRS (Airbag) Warning Light
13. Low Fuel Warning Light
14. Hand Brake/Brake Fluid Level Warning Light
15. Electronic Stability Program (ESP)
Indicator Light (If installed) 16. Seat Belt Warning Light
17. ABS Warning Light (If installed)
18. Oil Pressure Warning Light
19. Charging System Warning Light
20. Overdrive off Indicator Light
(Auto T/A only)
21. Malfunction Indicator Light (MIL)
(If installed)
Page 47 of 191
1- 36 FEATURES OF YOUR HYUNDAI
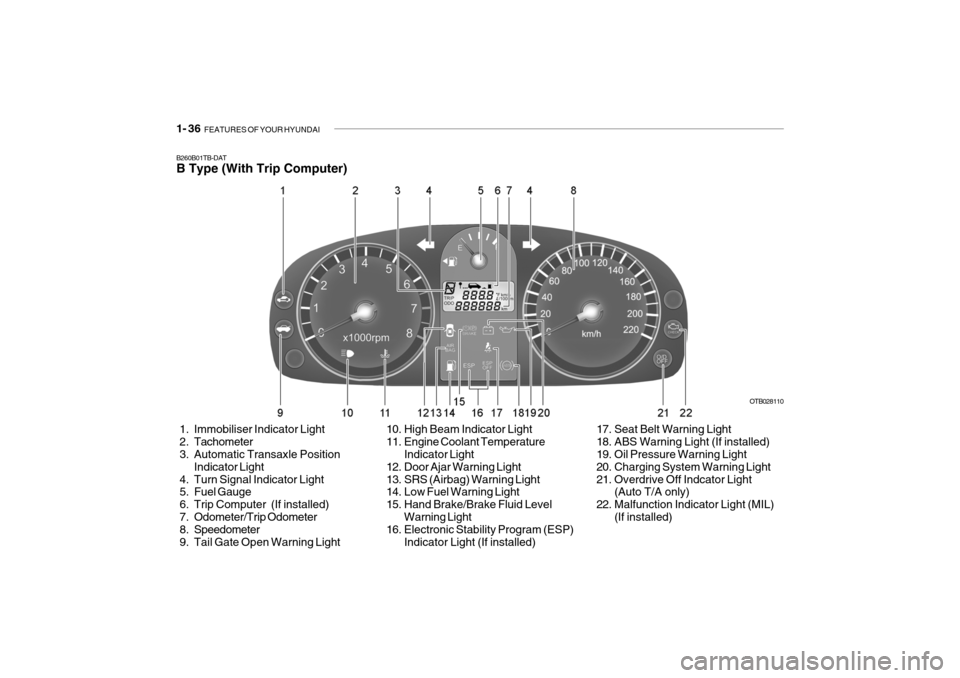
B260B01TB-DAT B Type (With Trip Computer)
1. Immobiliser Indicator Light
2. Tachometer
3. Automatic Transaxle Position
Indicator Light
4. Turn Signal Indicator Light
5. Fuel Gauge
6. Trip Computer (If installed)
7. Odometer/Trip Odometer
8. Speedometer
9. Tail Gate Open Warning Light OTB028110
10. High Beam Indicator Light
11. Engine Coolant Temperature Indicator Light
12. Door Ajar Warning Light
13. SRS (Airbag) Warning Light
14. Low Fuel Warning Light
15. Hand Brake/Brake Fluid Level
Warning Light
16. Electronic Stability Program (ESP)
Indicator Light (If installed) 17. Seat Belt Warning Light
18. ABS Warning Light (If installed)
19. Oil Pressure Warning Light
20. Charging System Warning Light
21. Overdrive Off Indcator Light
(Auto T/A only)
22. Malfunction Indicator Light (MIL)
(If installed)
Page 52 of 191
FEATURES OF YOUR HYUNDAI 1- 41
B270A01A-AAT BRAKE PAD WEAR WARNING SOUND The front disc brake pads have wear indicators that should make a high- pitched squealing or scraping noise when new pads are needed. The sound may come and go or be heard all the time when the vehicle is moving. It may also be heard when the brake pedal is pushed down firmly. Excessive rotor damage will result if the worn pads are not replaced. See your Hyundai dealer immediately.
B290A02TB-DAT
Engine Coolant Tempera-
ture Indicator
WARNING:
Never remove the radiator cap when the engine is hot. The engine coolantis under pressure and could erupt and cause severe burns. Wait until the engine is cool before removingthe radiator cap.
!
B900A01A-GAT ACOUSTIC WARNING SOUND (If Installed) The acoustic warning chime sounds when the tail lights are on and the door in driver side is open. This prevents the battery from discharging when the car is left with the tail lights on. The chime sounds until the tail lights are turned off.
The indicator shows the temperature of the engine coolant when the ignition switch is ON.The red indicator illuminates if the tem- perature of the engine coolant is above 120±3°C (248±5.5°F).Do not continue driving with an over- heated engine. If your vehicle over- heats, refer to “Overheating” in the In-dex. NOTE: If the red engine temperature indica- tor illuminates, it indicates overheat-ing that may damage the engine.
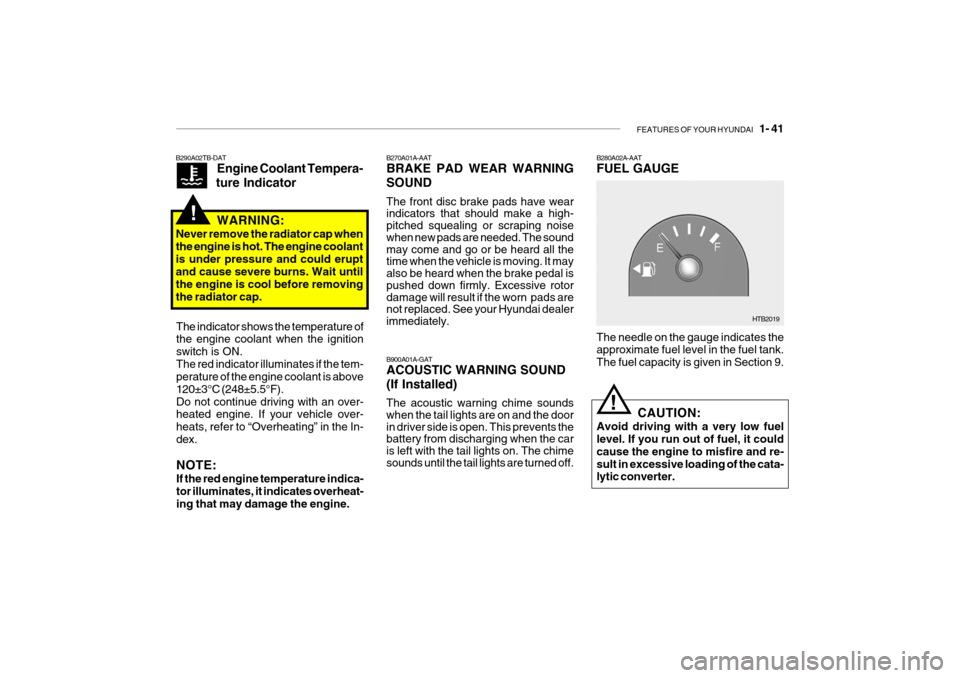
The needle on the gauge indicates the approximate fuel level in the fuel tank. The fuel capacity is given in Section 9.
B280A02A-AAT FUEL GAUGE
HTB2019
!CAUTION:
Avoid driving with a very low fuel level. If you run out of fuel, it could cause the engine to misfire and re-sult in excessive loading of the cata- lytic converter.
Page 75 of 191
1- 64 FEATURES OF YOUR HYUNDAI
!
HTB068
WARNING:
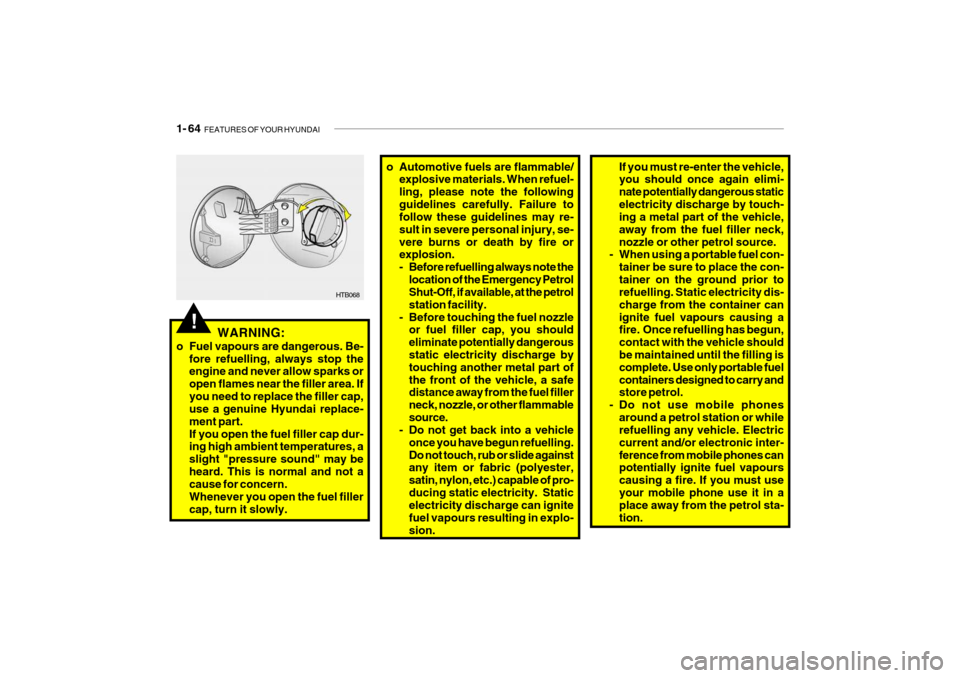
o Fuel vapours are dangerous. Be- fore refuelling, always stop the engine and never allow sparks or open flames near the filler area. Ifyou need to replace the filler cap, use a genuine Hyundai replace- ment part.If you open the fuel filler cap dur- ing high ambient temperatures, a slight "pressure sound" may beheard. This is normal and not a cause for concern. Whenever you open the fuel fillercap, turn it slowly. o Automotive fuels are flammable/
explosive materials. When refuel-ling, please note the followingguidelines carefully. Failure to follow these guidelines may re- sult in severe personal injury, se-vere burns or death by fire or explosion.
- Before refuelling always note the
location of the Emergency Petrol Shut-Off, if available, at the petrol station facility.
- Before touching the fuel nozzle or fuel filler cap, you shouldeliminate potentially dangerous static electricity discharge by touching another metal part ofthe front of the vehicle, a safe distance away from the fuel filler neck, nozzle, or other flammablesource.
- Do not get back into a vehicle
once you have begun refuelling.Do not touch, rub or slide against any item or fabric (polyester, satin, nylon, etc.) capable of pro-ducing static electricity. Static electricity discharge can ignite fuel vapours resulting in explo-sion. If you must re-enter the vehicle, you should once again elimi- nate potentially dangerous staticelectricity discharge by touch- ing a metal part of the vehicle, away from the fuel filler neck,nozzle or other petrol source.
- When using a portable fuel con-
tainer be sure to place the con-tainer on the ground prior to refuelling. Static electricity dis- charge from the container canignite fuel vapours causing a fire. Once refuelling has begun, contact with the vehicle should be maintained until the filling is complete. Use only portable fuelcontainers designed to carry and store petrol.
- Do not use mobile phones
around a petrol station or whilerefuelling any vehicle. Electric current and/or electronic inter-ference from mobile phones can potentially ignite fuel vapours causing a fire. If you must useyour mobile phone use it in a place away from the petrol sta- tion.
Page 109 of 191

2- 14 DRIVING YOUR HYUNDAI
C140A01A-DAT DRIVING FOR ECONOMY You can save fuel and get more kilo- meters from your car if you followthese suggestions:
o Drive smoothly. Accelerate at a
moderate rate. Don't make "kanga- roo" starts or full-throttle shifts. Maintain a steady cruising speed.Don't race between stoplights. Try to adjust your speed to that of the other traffic so you don't have tochange speeds unnecessarily. Avoid heavy traffic whenever possible. Always maintain a safe distancefrom other vehicles so you can avoid unnecessary braking. This also reduces brake wear.
o Drive at a moderate speed. The faster you drive, the more fuel yourcar uses. Driving at a moderatespeed, especially on the highway, is one of the most effective ways to reduce fuel consumption.
o Don't "ride" the brake. This can in- crease fuel consumption and alsoincrease wear on this components. o In addition, driving with your foot
resting on the brake pedal may causethe brakes to overheat, which re-duces their effectiveness and may
lead to more serious consequences.
o Take care of your tyres. Keep them inflated to the recommended pres-sure. Incorrect inflation, either too much or too little, results in unnec-essary tyre wear. Check the tyre pressures at least once a month.
o Be sure that the wheels are aligned correctly. Improper alignment canresult from hitting curbs or driving too fast over irregular surfaces Pooralignment causes faster tyre wear and may also result in other prob- lems as well as greater fuel con-sumption.
o Keep your car in good condition. For
better fuel economy and reducedmaintenance costs, maintain your car in accordance with the mainte- nance schedule in Section 5. If youdrive your car in severe conditions, more frequent maintenance is re- quired (see Section 5 for details).
C310D01JM-AAT Indicators and Warning The indicators should illuminate when the ignition key is turned to ON orSTART but should go out after three seconds. If the indicators do not illuminate, or theESP or ESP-OFF indicator does not go out after 3 seconds, have the vehicle checked by an authorized dealer. Should there be any unusual conditions in the device while driving, ESP-OFFindicator illuminates as a warning. If ESP-OFF indicator illuminates, pull your car to a safe place and stop theengine. Then, start the engine again to check if the ESP-OFF indicator goes out. If the indicator remains lit even after the engine has been started, have your carchecked by an authorized Hyundai dealer.
Page 112 of 191

DRIVING YOUR HYUNDAI 2- 17
C160K01A-DAT Carry Emergency Equipment Depending on the severity of the weather where you drive your car, youshould carry appropriate emergency equipment. Some of the items you may want to carry include tyre chains,tow straps or chains, flashlight, emer- gency flares, sand, a shovel, jumper cables, a window scraper, gloves,ground cloth, overalls, a blanket, etc.
C160J01A-AAT Don't Let Ice and Snow Accumu- late Underneath Under some conditions, snow and ice can build up under the fenders and interfere with the steering. When driv-ing in severe winter conditions where this may happen, you should periodi- cally check underneath the car to besure the movement of the front wheels and the steering components are not obstructed.
C170A01A-DAT HIGH SPEED MOTORING Pre-Trip Inspections
1. Tyres: Adjust the tyre inflation pressures to specification. Low tyre inflation pres-sures will result in overheating and possible failure of the tyres. Avoid using worn or damaged tyres whichmay result in reduced traction or tyre failure. NOTE: Never exceed the maximum tyre inflation pressure shown on the tyres.
2. Fuel, engine coolant and engine oil: High speed travel consumes 1.5 times more fuel than urban motoring. Do notforget to check both engine coolant and engine oil.
3. Drive belt: A loose or damaged drive belt may result in overheating of the engine.
C160H01A-DAT Use Approved Anti-Freeze in WindowWasher System To keep the water in the window washer system from freezing, add an approved anti-freeze solution in accordance withinstructions on the container. Window washer anti-freeze is available from Hyundai dealers and most auto partsoutlets. Do not use engine coolant or other types of anti-freeze as these may damage the paint finish.
C160I01L-DAT Don't Let Your Hand Brake Freeze Under some conditions your hand brake can freeze in the engaged posi-tion. This is most likely to happen when there is an accumulation of snow or ice around or near the rear brakes or if thebrakes are wet. If there is a risk the hand brake may freeze, apply it only temporarily while you put the gearselector lever in "P" and block the rear wheels so the car cannot roll. Then release the hand brake.
Page 115 of 191
2- 20 DRIVING YOUR HYUNDAI
!
C190F01A-DAT Trailer or Vehicle Towing Tips
1. Before towing, check hitch and
safety chain connections as well as proper operation of the trailer run- ning lights, brake lights, and turn signals.
2. Always drive your vehicle at a mod- erate speed (Less than 100 km/h).
3. Trailer towing requires more fuel than normal conditions.
4. To maintain engine braking effi-
ciency and electrical charging per-formance, do not use fifth gear (manual transmission) or overdrive (automatic transmission).
5. Always secure items in the trailer to prevent load shift while driving.
6. Check the condition and air pres- sure of all tyres on the trailer and your car. Low tyre pressure can seriously affect the handling. Alsocheck the spare tyre.
7. The vehicle/trailer combination is
more affected by crosswind andbuffeting. When being passed by a large vehicle, keep a constant speed and steer straight ahead. If there istoo much wind buffeting slow down to get out of the other vehicle's air turbulence.
!
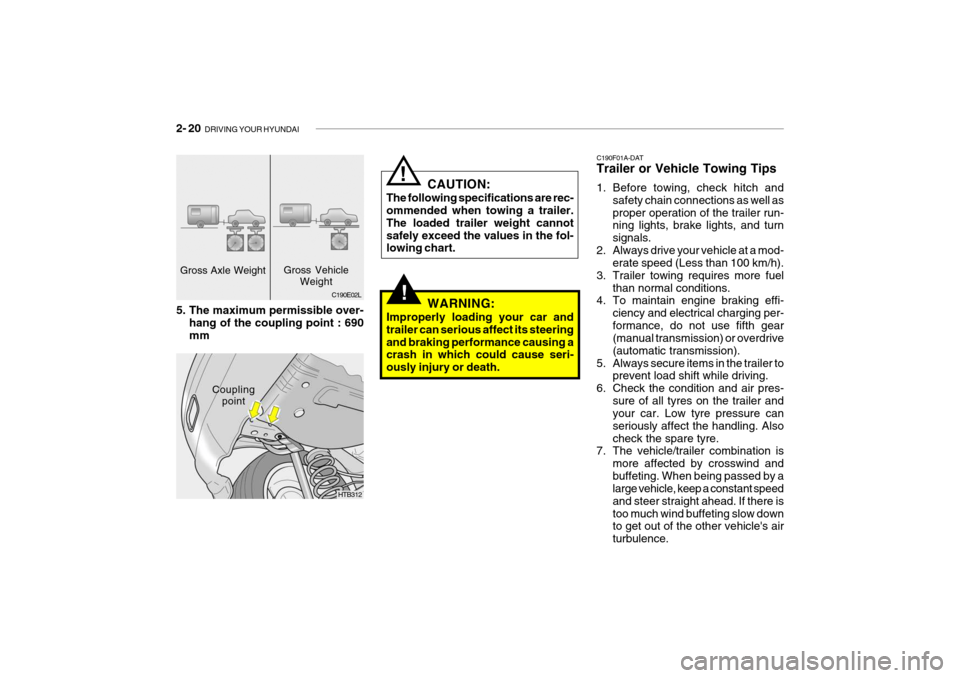
Gross Axle Weight
Couplingpoint C190E02L
Gross Vehicle
Weight
HTB312
5. The maximum permissible over-
hang of the coupling point : 690 mm CAUTION:
The following specifications are rec- ommended when towing a trailer. The loaded trailer weight cannotsafely exceed the values in the fol- lowing chart.
WARNING:
Improperly loading your car and trailer can serious affect its steeringand braking performance causing a crash in which could cause seri- ously injury or death.
Page 165 of 191
DO-IT-YOURSELF MAINTENANCE 6- 23
G290A01FC-DAT HEADLIGHT AIMING ADJUSTMENT Before performing aiming adjustment, make sure of the following.
1. Keep all tyres inflated to the correct
pressure.
2. Place the vehicle on level ground
and press the front bumper & rear bumper down several times. Place the vehicle at a distance of 3,000 mm (118 in.) from the test wall.
3. See that the vehicle is unloaded (except for full levels of coolant,engine oil and fuel, and spare tyre,jack, and tools).
4. Clean the head light lenses and turn
on the headlights (low beam).
G240A01A-DAT POWER STEERING HOSES It is suggested that you check the power steering hose connections forfluid leakage at those intervals speci- fied in the vehicle maintenance schedule in Section 5. The power steer-ing hoses should be replaced if there is severe surface cracking, pulling, scuff- ing or worn spots. Deterioration of thehoses could cause premature failure.
HTB269
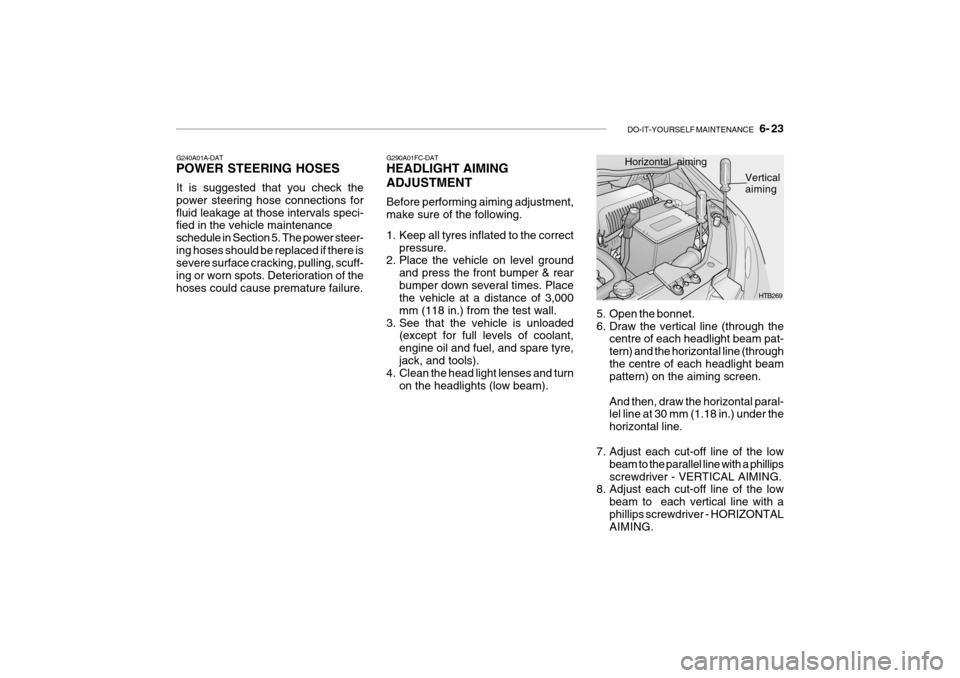
Horizontal aiming
Vertical
aiming
5. Open the bonnet.
6. Draw the vertical line (through the centre of each headlight beam pat-tern) and the horizontal line (throughthe centre of each headlight beam pattern) on the aiming screen. And then, draw the horizontal paral- lel line at 30 mm (1.18 in.) under the horizontal line.
7. Adjust each cut-off line of the low beam to the parallel line with a phillipsscrewdriver - VERTICAL AIMING.
8. Adjust each cut-off line of the low
beam to each vertical line with aphillips screwdriver - HORIZONTAL AIMING.