Hyundai Ioniq Electric 2019 Owner's Manual - RHD (UK, Australia)
Manufacturer: HYUNDAI, Model Year: 2019, Model line: Ioniq Electric, Model: Hyundai Ioniq Electric 2019Pages: 526, PDF Size: 16.63 MB
Page 171 of 526
3-24
Convenient features of your vehicle
The POWER button must be in the
ON position to be able to raise or
lower the windows. Each door has a
Power Window switch to control that
door's window. The driver has a
Power Window Lock switch which
can block the operation of passenger
windows. The power windows will
operate for approximately 30 sec-
onds after the POWER button is
placed in the ACC or OFF position.
However, if the front doors are
opened, the Power Windows cannot
be operated even within the 30 sec-
ond period.
Information
• In cold and wet climates, power win- dows may not work properly due to
freezing conditions.
• Whilst driving with the rear win- dows down or with the sunroof (if
equipped) opened (or partially
opened), your vehicle may demon-
strate a wind buffeting or pulsation
noise. This noise is normal and can
be reduced or eliminated by taking
the following actions. If the noise
occurs with one or both of the rear
windows down, partially lower both
front windows approximately 2.5
cm. If you experience the noise with
the sunroof open, slightly close the
sunroof.
Window opening and closing
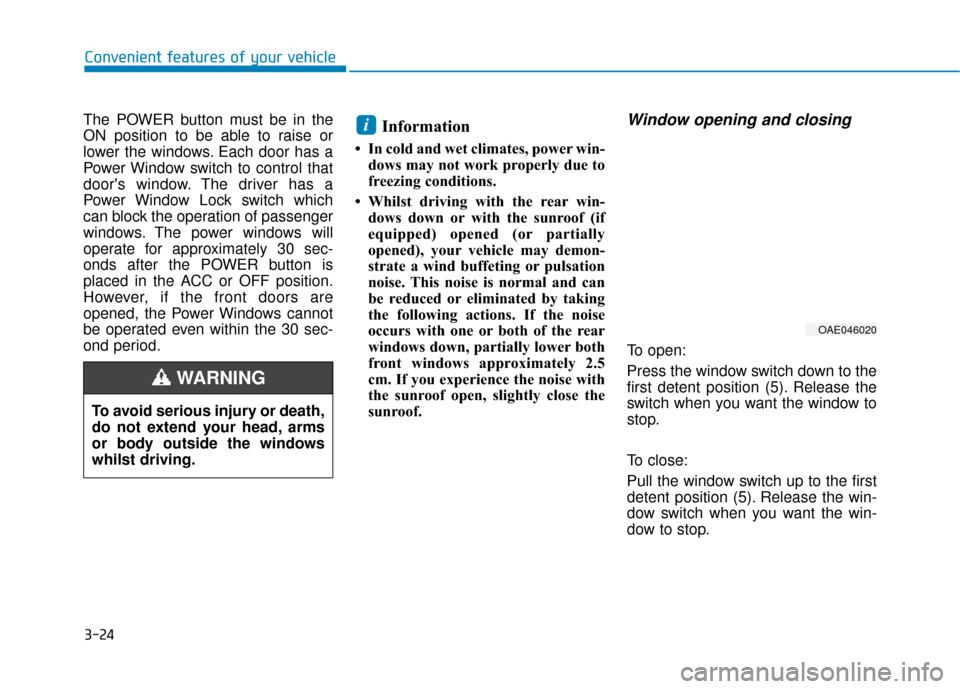
To open:
Press the window switch down to the
first detent position (5). Release the
switch when you want the window to
stop.
To close:
Pull the window switch up to the first
detent position (5). Release the win-
dow switch when you want the win-
dow to stop.
i
To avoid serious injury or death,
do not extend your head, arms
or body outside the windows
whilst driving.
WARNING
OAE046020
Page 172 of 526
3-25
Convenient features of your vehicle
3
Auto down window (if equipped)
Pressing the power window switch
momentarily to the second detent
position (6) completely lowers the
window even when the switch is
released. To stop the window at the
desired position whilst the window is
in operation, pull up or press down
and release the switch.
Auto up/down window (if equipped)
Pressing or pulling up the power win-
dow switch momentarily to the sec-
ond detent position (6) completely
lowers or lifts the window even when
the switch is released. To stop the
window at the desired position whilst
the window is in operation, pull up or
press down and release the switch.
To reset the power windows
If the power windows do not operate
normally, the automatic power win-
dow system must be reset as follows:
1. Place the POWER button to the
ON position.
2. Close the window and continue pulling up on the power window
switch for at least one second.
If the power windows do not operate
properly after resetting, it is recom-
mended that the system be checked
by a HYUNDAI authorised repairer.
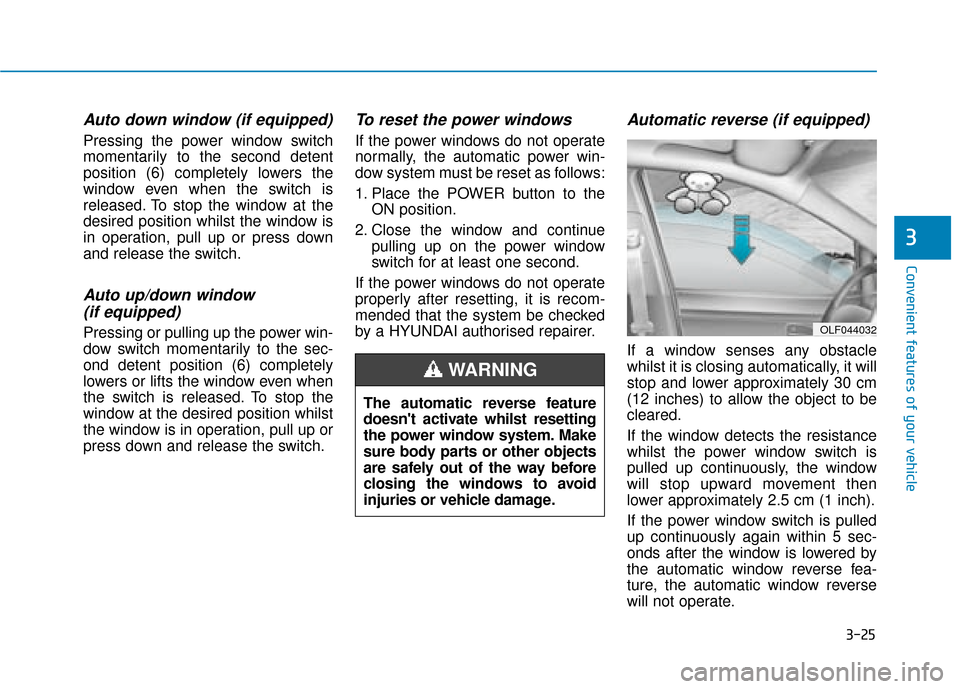
Automatic reverse (if equipped)
If a window senses any obstacle
whilst it is closing automatically, it will
stop and lower approximately 30 cm
(12 inches) to allow the object to be
cleared.
If the window detects the resistance
whilst the power window switch is
pulled up continuously, the window
will stop upward movement then
lower approximately 2.5 cm (1 inch).
If the power window switch is pulled
up continuously again within 5 sec-
onds after the window is lowered by
the automatic window reverse fea-
ture, the automatic window reverse
will not operate.
OLF044032
The automatic reverse feature
doesn't activate whilst resetting
the power window system. Make
sure body parts or other objects
are safely out of the way before
closing the windows to avoid
injuries or vehicle damage.
WARNING
Page 173 of 526
3-26
Convenient features of your vehicle
Information
The automatic reverse feature is only
active when the “Auto Up” feature is
used by fully pulling up the switch to
the second detent.
Do not install any accessories on
the windows. The automatic
reverse feature may not operate.
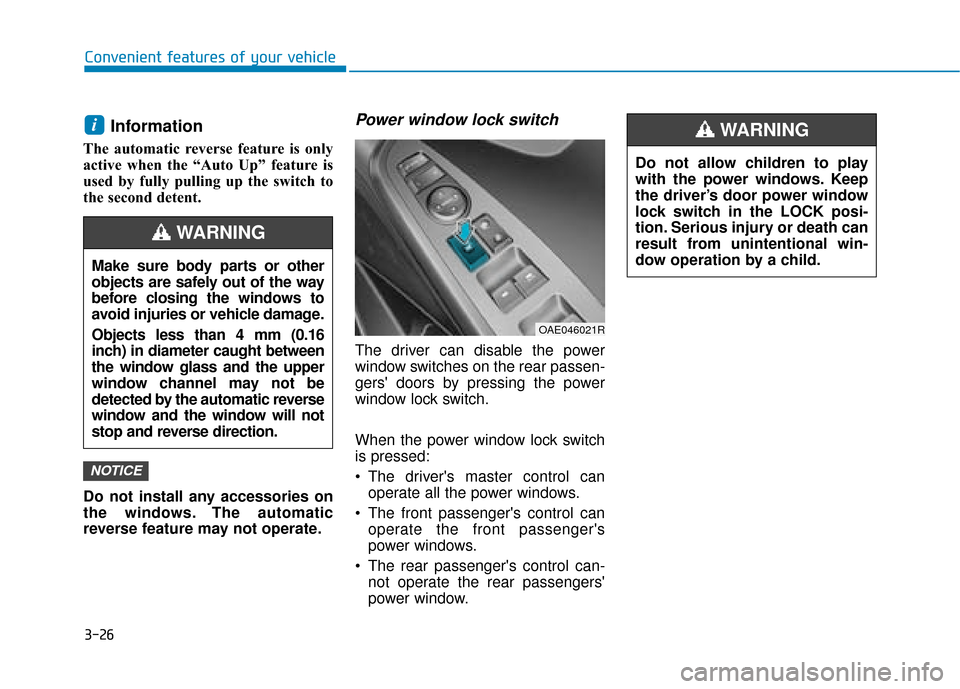
Power window lock switch
The driver can disable the power
window switches on the rear passen-
gers' doors by pressing the power
window lock switch.
When the power window lock switch
is pressed:
The driver's master control canoperate all the power windows.
The front passenger's control can operate the front passenger's
power windows.
The rear passenger's control can- not operate the rear passengers'
power window.
NOTICE
i
Make sure body parts or other
objects are safely out of the way
before closing the windows to
avoid injuries or vehicle damage.
Objects less than 4 mm (0.16
inch) in diameter caught between
the window glass and the upper
window channel may not be
detected by the automatic reverse
window and the window will not
stop and reverse direction.
WARNING
Do not allow children to play
with the power windows. Keep
the driver’s door power window
lock switch in the LOCK posi-
tion. Serious injury or death can
result from unintentional win-
dow operation by a child.
WARNING
OAE046021R
Page 174 of 526
3-27
Convenient features of your vehicle
3
To prevent possible damage tothe power window system, do
not open or close two windows
or more at the same time. This
will also ensure the longevity of
the fuse.
Never try to operate the main switch on the driver's door and
the individual door window
switch in opposite directions at
the same time. If this is done, the
window will stop and cannot be
opened or closed.
NOTICE
NEVER leave the keys in your
vehicle with unsupervised
children, when the vehicle is
ON.
NEVER leave any child unat-
tended in the vehicle. Even
very young children may inad-
vertently cause the vehicle to
move, entangle themselves in
the windows, or otherwise
injure themselves or others.
Always double check to make
sure all arms, hands, head
and other obstructions are
safely out of the way before
closing a window.
Do not allow children to play
with the power windows. Keep
the driver’s door power window
lock switch in the LOCK posi-
tion (pressed). Serious injury
can result from unintentional
window operation by the child.
Do not extend your head,
arms or body outside the win-
dows whilst driving.
WARNING
Page 175 of 526
3-28
Convenient features of your vehicle
S
SU
U N
NR
RO
O O
OF
F
(
( I
IF
F
E
E Q
Q U
UI
IP
P P
PE
ED
D )
)
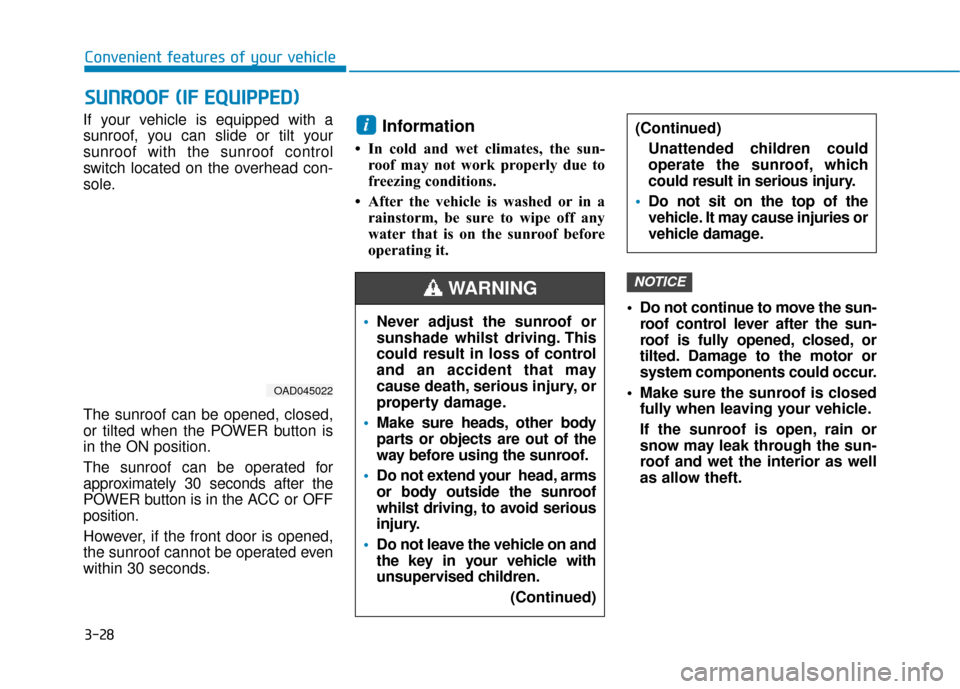
If your vehicle is equipped with a
sunroof, you can slide or tilt your
sunroof with the sunroof control
switch located on the overhead con-
sole.
The sunroof can be opened, closed,
or tilted when the POWER button is
in the ON position.
The sunroof can be operated for
approximately 30 seconds after the
POWER button is in the ACC or OFF
position.
However, if the front door is opened,
the sunroof cannot be operated even
within 30 seconds.Information
• In cold and wet climates, the sun-
roof may not work properly due to
freezing conditions.
• After the vehicle is washed or in a rainstorm, be sure to wipe off any
water that is on the sunroof before
operating it.
Do not continue to move the sun-roof control lever after the sun-
roof is fully opened, closed, or
tilted. Damage to the motor or
system components could occur.
Make sure the sunroof is closed fully when leaving your vehicle.
If the sunroof is open, rain or
snow may leak through the sun-
roof and wet the interior as well
as allow theft.
NOTICE
i
OAD045022
Never adjust the sunroof or
sunshade whilst driving. This
could result in loss of control
and an accident that may
cause death, serious injury, or
property damage.
Make sure heads, other body
parts or objects are out of the
way before using the sunroof.
Do not extend your head, arms
or body outside the sunroof
whilst driving, to avoid serious
injury.
Do not leave the vehicle on and
the key in your vehicle with
unsupervised children.
(Continued)
WARNING
(Continued)Unattended children could
operate the sunroof, which
could result in serious injury.
Do not sit on the top of the
vehicle. It may cause injuries or
vehicle damage.
Page 176 of 526
3-29
Convenient features of your vehicle
3
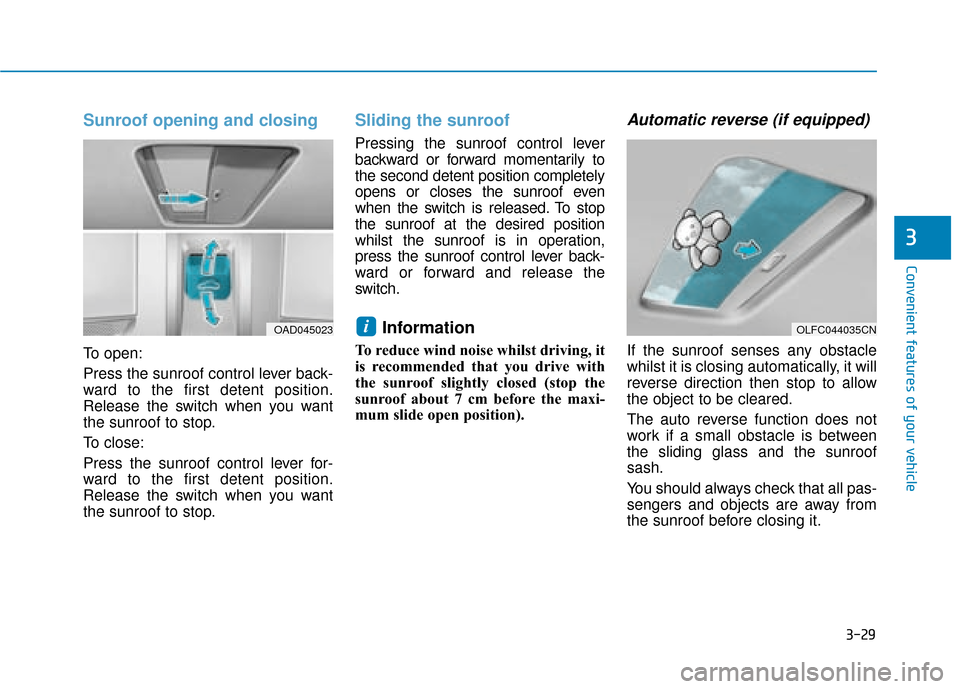
Sunroof opening and closing
To open:
Press the sunroof control lever back-
ward to the first detent position.
Release the switch when you want
the sunroof to stop.
To close:
Press the sunroof control lever for-
ward to the first detent position.
Release the switch when you want
the sunroof to stop.
Sliding the sunroof
Pressing the sunroof control lever
backward or forward momentarily to
the second detent position completely
opens or closes the sunroof even
when the switch is released. To stop
the sunroof at the desired position
whilst the sunroof is in operation,
press the sunroof control lever back-
ward or forward and release the
switch.
Information
To reduce wind noise whilst driving, it
is recommended that you drive with
the sunroof slightly closed (stop the
sunroof about 7 cm before the maxi-
mum slide open position).
Automatic reverse (if equipped)
If the sunroof senses any obstacle
whilst it is closing automatically, it will
reverse direction then stop to allow
the object to be cleared.
The auto reverse function does not
work if a small obstacle is between
the sliding glass and the sunroof
sash.
You should always check that all pas-
sengers and objects are away from
the sunroof before closing it.
iOLFC044035CNOAD045023
Page 177 of 526
3-30
Convenient features of your vehicle
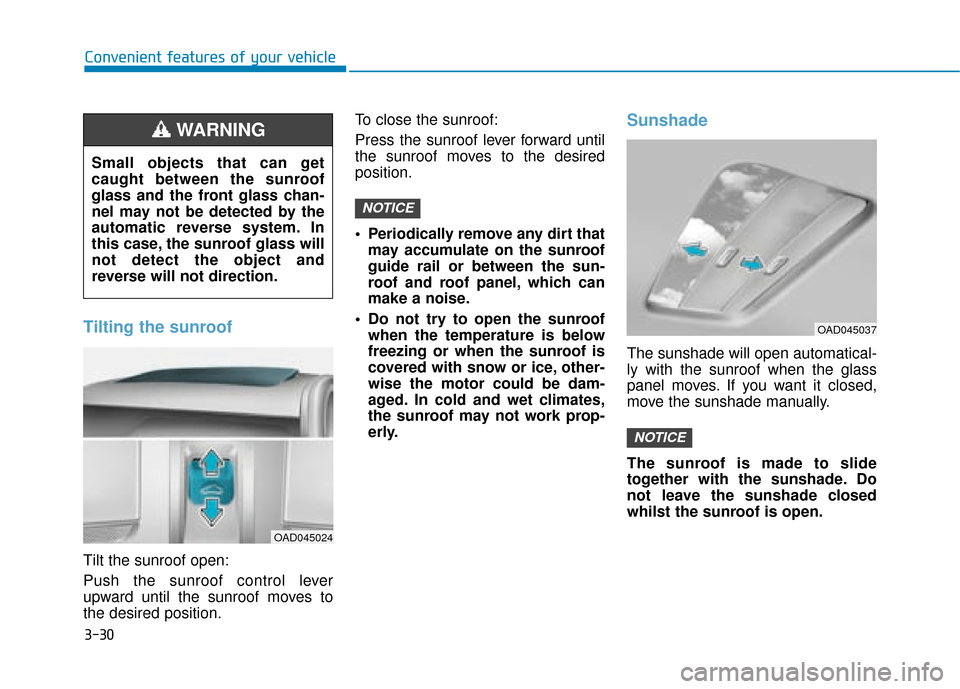
Tilting the sunroof
Tilt the sunroof open:
Push the sunroof control lever
upward until the sunroof moves to
the desired position.To close the sunroof:
Press the sunroof lever forward until
the sunroof moves to the desired
position.
Periodically remove any dirt that
may accumulate on the sunroof
guide rail or between the sun-
roof and roof panel, which can
make a noise.
Do not try to open the sunroof when the temperature is below
freezing or when the sunroof is
covered with snow or ice, other-
wise the motor could be dam-
aged. In cold and wet climates,
the sunroof may not work prop-
erly.
Sunshade
The sunshade will open automatical-
ly with the sunroof when the glass
panel moves. If you want it closed,
move the sunshade manually.
The sunroof is made to slide
together with the sunshade. Do
not leave the sunshade closed
whilst the sunroof is open.
NOTICE
NOTICE
OAD045037
Small objects that can get
caught between the sunroof
glass and the front glass chan-
nel may not be detected by the
automatic reverse system. In
this case, the sunroof glass will
not detect the object and
reverse will not direction.
WARNING
OAD045024
Page 178 of 526
3-31
Convenient features of your vehicle
3
Resetting the sunroof
The sunroof may need to be reset if
the following conditions occur:
- Battery is discharged or disconnect-ed or the related fuse has been
replaced or disconnected
- The one-touch sliding function of the sunroof does not normally operate
To reset the sunroof, perform the fol-
lowing steps:
1. Place the POWER button to the ON position or when the vehicle is
in the ready ( ) mode. It is rec-
ommended to reset the sunroof
whilst the vehicle is in the ready
( ) mode.
2. Push the control lever forward. The sunroof will close completely or tilt
depending on the condition of the
sunroof.
3. Release the control lever until the sunroof does not move. 4. Push the control lever forward
about 10 seconds.
- When the sunroof is in the close position :
The glass will tilt and slightly move up and down.
- When the sunroof is in the tilt posi- tion:
The glass will slightly move up and down.
Do not release the lever until the
operation is completed.
If you release the lever during opera-
tion, try again from step 2.
5. Within 3 seconds, push the control lever forward until the sunroof
operates as follows:
Tilt down → Slide Open → Slide
Close.
Do not release the lever until the
operation is completed.
If you release the lever during opera-
tion, try again from step 2. 6. Release the sunroof control lever
after all operation has completed.
The sunroof system has been
reset.
Information
• If the sunroof does not reset whenthe vehicle battery is disconnected
or discharged, or related fuse is
blown, the sunroof may not operate
normally.
• For more detailed information, we recommend that you contact a
HYUNDAI authorised repairer.
i
Page 179 of 526
3-32
Convenient features of your vehicle
Bonnet
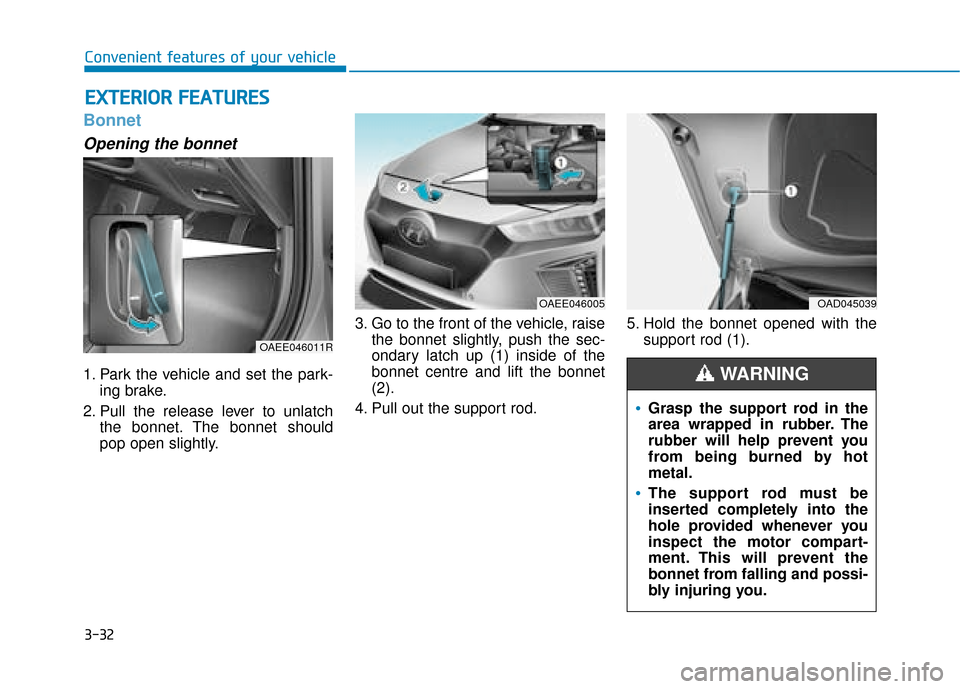
Opening the bonnet
1. Park the vehicle and set the park-ing brake.
2. Pull the release lever to unlatch the bonnet. The bonnet should
pop open slightly. 3. Go to the front of the vehicle, raise
the bonnet slightly, push the sec-
ondary latch up (1) inside of the
bonnet centre and lift the bonnet
(2).
4. Pull out the support rod. 5. Hold the bonnet opened with the
support rod (1).
E EX
X T
TE
ER
R I
IO
O R
R
F
F E
E A
A T
TU
U R
RE
ES
S
OAEE046005
Grasp the support rod in the
area wrapped in rubber. The
rubber will help prevent you
from being burned by hot
metal.
The support rod must be
inserted completely into the
hole provided whenever you
inspect the motor compart-
ment. This will prevent the
bonnet from falling and possi-
bly injuring you.
WARNING
OAD045039
OAEE046011R
Page 180 of 526
3-33
Convenient features of your vehicle
3
Closing the bonnet
1. Before closing the bonnet, checkthe following:
be correctly installed.
bustible material must be removed
from the motor compartment.
2. Return the support rod to its clip to prevent it from rattling.
3. Lower the bonnet halfway (lifted approximately 30cm from the
closed position) and push down to
securely lock in place. Then double
check to be sure the bonnet is
secure. If the bonnet can slightly be
raised, it is not securely locked.
Open it again and close it with more
force.
Tailgate
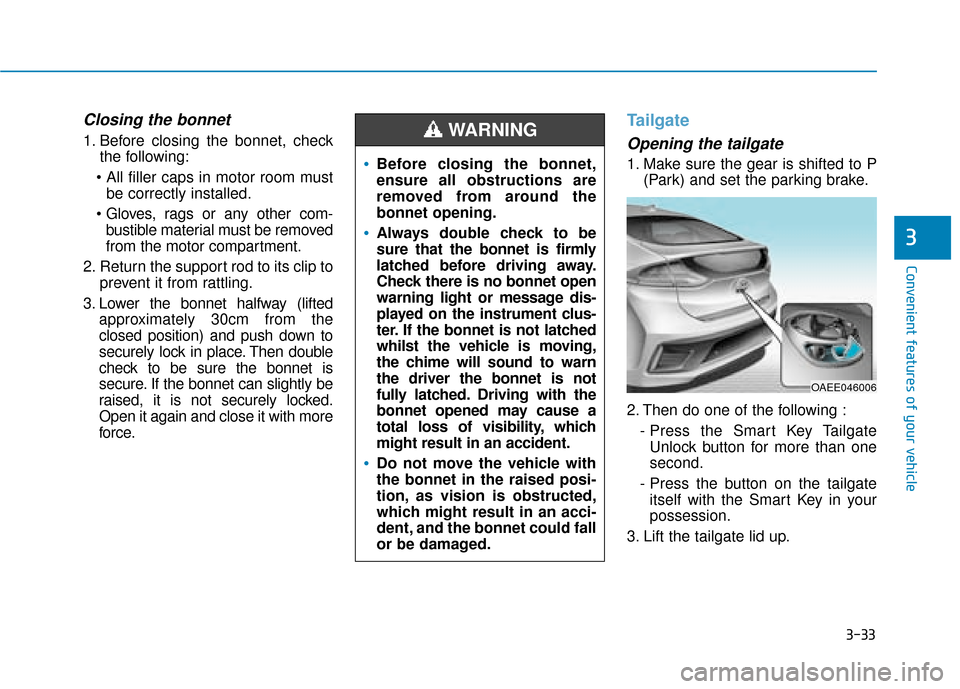
Opening the tailgate
1. Make sure the gear is shifted to P (Park) and set the parking brake.
2. Then do one of the following : - Press the Smart Key TailgateUnlock button for more than one
second.
- Press the button on the tailgate itself with the Smart Key in your
possession.
3. Lift the tailgate lid up.Before closing the bonnet,
ensure all obstructions are
removed from around the
bonnet opening.
Always double check to be
sure that the bonnet is firmly
latched before driving away.
Check there is no bonnet open
warning light or message dis-
played on the instrument clus-
ter. If the bonnet is not latched
whilst the vehicle is moving,
the chime will sound to warn
the driver the bonnet is not
fully latched. Driving with the
bonnet opened may cause a
total loss of visibility, which
might result in an accident.
Do not move the vehicle with
the bonnet in the raised posi-
tion, as vision is obstructed,
which might result in an acci-
dent, and the bonnet could fall
or be damaged.
WARNING
OAEE046006