instrument panel Hyundai Ioniq Electric 2019 Owner's Manual - RHD (UK, Australia)
[x] Cancel search | Manufacturer: HYUNDAI, Model Year: 2019, Model line: Ioniq Electric, Model: Hyundai Ioniq Electric 2019Pages: 526, PDF Size: 16.63 MB
Page 73 of 526
Your vehicle at a glance
1
Your vehicle at a glance
1Exterior overview (front view) ............................1-2
Exterior overview (rear view)..............................1-3
Interior overview ....................................................1-4
Instrument panel overview ...................................1-5
Motor compartment...............................................1-6
Page 76 of 526
1-4
Your vehicle at a glance
I
IN
N T
TE
ER
R I
IO
O R
R
O
O V
VE
ER
R V
V I
IE
E W
W
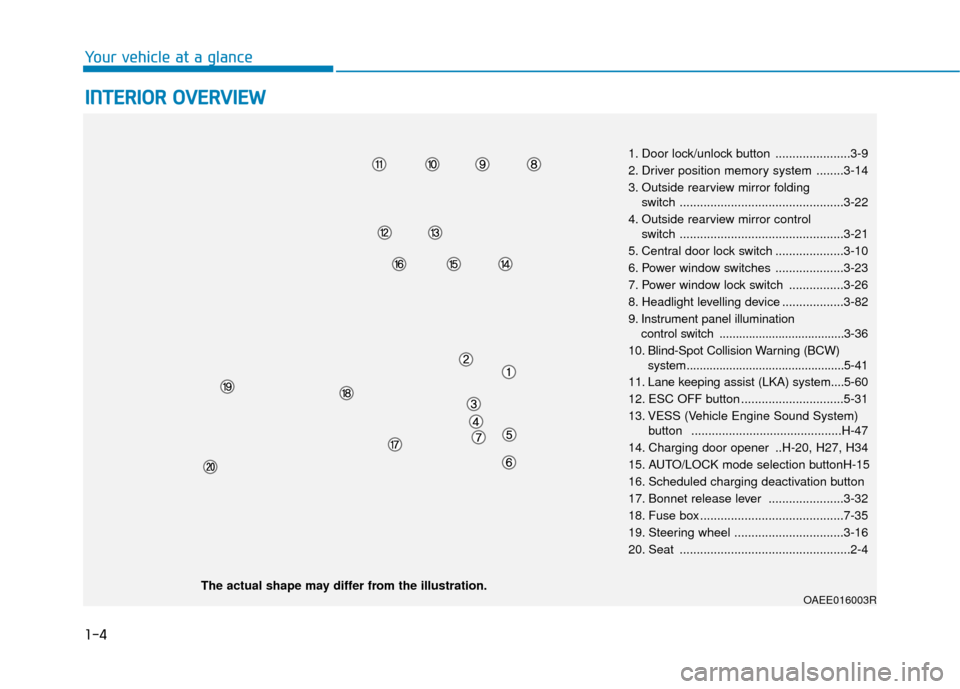
1. Door lock/unlock button ......................3-9
2. Driver position memory system ........3-14
3. Outside rearview mirror folding
switch ................................................3-22
4. Outside rearview mirror control switch ................................................3-21
5. Central door lock switch ....................3-10
6. Power window switches ....................3-23
7. Power window lock switch ................3-26
8. Headlight levelling device ..................3-82
9. Instrument panel illumination control switch ......................................3-36
10. Blind-Spot Collision Warning (BCW) system................................................5-41
11. Lane keeping assist (LKA) system....5-60
12. ESC OFF button ..............................5-31
13. VESS (Vehicle Engine Sound System) button ............................................H-47
14. Charging door opener ..H-20, H27, H34
15. AUTO/LOCK mode selection buttonH-15
16. Scheduled charging deactivation button
17. Bonnet release lever ......................3-32
18. Fuse box ..........................................7-35
19. Steering wheel ................................3-16
20. Seat ..................................................2-4
OAEE016003RThe actual shape may differ from the illustration.
Page 110 of 526
2-32
Safety system of your vehicle
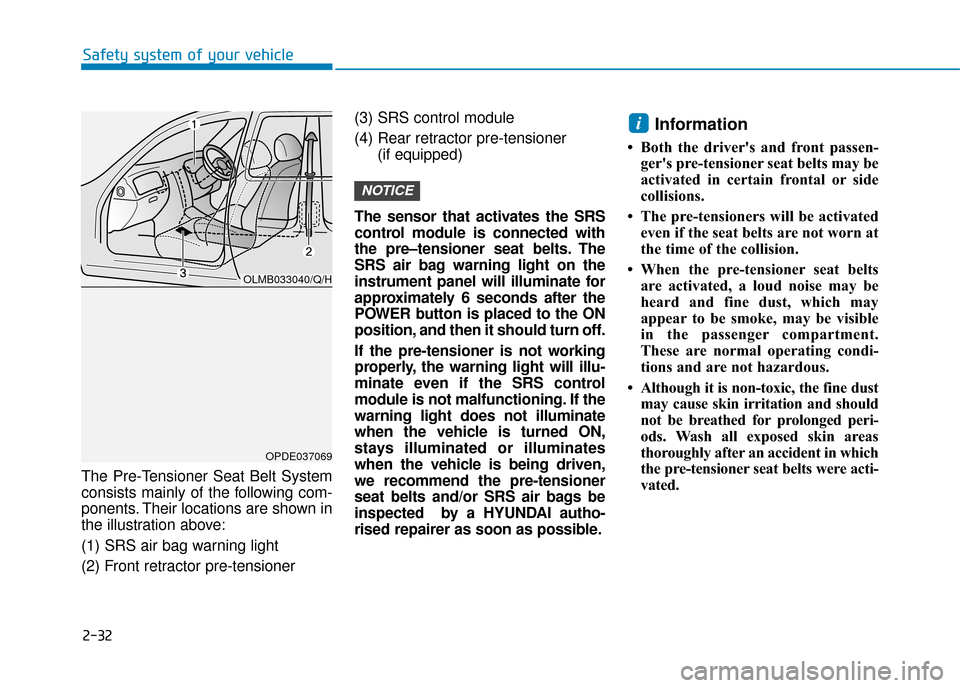
The Pre-Tensioner Seat Belt System
consists mainly of the following com-
ponents. Their locations are shown in
the illustration above:
(1) SRS air bag warning light
(2) Front retractor pre-tensioner (3) SRS control module
(4) Rear retractor pre-tensioner
(if equipped)
The sensor that activates the SRS
control module is connected with
the pre–tensioner seat belts. The
SRS air bag warning light on the
instrument panel will illuminate for
approximately 6 seconds after the
POWER button is placed to the ON
position, and then it should turn off.
If the pre-tensioner is not working
properly, the warning light will illu-
minate even if the SRS control
module is not malfunctioning. If the
warning light does not illuminate
when the vehicle is turned ON,
stays illuminated or illuminates
when the vehicle is being driven,
we recommend the pre-tensioner
seat belts and/or SRS air bags be
inspected by a HYUNDAI autho-
rised repairer as soon as possible.
Information
• Both the driver's and front passen- ger's pre-tensioner seat belts may be
activated in certain frontal or side
collisions.
• The pre-tensioners will be activated even if the seat belts are not worn at
the time of the collision.
• When the pre-tensioner seat belts are activated, a loud noise may be
heard and fine dust, which may
appear to be smoke, may be visible
in the passenger compartment.
These are normal operating condi-
tions and are not hazardous.
• Although it is non-toxic, the fine dust may cause skin irritation and should
not be breathed for prolonged peri-
ods. Wash all exposed skin areas
thoroughly after an accident in which
the pre-tensioner seat belts were acti-
vated.
i
NOTICE
OLMB033040/Q/H
OPDE037069
Page 130 of 526
2-52
Safety system of your vehicle
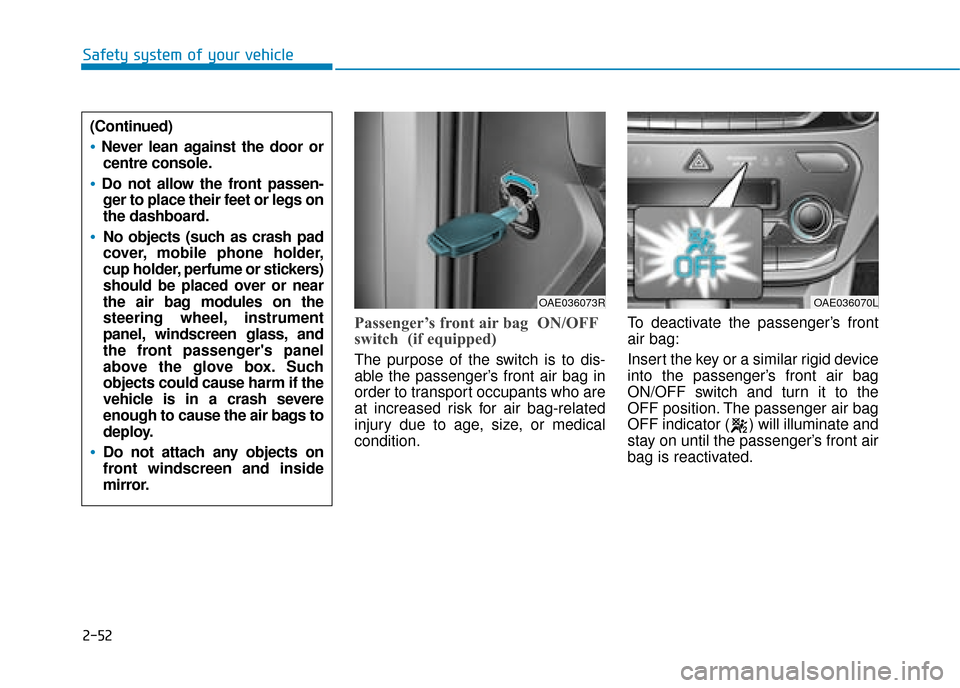
Passenger’s front air bag ON/OFF
switch (if equipped)
The purpose of the switch is to dis-
able the passenger’s front air bag in
order to transport occupants who are
at increased risk for air bag-related
injury due to age, size, or medical
condition.To deactivate the passenger’s front
air bag:
Insert the key or a similar rigid device
into the passenger’s front air bag
ON/OFF switch and turn it to the
OFF position. The passenger air bag
OFF indicator ( ) will illuminate and
stay on until the passenger’s front air
bag is reactivated.
OAE036073ROAE036070L
(Continued)
Never lean against the door or
centre console.
Do not allow the front passen-ger to place their feet or legs on
the dashboard.
No objects (such as crash pad
cover, mobile phone holder,
cup holder, perfume or stickers)
should be placed over or near
the air bag modules on the
steering wheel, instrument
panel, windscreen glass, and
the front passenger's panel
above the glove box. Such
objects could cause harm if the
vehicle is in a crash severe
enough to cause the air bags to
deploy.
Do not attach any objects on
front windscreen and inside
mirror.
Page 131 of 526
2-53
Safety system of your vehicle
2
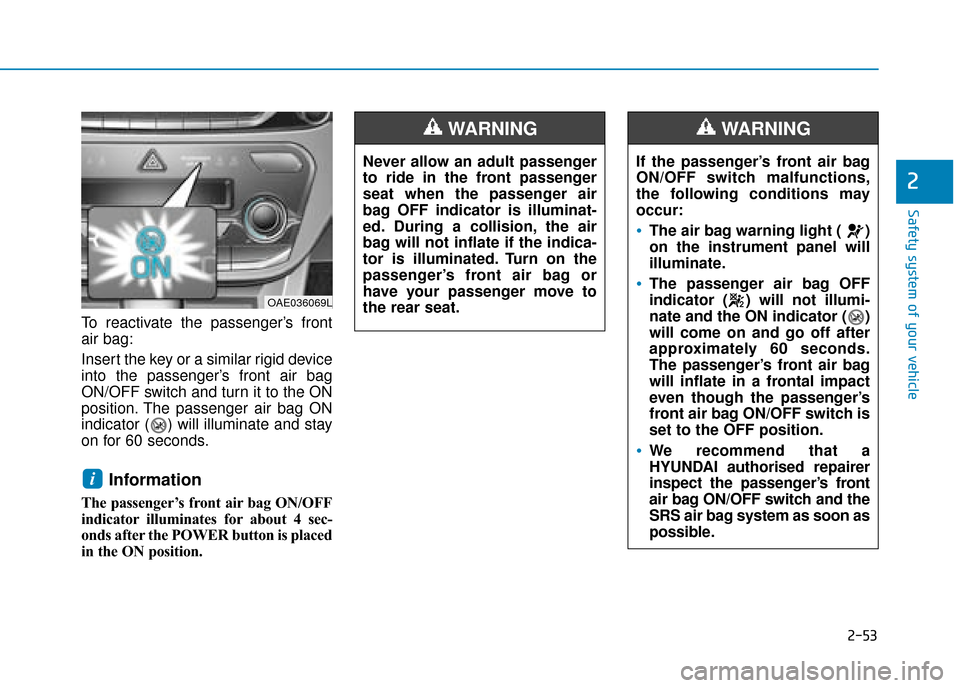
To reactivate the passenger’s front
air bag:
Insert the key or a similar rigid device
into the passenger’s front air bag
ON/OFF switch and turn it to the ON
position. The passenger air bag ON
indicator ( ) will illuminate and stay
on for 60 seconds.
Information
The passenger’s front air bag ON/OFF
indicator illuminates for about 4 sec-
onds after the POWER button is placed
in the ON position.
i
Never allow an adult passenger
to ride in the front passenger
seat when the passenger air
bag OFF indicator is illuminat-
ed. During a collision, the air
bag will not inflate if the indica-
tor is illuminated. Turn on the
passenger’s front air bag or
have your passenger move to
the rear seat.
WARNING
If the passenger’s front air bag
ON/OFF switch malfunctions,
the following conditions may
occur:
The air bag warning light ( )
on the instrument panel will
illuminate.
The passenger air bag OFF
indicator ( ) will not illumi-
nate and the ON indicator ( )
will come on and go off after
approximately 60 seconds.
The passenger’s front air bag
will inflate in a frontal impact
even though the passenger’s
front air bag ON/OFF switch is
set to the OFF position.
We recommend that a
HYUNDAI authorised repairer
inspect the passenger’s front
air bag ON/OFF switch and the
SRS air bag system as soon as
possible.
WARNING
OAE036069L
Page 135 of 526
2-57
Safety system of your vehicle
2
SRS warning light
The SRS (Supplement Restraint
System) air bag warning light on the
instrument panel displays the air bag
symbol depicted in the illustration. The
system checks the air bag electrical
system for malfunctions. The light indi-
cates that there is a potential problem
with your air bag system.During a moderate to severe frontal
collision, sensors will detect the vehi-
cle’s rapid deceleration. If the rate of
deceleration is high enough, the con-
trol unit will inflate the front air bags,
at the time and with the force needed.
The front air bags help protect the driv-
er and front passenger by responding
to frontal impacts in which seat belts
alone cannot provide adequate
restraint. When needed, the side air
bags help provide protection in the
event of a side impact or rollover by
supporting the side upper body area.
Air bags are activated (able to inflate
if necessary) only when the POWER
button is in the ON position.
Air bags inflate in the event of certain frontal or side collisions to help pro-
tect the occupants from serious
physical injury.
There is no single speed at which the air bags will inflate. Generally,
air bags are designed to inflate
based upon the severity of a colli-
sion and its direction. These two
factors determine whether the sen-
sors produce an electronic deploy-
ment/inflation signal.
If your SRS malfunctions, the
air bag may not inflate properly
during an accident increasing
the risk of serious injury or
death.
If any of the following condi-
tions occur, your SRS is mal-
functioning:
The light does not turn on for
approximately six seconds
when the POWER button is in
the ON position.
The light stays on after illumi-
nating for approximately six
seconds.
The light comes on whilst the
vehicle is in motion.
The light blinks when the
vehicle is running.
We recommend that a HYUNDAI
authorised repairer inspect the
SRS as soon as possible if any
of these conditions occur.
WARNING
Page 138 of 526
2-60
Safety system of your vehicle
What to expect after an air bag
inflates
After a frontal or side air bag inflates,
it will deflate very quickly. Air bag
inflation will not prevent the driver
from seeing out of the windscreen or
being able to steer. Curtain air bags
may remain partially inflated for
some time after they deploy.After an air bag inflates, take
the following precautions:
Open your windows and doors
as soon as possible after
impact to reduce prolonged
exposure to the smoke and
powder released by the inflat-
ing air bag.
Do not touch the air bag stor-
age area’s internal compo-
nents immediately after an air
bag has inflated. The parts
that come into contact with an
inflating air bag may be very
hot.
Always wash exposed skin
areas thoroughly with cold
water and mild soap.
We recommend that a
HYUNDAI authorised repairer
replace the air bag immediately
after deployment. Air bags are
designed to be used only once.
WARNING
To prevent objects from becom-
ing dangerous projectiles when
the passenger's air bag inflates:
Do not install or place any
objects (drink holder, CD hold-
er, stickers, etc.) on the front
passenger's panel above the
glove box where the passen-
ger's air bag is located.
Do not install a container of
liquid air freshener near the
instrument cluster or on the
instrument panel surface.
WARNING
Page 145 of 526
2-67
Safety system of your vehicle
2
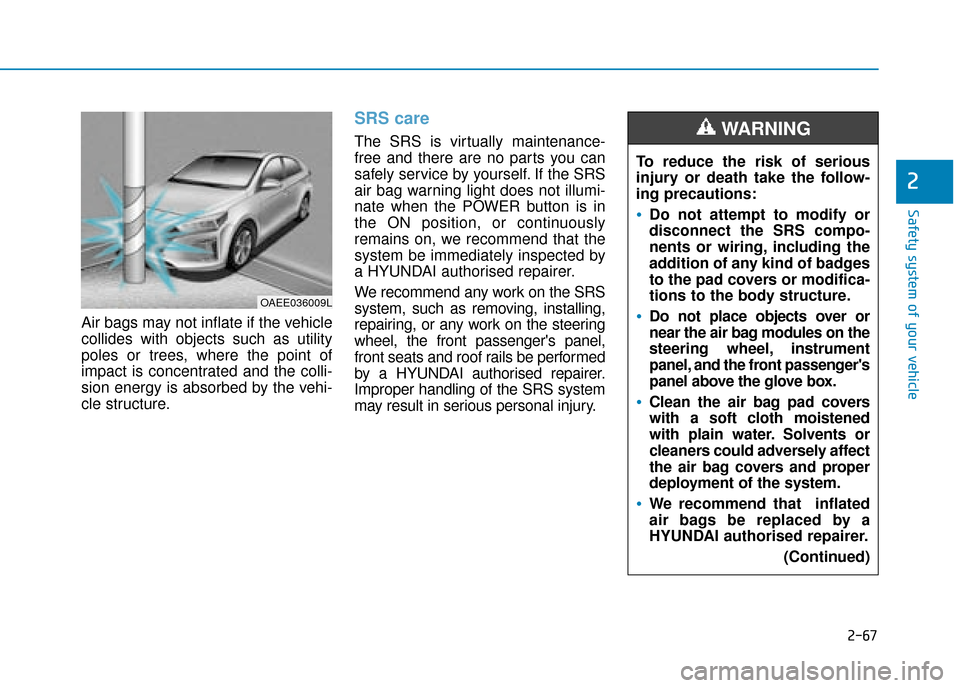
Air bags may not inflate if the vehicle
collides with objects such as utility
poles or trees, where the point of
impact is concentrated and the colli-
sion energy is absorbed by the vehi-
cle structure.
SRS care
The SRS is virtually maintenance-
free and there are no parts you can
safely service by yourself. If the SRS
air bag warning light does not illumi-
nate when the POWER button is in
the ON position, or continuously
remains on, we recommend that the
system be immediately inspected by
a HYUNDAI authorised repairer.
We recommend any work on the SRS
system, such as removing, installing,
repairing, or any work on the steering
wheel, the front passenger's panel,
front seats and roof rails be performed
by a HYUNDAI authorised repairer.
Improper handling of the SRS system
may result in serious personal injury.
OAEE036009L
To reduce the risk of serious
injury or death take the follow-
ing precautions:
Do not attempt to modify or
disconnect the SRS compo-
nents or wiring, including the
addition of any kind of badges
to the pad covers or modifica-
tions to the body structure.
Do not place objects over or
near the air bag modules on the
steering wheel, instrument
panel, and the front passenger's
panel above the glove box.
Clean the air bag pad covers
with a soft cloth moistened
with plain water. Solvents or
cleaners could adversely affect
the air bag covers and proper
deployment of the system.
We recommend that inflated
air bags be replaced by a
HYUNDAI authorised repairer.(Continued)
WARNING
Page 161 of 526
3-14
Convenient features of your vehicle
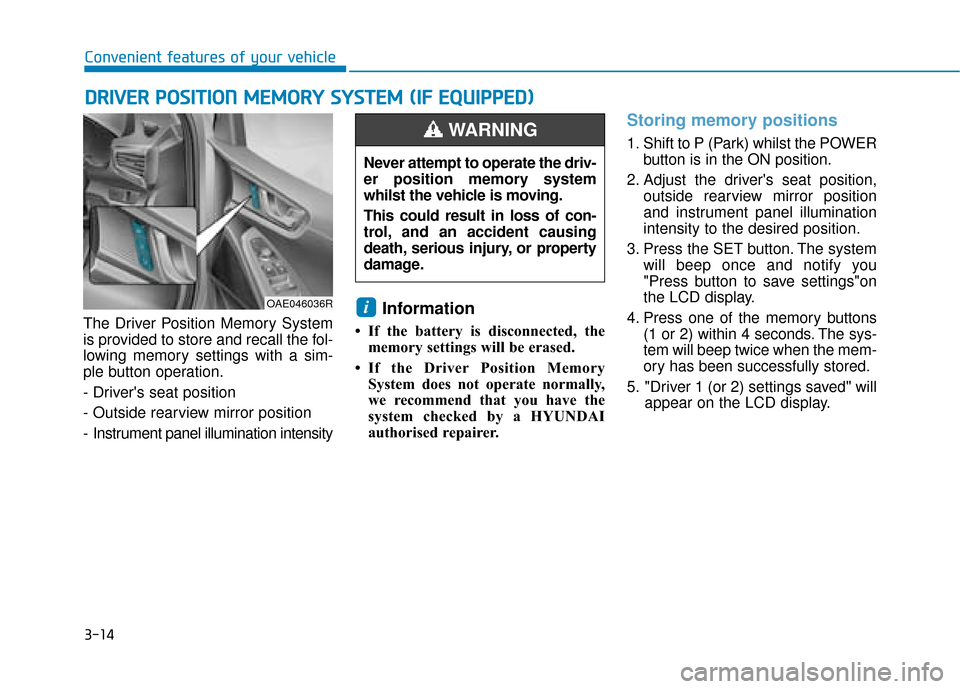
The Driver Position Memory System
is provided to store and recall the fol-
lowing memory settings with a sim-
ple button operation.
- Driver's seat position
- Outside rearview mirror position
- Instrument panel illumination intensity
Information
• If the battery is disconnected, the memory settings will be erased.
• If the Driver Position Memory System does not operate normally,
we recommend that you have the
system checked by a HYUNDAI
authorised repairer.
Storing memory positions
1. Shift to P (Park) whilst the POWER button is in the ON position.
2. Adjust the driver's seat position, outside rearview mirror position
and instrument panel illumination
intensity to the desired position.
3. Press the SET button. The system will beep once and notify you
"Press button to save settings"on
the LCD display.
4. Press one of the memory buttons (1 or 2) within 4 seconds. The sys-
tem will beep twice when the mem-
ory has been successfully stored.
5. "Driver 1 (or 2) settings saved" will appear on the LCD display.
i
D DR
RI
IV
V E
ER
R
P
P O
O S
SI
IT
T I
IO
O N
N
M
M E
EM
M O
OR
RY
Y
S
S Y
Y S
ST
T E
EM
M
(
( I
IF
F
E
E Q
Q U
UI
IP
P P
PE
ED
D )
)
OAE046036R
Never attempt to operate the driv-
er position memory system
whilst the vehicle is moving.
This could result in loss of con-
trol, and an accident causing
death, serious injury, or property
damage.
WARNING
Page 162 of 526
3-15
Convenient features of your vehicle
3
Recalling memory positions
1. Shift to P (Park) whilst the POWER
button is in the ON position.
2. Press the desired memory button (1 or 2). The system will beep
once, then the driver’s seat posi-
tion, outside rearview mirror and
instrument panel illumination will
automatically adjust to the stored
position (if equipped).
3. "Driver 1(or 2) settings is applied" will appear on the LCD display.Information
• Whilst recalling the "1" memoryposition, pressing the SET or 1 but-
ton temporarily stops the adjust-
ment of the recalled memory posi-
tion. Pressing the 2 button recalls
the "2" memory position.
• Whilst recalling the "2" memory position, pressing the SET or 2 but-
ton temporarily stops the adjust-
ment of the recalled memory posi-
tion. Pressing the 1 button recalls
the "1" memory position.
• Whilst recalling the stored positions, pressing one of the control buttons
for the driver's seat, outside
rearview mirror, or instrument
panel illumination will cause the
movement of that component to stop
and move in the direction that the
control button is pressed.
Easy access function
(if equipped)
The system will move the driver's
seat automatically as follows:
The gear is in P (Park)
- It will move the driver’s seat rear-ward when the POWER button is in
the OFF position and the driver’s
door is opened.
- It will move the driver’s seat forward when the vehicle is turned ON or
the driver’s door is closed with the
smart key with you.
You can activate or deactivate the
Easy Access Function from the User
Settings Mode on the LCD display.
For more details, refer to "LCD
Display" in this chapter.
i