door lock Hyundai Ioniq Plug-in Hybrid 2019 Owner's Manual - RHD (UK, Australia)
[x] Cancel search | Manufacturer: HYUNDAI, Model Year: 2019, Model line: Ioniq Plug-in Hybrid, Model: Hyundai Ioniq Plug-in Hybrid 2019Pages: 599, PDF Size: 17.32 MB
Page 7 of 599
H7
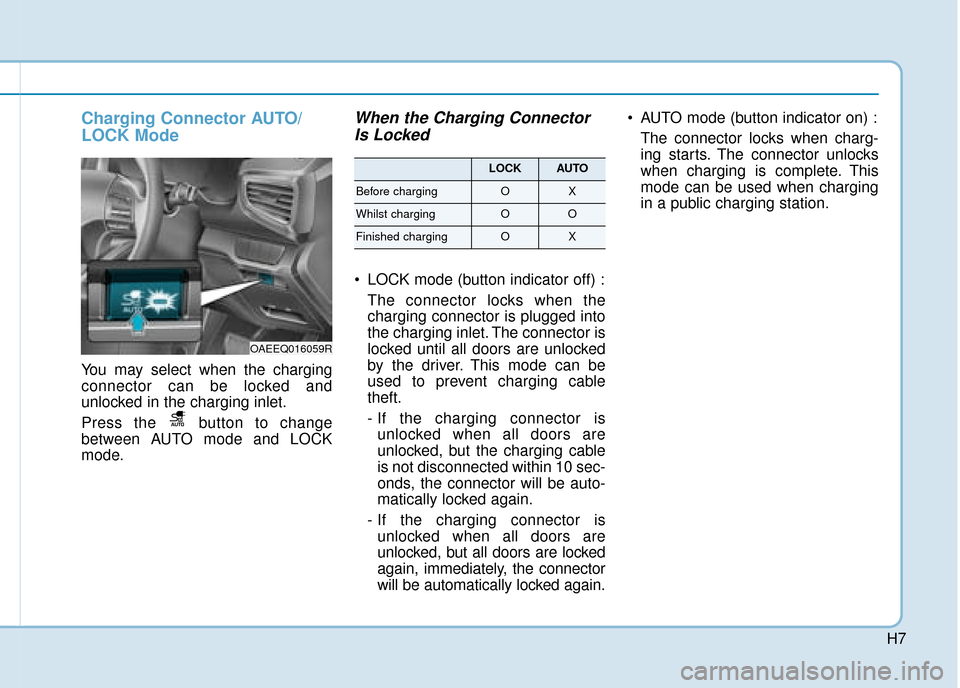
Charging Connector AUTO/
LOCK Mode
You may select when the charging
connector can be locked and
unlocked in the charging inlet.
Press the button to change
between AUTO mode and LOCK
mode.
When the Charging ConnectorIs Locked
LOCK mode (button indicator off) :
The connector locks when the
charging connector is plugged into
the charging inlet. The connector is
locked until all doors are unlocked
by the driver. This mode can be
used to prevent charging cable
theft.
- If the charging connector isunlocked when all doors are
unlocked, but the charging cable
is not disconnected within 10 sec-
onds, the connector will be auto-
matically locked again.
- If the charging connector is unlocked when all doors are
unlocked, but all doors are locked
again, immediately, the connector
will be automatically locked again. AUTO mode (button indicator on) :
The connector locks when charg-
ing starts. The connector unlocks
when charging is complete. This
mode can be used when charging
in a public charging station.
OAEEQ016059R
LOCKAUTO
Before chargingOX
Whilst chargingOO
Finished chargingOX
Page 10 of 599
H10
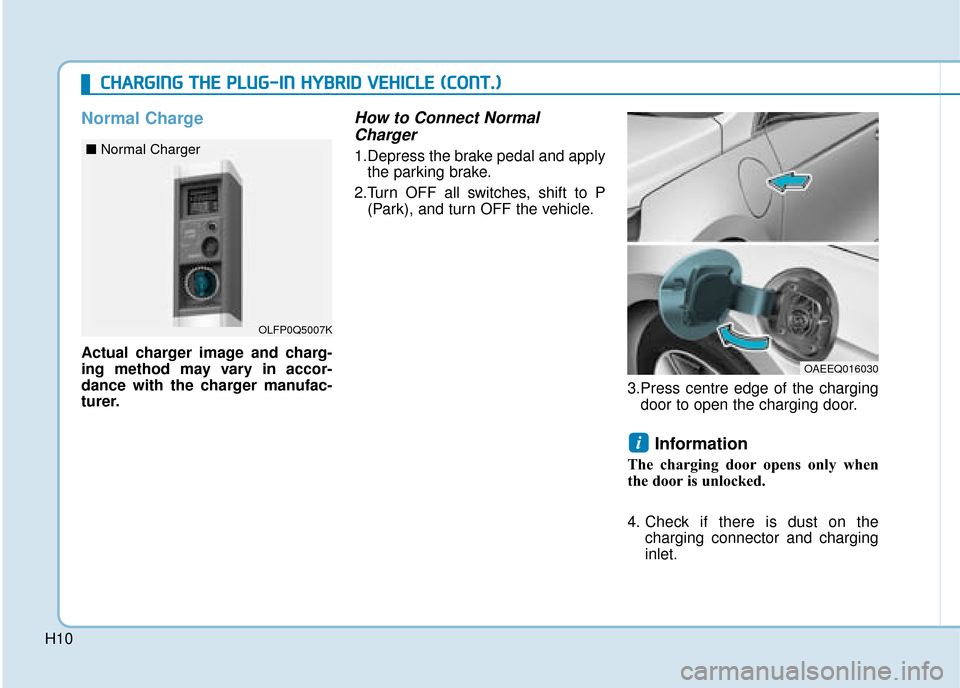
Normal Charge
Actual charger image and charg-
ing method may vary in accor-
dance with the charger manufac-
turer.
How to Connect NormalCharger
1.Depress the brake pedal and apply
the parking brake.
2.Turn OFF all switches, shift to P (Park), and turn OFF the vehicle.
3.Press centre edge of the chargingdoor to open the charging door.
Information
The charging door opens only when
the door is unlocked.
4. Check if there is dust on the charging connector and charging
inlet.
i
C CH
H A
AR
RG
G I
IN
N G
G
T
T H
H E
E
P
P L
LU
U G
G-
-I
IN
N
H
H Y
Y B
BR
RI
ID
D
V
V E
EH
H I
IC
C L
LE
E
(
( C
C O
O N
NT
T.
.)
)
OLFP0Q5007K
■ Normal Charger
OAEEQ016030
Page 12 of 599
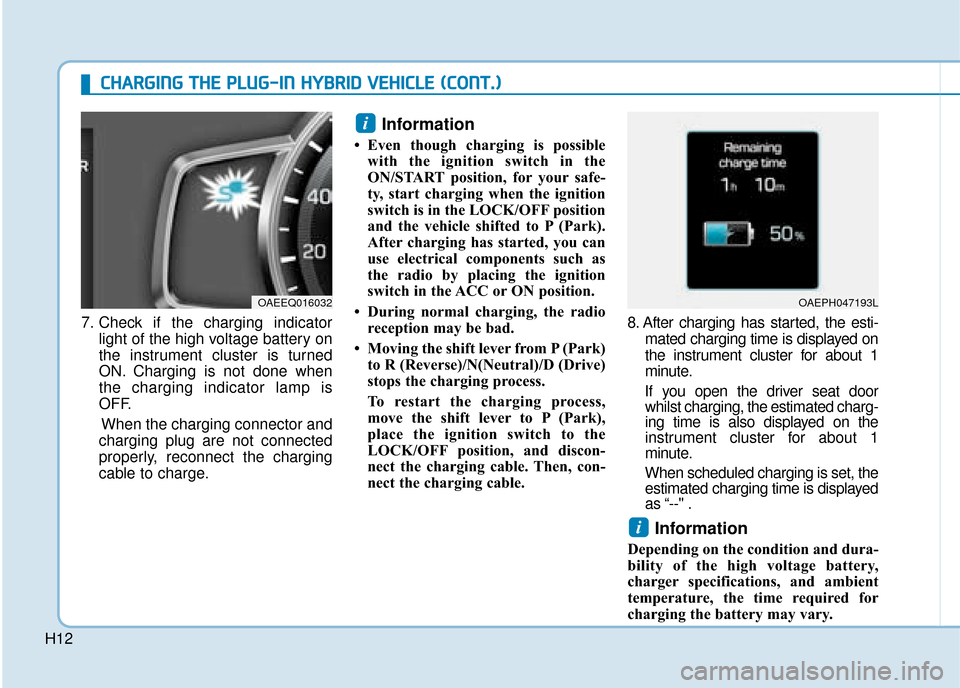
H127. Check if the charging indicator
light of the high voltage battery on
the instrument cluster is turned
ON. Charging is not done when
the charging indicator lamp is
OFF.
When the charging connector and
charging plug are not connected
properly, reconnect the charging
cable to charge.
Information
• Even though charging is possible with the ignition switch in the
ON/START position, for your safe-
ty, start charging when the ignition
switch is in the LOCK/OFF position
and the vehicle shifted to P (Park).
After charging has started, you can
use electrical components such as
the radio by placing the ignition
switch in the ACC or ON position.
• During normal charging, the radio reception may be bad.
• Moving the shift lever from P (Park) to R (Reverse)/N(Neutral)/D (Drive)
stops the charging process.
To restart the charging process,
move the shift lever to P (Park),
place the ignition switch to the
LOCK/OFF position, and discon-
nect the charging cable. Then, con-
nect the charging cable. 8. After charging has started, the esti-
mated charging time is displayed on
the instrument cluster for about 1
minute.
If you open the driver seat door whilst charging, the estimated charg-
ing time is also displayed on the
instrument cluster for about 1
minute.
When scheduled charging is set, the estimated charging time is displayed
as “--" .
Information
Depending on the condition and dura-
bility of the high voltage battery,
charger specifications, and ambient
temperature, the time required for
charging the battery may vary.
i
i
OAEEQ016032OAEPH047193L
C
C H
H A
AR
RG
G I
IN
N G
G
T
T H
H E
E
P
P L
LU
U G
G-
-I
IN
N
H
H Y
Y B
BR
RI
ID
D
V
V E
EH
H I
IC
C L
LE
E
(
( C
C O
O N
NT
T.
.)
)
Page 14 of 599
H14
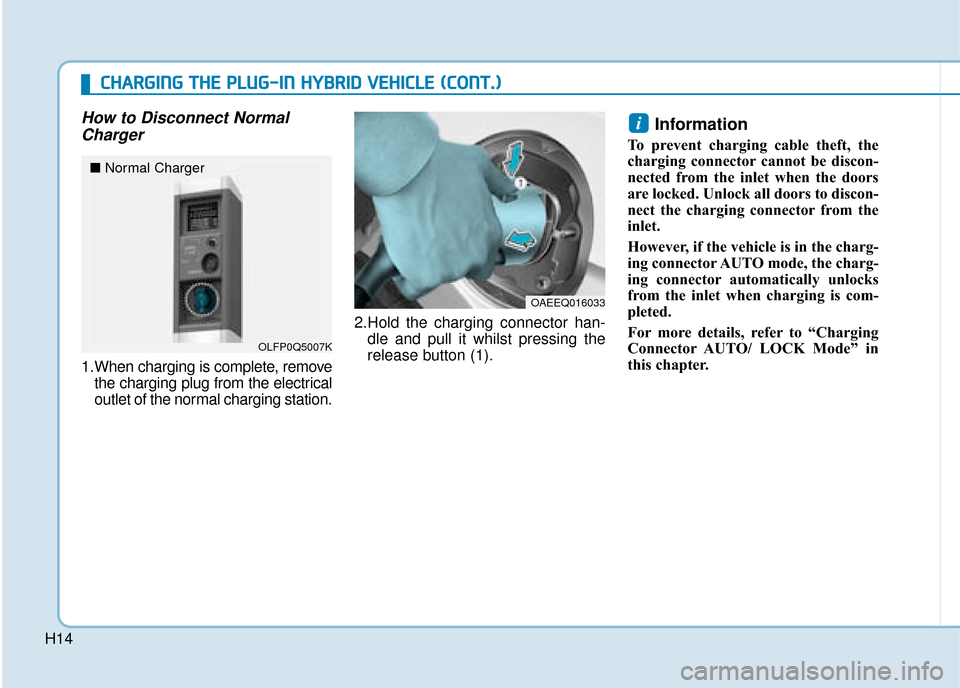
How to Disconnect NormalCharger
1.When charging is complete, remove
the charging plug from the electrical
outlet of the normal charging station. 2.Hold the charging connector han-
dle and pull it whilst pressing the
release button (1).
Information
To prevent charging cable theft, the
charging connector cannot be discon-
nected from the inlet when the doors
are locked. Unlock all doors to discon-
nect the charging connector from the
inlet.
However, if the vehicle is in the charg-
ing connector AUTO mode, the charg-
ing connector automatically unlocks
from the inlet when charging is com-
pleted.
For more details, refer to “Charging
Connector AUTO/ LOCK Mode” in
this chapter.
i
OAEEQ016033
OLFP0Q5007K
■ Normal Charger
C
CH
H A
AR
RG
G I
IN
N G
G
T
T H
H E
E
P
P L
LU
U G
G-
-I
IN
N
H
H Y
Y B
BR
RI
ID
D
V
V E
EH
H I
IC
C L
LE
E
(
( C
C O
O N
NT
T.
.)
)
Page 15 of 599
H15
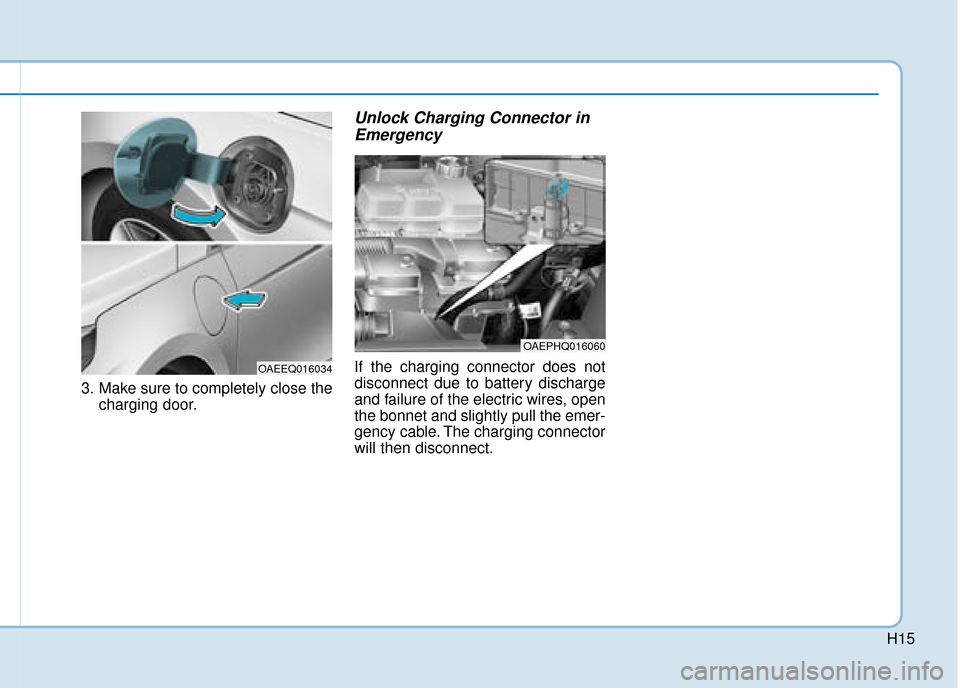
3. Make sure to completely close thecharging door.
Unlock Charging Connector inEmergency
If the charging connector does not
disconnect due to battery discharge
and failure of the electric wires, open
the bonnet and slightly pull the emer-
gency cable. The charging connector
will then disconnect.
OAEPHQ016060
OAEEQ016034
Page 19 of 599
H19
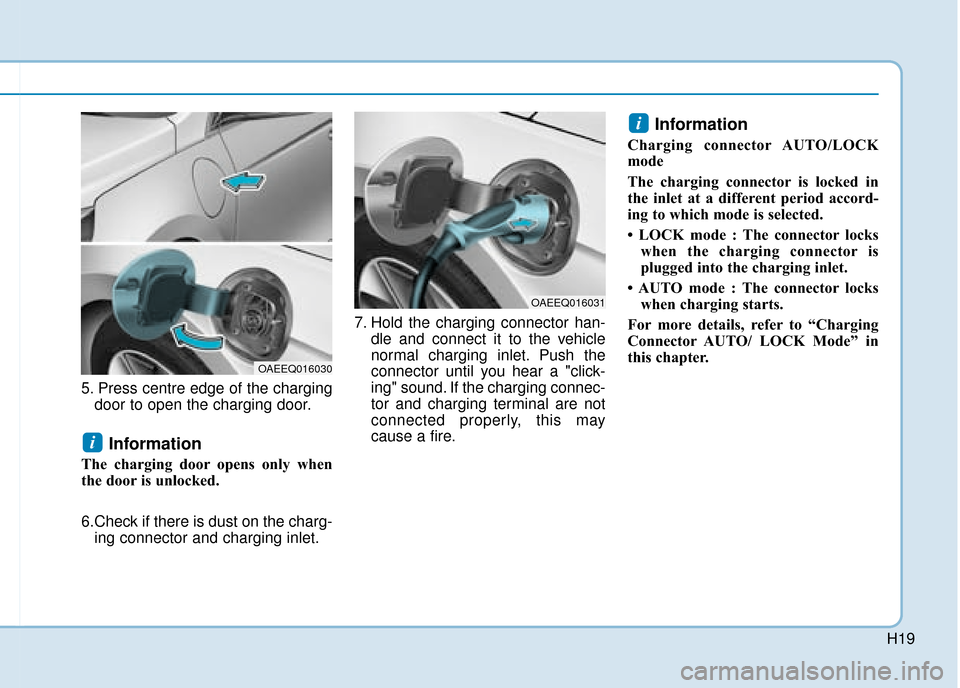
5. Press centre edge of the chargingdoor to open the charging door.
Information
The charging door opens only when
the door is unlocked.
6.Check if there is dust on the charg-ing connector and charging inlet. 7. Hold the charging connector han-
dle and connect it to the vehicle
normal charging inlet. Push the
connector until you hear a "click-
ing" sound. If the charging connec-
tor and charging terminal are not
connected properly, this may
cause a fire.
Information
Charging connector AUTO/LOCK
mode
The charging connector is locked in
the inlet at a different period accord-
ing to which mode is selected.
• LOCK mode : The connector lockswhen the charging connector is
plugged into the charging inlet.
• AUTO mode : The connector locks when charging starts.
For more details, refer to “Charging
Connector AUTO/ LOCK Mode” in
this chapter.
i
i
OAEEQ016030
OAEEQ016031
Page 26 of 599
H26
Charger (ICCB: In-Cable ControlBox)
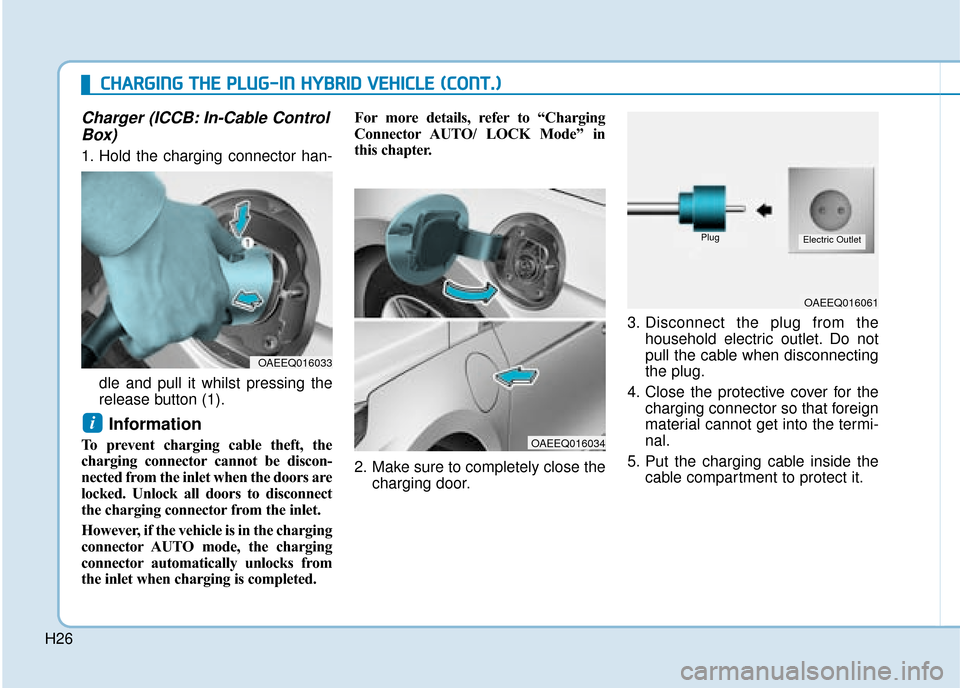
1. Hold the charging connector han-
dle and pull it whilst pressing the
release button (1).
Information
To prevent charging cable theft, the
charging connector cannot be discon-
nected from the inlet when the doors are
locked. Unlock all doors to disconnect
the charging connector from the inlet.
However, if the vehicle is in the charging
connector AUTO mode, the charging
connector automatically unlocks from
the inlet when charging is completed. For more details, refer to “Charging
Connector AUTO/ LOCK Mode” in
this chapter.
2. Make sure to completely close the
charging door. 3. Disconnect the plug from the
household electric outlet. Do not
pull the cable when disconnecting
the plug.
4. Close the protective cover for the charging connector so that foreign
material cannot get into the termi-
nal.
5. Put the charging cable inside the cable compartment to protect it.
i
OAEEQ016033
OAEEQ016034
OAEEQ016061
PlugElectric Outlet
C
CH
H A
AR
RG
G I
IN
N G
G
T
T H
H E
E
P
P L
LU
U G
G-
-I
IN
N
H
H Y
Y B
BR
RI
ID
D
V
V E
EH
H I
IC
C L
LE
E
(
( C
C O
O N
NT
T.
.)
)
Page 29 of 599
H29
Information
In the hybrid system, the engine auto-
matically runs and stops. When the
hybrid system operates, the " "
indicator is illuminated.
In the following situation, the engine
may operate automatically.
- When the engine is ready to run
- When the hybrid battery is beingcharged
- Depending on the temperature con- dition of the hybrid battery
Special Features
Hybrid vehicles sound different than
petrol engine vehicles. When the
hybrid system operates, you may
hear a sound from the hybrid battery
system behind the rear seat. If you
apply the accelerator pedal rapidly,
you may hear an unconventional
sound. When you apply the brake
pedal, you may hear a sound from
the regenerative brake system.
When the hybrid system is turned off
or on, you may hear a sound in the
engine compartment. If you depress
the brake pedal repeatedly when the
hybrid system is turned on, you may
hear a sound in the engine compart-
ment. None of these sounds indicate
a problem. These are normal charac-
teristics of hybrid vehicles.
If any of following occur, it's a normal
condition if you hear a motor sound
in the engine compartment:
- After turning off the hybrid system,the brake pedal is released.
- When the hybrid system is turned off, the brake pedal is applied.
- When the driver door is opened. When the hybrid system is turned
ON, the engine may run or may not.
In this situation, you may feel a vibra-
tion. This does not indicate a mal-
function. When the “ ” indicator
illuminates, the hybrid system is ready
to start. Even if the engine is off, you
can operate the vehicle as long as the
“ ” indicator is illuminated.
The hybrid system contains many
electronic components. High volt-
age components, such as cables
and other parts, may emit electro-
magnetic waves. Even when the
electromagnetic cover blocks elec-
tromagnetic emissions, electro-
magnetic waves may have an effect
on electronic devices. When your
vehicle is not for a long period of
time, the hybrid system will dis-
charge. You need to drive the vehi-
cle several times a month. We rec-
ommend driving at least for 1 hour
or 16 km. When the hybrid battery is
discharged, or when it is impossi-
ble to jump start the vehicle, con-
tact your HYUNDAI authorised
repairer.
NOTICE
i
Page 70 of 599
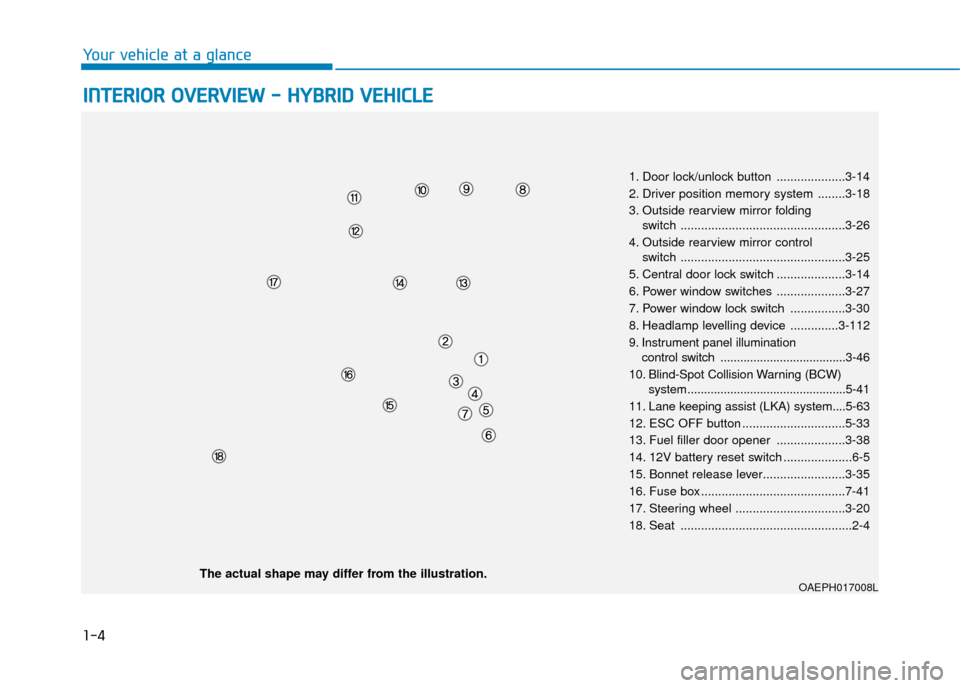
1-4
Your vehicle at a glance
I
IN
N T
TE
ER
R I
IO
O R
R
O
O V
VE
ER
R V
V I
IE
E W
W
-
-
H
H Y
Y B
BR
RI
ID
D
V
V E
EH
H I
IC
C L
LE
E
1. Door lock/unlock button ....................3-14
2. Driver position memory system ........3-18
3. Outside rearview mirror folding
switch ................................................3-26
4. Outside rearview mirror control switch ................................................3-25
5. Central door lock switch ....................3-14
6. Power window switches ....................3-27
7. Power window lock switch ................3-30
8. Headlamp levelling device ..............3-112
9. Instrument panel illumination control switch ......................................3-46
10. Blind-Spot Collision Warning (BCW) system................................................5-41
11. Lane keeping assist (LKA) system....5-63
12. ESC OFF button ..............................5-33
13. Fuel filler door opener ....................3-38
14. 12V battery reset switch ....................6-5
15. Bonnet release lever........................3-35
16. Fuse box ..........................................7-41
17. Steering wheel ................................3-20
18. Seat ..................................................2-4
OAEPH017008LThe actual shape may differ from the illustration.
Page 75 of 599
1-9
Your vehicle at a glance
1
I
IN
N T
TE
ER
R I
IO
O R
R
O
O V
VE
ER
R V
V I
IE
E W
W
-
-
P
P L
LU
U G
G-
-I
IN
N
H
H Y
Y B
BR
RI
ID
D
V
V E
EH
H I
IC
C L
LE
E
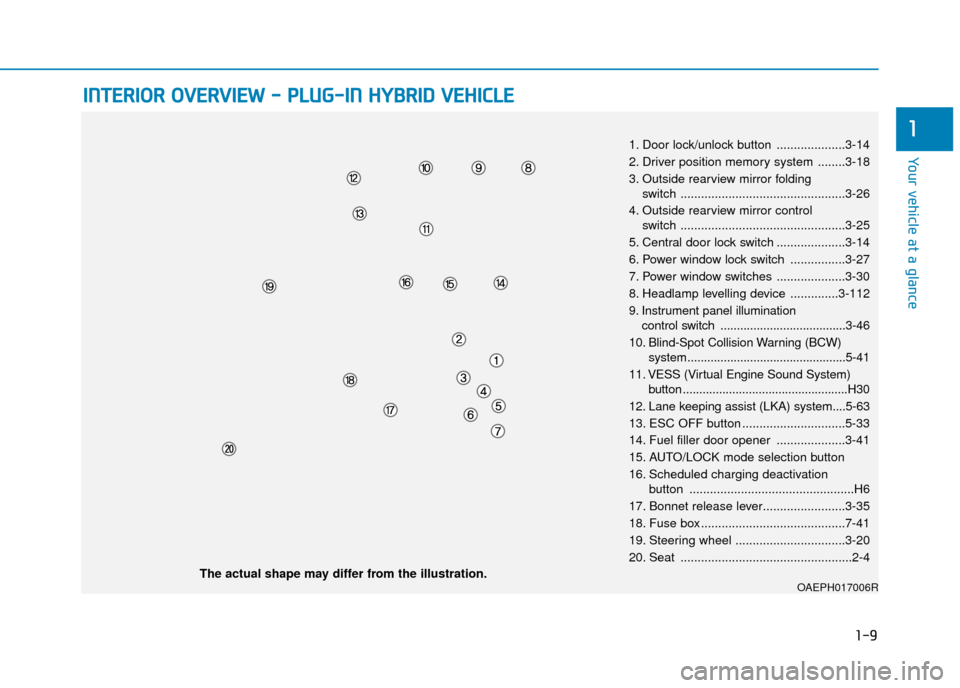
1. Door lock/unlock button ....................3-14
2. Driver position memory system ........3-18
3. Outside rearview mirror folding
switch ................................................3-26
4. Outside rearview mirror control switch ................................................3-25
5. Central door lock switch ....................3-14
6. Power window lock switch ................3-27
7. Power window switches ....................3-30
8. Headlamp levelling device ..............3-112
9. Instrument panel illumination control switch ......................................3-46
10. Blind-Spot Collision Warning (BCW) system................................................5-41
11. VESS (Virtual Engine Sound System) button ..................................................H30
12. Lane keeping assist (LKA) system....5-63
13. ESC OFF button ..............................5-33
14. Fuel filler door opener ....................3-41
15. AUTO/LOCK mode selection button
16. Scheduled charging deactivation button ................................................H6
17. Bonnet release lever........................3-35
18. Fuse box ..........................................7-41
19. Steering wheel ................................3-20
20. Seat ..................................................2-4
OAEPH017006RThe actual shape may differ from the illustration.