Hyundai Kona EV 2019 Owner's Manual
Manufacturer: HYUNDAI, Model Year: 2019, Model line: Kona EV, Model: Hyundai Kona EV 2019Pages: 540, PDF Size: 21.84 MB
Page 121 of 540
3-37
Convenient features of your vehicle
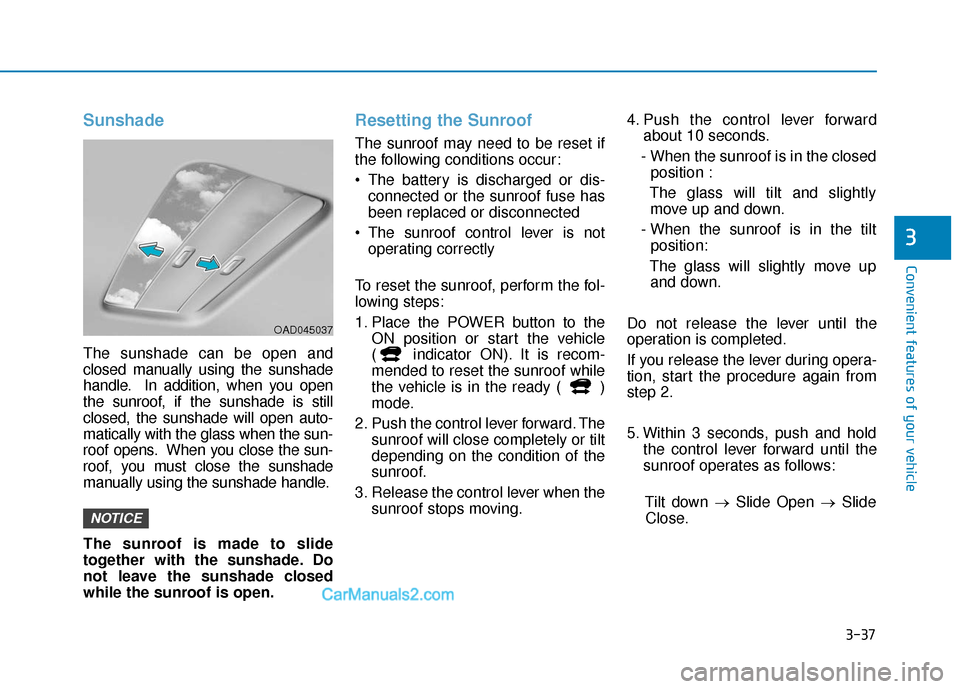
Sunshade
The sunshade can be open and
closed manually using the sunshade
handle. In addition, when you open
the sunroof, if the sunshade is still
closed, the sunshade will open auto-
matically with the glass when the sun-
roof opens. When you close the sun-
roof, you must close the sunshade
manually using the sunshade handle.
The sunroof is made to slide
together with the sunshade. Do
not leave the sunshade closed
while the sunroof is open.
Resetting the Sunroof
The sunroof may need to be reset if
the following conditions occur:
The battery is discharged or dis-connected or the sunroof fuse has
been replaced or disconnected
The sunroof control lever is not operating correctly
To reset the sunroof, perform the fol-
lowing steps:
1. Place the POWER button to the ON position or start the vehicle
( indicator ON). It is recom-
mended to reset the sunroof while
the vehicle is in the ready ( )
mode.
2. Push the control lever forward. The sunroof will close completely or tilt
depending on the condition of the
sunroof.
3. Release the control lever when the sunroof stops moving. 4. Push the control lever forward
about 10 seconds.
- When the sunroof is in the closed position :
The glass will tilt and slightly move up and down.
- When the sunroof is in the tilt position:
The glass will slightly move up and down.
Do not release the lever until the
operation is completed.
If you release the lever during opera-
tion, start the procedure again from
step 2.
5. Within 3 seconds, push and hold the control lever forward until the
sunroof operates as follows:
Tilt down → Slide Open → Slide
Close.
NOTICE
3
OAD045037
Page 122 of 540
3-38
Convenient features of your vehicle
Do not release the lever until the
operation is completed.
If you release the lever during opera-
tion, start the procedure again from
step 2.
6. Release the sunroof control lever after all steps have completed. The
sunroof system has been reset.
Information
• If the sunroof is not reset when thevehicle battery is disconnected or
discharged, or the sunroof fuse is
blown, the sunroof may not operate
normally.
• For more detailed information, con- tact an authorized HYUNDAI dealer.
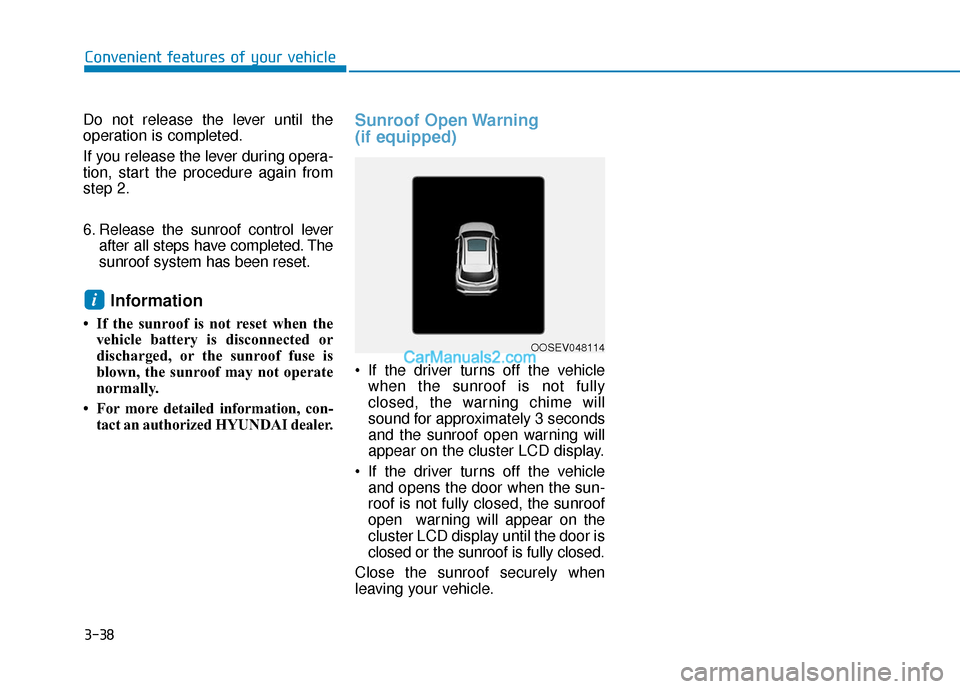
Sunroof Open Warning
(if equipped)
If the driver turns off the vehiclewhen the sunroof is not fully
closed, the warning chime will
sound for approximately 3 seconds
and the sunroof open warning will
appear on the cluster LCD display.
If the driver turns off the vehicle and opens the door when the sun-
roof is not fully closed, the sunroof
open warning will appear on the
cluster LCD display until the door is
closed or the sunroof is fully closed.
Close the sunroof securely when
leaving your vehicle.
i
OOSEV048114
Page 123 of 540
3-39
Convenient features of your vehicle
3
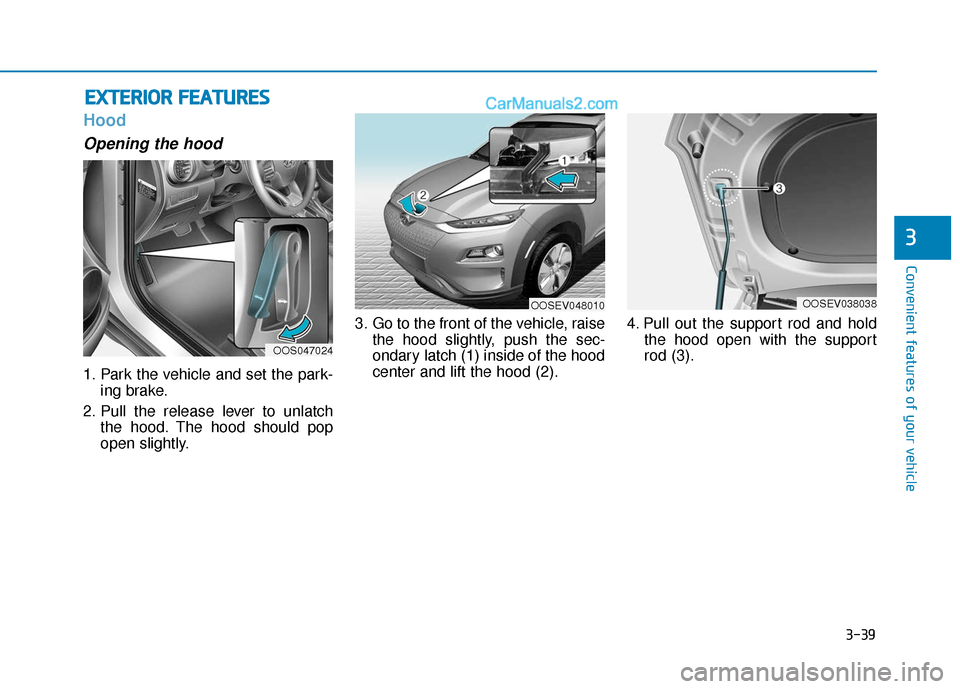
Hood
Opening the hood
1. Park the vehicle and set the park-ing brake.
2. Pull the release lever to unlatch the hood. The hood should pop
open slightly. 3. Go to the front of the vehicle, raise
the hood slightly, push the sec-
ondary latch (1) inside of the hood
center and lift the hood (2). 4. Pull out the support rod and hold
the hood open with the support
rod (3).
E EX
X T
TE
ER
R I
IO
O R
R
F
F E
E A
A T
TU
U R
RE
ES
S
OOS047024
OOSEV048010OOSEV038038
Page 124 of 540
3-40
Convenient features of your vehicle
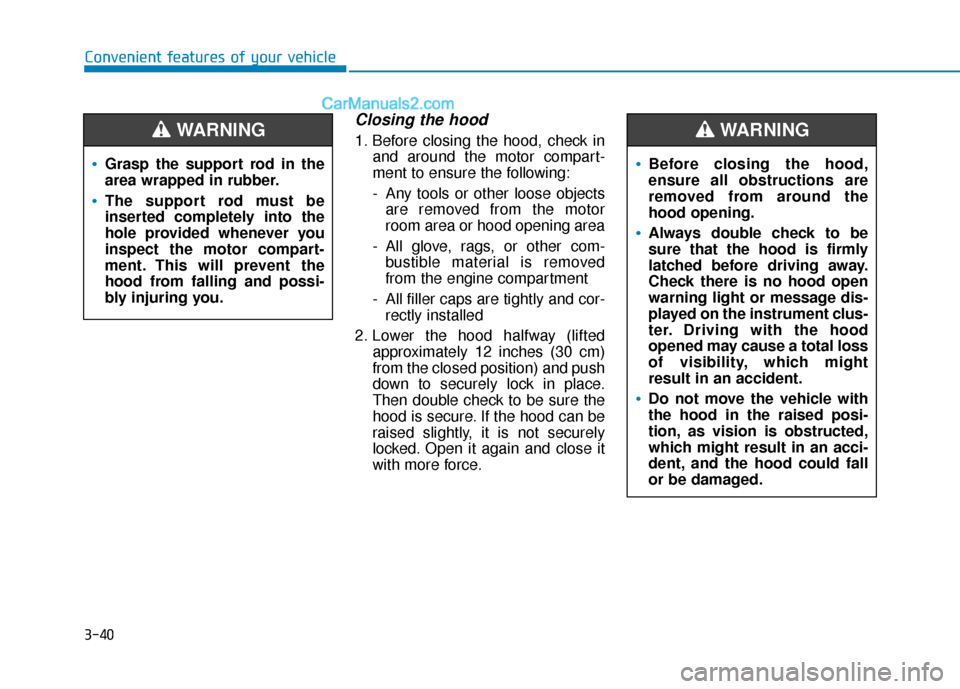
Closing the hood
1. Before closing the hood, check inand around the motor compart-
ment to ensure the following:
- Any tools or other loose objectsare removed from the motor
room area or hood opening area
- All glove, rags, or other com- bustible material is removed
from the engine compartment
- All filler caps are tightly and cor- rectly installed
2. Lower the hood halfway (lifted approximately 12 inches (30 cm)
from the closed position) and push
down to securely lock in place.
Then double check to be sure the
hood is secure. If the hood can be
raised slightly, it is not securely
locked. Open it again and close it
with more force.
Before closing the hood,
ensure all obstructions are
removed from around the
hood opening.
Always double check to be
sure that the hood is firmly
latched before driving away.
Check there is no hood open
warning light or message dis-
played on the instrument clus-
ter. Driving with the hood
opened may cause a total loss
of visibility, which might
result in an accident.
Do not move the vehicle with
the hood in the raised posi-
tion, as vision is obstructed,
which might result in an acci-
dent, and the hood could fall
or be damaged.
WARNING
Grasp the support rod in the
area wrapped in rubber.
The support rod must be
inserted completely into the
hole provided whenever you
inspect the motor compart-
ment. This will prevent the
hood from falling and possi-
bly injuring you.
WARNING
Page 125 of 540
3-41
Convenient features of your vehicle
3
Liftgate
Opening the liftgate
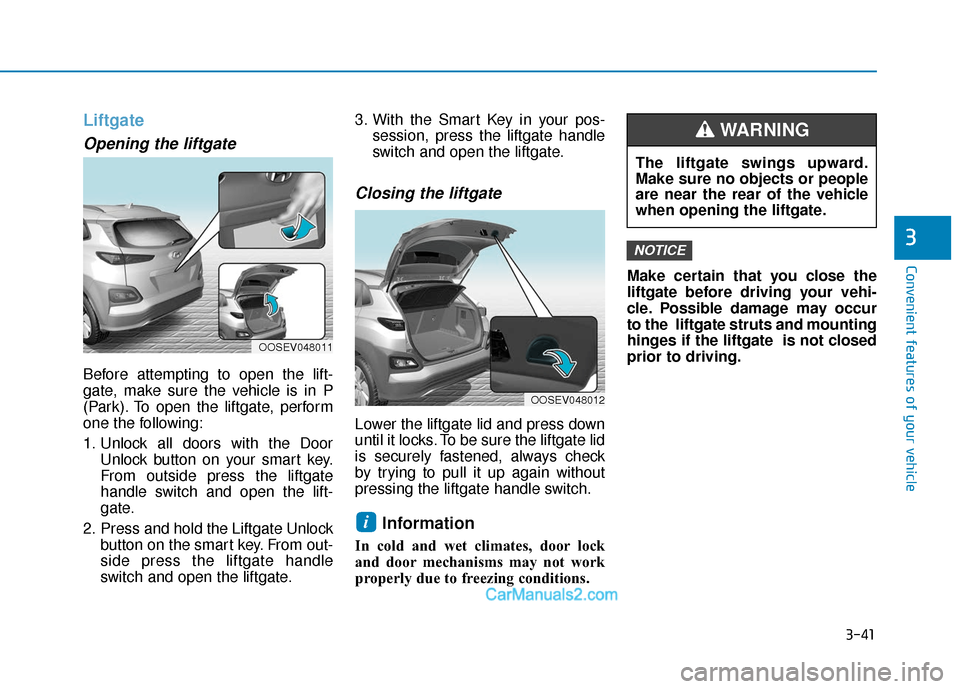
Before attempting to open the lift-
gate, make sure the vehicle is in P
(Park). To open the liftgate, perform
one the following:
1. Unlock all doors with the DoorUnlock button on your smart key.
From outside press the liftgate
handle switch and open the lift-
gate.
2. Press and hold the Liftgate Unlock button on the smart key. From out-
side press the liftgate handle
switch and open the liftgate. 3. With the Smart Key in your pos-
session, press the liftgate handle
switch and open the liftgate.
Closing the liftgate
Lower the liftgate lid and press down
until it locks. To be sure the liftgate lid
is securely fastened, always check
by trying to pull it up again without
pressing the liftgate handle switch.
Information
In cold and wet climates, door lock
and door mechanisms may not work
properly due to freezing conditions. Make certain that you close the
liftgate before driving your vehi-
cle. Possible damage may occur
to the liftgate struts and mounting
hinges if the liftgate is not closed
prior to driving.
NOTICE
i
The liftgate swings upward.
Make sure no objects or people
are near the rear of the vehicle
when opening the liftgate.
WARNING
OOSEV048011
OOSEV048012
Page 126 of 540
3-42
Emergency liftgate safetyrelease
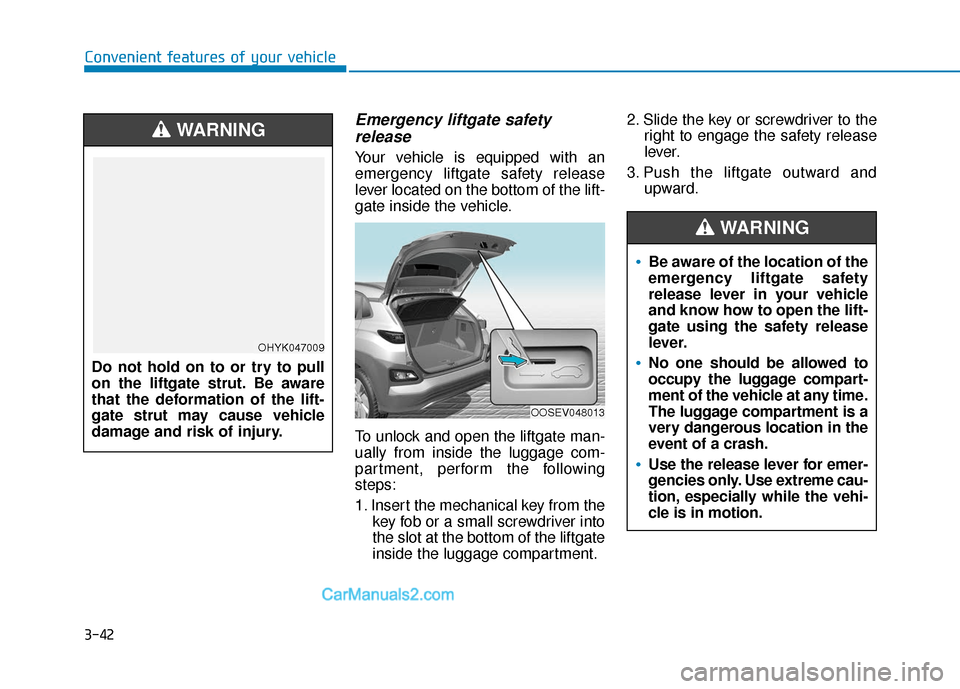
Your vehicle is equipped with an
emergency liftgate safety release
lever located on the bottom of the lift-
gate inside the vehicle.
To unlock and open the liftgate man-
ually from inside the luggage com-
partment, perform the following
steps:
1. Insert the mechanical key from the
key fob or a small screwdriver into
the slot at the bottom of the liftgate
inside the luggage compartment. 2. Slide the key or screwdriver to the
right to engage the safety release
lever.
3. Push the liftgate outward and upward.
Convenient features of your vehicle
OOSEV048013
Do not hold on to or try to pull
on the liftgate strut. Be aware
that the deformation of the lift-
gate strut may cause vehicle
damage and risk of injury.
WARNING
OHYK047009
Be aware of the location of the
emergency liftgate safety
release lever in your vehicle
and know how to open the lift-
gate using the safety release
lever.
No one should be allowed to
occupy the luggage compart-
ment of the vehicle at any time.
The luggage compartment is a
very dangerous location in the
event of a crash.
Use the release lever for emer-
gencies only. Use extreme cau-
tion, especially while the vehi-
cle is in motion.
WARNING
Page 127 of 540
3-43
Convenient features of your vehicle
Charging Door
Opening the charging door
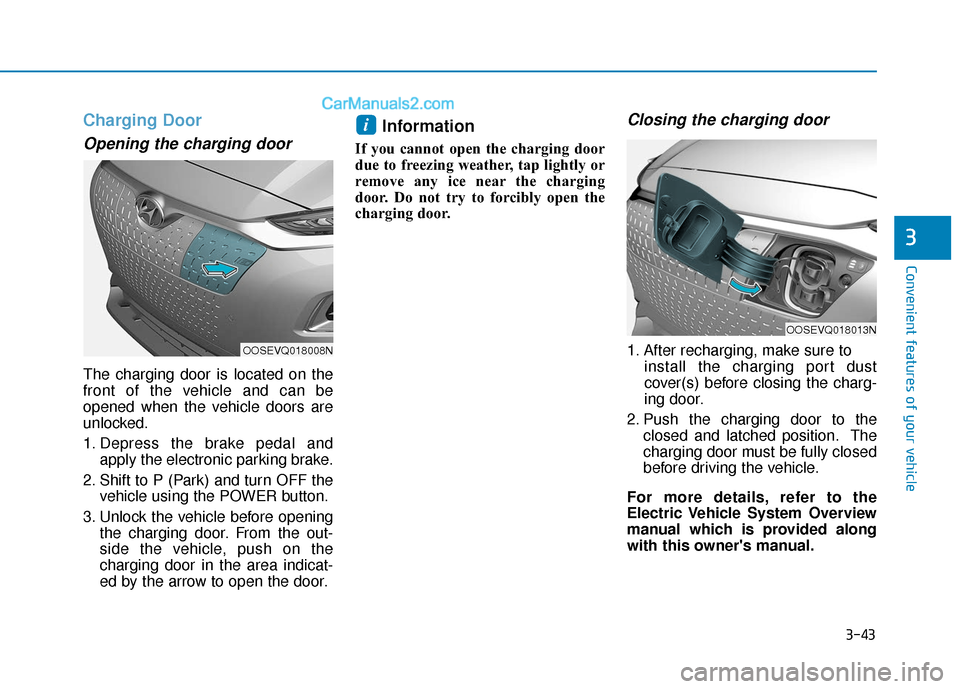
The charging door is located on the
front of the vehicle and can be
opened when the vehicle doors are
unlocked.
1. Depress the brake pedal andapply the electronic parking brake.
2. Shift to P (Park) and turn OFF the vehicle using the POWER button.
3. Unlock the vehicle before opening the charging door. From the out-
side the vehicle, push on the
charging door in the area indicat-
ed by the arrow to open the door.
Information
If you cannot open the charging door
due to freezing weather, tap lightly or
remove any ice near the charging
door. Do not try to forcibly open the
charging door.
Closing the charging door
1. After recharging, make sure to install the charging port dust
cover(s) before closing the charg-
ing door.
2. Push the charging door to the closed and latched position. The
charging door must be fully closed
before driving the vehicle.
For more details, refer to the
Electric Vehicle System Overview
manual which is provided along
with this owner's manual.
i
3
OOSEVQ018008N
OOSEVQ018013N
Page 128 of 540
3-44
Convenient features of your vehicle
I
IN
N S
ST
T R
R U
U M
M E
EN
N T
T
C
C L
LU
U S
ST
T E
ER
R
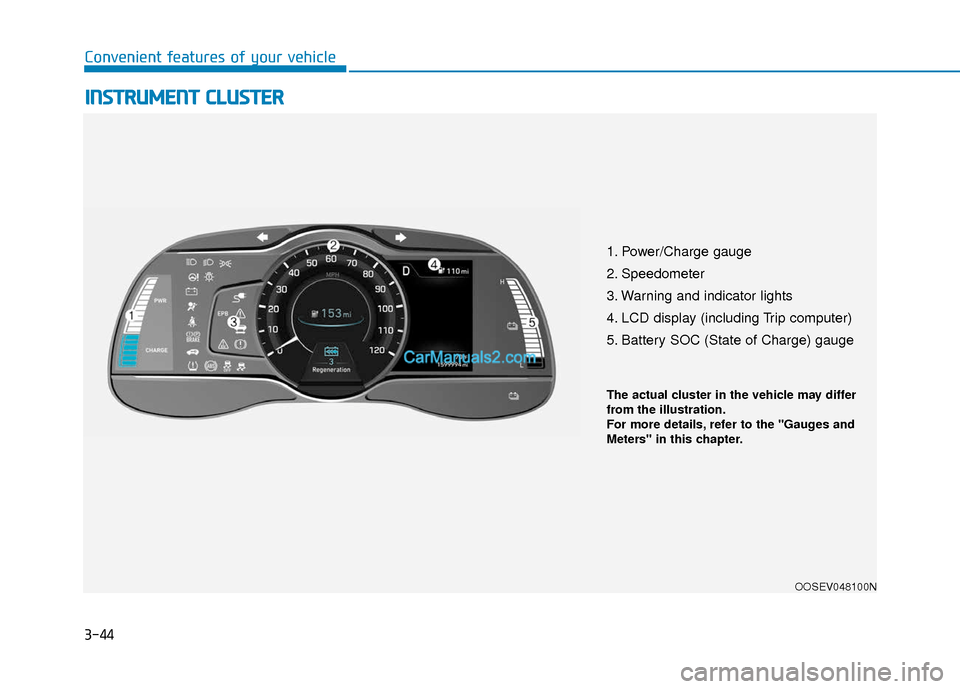
1. Power/Charge gauge
2. Speedometer
3. Warning and indicator lights
4. LCD display (including Trip computer)
5. Battery SOC (State of Charge) gauge
OOSEV048100N
The actual cluster in the vehicle may differ
from the illustration.
For more details, refer to the "Gauges and
Meters" in this chapter.
Page 129 of 540
3-45
Convenient features of your vehicle
3
Instrument Cluster Control
Adjusting instrument clusterillumination
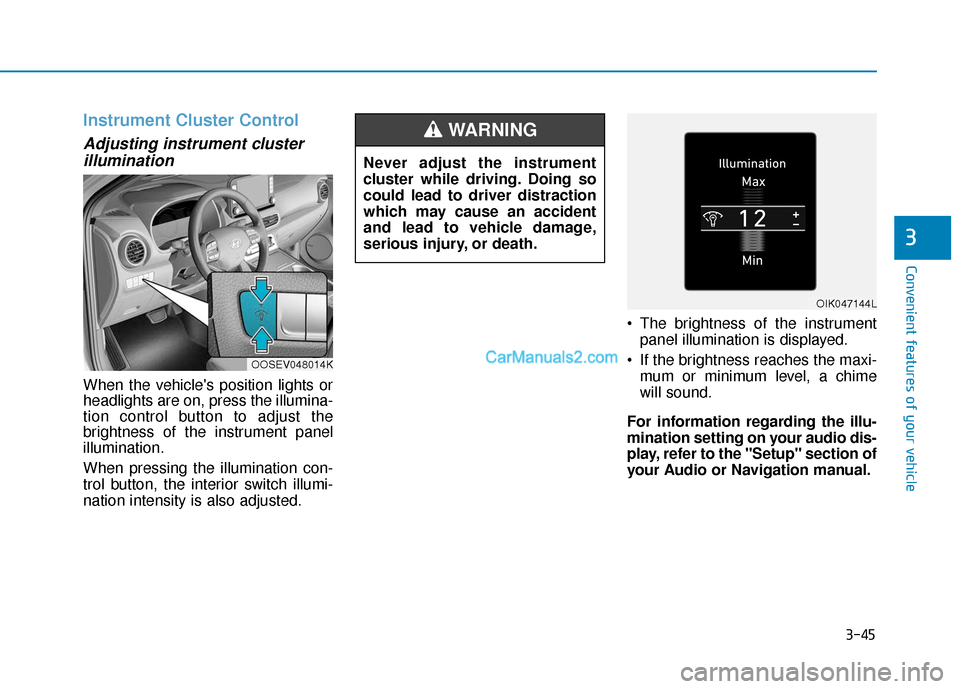
When the vehicle's position lights or
headlights are on, press the illumina-
tion control button to adjust the
brightness of the instrument panel
illumination.
When pressing the illumination con-
trol button, the interior switch illumi-
nation intensity is also adjusted. The brightness of the instrument
panel illumination is displayed.
If the brightness reaches the maxi- mum or minimum level, a chime
will sound.
For information regarding the illu-
mination setting on your audio dis-
play, refer to the "Setup" section of
your Audio or Navigation manual.
Never adjust the instrument
cluster while driving. Doing so
could lead to driver distraction
which may cause an accident
and lead to vehicle damage,
serious injury, or death.
WARNING
OOSEV048014K
OIK047144L
Page 130 of 540
3-46
Convenient features of your vehicle
Gauges and Meters
Speedometer
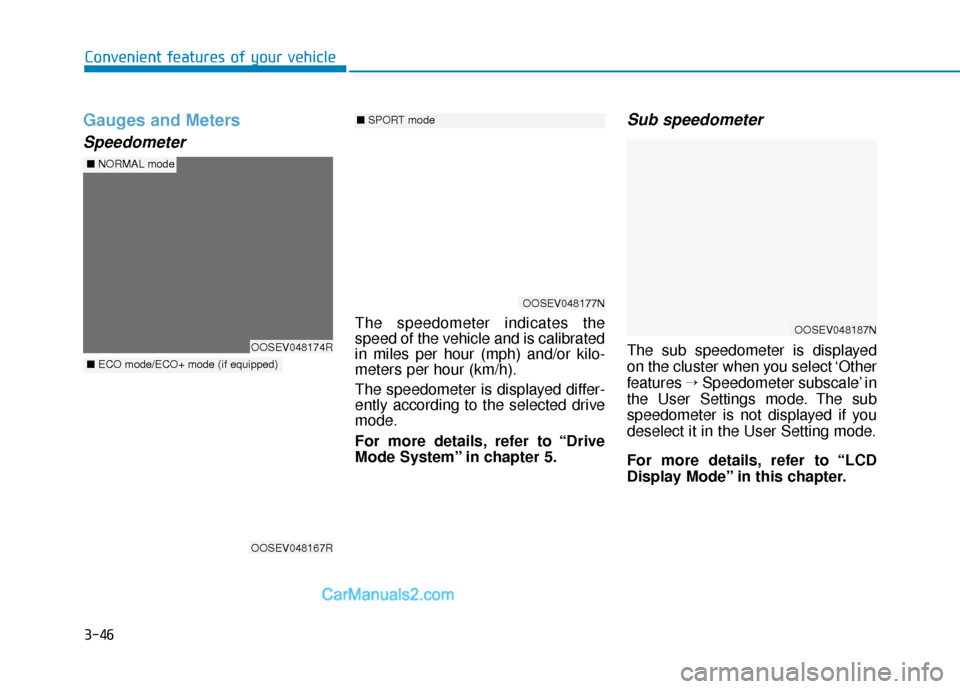
The speedometer indicates the
speed of the vehicle and is calibrated
in miles per hour (mph) and/or kilo-
meters per hour (km/h).
The speedometer is displayed differ-
ently according to the selected drive
mode.
For more details, refer to “Drive
Mode System” in chapter 5.
Sub speedometer
The sub speedometer is displayed
on the cluster when you select ‘Other
features →Speedometer subscale’ in
the User Settings mode. The sub
speedometer is not displayed if you
deselect it in the User Setting mode.
For more details, refer to “LCD
Display Mode” in this chapter.
OOSEV048177N
■ SPORT mode
OOSEV048174R
■NORMAL mode
OOSEV048167R
■ECO mode/ECO+ mode (if equipped)
OOSEV048187N