key Hyundai Matrix 2003 Service Manual
[x] Cancel search | Manufacturer: HYUNDAI, Model Year: 2003, Model line: Matrix, Model: Hyundai Matrix 2003Pages: 312, PDF Size: 4.1 MB
Page 184 of 312

1- 3
CONTROLS AND EQUIPMENT
B880C02A-GAT
Key Numbers
The vehicle key number is recorded upon a
metal tag attached to the keys when the vehicle is first delivered to you. The key number should be recorded and kept
in a safe place in case the need to orderfurther keys arises. New keys are availablefrom any Hyundai dealer by quoting the rel-evant key number.
In the interest of security, the metal tag at-
tached to the keys which bears the key num-ber should be removed from the key ring afteryou receive your new vehicle. In addition, keynumbers cannot be provided by Hyundai forsecurity reasons.
If you need additional keys or if you should
lose your keys, your authorized Hyundai dealercan make new keys. SB040B1-F Locking, unlocking front doors with key
o The door can be locked or unlocked with a
key.
o Lock the door by turning the key toward the front of the vehicle and unlock it by turning the key toward the rear.
AX10030A-1
B040A02Y-AAT DOOR LOCKS WARNING:
o Unlocked doors can be dangerous. Be- fore you drive away (especially if there are children in the car), be sure that allthe doors are securely closed and lockedso that the doors cannot be inadvert-ently opened from the inside. This helpsensure that doors will not be openedaccidentally. Also, when combined withthe proper use of seat belts, locking thedoors helps keep occupants from beingejected from the car in case of an acci-dent.
o Before opening the door, always look for and avoid oncoming traffic.
o In case of accident the door is unlocked automatically (If installed)
LOCK
UNLOCK
HFC2004-D
Page 185 of 312
CONTROLS AND EQUIPMENT
1- 4
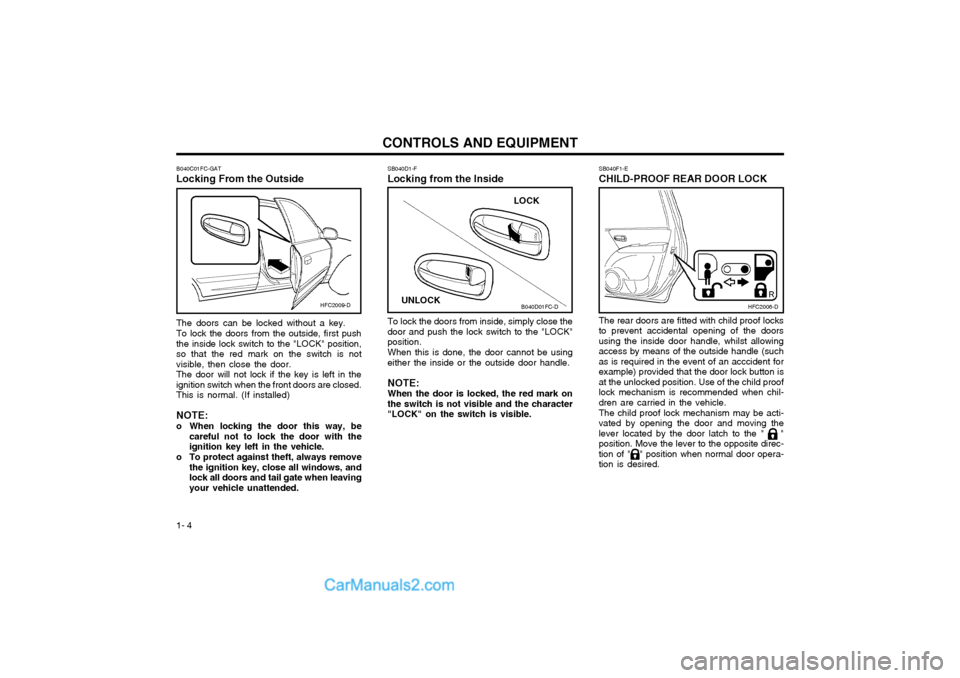
SB040F1-E CHILD-PROOF REAR DOOR LOCK The rear doors are fitted with child proof locks to prevent accidental opening of the doorsusing the inside door handle, whilst allowingaccess by means of the outside handle (suchas is required in the event of an acccident forexample) provided that the door lock button isat the unlocked position. Use of the child prooflock mechanism is recommended when chil-dren are carried in the vehicle. The child proof lock mechanism may be acti- vated by opening the door and moving thelever located by the door latch to the " "position. Move the lever to the opposite direc-tion of " " position when normal door opera-tion is desired.
SB040D1-F Locking from the Inside
B040D01FC-D
To lock the doors from inside, simply close the
door and push the lock switch to the "LOCK" position.
When this is done, the door cannot be using
either the inside or the outside door handle.
NOTE:When the door is locked, the red mark on
the switch is not visible and the character"LOCK" on the switch is visible.HFC2006-D
LOCK
UNLOCK
B040C01FC-GAT Locking From the Outside The doors can be locked without a key. To lock the doors from the outside, first push the inside lock switch to the "LOCK" position,so that the red mark on the switch is notvisible, then close the door.The door will not lock if the key is left in theignition switch when the front doors are closed.This is normal. (If installed) NOTE:
o When locking the door this way, be
careful not to lock the door with the ignition key left in the vehicle.
o To protect against theft, always remove the ignition key, close all windows, andlock all doors and tail gate when leavingyour vehicle unattended.
HFC2009-D
Page 186 of 312
1- 5
CONTROLS AND EQUIPMENT
SB040G1-F
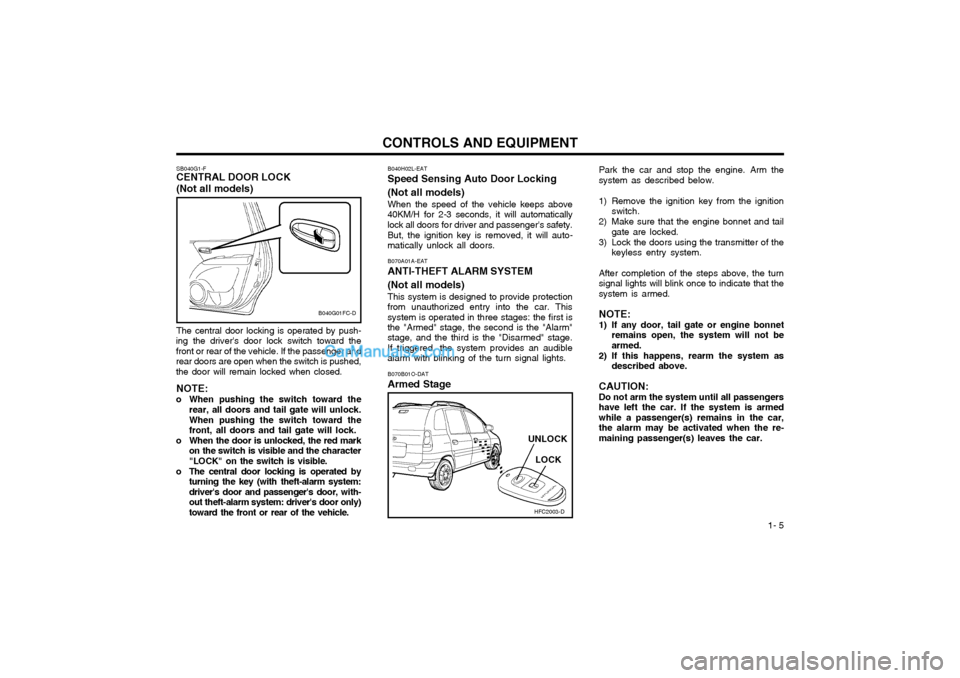
CENTRAL DOOR LOCK (Not all models) The central door locking is operated by push-
ing the driver's door lock switch toward the front or rear of the vehicle. If the passenger andrear doors are open when the switch is pushed,the door will remain locked when closed.
NOTE:
o When pushing the switch toward the rear, all doors and tail gate will unlock. When pushing the switch toward the front, all doors and tail gate will lock.
o When the door is unlocked, the red mark on the switch is visible and the character"LOCK" on the switch is visible.
o The central door locking is operated by turning the key (with theft-alarm system:driver's door and passenger's door, with-out theft-alarm system: driver's door only)toward the front or rear of the vehicle. B070A01A-EAT
ANTI-THEFT ALARM SYSTEM (Not all models)
This system is designed to provide protection
from unauthorized entry into the car. This system is operated in three stages: the first isthe "Armed" stage, the second is the "Alarm" stage, and the third is the "Disarmed" stage. If triggered, the system provides an audiblealarm with blinking of the turn signal lights.
HFC2003-D
LOCK
UNLOCK
B040G01FC-D
B070B01O-DAT
Armed Stage Park the car and stop the engine. Arm the system as described below.
1) Remove the ignition key from the ignition
switch.
2) Make sure that the engine bonnet and tail gate are locked.
3) Lock the doors using the transmitter of the keyless entry system.
After completion of the steps above, the turn signal lights will blink once to indicate that thesystem is armed. NOTE:
1) If any door, tail gate or engine bonnet remains open, the system will not be armed.
2) If this happens, rearm the system as described above.
CAUTION: Do not arm the system until all passengers have left the car. If the system is armedwhile a passenger(s) remains in the car,the alarm may be activated when the re-maining passenger(s) leaves the car.
B040H02L-EAT
Speed Sensing Auto Door Locking (Not all models)
When the speed of the vehicle keeps above
40KM/H for 2-3 seconds, it will automatically lock all doors for driver and passenger's safety.
But, the ignition key is removed, it will auto-
matically unlock all doors.
Page 187 of 312
CONTROLS AND EQUIPMENT
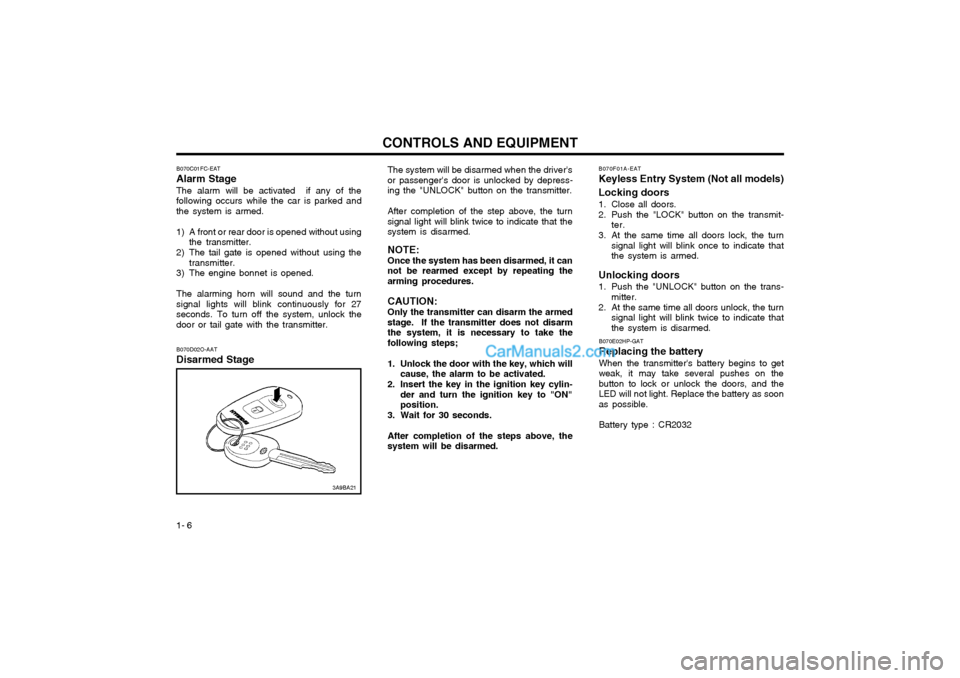
1- 6 The system will be disarmed when the driver's or passenger's door is unlocked by depress-ing the "UNLOCK" button on the transmitter. After completion of the step above, the turn signal light will blink twice to indicate that thesystem is disarmed. NOTE: Once the system has been disarmed, it can not be rearmed except by repeating thearming procedures. CAUTION: Only the transmitter can disarm the armed stage. If the transmitter does not disarmthe system, it is necessary to take thefollowing steps;
1. Unlock the door with the key, which will
cause, the alarm to be activated.
2. Insert the key in the ignition key cylin- der and turn the ignition key to "ON" position.
3. Wait for 30 seconds. After completion of the steps above, the system will be disarmed. B070F01A-EAT Keyless Entry System (Not all models) Locking doors
1. Close all doors.
2. Push the "LOCK" button on the transmit-
ter.
3. At the same time all doors lock, the turn signal light will blink once to indicate that the system is armed.
Unlocking doors
1. Push the "UNLOCK" button on the trans- mitter.
2. At the same time all doors unlock, the turn signal light will blink twice to indicate that the system is disarmed.
B070E02HP-GAT Replacing the batteryWhen the transmitter's battery begins to get weak, it may take several pushes on thebutton to lock or unlock the doors, and theLED will not light. Replace the battery as soonas possible. Battery type : CR2032
B070C01FC-EAT Alarm Stage The alarm will be activated if any of the following occurs while the car is parked andthe system is armed.
1) A front or rear door is opened without using
the transmitter.
2) The tail gate is opened without using the transmitter.
3) The engine bonnet is opened.The alarming horn will sound and the turn signal lights will blink continuously for 27seconds. To turn off the system, unlock thedoor or tail gate with the transmitter.
B070D02O-AAT Disarmed Stage
3A9BA21
Page 188 of 312
1- 7
CONTROLS AND EQUIPMENT
SB060A1-E DOOR WINDOWS The front door windows may be opened or closed by turning the window regulator handle.Ensure that when the windows are closed,nothing may become trapped between theglass and the door frame. WARNING: When opening or closing the windows, make sure your passenger's arms andhands are safety out of the way.B060A01E-EAT
POWER WINDOWS (Not all models) The power windows operate when the ignition key is in the "ON" position. The main switchesare located on the driver's armrest and control the front and rear windows on both sides of the vehicle. The windows may be opened bydepressing the appropriate window switch andclosed by pulling up the switch. To open thewindow on the driver's side, press the switch(1)down. The window moves as long as theswitch is operated.
MSO-0048-1
MSO-0048-2
Screwdriver
Case
Battery
B050A01FC-D
Close Open
B060A01FC-D
(1)
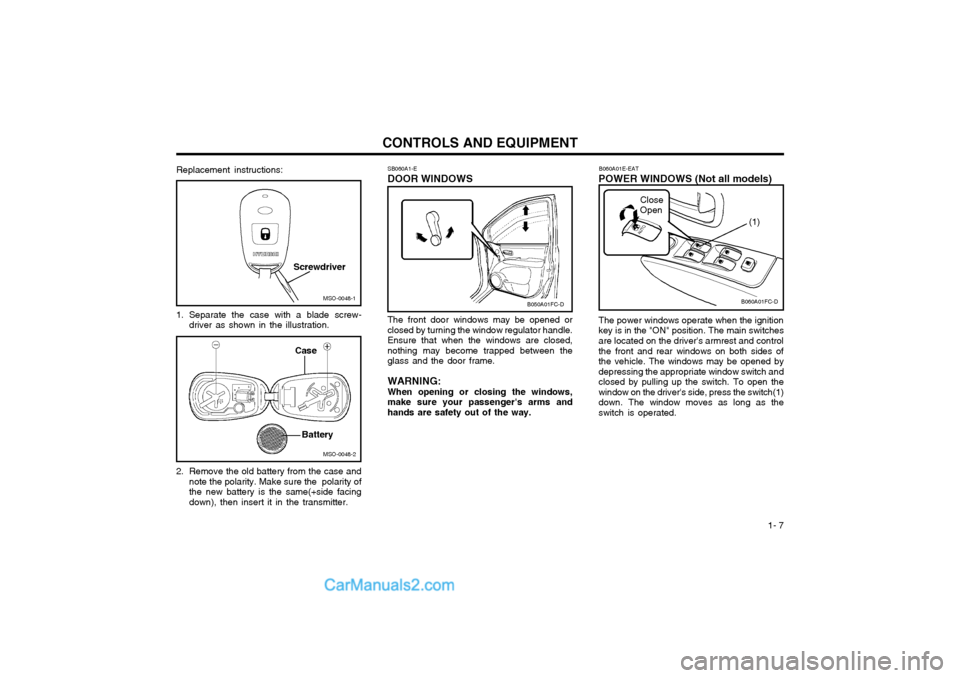
Replacement instructions:
1. Separate the case with a blade screw- driver as shown in the illustration.
2. Remove the old battery from the case and note the polarity. Make sure the polarity of the new battery is the same(+side facingdown), then insert it in the transmitter.
Page 189 of 312
CONTROLS AND EQUIPMENT
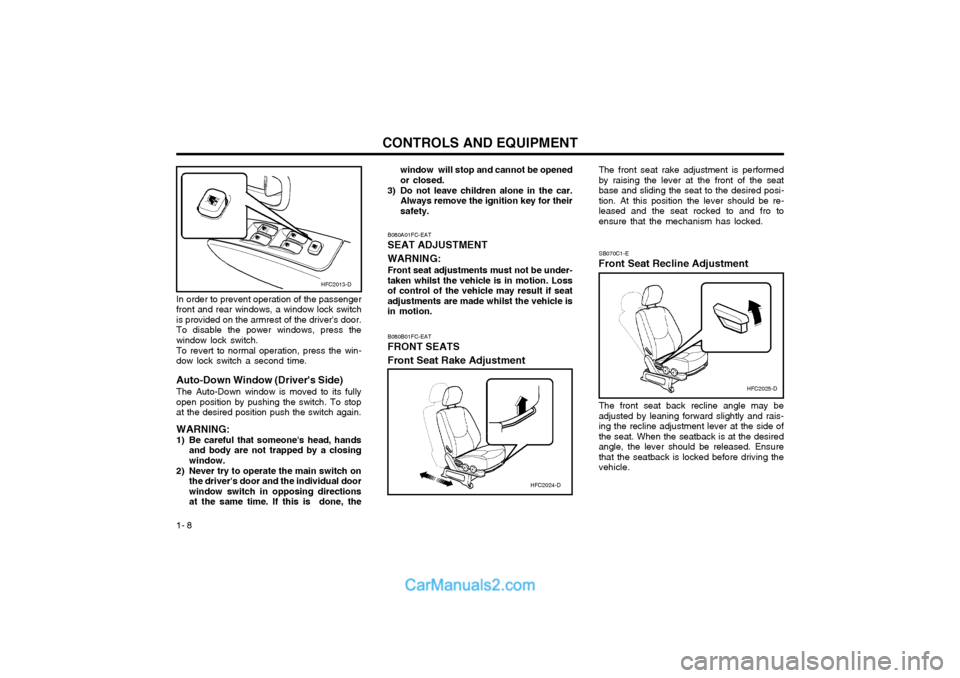
1- 8 The front seat rake adjustment is performed by raising the lever at the front of the seatbase and sliding the seat to the desired posi-tion. At this position the lever should be re-leased and the seat rocked to and fro toensure that the mechanism has locked. SB070C1-E
Front Seat Recline Adjustment
The front seat back recline angle may be adjusted by leaning forward slightly and rais-ing the recline adjustment lever at the side ofthe seat. When the seatback is at the desiredangle, the lever should be released. Ensurethat the seatback is locked before driving thevehicle.
B080B01FC-EAT FRONT SEATS Front Seat Rake Adjustment
HFC2024-D
HFC2025-D
B080A01FC-EAT SEAT ADJUSTMENT WARNING: Front seat adjustments must not be under- taken whilst the vehicle is in motion. Lossof control of the vehicle may result if seatadjustments are made whilst the vehicle isin motion. window will stop and cannot be openedor closed.
3) Do not leave children alone in the car. Always remove the ignition key for theirsafety.
In order to prevent operation of the passengerfront and rear windows, a window lock switchis provided on the armrest of the driver's door.To disable the power windows, press thewindow lock switch. To revert to normal operation, press the win- dow lock switch a second time. Auto-Down Window (Driver's Side) The Auto-Down window is moved to its fully open position by pushing the switch. To stopat the desired position push the switch again. WARNING:
1) Be careful that someone's head, hands and body are not trapped by a closing window.
2) Never try to operate the main switch on the driver's door and the individual doorwindow switch in opposing directionsat the same time. If this is done, the
HFC2013-D
Page 201 of 312

CONTROLS AND EQUIPMENT
1- 20 pre-tensioner seat belt or SRS airbag system as soon as possible.
WARNING:
o Pre-tensioners are designed to operate only one time. After activation, pre-tensioner seat belts must be replaced.All seat belts, of any type, should al-ways be replaced after they have beenworn during a collision.
o The pre-tensioner seat belt assembly mechanisms become hot during activa-tion. Do not touch the pre-tensionerseat belt assemblies for several min-utes after they have been activated.
o Do not attempt to inspect or replace the pre-tensioner seat belts yourself. Thismust be done by an authorized Hyundaidealer.
o Do not strike the pre-tensioner seat belt assemblies.
o Do not attempt to service or repair the pre-tensioner seat belt system in anymanner.
o Improper handling of the pre-tensioner seat belt assemblies, and failure to heedthe warnings to not strike, modify, in-spect, replace, service or repair the pre-tensioner seat belt assemblies may leadto improper operation or inadvertentactivation and serious injury.
o Always wear the seat belts when driving or travelling in a motor vehicle.
Driver's airbag conditions even if the seat belts are not being worn at the time of the collision.
o When the pre-tensioner seat belts are activated, a loud noise may be heardand fine dust, which may appear to besmoke, may be visible in the passengercompartment. These are normal operat-ing conditions and are not hazardous.
o Although it is harmless, the fine dust may cause skin irritation and shouldnot be breathed for prolonged periods.Wash your hands and face thoroughlyafter an accident in which the pre-tensioner seat belts were activated.
CAUTION:
o Because the sensor that activates the SRS airbag is connected with the pre- tensioner seat belt, the SRS airbag warn-ing light on the instrument panel willblink for approximately 6 seconds afterthe ignition key has been turned to the
"ON" position and then it should turn off.
o If the pre-tensioner seat belt is not work- ing properly, this warning light will illu-minate even if there is no malfunctionof the SRS airbag system. If the SRS airbag warning light does not illuminate when the ignition key is turnedto "ON", or if it remains illuminatedafter blinking for approximately 6 sec-onds, or if it illuminates while the ve-hicle is being driven, please have anauthorized Hyundai dealer inspect the
The seat belt pre-tensioner system consists
mainly of the following components. Theirlocations are shown in the illustration.
1. SRS airbag warning light
2. Seat belt pre-tensioner assembly
3. SRS control module
WARNING:To obtain maximum benefit from a pre-
tensioner seat belt:
1. The seat belt must be worn correctly.
2. The seat belt must be adjusted to the correct position.
NOTE:
o Both the driver's and front passenger's pre-tensioner seat belts will be acti- vated in certain frontal collisions. Thepre-tensioner seat belts can be acti-vated with the airbags. The pre-tensioners will be activated under these
1
2
3
B180B02S-DAG
Passenger's airbag
AIR
BAG
Page 203 of 312
CONTROLS AND EQUIPMENT
1- 22
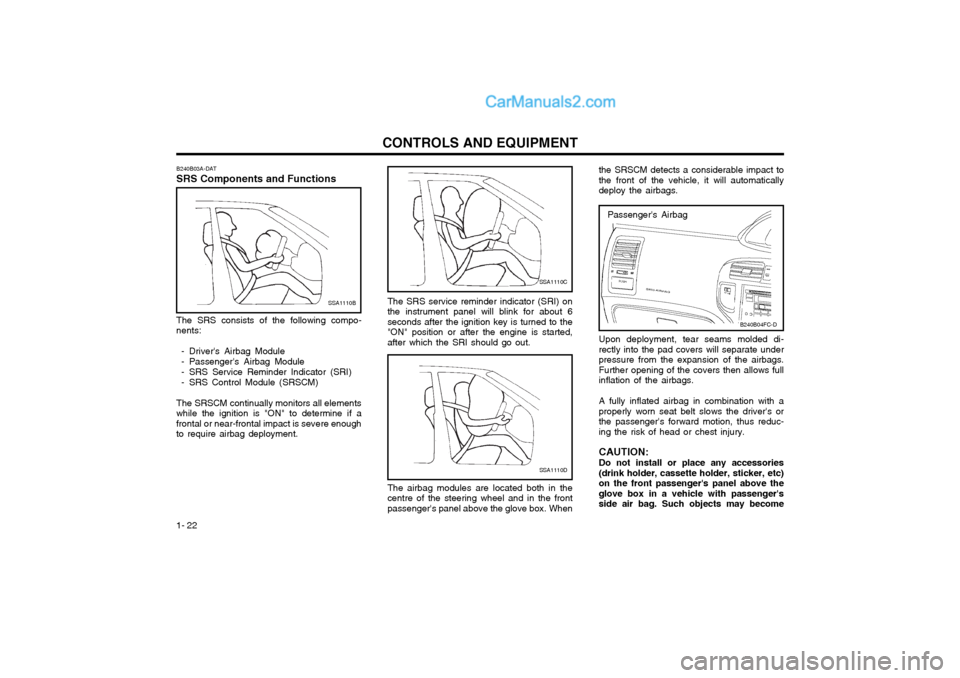
Passenger's Airbag
B240B04FC-D
Upon deployment, tear seams molded di- rectly into the pad covers will separate underpressure from the expansion of the airbags.Further opening of the covers then allows fullinflation of the airbags. A fully inflated airbag in combination with a properly worn seat belt slows the driver's orthe passenger's forward motion, thus reduc-ing the risk of head or chest injury. CAUTION: Do not install or place any accessories (drink holder, cassette holder, sticker, etc)on the front passenger's panel above theglove box in a vehicle with passenger'sside air bag. Such objects may become
the SRSCM detects a considerable impact tothe front of the vehicle, it will automaticallydeploy the airbags.
SSA1110C
The SRS service reminder indicator (SRI) on the instrument panel will blink for about 6seconds after the ignition key is turned to the"ON" position or after the engine is started,after which the SRI should go out.
SSA1110D
The airbag modules are located both in the centre of the steering wheel and in the frontpassenger's panel above the glove box. When
B240B03A-DAT SRS Components and Functions
SSA1110B
The SRS consists of the following compo- nents:
- Driver's Airbag Module
- Passenger's Airbag Module
- SRS Service Reminder Indicator (SRI)
- SRS Control Module (SRSCM)
The SRSCM continually monitors all elements while the ignition is "ON" to determine if afrontal or near-frontal impact is severe enoughto require airbag deployment.
Page 204 of 312

1- 23
CONTROLS AND EQUIPMENT
WARNING:
o When the SRS is activated, there maybe a loud noise and fine dust will be released throughout the vehicle. Theseconditions are normal and are not haz-ardous. However, the fine dust generat-ed during airbag deployment may causeskin irritation. Be sure to wash yourhands and face thoroughly with luke-warm water and a mild soap after anaccident in which the airbags were de-ployed.
o The SRS can function only when the ignition key is in the "ON" position. Ifthe SRS SRI does not come on, orcontinuously remains on, after flashingfor about 6 seconds when the ignitionkey is turned to the "ON" position, orafter the engine is started, or comes onwhile driving, the SRS is not workingproperly. If this occurs, have your ve-hicle immediately inspected by yourHyundai dealer.
o Before you replace a fuse or disconnect a battery terminal, turn the ignition keyto the "LOCK" position or remove theignition key. Never remove or replacethe air bag related fuse(s) when theignition key is in the "ON" position.Failure to heed this warning will causethe SRS SRI to illuminate.
Passenger's Airbag
After complete inflation, the airbag immedi- ately starts deflating, enabling the driver tomaintain forward visibility. CAUTION: When installing a container of liquid air freshener inside a vehicle, do not place itnear the instrument cluster nor on theinstrument panel pad surface. If there isany leakage from the air freshener ontothese areas (instrument cluster, instrumentpanel pad or air ventilator), it may damagethese parts. If the liquid from the air fresh-ener does leak onto these areas, washthem with water immediately. YR10353A
dangerous projectiles and cause injury ifthe passenger's side air bag inflates.
B990B04Y-EAT
Side Impact Airbag
Your Hyundai is equipped with a side impact airbag in each front seat. The purpose of theairbag is to provide the vehicle's driver and/orthe front passenger with additional protectionthan that offered by the seat belt alone. Theside impact airbags are designed to deployonly during certain side impact collisions, de-pending on the crash severity, angle, speedand point of impact. The air bags are notdesigned to deploy in all side impact situa-tions. B990B02Y
Page 205 of 312

CONTROLS AND EQUIPMENT
1- 24
YT10355A
WARNING:
o Do not install a child restraint system in the front passenger seat position.
A child restraint system must never be placed in the front seat. The infant orchild could be severely injured by anairbag deployment in case of an accident.
o Extreme Hazard! Do not use a rearward facing child restraint on a seat pro-tected by an airbag in front of it!
o Modification to SRS components or wir- ing, including the addition of any kindof badges to the pad covers or modifi-cations to the body structure, can ad-versely affect SRS performance and leadto possible injury.
WARNING:
o For best protection from the side airbag
system and to avoid being injured is by the deploying side impact airbag, both front seat occupants should sit in an upright position with the seat belt prop-erly fastened. The driver's hands shouldbe placed on the steering wheel at the9:00 and 3:00 o'clock positions. Thepassenger's arms and hands should beplaced in their laps.
o Do not use any accessory seat covers.
o Use of seat covers could reduce or prevent the effectiveness of the system.
o Do not install any accessories on the side or near the side impact airbag.
o Do not use excessive force on the side of the seat.
o Do not place any objects over the airbag or between the airbag and yourself. B240C03Y-GAT SRS Care The SRS is virtually maintenance-free and there are no parts you can safely service byyourself. The entire SRS system must beinspected by an authorized Hyundai dealer in10 years after the date that the vehicle wasmanufactured. Any work on the SRS system, such as remov- ing, installing, repairing, or any work on thesteering wheel must be performed by a quali-fied Hyundai technician. Improper handling ofthe SRS system may result in serious per-sonal injury.
HFC2092-DSide airbag sensor
o Do not place any objects (an umbrella,
bag, etc.) between the front door and the front seat. Such objects may be-come dangerous projectiles and causeinjury if the supplemental side impactair bag inflates.
o To prevent unexpected deployment of the side impact air bag that may resultin personal injury, avoid impact to theside airbag sensor when the ignitionkey is on.