set clock Hyundai Matrix 2005 Owner's Manual
[x] Cancel search | Manufacturer: HYUNDAI, Model Year: 2005, Model line: Matrix, Model: Hyundai Matrix 2005Pages: 407, PDF Size: 10.31 MB
Page 50 of 407

CONTROLS AND EQUIPMENT
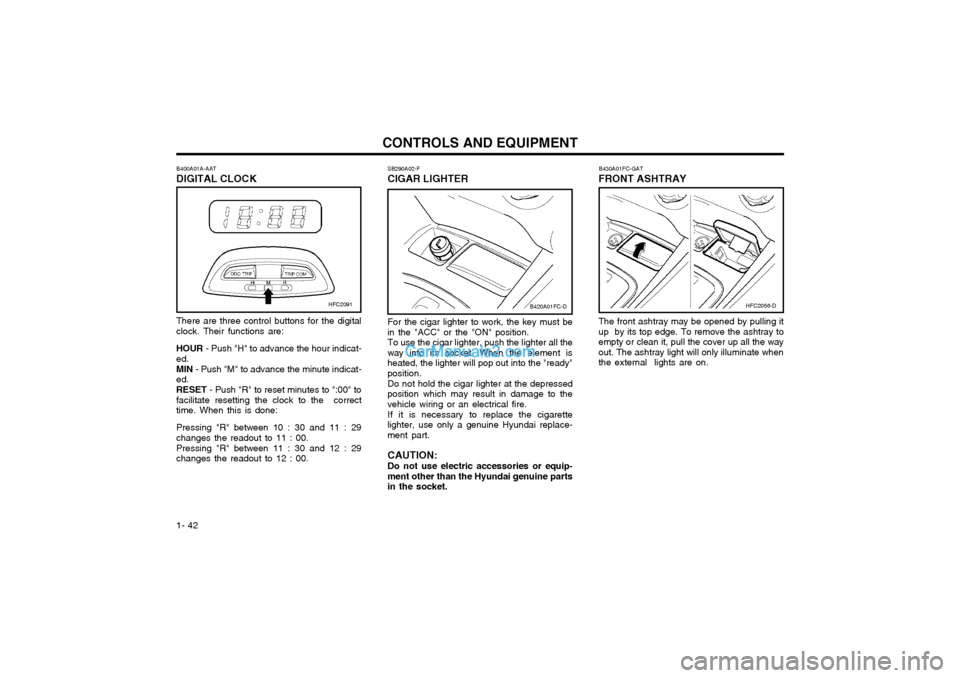
1- 42 SB290A02-F CIGAR LIGHTER
For the cigar lighter to work, the key must be
in the "ACC" or the "ON" position. To use the cigar lighter, push the lighter all the
way into its socket. When the element is heated, the lighter will pop out into the "ready"position.
Do not hold the cigar lighter at the depressed
position which may result in damage to thevehicle wiring or an electrical fire.
If it is necessary to replace the cigarette
lighter, use only a genuine Hyundai replace-ment part. CAUTION:
Do not use electric accessories or equip-
ment other than the Hyundai genuine parts in the socket. The front ashtray may be opened by pulling itup by its top edge. To remove the ashtray toempty or clean it, pull the cover up all the wayout. The ashtray light will only illuminate whenthe external lights are on.B430A01FC-GAT
FRONT ASHTRAY
There are three control buttons for the digitalclock. Their functions are: HOUR - Push "H" to advance the hour indicat-
ed. MIN - Push "M" to advance the minute indicat-
ed.RESET - Push "R" to reset minutes to ":00" to
facilitate resetting the clock to the correct time. When this is done: Pressing "R" between 10 : 30 and 11 : 29 changes the readout to 11 : 00. Pressing "R" between 11 : 30 and 12 : 29 changes the readout to 12 : 00.
B400A01A-AAT DIGITAL CLOCK
B420A01FC-DHFC2091HFC2056-D
Page 91 of 407

IN CASE OF EMERGENCY
3-4
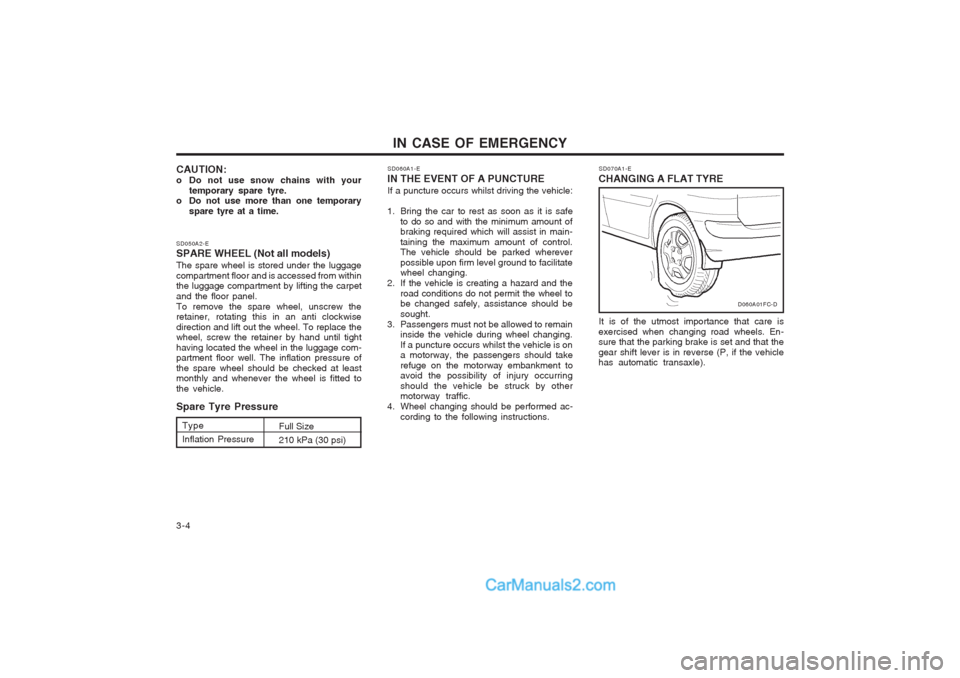
SD070A1-E
CHANGING A FLAT TYRE
It is of the utmost importance that care is
exercised when changing road wheels. En- sure that the parking brake is set and that the gear shift lever is in reverse (P, if the vehicle has automatic transaxle).
D060A01FC-D
SD050A2-E SPARE WHEEL (Not all models) The spare wheel is stored under the luggage compartment floor and is accessed from within the luggage compartment by lifting the carpet and the floor panel.To remove the spare wheel, unscrew the retainer, rotating this in an anti clockwise direction and lift out the wheel. To replace the wheel, screw the retainer by hand until tight having located the wheel in the luggage com- partment floor well. The inflation pressure of the spare wheel should be checked at least monthly and whenever the wheel is fitted to the vehicle. Spare Tyre Pressure
CAUTION:
o Do not use snow chains with your
temporary spare tyre.
o Do not use more than one temporary
spare tyre at a time. SD060A1-E
IN THE EVENT OF A PUNCTURE If a puncture occurs whilst driving the vehicle:
1. Bring the car to rest as soon as it is safe to do so and with the minimum amount of braking required which will assist in main- taining the maximum amount of control. The vehicle should be parked wherever possible upon firm level ground to facilitate wheel changing.
2. If the vehicle is creating a hazard and the road conditions do not permit the wheel tobe changed safely, assistance should be sought.
3. Passengers must not be allowed to remain inside the vehicle during wheel changing.If a puncture occurs whilst the vehicle is on a motorway, the passengers should take refuge on the motorway embankment to avoid the possibility of injury occurring should the vehicle be struck by other motorway traffic.
4. Wheel changing should be performed ac- cording to the following instructions.
Type Inflation Pressure Full Size210 kPa (30 psi)
Page 115 of 407

OWNER MAINTENANCE
6-8 CAUTION: Slowly loosen the oil filter upper cap not to overflow the oil.
4. Remove the engine oil filler cap.
5. Slide underneath the car and loosen the oil pan drain plug by turning it counterclock- wise oil pan with a wrench of the propersize. Be sure that a drain pan is in positionto catch the oil as it drains out, then removethe drain plug.
WARNING: Be very careful when draining the engine oil as it may be hot enough to burn you!
6. When the oil has stopped draining, replace the drain plug using a new gasket andretighten by turning it clockwise. Oil pan drain plug tightening torque : 3.5 ~ 4.5 kgf.m
7. Pull out the oil filter upper cap with element from the oil filter housing.Using a clean cloth, remove any dirt or oil accumulated around the oil filter housing.
8. After mounting a new centrepipe O-ring, new oil filter element and new O-ring toupper cap, install the upper cap to oil filterhousing and retighten by turning it clock-wise. Do not over-tighten. Tightening torque : 2.5 kgf.m CAUTION: Don't use old oil filter upper cap O-ring
and centrepipe O-ring.
9. Refill the crankcase with the recommended engine oil. Refer to the specification in chapter 9 for engine oil capacity.
CAUTION: Slowly pour the recommended oil by us-
ing a funnel. Do not overfill not to damage the engine.
10.Start the engine and check to be sure no oil is leaking from the drain plug or oil filter.
11.Shut off the engine and recheck the oil level.
NOTE:
o It is recommended that the engine oil and filter should be changed by an Hyundai authorised repairer.
o Always dispose of used engine oil in an environmentally acceptable man-ner. It is suggested that it be placed ina sealed container and taken to a ser-vice station for maybe reclaimation.Do not pour the oil on the ground orput it into the household trash.
WARNING: Used motor oil may cause irritation or
cancer of the skin if left in contact with the skin for prolonged periods of time.Wash your hands thoroughly with soapand warm water as soon as possible afterhandling used oil.
Centrepipe O-ring
G040B02FC
O-ring
Oil filter housing
2. Open the bonnet and remove the engine oil level dipstick.
3. Loosen the oil filter upper cap with a proper tool from the oil filter housing until an O-ring is seen. Then, drain the oil completely.
Oil filter element
Upper cap
If the car is being driven in severe conditions,
more frequent oil and filter changes are re-quired.
The procedure for changing the oil and filter
is as follows:
1. Park the car on level ground and set the parking brake. Start the engine and let it warm up until the needle on the coolanttemperature gauge moves above the low-est mark. Turn the engine off and place thegear selector lever in "P" (automatic) orreverse gear (manual transaxle).
Page 228 of 407

1FEATURES OF YOUR HYUNDAI
64CIGARETTE LIGHTER
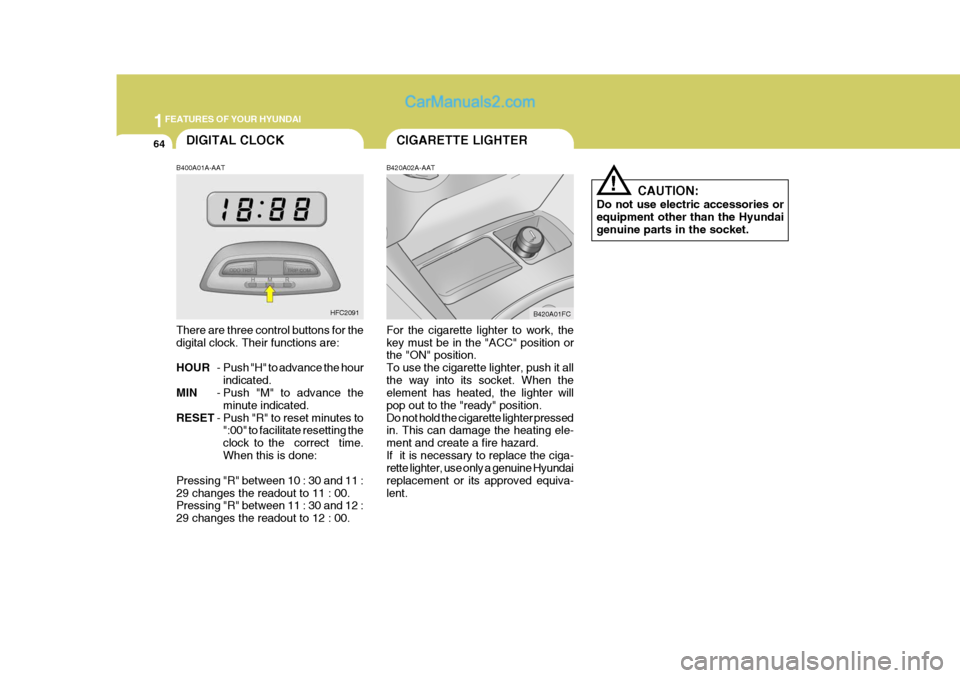
B420A02A-AAT For the cigarette lighter to work, the key must be in the "ACC" position or the "ON" position. To use the cigarette lighter, push it allthe way into its socket. When the element has heated, the lighter will pop out to the "ready" position.Do not hold the cigarette lighter pressed in. This can damage the heating ele- ment and create a fire hazard.If it is necessary to replace the ciga- rette lighter, use only a genuine Hyundai replacement or its approved equiva-lent. B420A01FC
CAUTION:
Do not use electric accessories orequipment other than the Hyundai genuine parts in the socket.
!
B400A01A-AAT
There are three control buttons for the digital clock. Their functions are: HOUR - Push "H" to advance the hour
indicated.
MIN - Push "M" to advance the
minute indicated.
RESET - Push "R" to reset minutes to
":00" to facilitate resetting the clock to the correct time.When this is done:
Pressing "R" between 10 : 30 and 11 :29 changes the readout to 11 : 00. Pressing "R" between 11 : 30 and 12 : 29 changes the readout to 12 : 00. DIGITAL CLOCK
HFC2091
Page 275 of 407

1
FEATURES OF YOUR HYUNDAI
111
4. TUNE (Manual) Select Button Press the ( ) side or ( ) side to increase or to decrease the frequency. Presseither button and hold down to continu- ously scroll. Release button once the desired station is reached. SEEK Operation (Automatic Channel Selection) Press the TUNE select button for 0.5 sec or more. Releasing it will automati-cally tune to the next available station with a beep sound. When the ( ) side is pressed longerthan 0.5 second and releasing will auto- matically tune to the next higher fre- quency and when the ( ) side ispressed longer than 0.5 second, releas- ing will automatically tune to the next lower frequency.
5. PRESET STATION Select Buttons
Six (6) stations for AM, FM1 and FM2 respectively can be preset in the elec-tronic memory circuit.
BALANCE Control knob Pull the Bass control knob out further. Rotate the knob clockwise to empha-size right speaker sound (left speaker sound will be attenuated). When the control knob is turned counterclock-wise, left speaker sound will be empha- sized (right speaker sound will be at- tenuated).
3. TREBLE/FAD Knob TREBLE Control Knob Press to pop the knob out and turn to the left or right for the desired treble tone. FAD (Fader Control) Knob Pull the Treble control knob out further. Turn the control knob counterclockwiseto emphasize front speaker sound (rear speaker sound will be attenuated). When the control knob is turned clockwise,rear speaker sound will be emphasized (front speaker sound will be attenu- ated).
H290B03E-GAT
1. POWER ON-OFF Control
Knob
The radio unit may be operated when the ignition key is in the "ACC" or "ON"position. Press the button to switch the power on. The display shows the radio frequency in the radio mode, the tapedirection indicator in the tape mode or CD track in either the CD mode or CD AUTO CHANGER mode. To switch thepower off, press the button again. VOLUME Control Rotate the knob clockwise to increase the volume and turn the knob counter- clockwise to reduce the volume.
2. BASS/BALANCE Control Knob
BASS Control Knob Press to pop the knob out. To increase the bass, rotate the knob clockwise,while to decrease the bass, rotate the knob counterclockwise.
E/FAD Konb
Page 354 of 407

6
DO-IT-YOURSELF MAINTENANCE
9CHANGING THE OIL AND FILTER
!
G040A04FC-GAT
Gasoline engine
The engine oil and filter should be changed at those intervals specified in the maintenance schedule in Sec-tion 5. If the car is being driven in severe conditions, more frequent oil and filter changes are required. G040A03EThe procedure for changing the oil
and filter is as follows:
1. Park the car on level ground and
set the parking brake. Start the engine and let it warm up until the needle on the coolant temperaturegauge moves above the lowest mark. Turn the engine off and place the gear selector lever in "P" (auto-matic) or reverse gear (manual transaxle).
2. Open the hood and remove the engine oil filler cap.
3. Slide underneath the car and loosen the oil pan drain plug by turning itcounterclockwise with a wrench of the proper size. Be sure that adrain pan is in position to catch the oil as it drains out, then remove the drain plug.
WARNING:
Be very careful when draining the
engine oil as it may be hot enough to burn you! 4. When the oil has stopped draining,
replace the drain plug using a new washer and retighten by turning it clockwise. Oil pan drain plug tightening torque :
Oil filler cap
Drain plug
Oil filler F040A02TB
1.6 DOHC
1.8 DOHC
1.6 DOHC 1.8 DOHC 4.0 ~ 4.5 3.5 ~ 4.5
E.CExcept E.C
4.0 ~ 4.5 kgf.m
5. Remove the oil filter by turning it counterclockwise with a oil filter wrench of the proper size. A cer-tain amount of oil will come out when you remove the filter. So be sure to have your drain pan inplace underneath it.
6. Install a new oil filter in accordance with the instructions on the cartonor on the filter itself. Do not over- tighten. Oil filter tightening torque: 1.2~1.6kgf.m
Oil filler cap
Drain plug
Oil filler
Page 359 of 407

6 DO-IT-YOURSELF MAINTENANCE
14
4. Turn the radiator cap counterclock-
wise without pressing down on it, until it stops. This relieves any pres- sure remaining in the cooling sys-tem. And remove the radiator cap by pushing down and turning coun- terclockwise.Fill the radiator with clean deminer-alized or distilled water. Continueto add clean demineralized or dis- tilled water in small quantities until the fluid level stays up in the radia-tor neck. G050D01FC
G050D02FC
5. Start the engine, top off the radia- tor with water and then add engine coolant to the reservoir until the level is between "L" and "F".
6. Replace the radiator and reservoir caps and check to be sure thedrain cocks are fully closed and not leaking.
G050D02A-AAT
To Change the Coolant
The coolant should be changed at
those intervals specified in the ve-hicle maintenance schedule in Sec- tion 5.
! CAUTION:
Engine coolant can damage the
finish of your car. If you spill en- gine coolant on the car, wash it off thoroughly with clean water.
1. Park the car on level ground, set the park-ing brake and remove the radiator cap when cool.
2. Be sure your drain receptacle is in
place. Open the drain cock on theradiator. Allow all the engine cool- ant to drain from the cooling sys- tem, then securely close the draincock.
3. Check Section 9 for the capacity of the cooling system in your car.Then, following the manufacturer's directions on the engine coolant container, add the appropriatequantity of coolant to the radiator.
Page 403 of 407

10INDEX
2
A Accessory Tray ......................................................... 1-71
Air Bag ...................................................................... 1-37
Air Cleaner Filter ....................................................... 6-17
Air Conditioning
Care ....................................................................... 6-25
Operation ............................................................... 6-25
Switch ..................................................................... 1-88
Air Conditioner Filter ................................................. 1-90
Antenna ................................................................... 1-124
Ashtray ...................................................................... 1-65
Audio System ............................................................ 1-93
Auto Fuel Cut Switch ................................................ 1-80
B
Battery ............................................................. 2-19, 6-31
Bleeding The Fuel System ....... ................................6-33
Brake Anti-lock system ..................................................... 2-13
Brake traction control system ................................ 2-14
Checking the brakes .............................................. 6-22
Fluid ....................................................................... 6-23
Pedal clearance ..................................................... 6-28
Pedal free play ....................................................... 6-28
Practices ................................................................ 2-15
Brake Pad Wear Warning Sound .............................1-52
Brake Traction Control System ................................ 2-14
Breaking-In your new Hyundai ................................... 1-3
Bulbs Wat tage ........................................................... 6-38C
Care of Cassette Tapes ....................
..................... 1-123
Care of Disc ............................................................ 1-122
Cargo Area Cover ..................................................... 1-79
Cassette Tape Player Operation (H220, H280) ............. .
................................................................... 1-99, 1-113
Catalytic Converter ..................................................... 7-3
CD Auto changer ...................................................... 1-77
CD Auto Changer (H 260, H280) ................ 1-107, 1-118
Child-Protector Rear Door Lock ................................. 1-9
Child Restraint S ystem ................................. 1-28 ~ 1-34
Cigarette Lighter ....................................................... 1-64
Clock ....................................................................... 1-64
Clutch Checking fluid ...................................................... 6-24
Pedal free play ..................................................... 6-17
Combination Light
Headlight flasher .................................................... 1-59
Headlight swi tch ..................................................... 1-58
High-beam swi tch .................................................. 1-59
Lane change si gnal ................................................ 1-58
Turn signal oper ation............................................. 1-58
Compact Disc Player Operation (H260, H280) .............. .
................................................................. 1-104, 1-115
Cooling Fans ............................................................. 6-32
Corrosion Protection Cleaning the interior ................................................. 4-5
Protecting your Hyundai from corrosion .................. 4-2
Washing and waxing ................................................ 4-4