headrest Hyundai Santa Fe Sport 2016 Owner's Manual
[x] Cancel search | Manufacturer: HYUNDAI, Model Year: 2016, Model line: Santa Fe Sport, Model: Hyundai Santa Fe Sport 2016Pages: 763, PDF Size: 37.75 MB
Page 23 of 763
Safety features of your vehicle
23
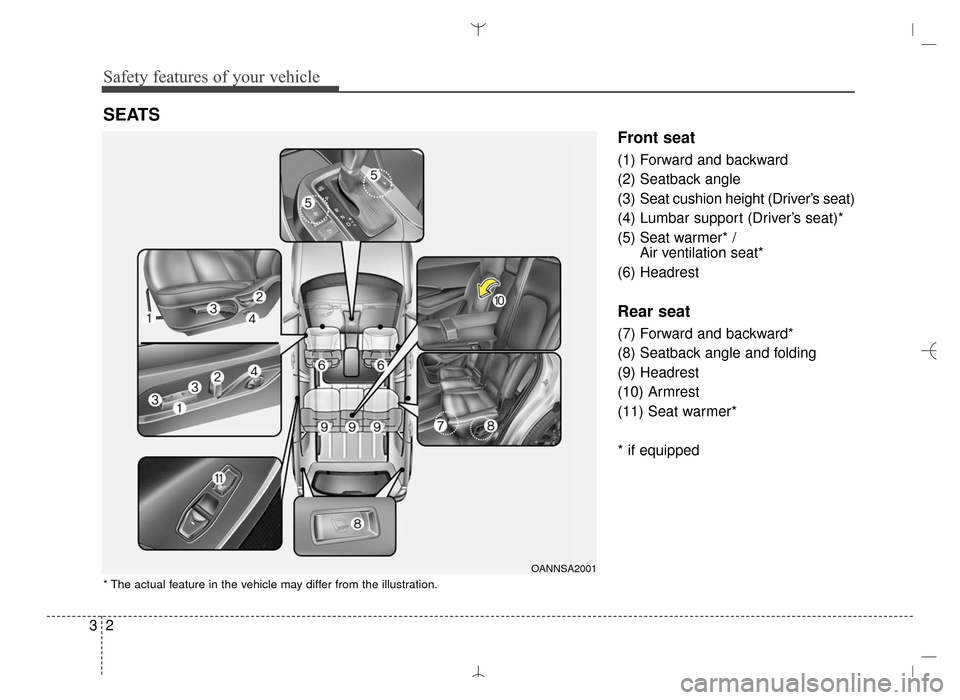
Front seat
(1) Forward and backward
(2) Seatback angle
(3) Seat cushion height (Driver’s seat)
(4) Lumbar support (Driver’s seat)*
(5) Seat warmer* / Air ventilation seat*
(6) Headrest
Rear seat
(7) Forward and backward*
(8) Seatback angle and folding
(9) Headrest
(10) Armrest
(11) Seat warmer*
* if equipped
SEATS
OANNSA2001
* The actual feature in the vehicle may differ from the illustration.
AN HMA 3.QXP 3/5/2015 3:09 PM Page 2
Page 30 of 763
39
Safety features of your vehicle
Recalling positions from memory
1. Shift the shift lever into P or Nwhile the engine start/stop button
is ON or ignition switch ON.
2. To recall the position in the memo- ry, press the desired memory but-
ton (1 or 2). The system will beep
once, then the driver’s seat will
automatically adjust to the stored
position.
Adjusting the control switch for the
driver’s seat while the system is
recalling the stored position will
cause the movement to stop and
move in the direction that the control
switch is moved.Easy access function (if equipped)
The system will move the driver's
seat automatically as follows:
Without smart key system
- It will move the driver’s seat rear-ward when the ignition key is
removed and front driver’s door is
opened.
- It will move the driver’s seat for- ward when the ignition key is
inserted.
With smart key system - It will move the driver’s seat rear-ward when the engine start/stop
button is changed to the OFF
position and front driver’s door is
opened.
- It will move the driver’s seat for- ward when the engine start/stop
button is changed to the ACC or
START position.
You can activate or deactivate this
feature. Refer to "User settings" in
section 4.
Headrest
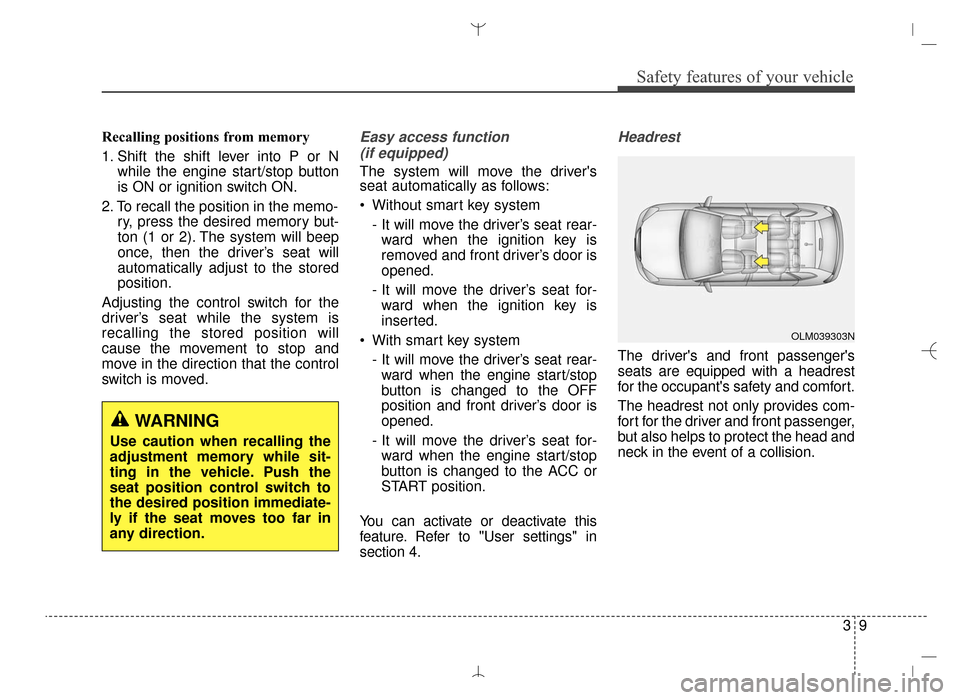
The driver's and front passenger's
seats are equipped with a headrest
for the occupant's safety and comfort.
The headrest not only provides com-
fort for the driver and front passenger,
but also helps to protect the head and
neck in the event of a collision.
WARNING
Use caution when recalling the
adjustment memory while sit-
ting in the vehicle. Push the
seat position control switch to
the desired position immediate-
ly if the seat moves too far in
any direction.
OLM039303N
AN HMA 3.QXP 3/5/2015 3:09 PM Page 9
Page 31 of 763
Safety features of your vehicle
10
3
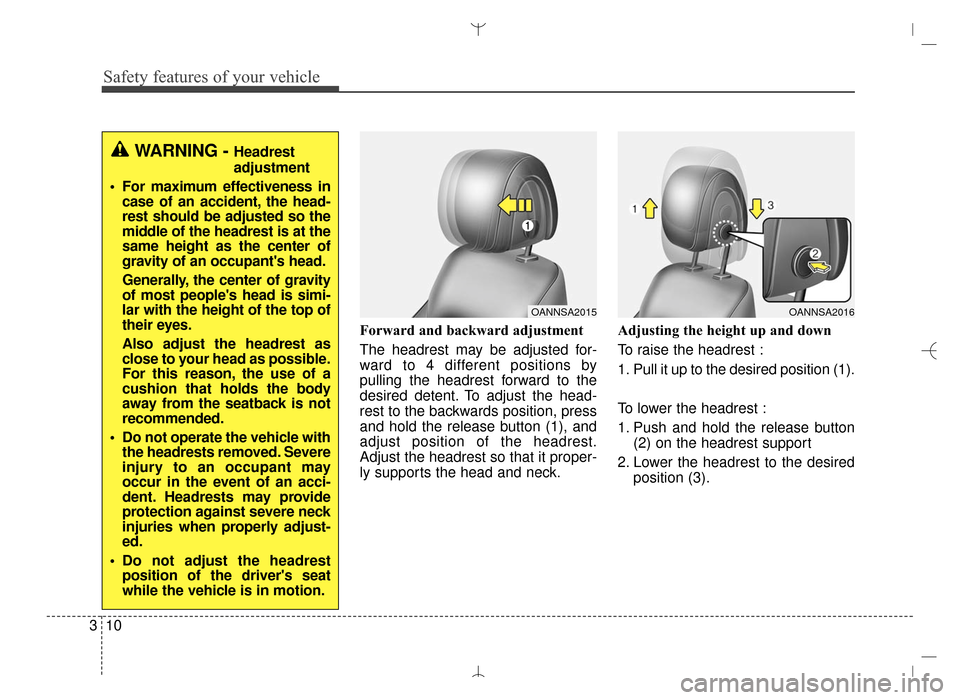
Forward and backward adjustment
The headrest may be adjusted for-
ward to 4 different positions by
pulling the headrest forward to the
desired detent. To adjust the head-
rest to the backwards position, press
and hold the release button (1), and
adjust position of the headrest.
Adjust the headrest so that it proper-
ly supports the head and neck. Adjusting the height up and down
To raise the headrest :
1. Pull it up to the desired position (1).
To lower the headrest :
1. Push and hold the release button
(2) on the headrest support
2. Lower the headrest to the desired position (3).
WARNING - Headrest
adjustment
For maximum effectiveness in case of an accident, the head-
rest should be adjusted so the
middle of the headrest is at the
same height as the center of
gravity of an occupant's head.
Generally, the center of gravity
of most people's head is simi-
lar with the height of the top of
their eyes.
Also adjust the headrest as
close to your head as possible.
For this reason, the use of a
cushion that holds the body
away from the seatback is not
recommended.
Do not operate the vehicle with the headrests removed. Severe
injury to an occupant may
occur in the event of an acci-
dent. Headrests may provide
protection against severe neck
injuries when properly adjust-
ed.
Do not adjust the headrest position of the driver's seat
while the vehicle is in motion.
OANNSA2015OANNSA2016
AN HMA 3.QXP 3/5/2015 3:09 PM Page 10
Page 32 of 763
311
Safety features of your vehicle
Removal and reinstallation
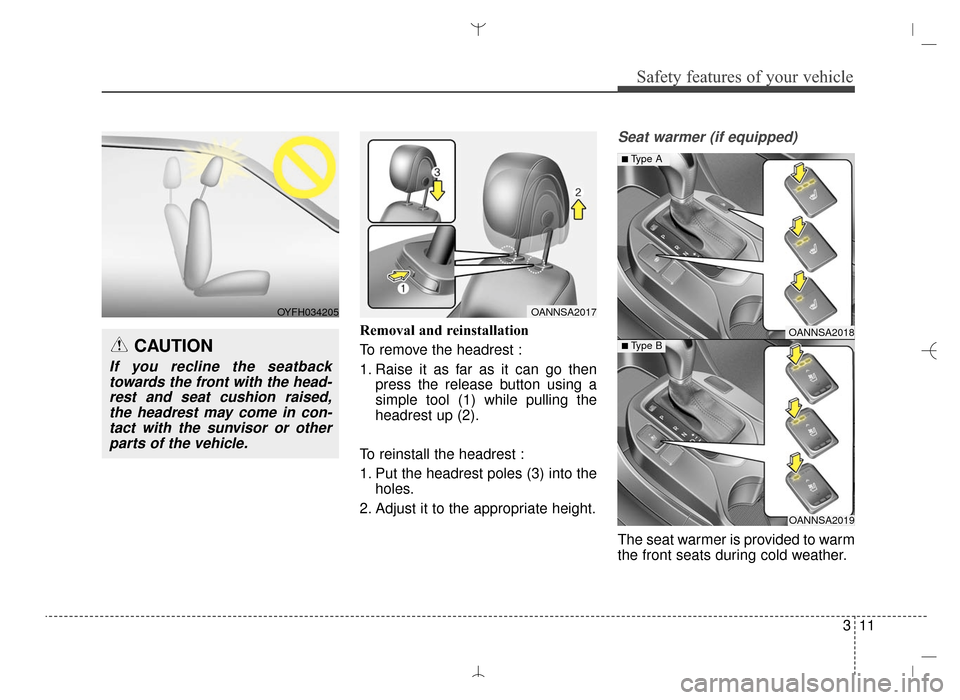
To remove the headrest :
1. Raise it as far as it can go thenpress the release button using a
simple tool (1) while pulling the
headrest up (2).
To reinstall the headrest :
1. Put the headrest poles (3) into the holes.
2. Adjust it to the appropriate height.
Seat warmer (if equipped)
The seat warmer is provided to warm
the front seats during cold weather.
OANNSA2017
OANNSA2018
OANNSA2019
â– Type A
â– Type B
OYFH034205
CAUTION
If you recline the seatback towards the front with the head-rest and seat cushion raised,the headrest may come in con-tact with the sunvisor or otherparts of the vehicle.
AN HMA 3.QXP 3/5/2015 3:09 PM Page 11
Page 36 of 763
315
Safety features of your vehicle
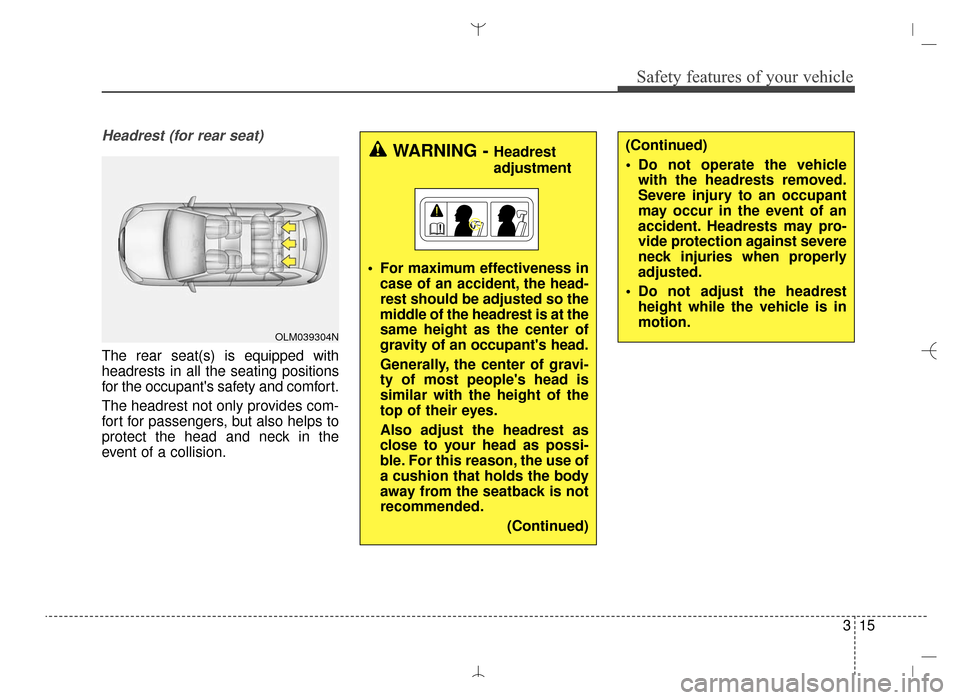
Headrest (for rear seat)
The rear seat(s) is equipped with
headrests in all the seating positions
for the occupant's safety and comfort.
The headrest not only provides com-
fort for passengers, but also helps to
protect the head and neck in the
event of a collision.
OLM039304N
WARNING - Headrest
adjustment
For maximum effectiveness in case of an accident, the head-
rest should be adjusted so the
middle of the headrest is at the
same height as the center of
gravity of an occupant's head.
Generally, the center of gravi-
ty of most people's head is
similar with the height of the
top of their eyes.
Also adjust the headrest as
close to your head as possi-
ble. For this reason, the use of
a cushion that holds the body
away from the seatback is not
recommended.
(Continued)(Continued)
Do not operate the vehiclewith the headrests removed.
Severe injury to an occupant
may occur in the event of an
accident. Headrests may pro-
vide protection against severe
neck injuries when properly
adjusted.
Do not adjust the headrest height while the vehicle is in
motion.
AN HMA 3.QXP 3/5/2015 3:09 PM Page 15
Page 37 of 763
Safety features of your vehicle
16
3
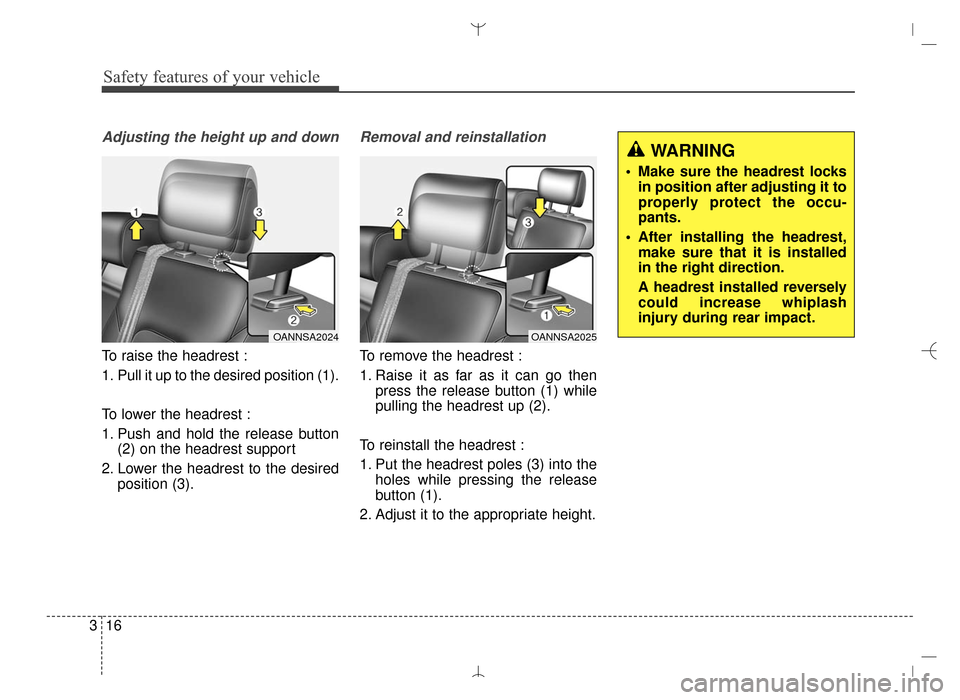
Adjusting the height up and down
To raise the headrest :
1. Pull it up to the desired position (1).
To lower the headrest :
1. Push and hold the release button
(2) on the headrest support
2. Lower the headrest to the desired position (3).
Removal and reinstallation
To remove the headrest :
1. Raise it as far as it can go thenpress the release button (1) while
pulling the headrest up (2).
To reinstall the headrest :
1. Put the headrest poles (3) into the holes while pressing the release
button (1).
2. Adjust it to the appropriate height.
OANNSA2024OANNSA2025
WARNING
Make sure the headrest locks in position after adjusting it to
properly protect the occu-
pants.
After installing the headrest, make sure that it is installed
in the right direction.
A headrest installed reversely
could increase whiplash
injury during rear impact.
AN HMA 3.QXP 3/5/2015 3:09 PM Page 16
Page 39 of 763
Safety features of your vehicle
18
3
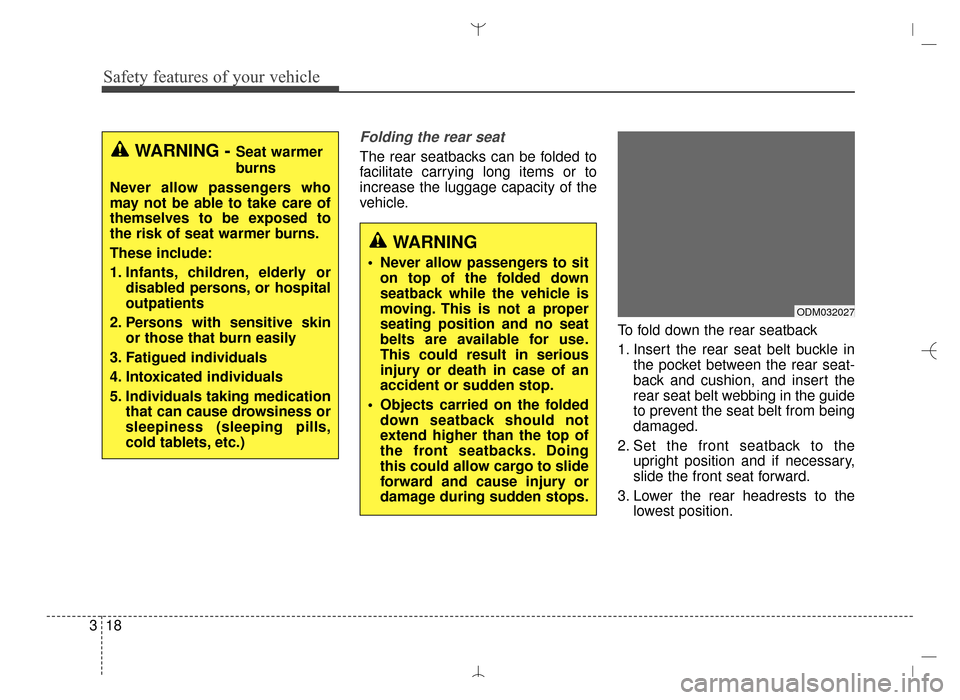
Folding the rear seat
The rear seatbacks can be folded to
facilitate carrying long items or to
increase the luggage capacity of the
vehicle.
To fold down the rear seatback
1. Insert the rear seat belt buckle inthe pocket between the rear seat-
back and cushion, and insert the
rear seat belt webbing in the guide
to prevent the seat belt from being
damaged.
2. Set the front seatback to the upright position and if necessary,
slide the front seat forward.
3. Lower the rear headrests to the lowest position.WARNING - Seat warmer
burns
Never allow passengers who
may not be able to take care of
themselves to be exposed to
the risk of seat warmer burns.
These include:
1. Infants, children, elderly or disabled persons, or hospital
outpatients
2. Persons with sensitive skin or those that burn easily
3. Fatigued individuals
4. Intoxicated individuals
5. Individuals taking medication that can cause drowsiness or
sleepiness (sleeping pills,
cold tablets, etc.)
WARNING
Never allow passengers to siton top of the folded down
seatback while the vehicle is
moving. This is not a proper
seating position and no seat
belts are available for use.
This could result in serious
injury or death in case of an
accident or sudden stop.
Objects carried on the folded down seatback should not
extend higher than the top of
the front seatbacks. Doing
this could allow cargo to slide
forward and cause injury or
damage during sudden stops.
ODM032027
AN HMA 3.QXP 3/5/2015 3:09 PM Page 18
Page 41 of 763

Safety features of your vehicle
20
3
To fold down the rear center seat-
back
1. Lower the rear headrests to the lowest position.
2. Push the center seatback folding lever up, then fold the seat toward
the front of the vehicle.
When you return the seatback to its
upright position, always be sure it
has locked into position by pushing
on the top of the seatback.âś˝ âś˝ NOTICE
If you are not able to pull out the seat
belt from the retractor, firmly pull the
belt out and release it. Then you will
be able to pull the belt out smoothly.
WARNING - Rear seat
folding
Do not attempt to fold the rear
seats if the seat is occupied
with other passengers, pets, or
luggage. Injury or damage to
persons, pets, or luggage may
occur.
OANNSA2030
WARNING - Rear center
seat folding
The rear center seat back does
not lock in place when folded
down. When carrying long
objects with the rear center seat
back folded, make sure to
secure the object to prevent it
from being thrown about the
vehicle in a collision. Failure to
do so may cause injury to vehi-
cle occupants.
AN HMA 3.QXP 3/5/2015 3:09 PM Page 20
Page 57 of 763
Safety features of your vehicle
36
3
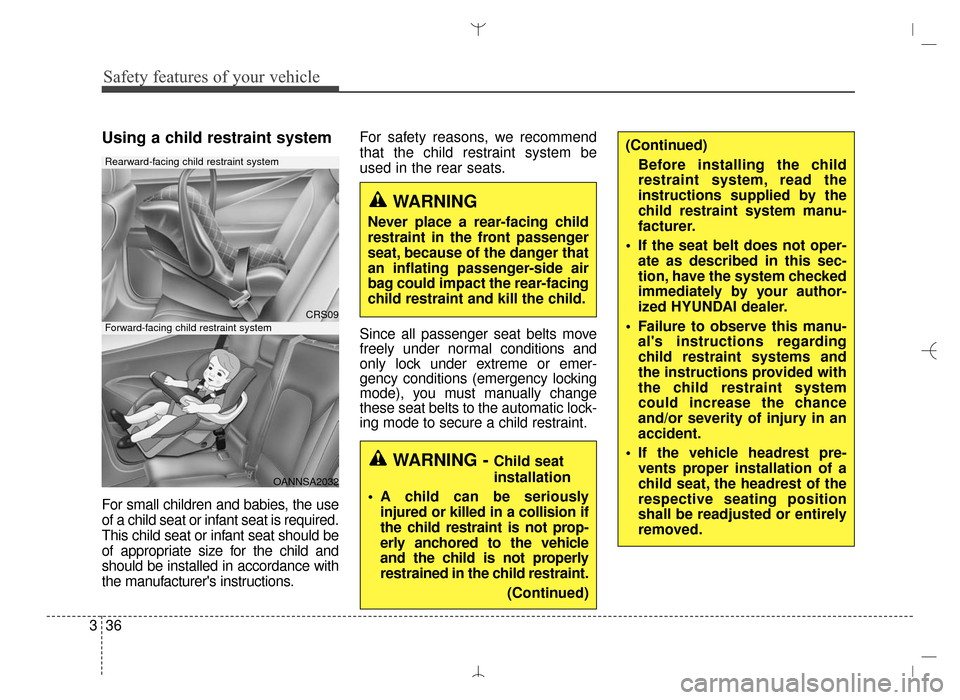
Using a child restraint system
For small children and babies, the use
of a child seat or infant seat is required.
This child seat or infant seat should be
of appropriate size for the child and
should be installed in accordance with
the manufacturer's instructions. For safety reasons, we recommend
that the child restraint system be
used in the rear seats.
Since all passenger seat belts move
freely under normal conditions and
only lock under extreme or emer-
gency conditions (emergency locking
mode), you must manually change
these seat belts to the automatic lock-
ing mode to secure a child restraint.
WARNING - Child seat
installation
A child can be seriously injured or killed in a collision if
the child restraint is not prop-
erly anchored to the vehicle
and the child is not properly
restrained in the child restraint.
(Continued)
(Continued)Before installing the child
restraint system, read the
instructions supplied by the
child restraint system manu-
facturer.
If the seat belt does not oper- ate as described in this sec-
tion, have the system checked
immediately by your author-
ized HYUNDAI dealer.
Failure to observe this manu- al's instructions regarding
child restraint systems and
the instructions provided with
the child restraint system
could increase the chance
and/or severity of injury in an
accident.
If the vehicle headrest pre- vents proper installation of a
child seat, the headrest of the
respective seating position
shall be readjusted or entirely
removed.
WARNING
Never place a rear-facing child
restraint in the front passenger
seat, because of the danger that
an inflating passenger-side air
bag could impact the rear-facing
child restraint and kill the child.
CRS09
OANNSA2032
Forward-facing child restraint system
Rearward-facing child restraint system
AN HMA 3.QXP 3/5/2015 3:09 PM Page 36
Page 60 of 763
339
Safety features of your vehicle
When the seat belt is allowed to
retract to its fully stowed position,
the retractor will automatically
switch from the “Automatic lock-
ing” mode to the emergency lock
mode for normal adult usage.
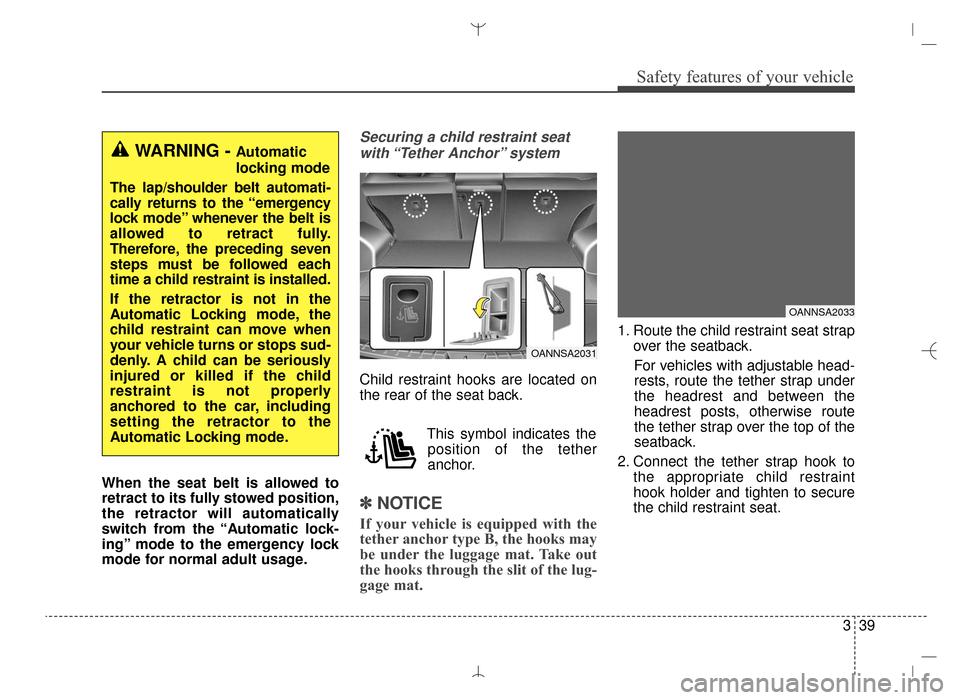
Securing a child restraint seatwith “Tether Anchor” system
Child restraint hooks are located on
the rear of the seat back.
This symbol indicates theposition of the tether
anchor.
âś˝ âś˝ NOTICE
If your vehicle is equipped with the
tether anchor type B, the hooks may
be under the luggage mat. Take out
the hooks through the slit of the lug-
gage mat.
1. Route the child restraint seat strap
over the seatback.
For vehicles with adjustable head-
rests, route the tether strap under
the headrest and between the
headrest posts, otherwise route
the tether strap over the top of the
seatback.
2. Connect the tether strap hook to the appropriate child restraint
hook holder and tighten to secure
the child restraint seat.
WARNING - Automatic
locking mode
The lap/shoulder belt automati-
cally returns to the “emergency
lock mode” whenever the belt is
allowed to retract fully.
Therefore, the preceding seven
steps must be followed each
time a child restraint is installed.
If the retractor is not in the
Automatic Locking mode, the
child restraint can move when
your vehicle turns or stops sud-
denly. A child can be seriously
injured or killed if the child
restraint is not properly
anchored to the car, including
setting the retractor to the
Automatic Locking mode.
OANNSA2031
OANNSA2033
AN HMA 3.QXP 3/5/2015 3:09 PM Page 39