key Hyundai Terracan 2004 Workshop Manual
[x] Cancel search | Manufacturer: HYUNDAI, Model Year: 2004, Model line: Terracan, Model: Hyundai Terracan 2004Pages: 361, PDF Size: 4.69 MB
Page 208 of 361
CONTROLS AND EQUIPMENT
1- 8
B070D01HP-EAT Disarmed StageThe system will be disarmed when the driver's or passenger's door is unlocked by depressingthe "UNLOCK" button on the transmitter. After completion of the step above, the turn signal lights will blink twice to indicate that thesystem is disarmed. If any door, hatchback door or engine bonnet is not opened within 30 seconds, the system willbe rearmed. CAUTION: Only the transmitter can disarm the armed stage. If the transmitter does not disarm thesystem, it is necessary to take the followingsteps;
1. Unlock the door with the key, which will cause, the alarm to be activated.
2. Insert the key in the ignition key cylinder and turn the ignition key to "ON" posi- tion.
3. Wait for 30 seconds. After completion of the steps above, the system will be disarmed.
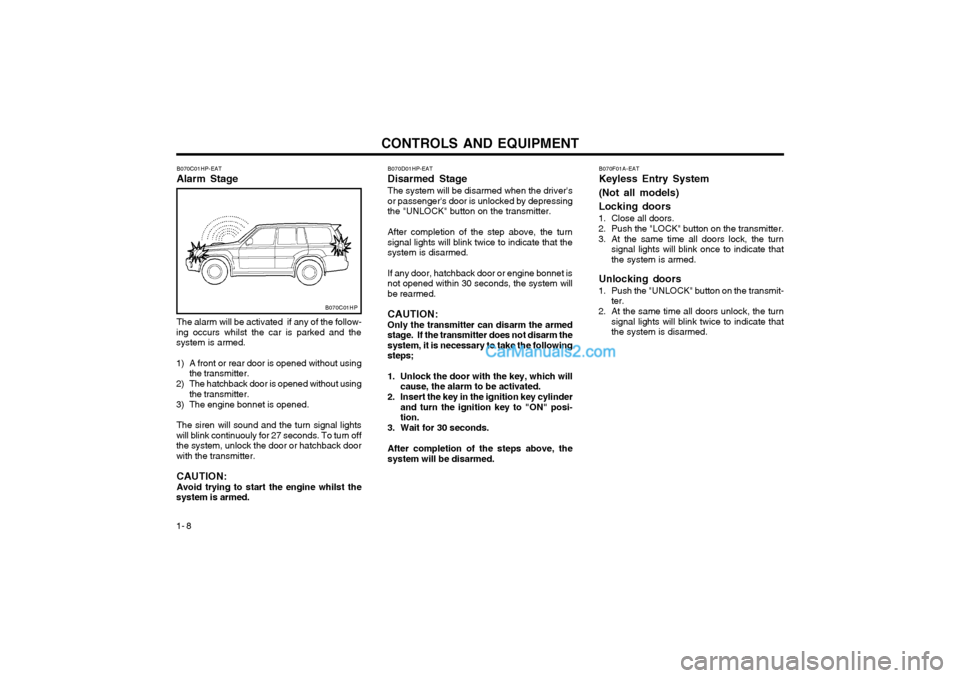
B070C01HP-EAT Alarm Stage
B070F01A-EATKeyless Entry System (Not all models) Locking doors
1. Close all doors.
2. Push the "LOCK" button on the transmitter.
3. At the same time all doors lock, the turn signal lights will blink once to indicate that the system is armed.
Unlocking doors
1. Push the "UNLOCK" button on the transmit- ter.
2. At the same time all doors unlock, the turn signal lights will blink twice to indicate thatthe system is disarmed.
B070C01HP
The alarm will be activated if any of the follow-
ing occurs whilst the car is parked and the system is armed.
1) A front or rear door is opened without using the transmitter.
2) The hatchback door is opened without using the transmitter.
3) The engine bonnet is opened.
The siren will sound and the turn signal lights
will blink continuouly for 27 seconds. To turn off the system, unlock the door or hatchback doorwith the transmitter.
CAUTION: Avoid trying to start the engine whilst the
system is armed.
Page 209 of 361
CONTROLS AND EQUIPMENT1- 9
B060A03L-DAT POWER WINDOWS
B060A01HP.DAG
(1)
(2)
The power windows operate when the ignition
key is in the "ON" position. The main switches are located on the driver's armrest and controlthe front and rear windows on both sides of thevehicle. The windows may be opened by de-pressing the appropriate window switch andclosed by pulling up the switch. To open thewindow on the driver's side, press the switch(1)halfway down. The window moves as long asthe switch is operated. To fully open the driver'swindow automatically, press the switch fullydown. In automatic operation, the window willfully open even if you let go of the switch. Tostop at the desired opening, pull up and re-lease the switch. In order to prevent operationof the passanger front and rear windows, awindow lock switch(2) is provided on the arm-rest of the driver's door. To disable the powerwindows, press the window lock switch. To
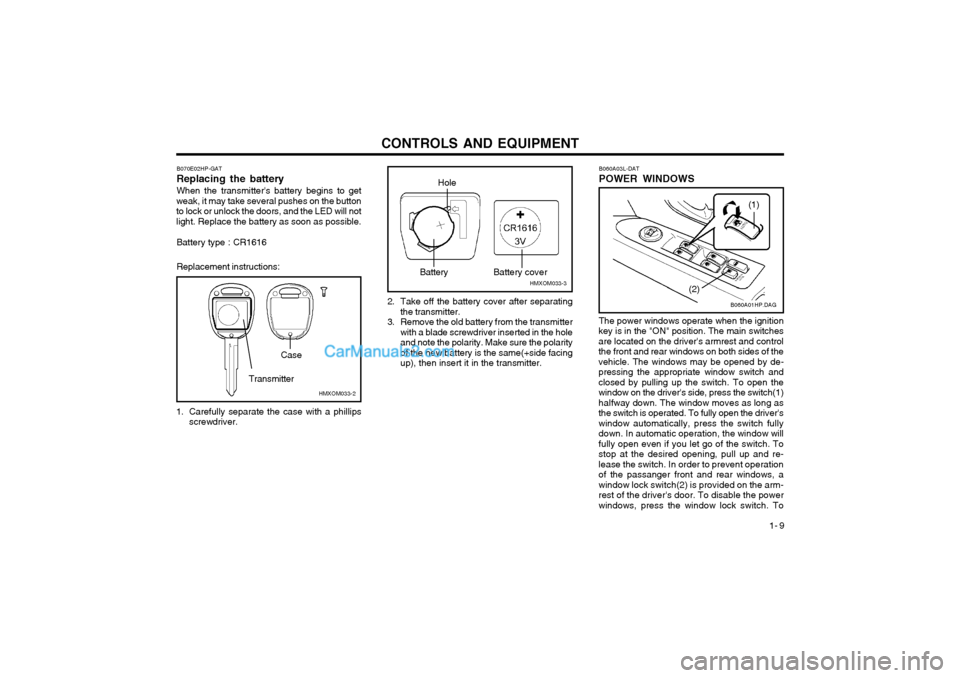
B070E02HP-GAT Replacing the batteryWhen the transmitter's battery begins to get
weak, it may take several pushes on the button to lock or unlock the doors, and the LED will notlight. Replace the battery as soon as possible.
Battery type : CR1616 Replacement instructions:
1. Carefully separate the case with a phillips screwdriver. 2. Take off the battery cover after separating
the transmitter.
3. Remove the old battery from the transmitter with a blade screwdriver inserted in the hole and note the polarity. Make sure the polarityof the new battery is the same(+side facingup), then insert it in the transmitter.
HMXOM033-2
Transmitter
Case
HMXOM033-3Battery
Hole
Battery cover
Page 210 of 361
CONTROLS AND EQUIPMENT
1- 10
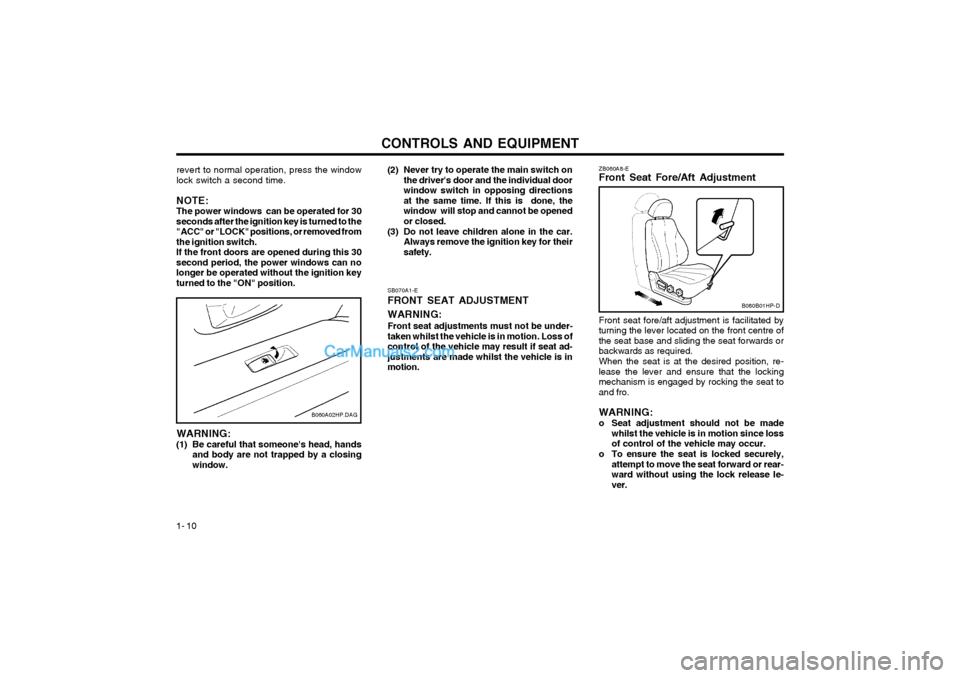
ZB060A8-E Front Seat Fore/Aft Adjustment
B080B01HP-D
Front seat fore/aft adjustment is facilitated by turning the lever located on the front centre ofthe seat base and sliding the seat forwards orbackwards as required. When the seat is at the desired position, re- lease the lever and ensure that the lockingmechanism is engaged by rocking the seat toand fro. WARNING:
o Seat adjustment should not be made whilst the vehicle is in motion since loss of control of the vehicle may occur.
o To ensure the seat is locked securely, attempt to move the seat forward or rear-ward without using the lock release le-ver.
SB070A1-E FRONT SEAT ADJUSTMENT WARNING:
Front seat adjustments must not be under- taken whilst the vehicle is in motion. Loss ofcontrol of the vehicle may result if seat ad-justments are made whilst the vehicle is inmotion.
B060A02HP.DAG
revert to normal operation, press the window lock switch a second time.
NOTE:The power windows can be operated for 30seconds after the ignition key is turned to the"ACC" or "LOCK" positions, or removed fromthe ignition switch.If the front doors are opened during this 30second period, the power windows can nolonger be operated without the ignition keyturned to the "ON" position. (2) Never try to operate the main switch on
the driver's door and the individual doorwindow switch in opposing directionsat the same time. If this is done, thewindow will stop and cannot be openedor closed.
(3) Do not leave children alone in the car. Always remove the ignition key for theirsafety.
WARNING:
(1) Be careful that someone's head, hands and body are not trapped by a closingwindow.
Page 214 of 361
CONTROLS AND EQUIPMENT
1- 14
B100A01HP-EAT SEAT WARMER (Not all models) The seat warmer is provided to warm the front
seats during cold weather. With the ignition key in the "ON" position, push either of the switchesto warm the driver's seat or the passenger'sseat.
During mild weather or under conditions where
the operation of the seat warmer is not needed,keep the switches in the "OFF" position.
o The seat warmer will not operate if ambient temperature is higher than 98.6 ± 37.4°F (37 ± 3°C).
o If the seat warmer doesn't work when ambi- ent temperature is lower than 82.4 ± 37.4°F(28 ± 3.5°C), it must be checked by autho-rized dealer.
B100A01HP.EAGHHP231-2
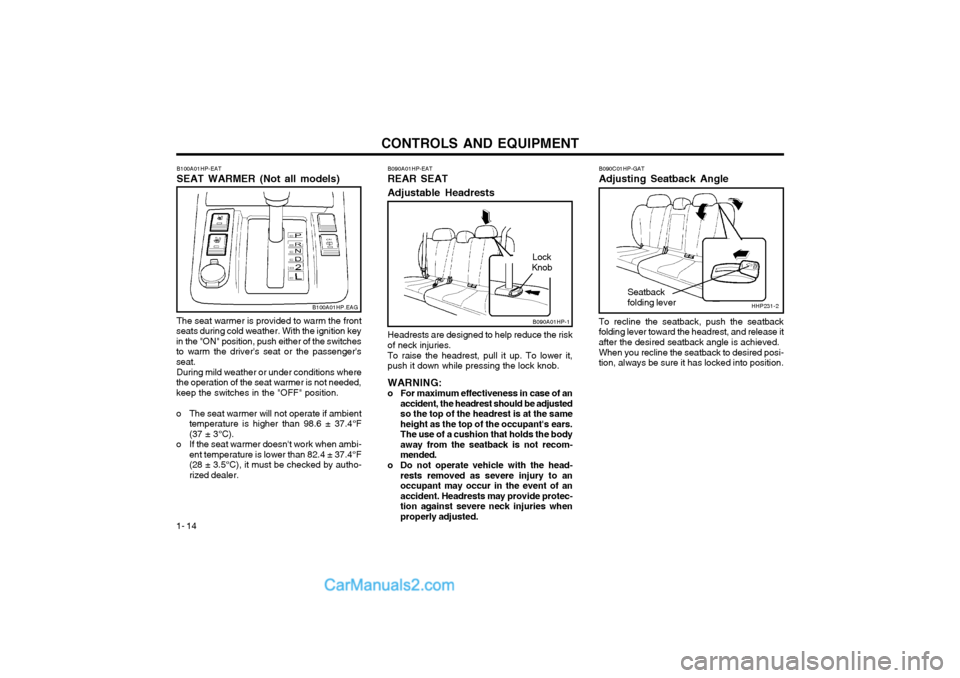
B090A01HP-EAT REAR SEAT Adjustable Headrests Headrests are designed to help reduce the risk of neck injuries. To raise the headrest, pull it up. To lower it, push it down while pressing the lock knob. WARNING:
o For maximum effectiveness in case of an accident, the headrest should be adjusted so the top of the headrest is at the sameheight as the top of the occupant's ears.
The use of a cushion that holds the bodyaway from the seatback is not recom-mended.
o Do not operate vehicle with the head- rests removed as severe injury to anoccupant may occur in the event of anaccident. Headrests may provide protec-tion against severe neck injuries whenproperly adjusted. B090C01HP-GAT Adjusting Seatback Angle To recline the seatback, push the seatback folding lever toward the headrest, and release itafter the desired seatback angle is achieved. When you recline the seatback to desired posi- tion, always be sure it has locked into position.
Seatback folding lever
B090A01HP-1
Lock
Knob
Page 223 of 361
CONTROLS AND EQUIPMENT1- 23
B230C01HPChild RestraintHook holders
Front of Vehicle
Tether strap hook
Child Restraint Hook Holder
Hole
B230B01HP-1
Tether anchor cover
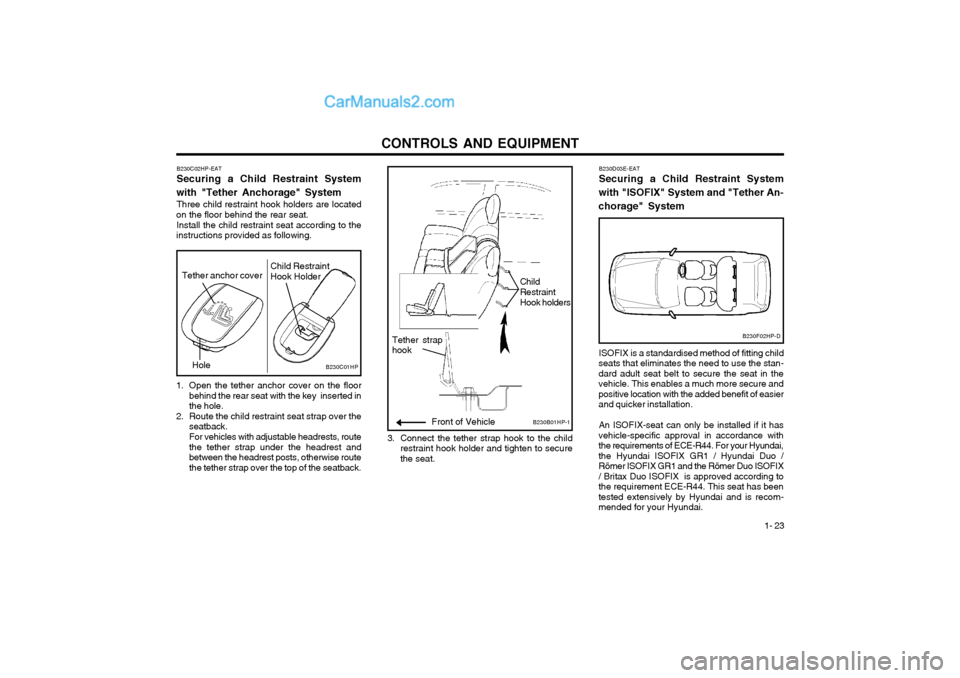
B230C02HP-EAT Securing a Child Restraint System
with "Tether Anchorage" System Three child restraint hook holders are located
on the floor behind the rear seat.
Install the child restraint seat according to the
instructions provided as following.
1. Open the tether anchor cover on the floor behind the rear seat with the key inserted in the hole.
2. Route the child restraint seat strap over the seatback. For vehicles with adjustable headrests, route the tether strap under the headrest andbetween the headrest posts, otherwise routethe tether strap over the top of the seatback. 3. Connect the tether strap hook to the child
restraint hook holder and tighten to securethe seat.
B230F02HP-D
B230D03E-EAT Securing a Child Restraint System
with "ISOFIX" System and "Tether An- chorage" System
ISOFIX is a standardised method of fitting child
seats that eliminates the need to use the stan- dard adult seat belt to secure the seat in thevehicle. This enables a much more secure andpositive location with the added benefit of easierand quicker installation.
An ISOFIX-seat can only be installed if it has
vehicle-specific approval in accordance withthe requirements of ECE-R44. For your Hyundai,the Hyundai ISOFIX GR1 / Hyundai Duo /Römer ISOFIX GR1 and the Römer Duo ISOFIX/ Britax Duo ISOFIX is approved according tothe requirement ECE-R44. This seat has beentested extensively by Hyundai and is recom-mended for your Hyundai.
Page 226 of 361
CONTROLS AND EQUIPMENT
1- 26 tion key is turned to "ON" or if it remains illuminated after blinking for approxi-mately 6 seconds, or if it illuminates whilstthe vehicle is being driven, please havean authorized Hyundai dealer inspect thepre-tensioner seat belts and SRS airbagsystem as soon as possible.
WARNING:
o Pre-tensioners are designed to operate only one time. After activation, pre-tensioner seat belts must be replaced.All seat belts, of any type, should alwaysbe replaced after they have been wornduring a collision.
o The pre-tensioner seat belt assembly mechanisms become hot during activa-tion. Do not touch the pre-tensioner seatbelt assemblies for several minutes afterthey have been activated.
o Do not attempt to inspect or replace the pre-tensioner seat belts yourself. Thismust be done by an authorized Hyundaidealer.
o Do not strike the pre-tensioner seat belt assemblies.
o Do not attempt to service or repair the pre-tensioner seat belt system in anymanner.
o Improper handling of the pre-tensioner seat belt assemblies, and failure to heedthe warnings to not strike, modify, insp-ect, replace, service or repair the pre-tensioner seat belt assemblies may lead to improper operation or inadvertent ac-tivation and serious injury.
o Always wear seat belts when driving or riding in a motor vehicle.
NOTE:
o Both the driver's and front passenger's pre-tensioner seat belts will be activatedin certain frontal collisions. The pre-tensioner seat belts can be activated aloneor, where the frontal collision is severeenough, together with the airbags.
o When the pre-tensioner seat belts are activated, a loud noise may be heard andfine dust, which may appear to be smoke,may be visible in the passenger compart-ment. These are normal operating condi-tions and are not hazardous.
o Although it is harmless, the fine dust may cause skin irritation and should notbe breathed for prolonged periods. Washyour hands and face thoroughly after anaccident in which the pre-tensioner seatbelts were activated.
CAUTION:
o Because the sensor that activates the SRS airbag is connected with pre-tensioner seat belt, the SRS airbag warn-ing light on the instrument panel willblink for approximately 6 seconds afterthe ignition key has been turned to the"ON" position, and then it should turnoff.
o If pre-tensioner seat belt is not working properly, this warning light will illumi-nate even if there is no malfunction of theSRS airbag. If the SRS airbag warninglight does not illuminate when the igni-
AIR
BAG
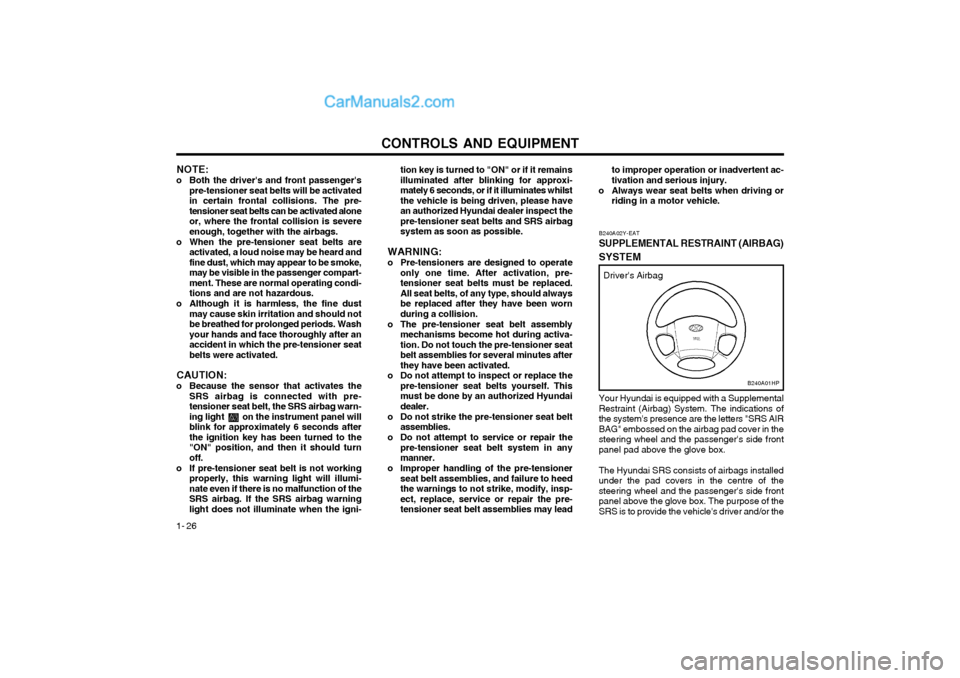
Your Hyundai is equipped with a Supplemental Restraint (Airbag) System. The indications ofthe system's presence are the letters "SRS AIRBAG" embossed on the airbag pad cover in thesteering wheel and the passenger's side frontpanel pad above the glove box. The Hyundai SRS consists of airbags installed under the pad covers in the centre of thesteering wheel and the passenger's side frontpanel above the glove box. The purpose of theSRS is to provide the vehicle's driver and/or the
B240A01HP
Driver's Airbag
B240A02Y-EAT
SUPPLEMENTAL RESTRAINT (AIRBAG)
SYSTEM
Page 228 of 361
CONTROLS AND EQUIPMENT
1- 28
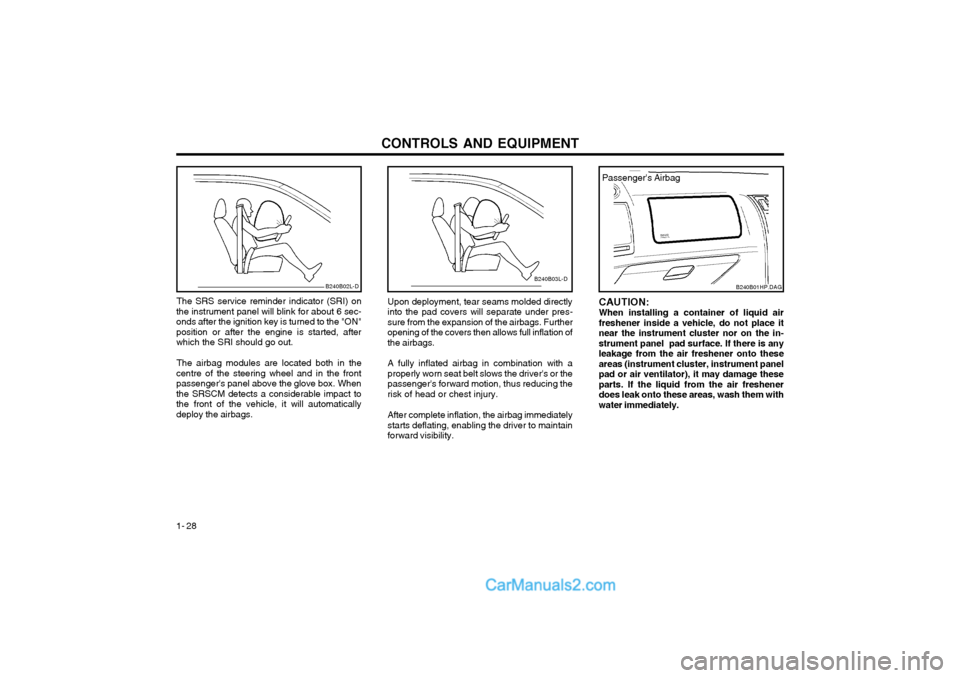
Upon deployment, tear seams molded directly into the pad covers will separate under pres-sure from the expansion of the airbags. Furtheropening of the covers then allows full inflation ofthe airbags. A fully inflated airbag in combination with a properly worn seat belt slows the driver's or thepassenger's forward motion, thus reducing the risk of head or chest injury. After complete inflation, the airbag immediately starts deflating, enabling the driver to maintainforward visibility.
B240B02L-D
The SRS service reminder indicator (SRI) on
the instrument panel will blink for about 6 sec- onds after the ignition key is turned to the "ON"position or after the engine is started, afterwhich the SRI should go out.
The airbag modules are located both in the
centre of the steering wheel and in the frontpassenger's panel above the glove box. Whenthe SRSCM detects a considerable impact tothe front of the vehicle, it will automaticallydeploy the airbags.B240B03L-D
CAUTION: When installing a container of liquid airfreshener inside a vehicle, do not place itnear the instrument cluster nor on the in-strument panel pad surface. If there is anyleakage from the air freshener onto theseareas (instrument cluster, instrument panelpad or air ventilator), it may damage theseparts. If the liquid from the air freshenerdoes leak onto these areas, wash them withwater immediately.
B240B01HP.DAG
Passenger's Airbag
Page 229 of 361
CONTROLS AND EQUIPMENT1- 29
B240C01HP-GAT SRS CareThe SRS is virtually maintenance-free and so
there are no parts you can safely service by yourself. The entire SRS system must be in-
spected by an authorized Hyundai dealer 10years after the date that the vehicle was man-ufactured.
Any work on the SRS system, such as remov-
ing, installing, repairing, or any work on thesteering wheel must be performed by a quali-
fied Hyundai technician. Improper handling ofthe SRS system may result in serious personal
injury. WARNING:
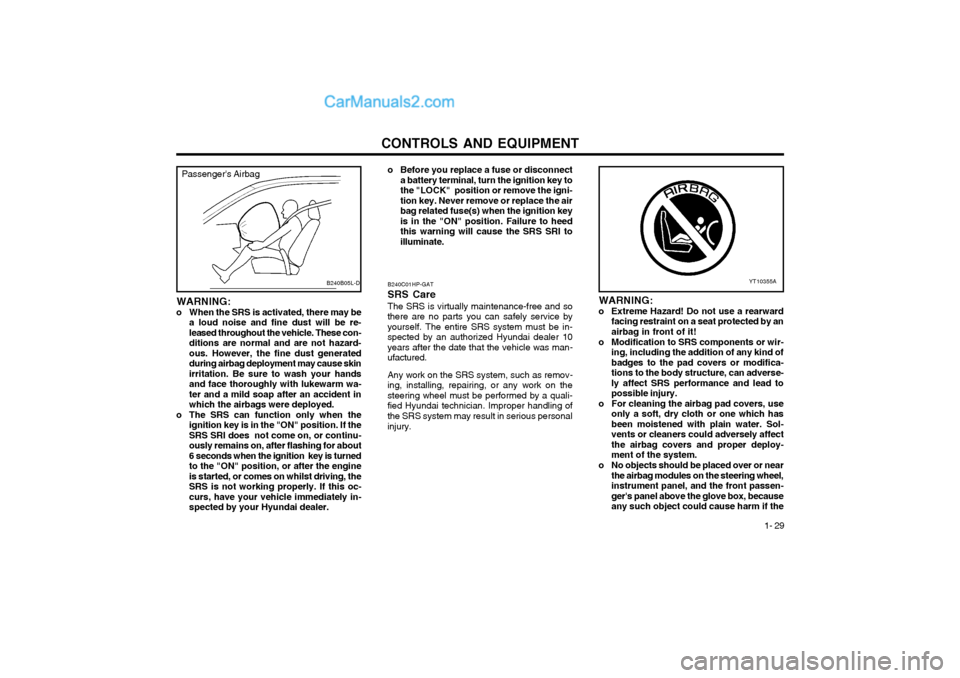
o Extreme Hazard! Do not use a rearward facing restraint on a seat protected by anairbag in front of it!
o Modification to SRS components or wir- ing, including the addition of any kind ofbadges to the pad covers or modifica-
tions to the body structure, can adverse-ly affect SRS performance and lead topossible injury.
o For cleaning the airbag pad covers, use only a soft, dry cloth or one which hasbeen moistened with plain water. Sol-
vents or cleaners could adversely affectthe airbag covers and proper deploy-ment of the system.
o No objects should be placed over or near the airbag modules on the steering wheel,instrument panel, and the front passen-
ger's panel above the glove box, becauseany such object could cause harm if the
YT10355A
Passenger's Airbag
B240B05L-D
WARNING:
o When the SRS is activated, there may be a loud noise and fine dust will be re- leased throughout the vehicle. These con-ditions are normal and are not hazard-ous. However, the fine dust generatedduring airbag deployment may cause skinirritation. Be sure to wash your handsand face thoroughly with lukewarm wa-ter and a mild soap after an accident inwhich the airbags were deployed.
o The SRS can function only when the ignition key is in the "ON" position. If theSRS SRI does not come on, or continu-ously remains on, after flashing for about6 seconds when the ignition key is turnedto the "ON" position, or after the engineis started, or comes on whilst driving, theSRS is not working properly. If this oc-curs, have your vehicle immediately in-spected by your Hyundai dealer. o Before you replace a fuse or disconnect
a battery terminal, turn the ignition key tothe "LOCK" position or remove the igni-tion key. Never remove or replace the airbag related fuse(s) when the ignition keyis in the "ON" position. Failure to heedthis warning will cause the SRS SRI toilluminate.
Page 240 of 361
CONTROLS AND EQUIPMENT
1- 40 B260P02Y-EAT
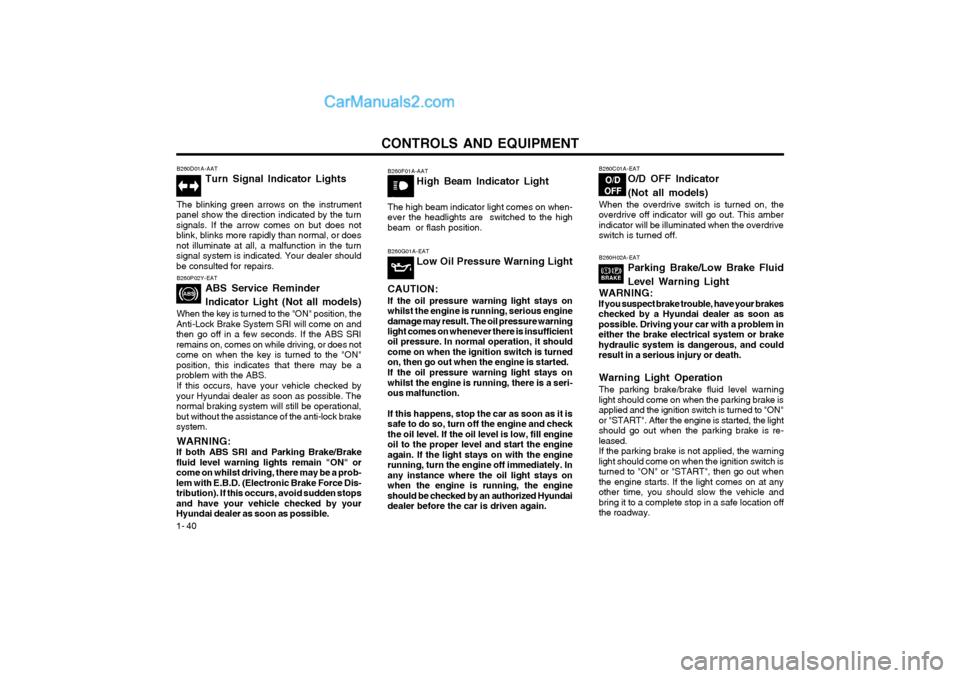
ABS Service Reminder Indicator Light (Not all models)
When the key is turned to the "ON" position, the
Anti-Lock Brake System SRI will come on and then go off in a few seconds. If the ABS SRIremains on, comes on while driving, or does notcome on when the key is turned to the "ON"position, this indicates that there may be aproblem with the ABS.
If this occurs, have your vehicle checked by
your Hyundai dealer as soon as possible. Thenormal braking system will still be operational,but without the assistance of the anti-lock brakesystem.
WARNING:
If both ABS SRI and Parking Brake/Brakefluid level warning lights remain "ON" orcome on whilst driving, there may be a prob-
lem with E.B.D. (Electronic Brake Force Dis-tribution). If this occurs, avoid sudden stopsand have your vehicle checked by yourHyundai dealer as soon as possible. B260F01A-AAT
High Beam Indicator Light
The high beam indicator light comes on when-ever the headlights are switched to the highbeam or flash position.
B260D01A-AAT Turn Signal Indicator Lights
The blinking green arrows on the instrument
panel show the direction indicated by the turn signals. If the arrow comes on but does notblink, blinks more rapidly than normal, or doesnot illuminate at all, a malfunction in the turnsignal system is indicated. Your dealer shouldbe consulted for repairs. B260G01A-EAT
Low Oil Pressure Warning Light
CAUTION:
If the oil pressure warning light stays onwhilst the engine is running, serious enginedamage may result. The oil pressure warninglight comes on whenever there is insufficient oil pressure. In normal operation, it should come on when the ignition switch is turnedon, then go out when the engine is started. If the oil pressure warning light stays onwhilst the engine is running, there is a seri-ous malfunction. If this happens, stop the car as soon as it is safe to do so, turn off the engine and checkthe oil level. If the oil level is low, fill engineoil to the proper level and start the engineagain. If the light stays on with the enginerunning, turn the engine off immediately. Inany instance where the oil light stays onwhen the engine is running, the engineshould be checked by an authorized Hyundaidealer before the car is driven again.B260C01A-EAT
O/D OFF Indicator (Not all models)
When the overdrive switch is turned on, the overdrive off indicator will go out. This amberindicator will be illuminated when the overdriveswitch is turned off.
B260H02A-EAT
Parking Brake/Low Brake Fluid Level Warning Light
WARNING:
If you suspect brake trouble, have your brakes checked by a Hyundai dealer as soon aspossible. Driving your car with a problem ineither the brake electrical system or brakehydraulic system is dangerous, and couldresult in a serious injury or death.
Warning Light Operation The parking brake/brake fluid level warning light should come on when the parking brake isapplied and the ignition switch is turned to "ON"or "START". After the engine is started, the lightshould go out when the parking brake is re-leased.If the parking brake is not applied, the warninglight should come on when the ignition switch isturned to "ON" or "START", then go out whenthe engine starts. If the light comes on at anyother time, you should slow the vehicle andbring it to a complete stop in a safe location offthe roadway.
Page 241 of 361
CONTROLS AND EQUIPMENT1- 41
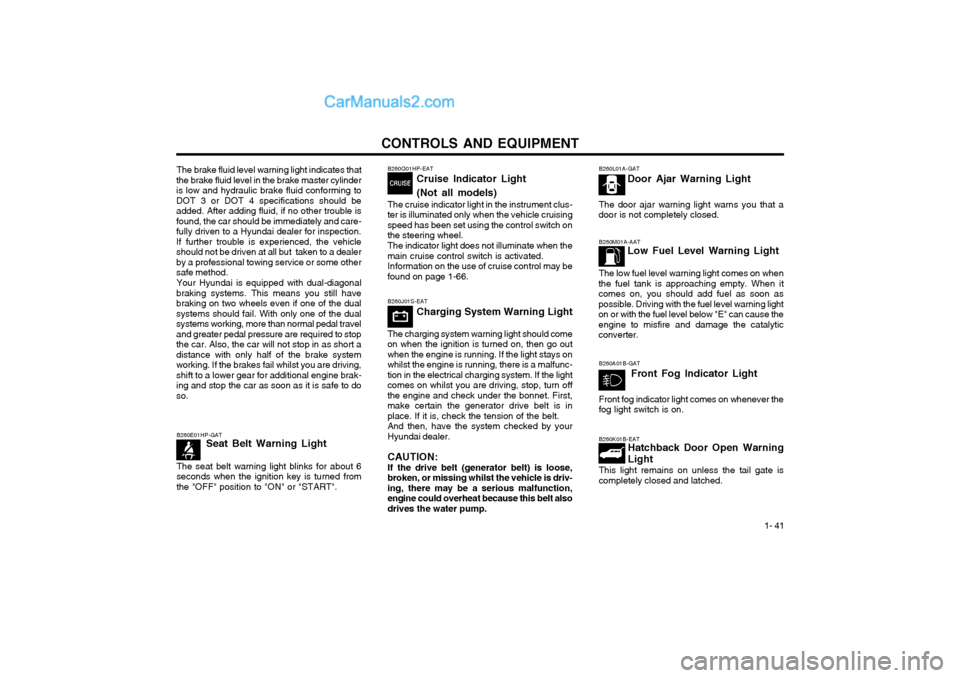
B260M01A-AATLow Fuel Level Warning Light
The low fuel level warning light comes on when
the fuel tank is approaching empty. When it comes on, you should add fuel as soon aspossible. Driving with the fuel level warning lighton or with the fuel level below "E" can cause theengine to misfire and damage the catalyticconverter.
B260K01B-EAT Hatchback Door Open Warning Light
This light remains on unless the tail gate is completely closed and latched.
B260E01HP-GAT
Seat Belt Warning Light
The seat belt warning light blinks for about 6seconds when the ignition key is turned fromthe "OFF" position to "ON" or "START".
B260L01A-GAT Door Ajar Warning Light
The door ajar warning light warns you that a
door is not completely closed.
B260A01B-GAT
Front Fog Indicator Light
Front fog indicator light comes on whenever the fog light switch is on.
B260J01S-EAT Charging System Warning Light
The charging system warning light should come on when the ignition is turned on, then go outwhen the engine is running. If the light stays onwhilst the engine is running, there is a malfunc-tion in the electrical charging system. If the lightcomes on whilst you are driving, stop, turn offthe engine and check under the bonnet. First,make certain the generator drive belt is inplace. If it is, check the tension of the belt.And then, have the system checked by yourHyundai dealer. CAUTION: If the drive belt (generator belt) is loose, broken, or missing whilst the vehicle is driv-ing, there may be a serious malfunction,engine could overheat because this belt alsodrives the water pump.
B260Q01HP-EAT Cruise Indicator Light (Not all models)
The cruise indicator light in the instrument clus-
ter is illuminated only when the vehicle cruising speed has been set using the control switch onthe steering wheel.
The indicator light does not illuminate when the
main cruise control switch is activated. Information on the use of cruise control may be
found on page 1-66.
The brake fluid level warning light indicates that
the brake fluid level in the brake master cylinderis low and hydraulic brake fluid conforming toDOT 3 or DOT 4 specifications should beadded. After adding fluid, if no other trouble isfound, the car should be immediately and care-fully driven to a Hyundai dealer for inspection.If further trouble is experienced, the vehicleshould not be driven at all but taken to a dealerby a professional towing service or some othersafe method.
Your Hyundai is equipped with dual-diagonal
braking systems. This means you still havebraking on two wheels even if one of the dualsystems should fail. With only one of the dualsystems working, more than normal pedal traveland greater pedal pressure are required to stopthe car. Also, the car will not stop in as short adistance with only half of the brake systemworking. If the brakes fail whilst you are driving,shift to a lower gear for additional engine brak-ing and stop the car as soon as it is safe to doso.