battery Hyundai Terracan 2004 Owner's Manual
[x] Cancel search | Manufacturer: HYUNDAI, Model Year: 2004, Model line: Terracan, Model: Hyundai Terracan 2004Pages: 361, PDF Size: 4.69 MB
Page 17 of 361
FEATURES OF YOUR HYUNDAI 1- 9
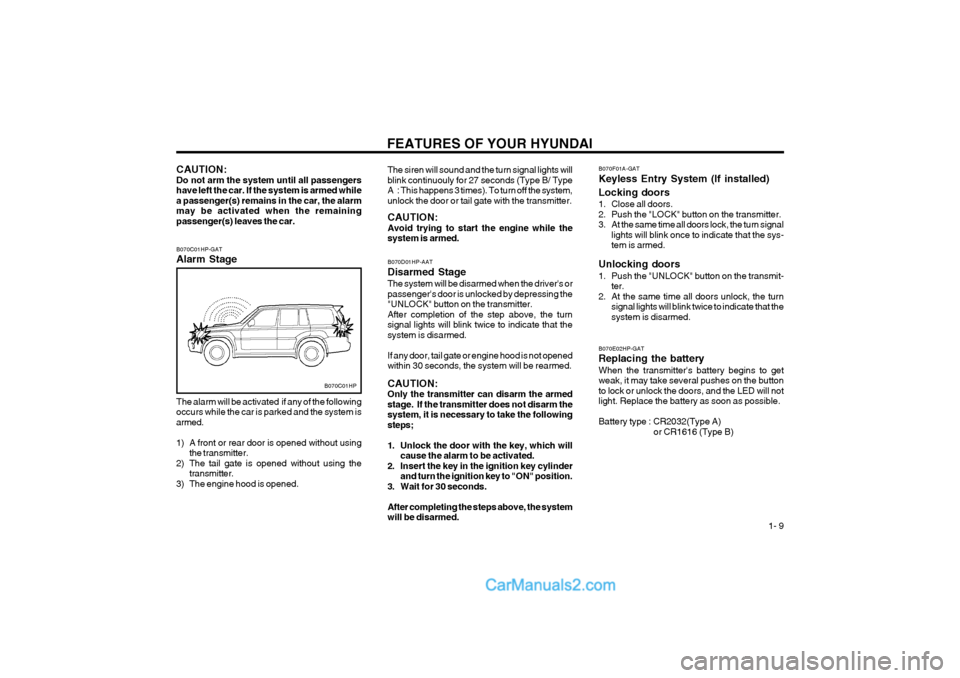
B070C01HP-GAT Alarm Stage
CAUTION: Do not arm the system until all passengershave left the car. If the system is armed whilea passenger(s) remains in the car, the alarmmay be activated when the remainingpassenger(s) leaves the car.
B070D01HP-AAT Disarmed Stage The system will be disarmed when the driver's or passenger's door is unlocked by depressing the"UNLOCK" button on the transmitter.After completion of the step above, the turnsignal lights will blink twice to indicate that thesystem is disarmed. If any door, tail gate or engine hood is not opened within 30 seconds, the system will be rearmed. CAUTION: Only the transmitter can disarm the armedstage. If the transmitter does not disarm thesystem, it is necessary to take the followingsteps;
1. Unlock the door with the key, which willcause the alarm to be activated.
2. Insert the key in the ignition key cylinder and turn the ignition key to "ON" position.
3. Wait for 30 seconds.After completing the steps above, the system will be disarmed.
B070C01HP
The alarm will be activated if any of the following occurs while the car is parked and the system isarmed.
1) A front or rear door is opened without using the transmitter.
2) The tail gate is opened without using the transmitter.
3) The engine hood is opened. The siren will sound and the turn signal lights will blink continuouly for 27 seconds (Type B/ Type
A : This happens 3 times). To turn off the system,unlock the door or tail gate with the transmitter. CAUTION: Avoid trying to start the engine while thesystem is armed.
B070F01A-GAT Keyless Entry System (If installed) Locking doors
1. Close all doors.
2. Push the "LOCK" button on the transmitter.
3. At the same time all doors lock, the turn signal
lights will blink once to indicate that the sys-tem is armed.
Unlocking doors
1. Push the "UNLOCK" button on the transmit- ter.
2. At the same time all doors unlock, the turn signal lights will blink twice to indicate that the system is disarmed.
B070E02HP-GAT Replacing the batteryWhen the transmitter's battery begins to get weak, it may take several pushes on the buttonto lock or unlock the doors, and the LED will notlight. Replace the battery as soon as possible. Battery type : CR2032(Type A) or CR1616 (Type B)
Page 18 of 361
FEATURES OF YOUR HYUNDAI
1- 10
B060A03L-DAT POWER WINDOWS
(1) (2)
B060A01HP
The power windows operate when the ignition key is in the "ON" position. The main switchesare located on the driver's armrest and controlthe front and rear windows on both sides of thevehicle. The windows may be opened by de-pressing the appropriate window switch andclosed by pulling up the switch. To open thewindow on the driver's side, press the switch(1)halfway down. The window moves as long asthe switch is operated. To fully open the driver'swindow automatically, press the switch fullydown. In automatic operation, the window willfully open even if you let go of the switch. To stopat the desired opening, pull up and release theswitch. In order to prevent operation of thepassanger front and rear windows, a windowlock switch(2) is provided on the armrest of thedriver's door. To disable the power windows,press the window lock switch. To revert tonormal operation, press the window lock switcha second time.
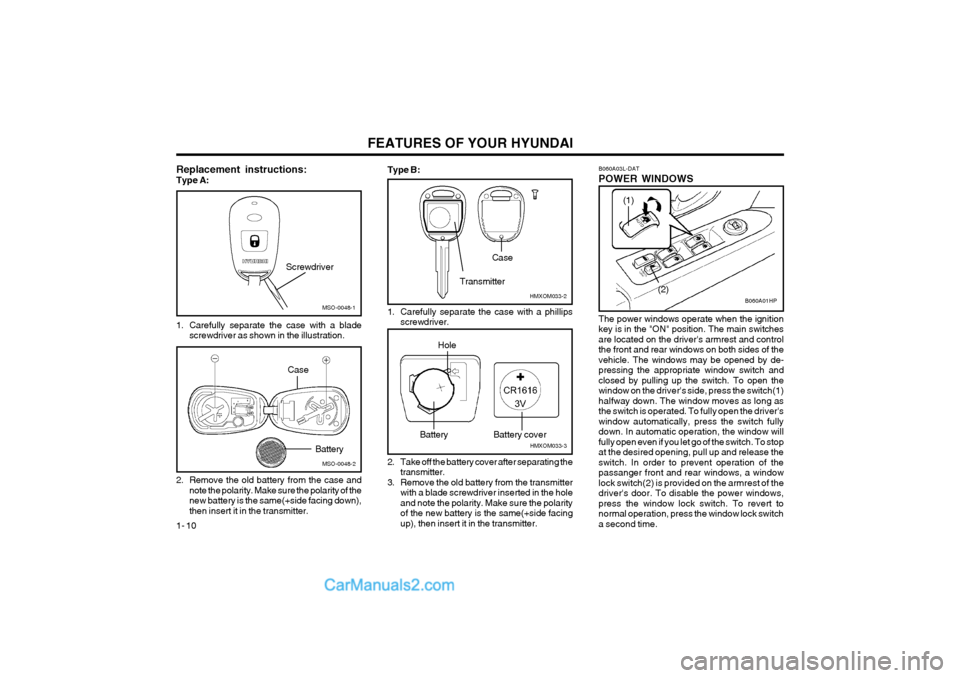
Replacement instructions:Type A:
MSO-0048-1
Screwdriver
1. Carefully separate the case with a blade screwdriver as shown in the illustration.
MSO-0048-2
Battery
CaseType B:
HMXOM033-2
Transmitter
Case
HMXOM033-3
Battery
Hole
Battery cover
2. Remove the old battery from the case and note the polarity. Make sure the polarity of the new battery is the same(+side facing down),then insert it in the transmitter. 1. Carefully separate the case with a phillips
screwdriver.
2. Take off the battery cover after separating the transmitter.
3. Remove the old battery from the transmitter with a blade screwdriver inserted in the holeand note the polarity. Make sure the polarityof the new battery is the same(+side facingup), then insert it in the transmitter.
Page 40 of 361
FEATURES OF YOUR HYUNDAI
1- 32
B240B05L
may damage these parts. If the liquid from the air freshener does leak onto these areas,wash them with water immediately. WARNING:
o When the SRS is activated, there may be a
loud noise and fine dust will be releasedthrough the vehicle. These conditions arenormal and are not hazardous. However,the fine dust generated during airbag de-ployment may cause skin irritation. Washyour hands and face thoroughly with luke-warm water and a mild soap after an acci-dent in which the airbags were deployed.
o The SRS can function only when the igni- tion key is in the "ON" position. If the SRSSRI does not come on, or continuouslyremains on after flashing for about 6 sec-onds when the ignition key is turned tothe "ON" position, or after the engine isstarted, comes on while driving, the SRS
Passenger's Airbag
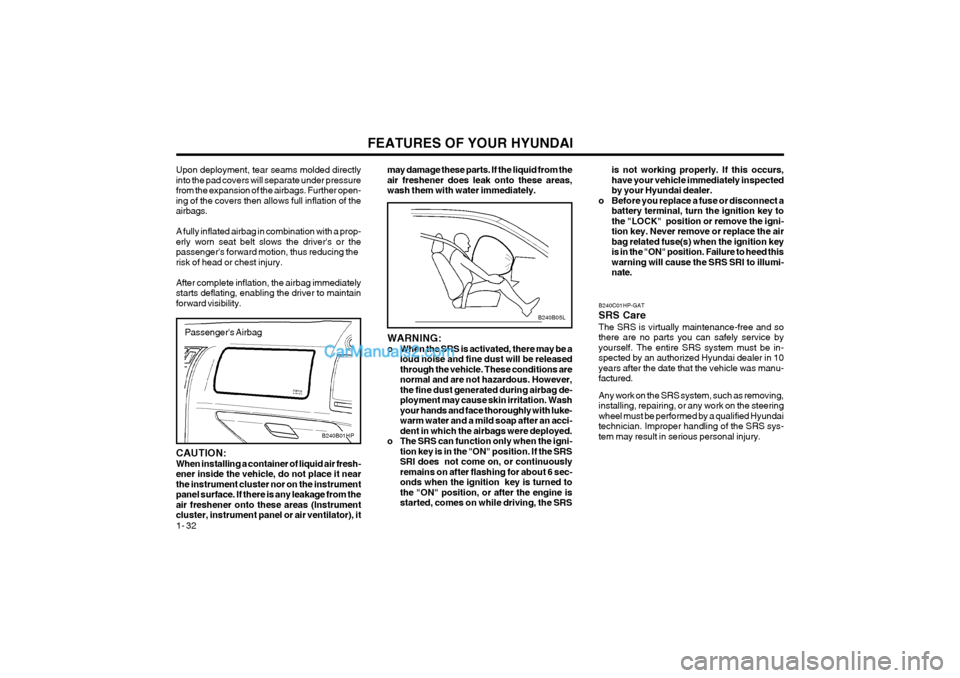
Upon deployment, tear seams molded directly into the pad covers will separate under pressurefrom the expansion of the airbags. Further open-ing of the covers then allows full inflation of theairbags. A fully inflated airbag in combination with a prop- erly worn seat belt slows the driver's or thepassenger's forward motion, thus reducing therisk of head or chest injury. After complete inflation, the airbag immediately starts deflating, enabling the driver to maintainforward visibility.
B240B01HP
CAUTION: When installing a container of liquid air fresh-ener inside the vehicle, do not place it nearthe instrument cluster nor on the instrumentpanel surface. If there is any leakage from theair freshener onto these areas (Instrumentcluster, instrument panel or air ventilator), it B240C01HP-GAT SRS CareThe SRS is virtually maintenance-free and so there are no parts you can safely service byyourself. The entire SRS system must be in-spected by an authorized Hyundai dealer in 10years after the date that the vehicle was manu-factured. Any work on the SRS system, such as removing, installing, repairing, or any work on the steeringwheel must be performed by a qualified Hyundaitechnician. Improper handling of the SRS sys-tem may result in serious personal injury.is not working properly. If this occurs,have your vehicle immediately inspectedby your Hyundai dealer.
o Before you replace a fuse or disconnect a battery terminal, turn the ignition key tothe "LOCK" position or remove the igni-tion key. Never remove or replace the airbag related fuse(s) when the ignition keyis in the "ON" position. Failure to heed thiswarning will cause the SRS SRI to illumi-nate.
Page 54 of 361
FEATURES OF YOUR HYUNDAI
1- 46
It displays 16 azimuths according to the vehicle driving direction and the angle of one graduationis 22.5°.
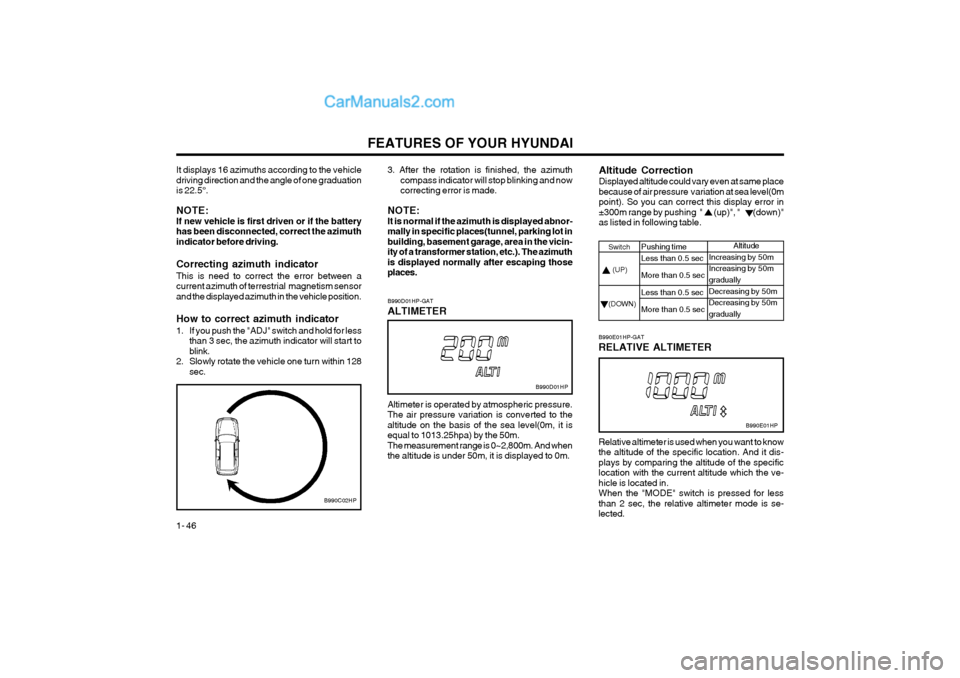
NOTE: If new vehicle is first driven or if the batteryhas been disconnected, correct the azimuthindicator before driving. Correcting azimuth indicator This is need to correct the error between a current azimuth of terrestrial magnetism sensorand the displayed azimuth in the vehicle position. How to correct azimuth indicator
1. If you push the "ADJ" switch and hold for less
than 3 sec, the azimuth indicator will start to blink.
2. Slowly rotate the vehicle one turn within 128 sec. B990D01HP-GAT ALTIMETER
B990C02HP 3. After the rotation is finished, the azimuth
compass indicator will stop blinking and now correcting error is made.
NOTE:It is normal if the azimuth is displayed abnor-mally in specific places(tunnel, parking lot inbuilding, basement garage, area in the vicin-ity of a transformer station, etc.). The azimuthis displayed normally after escaping thoseplaces. Altimeter is operated by atmospheric pressure. The air pressure variation is converted to thealtitude on the basis of the sea level(0m, it isequal to 1013.25hpa) by the 50m.The measurement range is 0~2,800m. And whenthe altitude is under 50m, it is displayed to 0m. B990D01HP
Altitude Correction Displayed altitude could vary even at same place because of air pressure variation at sea level(0mpoint). So you can correct this display error in±300m range by pushing " (up)", " (down)"as listed in following table.
Switch (UP) (DOWN)
Pushing time Less than 0.5 sec More than 0.5 secLess than 0.5 secMore than 0.5 sec Altitude
Increasing by 50m Increasing by 50m gradually Decreasing by 50mDecreasing by 50m gradually
B990E01HP-GAT RELATIVE ALTIMETER Relative altimeter is used when you want to know the altitude of the specific location. And it dis-plays by comparing the altitude of the specificlocation with the current altitude which the ve-hicle is located in.When the "MODE" switch is pressed for lessthan 2 sec, the relative altimeter mode is se-lected. B990E01HP
Page 83 of 361
FEATURES OF YOUR HYUNDAI 1- 75
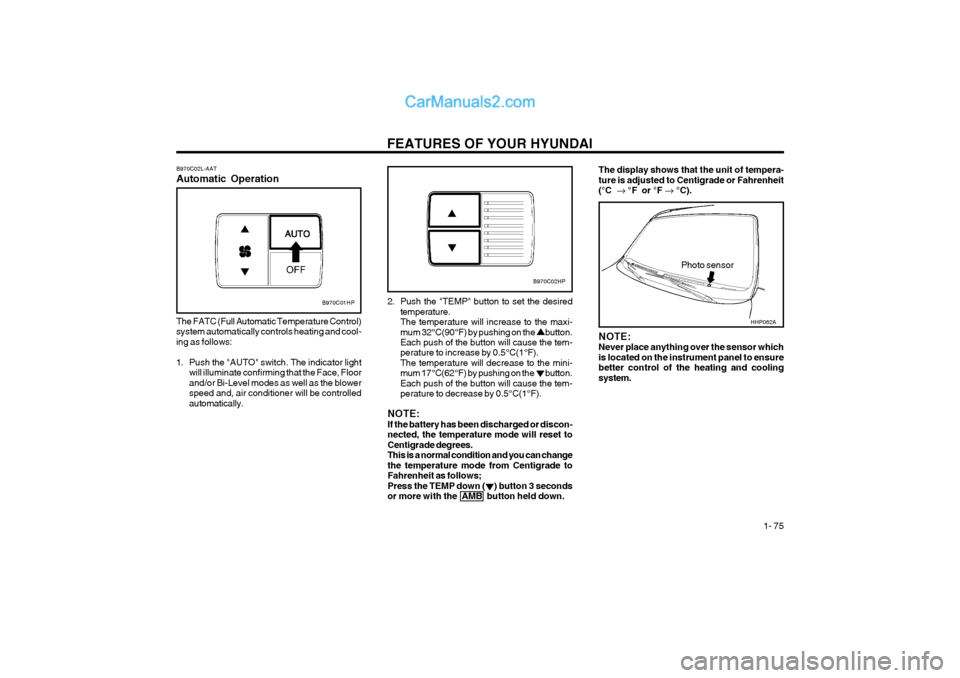
B970C02L-AAT Automatic Operation
B970C01HP
The FATC (Full Automatic Temperature Control) system automatically controls heating and cool-ing as follows:
1. Push the "AUTO" switch. The indicator light will illuminate confirming that the Face, Floor and/or Bi-Level modes as well as the blowerspeed and, air conditioner will be controlledautomatically. 2. Push the "TEMP" button to set the desired
temperature.The temperature will increase to the maxi-mum 32°C(90°F) by pushing on the button. Each push of the button will cause the tem- perature to increase by 0.5°C(1°F).The temperature will decrease to the mini-mum 17°C(62°F) by pushing on the button.Each push of the button will cause the tem-perature to decrease by 0.5°C(1°F).
NOTE:If the battery has been discharged or discon-nected, the temperature mode will reset toCentigrade degrees.This is a normal condition and you can changethe temperature mode from Centigrade toFahrenheit as follows;Press the TEMP down ( ) button 3 secondsor more with the AMB button held down.
Photo sensor
B970C02HP
NOTE: Never place anything over the sensor whichis located on the instrument panel to ensurebetter control of the heating and coolingsystem.
The display shows that the unit of tempera- ture is adjusted to Centigrade or Fahrenheit(°C � °F or °F � °C).
HHP062A
Page 101 of 361
FEATURES OF YOUR HYUNDAI 1- 93
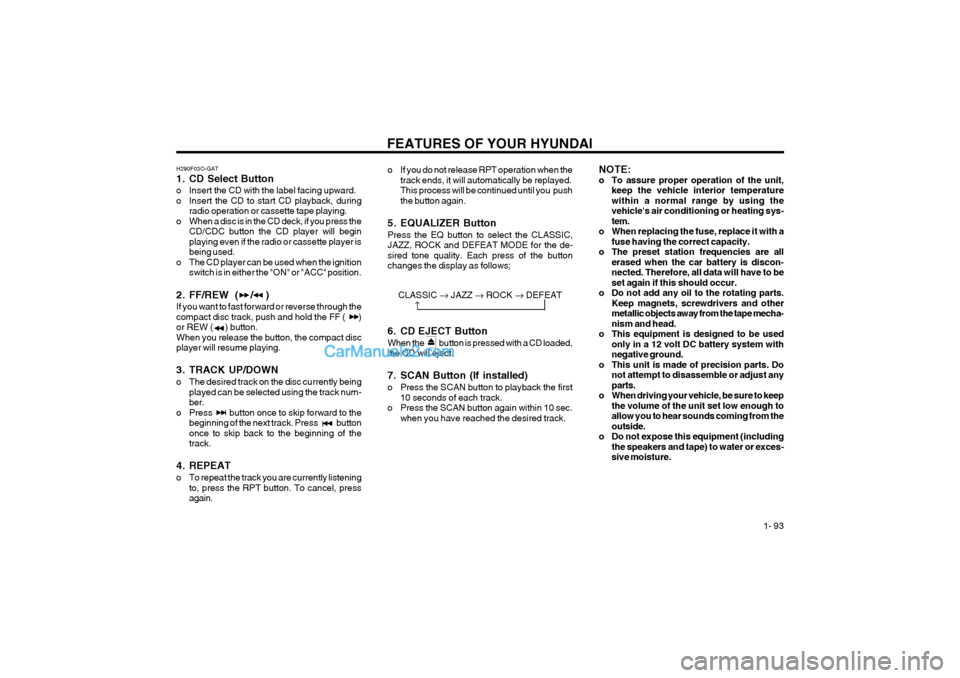
H290F03O-GAT
1. CD Select Button
o Insert the CD with the label facing upward.
o Insert the CD to start CD playback, during
radio operation or cassette tape playing.
o When a disc is in the CD deck, if you press the CD/CDC button the CD player will beginplaying even if the radio or cassette player isbeing used.
o The CD player can be used when the ignition switch is in either the "ON" or "ACC" position.
2. FF/REW ( / ) If you want to fast forward or reverse through the compact disc track, push and hold the FF ( )or REW ( ) button.When you release the button, the compact discplayer will resume playing.
3. TRACK UP/DOWN
o The desired track on the disc currently being played can be selected using the track num- ber.
o Press button once to skip forward to the beginning of the next track. Press buttononce to skip back to the beginning of thetrack.
4. REPEAT
o To repeat the track you are currently listening to, press the RPT button. To cancel, press again. o If you do not release RPT operation when the
track ends, it will automatically be replayed.This process will be continued until you pushthe button again.
5. EQUALIZER Button Press the EQ button to select the CLASSIC, JAZZ, ROCK and DEFEAT MODE for the de-sired tone quality. Each press of the buttonchanges the display as follows; NOTE:
o To assure proper operation of the unit,
keep the vehicle interior temperaturewithin a normal range by using thevehicle's air conditioning or heating sys-tem.
o When replacing the fuse, replace it with a fuse having the correct capacity.
o The preset station frequencies are all erased when the car battery is discon-nected. Therefore, all data will have to beset again if this should occur.
o Do not add any oil to the rotating parts. Keep magnets, screwdrivers and othermetallic objects away from the tape mecha-nism and head.
o This equipment is designed to be used only in a 12 volt DC battery system withnegative ground.
o This unit is made of precision parts. Do not attempt to disassemble or adjust anyparts.
o When driving your vehicle, be sure to keep the volume of the unit set low enough toallow you to hear sounds coming from theoutside.
o Do not expose this equipment (including the speakers and tape) to water or exces-sive moisture.
CLASSIC � JAZZ � ROCK � DEFEAT
�
6. CD EJECT Button When the button is pressed with a CD loaded, the CD will eject.
7. SCAN Button (If installed)
o Press the SCAN button to playback the first 10 seconds of each track.
o Press the SCAN button again within 10 sec. when you have reached the desired track.
Page 104 of 361
FEATURES OF YOUR HYUNDAI
1- 96
3. TRACK UP/DOWN
o The desired track on the disc currently being played can be selected using the track num- ber.
o Press once to skip forward to the begin- ning of the next track. Press once to skipback to the beginning of the track.
4. FF/REW ( / ) If you want to fast forward or reverse through the compact disc track, push and hold in the FF ( )or REW ( ) button.When you release the button, the compact discplayer will resume playing. 5. REPEAT
o To repeat the track you are listening to, press the RPT button. To cancel, press again.
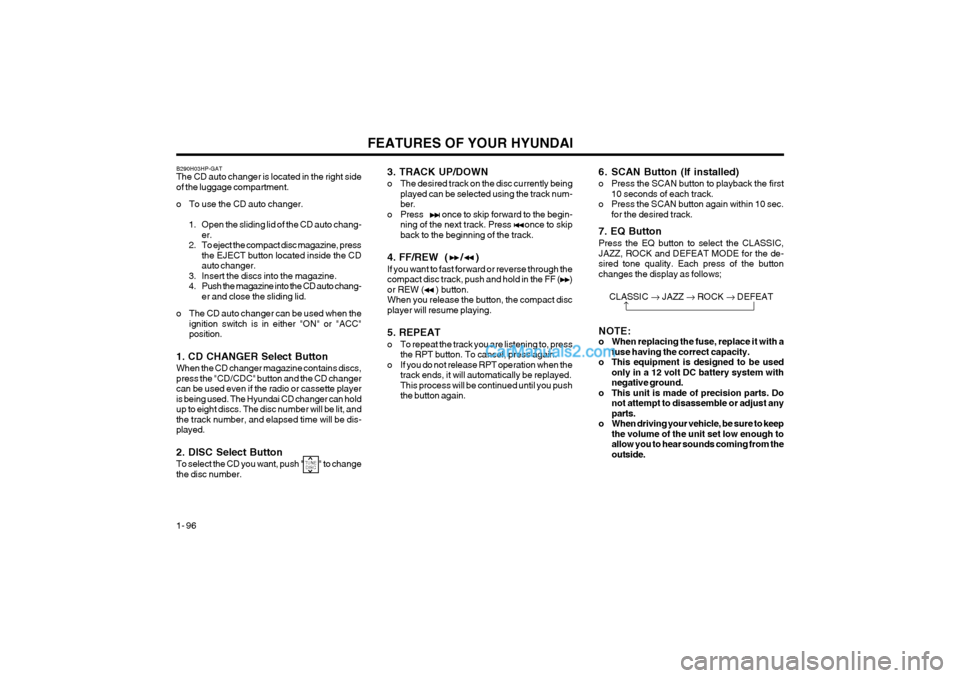
o If you do not release RPT operation when the track ends, it will automatically be replayed. This process will be continued until you pushthe button again.B290H03HP-GAT The CD auto changer is located in the right side of the luggage compartment.
o To use the CD auto changer.
1. Open the sliding lid of the CD auto chang- er.
2. To eject the compact disc magazine, press the EJECT button located inside the CD auto changer.
3. Insert the discs into the magazine.
4. Push the magazine into the CD auto chang- er and close the sliding lid.
o The CD auto changer can be used when the ignition switch is in either "ON" or "ACC"position.
1. CD CHANGER Select Button When the CD changer magazine contains discs, press the "CD/CDC" button and the CD changercan be used even if the radio or cassette playeris being used. The Hyundai CD changer can holdup to eight discs. The disc number will be lit, andthe track number, and elapsed time will be dis-played. 2. DISC Select Button To select the CD you want, push " " to change the disc number. 6. SCAN Button (If installed)
o Press the SCAN button to playback the first
10 seconds of each track.
o Press the SCAN button again within 10 sec. for the desired track.
7. EQ Button Press the EQ button to select the CLASSIC, JAZZ, ROCK and DEFEAT MODE for the de-sired tone quality. Each press of the buttonchanges the display as follows;
CLASSIC � JAZZ � ROCK � DEFEAT
�
NOTE:
o When replacing the fuse, replace it with a fuse having the correct capacity.
o This equipment is designed to be used only in a 12 volt DC battery system withnegative ground.
o This unit is made of precision parts. Do not attempt to disassemble or adjust anyparts.
o When driving your vehicle, be sure to keep the volume of the unit set low enough toallow you to hear sounds coming from theoutside.
TUNEDISC
Page 111 of 361
DRIVING YOUR HYUNDAI
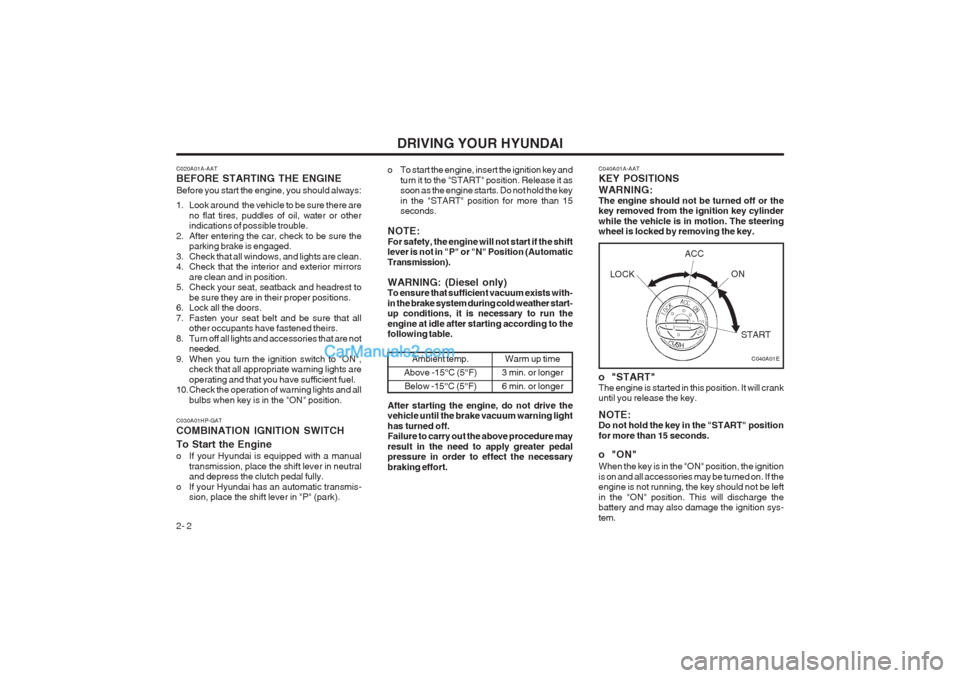
2- 2 C040A01A-AAT KEY POSITIONS WARNING: The engine should not be turned off or the key removed from the ignition key cylinder while the vehicle is in motion. The steering wheel is locked by removing the key.
o "START" The engine is started in this position. It will crank until you release the key. NOTE: Do not hold the key in the "START" position for more than 15 seconds.
o "ON" When the key is in the "ON" position, the ignition is on and all accessories may be turned on. If the engine is not running, the key should not be left in the "ON" position. This will discharge the battery and may also damage the ignition sys- tem.
C020A01A-AAT BEFORE STARTING THE ENGINE Before you start the engine, you should always:
1. Look around the vehicle to be sure there are
no flat tires, puddles of oil, water or other indications of possible trouble.
2. After entering the car, check to be sure the parking brake is engaged.
3. Check that all windows, and lights are clean.
4. Check that the interior and exterior mirrors are clean and in position.
5. Check your seat, seatback and headrest to
be sure they are in their proper positions.
6. Lock all the doors.
7. Fasten your seat belt and be sure that all other occupants have fastened theirs.
8. Turn off all lights and accessories that are not needed.
9. When you turn the ignition switch to "ON", check that all appropriate warning lights areoperating and that you have sufficient fuel.
10. Check the operation of warning lights and all
bulbs when key is in the "ON" position. o To start the engine, insert the ignition key and
turn it to the "START" position. Release it as soon as the engine starts. Do not hold the key in the "START" position for more than 15 seconds.
NOTE: For safety, the engine will not start if the shift lever is not in "P" or "N" Position (Automatic Transmission). WARNING: (Diesel only) To ensure that sufficient vacuum exists with- in the brake system during cold weather start- up conditions, it is necessary to run the engine at idle after starting according to the following table.
C030A01HP-GAT COMBINATION IGNITION SWITCH To Start the Engine
o If your Hyundai is equipped with a manual transmission, place the shift lever in neutral and depress the clutch pedal fully.
o If your Hyundai has an automatic transmis- sion, place the shift lever in "P" (park).
C040A01EAmbient temp.
Above -15°C (5°F) Below -15°C (5°F)Warm up time
3 min. or longer 6 min. or longer LOCK
ACC
ON
START
After starting the engine, do not drive the vehicle until the brake vacuum warning light has turned off. Failure to carry out the above procedure may result in the need to apply greater pedal pressure in order to effect the necessary braking effort.
Page 124 of 361
DRIVING YOUR HYUNDAI 2- 15
C160C01A-AAT Use High Quality Ethylene Glycol Coolant Your Hyundai is delivered with high quality ethyl- ene glycol coolant in the cooling system. It is the only type of coolant that should be used because it helps prevent corrosion in the cooling system, lubricates the water pump and prevents freezing. Be sure to replace or replenish your coolant in accordance with the maintenance schedule in Section 5. Before winter, have your coolant test- ed to assure that its freezing point is sufficient for the temperatures anticipated during the winter. C160D01A-AAT Check Battery and Cables Winter puts additional burdens on the battery system. Visually inspect the battery and cables as described in Section 6. The level of charge in your battery can be checked by your Hyundai dealer or a service station. C160E01A-AAT Change to "Winter Weight" Oil if Necessary In some climates it is recommended that a lower viscosity "winter weight" oil be used during cold weather. See Section 9 for recommendations. If you aren’t sure what weight oil you should use, consult your Hyundai dealer.
o Remember, your Hyundai does not require
extended warm-up. As soon as the engine is running smoothly, you can drive away. In very cold weather, however, give your engine a slightly longer warm-up period.
o Don't "lug" or "over-rev" the engine. Lugging is driving too slowly in too high a gear result- ing in the engine bucking. If this happens, shift to a lower gear. Over-revving is racing the engine beyond its safe limit. This can be avoided by shifting at the recommended speeds.
o Use your air conditioning sparingly. The air
conditioning system is operated by engine power so your fuel economy is reduced when you use it.
C160A01A-AAT WINTER DRIVING The more severe weather conditions of winter result in greater wear and other problems. To minimize the problems of winter driving, you should follow these suggestions:
C150A01A-AAT SMOOTH CORNERING Avoid braking or gear changing in corners, espe- cially when roads are wet. Ideally, corners should always be taken under gentle acceleration. If you follow these suggestions, tire wear will be held to a minimum. C160B01A-GAT Snowy or Icy Conditions To drive your vehicle in deep snow, it may be necessary to use snow tires or to install tire chains on your tires. If snow tires are needed, it is necessary to select tires equivalent in size and type of the original equipment tires. Failure to do so may adversely affect the safety and handling of your car. Furthermore, speeding, rapid accel- eration, sudden brake applications, and sharp turns are potentially very hazardous practices. During deceleration, use engine braking to the fullest extent. Sudden brake applications on snowy or icy roads may cause skids to occur. You need to keep sufficient distance between the vehicle in operation in front and your vehicle. Also, apply the brake gently. It should be noted that installing tire chains on the tire will provide a greater driving force, but will not prevent side skids. NOTE: Tire chains are not legal in all provinces. Check province laws before fitting tire chains.
Page 129 of 361
WHAT TO DO IN AN EMERGENCY 3-1
3. WHAT TO DO IN ANEMERGENCY
D010A01A-AAT IF THE ENGINE WILL NOT START WARNING: If the engine will not start, do not push or pull the car to start it. This could result in a collision or cause other damage. In addition, push or pull starting may cause the catalytic converter to be overloaded and create a fire hazard. D010B01HP-GAT If Engine Doesn’t Turn Over or Turns Over Slowly
1. If your car has an automatic transmission, be sure the gear selector lever is in "N" or "P" and the emergency brake is set. 2. Check the battery connections to be sure
they are clean and tight.
3. Turn on the interior light. If the light dims or
goes out when you operate the starter, the battery is discharged.
4. Check the starter connections to be sure they are securely tightened.
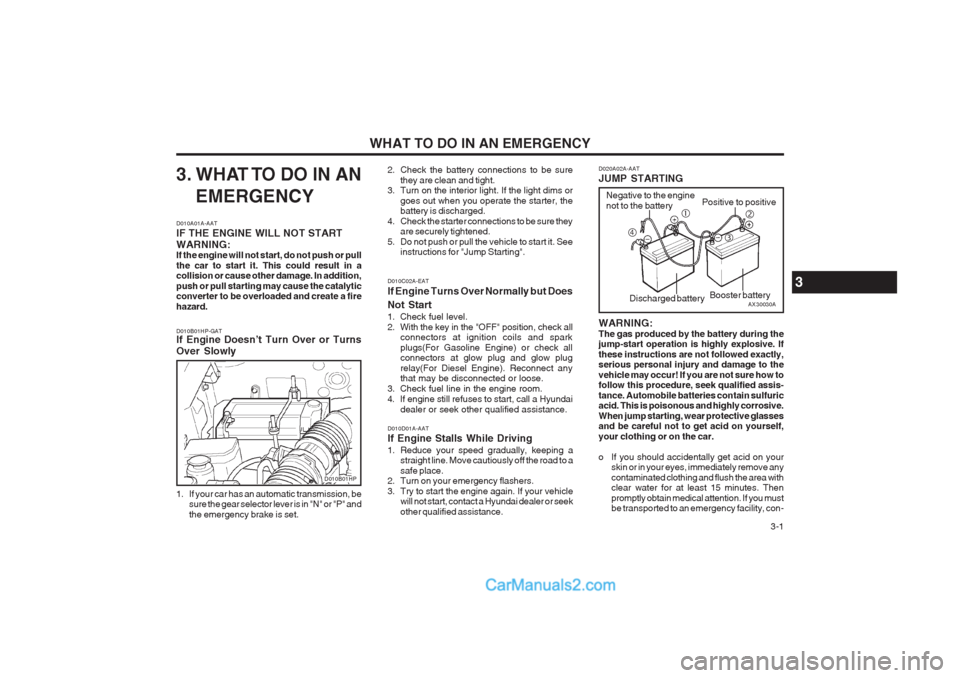
5. Do not push or pull the vehicle to start it. See instructions for "Jump Starting". D020A02A-AAT JUMP STARTING WARNING: The gas produced by the battery during the jump-start operation is highly explosive. If these instructions are not followed exactly, serious personal injury and damage to the vehicle may occur! If you are not sure how to follow this procedure, seek qualified assis- tance. Automobile batteries contain sulfuric acid. This is poisonous and highly corrosive. When jump starting, wear protective glasses and be careful not to get acid on yourself, your clothing or on the car.
o If you should accidentally get acid on your
skin or in your eyes, immediately remove any contaminated clothing and flush the area with clear water for at least 15 minutes. Then promptly obtain medical attention. If you must be transported to an emergency facility, con-
D010C02A-EAT If Engine Turns Over Normally but Does Not Start
1. Check fuel level.
2. With the key in the "OFF" position, check allconnectors at ignition coils and sparkplugs(For Gasoline Engine) or check all connectors at glow plug and glow plug relay(For Diesel Engine). Reconnect any that may be disconnected or loose.
3. Check fuel line in the engine room.
4. If engine still refuses to start, call a Hyundai
dealer or seek other qualified assistance.
D010D01A-AAT If Engine Stalls While Driving
1. Reduce your speed gradually, keeping a straight line. Move cautiously off the road to a safe place.
2. Turn on your emergency flashers.
3. Try to start the engine again. If your vehicle will not start, contact a Hyundai dealer or seekother qualified assistance.
AX30030A
Negative to the engine not to the battery
Positive to positive
Booster battery
�c
�e
�f �d
Discharged battery
D010B01HP
3