air condition Hyundai Terracan 2005 Owner's Manual
[x] Cancel search | Manufacturer: HYUNDAI, Model Year: 2005, Model line: Terracan, Model: Hyundai Terracan 2005Pages: 539, PDF Size: 18.03 MB
Page 11 of 539
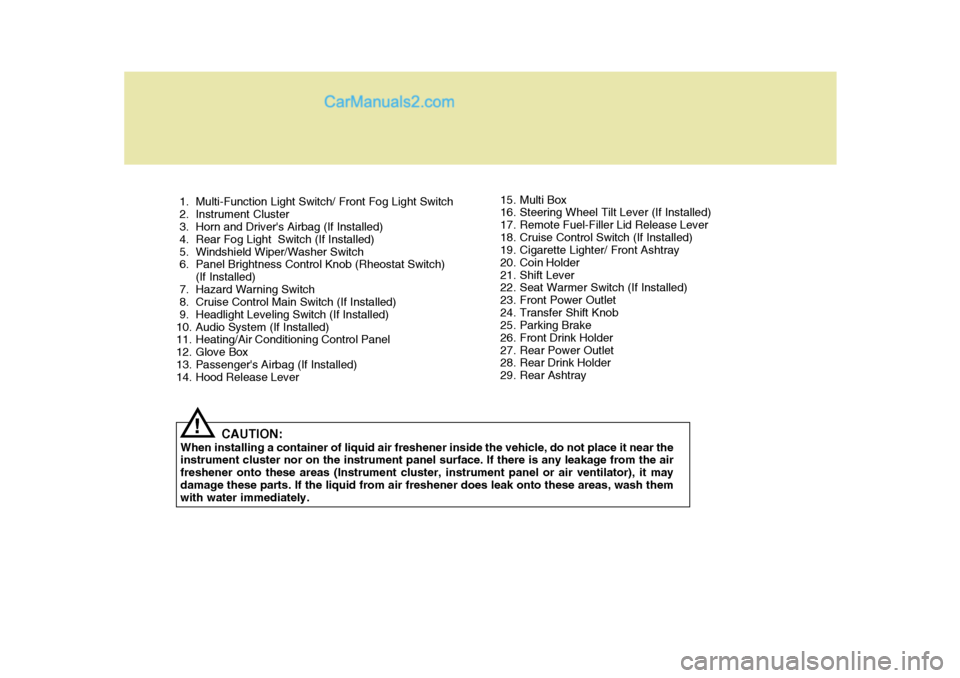
1. Multi-Function Light Switch/ Front Fog Light Switch
2. Instrument Cluster
3. Horn and Driver's Airbag (If Installed)
4. Rear Fog Light Switch (If Installed)
5. Windshield Wiper/Washer Switch
6. Panel Brightness Control Knob (Rheostat Switch)(If Installed)
7. Hazard Warning Switch
8. Cruise Control Main Switch (If Installed)
9. Headlight Leveling Switch (If Installed)
10. Audio System (If Installed)
11. Heating/Air Conditioning Control Panel
12. Glove Box
13. Passenger's Airbag (If Installed)
14. Hood Release Lever
CAUTION:
When installing a container of liquid air freshener inside the vehicle, do not place it near theinstrument cluster nor on the instrument panel surface. If there is any leakage from the air freshener onto these areas (Instrument cluster, instrument panel or air ventilator), it maydamage these parts. If the liquid from air freshener does leak onto these areas, wash them with water immediately.
! 15. Multi Box
16. Steering Wheel Tilt Lever (If Installed)
17. Remote Fuel-Filler Lid Release Lever
18. Cruise Control Switch (If Installed)
19. Cigarette Lighter/ Front Ashtray
20. Coin Holder
21. Shift Lever
22. Seat Warmer Switch (If Installed)
23. Front Power Outlet
24. Transfer Shift Knob
25. Parking Brake
26. Front Drink Holder
27. Rear Power Outlet
28. Rear Drink Holder
29. Rear Ashtray
Page 13 of 539
CAUTION:
When installing a container of liquid air freshener inside the vehicle, do not place it near the instrument cluster nor on the instrument panel surface. If there is any leakage from the air freshener onto these areas (Instrument cluster, instrument panel or air ventilator), it may damage these parts. If the liquid from air freshener does leak onto these areas, wash themwith water immediately.!
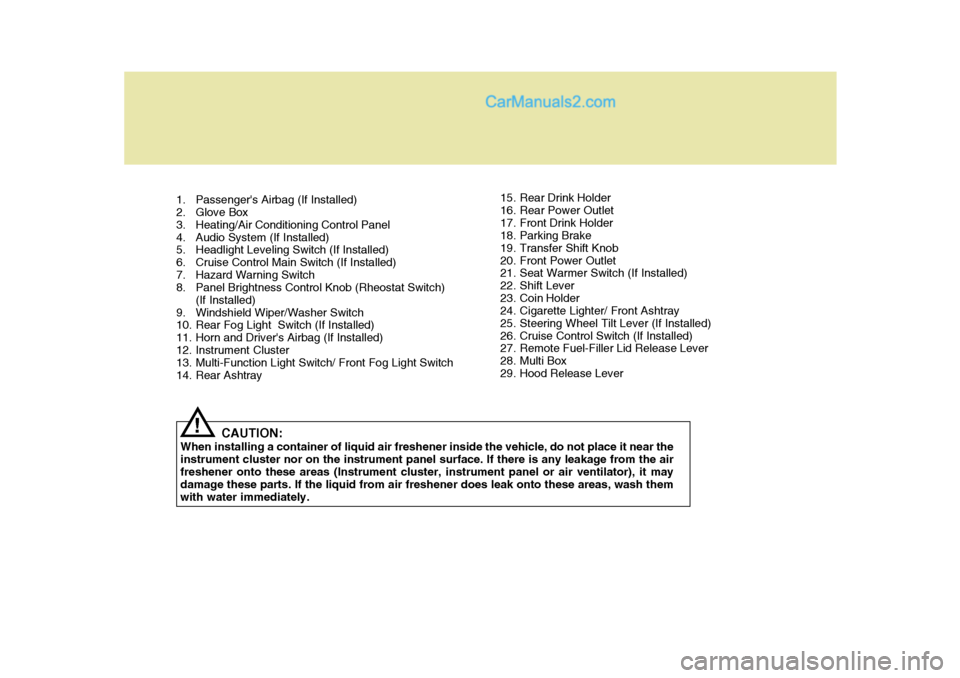
1. Passenger's Airbag (If Installed)
2. Glove Box
3. Heating/Air Conditioning Control Panel
4. Audio System (If Installed)
5. Headlight Leveling Switch (If Installed)
6. Cruise Control Main Switch (If Installed)
7. Hazard Warning Switch
8. Panel Brightness Control Knob (Rheostat Switch)
(If Installed)
9. Windshield Wiper/Washer Switch
10. Rear Fog Light Switch (If Installed)
11. Horn and Driver's Airbag (If Installed)
12. Instrument Cluster
13. Multi-Function Light Switch/ Front Fog Light Switch
14. Rear Ashtray 15. Rear Drink Holder
16. Rear Power Outlet
17. Front Drink Holder
18. Parking Brake
19. Transfer Shift Knob
20. Front Power Outlet
21. Seat Warmer Switch (If Installed)
22. Shift Lever
23. Coin Holder
24. Cigarette Lighter/ Front Ashtray
25. Steering Wheel Tilt Lever (If Installed)
26. Cruise Control Switch (If Installed)
27. Remote Fuel-Filler Lid Release Lever
28. Multi Box
29. Hood Release Lever
Page 55 of 539
1
FEATURES OF YOUR HYUNDAI
41
!
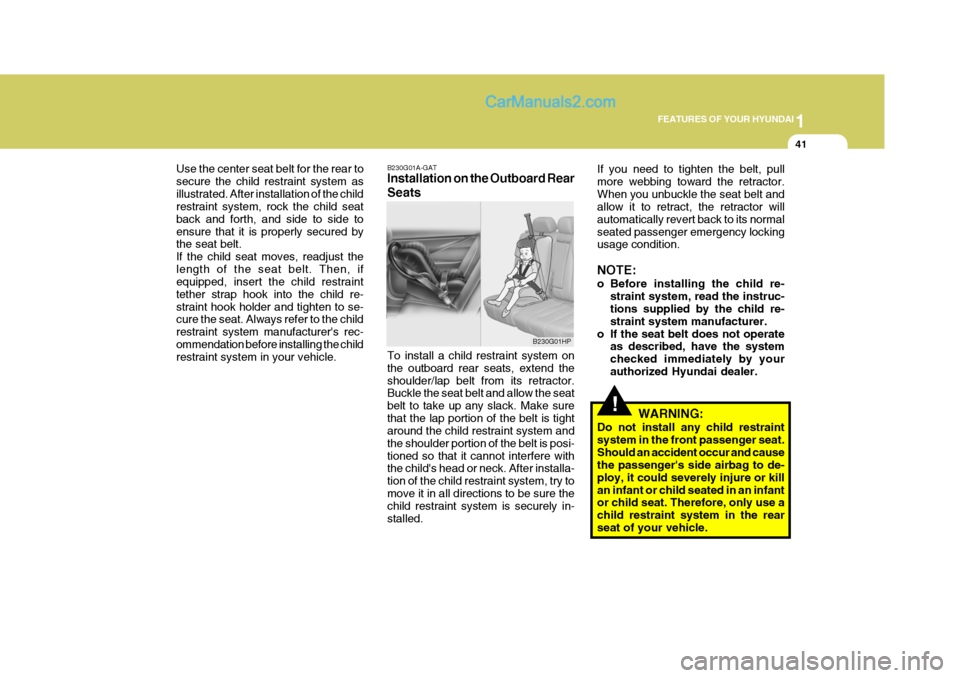
Use the center seat belt for the rear to secure the child restraint system asillustrated. After installation of the child restraint system, rock the child seat back and forth, and side to side toensure that it is properly secured by the seat belt. If the child seat moves, readjust thelength of the seat belt. Then, if equipped, insert the child restraint tether strap hook into the child re-straint hook holder and tighten to se- cure the seat. Always refer to the child restraint system manufacturer's rec-ommendation before installing the child restraint system in your vehicle. B230G01A-GAT Installation on the Outboard Rear Seats To install a child restraint system on the outboard rear seats, extend theshoulder/lap belt from its retractor. Buckle the seat belt and allow the seat belt to take up any slack. Make surethat the lap portion of the belt is tight around the child restraint system and the shoulder portion of the belt is posi-tioned so that it cannot interfere with the child's head or neck. After installa- tion of the child restraint system, try tomove it in all directions to be sure the child restraint system is securely in- stalled.If you need to tighten the belt, pullmore webbing toward the retractor.When you unbuckle the seat belt and allow it to retract, the retractor will automatically revert back to its normalseated passenger emergency locking usage condition. NOTE:
o Before installing the child re-
straint system, read the instruc- tions supplied by the child re- straint system manufacturer.
o If the seat belt does not operate as described, have the systemchecked immediately by yourauthorized Hyundai dealer.
WARNING:
Do not install any child restraintsystem in the front passenger seat.Should an accident occur and cause the passenger's side airbag to de- ploy, it could severely injure or killan infant or child seated in an infant or child seat. Therefore, only use a child restraint system in the rearseat of your vehicle.
B230G01HP
Page 60 of 539
1FEATURES OF YOUR HYUNDAI
46
!
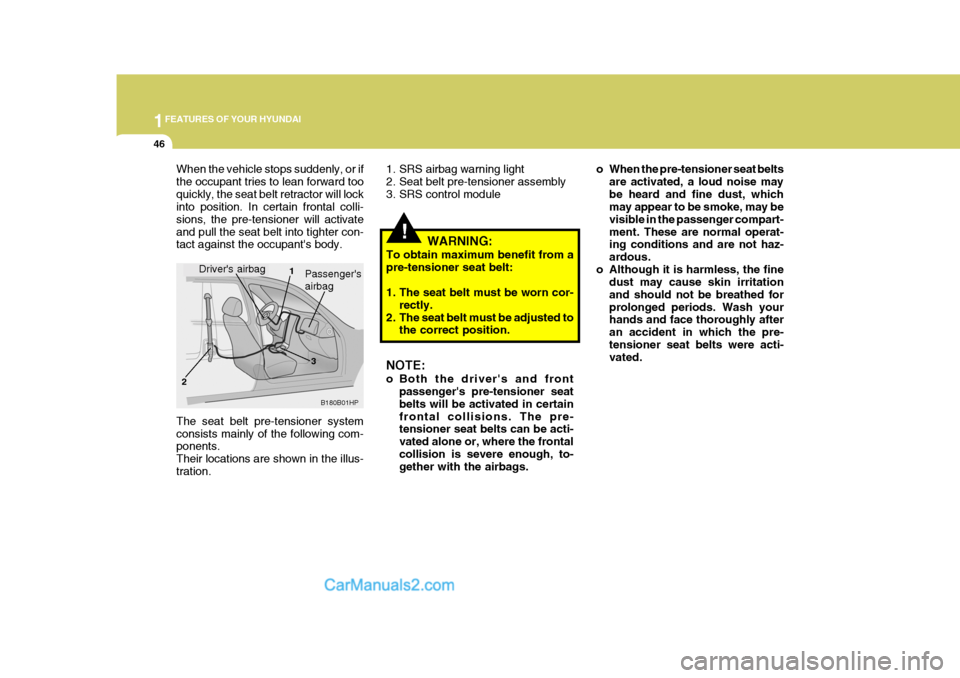
1. SRS airbag warning light
2. Seat belt pre-tensioner assembly
3. SRS control module o When the pre-tensioner seat belts
are activated, a loud noise maybe heard and fine dust, which may appear to be smoke, may be visible in the passenger compart-ment. These are normal operat- ing conditions and are not haz- ardous.
o Although it is harmless, the fine dust may cause skin irritationand should not be breathed forprolonged periods. Wash your hands and face thoroughly after an accident in which the pre-tensioner seat belts were acti- vated.
WARNING:
To obtain maximum benefit from a pre-tensioner seat belt:
1. The seat belt must be worn cor- rectly.
2. The seat belt must be adjusted to the correct position.
NOTE:
o Both the driver's and front passenger's pre-tensioner seat belts will be activated in certainfrontal collisions. The pre- tensioner seat belts can be acti- vated alone or, where the frontalcollision is severe enough, to- gether with the airbags.
When the vehicle stops suddenly, or if the occupant tries to lean forward tooquickly, the seat belt retractor will lock into position. In certain frontal colli- sions, the pre-tensioner will activateand pull the seat belt into tighter con- tact against the occupant's body.
B180B01HP
The seat belt pre-tensioner system consists mainly of the following com- ponents. Their locations are shown in the illus-tration.
Driver's airbag1
2 3Passenger's airbag
Page 62 of 539
1FEATURES OF YOUR HYUNDAI
48
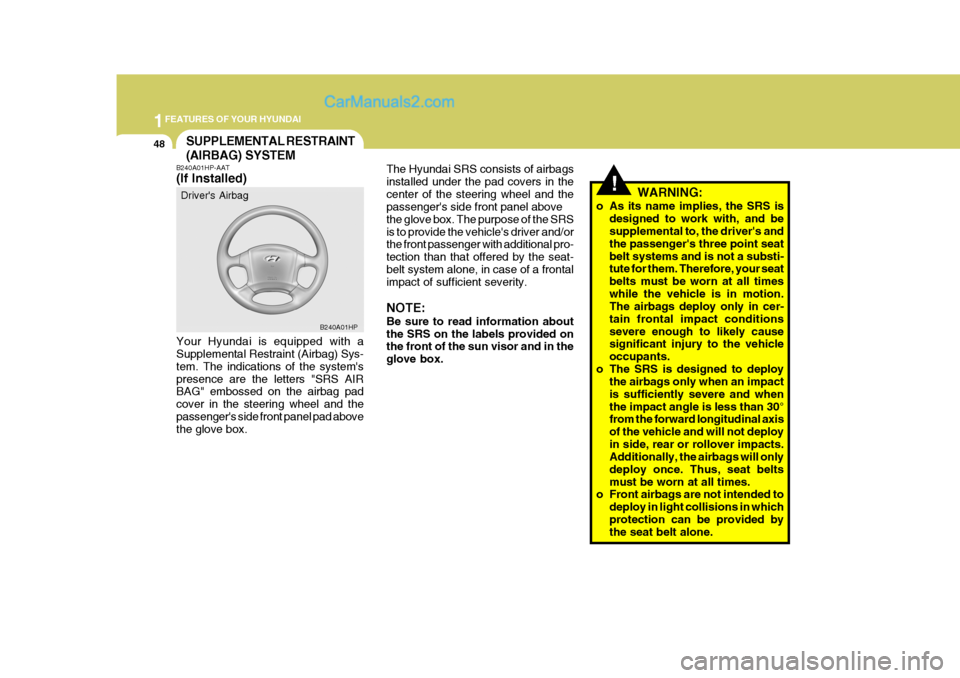
!
The Hyundai SRS consists of airbags installed under the pad covers in thecenter of the steering wheel and the passenger's side front panel above the glove box. The purpose of the SRSis to provide the vehicle's driver and/or the front passenger with additional pro- tection than that offered by the seat-belt system alone, in case of a frontal impact of sufficient severity. NOTE: Be sure to read information about the SRS on the labels provided on the front of the sun visor and in the glove box. WARNING:
o As its name implies, the SRS is designed to work with, and be supplemental to, the driver's and the passenger's three point seatbelt systems and is not a substi- tute for them. Therefore, your seat belts must be worn at all timeswhile the vehicle is in motion. The airbags deploy only in cer- tain frontal impact conditionssevere enough to likely cause significant injury to the vehicle occupants.
o The SRS is designed to deploy the airbags only when an impactis sufficiently severe and whenthe impact angle is less than 30° from the forward longitudinal axis of the vehicle and will not deployin side, rear or rollover impacts. Additionally, the airbags will only deploy once. Thus, seat beltsmust be worn at all times.
o Front airbags are not intended to
deploy in light collisions in whichprotection can be provided by the seat belt alone.
SUPPLEMENTAL RESTRAINT (AIRBAG) SYSTEM
B240A01HP-AAT (If Installed)
Your Hyundai is equipped with a Supplemental Restraint (Airbag) Sys- tem. The indications of the system'spresence are the letters "SRS AIR BAG" embossed on the airbag pad cover in the steering wheel and thepassenger's side front panel pad above the glove box. Driver's Airbag
B240A01HP
Page 65 of 539
1
FEATURES OF YOUR HYUNDAI
51
!WARNING:
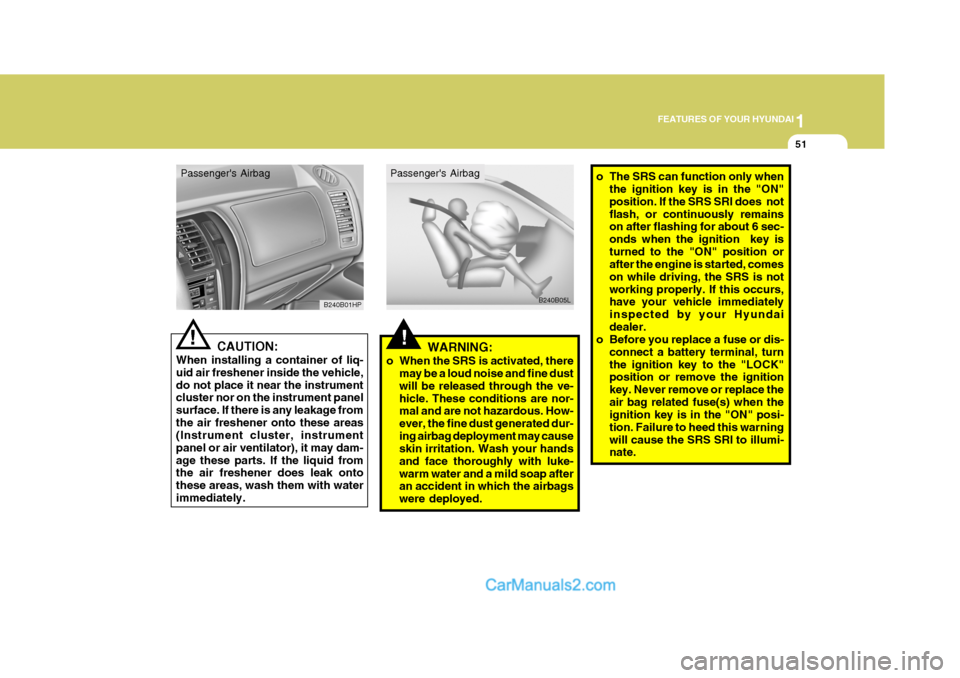
o When the SRS is activated, there may be a loud noise and fine dust will be released through the ve-hicle. These conditions are nor- mal and are not hazardous. How- ever, the fine dust generated dur-ing airbag deployment may cause skin irritation. Wash your hands and face thoroughly with luke-warm water and a mild soap after an accident in which the airbags were deployed. o The SRS can function only when
the ignition key is in the "ON"position. If the SRS SRI does notflash, or continuously remains on after flashing for about 6 sec- onds when the ignition key isturned to the "ON" position or after the engine is started, comes on while driving, the SRS is notworking properly. If this occurs, have your vehicle immediately inspected by your Hyundaidealer.
o Before you replace a fuse or dis-
connect a battery terminal, turnthe ignition key to the "LOCK" position or remove the ignition key. Never remove or replace theair bag related fuse(s) when the ignition key is in the "ON" posi- tion. Failure to heed this warningwill cause the SRS SRI to illumi- nate.! CAUTION:
When installing a container of liq- uid air freshener inside the vehicle,do not place it near the instrument cluster nor on the instrument panel surface. If there is any leakage fromthe air freshener onto these areas (Instrument cluster, instrument panel or air ventilator), it may dam-age these parts. If the liquid from the air freshener does leak onto these areas, wash them with waterimmediately. B240B01HP
B240B05L
Passenger's Airbag Passenger's Airbag
Page 119 of 539
1
FEATURES OF YOUR HYUNDAI
105
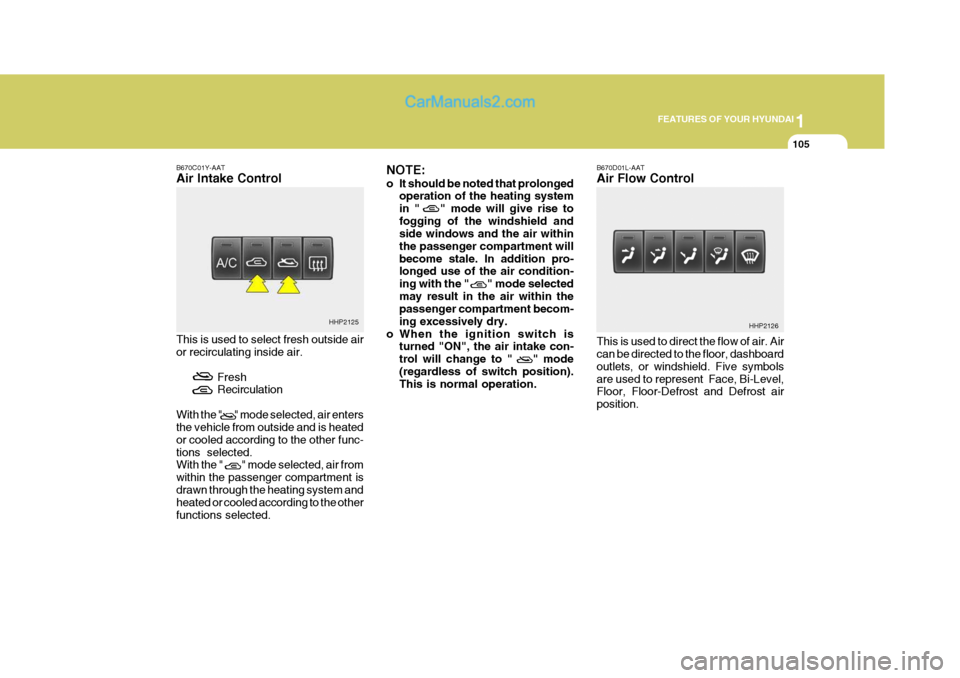
B670C01Y-AAT Air Intake Control This is used to select fresh outside air or recirculating inside air.
FreshRecirculation
With the " " mode selected, air entersthe vehicle from outside and is heated or cooled according to the other func-tions selected. With the " " mode selected, air from within the passenger compartment isdrawn through the heating system and heated or cooled according to the other functions selected. NOTE:
o It should be noted that prolonged
operation of the heating system in " " mode will give rise tofogging of the windshield and side windows and the air within the passenger compartment willbecome stale. In addition pro- longed use of the air condition- ing with the " " mode selectedmay result in the air within the passenger compartment becom- ing excessively dry.
o When the ignition switch is turned "ON", the air intake con-trol will change to " " mode(regardless of switch position). This is normal operation. B670D01L-AAT Air Flow Control This is used to direct the flow of air. Air can be directed to the floor, dashboard outlets, or windshield. Five symbolsare used to represent Face, Bi-Level, Floor, Floor-Defrost and Defrost air position.
HHP2125
HHP2126
Page 124 of 539
1FEATURES OF YOUR HYUNDAI
110AIR CONDITIONING SYSTEM
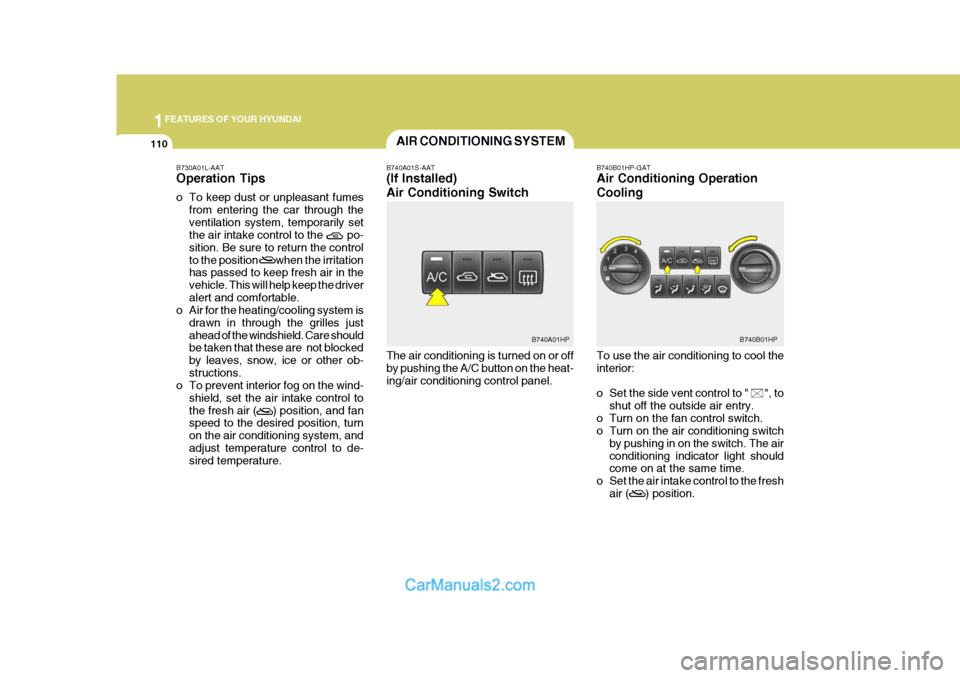
B740A01S-AAT (If Installed) Air Conditioning Switch The air conditioning is turned on or off by pushing the A/C button on the heat-ing/air conditioning control panel. B740B01HP-GAT Air Conditioning Operation Cooling To use the air conditioning to cool the interior:
o Set the side vent control to " ", to
shut off the outside air entry.
o Turn on the fan control switch.
o Turn on the air conditioning switch by pushing in on the switch. The air conditioning indicator light should come on at the same time.
o Set the air intake control to the fresh air ( ) position.
B730A01L-AAT Operation Tips
o To keep dust or unpleasant fumes
from entering the car through the ventilation system, temporarily set the air intake control to the po- sition. Be sure to return the controlto the position when the irritation has passed to keep fresh air in the vehicle. This will help keep the driveralert and comfortable.
o Air for the heating/cooling system is
drawn in through the grilles justahead of the windshield. Care should be taken that these are not blocked by leaves, snow, ice or other ob-structions.
o To prevent interior fog on the wind-
shield, set the air intake control tothe fresh air ( ) position, and fan speed to the desired position, turn on the air conditioning system, andadjust temperature control to de- sired temperature.
B740B01HPB740A01HP
Page 125 of 539
1
FEATURES OF YOUR HYUNDAI
111
o Set the temperature control to
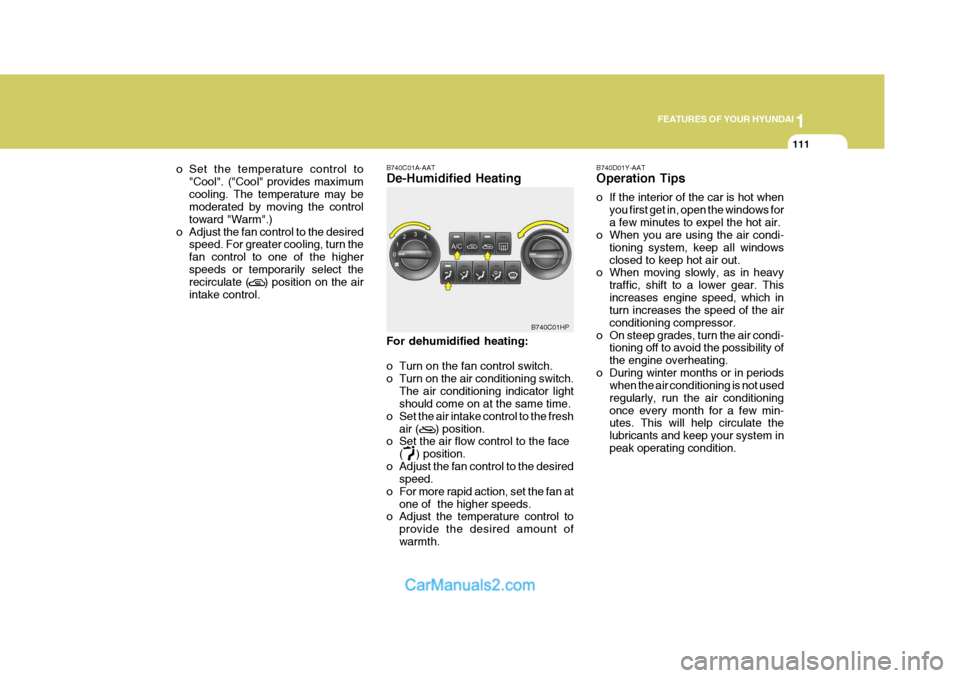
"Cool". ("Cool" provides maximum cooling. The temperature may be moderated by moving the control toward "Warm".)
o Adjust the fan control to the desired speed. For greater cooling, turn thefan control to one of the higherspeeds or temporarily select the recirculate ( ) position on the air intake control. B740C01A-AAT De-Humidified Heating For dehumidified heating:
o Turn on the fan control switch.
o Turn on the air conditioning switch.
The air conditioning indicator light should come on at the same time.
o Set the air intake control to the fresh
air ( ) position.
o Set the air flow control to the face
( ) position.
o Adjust the fan control to the desired speed.
o For more rapid action, set the fan at
one of the higher speeds.
o Adjust the temperature control to
provide the desired amount of warmth.
B740C01HP
B740D01Y-AAT Operation Tips
o If the interior of the car is hot when
you first get in, open the windows for a few minutes to expel the hot air.
o When you are using the air condi-
tioning system, keep all windowsclosed to keep hot air out.
o When moving slowly, as in heavy
traffic, shift to a lower gear. Thisincreases engine speed, which in turn increases the speed of the air conditioning compressor.
o On steep grades, turn the air condi- tioning off to avoid the possibility ofthe engine overheating.
o During winter months or in periods when the air conditioning is not usedregularly, run the air conditioningonce every month for a few min- utes. This will help circulate the lubricants and keep your system inpeak operating condition.
Page 126 of 539
1FEATURES OF YOUR HYUNDAI
112AUTOMATIC HEATING AND COOLING CONTROL SYSTEM
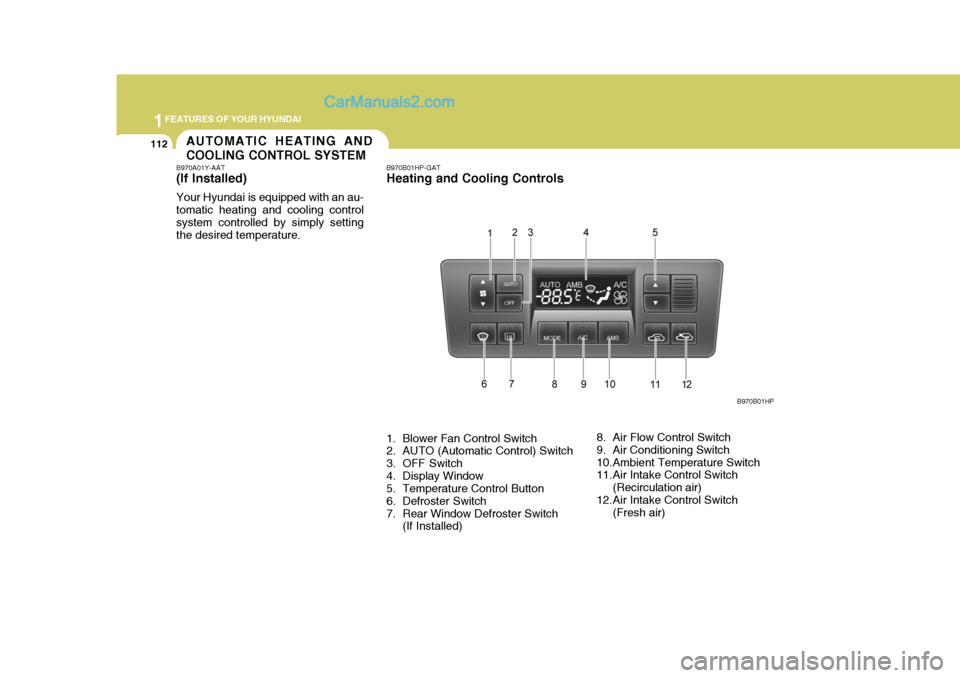
B970A01Y-AAT (If lnstalled) Your Hyundai is equipped with an au- tomatic heating and cooling controlsystem controlled by simply setting the desired temperature. B970B01HP-GAT Heating and Cooling Controls
1. Blower Fan Control Switch
2. AUTO (Automatic Control) Switch
3. OFF Switch
4. Display Window
5. Temperature Control Button
6. Defroster Switch
7. Rear Window Defroster Switch
(If Installed) 8. Air Flow Control Switch
9. Air Conditioning Switch
10.Ambient Temperature Switch
11.Air Intake Control Switch
(Recirculation air)
12.Air Intake Control Switch (Fresh air) B970B01HP