Hyundai Terracan 2006 Owner's Manual
Manufacturer: HYUNDAI, Model Year: 2006, Model line: Terracan, Model: Hyundai Terracan 2006Pages: 539, PDF Size: 18.11 MB
Page 261 of 539
6 DO-IT-YOURSELF MAINTENANCE
34
To check the power steering fluid level, be sure the ignition is "OFF", thencheck to make certain that the power steering fluid level is between the "MAX" and "MIN" level markings onthe fluid reservoir. NOTE: Grinding noise from the power steer- ing pump may be heard immedi- ately after the engine is started inextremely cold conditions (below - 20°C). If the noise stops during warm up, there is no abnormal function inthe system. If is due to a power steering fluid characteristic in ex- tremely cold conditions. Recommended Fluid Use PSF-3 type fluid. NOTE: Do not start the engine when the power steering oil reservoir is empty.
FUEL FILTER
G240A01A-AAT
POWER STEERING HOSES
It is suggested that you check the
power steering hose connections for fluid leakage at regular intervals. The power steering hoses should be re-placed if there is severe surface crack- ing, pulling, scuffing or worn spots. Deterioration of the hose could causepremature failure. G350A02HP-GAT
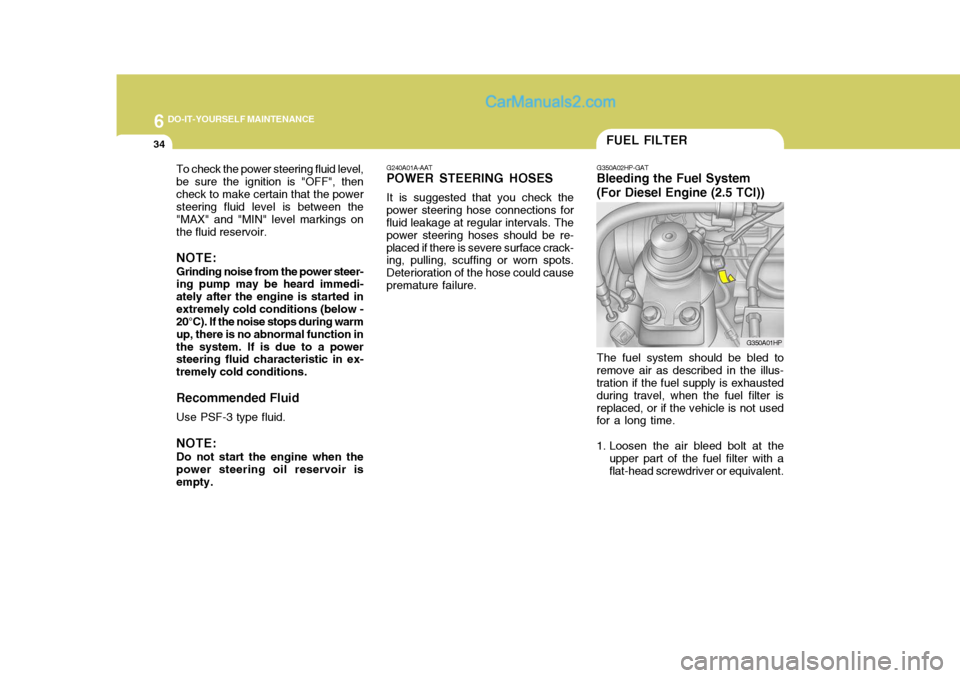
Bleeding the Fuel System (For Diesel Engine (2.5 TCI))
The fuel system should be bled to
remove air as described in the illus- tration if the fuel supply is exhausted during travel, when the fuel filter isreplaced, or if the vehicle is not used for a long time.
1. Loosen the air bleed bolt at the upper part of the fuel filter with a flat-head screwdriver or equivalent. G350A01HP
Page 262 of 539
6
DO-IT-YOURSELF MAINTENANCE
35
!WARNING:
o Do not smoke or have any other open flame near the vehicle while bleeding the fuel system.
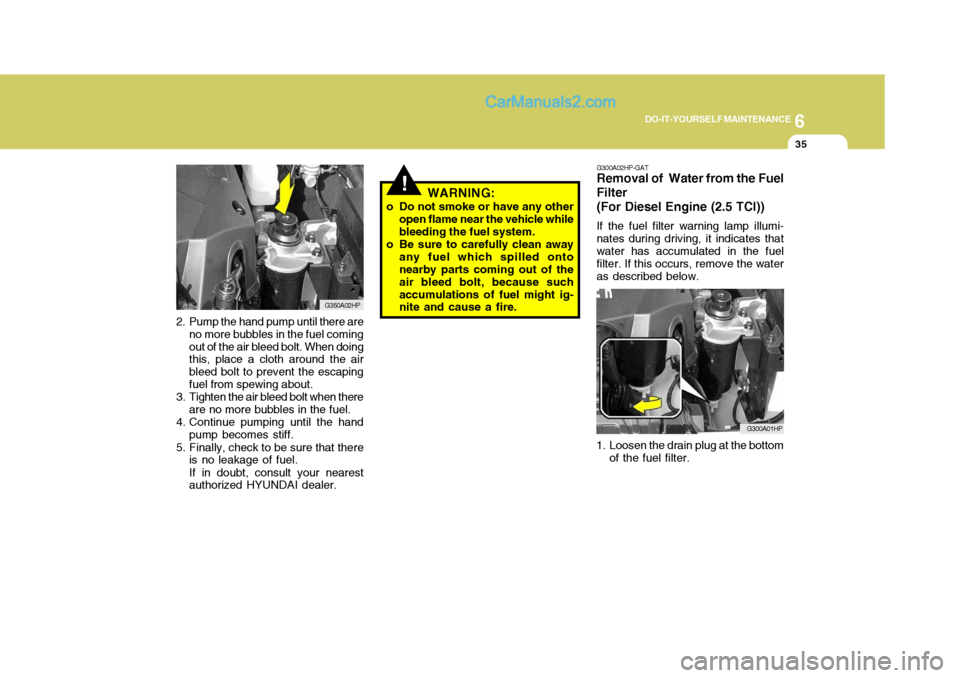
o Be sure to carefully clean away any fuel which spilled onto nearby parts coming out of the air bleed bolt, because suchaccumulations of fuel might ig- nite and cause a fire. G300A02HP-GAT Removal of Water from the Fuel Filter (For Diesel Engine (2.5 TCI)) If the fuel filter warning lamp illumi- nates during driving, it indicates thatwater has accumulated in the fuel filter. If this occurs, remove the water as described below.
G300A01HP
1. Loosen the drain plug at the bottom of the fuel filter.
2. Pump the hand pump until there are
no more bubbles in the fuel comingout of the air bleed bolt. When doing this, place a cloth around the air bleed bolt to prevent the escapingfuel from spewing about.
3. Tighten the air bleed bolt when there
are no more bubbles in the fuel.
4. Continue pumping until the hand pump becomes stiff.
5. Finally, check to be sure that there is no leakage of fuel. If in doubt, consult your nearest authorized HYUNDAI dealer. G350A02HP
Page 263 of 539
6 DO-IT-YOURSELF MAINTENANCE
36
2. Operate the hand pump slowly 6 or
7 times in order to force the water out through the drain plug.
3. Tighten the drain plug when water no longer comes out.
4. Loosen the air bleed bolt and bleed the air.(Refer to "Bleeding the fuel sys-tem".)
5. Check to be sure that the warning lamp illuminates when the ignitionkey is turned to "ON", and that itgoes off when the engine is started.If in doubt, consult your nearestauthorized HYUNDAI dealer. G350A02HP
!
NOTE: It is recommended that water ac-
cumulated in the fuel filter should be removed by an authorized Hyundai dealer. G350B01HP-GAT
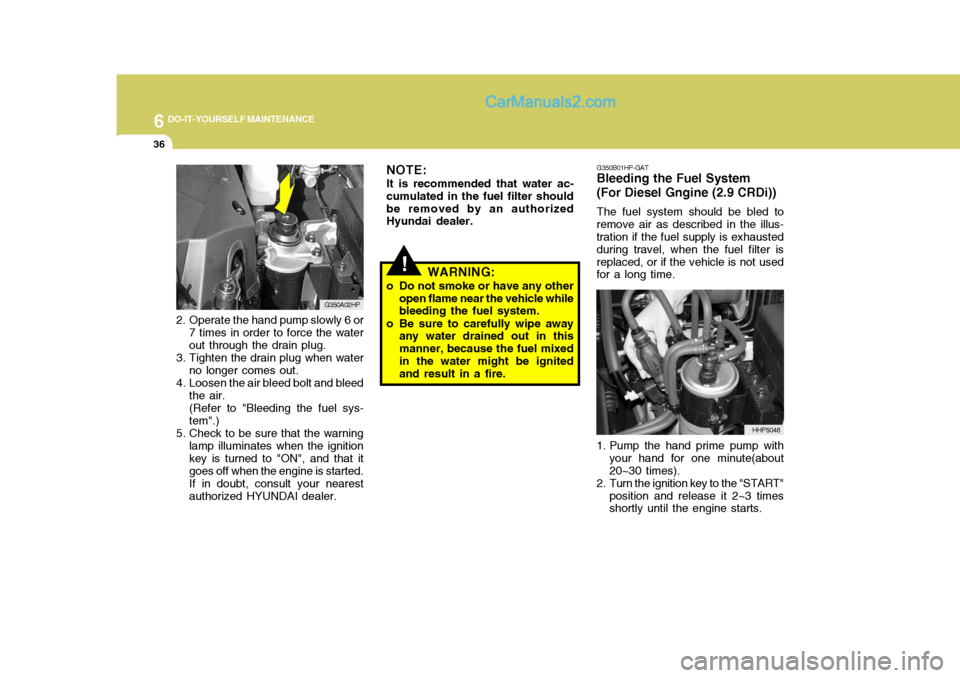
Bleeding the Fuel System (For Diesel Gngine (2.9 CRDi))
The fuel system should be bled to
remove air as described in the illus- tration if the fuel supply is exhausted during travel, when the fuel filter isreplaced, or if the vehicle is not used for a long time.
1. Pump the hand prime pump with your hand for one minute(about 20~30 times).
2. Turn the ignition key to the "START"
position and release it 2~3 times shortly until the engine starts. HHP5048
WARNING:
o Do not smoke or have any other open flame near the vehicle whilebleeding the fuel system.
o Be sure to carefully wipe away any water drained out in this manner, because the fuel mixedin the water might be ignited and result in a fire.
Page 264 of 539
6
DO-IT-YOURSELF MAINTENANCE
37
!
G300B02HP-GAT
Removal of Water from the Fuel Filter (For Diesel Engine (2.9 CRDi))
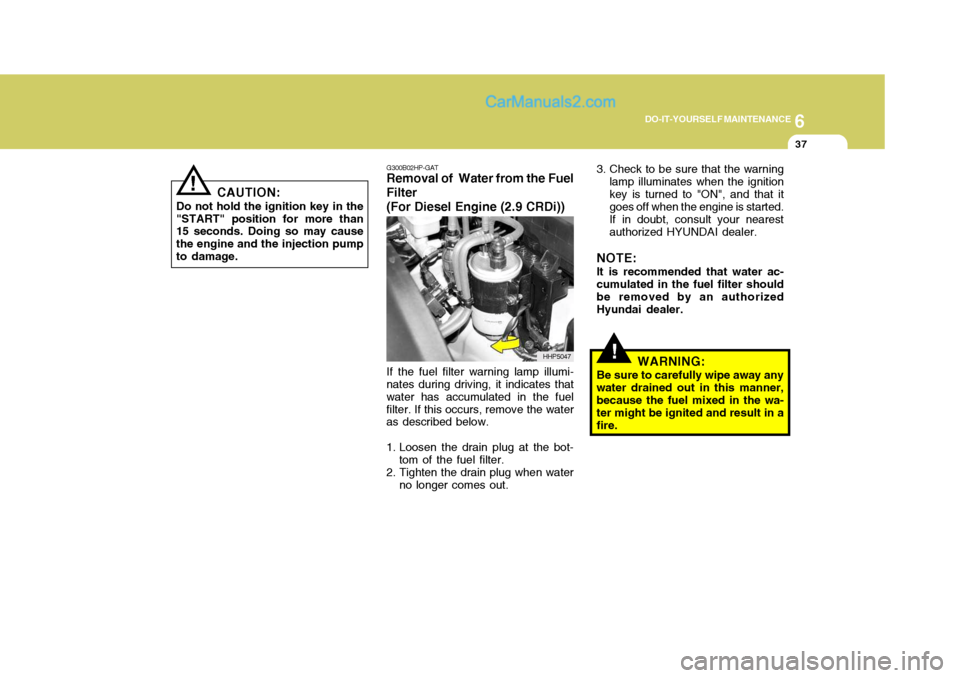
If the fuel filter warning lamp illumi-
nates during driving, it indicates that water has accumulated in the fuelfilter. If this occurs, remove the water as described below.
1. Loosen the drain plug at the bot-
tom of the fuel filter.
2. Tighten the drain plug when water
no longer comes out. 3. Check to be sure that the warning
lamp illuminates when the ignition key is turned to "ON", and that it goes off when the engine is started. If in doubt, consult your nearest authorized HYUNDAI dealer.
NOTE: It is recommended that water ac- cumulated in the fuel filter should be removed by an authorizedHyundai dealer.
WARNING:
Be sure to carefully wipe away anywater drained out in this manner,because the fuel mixed in the wa- ter might be ignited and result in a fire.
HHP5047
!
CAUTION:
Do not hold the ignition key in the "START" position for more than 15 seconds. Doing so may cause the engine and the injection pumpto damage.
Page 265 of 539
6 DO-IT-YOURSELF MAINTENANCE
38REPLACING HEADLIGHT BULBS
G260A03A-GAT Before attempting to replace a head- light bulb, be sure the switch is turned to the "OFF" position. The next paragraph shows how to reach the headlight bulbs so they may be changed. Be sure to replacethe burned-out bulb with one of the same number and wattage rating.
CAUTION:
o Keep the lamps out of contact with petroleum product, such as oil, gasoline, etc.
o After heavy, driving rain or wash- ing, headlight and taillight lensescould appear frosty. This condi- tion is caused by the temperature difference between the lamp in-side and outside. This is similar to the condensation on your win- dows inside your vehicle duringthe rain and doesn’t indicate a problem with your vehicle. If the water leaks into the lamp bulbcircuitry, have the vehicle checked by an Authorized Hyundai Dealer.
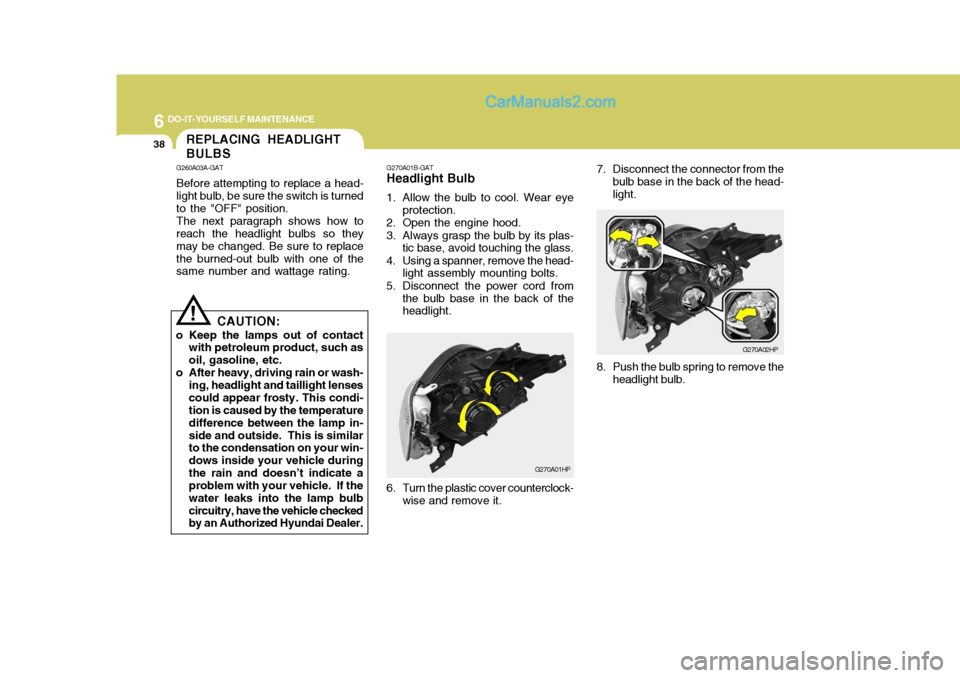
! G270A01B-GAT
Headlight Bulb
1. Allow the bulb to cool. Wear eye
protection.
2. Open the engine hood.
3. Always grasp the bulb by its plas- tic base, avoid touching the glass.
4. Using a spanner, remove the head- light assembly mounting bolts.
5. Disconnect the power cord from the bulb base in the back of the headlight.
G270A01HP7. Disconnect the connector from the
bulb base in the back of the head- light.
G270A02HP
6. Turn the plastic cover counterclock- wise and remove it. 8. Push the bulb spring to remove the
headlight bulb.
Page 266 of 539
6
DO-IT-YOURSELF MAINTENANCE
39HEADLIGHT AIMING AD- JUSTMENT
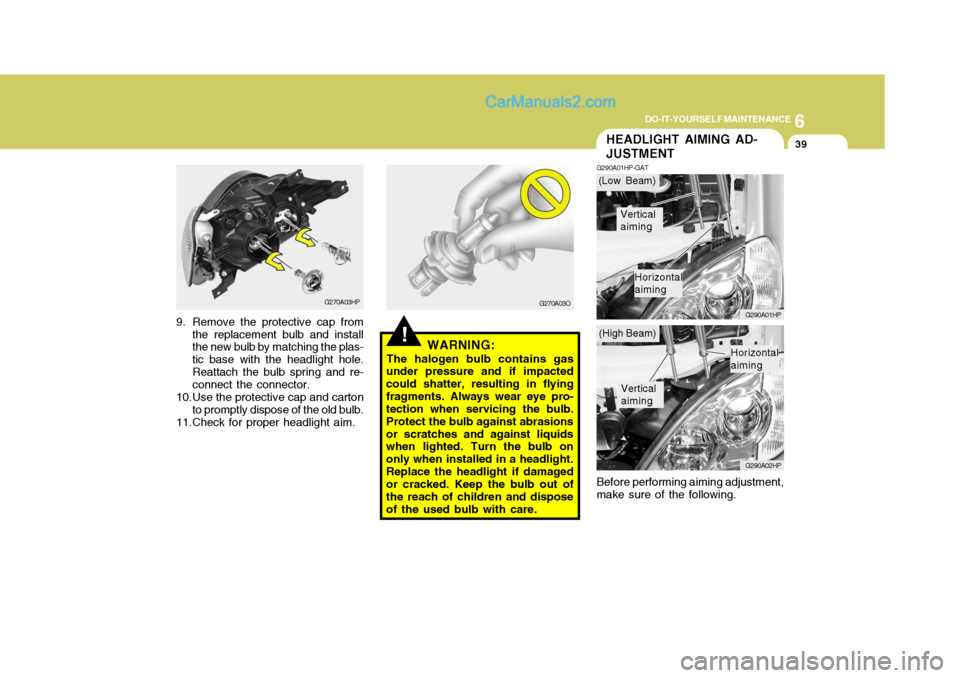
G290A01HP-GAT
G290A01HP G290A02HP
Before performing aiming adjustment, make sure of the following.
!WARNING:
The halogen bulb contains gas
under pressure and if impacted could shatter, resulting in flyingfragments. Always wear eye pro- tection when servicing the bulb. Protect the bulb against abrasionsor scratches and against liquids when lighted. Turn the bulb on only when installed in a headlight.Replace the headlight if damaged or cracked. Keep the bulb out of the reach of children and disposeof the used bulb with care.
G270A03HP
9. Remove the protective cap from the replacement bulb and install the new bulb by matching the plas- tic base with the headlight hole.Reattach the bulb spring and re- connect the connector.
10.Use the protective cap and carton to promptly dispose of the old bulb.
11.Check for proper headlight aim. G270A03O(Low Beam)
(High Beam)
Vertical aiming
Horizontal aiming
Vertical aiming
Horizontal aiming
Page 267 of 539
6 DO-IT-YOURSELF MAINTENANCE
40
1. Keep all tires inflated to the correct
pressure.
2. Place the vehicle on level ground and press the front bumper & rear bumper down several times. Placevehicle at a distance of 3m (118.1 in.) from the test wall.
3. See that the vehicle is unloaded (except for full levels of coolant, engine oil and fuel, and spare tire,jack, and tools). Have the driver or equivalent weight placed in driver's seat.
4. Clean the headlight lens and turn on the headlight.
5. Open the hood.
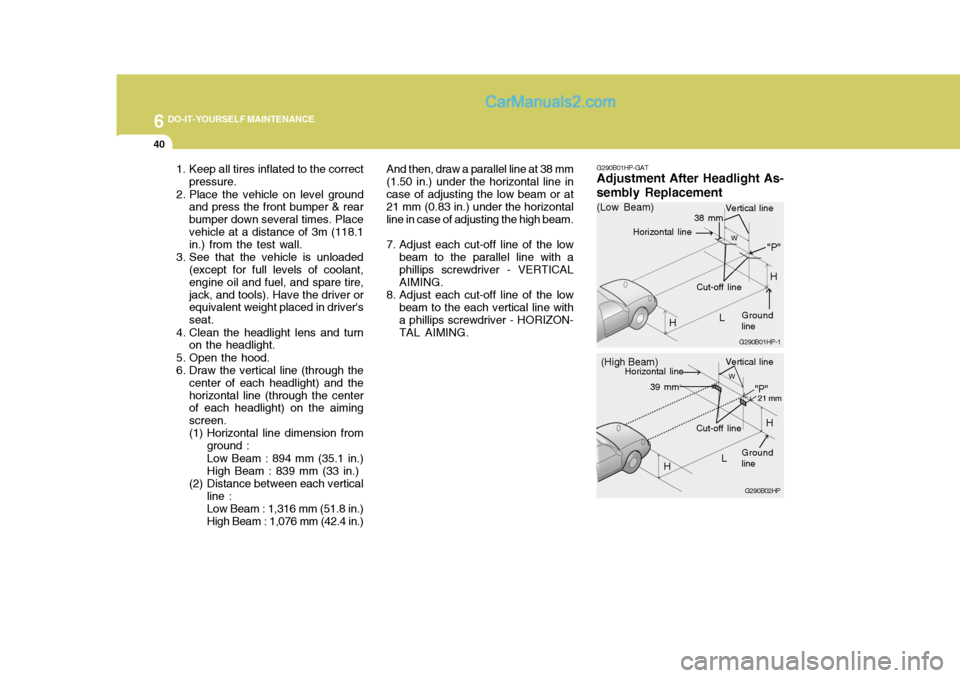
6. Draw the vertical line (through the center of each headlight) and thehorizontal line (through the center of each headlight) on the aiming screen.
(1) Horizontal line dimension from
ground : Low Beam : 894 mm (35.1 in.) High Beam : 839 mm (33 in.)
(2) Distance between each vertical line : Low Beam : 1,316 mm (51.8 in.) High Beam : 1,076 mm (42.4 in.) And then, draw a parallel line at 38 mm
(1.50 in.) under the horizontal line incase of adjusting the low beam or at 21 mm (0.83 in.) under the horizontal line in case of adjusting the high beam.
7. Adjust each cut-off line of the low beam to the parallel line with a phillips screwdriver - VERTICAL AIMING.
8. Adjust each cut-off line of the low beam to the each vertical line witha phillips screwdriver - HORIZON-TAL AIMING. G290B01HP-GAT
Adjustment After Headlight As- sembly Replacement
G290B02HP
LW
H Cut-off line
"P"
Vertical line
Horizontal line
Ground line
21 mm39 mm
(High Beam)
H
G290B01HP-1
LW
"P"
38 mm
H
H
(Low Beam)
Vertical line
Ground line
Cut-off line
Horizontal line
Page 268 of 539
6
DO-IT-YOURSELF MAINTENANCE
41
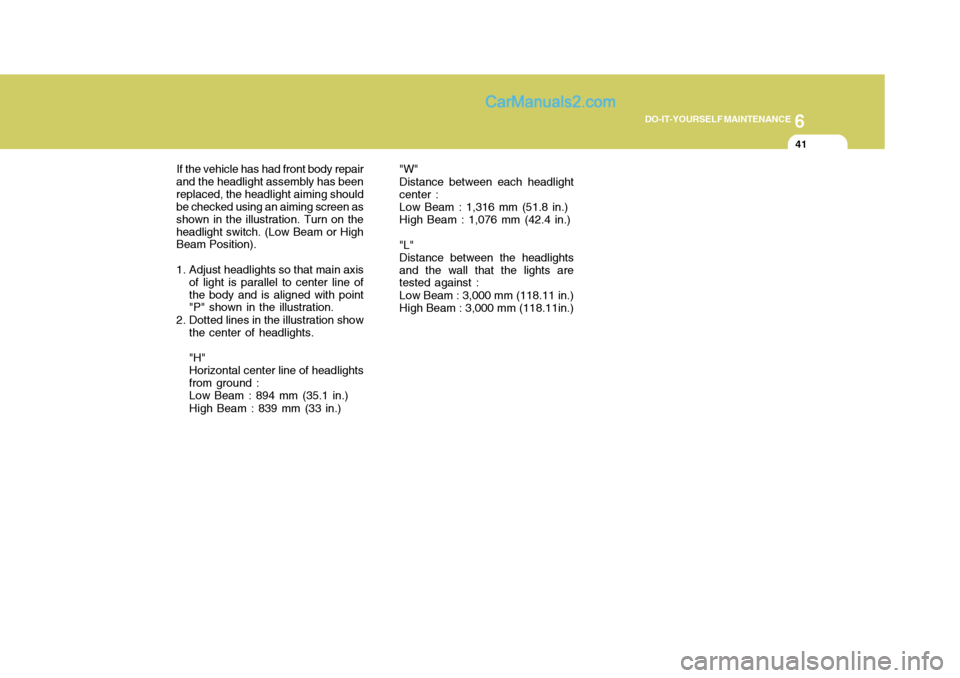
"W" Distance between each headlight center :Low Beam : 1,316 mm (51.8 in.) High Beam : 1,076 mm (42.4 in.) "L" Distance between the headlightsand the wall that the lights are tested against : Low Beam : 3,000 mm (118.11 in.) High Beam : 3,000 mm (118.11in.)
If the vehicle has had front body repair
and the headlight assembly has beenreplaced, the headlight aiming should be checked using an aiming screen as shown in the illustration. Turn on theheadlight switch. (Low Beam or High Beam Position).
1. Adjust headlights so that main axis of light is parallel to center line of the body and is aligned with point "P" shown in the illustration.
2. Dotted lines in the illustration show the center of headlights. "H" Horizontal center line of headlightsfrom ground :Low Beam : 894 mm (35.1 in.) High Beam : 839 mm (33 in.)
Page 269 of 539
6 DO-IT-YOURSELF MAINTENANCE
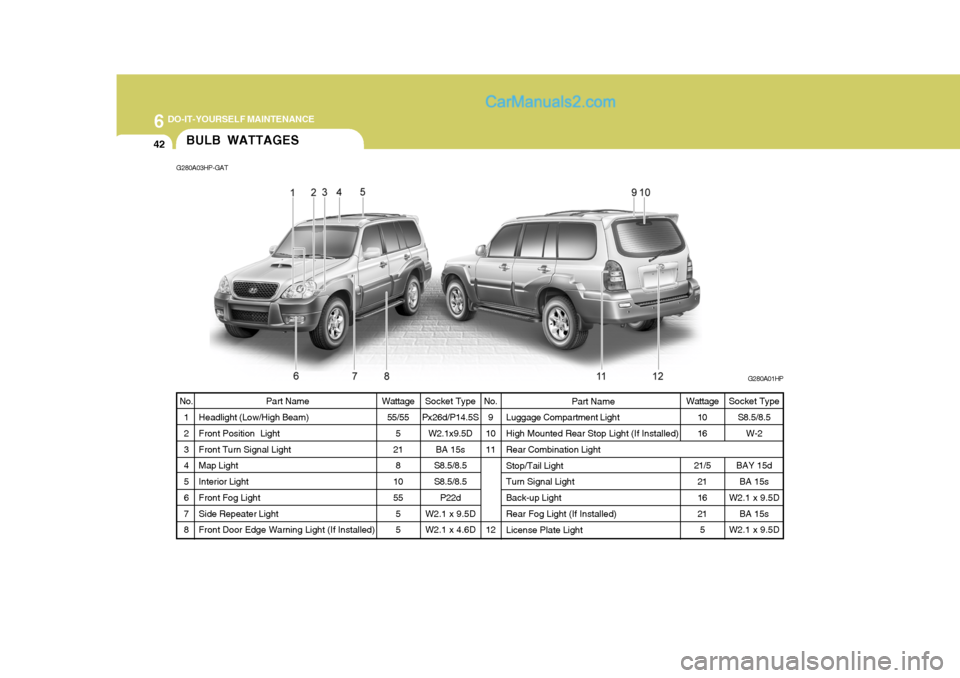
42BULB WATTAGES
Wattage55/55 5
21 8
10 55 55
Part Name
Headlight (Low/High Beam)Front Position Light Front Turn Signal Light Map Light Interior Light Front Fog Light Side Repeater Light Front Door Edge Warning Light (If Installed) Wattage
1016
21/5 2116 215
No.
9
1011 12 Part Name
Luggage Compartment Light High Mounted Rear Stop Light (If Installed) Rear Combination Light Stop/Tail Light Turn Signal Light Back-up Light Rear Fog Light (If Installed) License Plate Light
No.
1 2 3 4 5 6 7 8
G280A03HP-GAT
G280A01HP
Socket Type S8.5/8.5W-2
BAY 15d BA 15s
W2.1 x 9.5D
BA 15s
W2.1 x 9.5D
Socket Type
Px26d/P14.5S W2.1x9.5D
BA 15s
S8.5/8.5 S8.5/8.5 P22d
W2.1 x 9.5D W2.1 x 4.6D
Page 270 of 539
6
DO-IT-YOURSELF MAINTENANCE
43
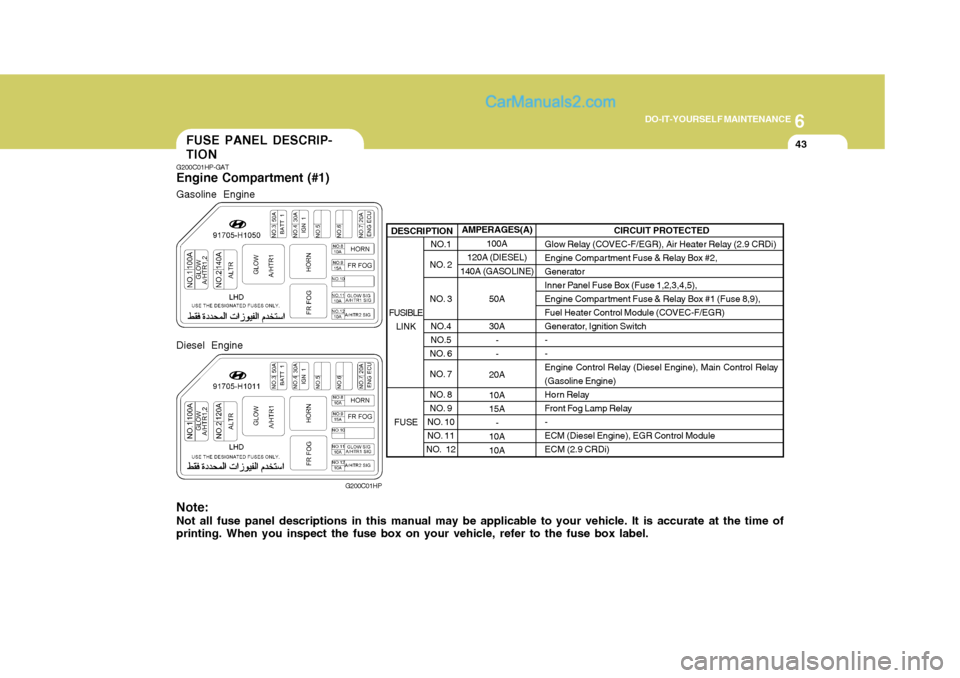
NO.1
NO. 2
NO. 3
NO.4
NO.5
NO. 6
NO. 7
NO. 8
NO. 9
NO. 10
NO. 11
NO. 12
DESCRIPTION
G200C01HP-GAT
Engine Compartment (#1)
G200C01HP
Note: Not all fuse panel descriptions in this manual may be applicable to your vehicle. It is accurate at the time of printing. When you inspect the fuse box on your vehicle, refer to the fuse box label. AMPERAGES(A)
100A
120A (DIESEL)
140A (GASOLINE)
50A 30A- -
20A 10A 15A -
10A10A CIRCUIT PROTECTED
Glow Relay (COVEC-F/EGR), Air Heater Relay (2.9 CRDi)
Engine Compartment Fuse & Relay Box #2,Generator
Inner Panel Fuse Box (Fuse 1,2,3,4,5),
Engine Compartment Fuse & Relay Box #1 (Fuse 8,9),
Fuel Heater Control Module (COVEC-F/EGR)
Generator, Ignition Switch--
Engine Control Relay (Diesel Engine), Main Control Relay(Gasoline Engine)
Horn Relay
Front Fog Lamp Relay-ECM (Diesel Engine), EGR Control ModuleECM (2.9 CRDi)
FUSIBLE LINK
FUSE
FUSE PANEL DESCRIP- TION
Gasoline Engine Diesel Engine