Hyundai Terracan 2006 Owner's Manual
Manufacturer: HYUNDAI, Model Year: 2006, Model line: Terracan, Model: Hyundai Terracan 2006Pages: 539, PDF Size: 18.11 MB
Page 501 of 539
6
OWNER MAINTENANCE
23
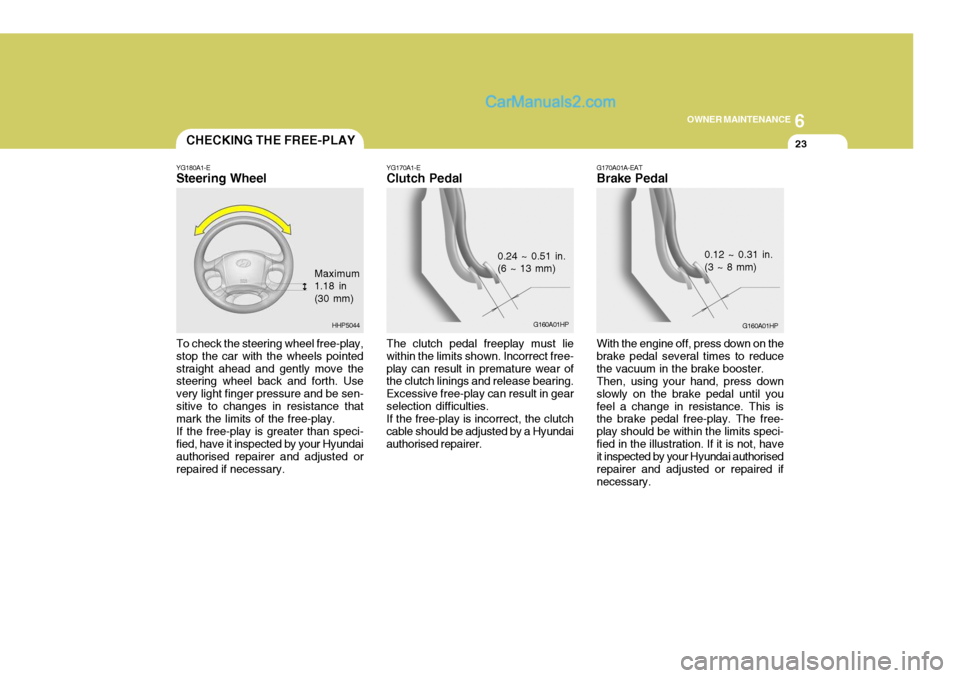
To check the steering wheel free-play, stop the car with the wheels pointedstraight ahead and gently move the steering wheel back and forth. Use very light finger pressure and be sen-sitive to changes in resistance that mark the limits of the free-play. If the free-play is greater than speci- fied, have it inspected by your Hyundai authorised repairer and adjusted or repaired if necessary. YG170A1-E
Clutch Pedal
The clutch pedal freeplay must lie
within the limits shown. Incorrect free-play can result in premature wear of the clutch linings and release bearing. Excessive free-play can result in gearselection difficulties. If the free-play is incorrect, the clutch
cable should be adjusted by a Hyundaiauthorised repairer. G170A01A-EAT Brake Pedal With the engine off, press down on the brake pedal several times to reducethe vacuum in the brake booster.Then, using your hand, press downslowly on the brake pedal until youfeel a change in resistance. This is the brake pedal free-play. The free- play should be within the limits speci-fied in the illustration. If it is not, have it inspected by your Hyundai authorised repairer and adjusted or repaired ifnecessary.CHECKING THE FREE-PLAY
YG180A1-E
Steering Wheel
Maximum 1.18 in(30 mm)
HHP5044
0.24 ~ 0.51 in. (6 ~ 13 mm)
G160A01HP0.12 ~ 0.31 in. (3 ~ 8 mm)
G160A01HP
Page 502 of 539
6 OWNER MAINTENANCE
24
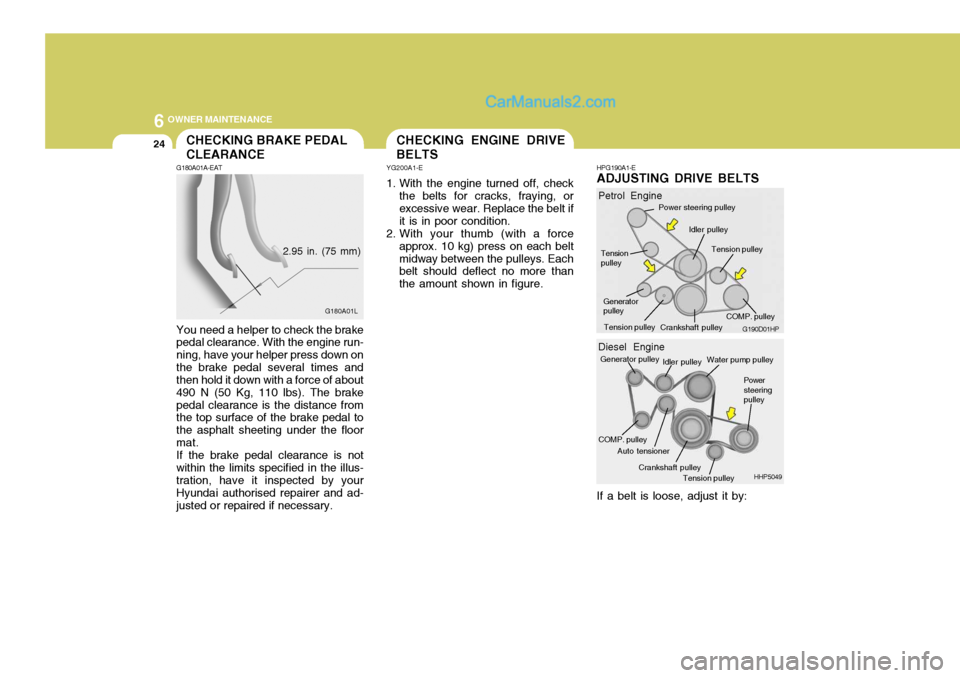
You need a helper to check the brake pedal clearance. With the engine run- ning, have your helper press down onthe brake pedal several times and then hold it down with a force of about 490 N (50 Kg, 110 lbs). The brakepedal clearance is the distance from the top surface of the brake pedal to the asphalt sheeting under the floormat.If the brake pedal clearance is notwithin the limits specified in the illus- tration, have it inspected by your Hyundai authorised repairer and ad-justed or repaired if necessary. HPG190A1-E
ADJUSTING DRIVE BELTS
If a belt is loose, adjust it by:CHECKING BRAKE PEDAL CLEARANCE
2.95 in. (75 mm) G180A01L
G190D01HP
Petrol Engine
Idler pulley
Power steering pulley
Crankshaft pulley
Generator pulley Tension pulley
Tension pulley
Tension pulley
COMP. pulley
HHP5049
Diesel Engine
Generator pulley
Tension pulley
COMP. pulley Power steeringpulley
Idler pulley
Auto tensioner Crankshaft pulley Water pump pulley
G180A01A-EAT
CHECKING ENGINE DRIVE BELTS
YG200A1-E
1. With the engine turned off, check the belts for cracks, fraying, or excessive wear. Replace the belt ifit is in poor condition.
2. With your thumb (with a force
approx. 10 kg) press on each beltmidway between the pulleys. Each belt should deflect no more than the amount shown in figure.
Page 503 of 539
6
OWNER MAINTENANCE
25
!
!
1. Loosen the adusting bolts just
enough so that the components can be moved.
2. Whilst pulling outward on the pry bar
or screwdriver, test the belt deflec-tion with your thumb.
3. After tightening the adjusting bolts, be sure to recheck the belt tension. Overtightening drive belts can cause excessive wear and failurein driven components and belts.
WARNING:
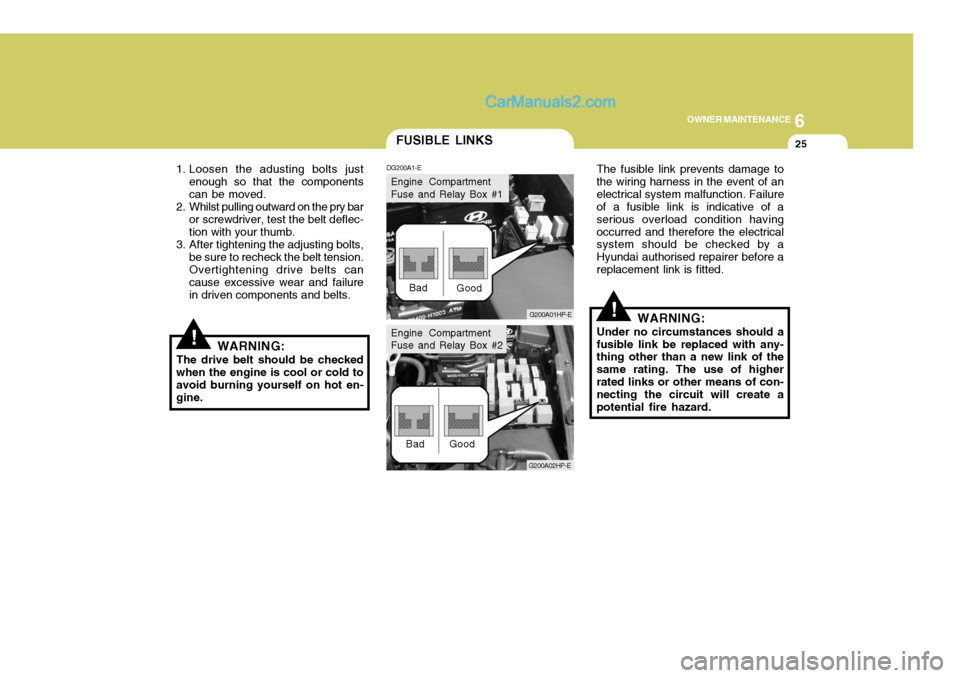
The drive belt should be checked when the engine is cool or cold to avoid burning yourself on hot en-gine. The fusible link prevents damage tothe wiring harness in the event of anelectrical system malfunction. Failure of a fusible link is indicative of a serious overload condition havingoccurred and therefore the electrical system should be checked by a Hyundai authorised repairer before areplacement link is fitted.
WARNING:
Under no circumstances should afusible link be replaced with any- thing other than a new link of the same rating. The use of higherrated links or other means of con- necting the circuit will create a potential fire hazard.
FUSIBLE LINKS
DG200A1-E
G200A01HP-E
Bad
Good
G200A02HP-E
Bad Good
Engine Compartment Fuse and Relay Box #1
Engine Compartment Fuse and Relay Box #2
Page 504 of 539
6 OWNER MAINTENANCE
26
!
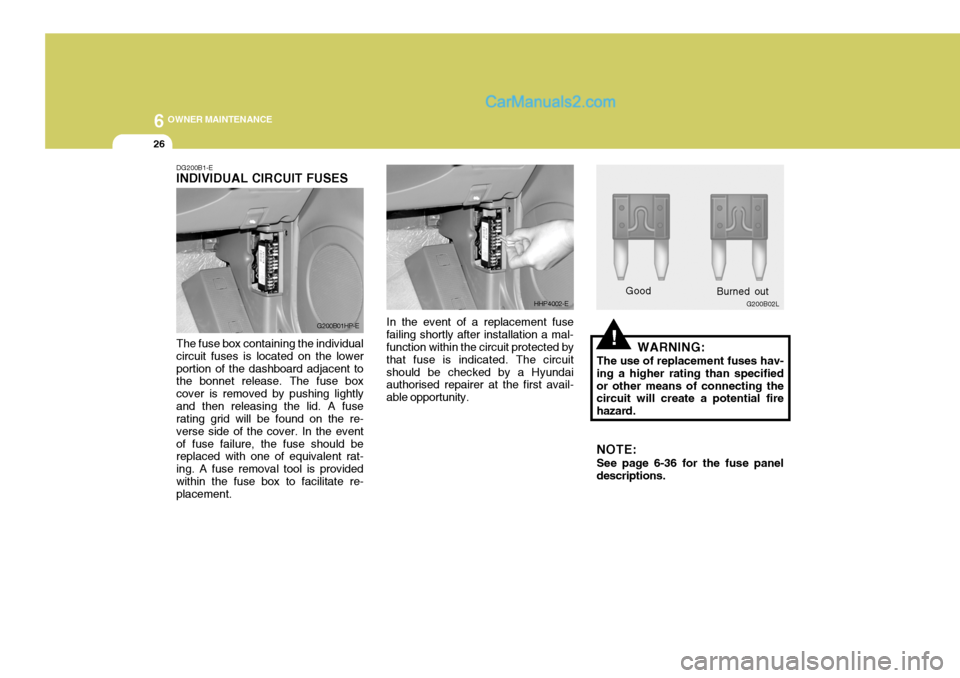
DG200B1-E INDIVIDUAL CIRCUIT FUSES The fuse box containing the individual circuit fuses is located on the lowerportion of the dashboard adjacent to the bonnet release. The fuse box cover is removed by pushing lightlyand then releasing the lid. A fuse rating grid will be found on the re- verse side of the cover. In the eventof fuse failure, the fuse should be replaced with one of equivalent rat- ing. A fuse removal tool is providedwithin the fuse box to facilitate re- placement. In the event of a replacement fuse
failing shortly after installation a mal-function within the circuit protected by that fuse is indicated. The circuitshould be checked by a Hyundai authorised repairer at the first avail- able opportunity. WARNING:
The use of replacement fuses hav-ing a higher rating than specifiedor other means of connecting the circuit will create a potential fire hazard. NOTE: See page 6-36 for the fuse panel descriptions.
G200B01HP-E
HHP4002-E
Good G200B02L
Burned out
Page 505 of 539
6
OWNER MAINTENANCE
27
!WARNING:
Motor vehicle batteries contain sulphuric acid which is corrosive and poisonous. Hydrogen gas isemitted from the battery which is explosive when combined with oxygen. The following precautionsmust be strictly observed to avoid personal injury or damage to the vehicle.
BATTERY MAINTENANCE
DG210A2-E
HHP5020-E
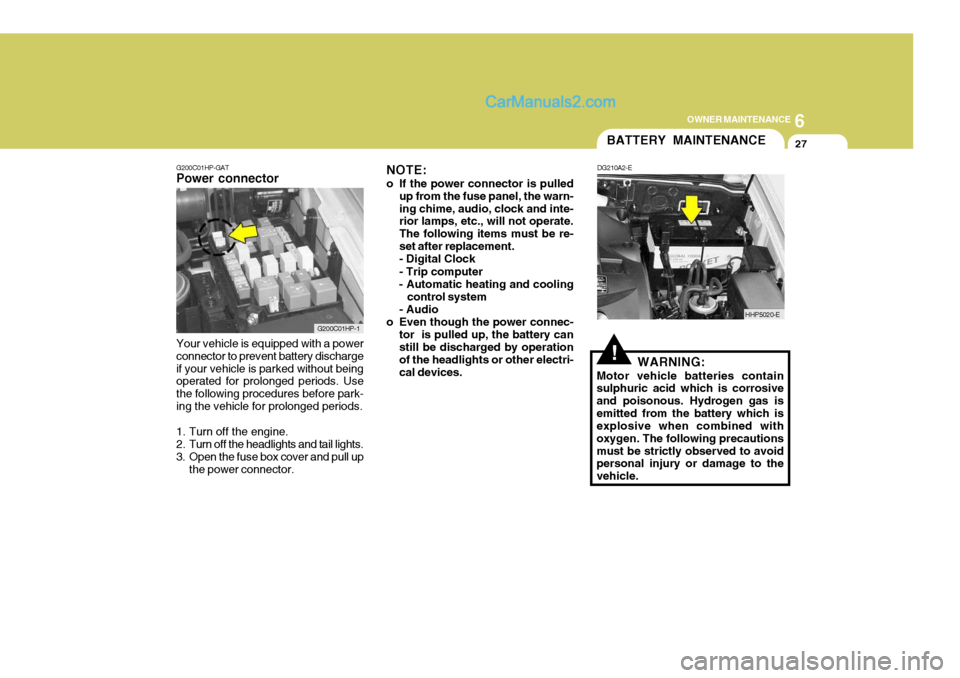
G200C01HP-GAT
Power connector NOTE:
o If the power connector is pulled up from the fuse panel, the warn- ing chime, audio, clock and inte- rior lamps, etc., will not operate. The following items must be re-set after replacement.- Digital Clock - Trip computer
- Automatic heating and cooling
control system
- Audio
o Even though the power connec- tor is pulled up, the battery can still be discharged by operation of the headlights or other electri-cal devices.
Your vehicle is equipped with a powerconnector to prevent battery dischargeif your vehicle is parked without being operated for prolonged periods. Use the following procedures before park-ing the vehicle for prolonged periods.
1. Turn off the engine.
2. Turn off the headlights and tail lights.
3. Open the fuse box cover and pull up the power connector.
G200C01HP-1
Page 506 of 539
6 OWNER MAINTENANCE
28
If electrolyte gets on your skin, thoroughly wash the contacted area. If you feel a pain or a burn- ing sensation, get medical attention immediately. Wear eye protection when charging or working near a battery. Always provide ventilation when working in an en- closed space.
o When lifting a plastic-cased bat- tery, excessive pressure on the case may cause battery acid toleak, resulting in personal injury. Lift with a battery carrier or with your hands on opposite corners.
o Never attempt to charge the bat- tery when the battery cables areconnected.
o The electrical ignition system works with high voltage.Never touch these componentswith the engine running or theignition switched on.o If battery electrolyte is spilled onto skin or into eyes, the effected area must be flushed with copious amounts of water and medical as- sistance sought.
o If battery electrolyte is ingested, copious amounts of water or milkfollowed by an antacid (raw egg ormilk of magnesia) must be drunk. Vomiting should not be induced and medical assistance must besought.
o Batteries must only be charged in well ventilated areas from which naked lights or sources of sparks are excluded.
o Ensure that children, pets or other unauthorised persons are kept awayfrom batteries.
o Do not allow anything to bridge the
positive (+) and negative (-) termi-nals of the battery.
o Never invert the battery.
The battery fitted during production isof the "Maintenance Free" type.
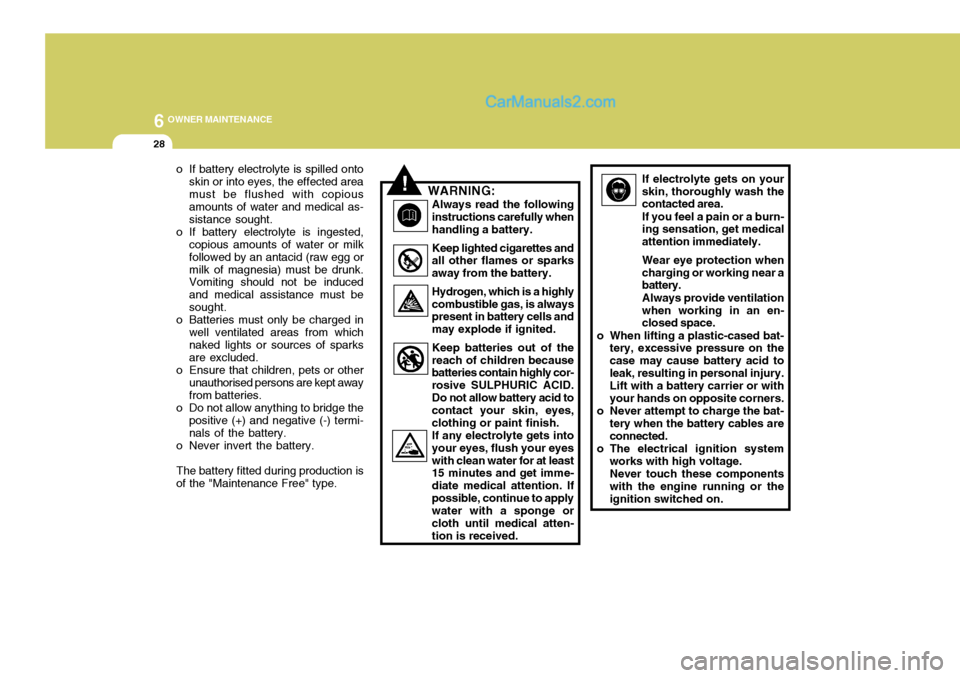
!WARNING: Always read the following instructions carefully whenhandling a battery. Keep lighted cigarettes and all other flames or sparks away from the battery. Hydrogen, which is a highly combustible gas, is always present in battery cells and may explode if ignited. Keep batteries out of the reach of children because batteries contain highly cor- rosive SULPHURIC ACID.Do not allow battery acid to contact your skin, eyes, clothing or paint finish.If any electrolyte gets intoyour eyes, flush your eyeswith clean water for at least 15 minutes and get imme- diate medical attention. Ifpossible, continue to apply water with a sponge or cloth until medical atten-tion is received.
Page 507 of 539
6
OWNER MAINTENANCE
29
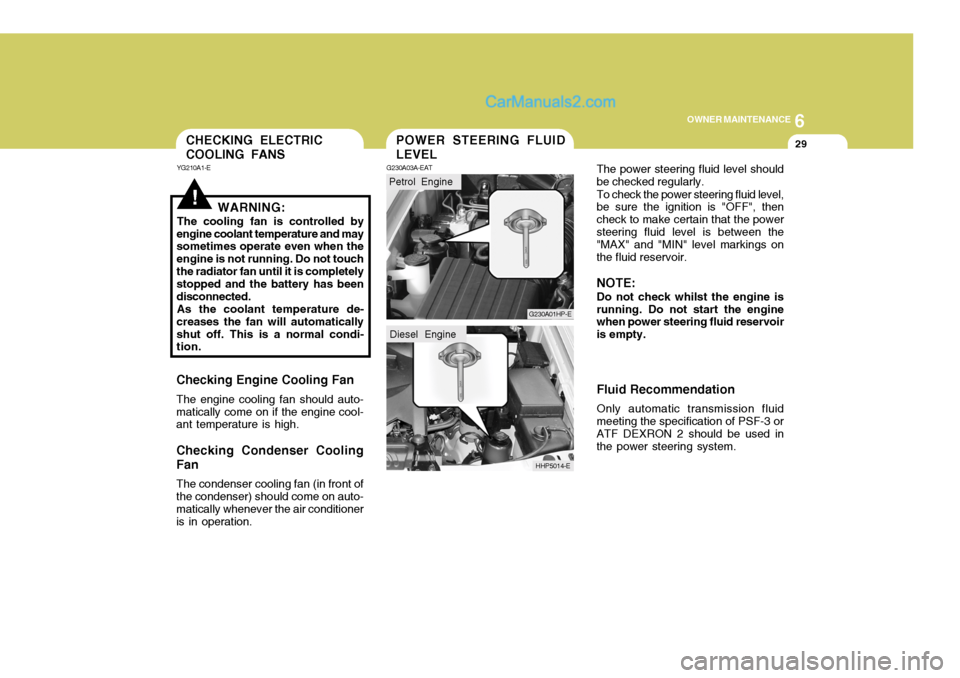
The power steering fluid level should be checked regularly. To check the power steering fluid level, be sure the ignition is "OFF", then check to make certain that the powersteering fluid level is between the "MAX" and "MIN" level markings on the fluid reservoir. NOTE: Do not check whilst the engine is running. Do not start the engine when power steering fluid reservoir is empty. Fluid Recommendation Only automatic transmission fluid meeting the specification of PSF-3 orATF DEXRON 2 should be used in the power steering system.POWER STEERING FLUID LEVEL
G230A03A-EAT
Petrol Engine
G230A01HP-E
HHP5014-E
Diesel Engine
!WARNING:
The cooling fan is controlled by
engine coolant temperature and may sometimes operate even when the engine is not running. Do not touchthe radiator fan until it is completely stopped and the battery has been disconnected. As the coolant temperature de-
creases the fan will automaticallyshut off. This is a normal condi- tion.
Checking Engine Cooling Fan The engine cooling fan should auto- matically come on if the engine cool- ant temperature is high.
Checking Condenser Cooling Fan The condenser cooling fan (in front of the condenser) should come on auto- matically whenever the air conditioner is in operation.
CHECKING ELECTRIC COOLING FANS
YG210A1-E
Page 508 of 539
6 OWNER MAINTENANCE
30
!
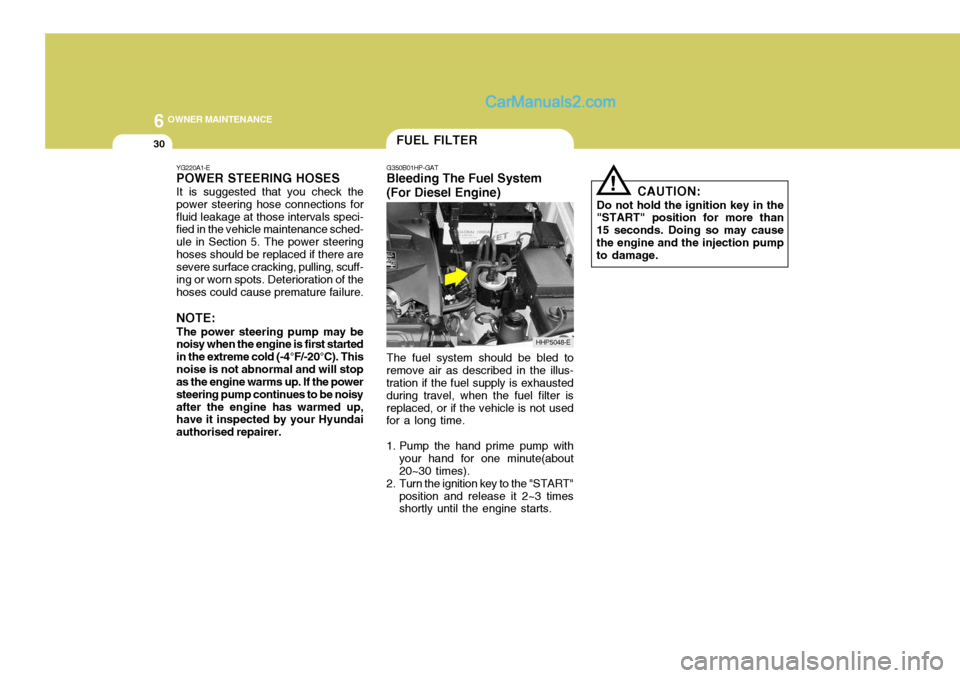
The fuel system should be bled to
remove air as described in the illus- tration if the fuel supply is exhausted during travel, when the fuel filter isreplaced, or if the vehicle is not used for a long time.
1. Pump the hand prime pump with your hand for one minute(about 20~30 times).
2. Turn the ignition key to the "START" position and release it 2~3 times shortly until the engine starts. CAUTION:
Do not hold the ignition key in the"START" position for more than 15 seconds. Doing so may causethe engine and the injection pump to damage.
FUEL FILTER
G350B01HP-GAT
Bleeding The Fuel System (For Diesel Engine)
HHP5048-E
YG220A1-E POWER STEERING HOSES It is suggested that you check the power steering hose connections forfluid leakage at those intervals speci- fied in the vehicle maintenance sched- ule in Section 5. The power steeringhoses should be replaced if there are severe surface cracking, pulling, scuff- ing or worn spots. Deterioration of thehoses could cause premature failure. NOTE: The power steering pump may be noisy when the engine is first started in the extreme cold (-4°F/-20°C). Thisnoise is not abnormal and will stop as the engine warms up. If the power steering pump continues to be noisyafter the engine has warmed up, have it inspected by your Hyundai authorised repairer.
Page 509 of 539
6
OWNER MAINTENANCE
31
!
!
3. Check to be sure that the warning
lamp illuminates when the ignition key is turned to "ON", and that it goes off when the engine is started. If in doubt, consult your nearest Hyundai authorised repairer.
NOTE: It is recommended that water accu- mulated in the fuel filter should be removed by a Hyundai authorised repairer.
WARNING:
Be sure to carefully wipe away anywater drained out in this manner, because the fuel mixed in the water might be ignited and resultin a fire. Before attempting to replace a head-
light bulb, be sure the switch is turned to the "OFF" position.
The next paragraph shows how to
reach the headlight bulbs so they may be changed. Be sure to replacethe burned-out bulb with one of the same number and wattage rating.
Ensure that the replacement bulb has
the same cap configuration and watt-age as the original.
See page 6-35 for the wattage descrip-
tions.
CAUTION:
Keep the lamps out of contact with
petroleum products, such as oil, petrol, etc.
REPLACING HEADLIGHT BULBS
G260A01HP-EAT
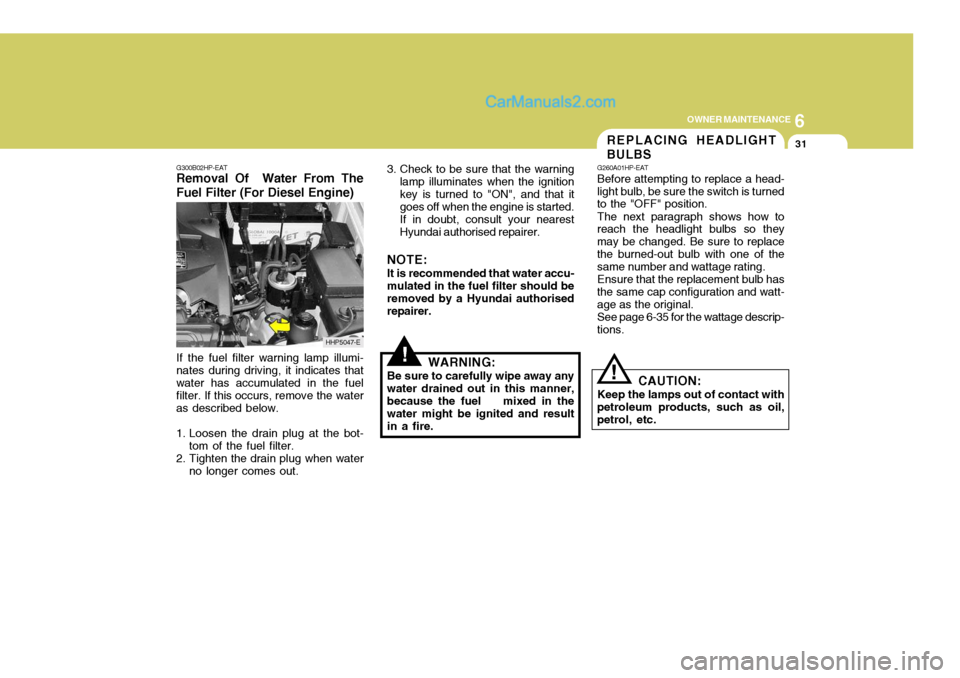
G300B02HP-EAT
Removal Of Water From TheFuel Filter (For Diesel Engine)
If the fuel filter warning lamp illumi- nates during driving, it indicates that water has accumulated in the fuel filter. If this occurs, remove the wateras described below.
1. Loosen the drain plug at the bot- tom of the fuel filter.
2. Tighten the drain plug when water no longer comes out.
HHP5047-E
Page 510 of 539
6 OWNER MAINTENANCE
32
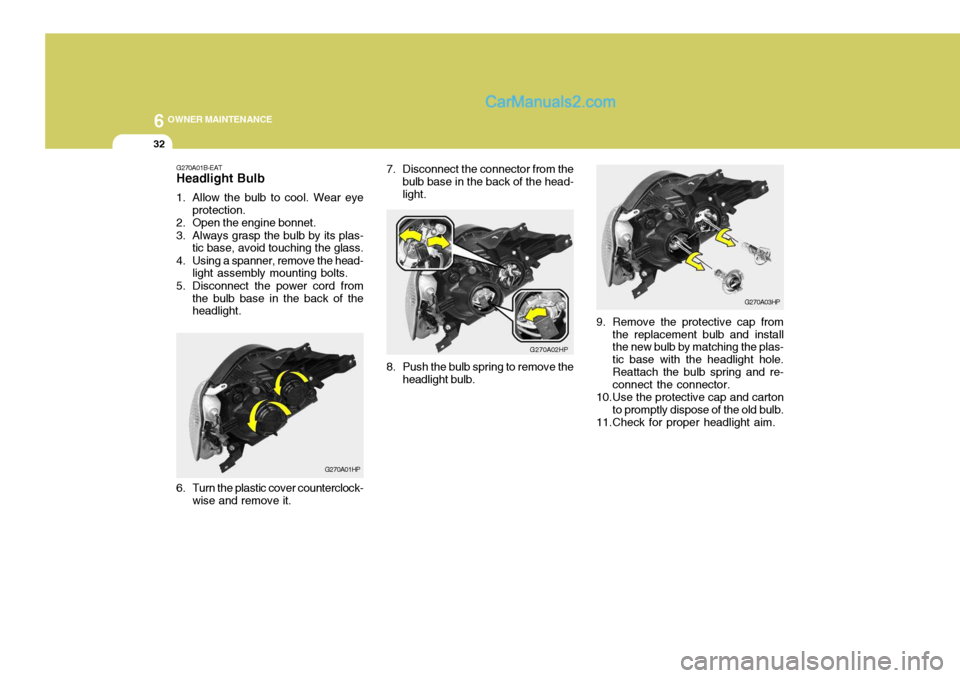
7. Disconnect the connector from the
bulb base in the back of the head- light.
G270A02HP
8. Push the bulb spring to remove the headlight bulb.
G270A03HP
9. Remove the protective cap from the replacement bulb and install the new bulb by matching the plas- tic base with the headlight hole.Reattach the bulb spring and re- connect the connector.
10.Use the protective cap and carton to promptly dispose of the old bulb.
11.Check for proper headlight aim.
G270A01B-EAT
Headlight Bulb
1. Allow the bulb to cool. Wear eye
protection.
2. Open the engine bonnet.
3. Always grasp the bulb by its plas- tic base, avoid touching the glass.
4. Using a spanner, remove the head- light assembly mounting bolts.
5. Disconnect the power cord from the bulb base in the back of the headlight.
G270A01HP
6. Turn the plastic cover counterclock- wise and remove it.