check oil HYUNDAI TUCSON 2009 User Guide
[x] Cancel search | Manufacturer: HYUNDAI, Model Year: 2009, Model line: TUCSON, Model: HYUNDAI TUCSON 2009Pages: 273, PDF Size: 10.29 MB
Page 205 of 273
6
Engine Compartment .................................................... 6-2
General Checks ............................................................ 6-4
Checking the Engine Oil ............................................... 6-5
Changing the Oil and Filter ............................................ 6-6
Checking and Changing the Engine Coolant ................ 6-8
Changing the Air Cleaner Filter ...................................6-10
Checking the Transaxle Oil (Manual) .........................6-11
Checking the Transaxle Fluid (Automatic)..................6-12
Checking the Brakes ..................................................6-14
Checking the Clutch Fluid...........................................6-15
Air Conditioning Care..................................................6-16
Changing the Climate Control Air Filter .......................6-17
Checking the Free-play...............................................6-19
Checking Drive Belts ..................................................6-20
Checking and Replacing Fuses..................................6-21
Checking the Battery..................................................6-23
Power Steering Fluid Level .........................................6-25
Replacement of Light Bulbs ........................................6-27
Bulb Wattage ...............................................................6-34
Fuse Panel Description...............................................6-35
6
DO-IT-YOURSELF MAINTENANCE
Page 208 of 273
6
DO-IT-YOURSELF MAINTENANCE
4
GENERAL CHECKS
G020C01A-AATVehicle InteriorThe following should be checked each
time when the vehicle is driven:
o Lights operation
o Windshield wiper operation
o Horn operation
o Defroster, heating system operation
(and air conditioning, if installed)
o Steering operation and condition
o Mirror condition and operation
o Turn signal operation
o Accelerator pedal operation
o Brake operation, including parking
brake
o Manual transaxle operation, including
clutch operation
o Automatic transaxle operation, includ-
ing "Park" mechanism operation
o Seat control condition and operation
o Seat belt condition and operation
o Sunvisor operation
If you notice anything that does not operate
correctly or appears to be functioning cor-
rectly, inspect it carefully and seek assis-
tance from your Hyundai dealer if service
is needed.
G020B01A-AATVehicle ExteriorThe following should be checked monthly:
o Overall appearance and condition
o Wheel condition and wheel nut torque
o Exhaust system condition
o Light condition and operation
o Windshield glass condition
o Wiper blade condition
o Paint condition and body corrosion
o Fluid leaks
o Door and hood lock condition
o Tire pressure and condition
(including spare tire)
G020A01A-AATEngine CompartmentThe following should be checked regu-
larly:
o Engine oil level and condition
o Transaxle fluid level and condition
o Brake fluid level
o Clutch fluid level
o Engine coolant level
o Windshield washer fluid level
o Accessory drive belt condition
o Engine coolant hose condition
o Fluid leaks (on or below components)
o Power steering fluid level
o Battery condition
o Air filter condition
Page 209 of 273
6
DO-IT-YOURSELF MAINTENANCE
5
CHECKING THE ENGINE OILG030A01A-AATEngine oil is essential to the performance
and service of the engine. It is suggested
that you check the oil level at least once a
week in normal use and more often if you
are on a trip or driving in severe conditions.
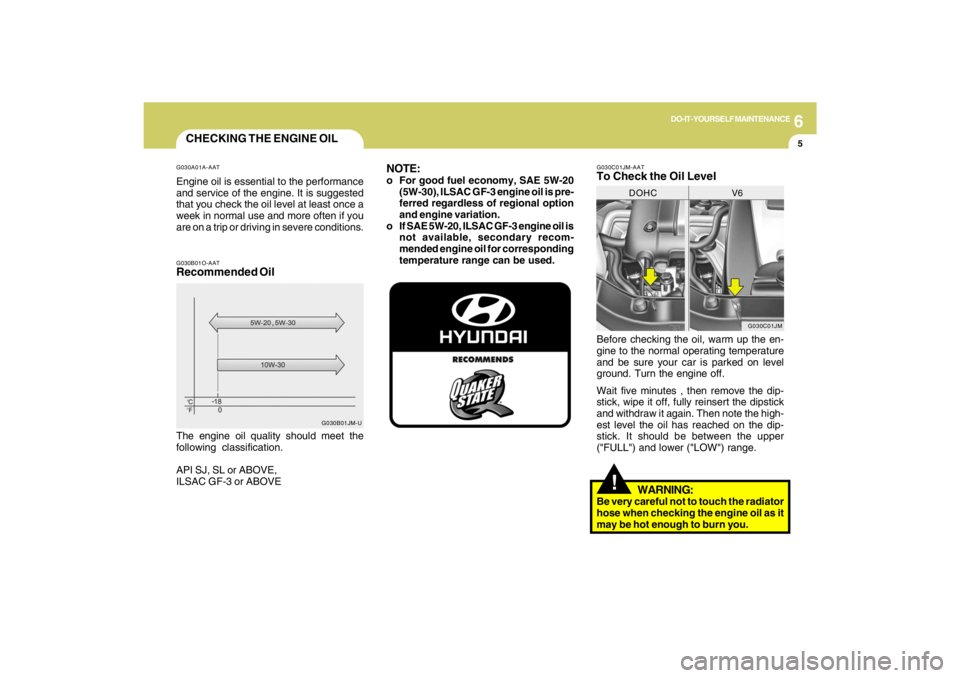
G030C01JM-AATTo Check the Oil LevelBefore checking the oil, warm up the en-
gine to the normal operating temperature
and be sure your car is parked on level
ground. Turn the engine off.
Wait five minutes , then remove the dip-
stick, wipe it off, fully reinsert the dipstick
and withdraw it again. Then note the high-
est level the oil has reached on the dip-
stick. It should be between the upper
("FULL") and lower ("LOW") range.
G030C01JM
DOHC V6
!
WARNING:
Be very careful not to touch the radiator
hose when checking the engine oil as it
may be hot enough to burn you.
G030B01O-AATRecommended OilThe engine oil quality should meet the
following classification.
API SJ, SL or ABOVE,
ILSAC GF-3 or ABOVE
G030B01JM-U
NOTE:o For good fuel economy, SAE 5W-20
(5W-30), ILSAC GF-3 engine oil is pre-
ferred regardless of regional option
and engine variation.
o If SAE 5W-20, ILSAC GF-3 engine oil is
not available, secondary recom-
mended engine oil for corresponding
temperature range can be used.
Page 210 of 273
6
DO-IT-YOURSELF MAINTENANCE
6
WARNING:
Be very careful not to touch the radiator
hose when adding the engine oil as it may
be hot enough to burn you.
!
CHANGING THE OIL AND FIL-
TER
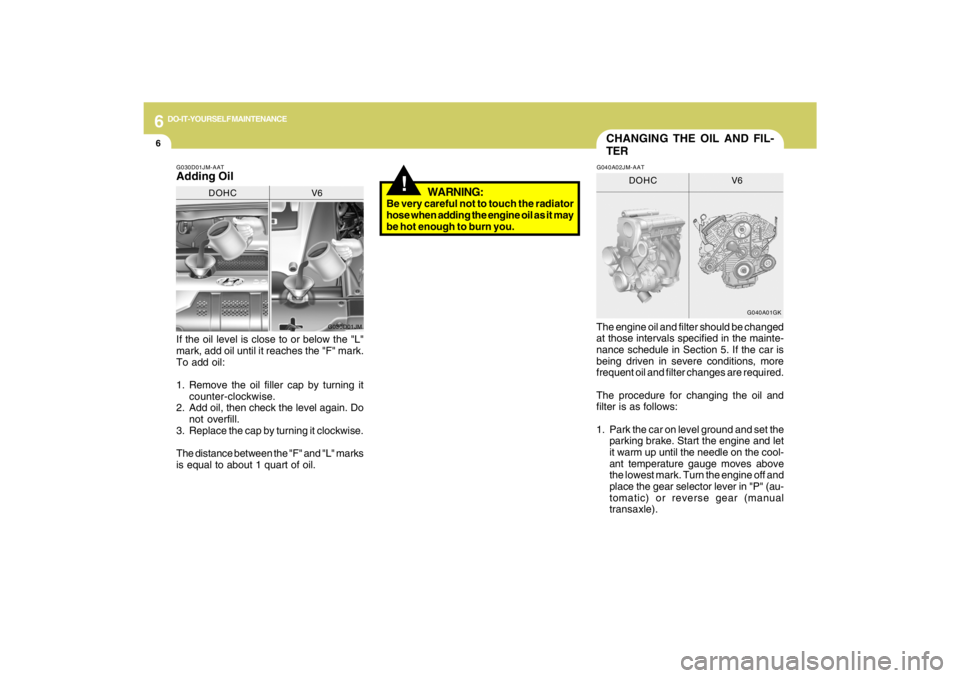
If the oil level is close to or below the "L"
mark, add oil until it reaches the "F" mark.
To add oil:
1. Remove the oil filler cap by turning it
counter-clockwise.
2. Add oil, then check the level again. Do
not overfill.
3. Replace the cap by turning it clockwise.
The distance between the "F" and "L" marks
is equal to about 1 quart of oil.The engine oil and filter should be changed
at those intervals specified in the mainte-
nance schedule in Section 5. If the car is
being driven in severe conditions, more
frequent oil and filter changes are required.
The procedure for changing the oil and
filter is as follows:
1. Park the car on level ground and set the
parking brake. Start the engine and let
it warm up until the needle on the cool-
ant temperature gauge moves above
the lowest mark. Turn the engine off and
place the gear selector lever in "P" (au-
tomatic) or reverse gear (manual
transaxle).G030D01JM-AATAdding Oil
G030D01JM
DOHC V6
G040A01GK
DOHC V6
G040A02JM-AAT
Page 211 of 273
6
DO-IT-YOURSELF MAINTENANCE
7
6. Install a new oil filter in accordance with
the instructions on the carton or on the
filter itself. Do not over-tighten. (Tight-
ening torque : 1.2 ~ 1.6 kgf.m) Be sure
that the mounting surface on the engine
is clean and that the old gasket is re-
moved completely. Lubricate the new
gasket on the filter with clean engine oil
before installation.
7. Remove the engine oil level dipstick.
8. Refill the crankcase with the recom-
mended engine oil. Refer to the speci-
fication in chapter 9 for engine oil ca-
pacity.
!
PROPOSITION 65 WARNING:
This product contains a chemical known
to the State of California to cause can-
cer. Used engine oil may cause irritation
or cancer of the skin if left in contact with
the skin for prolonged periods of time.
Used engine oil contains chemicals that
have caused cancer in laboratory ani-
mals. Always protect your skin by wash-
ing your hands thoroughly with soap and
warm water as soon as possible after
handling used oil.
!
WARNING:
Be very careful when draining the en-
gine oil as it may be hot enough to burn
you! 2. Open the hood and remove the engine
oil filler cap.
3. Slide underneath the car and loosen
the drain plug by turning it counter-
clockwise with a wrench of the proper
size. Be sure that a drain pan is in
position to catch the oil as it drains out,
then remove the drain plug.
4. When the oil has stopped draining, re-
place the drain plug using a new washer
and retighten by turning it clockwise.
Oil pan drain plug tightening torque:
3.5 ~ 4.5 kgf.m (2.7L)
4.0 ~ 4.5 kgf.m (2.0L)
5. Remove the oil filter by turning it coun-
terclockwise with a oil filter wrench of
the proper size. A certain amount of oil
will come out when you remove the
filter. So be sure to have your drain pan
in place underneath it.
CAUTION:
Slowly pour the recommended oil using
by a funnel. Do not overfill! Engine dam-
age may occur if overfilled.
!
9. Start the engine and check to be sure no
oil is leaking from the drain plug or oil
filter.
10. Shut off the engine and recheck the oil
level.
NOTE:Always dispose of used engine oil in an
environmentally acceptable manner. It
is suggested that it be placed in a sealed
container and taken to a service station
for reclamation. Do not pour the oil on the
ground or put it in with the household
trash.
Page 215 of 273
6
DO-IT-YOURSELF MAINTENANCE
11
G090A01JM
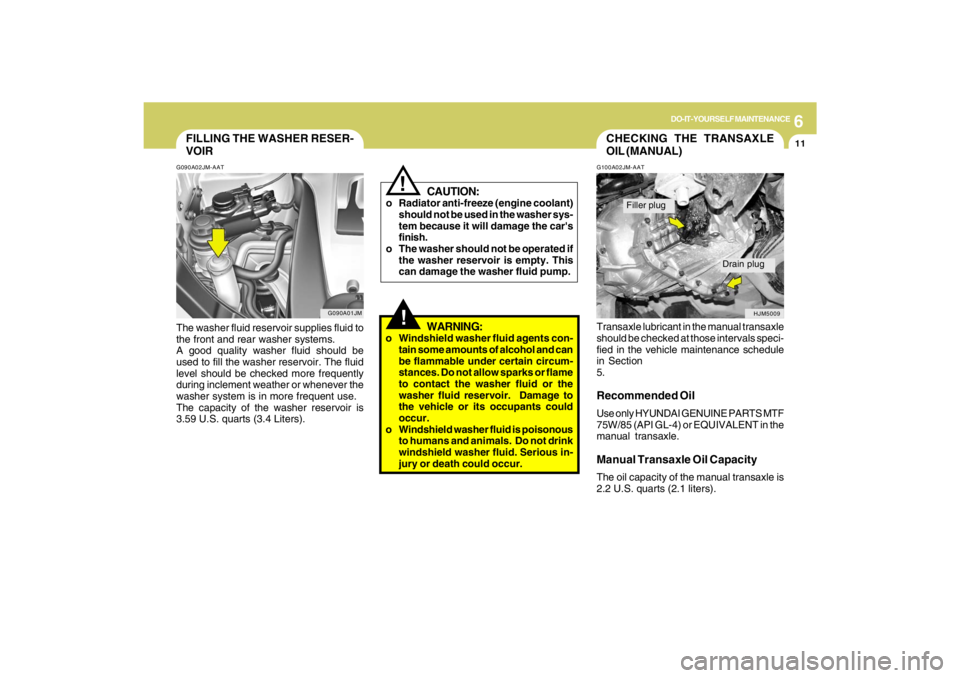
FILLING THE WASHER RESER-
VOIRG090A02JM-AATThe washer fluid reservoir supplies fluid to
the front and rear washer systems.
A good quality washer fluid should be
used to fill the washer reservoir. The fluid
level should be checked more frequently
during inclement weather or whenever the
washer system is in more frequent use.
The capacity of the washer reservoir is
3.59 U.S. quarts (3.4 Liters).
CAUTION:
o Radiator anti-freeze (engine coolant)
should not be used in the washer sys-
tem because it will damage the car's
finish.
o The washer should not be operated if
the washer reservoir is empty. This
can damage the washer fluid pump.
!!
WARNING:
o Windshield washer fluid agents con-
tain some amounts of alcohol and can
be flammable under certain circum-
stances. Do not allow sparks or flame
to contact the washer fluid or the
washer fluid reservoir. Damage to
the vehicle or its occupants could
occur.
o Windshield washer fluid is poisonous
to humans and animals. Do not drink
windshield washer fluid. Serious in-
jury or death could occur.
CHECKING THE TRANSAXLE
OIL (MANUAL)G100A02JM-AATTransaxle lubricant in the manual transaxle
should be checked at those intervals speci-
fied in the vehicle maintenance schedule
in Section
5.Recommended OilUse only HYUNDAI GENUINE PARTS MTF
75W/85 (API GL-4) or EQUIVALENT in the
manual transaxle.Manual Transaxle Oil CapacityThe oil capacity of the manual transaxle is
2.2 U.S. quarts (2.1 liters).
HJM5009
Filler plug
Drain plug
Page 216 of 273
6
DO-IT-YOURSELF MAINTENANCE
12
CHECKING THE TRANSAXLE
FLUID (AUTOMATIC)G110A01E-AATTransaxle fluid in the automatic transaxle
should be checked at those intervals speci-
fied in the vehicle maintenance schedule
in Section 5.NOTE:Automatic transaxle fluid is basically
red color. As driving distance increases,
the fluid color turns darkish red gradu-
ally. It is a normal condition and you
should not judge the need to replace
based upon the changing color.
You must replace the automatic
transaxle fluid in accordance with inter-
vals specified in the vehicle maintenance
schedule in section 5.
!
G110B05A-AATRecommended Fluid
Your Hyundai automatic transaxle is spe-
cially designed to operate with HYUNDAI
GENUINE ATF SP III, DIAMOND ATF SP III,
SK ATF SP III or other brands meeting the
SP III specification approved by Hyundai
Motor Co.. Damage caused by a
nonspecified fluid is not covered by your
new vehicle limited warranty.
CAUTION:
Use of aftermarket ATF additives may
cause damage to the automatic
transaxle.
Only use HYUNDAI GENUINE ATF SP III,
DIAMOND ATF SP III, SK ATF SP III or
other brands meeting the SP III specifi-
cation approved by Hyundai Motor Co..
If you are having your vehicle serviced
at a facility other than a Hyundai dealer,
verify that the correct ATF is used for
your vehicle.
!
WARNING:
It is always better to check the transaxle
oil level when the engine is cool or cold.
If the engine is hot, you should exercise
great caution to avoid burning yourself
on hot engine or exhaust parts.NOTE:It is recommended that the manual
transaxle fluid should be checked by an
authorized Hyundai dealer.
Page 227 of 273
6
DO-IT-YOURSELF MAINTENANCE
23
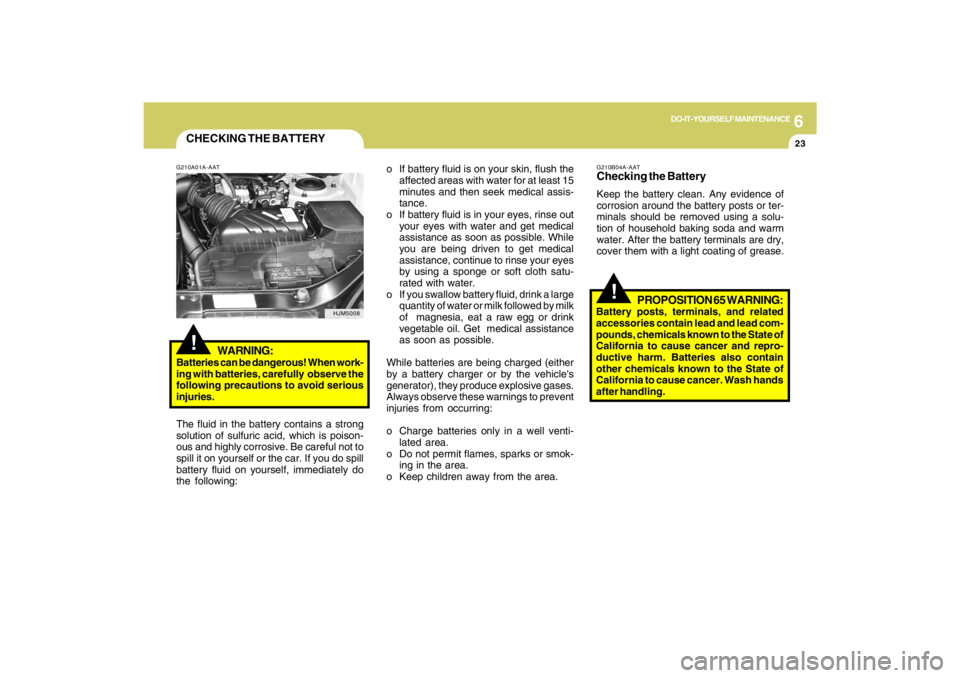
CHECKING THE BATTERY!
G210A01A-AAT
WARNING:
Batteries can be dangerous! When work-
ing with batteries, carefully observe the
following precautions to avoid serious
injuries.
The fluid in the battery contains a strong
solution of sulfuric acid, which is poison-
ous and highly corrosive. Be careful not to
spill it on yourself or the car. If you do spill
battery fluid on yourself, immediately do
the following:
HJM5008
!
G210B04A-AATChecking the BatteryKeep the battery clean. Any evidence of
corrosion around the battery posts or ter-
minals should be removed using a solu-
tion of household baking soda and warm
water. After the battery terminals are dry,
cover them with a light coating of grease. o If battery fluid is on your skin, flush the
affected areas with water for at least 15
minutes and then seek medical assis-
tance.
o If battery fluid is in your eyes, rinse out
your eyes with water and get medical
assistance as soon as possible. While
you are being driven to get medical
assistance, continue to rinse your eyes
by using a sponge or soft cloth satu-
rated with water.
o If you swallow battery fluid, drink a large
quantity of water or milk followed by milk
of magnesia, eat a raw egg or drink
vegetable oil. Get medical assistance
as soon as possible.
While batteries are being charged (either
by a battery charger or by the vehicle's
generator), they produce explosive gases.
Always observe these warnings to prevent
injuries from occurring:
o Charge batteries only in a well venti-
lated area.
o Do not permit flames, sparks or smok-
ing in the area.
o Keep children away from the area.
PROPOSITION 65 WARNING:
Battery posts, terminals, and related
accessories contain lead and lead com-
pounds, chemicals known to the State of
California to cause cancer and repro-
ductive harm. Batteries also contain
other chemicals known to the State of
California to cause cancer. Wash hands
after handling.
Page 229 of 273
6
DO-IT-YOURSELF MAINTENANCE
25
POWER STEERING FLUID
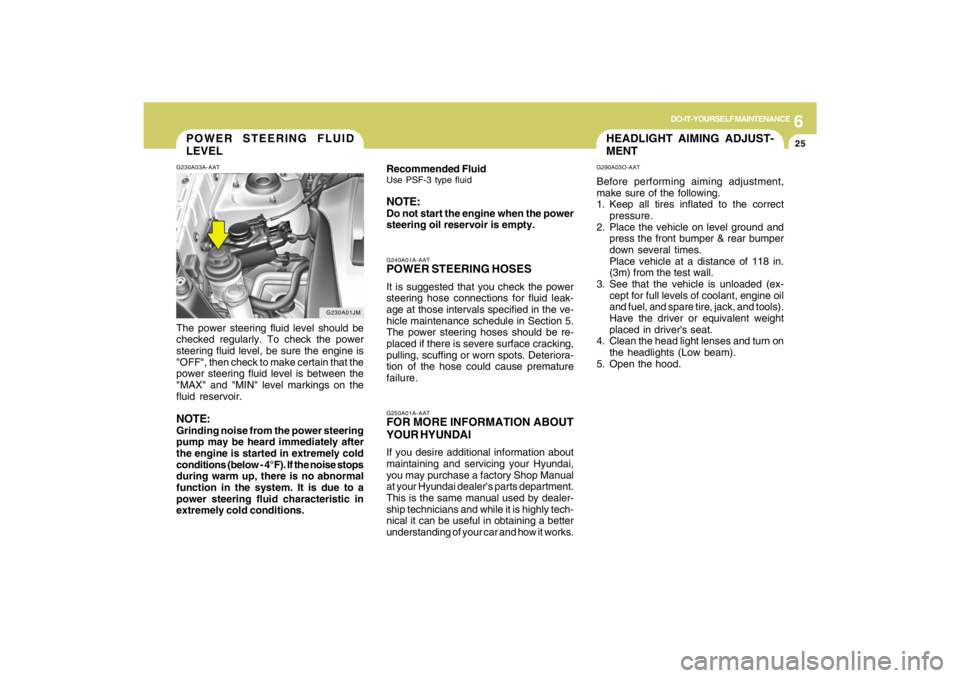
LEVELG230A03A-AATThe power steering fluid level should be
checked regularly. To check the power
steering fluid level, be sure the engine is
"OFF", then check to make certain that the
power steering fluid level is between the
"MAX" and "MIN" level markings on the
fluid reservoir.NOTE:Grinding noise from the power steering
pump may be heard immediately after
the engine is started in extremely cold
conditions (below - 4°F). If the noise stops
during warm up, there is no abnormal
function in the system. It is due to a
power steering fluid characteristic in
extremely cold conditions.
G230A01JM
HEADLIGHT AIMING ADJUST-
MENTG290A03O-AATBefore performing aiming adjustment,
make sure of the following.
1. Keep all tires inflated to the correct
pressure.
2. Place the vehicle on level ground and
press the front bumper & rear bumper
down several times.
Place vehicle at a distance of 118 in.
(3m) from the test wall.
3. See that the vehicle is unloaded (ex-
cept for full levels of coolant, engine oil
and fuel, and spare tire, jack, and tools).
Have the driver or equivalent weight
placed in driver's seat.
4. Clean the head light lenses and turn on
the headlights (Low beam).
5. Open the hood.
G250A01A-AATFOR MORE INFORMATION ABOUT
YOUR HYUNDAIIf you desire additional information about
maintaining and servicing your Hyundai,
you may purchase a factory Shop Manual
at your Hyundai dealer's parts department.
This is the same manual used by dealer-
ship technicians and while it is highly tech-
nical it can be useful in obtaining a better
understanding of your car and how it works.G240A01A-AATPOWER STEERING HOSESIt is suggested that you check the power
steering hose connections for fluid leak-
age at those intervals specified in the ve-
hicle maintenance schedule in Section 5.
The power steering hoses should be re-
placed if there is severe surface cracking,
pulling, scuffing or worn spots. Deteriora-
tion of the hose could cause premature
failure. Recommended FluidUse PSF-3 type fluidNOTE:Do not start the engine when the power
steering oil reservoir is empty.
Page 231 of 273
6
DO-IT-YOURSELF MAINTENANCE
27
SPECIFICATION:
"H";
Horizontal center line of headlights from
ground: 35.6 in.(904 mm)
"W";
Distance between each headlight cen-
ter:
53.4 in.(1,356 mm)
"L";
Distance between the headlights and
the wall that the lights are tested against:
118 in. (3,000 mm).
REPLACEMENT OF LIGHT
BULBS!
G260A02A-AATBefore attempting to replace a light bulb,
be sure the switch is turned to the "OFF"
position.
The next paragraph shows how to reach
the light bulbs so they may be changed. Be
sure to replace the burned-out bulb with
one of the same number and wattage
rating.
See page 6-34 for the wattage description.
CAUTION:
o Keep the lamps out of contact with
petroleum products, such as oil, gaso-
line, etc.
o After heavy, driving rain or washing,
headlight and taillight lenses could
appear frosty. This condition is
caused by the temperature difference
between the lamp inside and outside.
This is similar to the condensation on
your windows inside your vehicle
during the rain and doesn’t indicate a
problem with your vehicle. If the water
leaks into the lamp bulb circuitry, have
the vehicle checked by an Authorized
Hyundai Dealer.
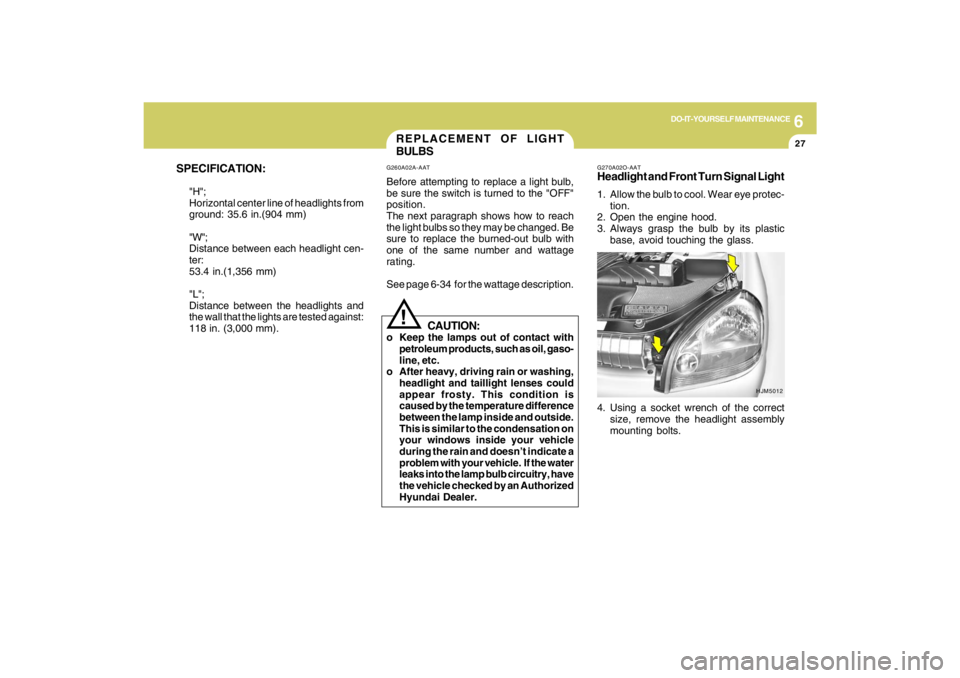
G270A02O-AATHeadlight and Front Turn Signal Light1. Allow the bulb to cool. Wear eye protec-
tion.
2. Open the engine hood.
3. Always grasp the bulb by its plastic
base, avoid touching the glass.
4. Using a socket wrench of the correct
size, remove the headlight assembly
mounting bolts.
HJM5012