clock Hyundai Tucson 2019 Owner's Manual - RHD (UK, Australia)
[x] Cancel search | Manufacturer: HYUNDAI, Model Year: 2019, Model line: Tucson, Model: Hyundai Tucson 2019Pages: 685, PDF Size: 17.76 MB
Page 25 of 685
2-5
Safety system of your vehicle
2
Safety precautions
Adjusting the seats so that you are
sitting in a safe, comfortable position
plays an important role in driver and
passenger safety together with the
seat belts and air bags in an acci-
dent.
Air bags
You can take steps to reduce the risk
of being injured by an inflating air
bag. Sitting too close to an air bag
greatly increases the risk of injury in
the event the air bag inflates. Move
your seat as far back as possible
from front air bags, whilst still main-
taining control of the vehicle.To reduce the risk of serious
injury or death from an inflating
air bag, take the following pre-
cautions:
• Adjust the driver’s seat as far
to the rear as possible main-
taining the ability to control of
the vehicle.
• Adjust the front passenger
seat as far to the rear as pos-
sible.
(Continued)
WARNING
(Continued)
•Hold the steering wheel by the
rim with hands at the 9 o’clock
and 3 o’clock positions to
minimise the risk of injuries to
your hands and arms.
• NEVER place anything or any-
one between the air bag.
• Do not allow the front passen-
ger to place feet or legs on the
dashboard to minimise the
risk of leg injuries.
Do not use a cushion that
reduces friction between the
seat and the passenger. The
passenger's hips may slide
under the lap portion of the seat
belt during an accident or a
sudden stop.
Serious or fatal internal injuries
could result because the seat
belt cannot operate properly.
WARNING
TLe UK 2.qxp 6/12/2018 2:03 PM Page 5
Page 75 of 685
2-55
Safety system of your vehicle
2
The side air bags are designed to
deploy during certain side impact col-
lisions, depending on the crash
severity, angle, speed and point of
impact.
The side air bags on both sides of the
vehicle are designed to deploy when a
rollover is detected by a rollover sen-
sor. (if equipped with rollover sensor)
The side air bags are not designed to
deploy in all side impact or rollover
situations.(Continued)
•
Do not place any objects
between the door and the
seat. They may become dan-
gerous projectiles if the side
air bag inflates.
• Do not install any accessories
on the side or near the side air
bags.
• Do not put any objects
between the side air bag label
and seat cushion. It could
cause harm if the vehicle is in
a crash severe enough to
cause the air bags to deploy.
• Do not cause impact to the
doors when the ignition
switch is in the ON position or
this may cause the side air
bags to inflate.
• If the seat or seat cover is
damaged, we recommend that
the system be serviced by a
HYUNDAI authorised repairer.(Continued)
•Do not allow passengers to
lean their heads or bodies
onto doors, put their arms on
the doors, stretch their arms
out of the window, or place
objects between the doors
and seats.
• Hold the steering wheel at the
9 o’clock and 3 o’clock posi-
tions, to minimise the risk of
injuries to your hands and
arms.
• Do not use any accessory
seat covers. This could reduce
or prevent the effectiveness
of the system.
• Do not place any objects over
the air bag or between the air
bag and yourself. Also, do not
attach any objects around the
area the air bag inflates such
as the door, side door glass,
front and rear pillar.
(Continued)
To reduce the risk of serious
injury or death from an inflating
side air bag, take the following
precautions:
•Seat belts must be worn at all
times to help keep occupants
positioned properly.
(Continued)
WARNING
TLe UK 2.qxp 6/12/2018 2:08 PM Page 55
Page 95 of 685
Convenient features of your vehicle
3
Storage compartment ........................................3-168
Centre console storage ...............................................3-168
Sliding armrest ...............................................................3-168
Glove box ........................................................................\
3-169
Cool box........................................................................\
...3-169
Sunglass holder .............................................................3-169
Interior features.................................................3-171
Ashtray ........................................................................\
....3-171
Cup holder.......................................................................3\
-171
Sunvisor ........................................................................\
...3-172
Power outlet ...................................................................3-173\
USB charger ...................................................................3-174\
Wireless mobile phone charging system ................3-175
Cigarette lighter ............................................................3-177
Clock ........................................................................\
.........3-177
Clothes hanger ..............................................................3-178
Floor mat anchor(s)......................................................3-178
Luggage net (holder) ...................................................3-179
Cargo security screen..................................................3-180
Luggage tray ..................................................................3-182
Exterior features ...............................................3-183
Roof rack ........................................................................\
3-183
3
TLe UK 3a(~109).qxp 6/12/2018 2:20 PM Page 3
Page 136 of 685
3-44
Fuel filler door
Opening the fuel filler door
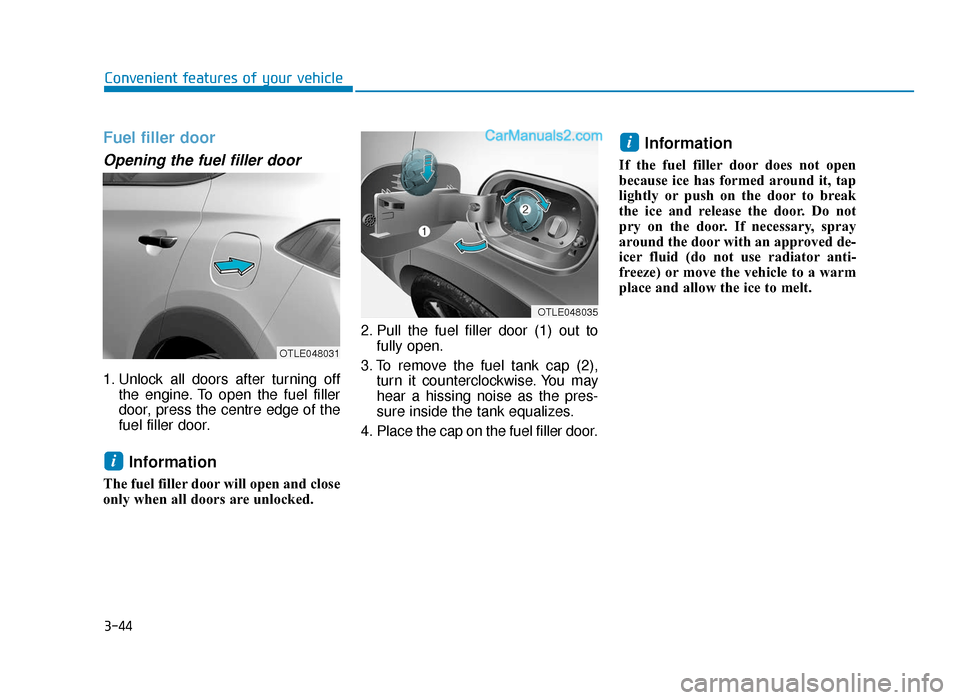
1. Unlock all doors after turning offthe engine. To open the fuel filler
door, press the centre edge of the
fuel filler door.
Information
The fuel filler door will open and close
only when all doors are unlocked. 2. Pull the fuel filler door (1) out to
fully open.
3. To remove the fuel tank cap (2), turn it counterclockwise. You may
hear a hissing noise as the pres-
sure inside the tank equalizes.
4. Place the cap on the fuel filler door.
Information
If the fuel filler door does not open
because ice has formed around it, tap
lightly or push on the door to break
the ice and release the door. Do not
pry on the door. If necessary, spray
around the door with an approved de-
icer fluid (do not use radiator anti-
freeze) or move the vehicle to a warm
place and allow the ice to melt.
i
i
Convenient features of your vehicle
OTLE048031
OTLE048035
TLe UK 3a(~109).qxp 6/12/2018 2:24 PM Page 44
Page 137 of 685
3-45
Convenient features of your vehicle
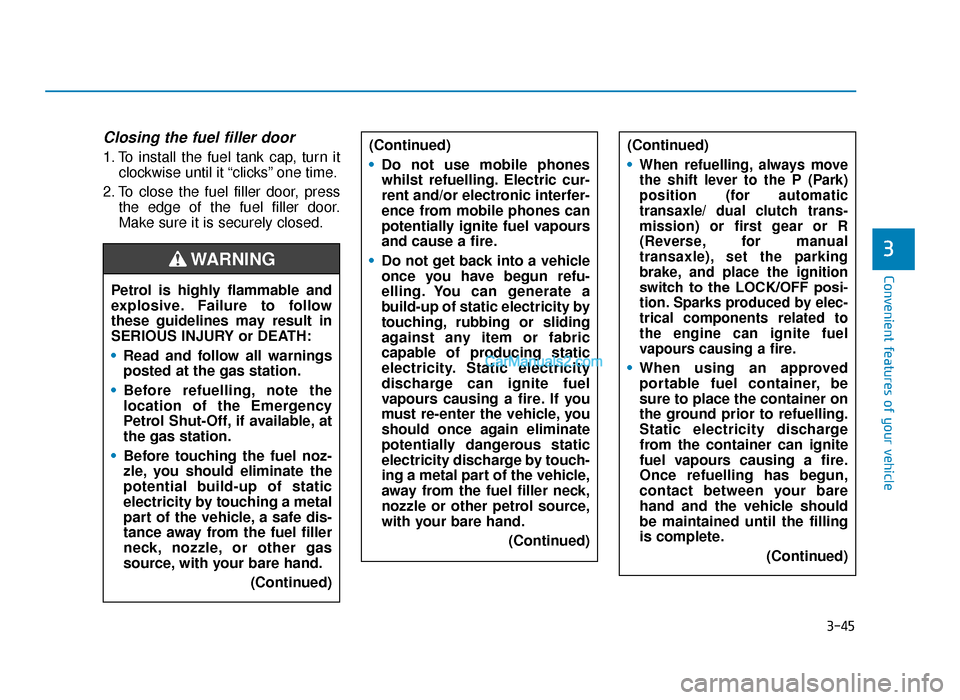
Closing the fuel filler door
1. To install the fuel tank cap, turn itclockwise until it “clicks” one time.
2. To close the fuel filler door, press the edge of the fuel filler door.
Make sure it is securely closed.
3
Petrol is highly flammable and
explosive. Failure to follow
these guidelines may result in
SERIOUS INJURY or DEATH:
•Read and follow all warnings
posted at the gas station.
• Before refuelling, note the
location of the Emergency
Petrol Shut-Off, if available, at
the gas station.
• Before touching the fuel noz-
zle, you should eliminate the
potential build-up of static
electricity by touching a metal
part of the vehicle, a safe dis-
tance away from the fuel filler
neck, nozzle, or other gas
source, with your bare hand.
(Continued)
WARNING
(Continued)
•Do not use mobile phones
whilst refuelling. Electric cur-
rent and/or electronic interfer-
ence from mobile phones can
potentially ignite fuel vapours
and cause a fire.
• Do not get back into a vehicle
once you have begun refu-
elling. You can generate a
build-up of static electricity by
touching, rubbing or sliding
against any item or fabric
capable of producing static
electricity. Static electricity
discharge can ignite fuel
vapours causing a fire. If you
must re-enter the vehicle, you
should once again eliminate
potentially dangerous static
electricity discharge by touch-
ing a metal part of the vehicle,
away from the fuel filler neck,
nozzle or other petrol source,
with your bare hand.
(Continued)(Continued)
•
When refuelling, always move
the shift lever to the P (Park)
position (for automatic
transaxle/
dual clutch trans-
mission) or first gear or R
(Reverse, for manual
transaxle), set the parking
brake, and place the ignition
switch to the LOCK/OFF posi-
tion. Sparks produced by elec-
trical components related to
the engine can ignite fuel
vapours causing a fire.
• When using an approved
portable fuel container, be
sure to place the container on
the ground prior to refuelling.
Static electricity discharge
from the container can ignite
fuel vapours causing a fire.
Once refuelling has begun,
contact between your bare
hand and the vehicle should
be maintained until the filling
is complete.
(Continued)
TLe UK 3a(~109).qxp 6/12/2018 2:24 PM Page 45
Page 263 of 685
3-171
Convenient features of your vehicle
3
INTERIOR FEATURES
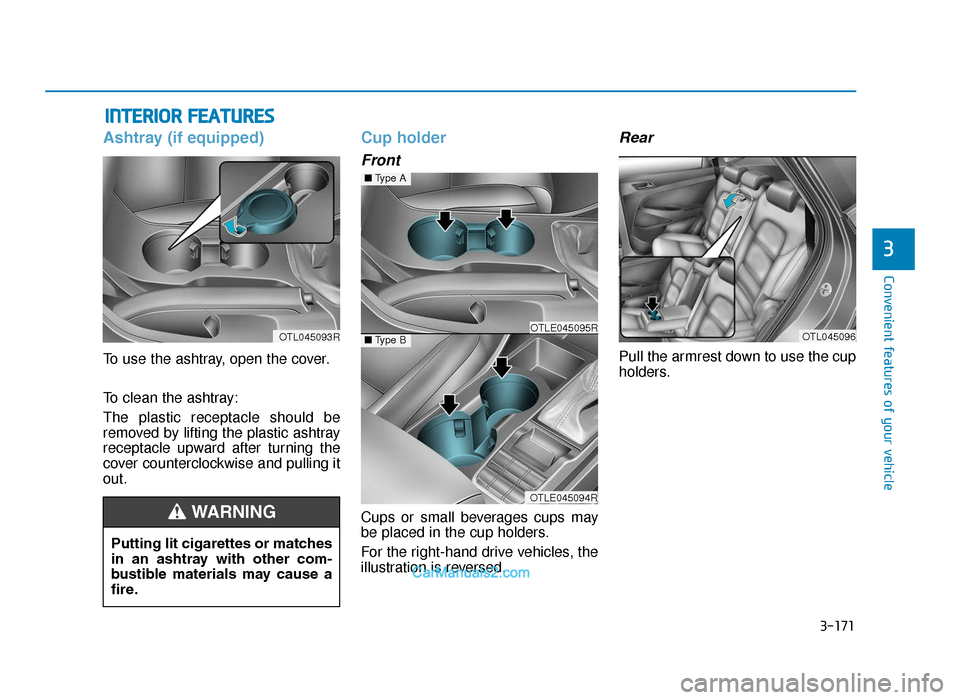
Ashtray (if equipped)
To use the ashtray, open the cover.
To clean the ashtray:
The plastic receptacle should be
removed by lifting the plastic ashtray
receptacle upward after turning the
cover counterclockwise and pulling it
out.
Cup holder
Front
Cups or small beverages cups may
be placed in the cup holders.
For the right-hand drive vehicles, the
illustration is reversed.
Rear
Pull the armrest down to use the cup
holders.
OTL045093R
Putting lit cigarettes or matches
in an ashtray with other com-
bustible materials may cause a
fire.
WARNING
OTLE045095R
OTLE045094R
■Type A
■Type BOTL045096
TLe UK 3b(110~).qxp 6/12/2018 2:41 PM Page 171
Page 269 of 685
3-177
Convenient features of your vehicle
3
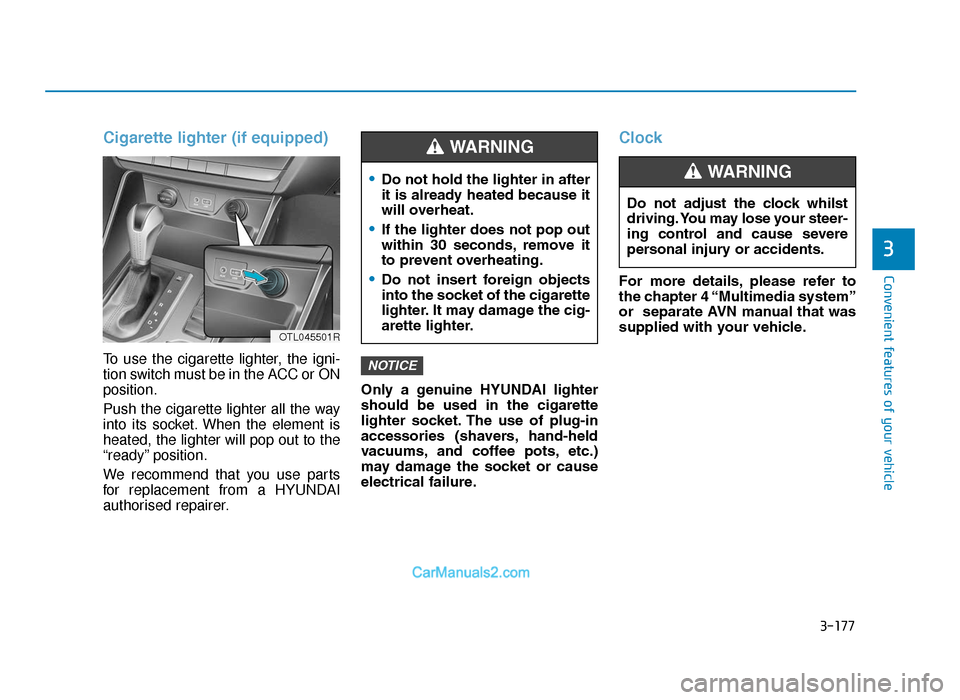
Cigarette lighter (if equipped)
To use the cigarette lighter, the igni-
tion switch must be in the ACC or ON
position.
Push the cigarette lighter all the way
into its socket. When the element is
heated, the lighter will pop out to the
“ready” position.
We recommend that you use parts
for replacement from a HYUNDAI
authorised repairer.Only a genuine HYUNDAI lighter
should be used in the cigarette
lighter socket. The use of plug-in
accessories (shavers, hand-held
vacuums, and coffee pots, etc.)
may damage the socket or cause
electrical failure.
Clock
For more details, please refer to
the chapter 4 “Multimedia system”
or separate AVN manual that was
supplied with your vehicle.
NOTICE
Do not adjust the clock whilst
driving. You may lose your steer-
ing control and cause severe
personal injury or accidents.
WARNING
OTL045501R
•Do not hold the lighter in after
it is already heated because it
will overheat.
•If the lighter does not pop out
within 30 seconds, remove it
to prevent overheating.
•Do not insert foreign objects
into the socket of the cigarette
lighter. It may damage the cig-
arette lighter.
WARNING
TLe UK 3b(110~).qxp 6/12/2018 2:42 PM Page 177
Page 278 of 685
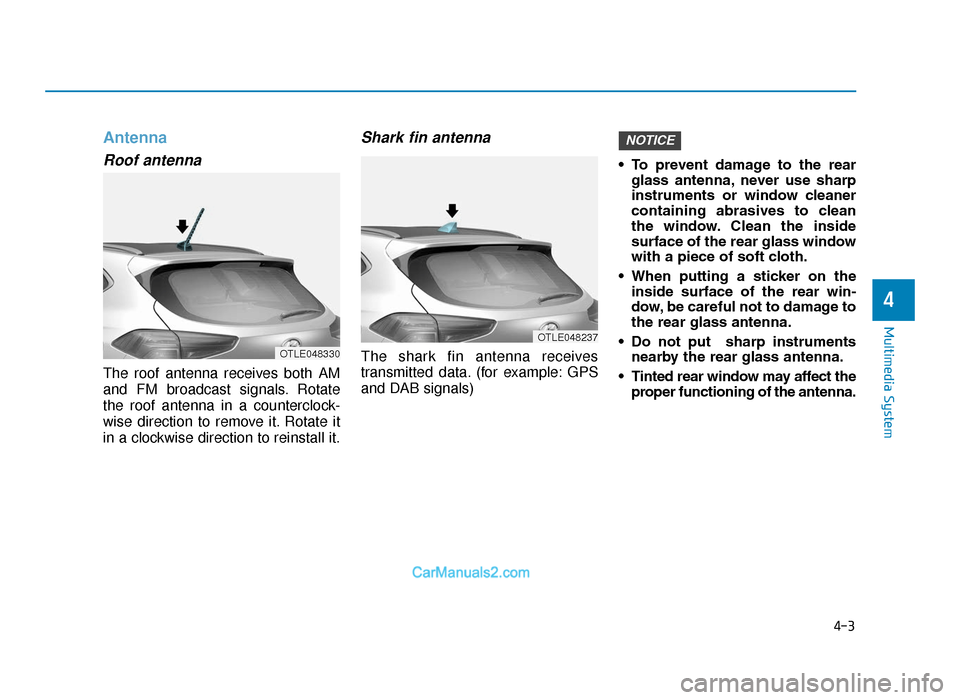
Antenna
Roof antenna
The roof antenna receives both AM
and FM broadcast signals. Rotate
the roof antenna in a counterclock-
wise direction to remove it. Rotate it
in a clockwise direction to reinstall it.
Shark fin antenna
The shark fin antenna receives
transmitted data. (for example: GPS
and DAB signals)• To prevent damage to the rear
glass antenna, never use sharp
instruments or window cleaner
containing abrasives to clean
the window. Clean the inside
surface of the rear glass window
with a piece of soft cloth.
• When putting a sticker on the inside surface of the rear win-
dow, be careful not to damage to
the rear glass antenna.
• Do not put sharp instruments nearby the rear glass antenna.
• Tinted rear window may affect the proper functioning of the antenna.
NOTICE
4-3
Multimedia System
4
OTLE048330
OTLE048237
TLe UK 4.qxp 5/10/2018 12:03 PM Page 3
Page 291 of 685
4-16
Multimedia System
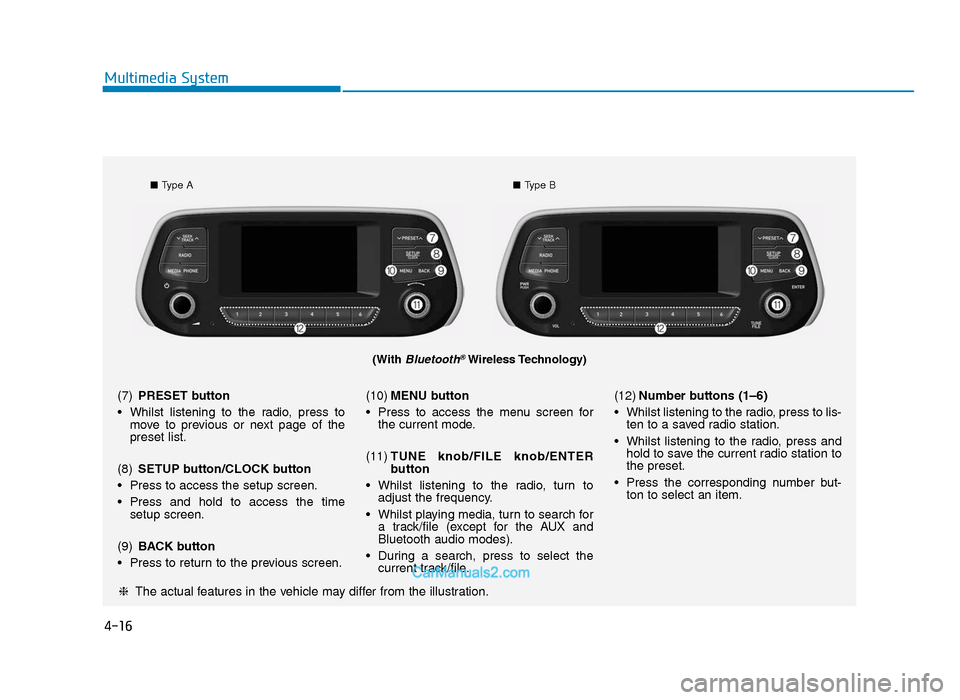
(With Bluetooth®Wireless Technology)
■Type A ■Type B
❈ The actual features in the vehicle may differ from the illustration.
(7)
PRESET button
• Whilst listening to the radio, press to move to previous or next page of the
preset list.
(8) SETUP button/CLOCK button
• Press to access the setup screen.
• Press and hold to access the time setup screen.
(9) BACK button
• Press to return to the previous screen. (10)
MENU button
• Press to access the menu screen for the current mode.
(11) TUNE knob/FILE knob/ENTER
button
• Whilst listening to the radio, turn to adjust the frequency.
• Whilst playing media, turn to search for a track/file (except for the AUX and
Bluetooth audio modes).
• During a search, press to select the current track/file. (12)
Number buttons (1–6)
• Whilst listening to the radio, press to lis- ten to a saved radio station.
• Whilst listening to the radio, press and hold to save the current radio station to
the preset.
• Press the corresponding number but- ton to select an item.
TLe UK 4.qxp 5/10/2018 12:04 PM Page 16
Page 295 of 685
4-20
Multimedia System
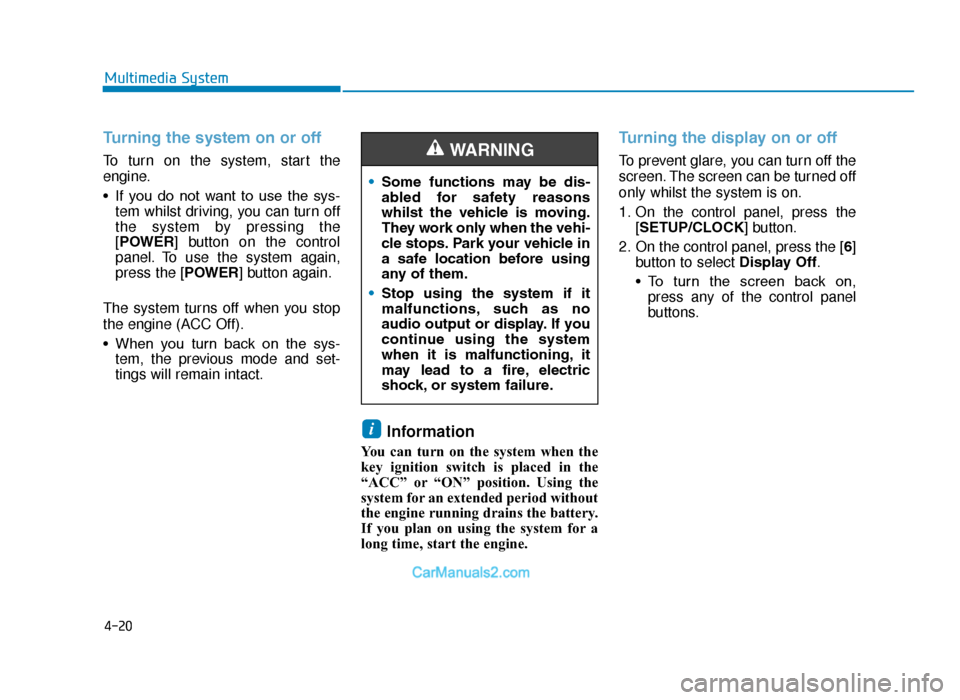
Turning the system on or off
To turn on the system, start the
engine.
• If you do not want to use the sys-tem whilst driving, you can turn off
the system by pressing the
[POWER] button on the control
panel. To use the system again,
press the [POWER] button again.
The system turns off when you stop
the engine (ACC Off).
• When you turn back on the sys- tem, the previous mode and set-
tings will remain intact.
Information
You can turn on the system when the
key ignition switch is placed in the
“ACC” or “ON” position. Using the
system for an extended period without
the engine running drains the battery.
If you plan on using the system for a
long time, start the engine.
Turning the display on or off
To prevent glare, you can turn off the
screen. The screen can be turned off
only whilst the system is on.
1. On the control panel, press the [SETUP/CLOCK] button.
2. On the control panel, press the [ 6]
button to select Display Off.
• To turn the screen back on, press any of the control panel
buttons.
i
•Some functions may be dis-
abled for safety reasons
whilst the vehicle is moving.
They work only when the vehi-
cle stops. Park your vehicle in
a safe location before using
any of them.
• Stop using the system if it
malfunctions, such as no
audio output or display. If you
continue using the system
when it is malfunctioning, it
may lead to a fire, electric
shock, or system failure.
WARNING
TLe UK 4.qxp 5/10/2018 12:04 PM Page 20