key INFINITI G35 2003 Service Manual
[x] Cancel search | Manufacturer: INFINITI, Model Year: 2003, Model line: G35, Model: INFINITI G35 2003Pages: 256, PDF Size: 3.37 MB
Page 130 of 256

button again during this 5 second period will
stop SCAN tuning and the radio will remain
tuned to that station. If the SCAN tuning
button is not pushed within 5 seconds,
SCAN tuning moves to the next station.
Cassette tape player operation Turn the ignition key to ACC or ON, and then
lightly insert the cassette tape into the tape
door. The cassette tape will be automatically
pulled into the player.
The radio or CD will turn off (if it is on) and the
cassette tape will begin to play.
CAUTIONDo not force the cassette tape into the
tape door. This could cause player dam-
age.
If the system is turned off by pushing the
ON z OFF/VOL control knob with the cassette
tape still in the player, the tape will resume
playing when the system is turned back on.
PLAY:
O When the TAPE button is pushed with the
system turned off and a tape loaded, the
system will come on and the tape will play. O When the TAPE button is pushed with
either the radio or compact disc turned on
and a tape loaded, the compact disc or the
radio will automatically be turned off and
the tape will play.
O When the TAPE button is pushed with the
TAPE playing, the tape will play the pro-
gram recorded on the reverse side.
FF (Fast Forward), REW
(Rewind):
Push the (fast forward) button to fast
forward the tape. To rewind the tape, push the
(rewind) button. Either the FF or REW
symbol illuminates on the right side of the
display window. To stop the FF or REW func-
tion, press the (fast forward) or (re-
wind) again, or the TAPE button.
APS (Automatic
Program Search) FF,
APS REW:
When the (APS FF) button is pushed
while the tape is being played, the next pro-
gram will start to play from the beginning. Push
the (APS FF) button several times to skip
through programs. The tape will advance the
number of times the button is pushed (up to
nine programs).
When the (APS REW) button is pushed once, the program being played starts over
from the beginning. Push the (APS
REW) button several times to skip back sev-
eral selections. The tape will go back the
number of times the button is pushed. Either
the FF or REW symbol flashes on the right
side of the display window while searching for
the selection.
This system searches for the blank intervals
between selections. If there is a blank interval
within one program or there is no interval
between programs, the system may not stop in
the desired or expected location.
SCAN tuning:
Push the SCAN tuning button while playing a
tape, and it will stop at the next tape program
for 5 seconds. Pushing the button again during
this 5 second period will stop SCAN tuning and
the tape program is continued. If the SCAN
tuning button is not pushed within 5 seconds,
SCAN tuning moves to the next tape program.
TAPE EJECT:
When this button is pushed with the tape
loaded, the tape will be ejected.
When the tape is ejected while it is being
played, the system will be turned off.
4-14 Heater, air conditioner and audio systems
Z 02.7.29/V35-D/V5.0
X
Page 131 of 256

Compact disc (CD) changer
operation Turn the ignition key to the ACC or ON position
and insert the compact disc into the slot with
the label side facing up. The compact disc will
be guided automatically into the slot and start
playing.
After loading the disc, the number of tracks on
the disc and the play time will appear on the
display.
If the radio or tape is already operating, it will
automatically turn off and the compact disc will
play.
CAUTIONDo not force the compact disc into the
slot. This could damage the player.
If the system has been turned off while the
compact disc was playing, pushing the
ON z OFF/VOL control knob will start the com-
pact disc.
3.1 in (8 cm) diameter compact discs can also
be used without an adapter.
button:
To insert a CD in the CD changer, push the LOAD button for less than 1.5 seconds. Select
the loading slot by pushing the CD insert select
button (1 to 6), then insert the CD.
To insert 6 CDs to the CD changer in succes-
sion, push the LOAD button for more than 1.5
seconds.
The inserted slot numbers will illuminate on the
display.
PLAY:
When the DISC (CD play) button is pushed
with the system off and the compact disc
loaded, the system will turn on and the com-
pact disc will start to play.
When the DISC button is pushed with the
compact disc loaded with the tape or the radio
playing, the tape or radio will automatically be
turned off and the compact disc will start to
play.
FF (Fast Forward), REW
(Rewind):
When the (fast forward) or (rewind)
button is pushed while the compact disc is
being played, the compact disc will play while
fast forwarding or rewinding. When the button
is released, the compact disc will return to
normal play speed. APS (Automatic Program
Search) FF, APS REW:
When the (APS FF) button is pushed
while the compact disc is being played, the
program after the present one will start to play
from its beginning. Push several times to skip
through programs. The compact disc will ad-
vance the number of times the button is
pushed. (When the last program on the com-
pact disc is skipped through, the first program
will be played.) When the (APS REW)
button is pushed, the program being played
returns to its beginning. Push several times to
skip back through programs. The compact disc
will go back the number of times the button is
pushed.
CD PLAY button:
To change CD, push the CD play select button
(1 to 6).
SCAN tuning:
When the SCAN tuning button is pushed for
less than 1.5 seconds while the CD is being
played, the beginning of all the CD programs in
each track will be played for 10 seconds in
sequence.
When the SCAN tuning button is pushed for
more than 1.5 seconds while the CD is being
played, the first program in all the CDs will be Heater, air conditioner and audio systems
4-15
Z 02.7.29/V35-D/V5.0
X
Page 133 of 256

STEERING SWITCH FOR AUDIO
CONTROL (if so equipped) The audio system can be operated using the
controls on the steering wheel.
POWER on/off switch With the ignition key turned to the ACC or ON
position, push the POWER switch to turn the
audio system on or off.
MODE select switch Push the mode select switch to change the
mode in the sequence of AM, FM1, FM2,
SAT1, SAT2, CD and Tape. Volume control switches Push the volume control switch to increase or
decrease the volume.
TuningMemory change (radio):
Push the tuning switch or for less
than 1.5 seconds to change the radio fre-
quency.
Seek tuning (radio):
Push the tuning switch or for more
than 1.5 seconds to seek the next or previous
radio station.
APS (Automatic Program Search) FF, APS
REW (tape and CD):
Push the tuning switch or for less
1.5 seconds to return to the beginning of the
present program or skip to the next program.
Push several times to skip back or skip
through programs.
This system searches for the blank intervals
between selections. If there is a blank interval
within one program or there is no interval
between programs, the system may not stop in
the desired or expected location. FF REW (tape or CD):
Push the tuning switch or for more
than 1.5 seconds to rewind or fast forward the
tape or to change the playing disc up or down.
To stop the FF or REW function, press the
or button for more than 1.5 sec-
onds again.
ANTENNA
Window antenna The antenna pattern is printed inside the rear
window.
CAUTION O Do not place metalized film near the
rear window glass or attach any metal
parts to it. This may cause poor re-
ception or noise.
O When cleaning the inside of the rear
window, be careful not to scratch or
damage the rear window antenna.
Lightly wipe along the antenna with a
dampened soft cloth.SAA0567
Heater, air conditioner and audio systems
4-17
Z 02.7.29/V35-D/V5.0
X
Page 135 of 256

5 Starting and driving Precautions when starting and driving ...................... 5-2
Exhaust gas (Carbon monoxide).......................... 5-2
Three way catalyst ............................................... 5-3
Avoiding collision and rollover .............................. 5-3
Drinking alcohol/drugs and driving ....................... 5-4
Ignition switch............................................................ 5-4
Automatic transmission ........................................ 5-4
Manual transmission ............................................ 5-5
Key positions ........................................................ 5-6
Infiniti vehicle immobilizer system ....................... 5-6
Before starting the engine ......................................... 5-7
Starting the engine .................................................... 5-7
Driving the vehicle ..................................................... 5-8
Automatic transmission ........................................ 5-8
Manual transmission .......................................... 5-12
Parking brake .......................................................... 5-14
Cruise control .......................................................... 5-15
Precautions on cruise control ............................. 5-15
Cruise control operations ................................... 5-15
Break-in schedule ................................................... 5-17
Increasing fuel economy ......................................... 5-17
Parking/parking on hills ........................................... 5-18
Power steering ........................................................ 5-19
Brake system .......................................................... 5-19 Braking precautions............................................ 5-19
Anti-lock brake system (ABS) ........................... 5-20
Vehicle dynamics control (VDC) system................. 5-21
Cold weather driving ............................................... 5-23
Freeing a frozen door lock ................................. 5-23
Anti-freeze .......................................................... 5-23
Battery ................................................................ 5-23
Draining of coolant water ................................... 5-23
Tire equipment ................................................... 5-23
Special winter equipment ................................... 5-23
Driving on snow or ice ....................................... 5-24
Engine block heater (if so equipped) ................. 5-24
Z 02.7.29/V35-D/V5.0
X
Page 136 of 256

WARNINGO Do not leave children, impaired
adults, or pets alone in your vehicle.
They could accidentally injure them-
selves or others through inadvertent
operation of the vehicle. Also, on hot,
sunny days, temperatures in a closed
vehicle could quickly become high
enough to cause severe or possibly
fatal injuries to people or animals.
O Closely supervise children when they
are around cars to prevent them from
playing and becoming locked in the
trunk where they could be seriously
injured. Keep the car locked with the
trunk closed when not in use, and
prevent children's access to car keys.
EXHAUST GAS (Carbon monoxide)
WARNINGDo not breathe exhaust gases; they con- tain colorless and odorless carbon mon-
oxide. Carbon monoxide is dangerous. It
can cause unconsciousness or death.
O If you suspect that exhaust fumes are
entering the vehicle, drive with all
windows fully open, and have the
vehicle inspected immediately.
O Do not run the engine in closed
spaces such as a garage.
O Do not park the vehicle with the en-
gine running for any extended length
of time.
O Keep the trunk lid closed while driv-
ing, otherwise exhaust gases could
be drawn into the passenger com-
partment. If you must drive with the
trunk lid open, follow these precau-
tions:
1. Open all the windows.
2. Set the air recirculation switch
OFF and the fan control at 4 (high)
to circulate the air.
O If electrical wiring or other cable con- nections must pass to a trailer
through the seal on the trunk lid or
the body, follow the manufacturer's
recommendation to prevent carbon
monoxide entry into the vehicle.
O If a special body or other equipment
is added for recreational or other us-
age, follow the manufacturer's rec-
ommendation to prevent carbon
monoxide entry into the vehicle.
(Some recreational vehicle appli-
ances such as stoves, refrigerator,
heaters, etc. may also generate car-
bon monoxide.)
O The exhaust system and body should
be inspected by a qualified mechanic
whenever:
a. The vehicle is raised for service.
b. You suspect that exhaust fumes
are entering into the passenger
compartment.
c. You notice a change in the sound
of the exhaust system.PRECAUTIONS WHEN STARTING
AND DRIVING
5-2 Starting and driving
Z 02.7.29/V35-D/V5.0
X
Page 138 of 256

DRINKING ALCOHOL/DRUGS AND
DRIVING
WARNINGNever drive under the influence of alco-
hol or drugs. Alcohol in the bloodstream
reduces coordination, delays reaction
time and impairs judgment. Driving after
drinking alcohol increases the likeli-
hood of being involved in an accident
injuring yourself and others. Addition-
ally, if you are injured in the accident,
alcohol can increase the severity of the
injury.
INFINITI is committed to safe driving. You
must not drive under the influence of alcohol.
Every year thousands of people are injured or
killed in alcohol related accidents. Although
the local laws vary on what is considered to be
legally intoxicated, the fact is that alcohol
affects all people differently and most people
underestimate the effects of alcohol.
Remember, drinking and driving don't mix!
And that's true for drugs too (over the counter,
prescription, and illegal drugs). Don't drive if your ability to operate your vehicle is impaired
by alcohol, drugs, or some other physical
condition.
AUTOMATIC TRANSMISSION On automatic transmission models, the igni-
tion lock is designed so that the key cannot be
turned to LOCK and removed until the selector
lever is moved to the P (Park) position.
When removing the key from the ignition,
make sure the selector lever is in the P (Park)
position.
If the selector lever is not returned to P (Park)
position, the key cannot be moved toward
LOCK.
When the key cannot be turned toward the SSD0083
IGNITION SWITCH
5-4 Starting and driving
Z 02.7.29/V35-D/V5.0
X
Page 139 of 256

LOCK position, proceed as follows to remove
the key:
1. Move the selector lever into the P (Park)
position.
2. Turn the ignition key slightly in the ON
direction.
3. Turn the key toward the LOCK position.
4. Remove the key.
If the key is removed from the ignition switch,
the selector lever cannot be moved from P
(Park) position. The selector lever can be
moved if the ignition switch is in the ON
position and the foot brake pedal is de-
pressed.
There is an OFF position in between LOCK
and ACC, although it does not show on the
lock cylinder. When the ignition is in OFF the
steering wheel is not locked.
In order for the steering wheel to be locked, it
must be turned about 1/6 of a turn counter-
clockwise from the straight up position.
To lock the steering wheel, turn the key to
the LOCK position. Remove the key. To
unlock the steering wheel, insert the key
and turn it gently while rotating the steer-
ing wheel slightly right and left. WARNING Never remove or turn the key to the
LOCK position while driving. The steer-
ing wheel will lock. This may cause the
driver to lose control of the vehicle and
could result in serious vehicle damage
and/or personal injury.
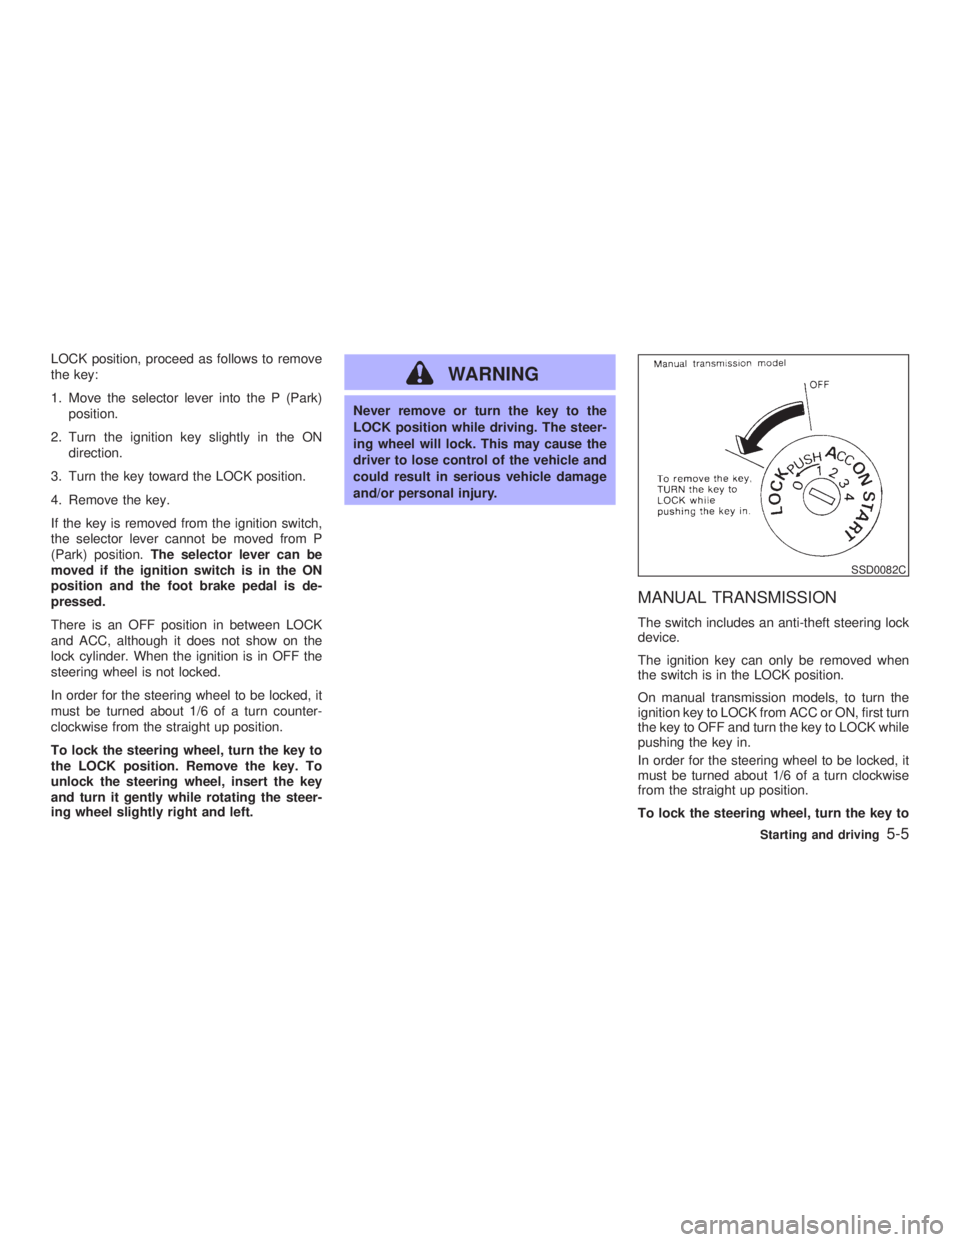
MANUAL TRANSMISSION The switch includes an anti-theft steering lock
device.
The ignition key can only be removed when
the switch is in the LOCK position.
On manual transmission models, to turn the
ignition key to LOCK from ACC or ON, first turn
the key to OFF and turn the key to LOCK while
pushing the key in.
In order for the steering wheel to be locked, it
must be turned about 1/6 of a turn clockwise
from the straight up position.
To lock the steering wheel, turn the key to SSD0082C
Starting and driving
5-5
Z 02.7.29/V35-D/V5.0
X
Page 140 of 256

the LOCK position. Remove the key. To
unlock the steering wheel, insert the key
and turn it gently while rotating the steer-
ing wheel slightly right and left.
WARNINGNever remove or turn the key to the
LOCK position while driving. The steer-
ing wheel will lock. This may cause the
driver to lose control of the vehicle and
could result in serious vehicle damage
and/or personal injury.
KEY POSITIONS The switch includes an anti-theft steering lock
device.
LOCK (Normal parking position) (0)
The ignition key can only be removed when
the switch is in this position.
OFF (1)
The engine can be turned off without locking
the steering wheel.
The ignition lock is designed so that the key
cannot be turned to LOCK and removed until the selector lever is moved to the P (Park)
position.
ACC (Accessories) (2)
This position activates electrical accessories
such as the radio when the engine is not
running.
ON (Normal operating position) (3)
This position turns on the ignition system and
the electrical accessories.
START (4)
This position activates the starter motor, start-
ing the engine.
INFINITI VEHICLE IMMOBILIZER
SYSTEM The Infiniti Vehicle Immobilizer System will not
allow the engine to start without the use of the
registered Infiniti Vehicle Immobilizer System
key.
If the engine fails to start using the registered
Infiniti Vehicle Immobilizer System key, it may
be due to interference caused by another
Infiniti Vehicle Immobilizer System key, an
automated toll road device or automated pay-
ment device on the key ring. Restart the en-
gine using the following procedures: 1. Leave the ignition switch in the ON position
for approximately 5 seconds.
2. Turn the ignition switch to the OFF or LOCK
position and wait approximately 10 sec-
onds.
3. Repeat step 1 and 2 again.
4. Restart the engine while holding the device
(which may have caused the interference)
separate from the registered Infiniti Vehicle
Immobilizer System key.
If this procedure allows the engine to start,
INFINITI recommends placing the registered
Infiniti Vehicle Immobilizer System key on a
separate key ring to avoid interference from
other devices.
5-6 Starting and driving
Z 02.7.29/V35-D/V5.0
X
Page 141 of 256

O Make sure the area around the vehicle is
clear.
O Maintenance items should be checked pe-
riodically, e.g., each time you check engine
oil.
O Check that all windows and lights are clean.
O Visually inspect tires for their appearance
and condition. Also, check tires for proper
inflation.
O Lock all doors.
O Position seat and adjust head restraints.
O Adjust inside and outside mirrors.
O Fasten seat belts and ask all passengers to
do likewise.
O Check the operation of warning lights when
key is turned to the ON (3) position. 1. Apply the parking brake.
2. Automatic transmission:
Move the selector lever to P (Park) or N
(Neutral). (P preferred.)
The starter is designed not to operate if the
selector lever is in one of the driving posi-
tions.
Manual transmission:
Move the shift lever to N (Neutral) position,
and depress the clutch pedal to the floor
while cranking the engine.
The starter is designed not to operate un-
less the clutch pedal is fully depressed.
3. Crank the engine with your foot off the
accelerator pedal by turning the ignition
key to START. Release the key when the
engine starts. If the engine starts, but fails
to run, repeat the above procedure.
O If the engine is very hard to start in ex-
tremely cold weather or when restarting,
depress the accelerator pedal a little (ap-
proximately 1/5 to the floor) and hold it then
crank the engine. Release the key and the
accelerator pedal when the engine starts.
O If the engine is very hard to start because it
is flooded, depress the accelerator pedal all the way to the floor and hold it. Crank the
engine for 5 to 6 seconds. After cranking
the engine, release the accelerator pedal.
Crank the engine with your foot off the
accelerator pedal by turning the ignition
key to START. Release the key when the
engine starts. If the engine starts, but fails
to run, repeat the above procedure.
CAUTION Do not operate the starter for more than
15 seconds at a time. If the engine does
not start, turn the key off and wait 10
seconds before cranking again, other-
wise the starter could be damaged.
4. Warm-up
Allow the engine to idle for at least 30
seconds after starting. Drive at moderate
speed for a short distance first, especially in
cold weather.BEFORE STARTING THE ENGINE STARTING THE ENGINE
Starting and driving
5-7
Z 02.7.29/V35-D/V5.0
X
Page 142 of 256

AUTOMATIC TRANSMISSION
5 speed automatic transmission The automatic transmission in your vehicle is
electronically controlled by a transmission con-
trol module to produce maximum power and
smooth operation.
Shown on the following pages are the recom-
mended operating procedures for this trans-
mission. Follow these procedures for maxi-
mum vehicle performance and driving
enjoyment.
Starting the vehicle After starting the engine, fully depress the foot
brake pedal and push the selector lever button
before shifting the selector lever to the R
(Reverse), N (Neutral), D (Drive) or Manual
shift mode position. Be sure the vehicle is fully
stopped before attempting to shift the selector
lever.
This automatic transmission model is de-
signed so that the foot brake pedal must be
depressed before shifting from P (Park) to
any drive position while the ignition switch
is ON.
The selector lever cannot be moved out of
P (Park) position and into any of the other
gear positions if the ignition key is turned to the LOCK, OFF or ACC position or if the
key is removed from the switch.
1. Keep the foot brake pedal depressed and
push the selector lever button to shift into a
driving gear.
2. Release the parking brake and foot brake,
then gradually start the vehicle in motion.
WARNING O Do not depress the accelerator pedal
while shifting from P (Park) or N (Neu-
tral) to R (Reverse), D (Drive) or
manual shift mode. Always depress
the brake pedal until shifting is com-
pleted. Failure to do so could cause
you to lose control and have an acci-
dent.
O Cold engine idle speed is high, so use
caution when shifting into a forward
or reverse gear before the engine has
warmed up.
O On slippery roads, do not downshift.
This may cause a loss of control.
O Never shift to P (Park) or R (Reverse) while vehicle is moving forward.
Never shift to P (Park) or D (Drive)
while vehicle is moving rearward.
These could cause an accident.
CAUTION When stopping the vehicle on an uphill
grade, do not hold the vehicle by de-
pressing the accelerator pedal. The foot
brakes should be used for this purpose.DRIVING THE VEHICLE
5-8 Starting and driving
Z 02.7.29/V35-D/V5.0
X