brake INFINITI M35 2006 Factory Service Manual
[x] Cancel search | Manufacturer: INFINITI, Model Year: 2006, Model line: M35, Model: INFINITI M35 2006Pages: 5621, PDF Size: 65.56 MB
Page 245 of 5621
AT-166
DTC P1774 LOW COAST BRAKE SOLENOID VALVE FUNCTION
Revision: 2006 January2006 M35/M45
Diagnostic ProcedureNCS001OS
1. CHECK INPUT SIGNALS
With CONSULT-II
1. Start engine.
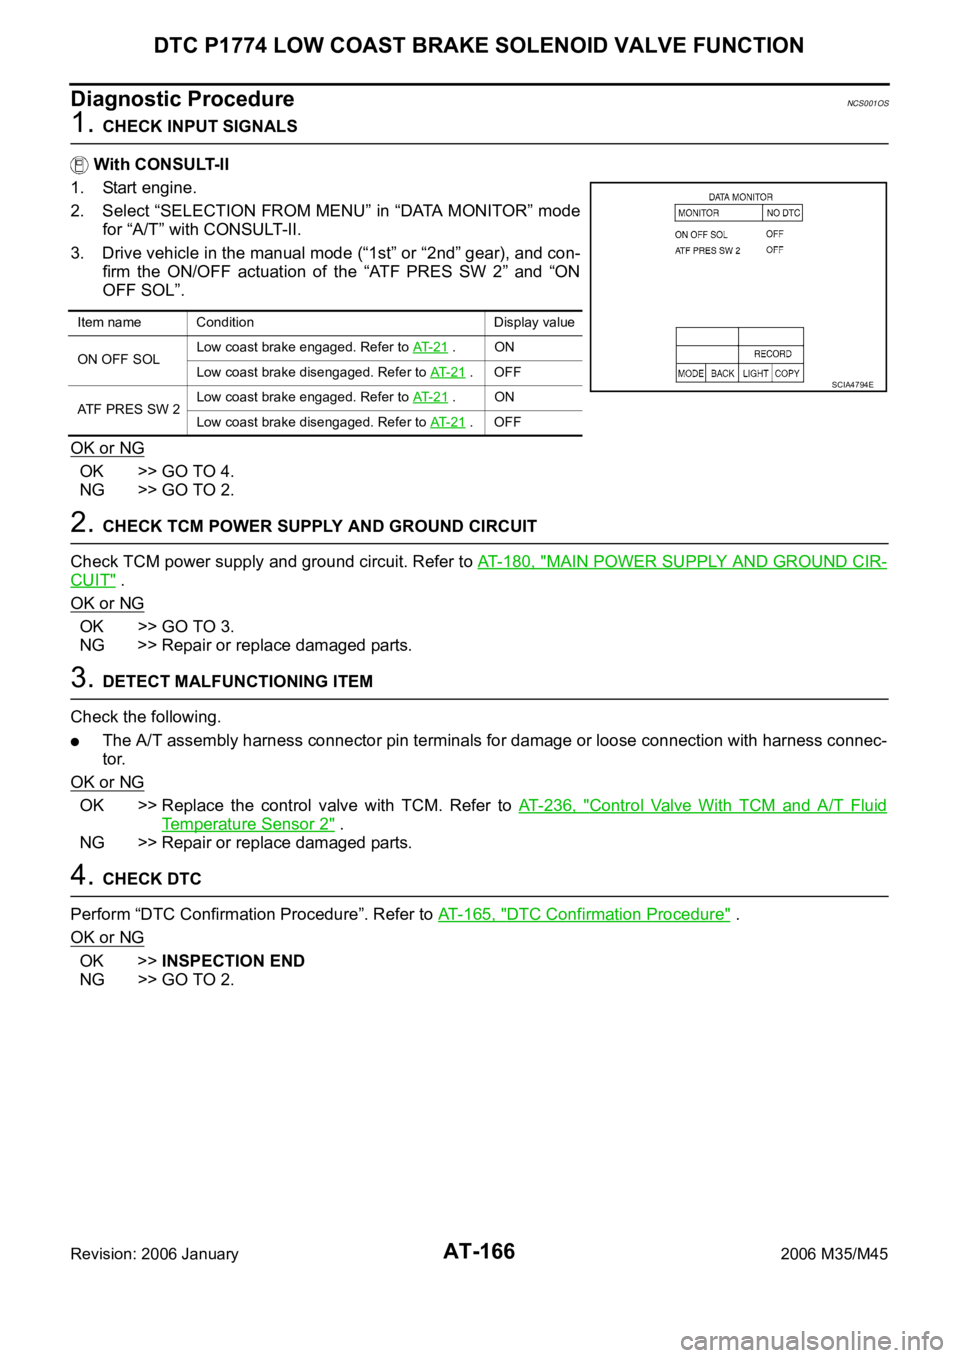
2. Select “SELECTION FROM MENU” in “DATA MONITOR” mode
for “A/T” with CONSULT-II.
3. Drive vehicle in the manual mode (“1st” or “2nd” gear), and con-
firm the ON/OFF actuation of the “ATF PRES SW 2” and “ON
OFF SOL”.
OK or NG
OK >> GO TO 4.
NG >> GO TO 2.
2. CHECK TCM POWER SUPPLY AND GROUND CIRCUIT
Check TCM power supply and ground circuit. Refer to AT- 1 8 0 , "
MAIN POWER SUPPLY AND GROUND CIR-
CUIT" .
OK or NG
OK >> GO TO 3.
NG >> Repair or replace damaged parts.
3. DETECT MALFUNCTIONING ITEM
Check the following.
The A/T assembly harness connector pin terminals for damage or loose connection with harness connec-
tor.
OK or NG
OK >> Replace the control valve with TCM. Refer to AT- 2 3 6 , "Control Valve With TCM and A/T Fluid
Temperature Sensor 2" .
NG >> Repair or replace damaged parts.
4. CHECK DTC
Perform “DTC Confirmation Procedure”. Refer to AT- 1 6 5 , "
DTC Confirmation Procedure" .
OK or NG
OK >>INSPECTION END
NG >> GO TO 2.
Item name Condition Display value
ON OFF SOLLow coast brake engaged. Refer to AT- 2 1
. ON
Low coast brake disengaged. Refer to AT- 2 1
. OFF
ATF PRES SW 2Low coast brake engaged. Refer to AT- 2 1
. ON
Low coast brake disengaged. Refer to AT- 2 1
. OFF
SCIA4794E
Page 251 of 5621

AT-172
DTC P1841 ATF PRESSURE SWITCH 1
Revision: 2006 January2006 M35/M45
DTC P1841 ATF PRESSURE SWITCH 1PFP:25240
DescriptionNCS001P1
Fail-safe function to detect front brake solenoid valve condition.
CONSULT-II Reference ValueNCS001P2
On Board Diagnosis LogicNCS001P3
This is not an OBD-II self-diagnostic item.
Diagnostic trouble code “P1841 ATF PRES SW 1/CIRC” with CONSULT-II is detected when TCM detects
that actual gear ratio is normal, and relation between gear position and condition of ATF pressure switch 1
is irregular during depressing accelerator pedal. (Other than during shift change.)
Possible CauseNCS001P4
AT F p r e s s u r e s w i t c h 1
Harness or connectors
(Switch circuit is open or shorted.)
DTC Confirmation ProcedureNCS001P5
CAUTION:
Always drive vehicle at a safe speed.
NOTE:
If “DTC Confirmation Procedure” has been previously performed, always turn ignition switch OFF and
wait at least 10 seconds before performing the next test.
After the repair, perform the following procedure to confirm the malfunction is eliminated.
WITH CONSULT-II
1. Start engine.
2. Accelerate vehicle to maintain the following conditions.
ACCELE POSI: 1.5/8 - 2.0/8
SLCT LVR POSI: “D” position
GEAR: “3”
“4” (FR/B ON/OFF)
Driving location: Driving the vehicle uphill (increased
engine load) will help maintain the driving conditions
required for this test.
3. Perform step 2 again.
4. Turn ignition switch OFF, then perform step 1 to 3 again.
5. Check “SELF-DIAG RESULTS” mode for “A/T” with CONSULT-
II.
If DTC (P1841) is detected, go to AT-173, "
Diagnostic Procedure" .
If DTC (P1757) is detected, go to AT-152, "
Diagnostic Procedure" .
Item name Condition Display value
ATF PRES SW 1Front brake engaged. Refer to AT- 2 1
. ON
Front brake disengaged. Refer to AT- 2 1
. OFF
BCIA0030E
Page 252 of 5621
DTC P1841 ATF PRESSURE SWITCH 1
AT-173
D
E
F
G
H
I
J
K
L
MA
B
AT
Revision: 2006 January2006 M35/M45
Diagnostic ProcedureNCS001P6
1. CHECK INPUT SIGNAL
With CONSULT-II
1. Start engine.
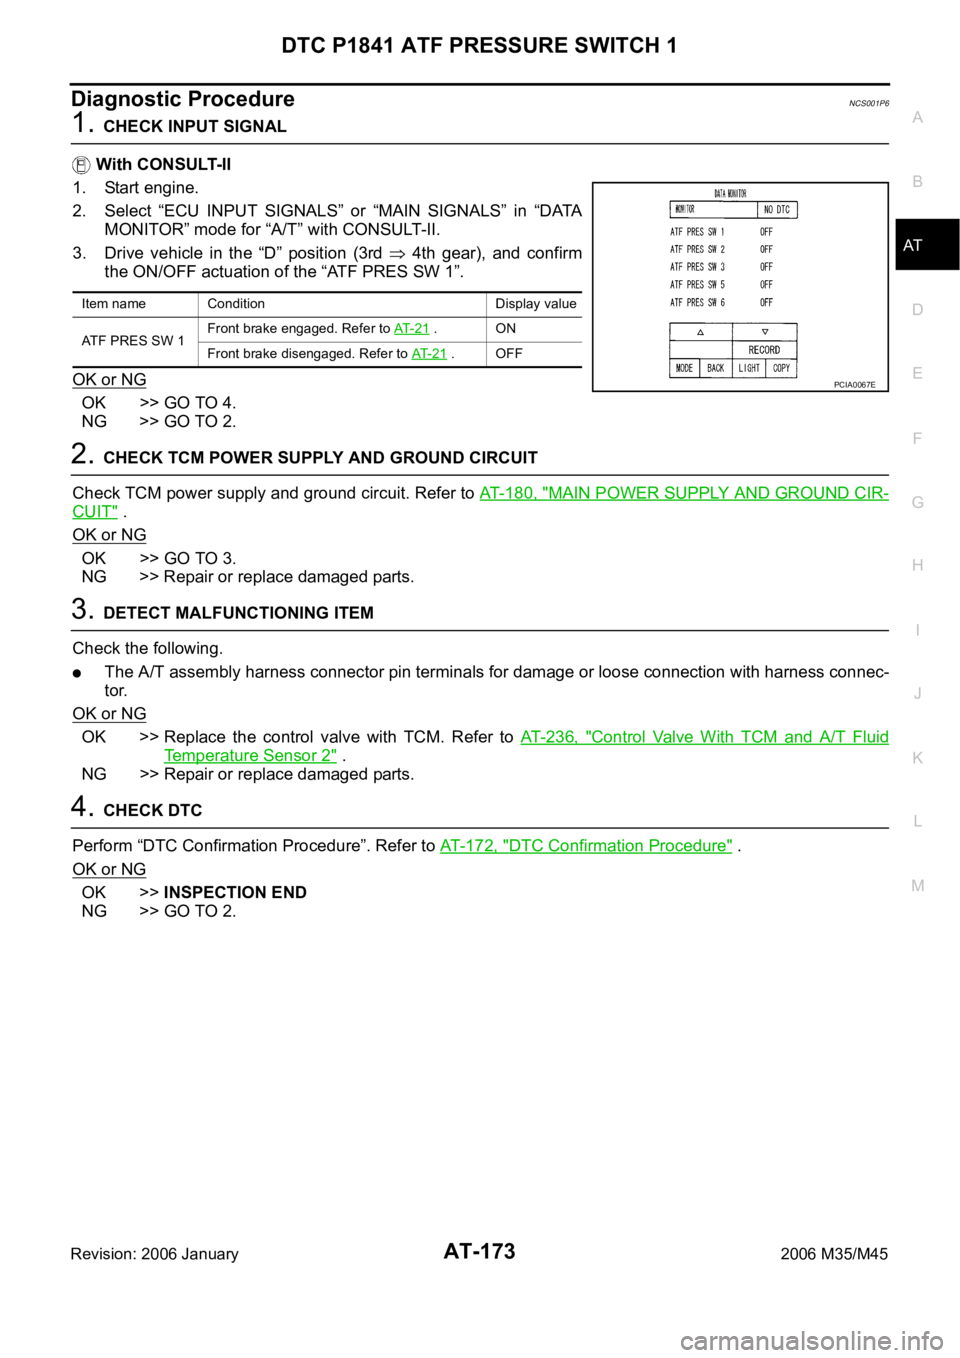
2. Select “ECU INPUT SIGNALS” or “MAIN SIGNALS” in “DATA
MONITOR” mode for “A/T” with CONSULT-II.
3. Drive vehicle in the “D” position (3rd
4th gear), and confirm
the ON/OFF actuation of the “ATF PRES SW 1”.
OK or NG
OK >> GO TO 4.
NG >> GO TO 2.
2. CHECK TCM POWER SUPPLY AND GROUND CIRCUIT
Check TCM power supply and ground circuit. Refer to AT-180, "
MAIN POWER SUPPLY AND GROUND CIR-
CUIT" .
OK or NG
OK >> GO TO 3.
NG >> Repair or replace damaged parts.
3. DETECT MALFUNCTIONING ITEM
Check the following.
The A/T assembly harness connector pin terminals for damage or loose connection with harness connec-
tor.
OK or NG
OK >> Replace the control valve with TCM. Refer to AT- 2 3 6 , "Control Valve With TCM and A/T Fluid
Temperature Sensor 2" .
NG >> Repair or replace damaged parts.
4. CHECK DTC
Perform “DTC Confirmation Procedure”. Refer to AT- 1 7 2 , "
DTC Confirmation Procedure" .
OK or NG
OK >>INSPECTION END
NG >> GO TO 2.
Item name Condition Display value
ATF PRES SW 1Front brake engaged. Refer to AT- 2 1
. ON
Front brake disengaged. Refer to AT- 2 1
. OFF
PCIA0067E
Page 264 of 5621

BRAKE SIGNAL CIRCUIT
AT-185
D
E
F
G
H
I
J
K
L
MA
B
AT
Revision: 2006 January2006 M35/M45
BRAKE SIGNAL CIRCUITPFP:25320
CONSULT-II Reference ValueNCS001PT
Diagnostic ProcedureNCS001PU
1. CHECK CAN COMMUNICATION LINE
Perform the self-diagnosis. Refer to AT- 9 2 , "
SELF-DIAGNOSTIC RESULT MODE" , AT- 1 0 3 , "Diagnostic Pro-
cedure without CONSULT-II" .
Is a malfunction in the CAN communication indicated in the results?
YES >> Check CAN communication line. Refer to AT-105, "DTC U1000 CAN COMMUNICATION LINE" .
NO >> GO TO 2.
2. CHECK STOP LAMP SWITCH CIRCUIT
With CONSULT-II
1. Turn ignition switch ON. (Do not start engine.)
2. Select “ECU INPUT SIGNALS” in “DATA MONITOR” mode for
“A/T” with CONSULT-II.
3. Read out ON/OFF switching action of the “BRAKE SW”.
OK or NG
OK >>INSPECTION END
NG >> GO TO 3.
3. CHECK STOP LAMP SWITCH
Check continuity between stop lamp switch harness connector termi-
nals. Refer to AT-187, "
Wiring Diagram — AT — NONDTC" .
Check stop lamp switch after adjusting brake pedal — refer to
BR-6, "
BRAKE PEDAL" .
OK or NG
OK >> Check the following. If NG, repair or replace damaged
parts.
Harness for short or open between battery and stop lamp switch.
Harness for short or open between stop lamp switch and unified meter and A/C amp.
10A fuse (No.20, located in fuse block).
NG >> Repair or replace the stop lamp switch.
Item name Condition Display value
BRAKE SWDepressed brake pedal. ON
Released brake pedal. OFF
Item name Condition Display value
BRAKE SWDepressed brake pedal. ON
Released brake pedal. OFF
PCIA0070E
Condition Continuity
When brake pedal is depressed Yes
When brake pedal is released No
SCIA4782E
Page 274 of 5621

TROUBLE DIAGNOSIS FOR SYMPTOMS
AT-195
D
E
F
G
H
I
J
K
L
MA
B
AT
Revision: 2006 January2006 M35/M45
Vehicle Does Not Creep Backward in “R” PositionNCS001Q4
SYMPTOM:
The vehicle does not creep in “R” position. Or an extreme lack of acceleration is observed.
DIAGNOSTIC PROCEDURE
1. CHECK SELF-DIAGNOSTIC RESULTS
Perform self-diagnosis. Refer to AT- 9 2 , "
SELF-DIAGNOSTIC RESULT MODE" , AT- 1 0 3 , "TCM SELF-DIAG-
NOSTIC PROCEDURE (NO TOOLS)" .
Is any malfunction detected by self-diagnosis results?
YES >> Check malfunctioning system. Refer to AT- 9 2 , "SELF-DIAGNOSTIC RESULT MODE" , AT- 1 0 4 ,
"Judgement Self-diagnosis Code" .
NO >> GO TO 2.
2. CHECK CONTROL LINKAGE
Check control linkage.
Refer to AT-228, "Checking of A/T Position" .
OK or NG
OK >> GO TO 3.
NG >> Adjust control linkage. Refer to AT-227, "
Adjustment of A/T Position" .
3. CHECK A/T FLUID LEVEL
Check A/T fluid level. Refer to AT- 1 3 , "
Checking A/T Fluid" .
OK or NG
OK >> GO TO 4.
NG >> Refill ATF.
4. CHECK STALL TEST
Check stall revolution with selector lever in “M” and “R” positions.
Refer to AT- 5 3 , "
STALL TEST" .
OK or NG
OK >> GO TO 6.
OK in “M” position, NG in “R” position>>GO TO 5
NG in both “M” and “R” positions>>GO TO 8.
5. DETECT MALFUNCTIONING ITEM
1. Disassemble A/T. Refer to AT-298, "
DISASSEMBLY" .
2. Check the following.
–Reverse brake. Refer to AT-298, "DISASSEMBLY" .
OK or NG
OK >> GO TO 9.
NG >> Repair or replace damaged parts.
6. CHECK LINE PRESSURE
Check line pressure with the engine idling. Refer to AT- 5 5 , "
LINE PRESSURE TEST" .
OK or NG
OK >> GO TO 9.
NG - 1 >> Line pressure high: GO TO 7.
NG - 2 >> Line pressure low: GO TO 8.
Page 299 of 5621
AT-220
TROUBLE DIAGNOSIS FOR SYMPTOMS
Revision: 2006 January2006 M35/M45
Vehicle Does Not Decelerate by Engine BrakeNCS001QK
SYMPTOM:
No engine brake is applied when the gear is shifted from the 2nd to 1st gear.
DIAGNOSTIC PROCEDURE
1. CHECK SELF-DIAGNOSTIC RESULTS
Perform self-diagnosis. Refer to AT- 9 2 , "
SELF-DIAGNOSTIC RESULT MODE" , AT- 1 0 3 , "TCM SELF-DIAG-
NOSTIC PROCEDURE (NO TOOLS)" .
Is any malfunction detected by self-diagnostic results?
YES >> Check malfunctioning system. Refer to AT- 9 2 , "SELF-DIAGNOSTIC RESULT MODE" , AT- 1 0 4 ,
"Judgement Self-diagnosis Code" .
NO >> GO TO 2.
2. CHECK A/T FLUID LEVEL
Check A/T fluid level. Refer to AT-13, "
Checking A/T Fluid" .
OK or NG
OK >> GO TO 3.
NG >> Refill ATF.
3. CHECK CONTROL LINKAGE
Check control linkage.
Refer to AT-228, "Checking of A/T Position" .
OK or NG
OK >> GO TO 4.
NG >> Adjust control linkage. Refer to AT-227, "
Adjustment of A/T Position" .
4. CHECK MANUAL MODE SWITCH
Check manual mode switch. Refer to AT-167, "
DTC P1815 MANUAL MODE SWITCH" .
OK or NG
OK >> GO TO 5.
NG >> Repair or replace damaged parts.
5. CHECK A/T FLUID CONDITION
1. Remove oil pan. Refer to AT-236, "
Control Valve With TCM and A/T Fluid Temperature Sensor 2" .
2. Check A/T fluid condition. Refer to AT- 5 3 , "
A/T Fluid Condition Check" .
OK or NG
OK >> GO TO 6.
NG >> GO TO 9.
6. DETECT MALFUNCTIONING ITEM
Check malfunction items. If any items are damaged, repair or replace damaged parts. Refer to AT- 6 4 ,
"Symptom Chart" (Symptom No.58).
OK or NG
OK >> GO TO 7.
NG >> Repair or replace damaged parts.
Page 307 of 5621
AT-228
SHIFT CONTROL SYSTEM
Revision: 2006 January2006 M35/M45
Checking of A/T PositionNCS001QO
1. Place selector lever in “P” position, and turn ignition switch ON (engine stop).
2. Make sure that selector lever can be shifted to other than “P” position when brake pedal is depressed.
Also make sure that selector lever can be shifted from “P” position only when brake pedal is depressed.
3. Move the selector lever and check for excessive effort, sticking, noise or rattle.
4. Confirm the selector lever stops at each position with the feel of engagement when it is moved through all
the positions. Check whether or not the actual position the selector lever is in matches the position shown
by the shift position indicator and the A/T body.
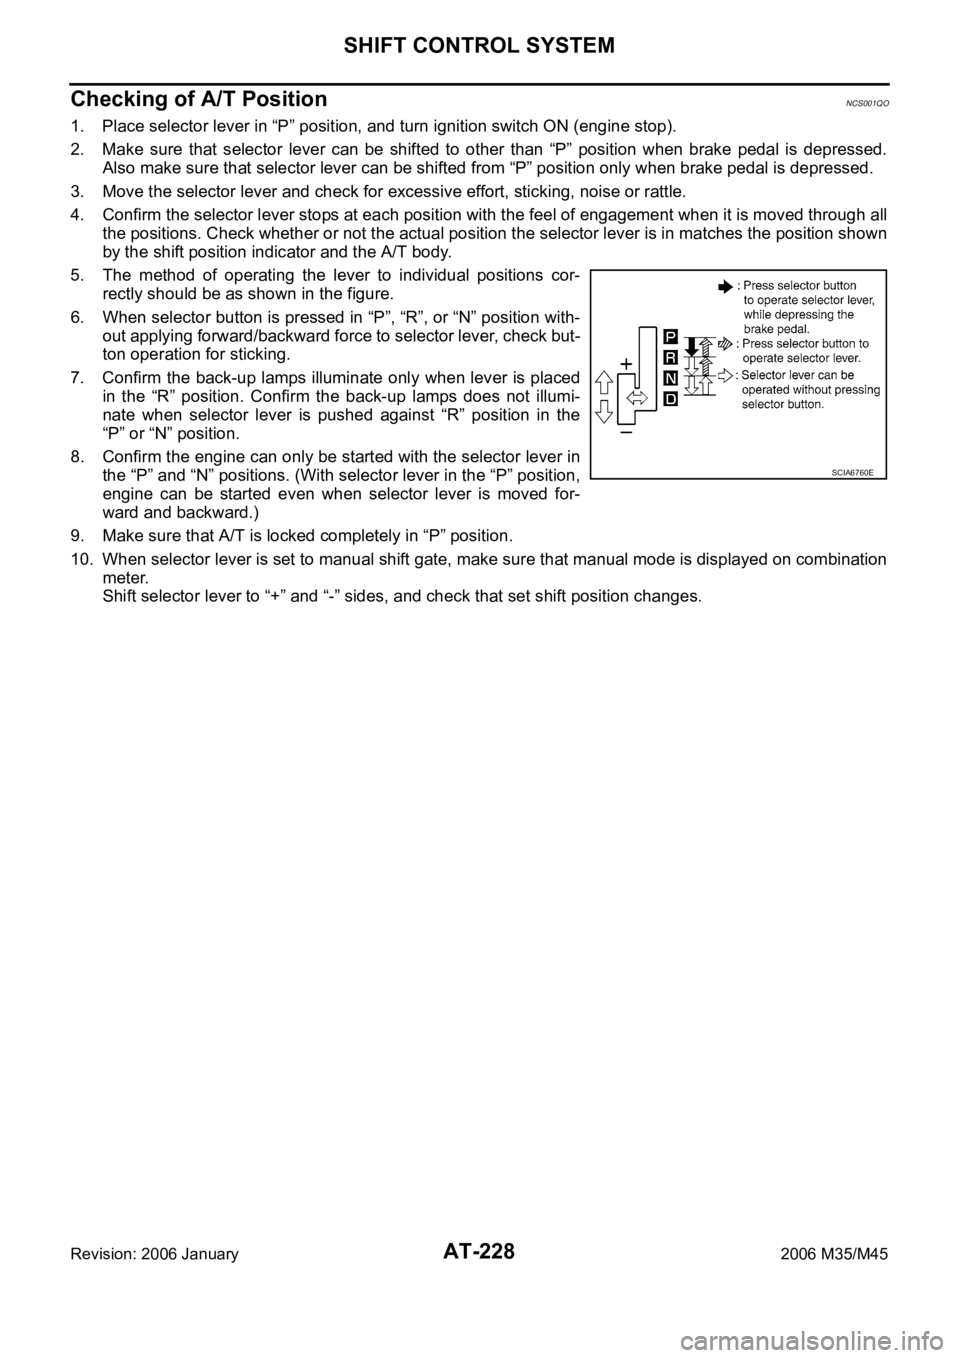
5. The method of operating the lever to individual positions cor-
rectly should be as shown in the figure.
6. When selector button is pressed in “P”, “R”, or “N” position with-
out applying forward/backward force to selector lever, check but-
ton operation for sticking.
7. Confirm the back-up lamps illuminate only when lever is placed
in the “R” position. Confirm the back-up lamps does not illumi-
nate when selector lever is pushed against “R” position in the
“P” or “N” position.
8. Confirm the engine can only be started with the selector lever in
the “P” and “N” positions. (With selector lever in the “P” position,
engine can be started even when selector lever is moved for-
ward and backward.)
9. Make sure that A/T is locked completely in “P” position.
10. When selector lever is set to manual shift gate, make sure that manual mode is displayed on combination
meter.
Shift selector lever to “+” and “-” sides, and check that set shift position changes.
SCIA6760E
Page 308 of 5621
A/T SHIFT LOCK SYSTEM
AT-229
D
E
F
G
H
I
J
K
L
MA
B
AT
Revision: 2006 January2006 M35/M45
A/T SHIFT LOCK SYSTEMPFP:34950
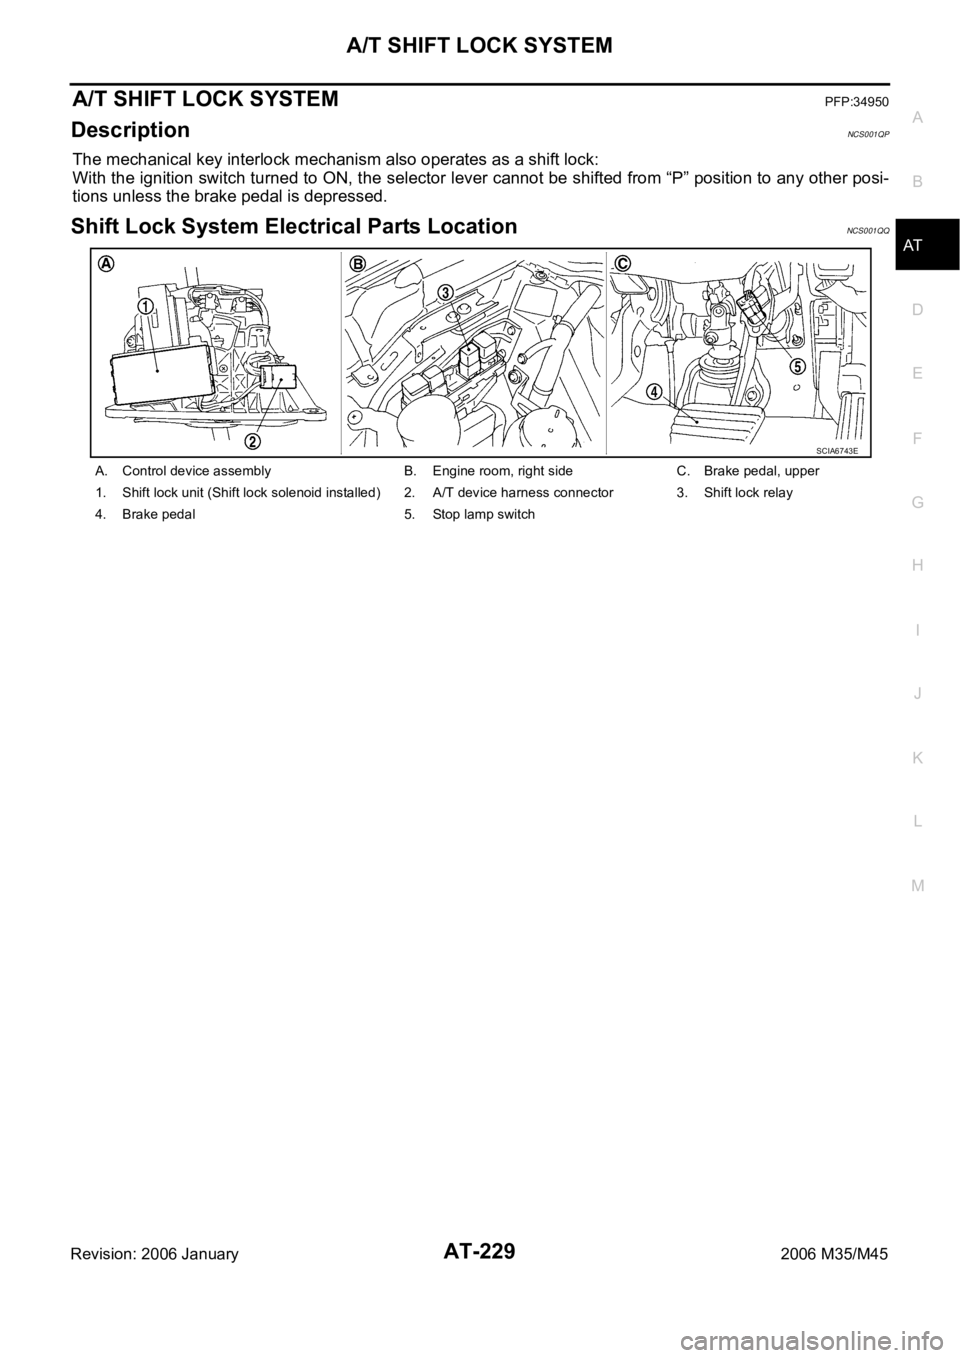
DescriptionNCS001QP
The mechanical key interlock mechanism also operates as a shift lock:
With the ignition switch turned to ON, the selector lever cannot be shifted from “P” position to any other posi-
tions unless the brake pedal is depressed.
Shift Lock System Electrical Parts LocationNCS001QQ
A. Control device assembly B. Engine room, right side C. Brake pedal, upper
1. Shift lock unit (Shift lock solenoid installed) 2. A/T device harness connector 3. Shift lock relay
4. Brake pedal 5. Stop lamp switch
SCIA6743E
Page 311 of 5621

AT-232
A/T SHIFT LOCK SYSTEM
Revision: 2006 January2006 M35/M45
Diagnostic ProcedureNCS001QS
SYMPTOM:
Selector lever cannot be moved from “P” position with key in ON position and brake pedal
applied.
Selector lever can be moved from “P” position with key in ON position and brake pedal released.
1. CHECK SELECTOR LEVER POSITION
Check the selector lever position for damage. Refer to AT- 2 2 8 , "
Checking of A/T Position" .
OK or NG
OK >> GO TO 2.
NG >> Adjust control linkage. Refer to AT-227, "
Adjustment of A/T Position" .
2. CHECK POWER SOURCE
1. Turn ignition switch OFF.
2. Disconnect shift lock relay.
3. Check voltage between shift lock relay E35 terminal 2 and
ground.
OK or NG
OK >> GO TO 4.
NG >> GO TO 3.Vo l ta g e
Brake pedal depressed: Battery voltage
Brake pedal released: 0V
SCIA6866E
Page 312 of 5621
A/T SHIFT LOCK SYSTEM
AT-233
D
E
F
G
H
I
J
K
L
MA
B
AT
Revision: 2006 January2006 M35/M45
3. DETECT MALFUNCTIONING ITEM
Check the following.
Harness for short or open between battery and stop lamp switch harness connector E124 terminal 1
Harness for short or open between stop lamp switch harness connector E124 terminal 2 and shift lock
relay E35 terminal 2
10A fuse [No.20, located in the fuse block (J/B)]
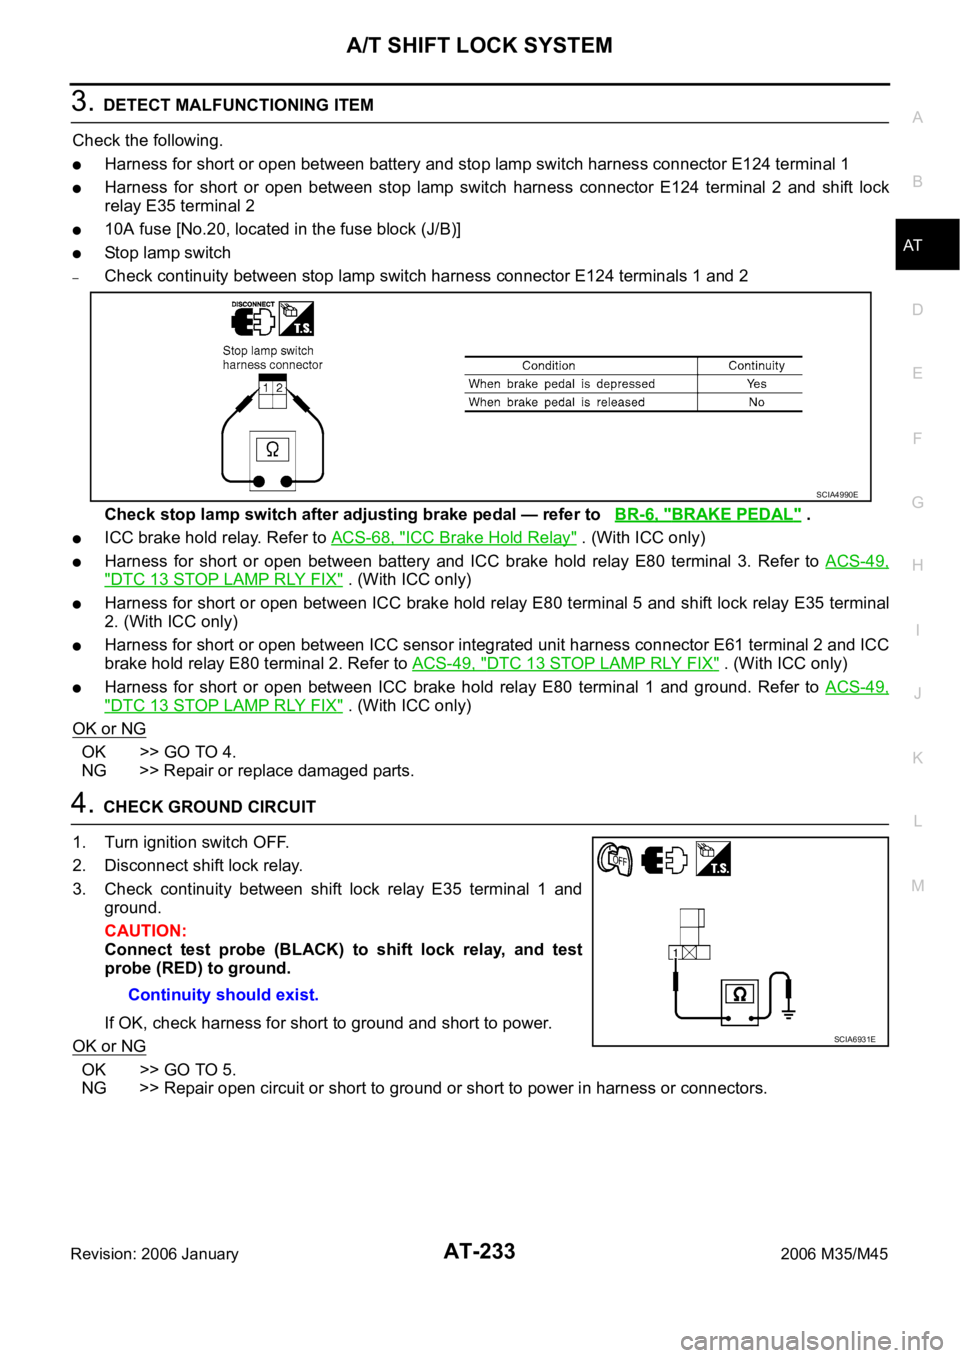
Stop lamp switch
–Check continuity between stop lamp switch harness connector E124 terminals 1 and 2
Check stop lamp switch after adjusting brake pedal — refer to BR-6, "
BRAKE PEDAL" .
ICC brake hold relay. Refer to ACS-68, "ICC Brake Hold Relay" . (With ICC only)
Harness for short or open between battery and ICC brake hold relay E80 terminal 3. Refer to ACS-49,
"DTC 13 STOP LAMP RLY FIX" . (With ICC only)
Harness for short or open between ICC brake hold relay E80 terminal 5 and shift lock relay E35 terminal
2. (With ICC only)
Harness for short or open between ICC sensor integrated unit harness connector E61 terminal 2 and ICC
brake hold relay E80 terminal 2. Refer to ACS-49, "
DTC 13 STOP LAMP RLY FIX" . (With ICC only)
Harness for short or open between ICC brake hold relay E80 terminal 1 and ground. Refer to ACS-49,
"DTC 13 STOP LAMP RLY FIX" . (With ICC only)
OK or NG
OK >> GO TO 4.
NG >> Repair or replace damaged parts.
4. CHECK GROUND CIRCUIT
1. Turn ignition switch OFF.
2. Disconnect shift lock relay.
3. Check continuity between shift lock relay E35 terminal 1 and
ground.
CAUTION:
Connect test probe (BLACK) to shift lock relay, and test
probe (RED) to ground.
If OK, check harness for short to ground and short to power.
OK or NG
OK >> GO TO 5.
NG >> Repair open circuit or short to ground or short to power in harness or connectors.
SCIA4990E
Continuity should exist.
SCIA6931E